navigation system Alfa Romeo 159 2005 Owner handbook (in English)
[x] Cancel search | Manufacturer: ALFA ROMEO, Model Year: 2005, Model line: 159, Model: Alfa Romeo 159 2005Pages: 275, PDF Size: 3.98 MB
Page 25 of 275

23
SAFETY
DEVICES
WARNING LIGHTS
AND MESSAGES
IN AN
EMERGENCY
CAR
MAINTENANCE
TECHNICAL
SPECIFICATIONS
INDEX
DASHBOARD
AND
CONTROLS
CORRECT USE
OF THE CARIMPORTANTThe pointer can reach
the red area also for a sum of un-
favourable conditions, i.e.: slow speed,
uphill, fully laden or towing a trailer with
hot outside temperature.
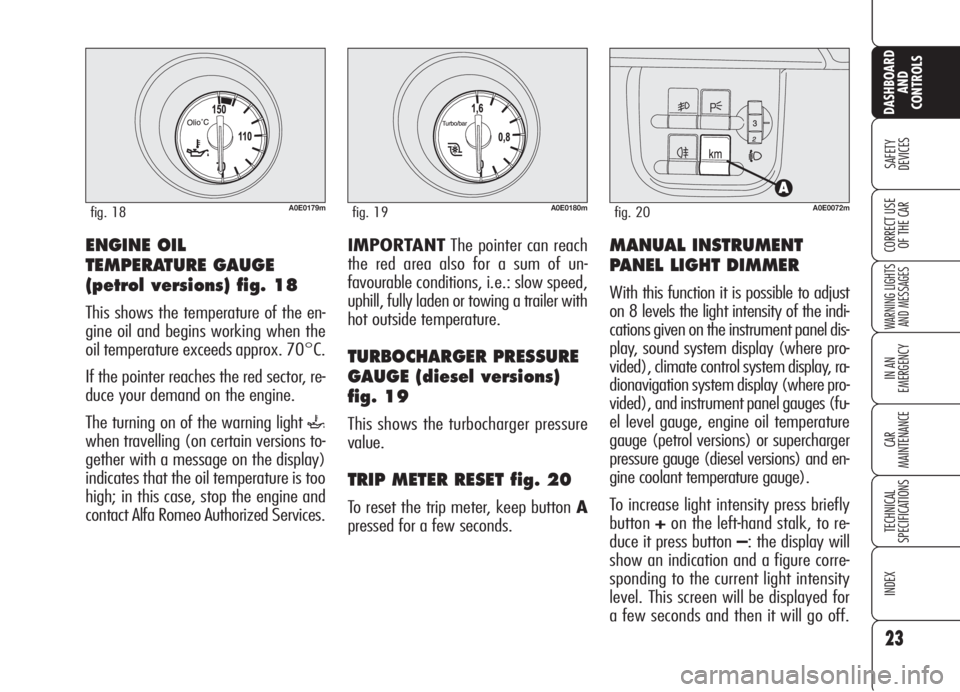
TURBOCHARGER PRESSURE
GAUGE (diesel versions)
fig. 19
This shows the turbocharger pressure
value.
TRIP METER RESET fig. 20
To reset the trip meter, keep button A
pressed for a few seconds.
MANUAL INSTRUMENT
PANEL LIGHT DIMMER
With this function it is possible to adjust
on 8 levels the light intensity of the indi-
cations given on the instrument panel dis-
play, sound system display (where pro-
vided), climate control system display, ra-
dionavigation system display (where pro-
vided), and instrument panel gauges (fu-
el level gauge, engine oil temperature
gauge (petrol versions) or supercharger
pressure gauge (diesel versions) and en-
gine coolant temperature gauge).
To increase light intensity press briefly
button+on the left-hand stalk, to re-
duce it press button –: the display will
show an indication and a figure corre-
sponding to the current light intensity
level. This screen will be displayed for
a few seconds and then it will go off.
ENGINE OIL
TEMPERATURE GAUGE
(petrol versions) fig. 18
This shows the temperature of the en-
gine oil and begins working when the
oil temperature exceeds approx. 70°C.
If the pointer reaches the red sector, re-
duce your demand on the engine.
The turning on of the warning light
`
when travelling (on certain versions to-
gether with a message on the display)
indicates that the oil temperature is too
high; in this case, stop the engine and
contact Alfa Romeo Authorized Services.
A0E0179mfig. 18A0E0180mfig. 19A0E0072mfig. 20
Page 26 of 275

24
SAFETY
DEVICES
WARNING LIGHTS
AND MESSAGES
IN AN
EMERGENCY
CAR
MAINTENANCE
TECHNICAL
SPECIFICATIONS
INDEX
DASHBOARD
AND
CONTROLS
CORRECT USE
OF THE CAR
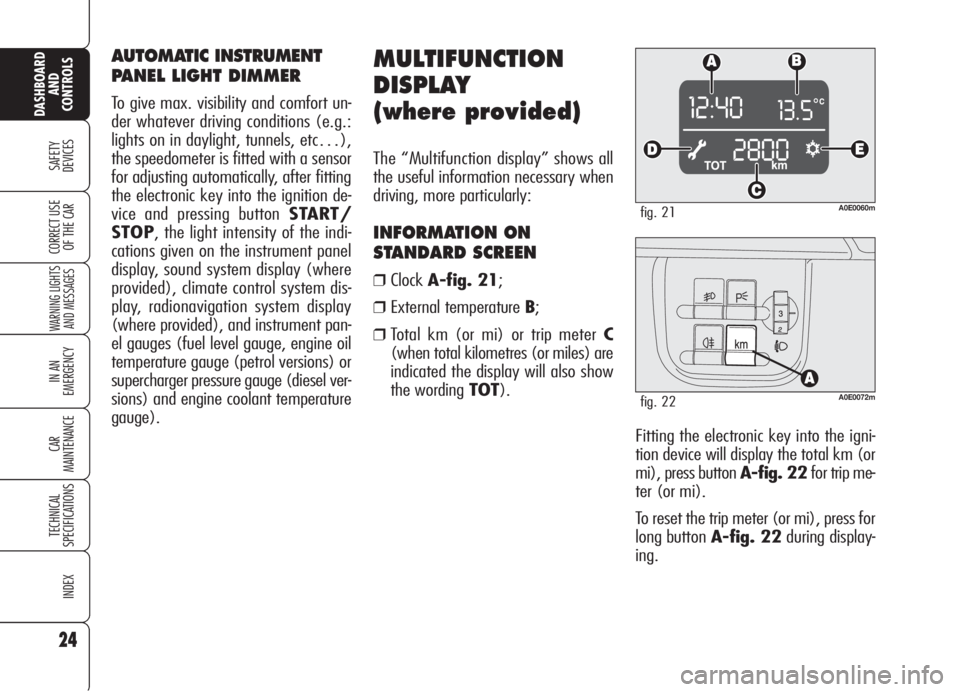
Fitting the electronic key into the igni-
tion device will display the total km (or
mi), press button A-fig. 22for trip me-
ter (or mi).
To reset the trip meter (or mi), press for
long button A-fig. 22during display-
ing.
MULTIFUNCTION
DISPLAY
(where provided)
The “Multifunction display” shows all
the useful information necessary when
driving, more particularly:
INFORMATION ON
STANDARD SCREEN
❒ClockA-fig. 21;
❒External temperature B;
❒Total km (or mi) or trip meter C
(when total kilometres (or miles) are
indicated the display will also show
the wording TOT).
A0E0060mfig. 21
A0E0072mfig. 22
AUTOMATIC INSTRUMENT
PANEL LIGHT DIMMER
To give max. visibility and comfort un-
der whatever driving conditions (e.g.:
lights on in daylight, tunnels, etc…),
the speedometer is fitted with a sensor
for adjusting automatically, after fitting
the electronic key into the ignition de-
vice and pressing button START/
STOP, the light intensity of the indi-
cations given on the instrument panel
display, sound system display (where
provided), climate control system dis-
play, radionavigation system display
(where provided), and instrument pan-
el gauges (fuel level gauge, engine oil
temperature gauge (petrol versions) or
supercharger pressure gauge (diesel ver-
sions) and engine coolant temperature
gauge).
Page 35 of 275

33
SAFETY
DEVICES
WARNING LIGHTS
AND MESSAGES
IN AN
EMERGENCY
CAR
MAINTENANCE
TECHNICAL
SPECIFICATIONS
INDEX
DASHBOARD
AND
CONTROLS
CORRECT USE
OF THE CAR
Briefly press button MENUto access navigation from the standard screen. To surf the menu press buttons +or–. For safety rea-
sons, when the car is running, it is possible to access only the reduced menu (for setting “Speed limit”). When the car is stationary
access to the whole menu is enabled. With the Radionavigation system it is only possible to adjust/set the following functions: “Speed
Limit”, “Light sensor sensitivity ” (where provided) and “S.B.R. buzzer reactivation” (where provided). The other functions are shown
on the Radionavigation system display, that shall be use to adjust/set them as required.
fig. 26
BEEP VOL.SERVICEQUIT SETUPLIGHT SENS.RESET TRIP B
CLOCK
MODE 12/24
DATE
AUDIO RPT.
INDEP. BOOT
UNLOCK FDA
DOOR LOCK
UNITS KEYS VOL.
LANGUAGESPEED LIMIT
A0E0218g
Page 94 of 275

92
SAFETY
DEVICES
WARNING
LIGHTS AND
MESSAGES
IN AN
EMERGENCY
CAR
MAINTENANCE
TECHNICAL
SPECIFICATIONS
INDEX
CORRECT USE
OF THE CAR
DASHBOARD
AND
CONTROLS
With key removed the led will turn off
after about 2 minutes.
When doors are unlocked the led is off;
pressing the button will lock all the
doors. Central door locking will only take
place if all doors are perfectly closed.
DOORS
CENTRAL DOOR LOCKING/
UNLOCKING SYSTEM
Door locking from the outside
With the doors closed, press the elec-
tronic key button
Áor fit and turn the
metal insert (inside the key) into the
lock of the driver’s door. Central door
locking can only be activated if all the
doors are closed. If one or more doors
are open after pressing the electronic
key button
Áthe direction indicators and
the driver’s door led will flash fast for
about 3 seconds.
If one or more doors are open by turning
the metal insert of the electronic key, on-
ly the driver’s door led will flash fast for
about 3 seconds. If the doors are closed
but the tailgate is open, central locking
is actuated: the direction indicators (only
for locking performed by pressing button
Á) and the driver’s door led will flash fast
for about 3 seconds.
A0E0025mfig. 89
Through the “Setup menu” (or the Ra-
dionavigation system for certain versions)
it is possible to activate the function that
enables to unlock only the driver’s door
lock by pressing the electronic key button
Ë(see paragraph “Reconfigurable mul-
tifunction display” in this section).
With this function on (ON) it is howev-
er possible to unlock the other doors by
pressing button
q(fig. 89) set on the
central console.
Door unlocking from
the outside
Press the electronic key button
Ëor, fit
and turn the metal insert (inside the
key) into the lock of the driver’s door.
Door locking/unlocking from
the inside
Press button
q(fig. 89) to lock/un-
lock all the doors.
The button is provided with a circular led
indicating the car condition (doors
locked or unlocked). When doors are
locked the led is on: in this case press-
ing the button again will unlock all the
doors and will turn the led off.
Page 99 of 275

97
SAFETY
DEVICES
WARNING
LIGHTS AND
MESSAGES
IN AN
EMERGENCY
CAR
MAINTENANCE
TECHNICAL
SPECIFICATIONS
INDEX
CORRECT USE
OF THE CAR
DASHBOARD
AND
CONTROLS
On certain versions, improper boot
closing is indicated by the instrument
panel warning light
´, whereas on
other versions the symbol
Rand a
message are displayed (see section
“Warning lights and messages”).
OPENING FROM
THE INSIDE
Press button A-fig. 93set on the
front ceiling light.
ButtonA-fig. 93is disabled when
locking the doors by:
❒pressing the electronic key button
Á;
❒turning the metal insert of the key
into the driver's door lock;
❒automatic locking of the doors
after about 2.5 minutes.
Tailgate opening is facilitated by the
side gas shock springs.
Opening the boot its internal light will
turn on and it will turn off automati-
cally when re-closing the tailgate.
Leaving the tailgate inadvertently
open, the light will turn off automati-
cally after a few minutes.
BOOT
The boot lock is electric and it is dis-
abled when the car is running.
Through the “Setup menu” (or the
Radionavigation system for certain
versions) boot opening can be set by
selecting the option “Indep. boot”
(see paragraph “Reconfigurable multi-
function display” in this section):
when this function is on, the boot can
only be opened by pressing the elec-
tronic key button
`, thus inhibit-
ing the boot opening button on the
ceiling light A-fig. 93.
A0E0096mfig. 93
Page 213 of 275

211
SAFETY
DEVICES
WARNING
LIGHTS AND
MESSAGES
CAR
MAINTENANCE
TECHNICAL
SPECIFICATIONS
INDEX
CORRECT USE
OF THE CAR
DASHBOARD
AND
CONTROLS
IN AN
EMERGENCY
USERS FUSE AMPERE FIGURE
Climate control system fan F02 (MAXI-FUSE) 40 62
Electric steering lock F03 (MAXI-FUSE) 20 62
Brake branch point (pump) F04 (MAXI-FUSE) 40 62
Brake branch point (solenoid valve) F05 (MAXI-FUSE) 40 62
Radiator fan (low speed) F06 (MAXI-FUSE) 40 62
Radiator fan (high speed) F07 (MAXI-FUSE) 50 62
Headlight washer F09 20 62
Horns F10 15 62
Electronic injection sundry secondary services F11 15 62
+ INT for electronic injection system F16 7.5 62
Electronic injection primary services F17 10 62
Engine control branch point F18 15 62
Climate control system compressor F19 7.5 62
Rear window heating F20 20 62
Fuel pump supply F21 20 62
Ignition coils/injectors (petrol versions) F22 15 62
Electronic injection primary services diesel versions) F22 20 62
Sound system/radionavigation system power F23 15 62
Body Computer branch point/Headlight washer relay coil F31 7.5 58
Driver’s door branch point/passenger’s door branch point/
ignition device F32 15 58
Rear left power window F33 20 58
Rear right power window F34 20 58
Page 215 of 275

213
SAFETY
DEVICES
WARNING
LIGHTS AND
MESSAGES
CAR
MAINTENANCE
TECHNICAL
SPECIFICATIONS
INDEX
CORRECT USE
OF THE CAR
DASHBOARD
AND
CONTROLS
IN AN
EMERGENCY
USERS FUSE AMPERE FIGURE
Front cigar lighter on central console F44 10 58
Sunroof control unit (curtain) F45 20 58
Sunroof F46 20 58
Left front power window F47 20 58
Right front power window/
passenger’s door control unit F48 30 58
Radionavigation system F49 7.5 58
Rain sensor control unit F49 7.5 58
Steering wheel branch point F49 7.5 58
Sunroof F49 7.5 58
Control buttons panel F49 7.5 58
Volumetric alarm control unit F49 7.5 58
Parking sensor branch point F49 7.5 58
Central console button panel F49 7.5 58
Front seat controls light F49 7.5 58
Windscreen services F49 7.5 58
Mobile phone presetting F39 10 58
START/STOP button F49 7.5 58
Air Bag system F50 7.5 58
Tyer pressure monitoring system control unit F51 7.5 58