Alfa Romeo 4C Spider 2017 Owner's Manual
4C Spider 2017
Alfa Romeo
Alfa Romeo
https://www.carmanualsonline.info/img/27/9384/w960_9384-0.png
Alfa Romeo 4C Spider 2017 Owner's Manual
Trending: coolant temperature, tires, auxiliary battery location, key battery, checking oil, jump start, four wheel drive
Page 251 of 297
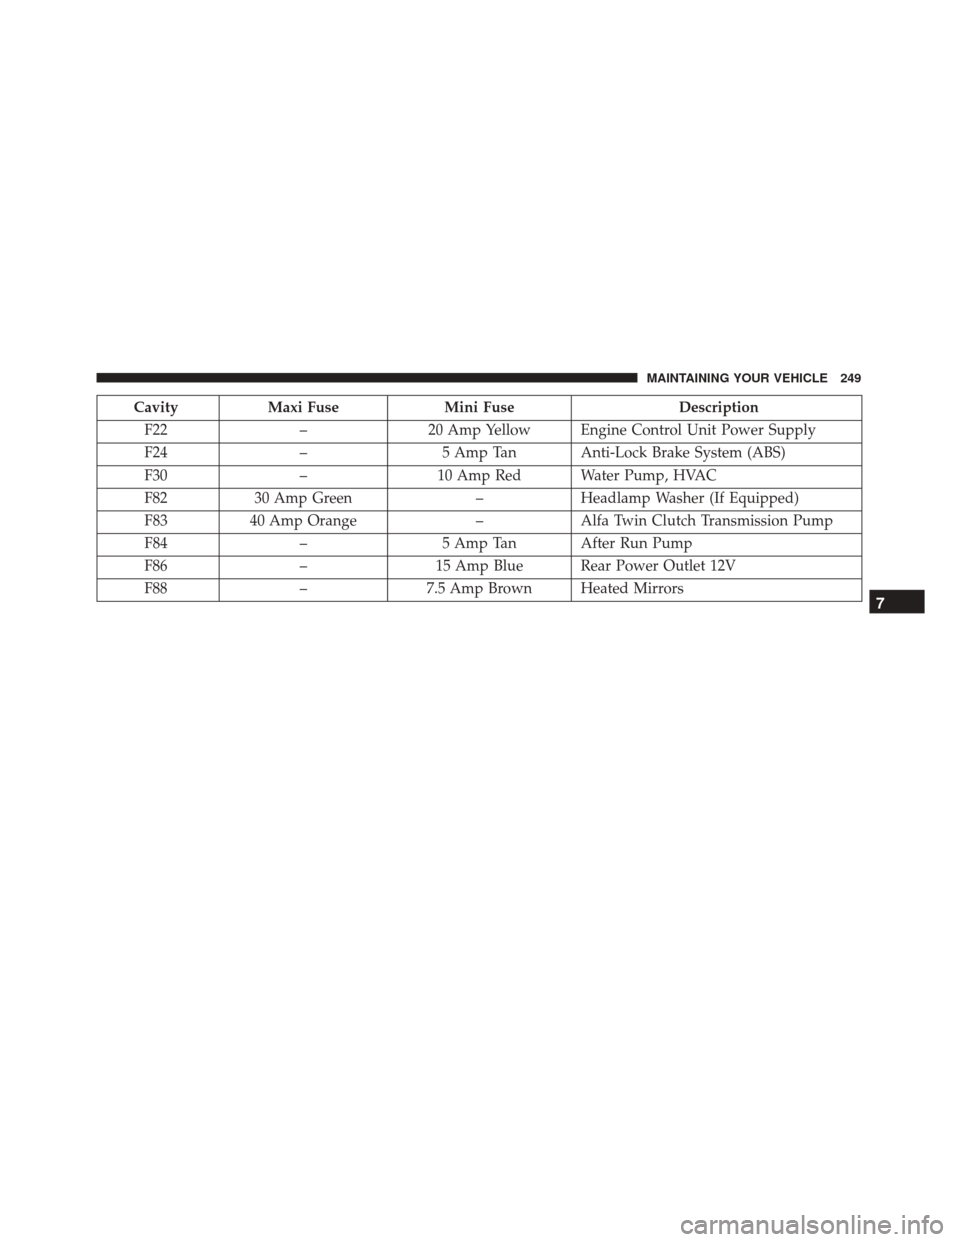
CavityMaxi Fuse Mini Fuse Description
F22 –20 Amp Yellow Engine Control Unit Power Supply
F24 –5 Amp Tan Anti-Lock Brake System (ABS)
F30 –10 Amp Red Water Pump, HVAC
F82 30 Amp Green –Headlamp Washer (If Equipped)
F83 40 Amp Orange –Alfa Twin Clutch Transmission Pump
F84 –5 Amp Tan After Run Pump
F86 –15 Amp Blue Rear Power Outlet 12V
F88 –7.5 Amp Brown Heated Mirrors
7
MAINTAINING YOUR VEHICLE 249
Page 252 of 297
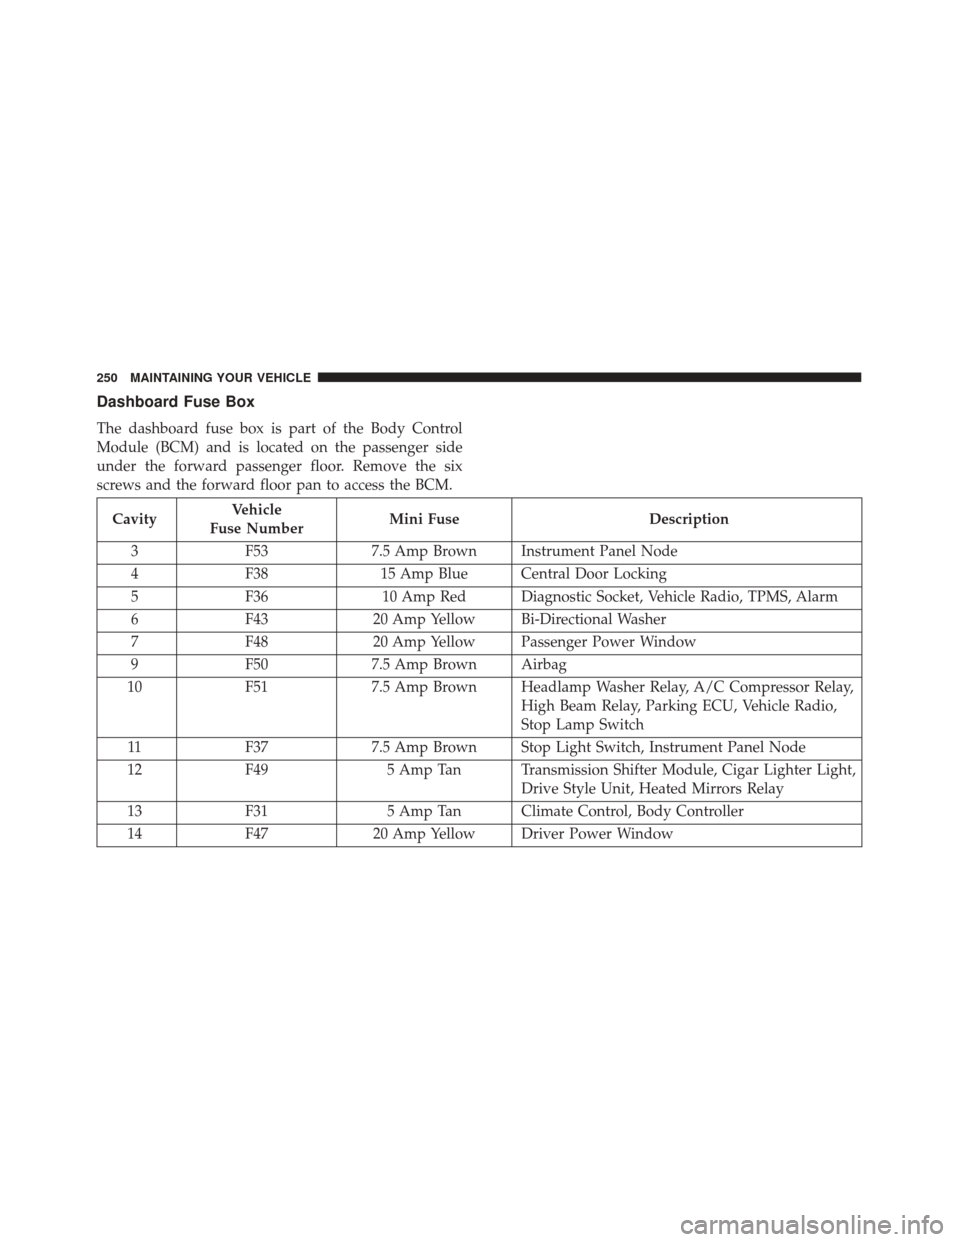
Dashboard Fuse Box
The dashboard fuse box is part of the Body Control
Module (BCM) and is located on the passenger side
under the forward passenger floor. Remove the six
screws and the forward floor pan to access the BCM.
CavityVehicle
Fuse Number Mini Fuse
Description
3 F53 7.5 Amp Brown Instrument Panel Node
4 F38 15 Amp Blue Central Door Locking
5 F36 10 Amp Red Diagnostic Socket, Vehicle Radio, TPMS, Alarm
6 F43 20 Amp Yellow Bi-Directional Washer
7 F48 20 Amp Yellow Passenger Power Window
9 F50 7.5 Amp Brown Airbag
10 F51 7.5 Amp Brown Headlamp Washer Relay, A/C Compressor Relay,
High Beam Relay, Parking ECU, Vehicle Radio,
Stop Lamp Switch
11 F37 7.5 Amp Brown Stop Light Switch, Instrument Panel Node
12 F49 5 Amp Tan Transmission Shifter Module, Cigar Lighter Light,
Drive Style Unit, Heated Mirrors Relay
13 F31 5 Amp Tan Climate Control, Body Controller
14 F47 20 Amp Yellow Driver Power Window
250 MAINTAINING YOUR VEHICLE
Page 253 of 297
VEHICLE STORAGE
If you are leaving your vehicle dormant for more than
21 days, you may want to take these steps to protect
your battery.
•Disconnect the negative cable from the battery.
• Anytime you store your vehicle, or keep it out of
service (e.g., vacation) for two weeks or more, run the
air conditioning system at idle for about five minutes
in the fresh air and high blower setting. This will
ensure adequate system lubrication to minimize the
possibility of compressor damage when the system is
started again.
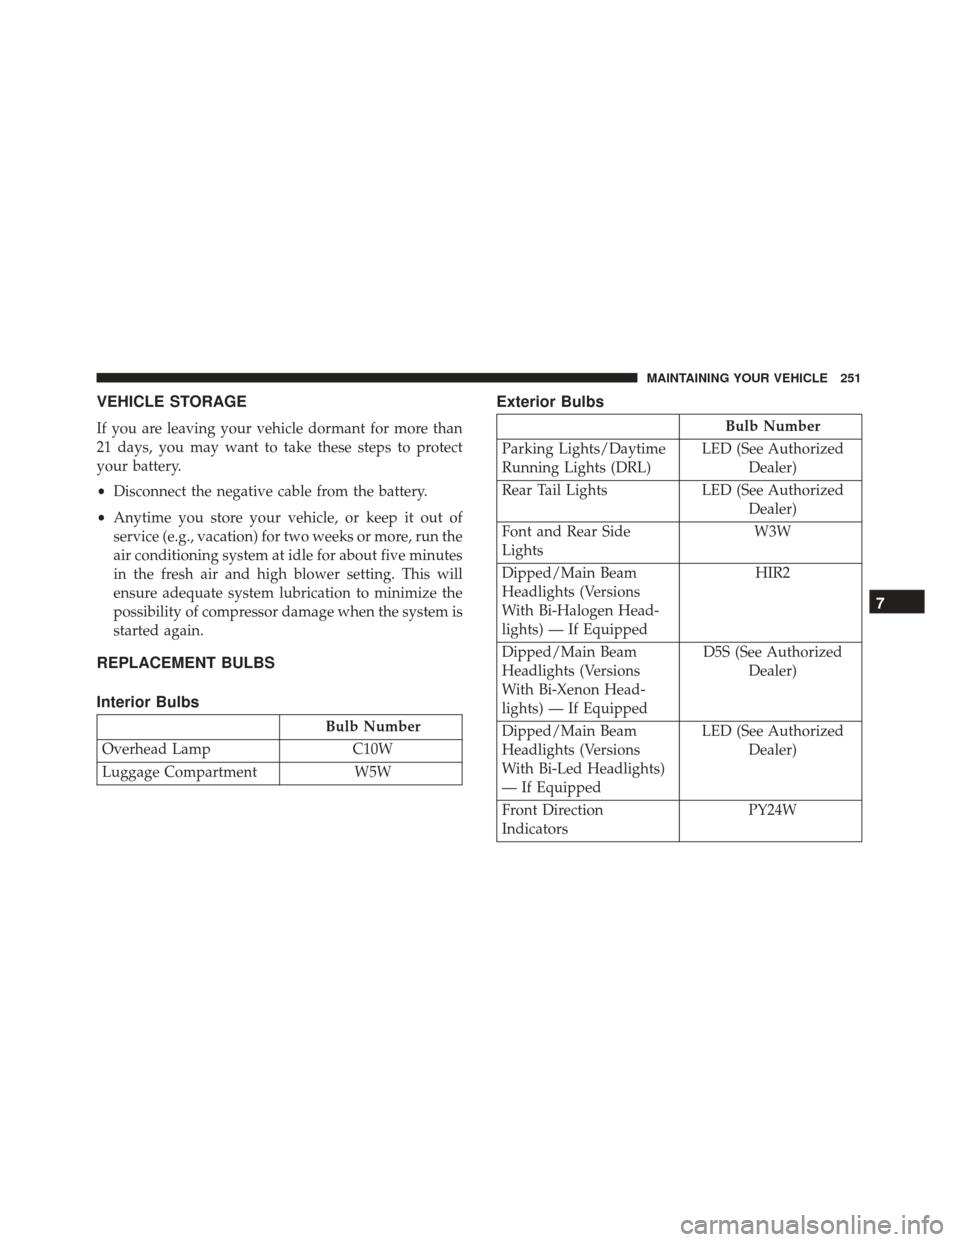
REPLACEMENT BULBS
Interior Bulbs
Bulb Number
Overhead Lamp C10W
Luggage Compartment W5W
Exterior Bulbs
Bulb Number
Parking Lights/Daytime
Running Lights (DRL) LED (See Authorized
Dealer)
Rear Tail Lights LED (See Authorized
Dealer)
Font and Rear Side
Lights W3W
Dipped/Main Beam
Headlights (Versions
With Bi-Halogen Head-
lights) — If Equipped HIR2
Dipped/Main Beam
Headlights (Versions
With Bi-Xenon Head-
lights) — If Equipped D5S (See Authorized
Dealer)
Dipped/Main Beam
Headlights (Versions
With Bi-Led Headlights)
— If Equipped LED (See Authorized
Dealer)
Front Direction
Indicators PY24W
7
MAINTAINING YOUR VEHICLE 251
Page 254 of 297
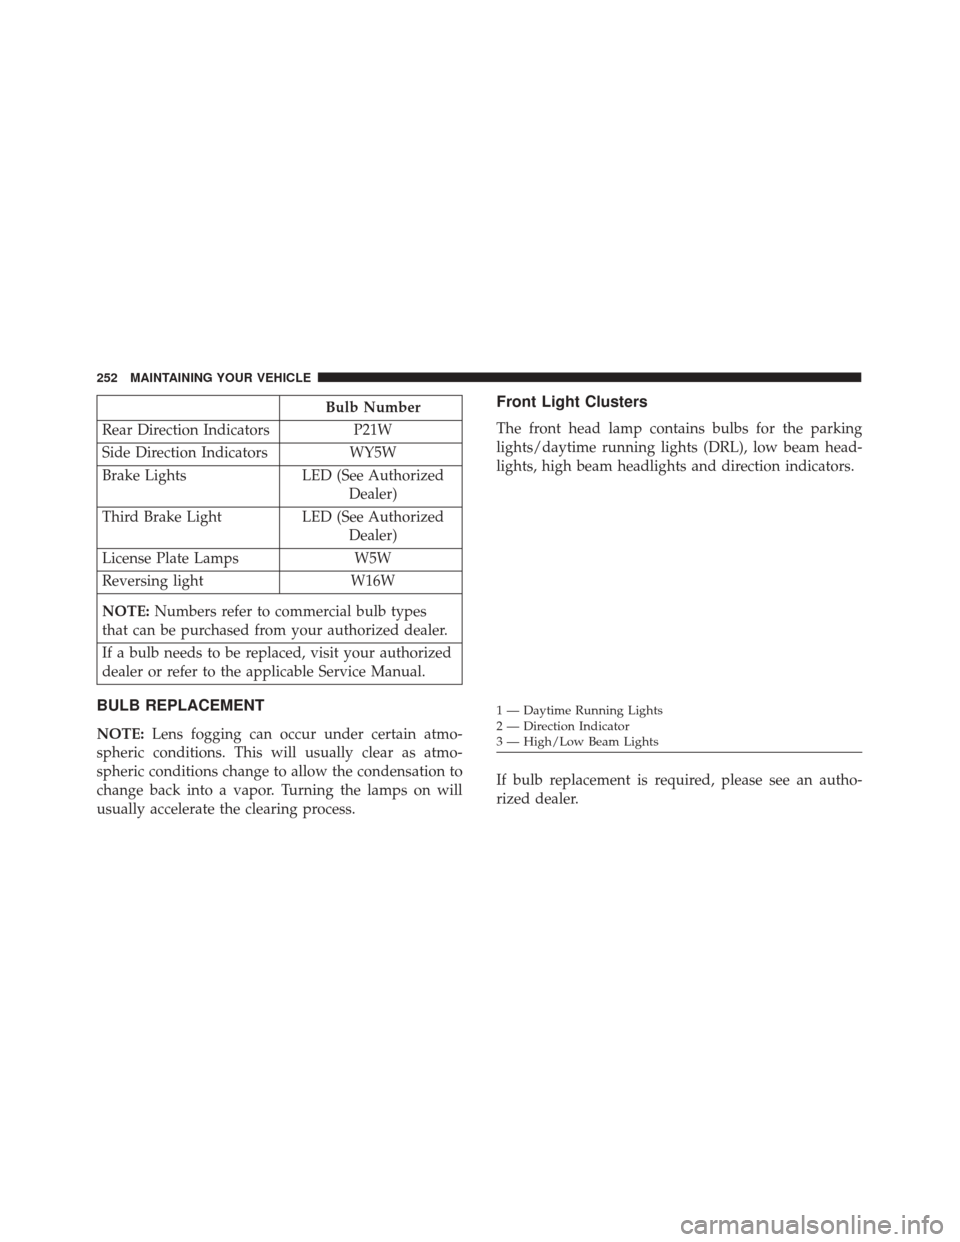
Bulb Number
Rear Direction Indicators P21W
Side Direction Indicators WY5W
Brake Lights LED (See Authorized
Dealer)
Third Brake Light LED (See Authorized
Dealer)
License Plate Lamps W5W
Reversing light W16W
NOTE: Numbers refer to commercial bulb types
that can be purchased from your authorized dealer.
If a bulb needs to be replaced, visit your authorized
dealer or refer to the applicable Service Manual.
BULB REPLACEMENT
NOTE: Lens fogging can occur under certain atmo-
spheric conditions. This will usually clear as atmo-
spheric conditions change to allow the condensation to
change back into a vapor. Turning the lamps on will
usually accelerate the clearing process.
Front Light Clusters
The front head lamp contains bulbs for the parking
lights/daytime running lights (DRL), low beam head-
lights, high beam headlights and direction indicators.
If bulb replacement is required, please see an autho-
rized dealer.
1 — Daytime Running Lights
2 — Direction Indicator
3 — High/Low Beam Lights
252 MAINTAINING YOUR VEHICLE
Page 255 of 297
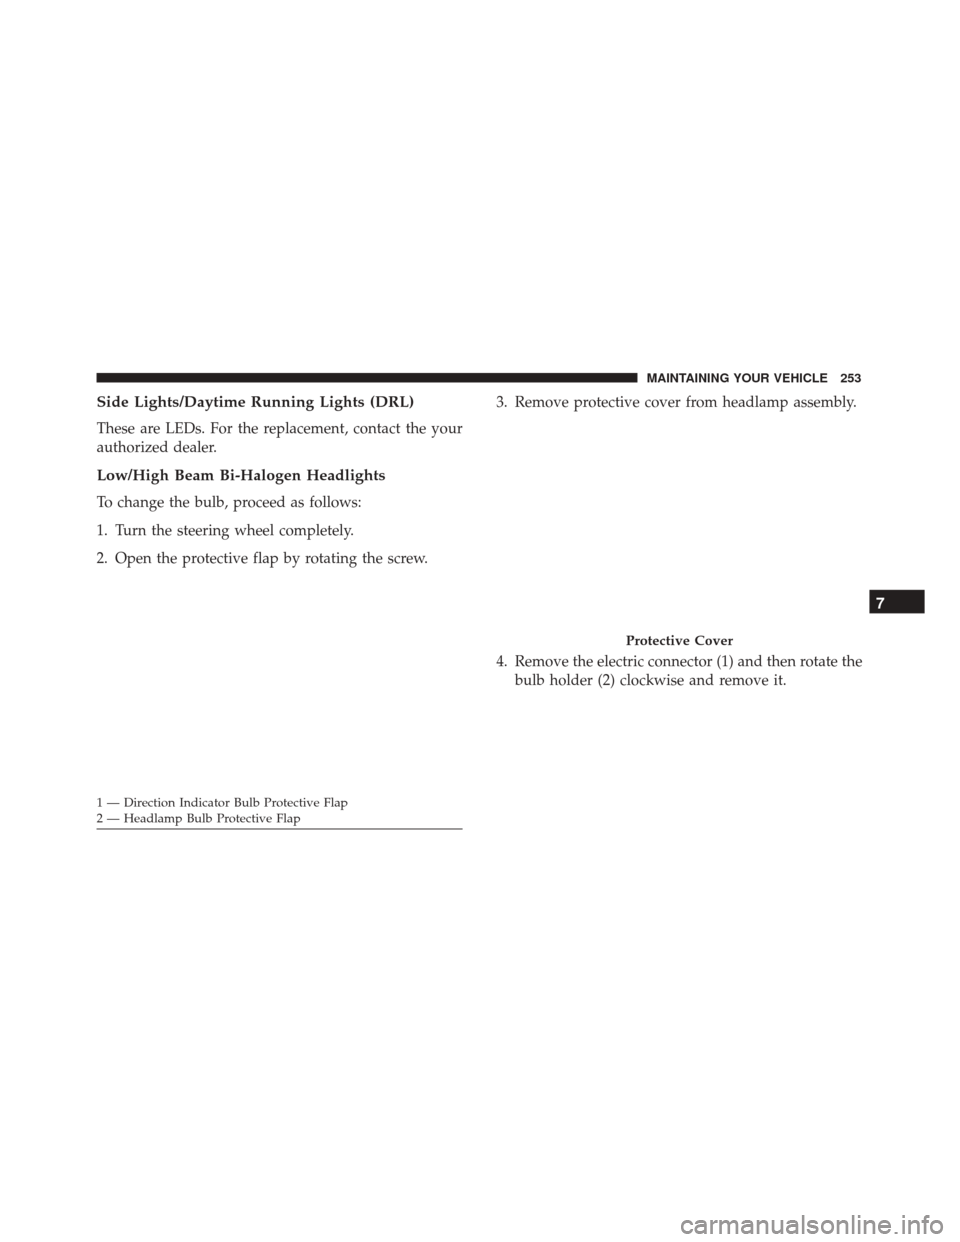
Side Lights/Daytime Running Lights (DRL)
These are LEDs. For the replacement, contact the your
authorized dealer.
Low/High Beam Bi-Halogen Headlights
To change the bulb, proceed as follows:
1. Turn the steering wheel completely.
2. Open the protective flap by rotating the screw.3. Remove protective cover from headlamp assembly.
4. Remove the electric connector (1) and then rotate the
bulb holder (2) clockwise and remove it.
1 — Direction Indicator Bulb Protective Flap
2 — Headlamp Bulb Protective Flap
Protective Cover
7
MAINTAINING YOUR VEHICLE 253
Page 256 of 297
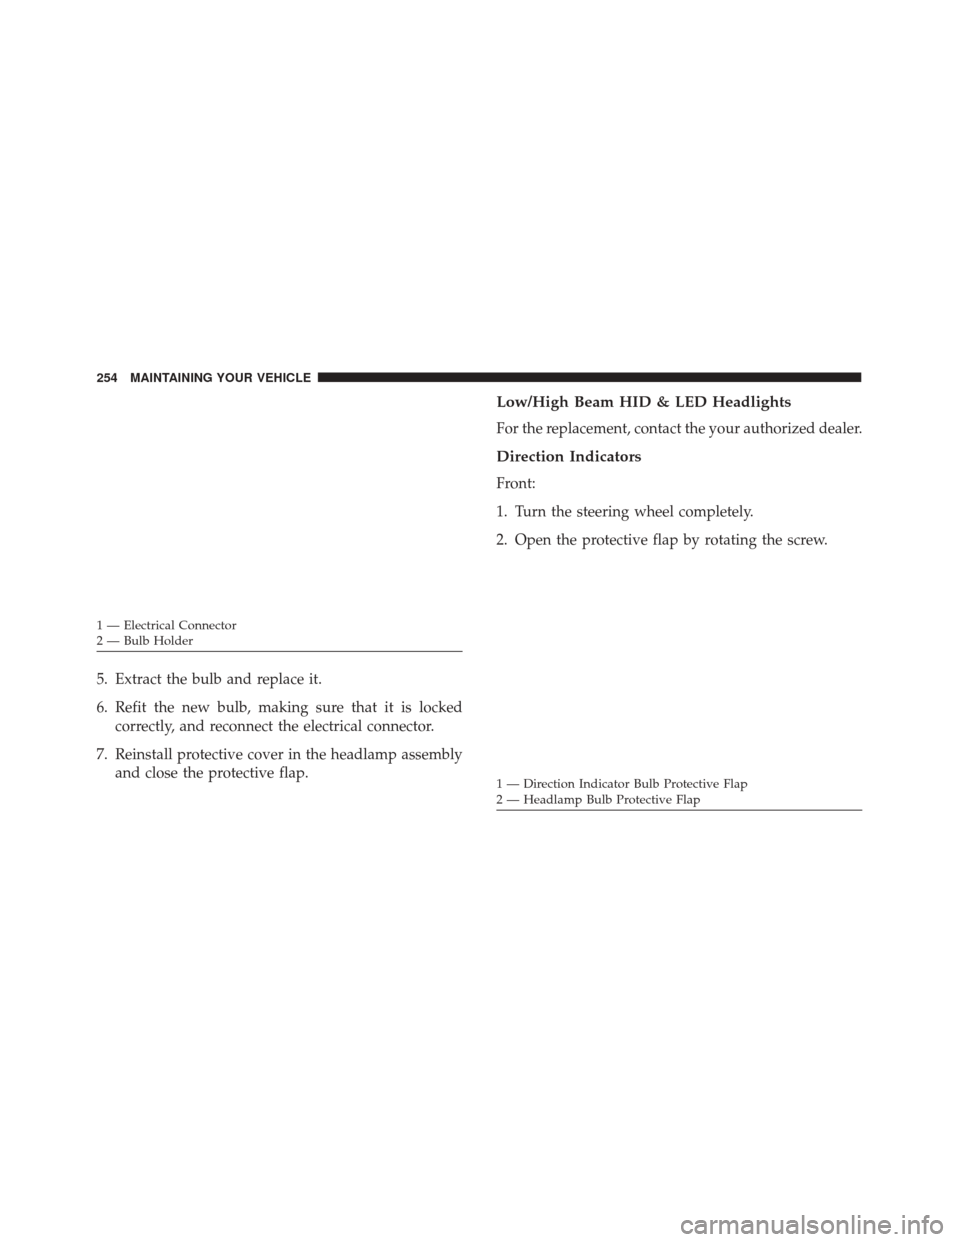
5. Extract the bulb and replace it.
6. Refit the new bulb, making sure that it is lockedcorrectly, and reconnect the electrical connector.
7. Reinstall protective cover in the headlamp assembly and close the protective flap.
Low/High Beam HID & LED Headlights
For the replacement, contact the your authorized dealer.
Direction Indicators
Front:
1. Turn the steering wheel completely.
2. Open the protective flap by rotating the screw.
1 — Electrical Connector
2 — Bulb Holder
1 — Direction Indicator Bulb Protective Flap
2 — Headlamp Bulb Protective Flap
254 MAINTAINING YOUR VEHICLE
Page 257 of 297
3. Remove protective cover from headlamp assembly.
4. Rotate the bulb holder counterclockwise and removeit.
5. Rotate the bulb assembly counter clockwise to re- move from bulb holder.
6. Install the new bulb, making sure that it is locked in correctly, and reinstall into headlamp assembly.
7. Reinstall protective cover in the headlamp assembly and close the protective flap. Side:
1. Adjust the lens in the point shown in to compress the
retaining clip, then pull the cluster outwards.
2. Turn the bulb holder counterclockwise, remove the bulb and replace it.
3. Install the bulb holder in the lens and turn it clock- wise.
4. Install the cluster making sure that the internal clip clicks into position.
Protective Cover
1 — Lens
2 — Bulb Holder
7
MAINTAINING YOUR VEHICLE 255
Page 258 of 297
Front Side Marker
To change the bulb, proceed as follows:
1. Turn the front wheels to gain access and then removethe fastener from the inner wheel liner. 2. Fold back wheel liner door to access bulb housing.
Fastener Location
Bulb Housing Location
256 MAINTAINING YOUR VEHICLE
Page 259 of 297
3. Remove bulb from bulb housing then remove andreplace bulb and reinstall.
Rear Light Clusters
These contain the bulbs for the side lights, direction
indicators and brake lights.
Direction Indicators
To change the bulb, proceed as follows:
1. Remove the protective cap (one for each side) on theside cover of the luggage compartment.
2. Remove the second protective cap insert a hand inside the opening.
Front Side Marker Bulb
First Protective Cap
7
MAINTAINING YOUR VEHICLE 257
Page 260 of 297
3. Rotate clockwise to remove the bulb holder removethe bulb from the bulb holder.
4. Install the bulb by pressing it into bulb holder then turn install the bulb holder and turn it counterclock-
wise.
5. Install the previously removed protective caps.
Tail Lights/Brake Lights
These are LEDs. For the replacement, contact the your
local dealer.
Reversing Light
WARNING!
The reversing light are located close to the exhaust
pipes; take the utmost care not to get burnt during
the bulb replacement.
To replace the reversing lights turn the bulb holder
counterclockwise, remove the bulb and replace it.
Second Protective Cap
258 MAINTAINING YOUR VEHICLE
Trending: key fob battery, air suspension, adding oil, battery capacity, lock, run flat, service interval reset
