display Alfa Romeo 8C 2007 Owner handbook (in English)
[x] Cancel search | Manufacturer: ALFA ROMEO, Model Year: 2007, Model line: 8C, Model: Alfa Romeo 8C 2007Pages: 223, PDF Size: 14.35 MB
Page 88 of 223
86
4
1) Read the 5-digit electronic code found on
the CODE CARD.
2) Turn the ignition key to MAR: at this
moment the CODE
and EOBD
warning lights are on.
3) Depress the accelerator pedal and hold
it down. Approximately 8 seconds later,
the EOBD warning light will go off.
Release the accelerator and get ready to
count the number of times the EOBD
warning light fl ashes.
4) As soon as the number of fl ashing is equal
to the fi rst digit of your CODE CARD, fully
depress the accelerator pedal and hold it
down until the EOBD warning light
goes off (after approximately 4 seconds).
then release the accelerator.
5) The EOBD warning light starts fl ashing
again. As soon as the displayed number of
fl ashing is equal to the second digit of your
CODE CARD, depress the accelerator and
hold it down.6) Follow the same procedure for the
remaining digits in the code on the CODE
CARD.
7) When the last digit has been entered, hold
the accelerator pedal pressed down. The
EOBD warning light comes on for 4
seconds and then goes off; you can now
release the accelerator.
8) A quick fl ashing of the EOBD warning
light (about 4 seconds) confi rms that
procedure has been carried out correctly.9) Start the engine by turning the key to
position MAR.
If the EOBD warning light remains on,
turn the key to position STOP and repeat the
procedure from step 1.
This procedure can be repeated an unlimited
number of times.
WARNING: After an emergency staring, you
should contact an Authorised Service Centre of
the Manufacturer’s Network otherwise you will
have to perform the emergency procedure every
time the engine is started.
Page 92 of 223
90
4
D
C
DEACTIVATING THE
MOTION SENSING
ALARM
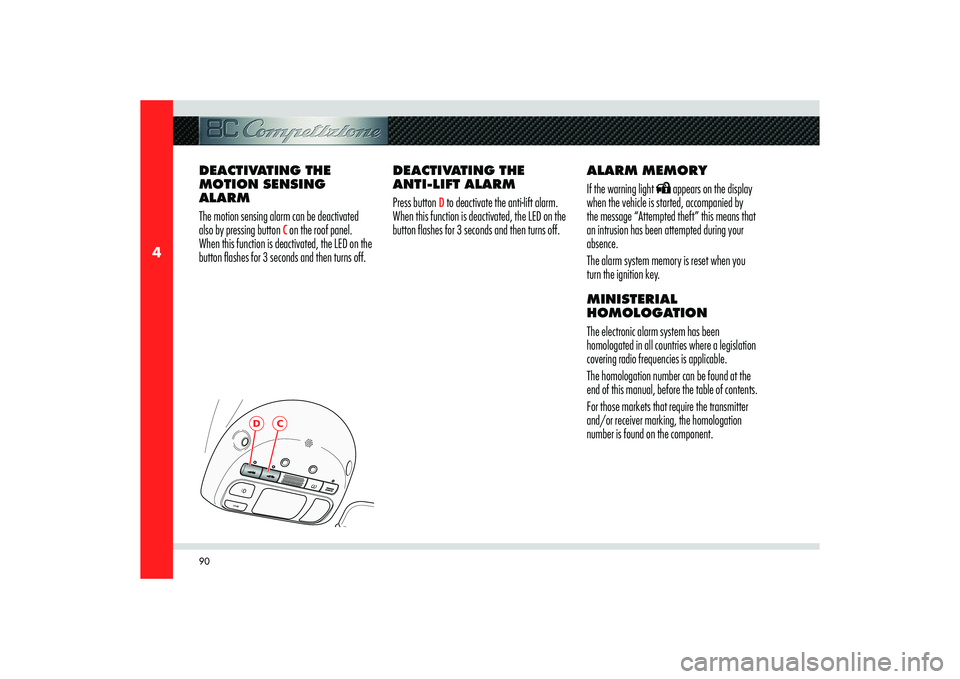
The motion sensing alarm can be deactivated
also by pressing button
C on the roof panel.
When this function is deactivated, the LED on the
button flashes for 3 seconds and then turns off.DEACTIVATING THE
ANTI-LIFT ALARM
Press button
D to deactivate the anti-lift alarm.
When this function is deactivated, the LED on the
button flashes for 3 seconds and then turns off.ALARM MEMORY
If the warning light
appears on the display
when the vehicle is started, accompanied by
the message “Attempted theft” this means that
an intrusion has been attempted during your
absence.
The alarm system memory is reset when you
turn the ignition key.
MINISTERIAL
HOMOLOGATION
The electronic alarm system has been
homologated in all countries where a legislation
covering radio frequencies is applicable.
The homologation number can be found at the
end of this manual, before the table of contents.
For those markets that require the transmitter
and/or receiver marking, the homologation
number is found on the component.
Page 97 of 223
95
4
A
BEFORE YOU DRIVE
EXTERNAL LIGHTS
AND DIRECTION
INDICATORSThe external lights and direction indicators can be
turned on only when the starter key is at MAR,
except the parking lights which can always be
turned on.
The external lights can be turned on and off
manually or automatically, according to the
brightness of the light outside.HEADLIGHT SWITCH
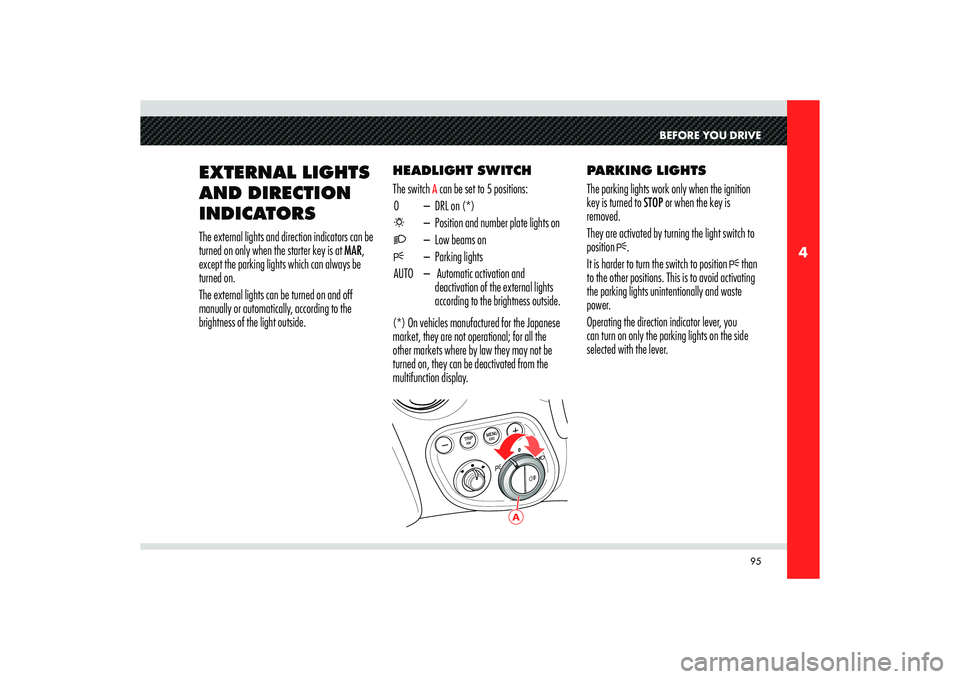
The switch
A can be set to 5 positions:
0 – DRL on (*)
– Position and number plate lights on
– Low beams on
– Parking lights
AUTO – Automatic activation and
deactivation of the external lights
according to the brightness outside.
(*) On vehicles manufactured for the Japanese
market, they are not operational; for all the
other markets where by law they may not be
turned on, they can be deactivated from the
multifunction display.PARKING LIGHTS
The parking lights work only when the ignition
key is turned to STOP or when the key is
removed.
They are activated by turning the light switch to
position .
It is harder to turn the switch to position than
to the other positions. This is to avoid activating
the parking lights unintentionally and waste
power.
Operating the direction indicator lever, you
can turn on only the parking lights on the side
selected with the lever.
Page 99 of 223
97
4
BC
D
BEFORE YOU DRIVE
TWILIGHT SENSOR
The twilight sensor is comprised of two sensors:
a global sensor, capable of measuring the light
intensity above, and a directional sensor, which
measures the light intensity in the vehicle’s
travelling direction, enabling it to recognise
tunnels and driveways. The sensing range of
the twilight sensor can be adjusted through the
instrument panel, by selecting the Setup mode.
In the event of a sensor failure, the system will
turn on the low beams and the position lights,
regardless of the light outside, and a failure
message will appear on the instrument panel
display.
The failure signal remains active until the switch A is turned to AUTO.
In this case, we recommend that you deactivate
the automatic system and turn on the external
lights manually if necessary; as soon as possible,
contact an Authorised Service Centre of the
Manufacturer’s Network.DIRECTION INDICATORS
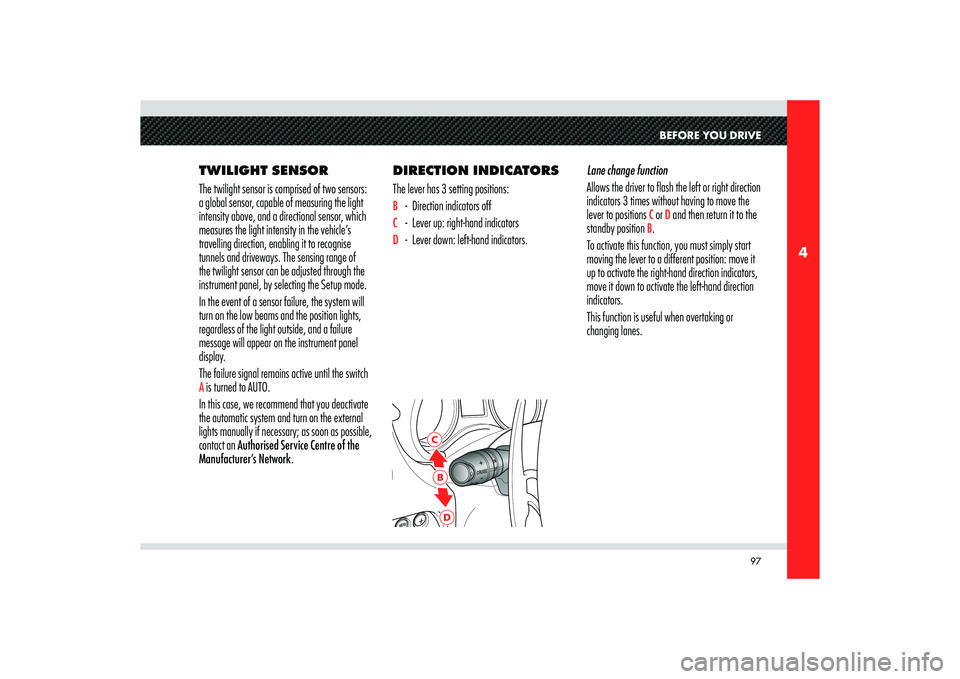
The lever has 3 setting positions:
B - Direction indicators offC - Lever up: right-hand indicatorsD - Lever down: left-hand indicators.Lane change function
Allows the driver to flash the left or right direction
indicators 3 times without having to move the
lever to positions
C or D and then return it to the
standby position
B.
To activate this function, you must simply start
moving the lever to a different position: move it
up to activate the right-hand direction indicators,
move it down to activate the left-hand direction
indicators.
This function is useful when overtaking or
changing lanes.
Page 100 of 223
98
4
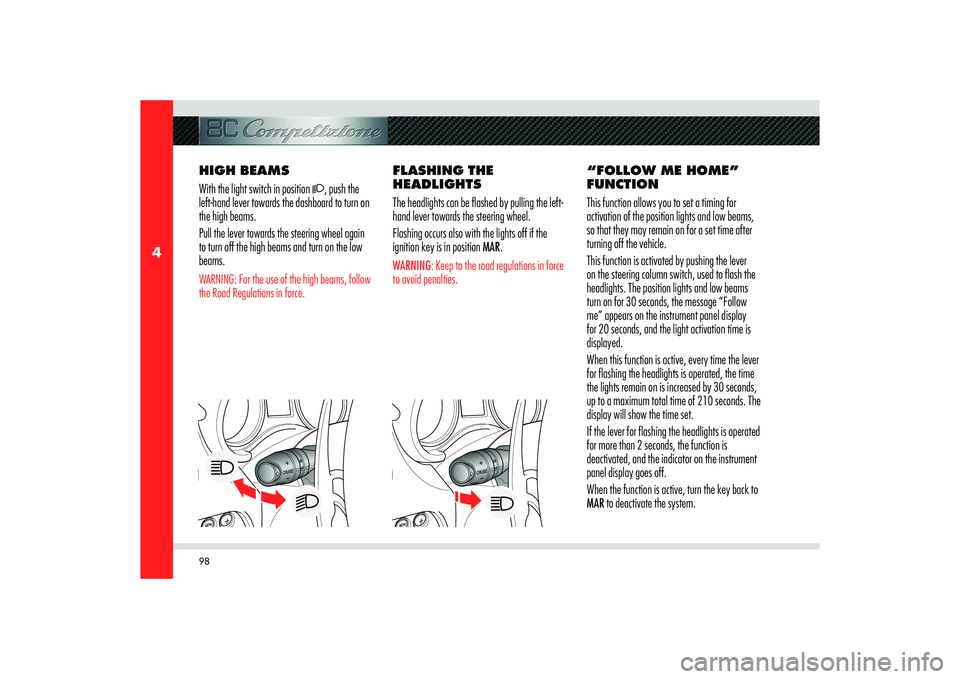
HIGH BEAMS
With the light switch in position
, push the
left-hand lever towards the dashboard to turn on
the high beams.
Pull the lever towards the steering wheel again
to turn off the high beams and turn on the low
beams.
WARNING: For the use of the high beams, follow
the Road Regulations in force.
FLASHING THE
HEADLIGHTS
The headlights can be flashed by pulling the left-
hand lever towards the steering wheel.
Flashing occurs also with the lights off if the
ignition key is in position MAR.WARNING: Keep to the road regulations in force
to avoid penalties.
“FOLLOW ME HOME”
FUNCTION
This function allows you to set a timing for
activation of the position lights and low beams,
so that they may remain on for a set time after
turning off the vehicle.
This function is activated by pushing the lever
on the steering column switch, used to flash the
headlights. The position lights and low beams
turn on for 30 seconds, the message “Follow
me” appears on the instrument panel display
for 20 seconds, and the light activation time is
displayed.
When this function is active, every time the lever
for flashing the headlights is operated, the time
the lights remain on is increased by 30 seconds,
up to a maximum total time of 210 seconds. The
display will show the time set.
If the lever for flashing the headlights is operated
for more than 2 seconds, the function is
deactivated, and the indicator on the instrument
panel display goes off.
When the function is active, turn the key back to
MAR to deactivate the system.
Page 103 of 223
101
4
BEFORE YOU DRIVE
CAUTION
Before cleaning the front
windscreen (for example in service
stations) make sure the rain sensor is
deactivated or that the key is turned
to STOP. The rain sensor must be
deactivated also when washing the
vehicle by hand or in automatic car
washes.WARNING: If there is ice or snow on the front
windscreen, do not activate the rain sensor to
avoid damaging the wiper motor.
SENSOR FAILURE
When the rain sensor is activated, in the event
that it is malfunctioning, the windscreen wiper
will be turned on in intermittent mode and the
sensing range will be set by the user, regardless
of whether or not there is rain on the windscreen.
A failure message will be displayed on the
instrument panel.
In this case, we recommend that you deactivate
the rain sensor and turn on the windscreen wiper,
if necessary, in continuous mode. As soon as
possible, contact an Authorised Service Centre
of the Manufacturer’s Network.
Page 116 of 223
114
5
MAR
STARTING THE
ENGINE
CAUTION
Hold the brake pedal depressed
when starting the engine.
CAUTION
It is dangerous to operate the
engine in an enclosed space. The engine
consumes oxygen and discharges
carbon dioxide, carbon monoxide and
other toxic gases.
WARNING: Before start-up, switch off the
electrical devices with a high power consumption
(air-conditioning and heating system, heated
rear window, headlights, etc.).
WARNING: Do not start the engine if the fuel
level in the tank is low.
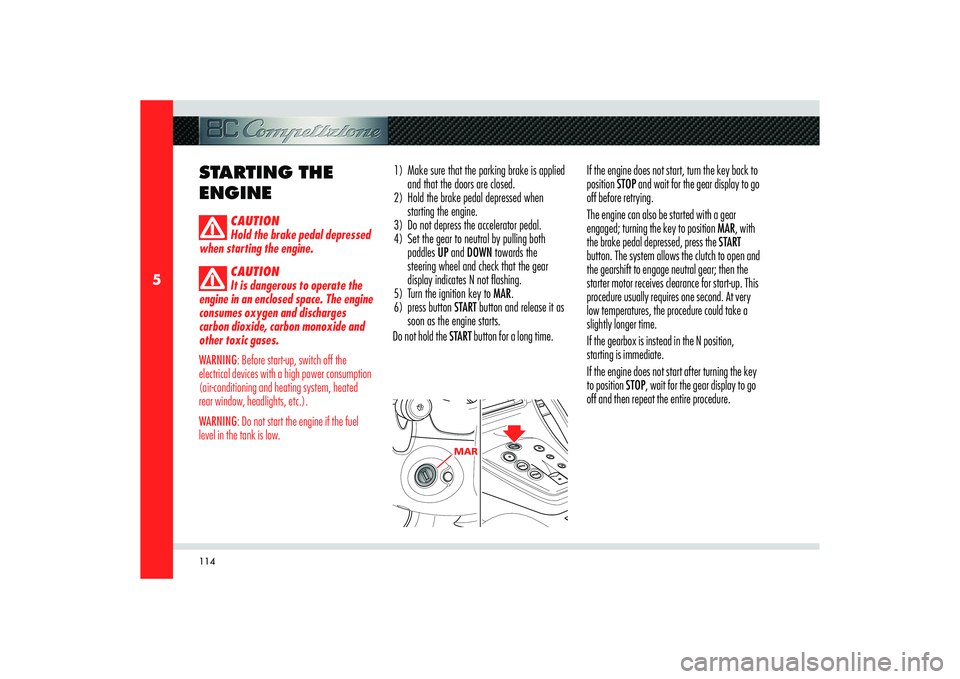
1) Make sure that the parking brake is applied
and that the doors are closed.
2) Hold the brake pedal depressed when
starting the engine.
3) Do not depress the accelerator pedal.
4) Set the gear to neutral by pulling both
paddles UP and DOWN towards the
steering wheel and check that the gear
display indicates N not fl ashing.
5) Turn the ignition key to MAR.
6) press button START button and release it as
soon as the engine starts.
Do not hold the START button for a long time.If the engine does not start, turn the key back to
position STOP and wait for the gear display to go
off before retrying.
The engine can also be started with a gear
engaged; turning the key to position MAR, with
the brake pedal depressed, press the START
button. The system allows the clutch to open and
the gearshift to engage neutral gear; then the
starter motor receives clearance for start-up. This
procedure usually requires one second. At very
low temperatures, the procedure could take a
slightly longer time.
If the gearbox is instead in the N position,
starting is immediate.
If the engine does not start after turning the key
to position STOP, wait for the gear display to go
off and then repeat the entire procedure.
Page 119 of 223
117
5
E
CD
F
H
G
USING THE VEHICLE
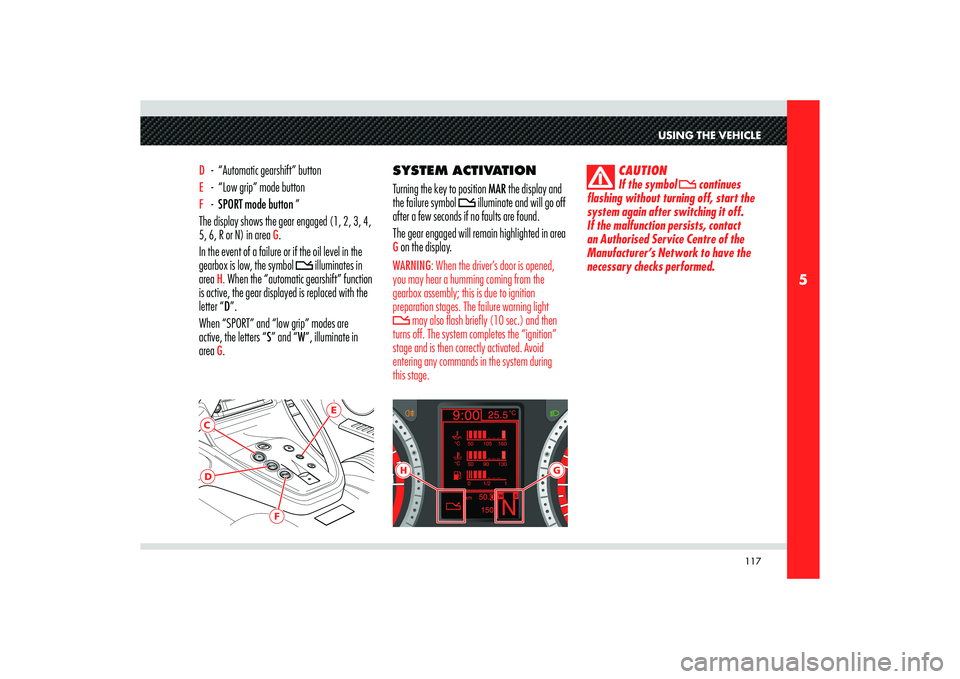
D - “Automatic gearshift” button E - “Low grip” mode button F - SPORT mode button ”
The display shows the gear engaged (1, 2, 3, 4,
5, 6, R or N) in area
G.
In the event of a failure or if the oil level in the
gearbox is low, the symbol
illuminates in
area
H. When the “automatic gearshift” function
is active, the gear displayed is replaced with the
letter “D”.
When “SPORT” and “low grip” modes are
active, the letters “S” and “W”, illuminate in
area G.SYSTEM ACTIVATION
Turning the key to position MAR the display and
the failure symbol
illuminate and will go off
after a few seconds if no faults are found.
The gear engaged will remain highlighted in area
G on the display.WARNING: When the driver’s door is opened,
you may hear a humming coming from the
gearbox assembly; this is due to ignition
preparation stages. The failure warning light
may also flash briefly (10 sec.) and then
turns off. The system completes the “ignition”
stage and is then correctly activated. Avoid
entering any commands in the system during
this stage.
CAUTION
If the symbol continues
flashing without turning off, start the
system again after switching it off.
If the malfunction persists, contact
an Authorised Service Centre of the
Manufacturer’s Network to have the
necessary checks performed.
Page 120 of 223
118
5
If the symbol
remains on, there is a system
failure. This condition is also indicated by a beep
when the key is turned to position MAR.
WARNING: Contact an Authorised Service
Centre of the Manufacturer’s Network to have
the malfunction corrected.
OPERATION WITH THE
ENGINE OFF
After completing the “system start-up” stage,
the gear currently engaged will appear on the
display:
- N (Neutral)
- R (Reverse)
- D(1
st).
If the indication flashes (may also occur with N)
it means that the gear is not properly engaged or
is disengaged; therefore, request neutral (N) and
then the desired gear.CAUTION
If a horizontal dash appears on
the display, there is a system failure.
When the engine is off, 1st gear, reverse (R) and
neutral (N) can be engaged. Keeping the brake
pedal pressed during the request, you must
proceed as follows:
- N (Neutral): pull both paddles found behind
the steering wheel.
- R (Reverse): press button
C.
- Engaging 1
st gear: pull the UP paddle
towards the steering wheel.
CAUTION
To engage reverse gear, hold
the button C down until the letter R is
displayed.
WARNING: Immediately release the paddles
UP, DOWN and the button R after the gearshift
request. A prolonged manoeuvre may cause
the failure warning light
and the buzzer
to activate. Do not operate the system with the
engine off, to prevent discharging the battery.
Avoid useless gearshifting with the engine off, to
prevent overheating of the pump.
Page 123 of 223

121
5
USING THE VEHICLE
REQUESTING
NEUTRAL (N)
If necessary, neutral (N) can be requested at any
speed.
If you then operate the UP paddle, the system
will engage a gear suited to the vehicle speed.
STOPPING THE VEHICLE
When the vehicle stops, the system
automatically engages 1
st gear (unless N has
already bee requested).
With the vehicle stationary and the engine
running, hold the brake pedal depressed until
you are ready to start off again. TURNING OFF
THE ENGINE AND
DEACTIVATING THE
SYSTEM
The engine can only be turned off with the
gearbox in 1
st, or reverse gear R.
If the gear is in neutral and the key is turned
from MAR to position STOP, the display remains
on for a few seconds showing the letter (N)
flashing and activating the acoustic signal.
For safety reasons, to avoid undesired and
sudden vehicle movements:
CAUTION
Never leave the vehicle with
the gear in neutral (N), but engage
1
st or reverse gear and check that the
parking brake has been engaged. Do
not leave the vehicle with the engine
running.CAUTION
Do not remove the key when
the vehicle is moving! The system (and
thus the display) would remain active
but malfunctioning, until the vehicle
stops; in addition, the steering wheel
would lock automatically at the first
turn of the wheel.
In this case, the failure symbol
will
illuminate and, before starting-off again, the
system must be turned off and the “system start-
up” phase repeated.
In any event, it is best to:
- Turn off the engine and the system holding
the brake pedal depressed.
- Do not request a gearshift while the system
is turning off.