warning Alfa Romeo 8C 2008 Owner handbook (in English)
[x] Cancel search | Manufacturer: ALFA ROMEO, Model Year: 2008, Model line: 8C, Model: Alfa Romeo 8C 2008Pages: 223, PDF Size: 14.35 MB
Page 98 of 223
96
4
AUTOMATIC
ACTIVATION/
DEACTIVATION
When the switch
A is turned to AUTO and the
ignition key is turned to MAR, the position lights,
low beams and number plate lights automatically
turn on and off according to the ambient light.
WARNING: The high beams can only be turned
on manually by pushing the left-hand lever
forward.
CAUTION
If the high beams are activated,
they will be switched on automatically
every time the lights are turned on.
We recommend therefore that you
turn them off every time the twilight
sensor deactivates the external lights.CAUTION
In case of fog during the day,
the position lights and low beams will
not be activated automatically. The
driver must always be prepared to
turn on the external lights manually,
even the rear fog lights if necessary.
WARNING: After automatic activation of the
external lights, it will always be possible to
turn on the rear fog lights manually. When the
external lights turn off automatically, also the
rear fog lights (if on) will be turned off. The next
time the external lights activate automatically,
the rear fog lights will have to be turned on
manually if necessary. CAUTION
The driver is always
responsible for turning on the external
lights, depending on the ambient light
and in compliance with the regulations
in force in the country of use. The
automatic system for activating/
deactivating the external lights must
be considered an aid for the driver. If
necessary, turn the lights on and off
manually.
Page 100 of 223
98
4
HIGH BEAMS
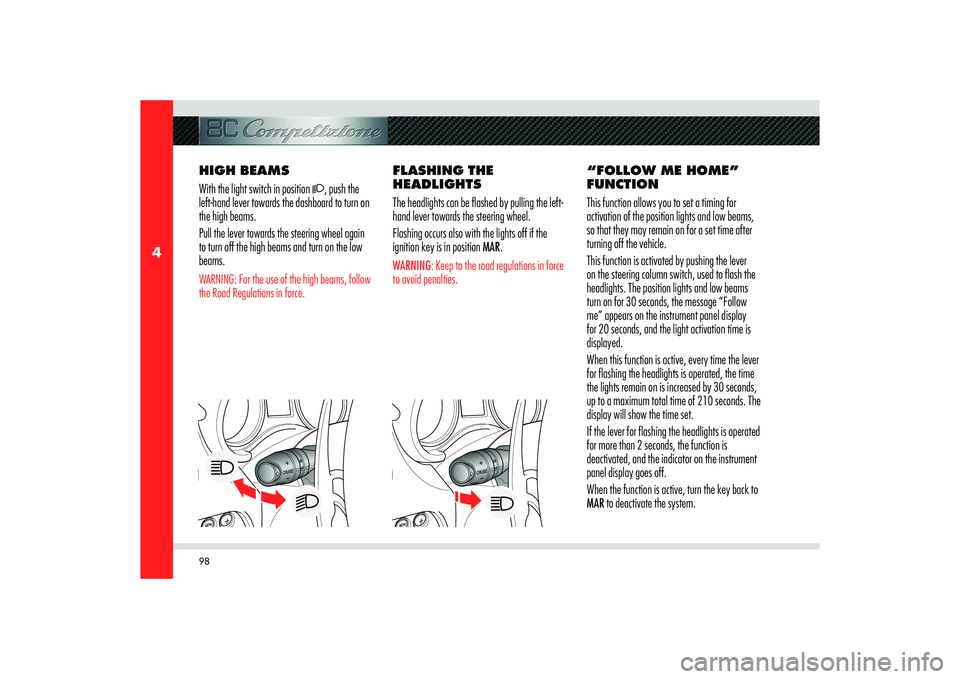
With the light switch in position
, push the
left-hand lever towards the dashboard to turn on
the high beams.
Pull the lever towards the steering wheel again
to turn off the high beams and turn on the low
beams.
WARNING: For the use of the high beams, follow
the Road Regulations in force.
FLASHING THE
HEADLIGHTS
The headlights can be flashed by pulling the left-
hand lever towards the steering wheel.
Flashing occurs also with the lights off if the
ignition key is in position MAR.WARNING: Keep to the road regulations in force
to avoid penalties.
“FOLLOW ME HOME”
FUNCTION
This function allows you to set a timing for
activation of the position lights and low beams,
so that they may remain on for a set time after
turning off the vehicle.
This function is activated by pushing the lever
on the steering column switch, used to flash the
headlights. The position lights and low beams
turn on for 30 seconds, the message “Follow
me” appears on the instrument panel display
for 20 seconds, and the light activation time is
displayed.
When this function is active, every time the lever
for flashing the headlights is operated, the time
the lights remain on is increased by 30 seconds,
up to a maximum total time of 210 seconds. The
display will show the time set.
If the lever for flashing the headlights is operated
for more than 2 seconds, the function is
deactivated, and the indicator on the instrument
panel display goes off.
When the function is active, turn the key back to
MAR to deactivate the system.
Page 101 of 223
99
4
BAECD
BEFORE YOU DRIVE
WINDSCREEN
WASHER/WIPERS
AND HEADLIGHT
WASHERThe windscreen wiper and washer only works
with the ignition key turned to MAR.
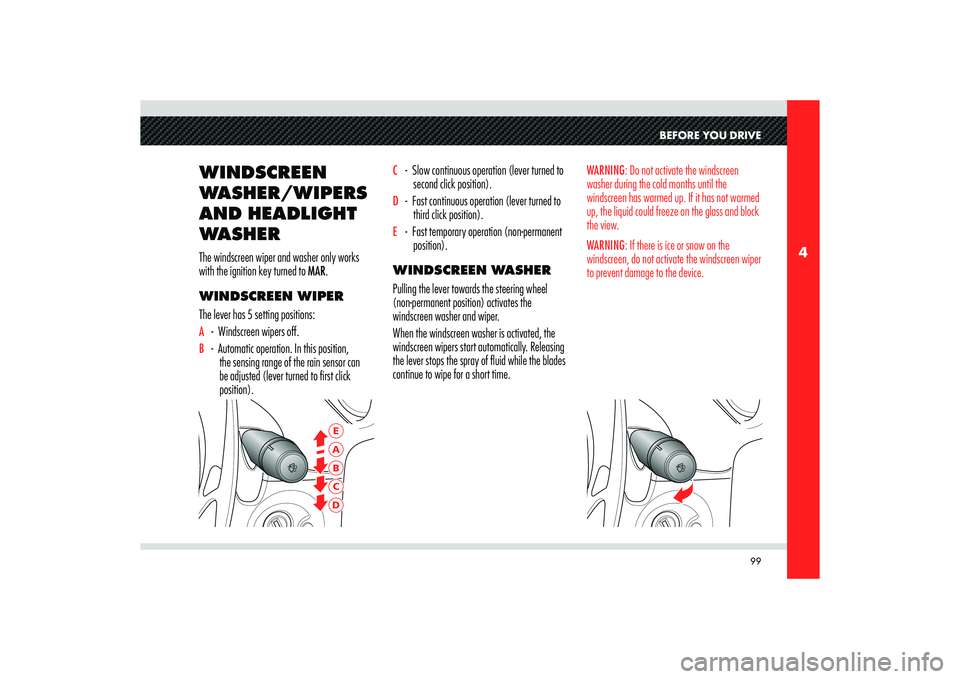
WINDSCREEN WIPER
The lever has 5 setting positions:A - Windscreen wipers off.B - Automatic operation. In this position,
the sensing range of the rain sensor can
be adjusted (lever turned to first click
position).
C - Slow continuous operation (lever turned to
second click position).D - Fast continuous operation (lever turned to
third click position).E - Fast temporary operation (non-permanent
position).
WINDSCREEN WASHER
Pulling the lever towards the steering wheel
(non-permanent position) activates the
windscreen washer and wiper.
When the windscreen washer is activated, the
windscreen wipers start automatically. Releasing
the lever stops the spray of fluid while the blades
continue to wipe for a short time.
WARNING: Do not activate the windscreen
washer during the cold months until the
windscreen has warmed up. If it has not warmed
up, the liquid could freeze on the glass and block
the view.
WARNING: If there is ice or snow on the
windscreen, do not activate the windscreen wiper
to prevent damage to the device.
Page 102 of 223
100
4
F
HEADLIGHT WASHERS
The headlight washers are activated
automatically when the windscreen washer is
started and the low beams are on.
The headlight washer and windscreen washer
share the same fluid tank, and a low fluid level
is indicated by the same warning light on the
instrument panel.
The headlight washers are deactivated if the
vehicle speed exceeds 130 Km/h.RAIN SENSOR
The function of the rain sensor is to adapt the
frequency of the windscreen wiper strokes (in
the intermittent operation mode) to the intensity
of the rain.
All the other functions controlled by the right-
hand lever (windscreen wipers off, headlight and
windscreen washer in continuous slow and fast
operation mode and in temporary fast operation
mode) remain the same.
The rain sensor is automatically activated when
shifting the right-hand lever to position
B and has
an adjustment range that varies progressively
from “windscreen wiper off” when the
windscreen is dry, to” second continuous speed”
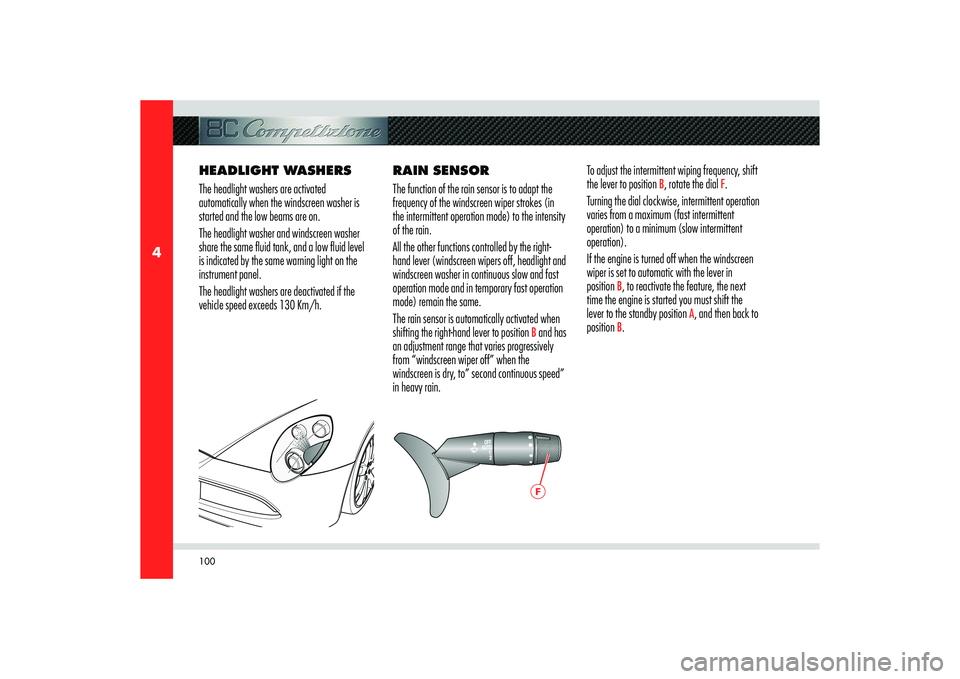
in heavy rain.To adjust the intermittent wiping frequency, shift
the lever to position
B, rotate the dial
F.
Turning the dial clockwise, intermittent operation
varies from a maximum (fast intermittent
operation) to a minimum (slow intermittent
operation).
If the engine is turned off when the windscreen
wiper is set to automatic with the lever in
position
B, to reactivate the feature, the next
time the engine is started you must shift the
lever to the standby position
A, and then back to
position
B.
Page 103 of 223
101
4
BEFORE YOU DRIVE
CAUTION
Before cleaning the front
windscreen (for example in service
stations) make sure the rain sensor is
deactivated or that the key is turned
to STOP. The rain sensor must be
deactivated also when washing the
vehicle by hand or in automatic car
washes.WARNING: If there is ice or snow on the front
windscreen, do not activate the rain sensor to
avoid damaging the wiper motor.
SENSOR FAILURE
When the rain sensor is activated, in the event
that it is malfunctioning, the windscreen wiper
will be turned on in intermittent mode and the
sensing range will be set by the user, regardless
of whether or not there is rain on the windscreen.
A failure message will be displayed on the
instrument panel.
In this case, we recommend that you deactivate
the rain sensor and turn on the windscreen wiper,
if necessary, in continuous mode. As soon as
possible, contact an Authorised Service Centre
of the Manufacturer’s Network.
Page 116 of 223
114
5
MAR
STARTING THE
ENGINE
CAUTION
Hold the brake pedal depressed
when starting the engine.
CAUTION
It is dangerous to operate the
engine in an enclosed space. The engine
consumes oxygen and discharges
carbon dioxide, carbon monoxide and
other toxic gases.
WARNING: Before start-up, switch off the
electrical devices with a high power consumption
(air-conditioning and heating system, heated
rear window, headlights, etc.).
WARNING: Do not start the engine if the fuel
level in the tank is low.
1) Make sure that the parking brake is applied
and that the doors are closed.
2) Hold the brake pedal depressed when
starting the engine.
3) Do not depress the accelerator pedal.
4) Set the gear to neutral by pulling both
paddles UP and DOWN towards the
steering wheel and check that the gear
display indicates N not fl ashing.
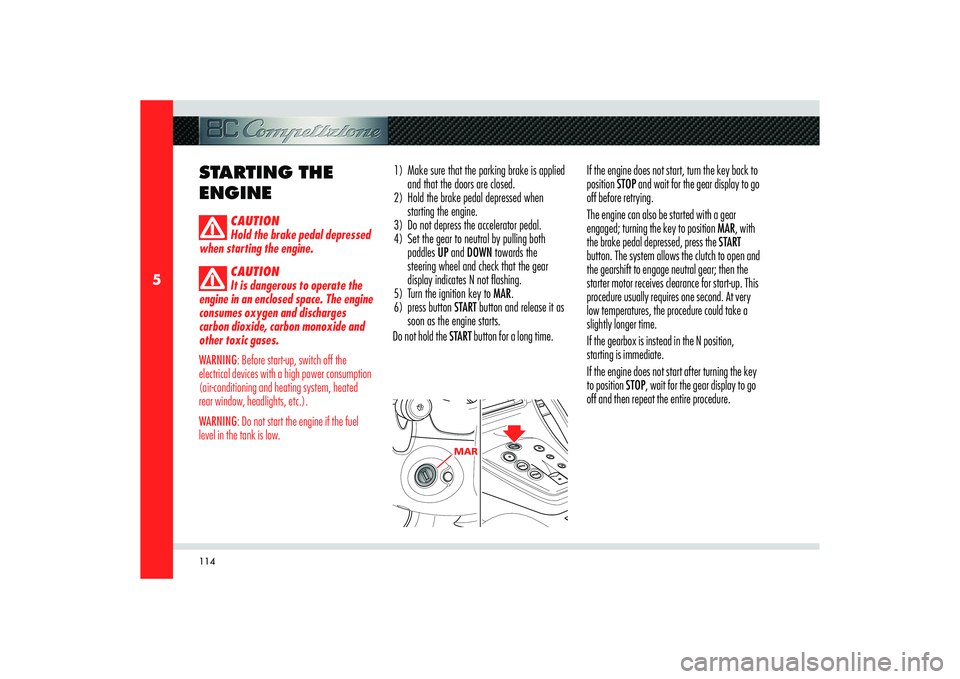
5) Turn the ignition key to MAR.
6) press button START button and release it as
soon as the engine starts.
Do not hold the START button for a long time.If the engine does not start, turn the key back to
position STOP and wait for the gear display to go
off before retrying.
The engine can also be started with a gear
engaged; turning the key to position MAR, with
the brake pedal depressed, press the START
button. The system allows the clutch to open and
the gearshift to engage neutral gear; then the
starter motor receives clearance for start-up. This
procedure usually requires one second. At very
low temperatures, the procedure could take a
slightly longer time.
If the gearbox is instead in the N position,
starting is immediate.
If the engine does not start after turning the key
to position STOP, wait for the gear display to go
off and then repeat the entire procedure.
Page 117 of 223

115
5
USING THE VEHICLE
STARTING-OFF WHEN
THE ENGINE IS COLD
Start-off slowly, avoiding sudden accelerations
and run the engine at low-medium speeds. High-
performance driving should be avoided until the
water temperature reaches
65–70 °C.EMERGENCY STARTING
WITH AUXILIARY
BATTERY
If the battery is flat, the engine can be started
using another battery having the same or slightly
higher capacity than the flat one.
Proceed as follows:
1) Connect the positive terminals (+) of the
two batteries with a cable specifi cally
designed for this purpose.
2) Connect the negative terminals (-) of the
two batteries with a cable specifi cally
designed for this purpose.
WARNING: The battery is housed in a metal box,
therefore, be extremely careful not to let the
battery charger clips come into contact with it.3) Start the engine.
4) When the engine starts, remove the cables
in reverse order.
If the engine does not start after a number
of attempts, do not continue indefinitely but
consult an Authorised Service Centre of the
Manufacturer’s Network.
CAUTION
Do not carry out this procedure
if you have no experience of it:
incorrect manoeuvres may cause high
levels of electrical discharge and may
even lead to the battery explosion.
CAUTION
You are also advised not to
approach the battery with open flames
or lit cigarettes and not to cause
sparks: risk of explosion and fire!
Page 118 of 223
116
5
A
B
WARNING: Do not use a battery-charger for
emergency starting under any circumstances:
you could damage the electronic systems,
particularly the control units that manage the
ignition and fuel supply functions.
CAUTION
Remember that when the
engine is not started, the power
braking and power steering systems
are not activated and so the effort
required on the brake pedal and
steering wheel is much greater.
TURNING OFF THE
ENGINE
With the engine idling, rotate the ignition key to
the STOP position.
A burst on the accelerator pedal before turning
off the engine has no purpose and increases fuel
consumption.
Q-SELECT
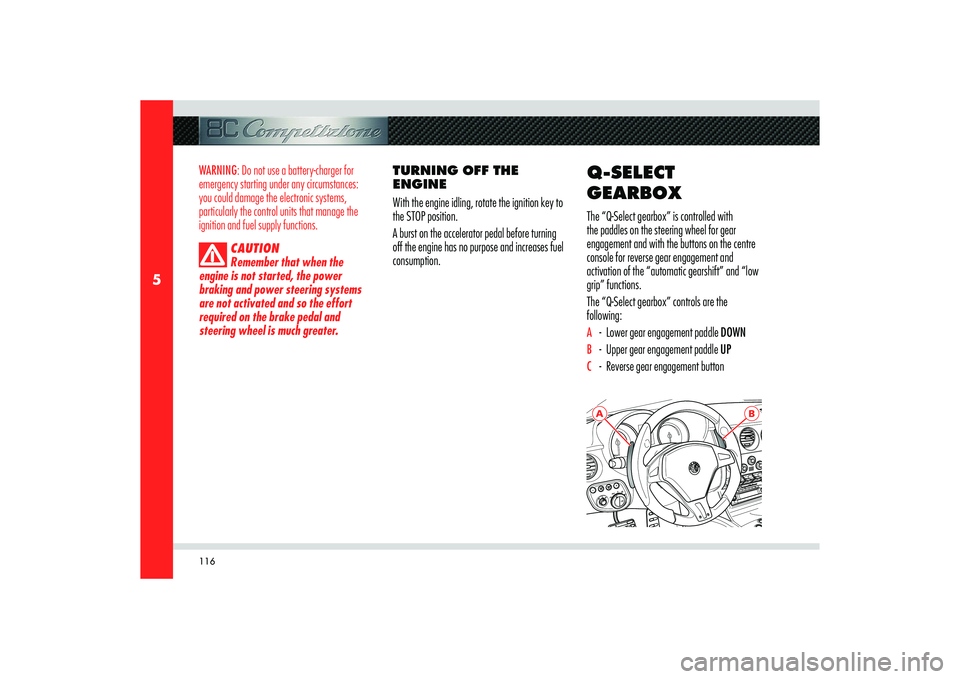
GEARBOXThe “Q-Select gearbox” is controlled with
the paddles on the steering wheel for gear
engagement and with the buttons on the centre
console for reverse gear engagement and
activation of the “automatic gearshift” and “low
grip” functions.
The “Q-Select gearbox” controls are the
following:A - Lower gear engagement paddle DOWNB - Upper gear engagement paddle UPC - Reverse gear engagement button
Page 119 of 223
117
5
E
CD
F
H
G
USING THE VEHICLE
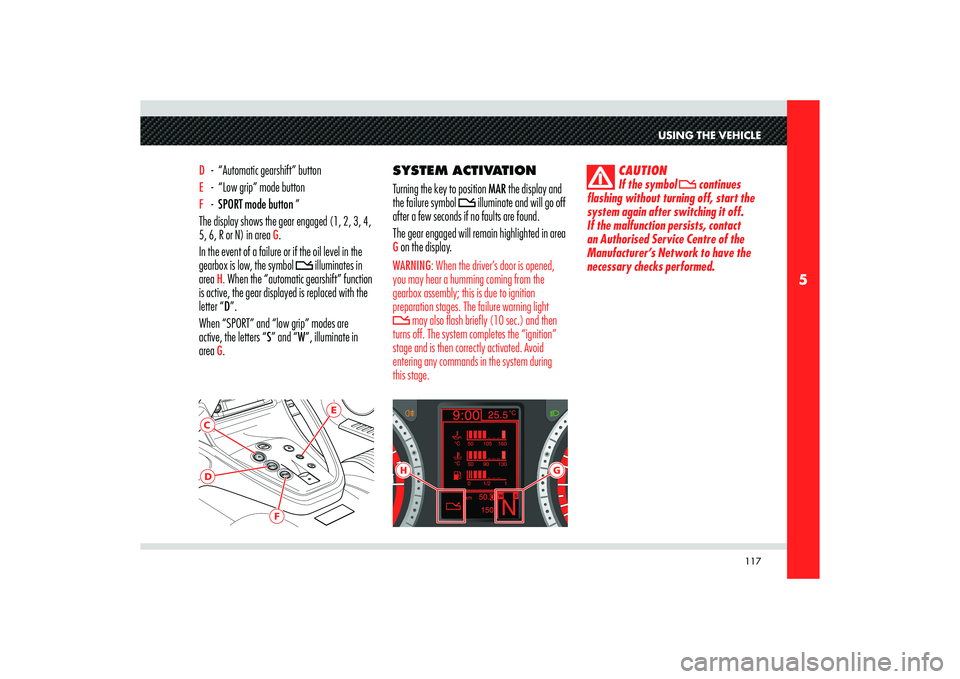
D - “Automatic gearshift” button E - “Low grip” mode button F - SPORT mode button ”
The display shows the gear engaged (1, 2, 3, 4,
5, 6, R or N) in area
G.
In the event of a failure or if the oil level in the
gearbox is low, the symbol
illuminates in
area
H. When the “automatic gearshift” function
is active, the gear displayed is replaced with the
letter “D”.
When “SPORT” and “low grip” modes are
active, the letters “S” and “W”, illuminate in
area G.SYSTEM ACTIVATION
Turning the key to position MAR the display and
the failure symbol
illuminate and will go off
after a few seconds if no faults are found.
The gear engaged will remain highlighted in area
G on the display.WARNING: When the driver’s door is opened,
you may hear a humming coming from the
gearbox assembly; this is due to ignition
preparation stages. The failure warning light
may also flash briefly (10 sec.) and then
turns off. The system completes the “ignition”
stage and is then correctly activated. Avoid
entering any commands in the system during
this stage.
CAUTION
If the symbol continues
flashing without turning off, start the
system again after switching it off.
If the malfunction persists, contact
an Authorised Service Centre of the
Manufacturer’s Network to have the
necessary checks performed.
Page 120 of 223
118
5
If the symbol
remains on, there is a system
failure. This condition is also indicated by a beep
when the key is turned to position MAR.
WARNING: Contact an Authorised Service
Centre of the Manufacturer’s Network to have
the malfunction corrected.
OPERATION WITH THE
ENGINE OFF
After completing the “system start-up” stage,
the gear currently engaged will appear on the
display:
- N (Neutral)
- R (Reverse)
- D(1
st).
If the indication flashes (may also occur with N)
it means that the gear is not properly engaged or
is disengaged; therefore, request neutral (N) and
then the desired gear.CAUTION
If a horizontal dash appears on
the display, there is a system failure.
When the engine is off, 1st gear, reverse (R) and
neutral (N) can be engaged. Keeping the brake
pedal pressed during the request, you must
proceed as follows:
- N (Neutral): pull both paddles found behind
the steering wheel.
- R (Reverse): press button
C.
- Engaging 1
st gear: pull the UP paddle
towards the steering wheel.
CAUTION
To engage reverse gear, hold
the button C down until the letter R is
displayed.
WARNING: Immediately release the paddles
UP, DOWN and the button R after the gearshift
request. A prolonged manoeuvre may cause
the failure warning light
and the buzzer
to activate. Do not operate the system with the
engine off, to prevent discharging the battery.
Avoid useless gearshifting with the engine off, to
prevent overheating of the pump.