gas type Alfa Romeo Giulia 2016 Owner's Manual
[x] Cancel search | Manufacturer: ALFA ROMEO, Model Year: 2016, Model line: Giulia, Model: Alfa Romeo Giulia 2016Pages: 204, PDF Size: 4.95 MB
Page 125 of 204

TYPES OF BULBS
The vehicle is equipped with the following bulbs
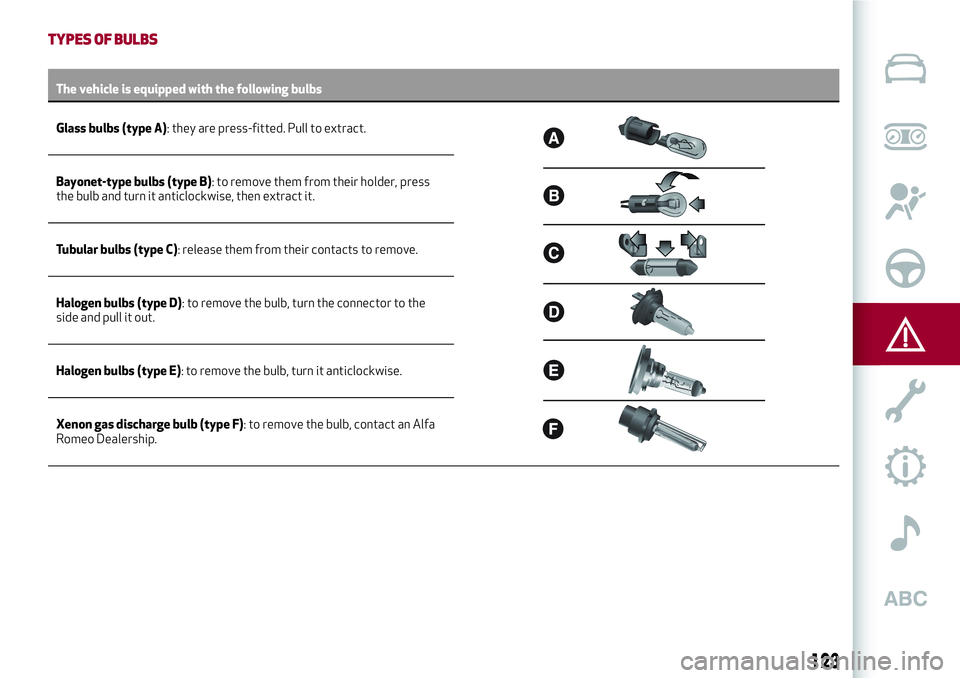
Glass bulbs (type A): they are press-fitted. Pull to extract.
Bayonet-type bulbs (type B): to remove them from their holder, press
the bulb and turn it anticlockwise, then extract it.
Tubular bulbs (type C): release them from their contacts to remove.
Halogen bulbs (type D): to remove the bulb, turn the connector to the
side and pull it out.
Halogen bulbs (type E): to remove the bulb, turn it anticlockwise.
Xenon gas discharge bulb (type F): to remove the bulb, contact an Alfa
Romeo Dealership.
123
Page 126 of 204

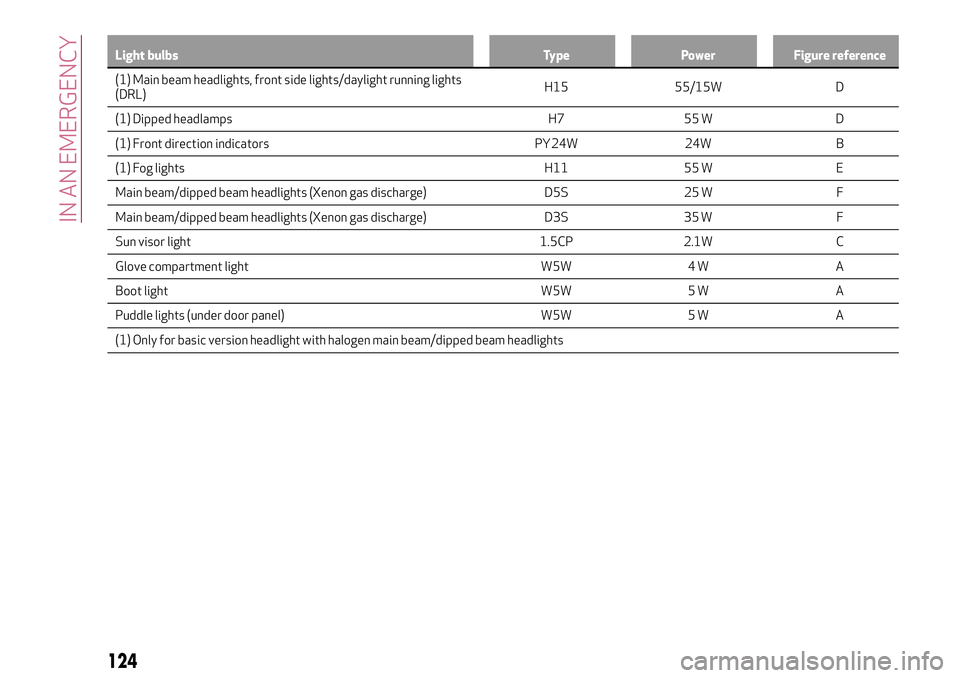
Light bulbs Type Power Figure reference
(1) Main beam headlights, front side lights/daylight running lights
(DRL)H1555/15W D
(1) Dipped
headlamps H7 55 W D
(1) Front direction indicators PY24W 24W B
(1) Fog lights H11 55 W E
Main beam/dipped beam headlights (Xenon gas discharge) D5S 25 W F
Main beam/dipped beam headlights (Xenon gas discharge) D3S 35 W F
Sun visor light 1.5CP 2.1W C
Glove compartment light W5W 4 W A
Boot light W5W 5 W A
Puddle lights (under door panel) W5W 5 W A
(1) Only for basic version headlight with halogen main beam/dipped beam headlights
124
IN AN EMERGENCY
Page 129 of 204

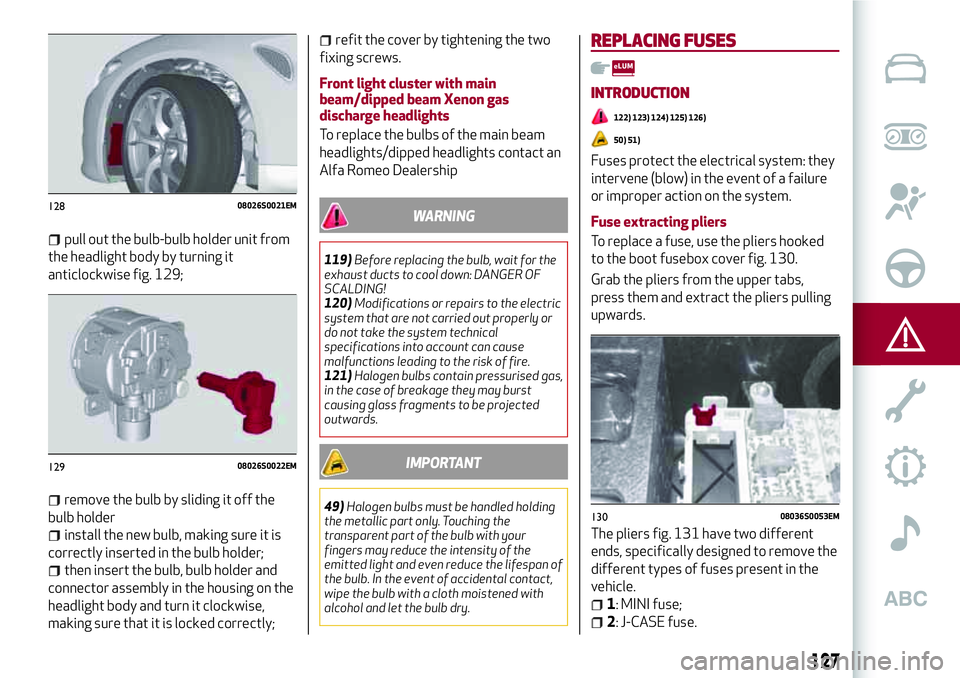
pull out the bulb-bulb holder unit from
the headlight body by turning it
anticlockwise fig. 129;
remove the bulb by sliding it off the
bulb holder
install the new bulb, making sure it is
correctly inserted in the bulb holder;
then insert the bulb, bulb holder and
connector assembly in the housing on the
headlight body and turn it clockwise,
making sure that it is locked correctly;
refit the cover by tightening the two
fixing screws.
Front light cluster with main
beam/dipped beam Xenon gas
discharge headlights
To replace the bulbs of the main beam
headlights/dipped headlights contact an
Alfa Romeo Dealership
WARNING
119)Before replacing the bulb, wait for the
exhaust ducts to cool down: DANGER OF
SCALDING!
120)Modifications or repairs to the electric
system that are not carried out properly or
do not take the system technical
specifications into account can cause
malfunctions leading to the risk of fire.
121)Halogen bulbs contain pressurised gas,
in the case of breakage they may burst
causing glass fragments to be projected
outwards.
IMPORTANT
49)Halogen bulbs must be handled holding
the metallic part only. Touching the
transparent part of the bulb with your
fingers may reduce the intensity of the
emitted light and even reduce the lifespan of
the bulb. In the event of accidental contact,
wipe the bulb with a cloth moistened with
alcohol and let the bulb dry.
REPLACING FUSES
INTRODUCTION
122) 123) 124) 125) 126)
50) 51)
Fuses protect the electrical system: they
intervene (blow) in the event of a failure
or improper action on the system.
Fuse extracting pliers
To replace a fuse, use the pliers hooked
to the boot fusebox cover fig. 130.
Grab the pliers from the upper tabs,
press them and extract the pliers pulling
upwards.
The pliers fig. 131 have two different
ends, specifically designed to remove the
different types of fuses present in the
vehicle.
1: MINI fuse;
2: J-CASE fuse.
12808026S0021EM
12908026S0022EM
13008036S0053EM
127
Page 152 of 204

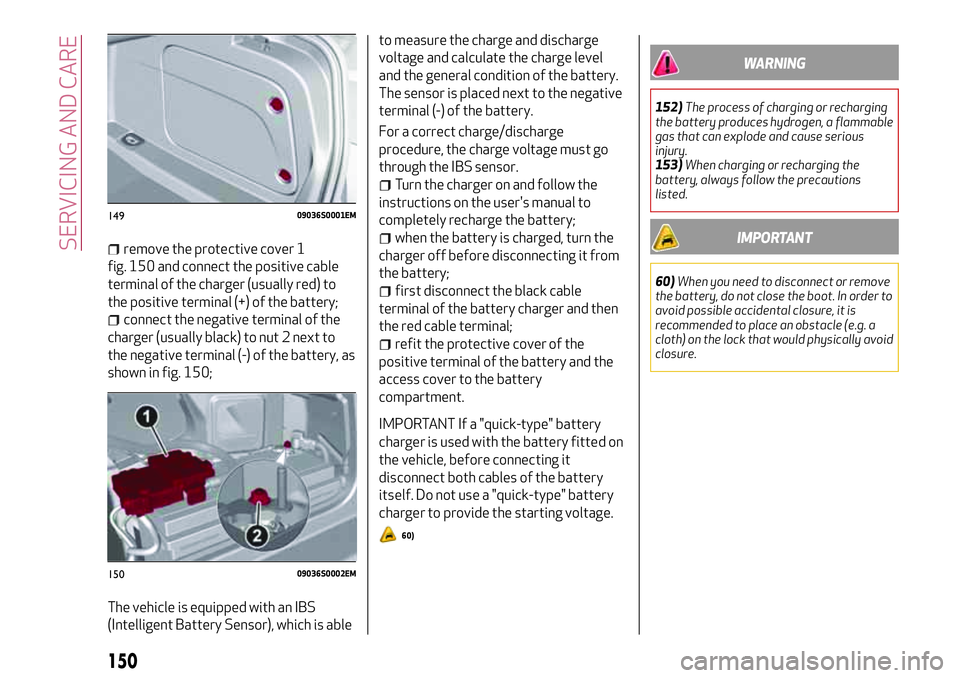
remove the protective cover 1
fig. 150 and connect the positive cable
terminal of the charger (usually red) to
the positive terminal (+) of the battery;
connect the negative terminal of the
charger (usually black) to nut 2 next to
the negative terminal (-) of the battery, as
shown in fig. 150;
The vehicle is equipped with an IBS
(Intelligent Battery Sensor), which is ableto measure the charge and discharge
voltage and calculate the charge level
and the general condition of the battery.
The sensor is placed next to the negative
terminal (-) of the battery.
For a correct charge/discharge
procedure, the charge voltage must go
through the IBS sensor.
Turn the charger on and follow the
instructions on the user's manual to
completely recharge the battery;
when the battery is charged, turn the
charger off before disconnecting it from
the battery;
first disconnect the black cable
terminal of the battery charger and then
the red cable terminal;
refit the protective cover of the
positive terminal of the battery and the
access cover to the battery
compartment.
IMPORTANT If a "quick-type" battery
charger is used with the battery fitted on
the vehicle, before connecting it
disconnect both cables of the battery
itself. Do not use a "quick-type" battery
charger to provide the starting voltage.
60)
WARNING
152)The process of charging or recharging
the battery produces hydrogen, a flammable
gas that can explode and cause serious
injury.
153)When charging or recharging the
battery, always follow the precautions
listed.
IMPORTANT
60)When you need to disconnect or remove
the battery, do not close the boot. In order to
avoid possible accidental closure, it is
recommended to place an obstacle (e.g. a
cloth) on the lock that would physically avoid
closure.
14909036S0001EM
15009036S0002EM
150
SERVICING AND CARE