Alfa Romeo Giulia Quadrifoglio 2017 Owner's Manual
Manufacturer: ALFA ROMEO, Model Year: 2017, Model line: Giulia Quadrifoglio, Model: Alfa Romeo Giulia Quadrifoglio 2017Pages: 268, PDF Size: 110.98 MB
Page 181 of 268
HAZARD WARNING
LIGHTS
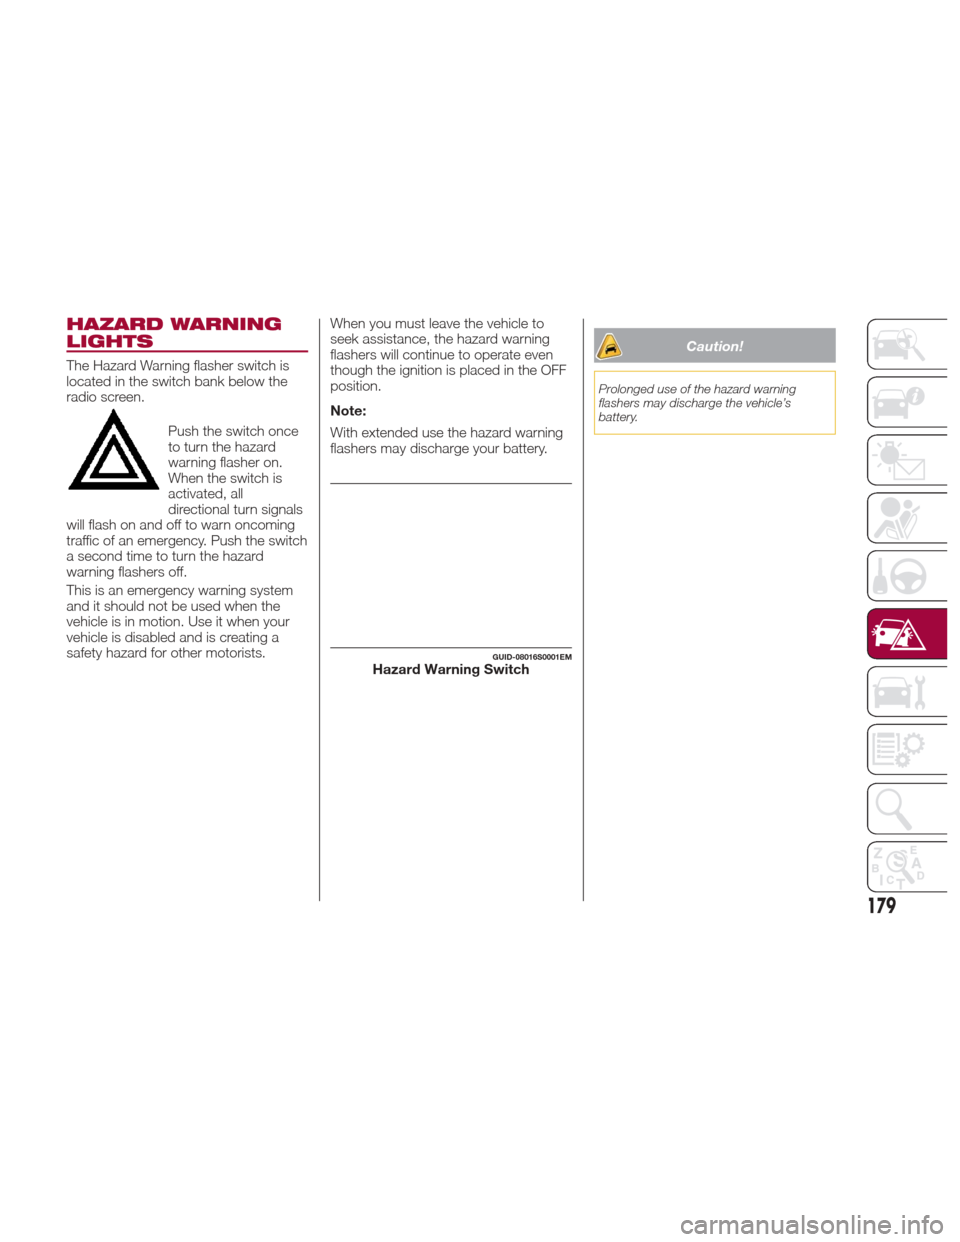
The Hazard Warning flasher switch is
located in the switch bank below the
radio screen.Push the switch once
to turn the hazard
warning flasher on.
When the switch is
activated, all
directional turn signals
will flash on and off to warn oncoming
traffic of an emergency. Push the switch
a second time to turn the hazard
warning flashers off.
This is an emergency warning system
and it should not be used when the
vehicle is in motion. Use it when your
vehicle is disabled and is creating a
safety hazard for other motorists. When you must leave the vehicle to
seek assistance, the hazard warning
flashers will continue to operate even
though the ignition is placed in the OFF
position.
Note:
With extended use the hazard warning
flashers may discharge your battery.
Caution!
Prolonged use of the hazard warning
flashers may discharge the vehicle’s
battery.
GUID-08016S0001EMHazard Warning Switch
179
Page 182 of 268
BULB
REPLACEMENT
General InstructionsBefore replacing a bulb, check the
contacts for oxidation.
Replace blown bulbs with others of
the same type and power.
After replacing a headlight bulb,
always check its alignment.
When a light is not working, check
that the corresponding fuse is intact
before changing the bulb. For the
location of fuses, refer to “Fuses” in this
chapter. Note:
In some particular climate conditions,
such as low temperature, humidity, or
after washing the car, a thin
condensation layer may form on the
internal surfaces of the front and rear
headlights. This condensation will
disappear after switching on the
headlights.
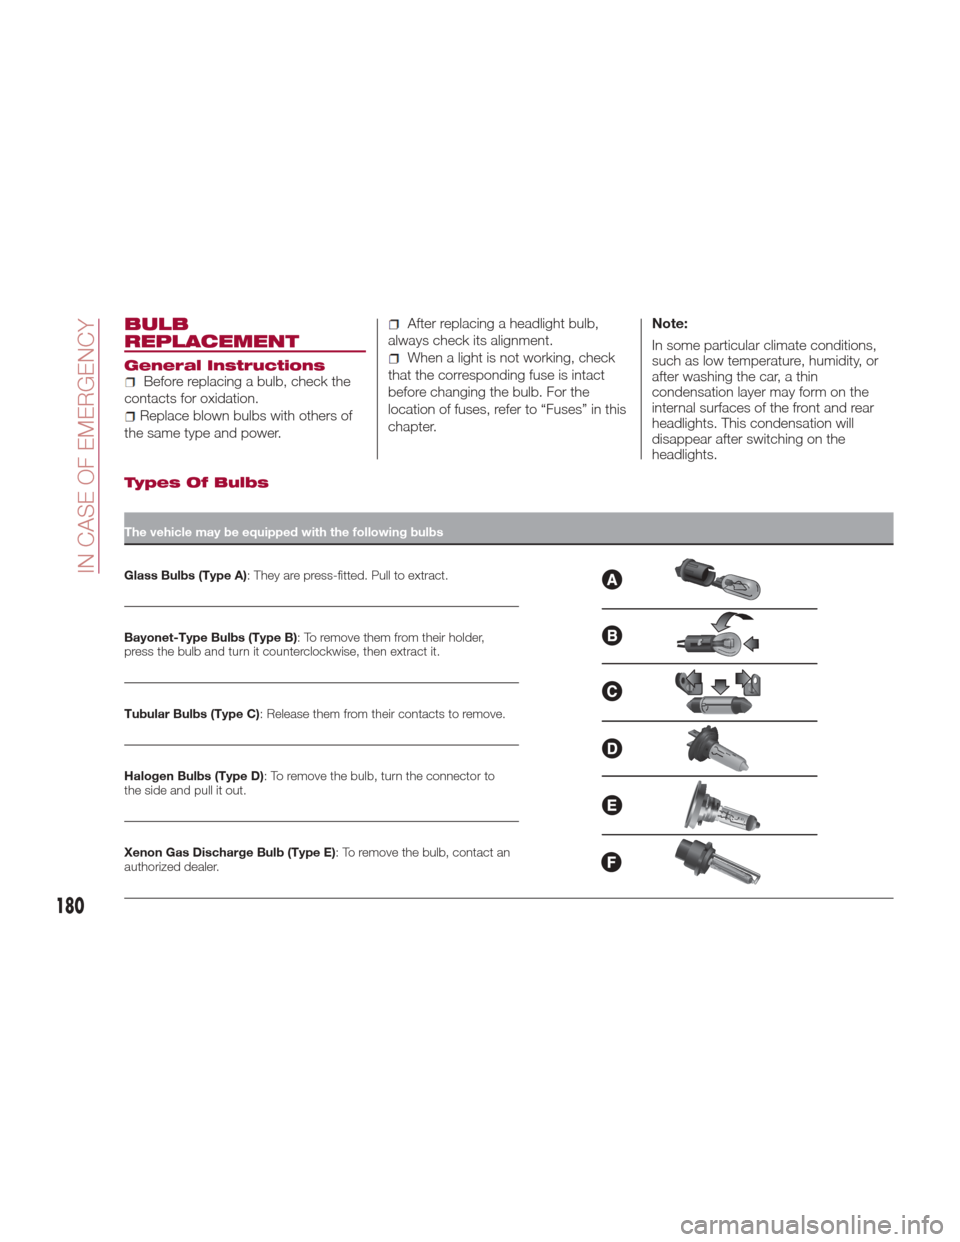
Types Of Bulbs
The vehicle may be equipped with the following bulbs
Glass Bulbs (Type A)
:
They are press-fitted. Pull to extract.
Bayonet-Type Bulbs (Type B) : To remove them from their holder,
press the bulb and turn it counterclockwise, then extract it.
Tubular Bulbs (Type C) : Release them from their contacts to remove.
Halogen Bulbs (Type D) : To remove the bulb, turn the connector to
the side and pull it out.
Xenon Gas Discharge Bulb (Type E) : To remove the bulb, contact an
authorized dealer.
180
IN CASE OF EMERGENCY
Page 183 of 268
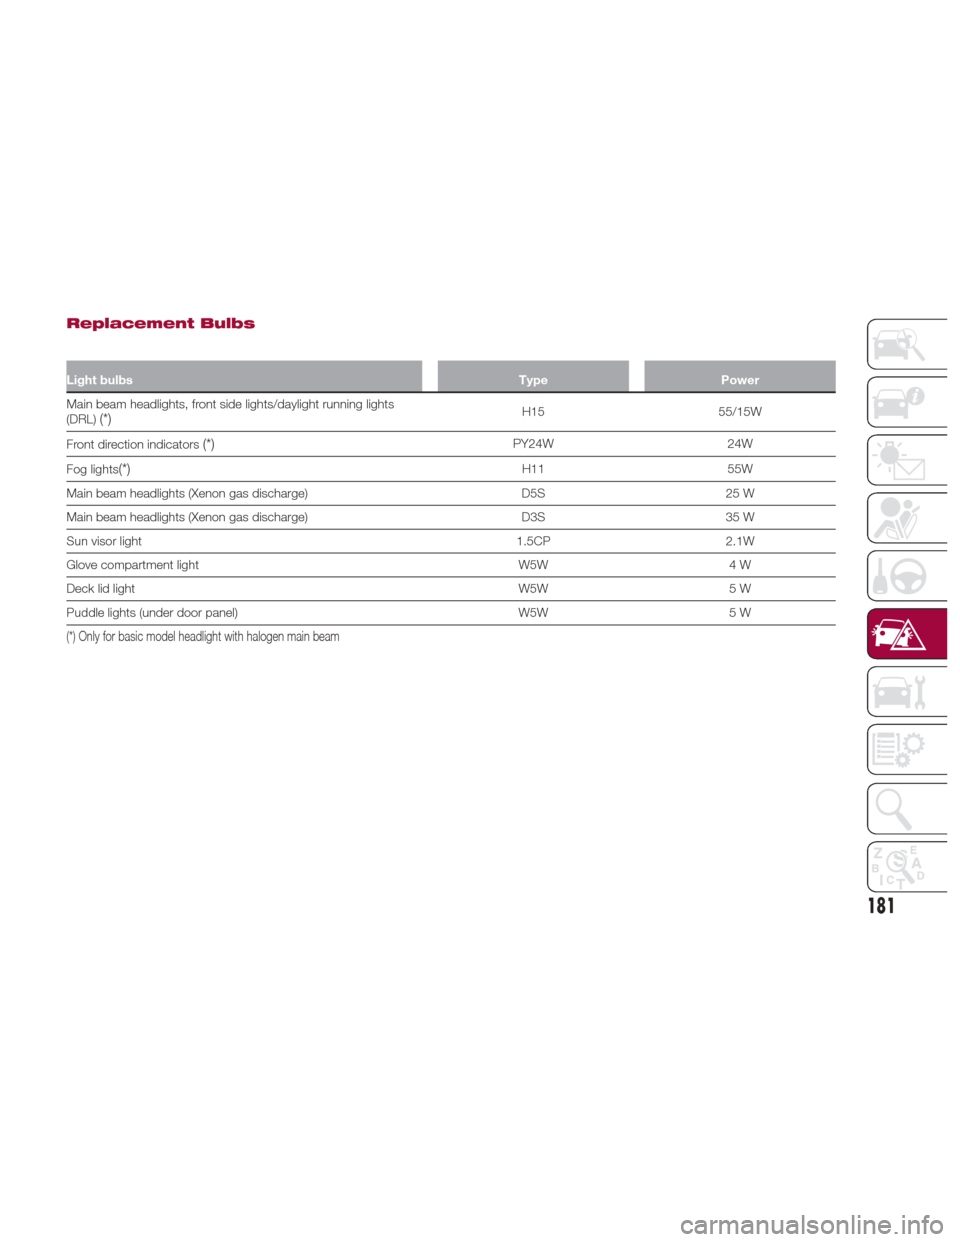
Replacement Bulbs
Light bulbsTypePower
Main beam headlights, front side lights/daylight running lights
(DRL)
(*)H15 55/15W
Front direction indicators
(*)PY24W 24W
Fog lights
(*)H11 55W
Main beam headlights (Xenon gas discharge) D5S25 W
Main beam headlights (Xenon gas discharge) D3S35 W
Sun visor light 1.5CP2.1W
Glove compartment light W5W4 W
Deck lid light W5W5 W
Puddle lights (under door panel) W5W5 W
(*) Only for basic model headlight with halogen main beam
181
Page 184 of 268
Replacing Exterior
Bulbs
Note:Only replace the bulb when the
engine is off. Also ensure that the
engine is cold, to prevent the risk of
burns.
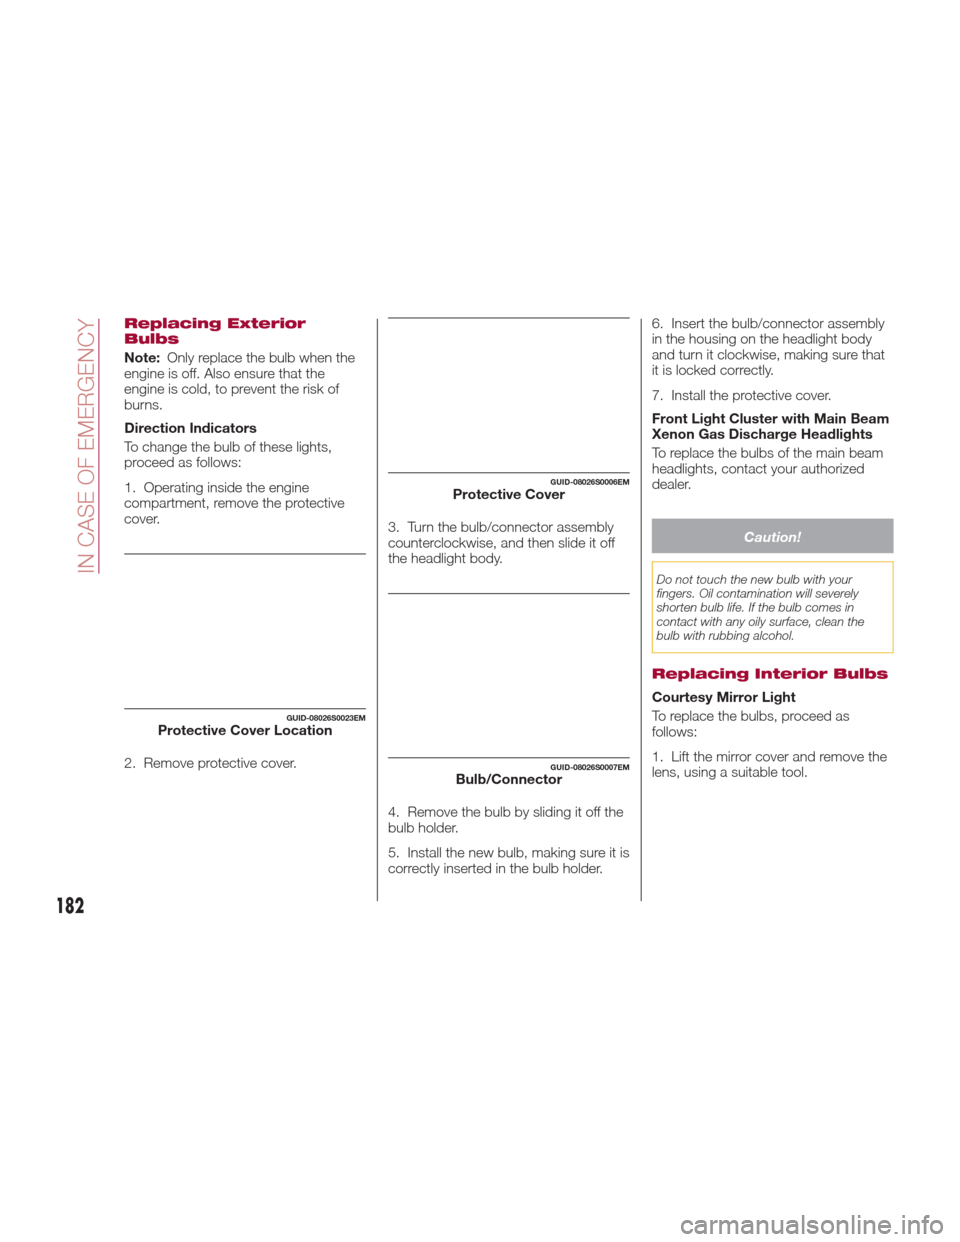
Direction Indicators
To change the bulb of these lights,
proceed as follows:
1. Operating inside the engine
compartment, remove the protective
cover.
2. Remove protective cover. 3. Turn the bulb/connector assembly
counterclockwise, and then slide it off
the headlight body.
4. Remove the bulb by sliding it off the
bulb holder.
5. Install the new bulb, making sure it is
correctly inserted in the bulb holder.6. Insert the bulb/connector assembly
in the housing on the headlight body
and turn it clockwise, making sure that
it is locked correctly.
7. Install the protective cover.
Front Light Cluster with Main Beam
Xenon Gas Discharge Headlights
To replace the bulbs of the main beam
headlights, contact your authorized
dealer.
Caution!
Do not touch the new bulb with your
fingers. Oil contamination will severely
shorten bulb life. If the bulb comes in
contact with any oily surface, clean the
bulb with rubbing alcohol.
Replacing Interior Bulbs
Courtesy Mirror Light
To replace the bulbs, proceed as
follows:
1. Lift the mirror cover and remove the
lens, using a suitable tool.
GUID-08026S0023EMProtective Cover Location
GUID-08026S0006EMProtective Cover
GUID-08026S0007EMBulb/Connector
182
IN CASE OF EMERGENCY
Page 185 of 268
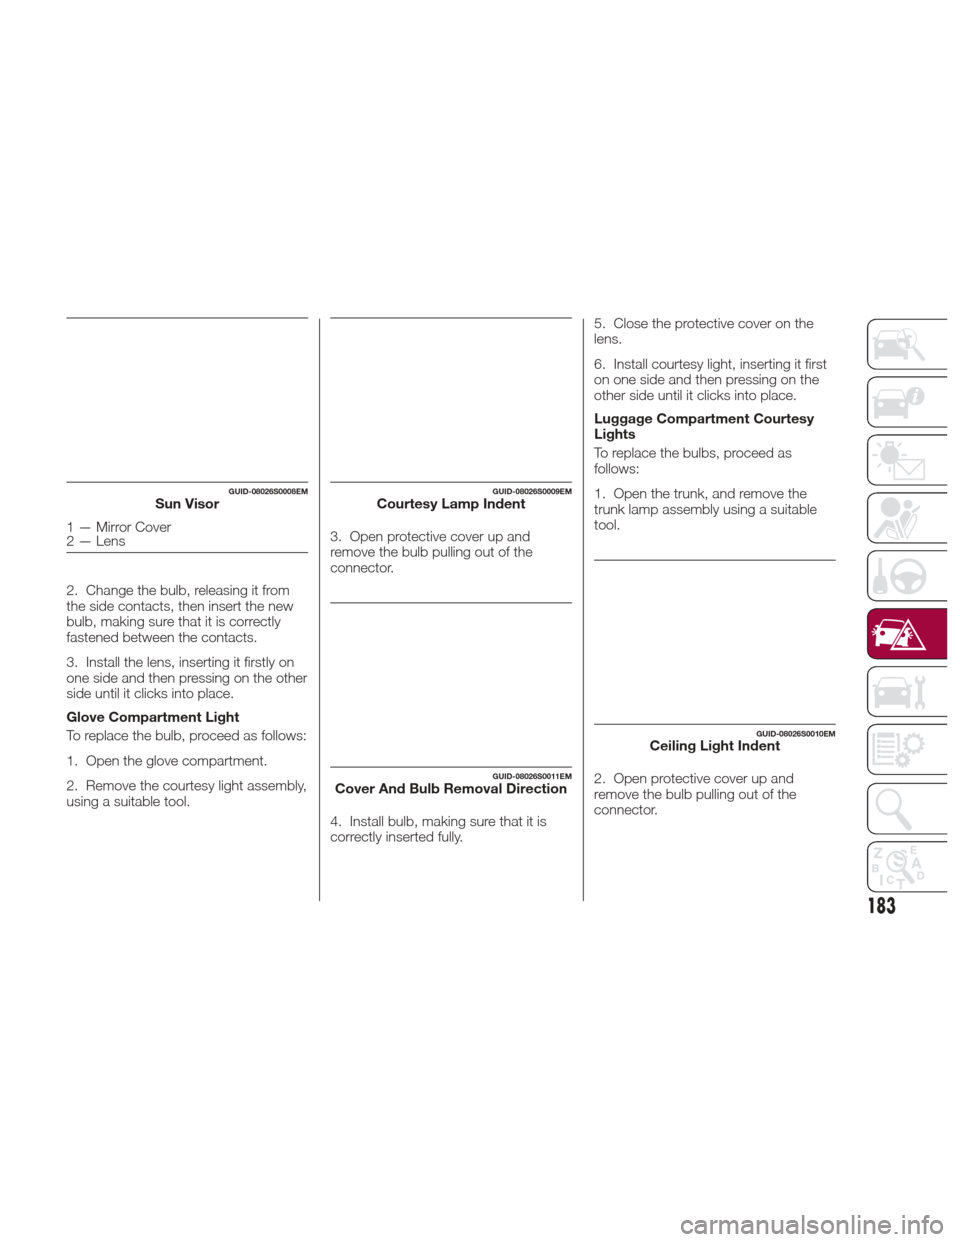
2. Change the bulb, releasing it from
the side contacts, then insert the new
bulb, making sure that it is correctly
fastened between the contacts.
3. Install the lens, inserting it firstly on
one side and then pressing on the other
side until it clicks into place.
Glove Compartment Light
To replace the bulb, proceed as follows:
1. Open the glove compartment.
2. Remove the courtesy light assembly,
using a suitable tool.3. Open protective cover up and
remove the bulb pulling out of the
connector.
4. Install bulb, making sure that it is
correctly inserted fully.5. Close the protective cover on the
lens.
6. Install courtesy light, inserting it first
on one side and then pressing on the
other side until it clicks into place.
Luggage Compartment Courtesy
Lights
To replace the bulbs, proceed as
follows:
1. Open the trunk, and remove the
trunk lamp assembly using a suitable
tool.
2. Open protective cover up and
remove the bulb pulling out of the
connector.
GUID-08026S0008EMSun Visor
1 — Mirror Cover
2 — Lens
GUID-08026S0009EMCourtesy Lamp Indent
GUID-08026S0011EMCover And Bulb Removal Direction
GUID-08026S0010EMCeiling Light Indent
183
Page 186 of 268
3. Install bulb, making sure that it is
correctly inserted fully.
4. Close the protective cover on the
lens.
5. Install trunk lamp in the correct
position, inserting it firstly on one side,
and then pressing on the other side
until it clicks into place.
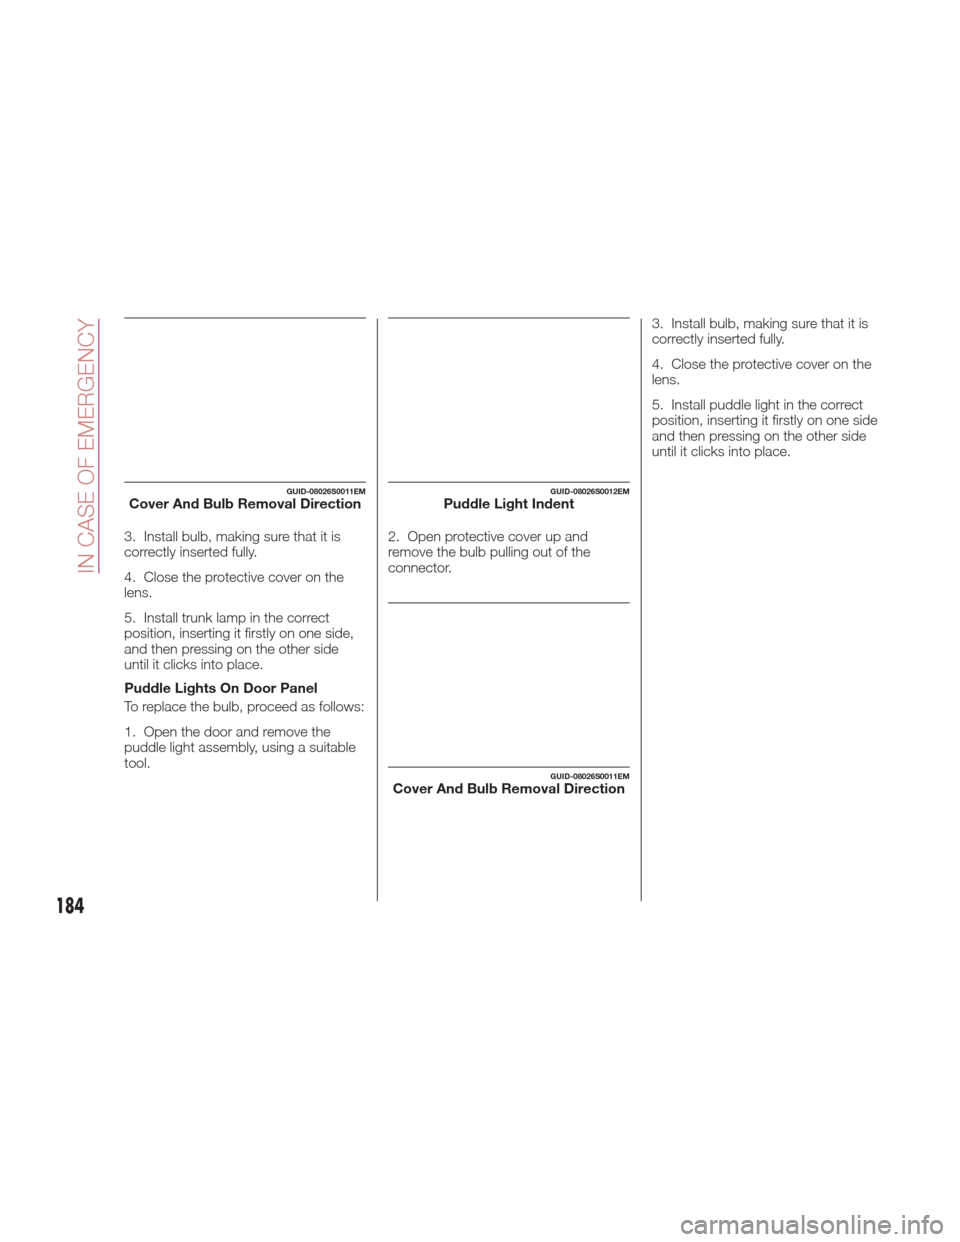
Puddle Lights On Door Panel
To replace the bulb, proceed as follows:
1. Open the door and remove the
puddle light assembly, using a suitable
tool.2. Open protective cover up and
remove the bulb pulling out of the
connector.3. Install bulb, making sure that it is
correctly inserted fully.
4. Close the protective cover on the
lens.
5. Install puddle light in the correct
position, inserting it firstly on one side
and then pressing on the other side
until it clicks into place.
GUID-08026S0011EMCover And Bulb Removal DirectionGUID-08026S0012EMPuddle Light Indent
GUID-08026S0011EMCover And Bulb Removal Direction
184
IN CASE OF EMERGENCY
Page 187 of 268
FUSES
General Information
The fuses protect electrical systems
against excessive current.
When a device does not work, you
must check the electrical circuit inside
of the fuse for a break/melt.
Also, please be aware that using power
outlets for extended periods of time
with the engine off may result in vehicle
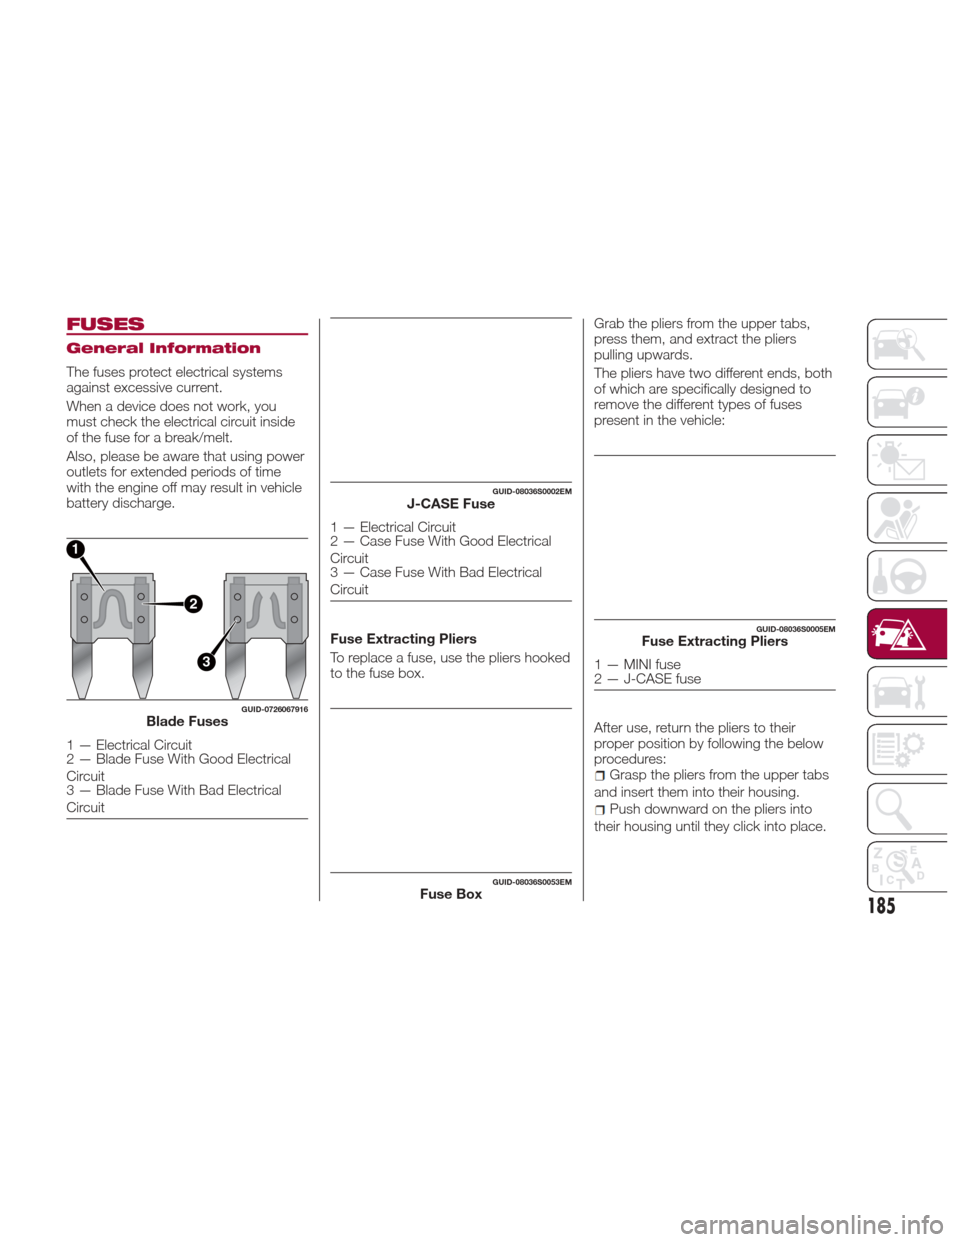
battery discharge.Fuse Extracting Pliers
To replace a fuse, use the pliers hooked
to the fuse box.Grab the pliers from the upper tabs,
press them, and extract the pliers
pulling upwards.
The pliers have two different ends, both
of which are specifically designed to
remove the different types of fuses
present in the vehicle:
After use, return the pliers to their
proper position by following the below
procedures:
Grasp the pliers from the upper tabs
and insert them into their housing.
Push downward on the pliers into
their housing until they click into place.
2
3
1
GUID-0726067916Blade Fuses
1 — Electrical Circuit
2 — Blade Fuse With Good Electrical
Circuit
3 — Blade Fuse With Bad Electrical
Circuit
GUID-08036S0002EMJ-CASE Fuse
1 — Electrical Circuit
2 — Case Fuse With Good Electrical
Circuit
3 — Case Fuse With Bad Electrical
Circuit
GUID-08036S0053EMFuse Box
GUID-08036S0005EMFuse Extracting Pliers
1 — MINI fuse
2 — J-CASE fuse
185
Page 188 of 268
Warning!
When replacing a blown fuse, always
use an appropriate replacement fuse with
the same amp rating as the original fuse.
Never replace a fuse with another fuse of
higher amp rating. Never replace a blown
fuse with metal wires or any other material.
Failure to use proper fuses may result in
serious personal injury, fire and/or property
damage.
Before replacing a fuse, make sure that
the ignition is off and that all the other
services are switched off and/or
disengaged.
If the replaced fuse blows again, contact
an authorized dealer.
If a general protection fuse for safety
systems (air bag system, braking system),
power unit systems (engine system,
transmission system) or steering system
blows, contact an authorized dealer.
Fuse Location
The fuses, which can be replaced by
the user, are grouped in two boxes
below the passenger side foot board
and inside the trunk.
Control Unit Under
Passenger Side
Footboard
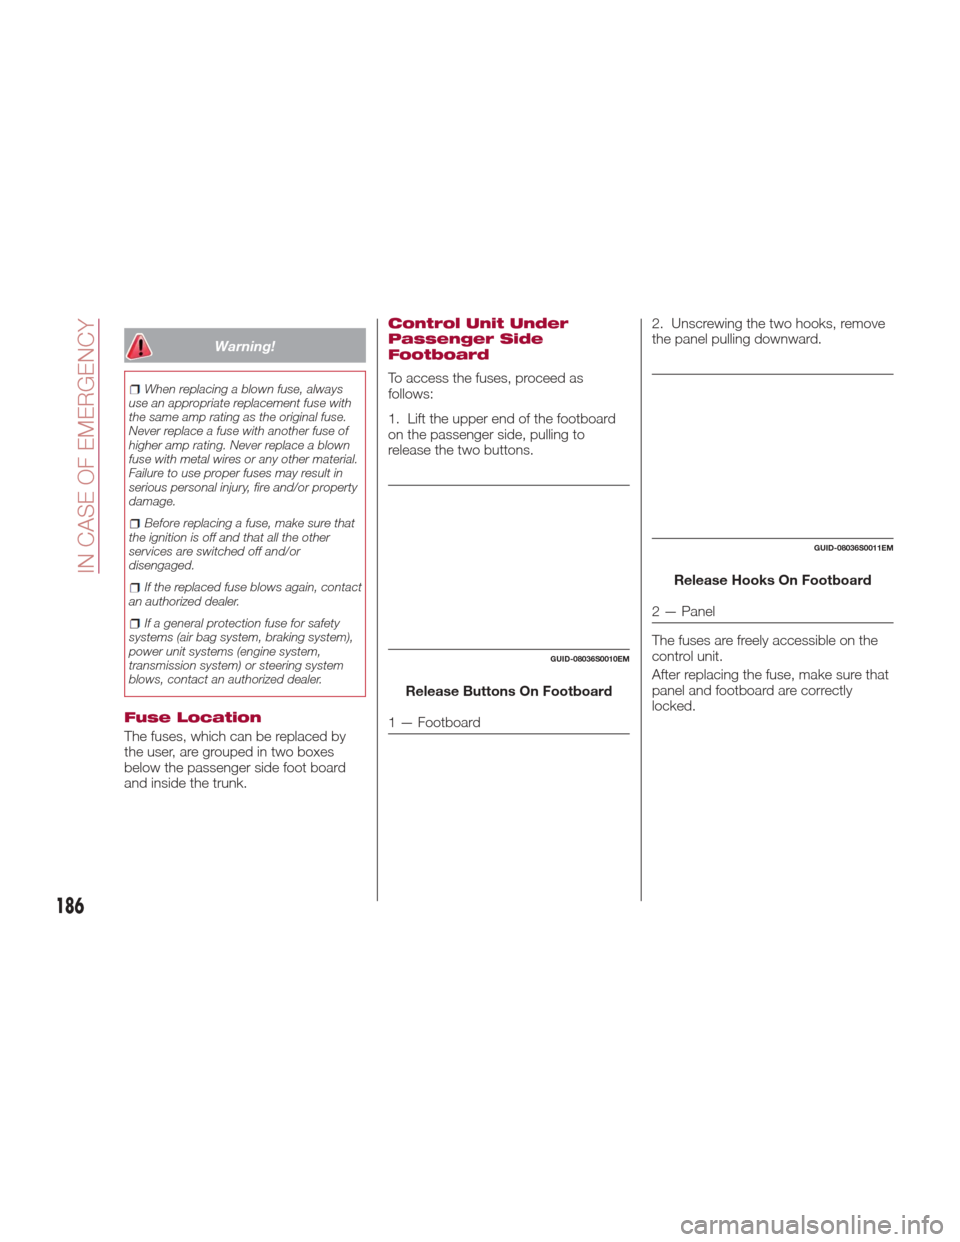
To access the fuses, proceed as
follows:
1. Lift the upper end of the footboard
on the passenger side, pulling to
release the two buttons.
Release Buttons On Footboard
1 — Footboard 2. Unscrewing the two hooks, remove
the panel pulling downward.
Release Hooks On Footboard
2 — Panel
The fuses are freely accessible on the
control unit.
After replacing the fuse, make sure that
panel and footboard are correctly
locked.
GUID-08036S0010EM
GUID-08036S0011EM
186
IN CASE OF EMERGENCY
Page 189 of 268
Luggage Compartment
Fuse Box
To access the fuses, proceed as
follows:
1. Lift the luggage compartment cover.
2. Remove the control unit cover.
The fuses are freely accessible on the
control unit.
The number identifying the electrical
component corresponding to each fuse
is shown on the cover.
After replacing a fuse, make sure that
you have closed cover correctly.
GUID-08036S0014EMControl Unit
187
Page 190 of 268
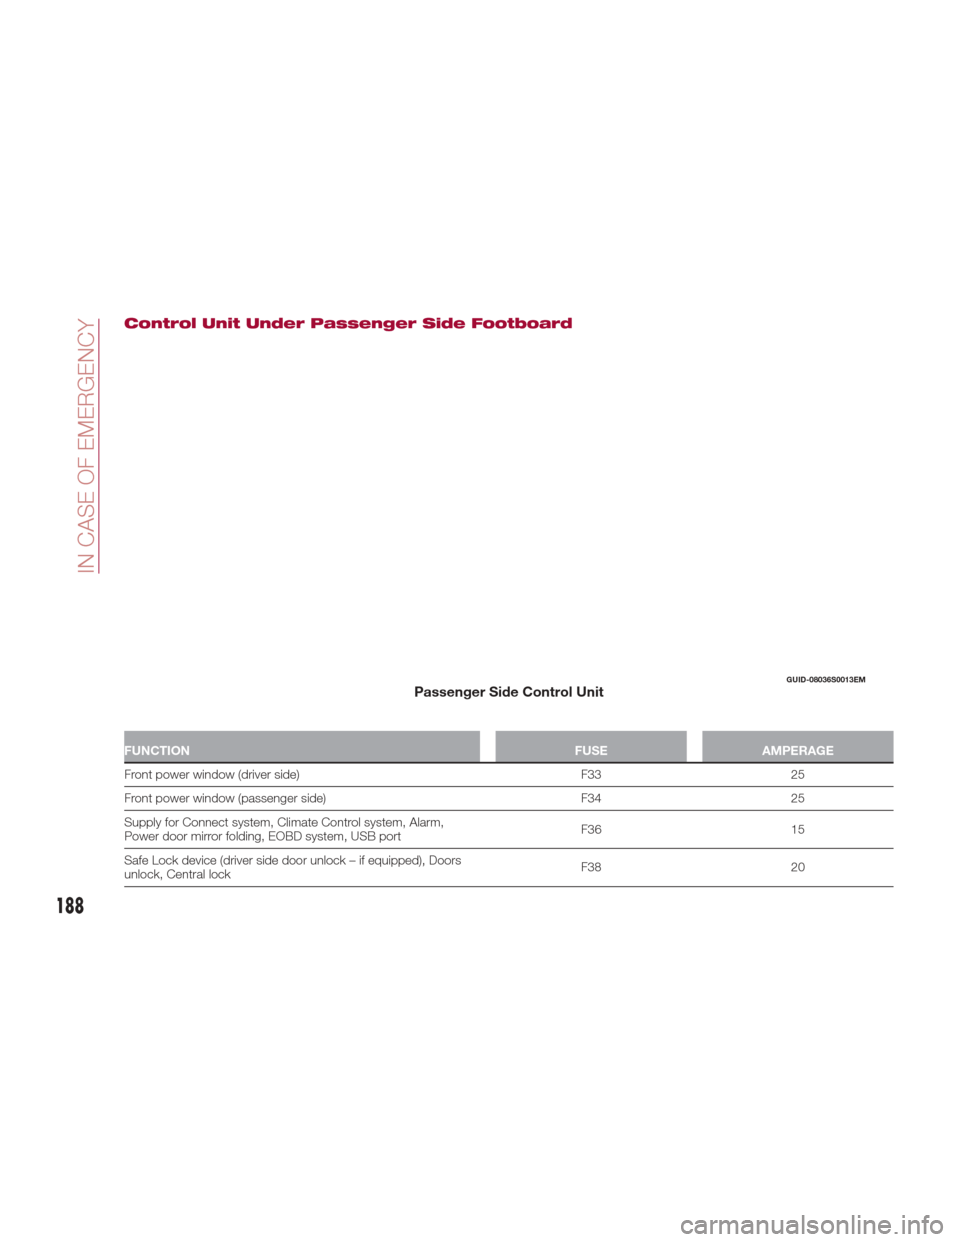
Control Unit Under Passenger Side Footboard
FUNCTIONFUSEAMPERAGE
Front power window (driver side) F3325
Fr
ont power window (passenger side) F3425
Supply for Connect system, Climate Control system, Alarm,
Power door mirror folding, EOBD system, USB port F36
15
Safe Lock device (driver side door unlock – if equipped), Doors
unlock, Central lock F38
20
GUID-08036S0013EMPassenger Side Control Unit
188
IN CASE OF EMERGENCY