key Alfa Romeo Giulietta 2011 Owner handbook (in English)
[x] Cancel search | Manufacturer: ALFA ROMEO, Model Year: 2011, Model line: Giulietta, Model: Alfa Romeo Giulietta 2011Pages: 297, PDF Size: 9.37 MB
Page 49 of 297

45
GETTING
TO KNOW
YOUR CAR
SAFETY
STARTING
AND DRIVING
IN AN
EMERGENCY
SERVICING AND
MAINTENANCE
TECHNICAL
SPECIFICATIONS
CONTENTS
SAFE LOCK DEVICE
(for versions/markets where provided)
This safety device prevents operation of the inside door handles
and of the door locking/unlocking button. We recommend that
you activate this device whenever you park your car.
Switching the device on
The device is enabled on all the doors by quickly double-pressing
the
Ábutton on the key.
The engagement of the device is indicated by three flashes of the
direction indicators and the flashing of A LED fig. 19. The device
will not switch on if one or more doors are not closed correctly.Once the safe lock device is engaged it is impossi-
ble to open the doors from inside the car. Before
engaging the device, check that there is no one left
on board. If the remote control battery is flat, the device
can only be disengaged by using the metal insert in ei-
ther of the door locks.
Switching the device off
The device disengages automatically by:
❍opening the driver’s door using the metal insert;
❍pressing the Ëbutton on the remote control;
❍turning the ignition key to the MAR position
fig. 19A0K0122m
Page 50 of 297

46
GETTING
TO KNOW
YOUR CAR
SAFETY
STARTING
AND DRIVING
IN AN
EMERGENCY
SERVICING AND
MAINTENANCE
TECHNICAL
SPECIFICATIONS
CONTENTS
The main functions that can be activated with the keys (with or without remote control) are the following:
Type of key
Mechanical key
Key with remote control
Direction indicators flashing
(only for key with
remote control)
Deterrence LED
Doors
unlocking
Turn key
anticlockwise
(driver’s side)
Turn key
anticlockwise
(driver’s side)
Briefly press
Ëbutton
double flashing
Switching offLocking the doors
from the outside
Turn key
clockwise
(driver’s side)
Turn key
clockwise
(driver’s side)
Briefly pressÁbutton
flashes once
Switching on con-
stantly for about 3
seconds, followed
by deterrence LED
flashingSafe Lock engage-
ment (for versions/
markets, where
provided)
–
–
Double pressing Ábutton
flashes three times
Double flash,
followed by
deterrence flashingUnlocking the
tailgate boot
–
–
Briefly press Rbutton
flashes twice
Deterrence LED
IMPORTANT Windows will lower down when the doors are unlocked; they will be wound up when the doors are locked.
Windows down
(for versions/
markets, where
provided)
–
–
Hold pressed
Ëbutton
(for longer than
2 seconds)
flashes twice
Switching offWindows up
(for versions/
markets, where
provided)
–
–
Hold pressed Ábutton
(for longer than 2
seconds)
flashes once
Deterrence LED
Page 51 of 297

47
GETTING
TO KNOW
YOUR CAR
SAFETY
STARTING
AND DRIVING
IN AN
EMERGENCY
SERVICING AND
MAINTENANCE
TECHNICAL
SPECIFICATIONS
CONTENTS
ALARM(for versions/markets, where provided)
OPERATION OF THE ALARM
The alarm intervenes in the following instances:
❍unauthorised opening of doors/bonnet/boot (perimeter pro-
tection);
❍unauthorised operation of ignition system (ignition key rotat-
ed to MAR);
❍the battery cables cutting;
❍when someone is moving inside the passenger compartment
(volumetric protection);
❍anomalous lifting/tilting of the vehicle (for versions/markets,
where provided).
Operation of the alarm is indicated by an acoustic and visual sig-
nal (flashing of the direction indicators for several seconds). The
alarm triggering modes may vary according to the markets. There
is a maximum number of acoustic/visual cycles. When this is
reached the system returns to normal operation.
IMPORTANT The engine locking function is guaranteed by the Alfa
Romeo CODE, which is automatically activated when the ignition
key is extracted from the ignition switch.
IMPORTANT The alarm is configured to comply with the regulations
existing in different countries.
SWITCHING ON THE ALARM
With the doors and bonnet closed and the ignition key either turned
to STOP or removed, direct the key with the remote control to-
wards the car, then press and release
Ábutton. Except specific
markets, the system produces a visual and acoustic signal and
enables door locking.
A self-diagnostic stage precedes the turning on of the alarm: In case
of faults the system will generate a further acoustic and/or visu-
al signal using the LED on the dashboard.
If after the alarm is switched on, a second acoustic signal is emit-
ted and/or the LED on the dashboard flashes, wait about 4 sec-
onds and switch off the alarm by pressing
Ëbutton, check that the
doors, bonnet and boot are closed correctly and then reactivate the
system by pressing
Ábutton.
If the alarm produces an acoustic signal even when the doors, bon-
net and boot are correctly closed, a fault has occurred in system
operation: in this case, go to Alfa Romeo Authorized Services.
ALARM SELF-ACTIVATION
(for versions/markets, where provided)
If the alarm has not been activated using the remote control, once
about 30 seconds have elapsed from when the ignition key was
turned to STOP and a door or the tailgate was last opened and
then closed, the alarm activates automatically. This is indicated
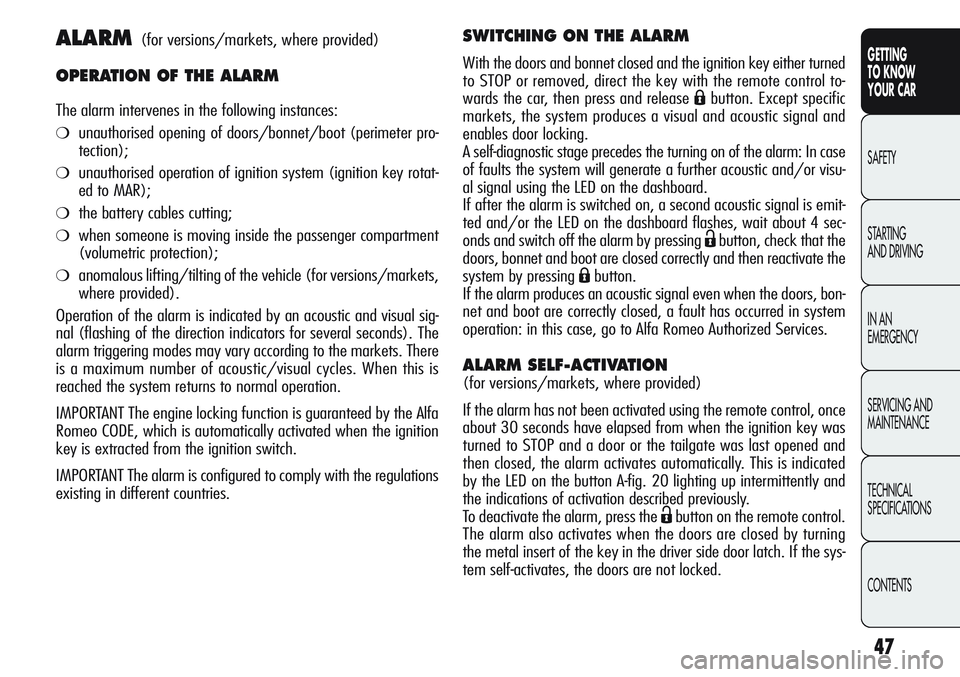
by the LED on the button A-fig. 20 lighting up intermittently and
the indications of activation described previously.
To deactivate the alarm, press the
Ëbutton on the remote control.
The alarm also activates when the doors are closed by turning
the metal insert of the key in the driver side door latch. If the sys-
tem self-activates, the doors are not locked.
Page 52 of 297

48
GETTING
TO KNOW
YOUR CAR
SAFETY
STARTING
AND DRIVING
IN AN
EMERGENCY
SERVICING AND
MAINTENANCE
TECHNICAL
SPECIFICATIONS
CONTENTS
SWITCHING OFF THE ALARM
PressËbutton. The following operations are performed (exclud-
ing specific markets):
❍the direction indicators flash twice;
❍two brief acoustic signals are emitted;
❍the doors are unlocked.
IMPORTANT Activating the central opening using the key metal
insert the alarm does not turn off.
VOLUMETRIC/ANTI-LIFT PROTECTION
To guarantee the correct operation of the protection, completely
close the side windows and sunroof (for versions/markets, where
provided).
To disable the function, press A button fig. 20 before switching
on the alarm. The deactivation of the function is indicated by the
LED on A button flashing for several seconds.
The volume sensing/anti-tilt protection disabling procedure must
be repeated each time the key is turned off.
EXCLUDING THE ALARM
To permanently disable the alarm (e.g. for long storage of the car),
lock the car by turning the metal insert of the key with remote con-
trol in the lock.
IMPORTANT If the battery of the key with the remote control run
out or the system fails, the alarm can be switched off by placing
the key in the ignition switch and turning it to MAR.
fig. 20A0K0130m
Page 53 of 297

49
GETTING
TO KNOW
YOUR CAR
SAFETY
STARTING
AND DRIVING
IN AN
EMERGENCY
SERVICING AND
MAINTENANCE
TECHNICAL
SPECIFICATIONS
CONTENTS
IGNITION SWITCH
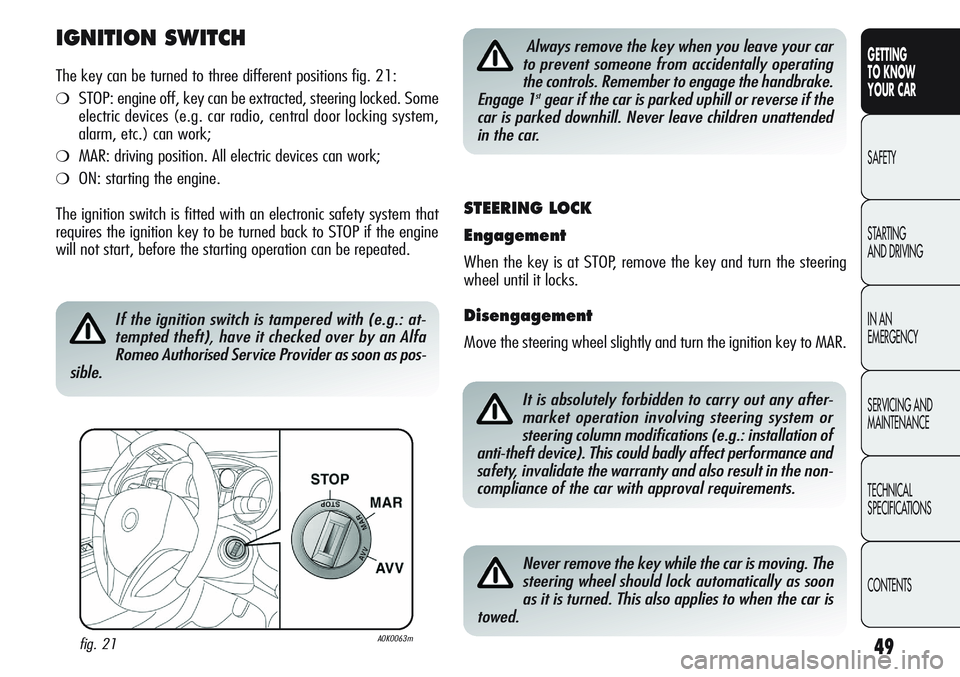
The key can be turned to three different positions fig. 21:
❍STOP: engine off, key can be extracted, steering locked. Some
electric devices (e.g. car radio, central door locking system,
alarm, etc.) can work;
❍MAR: driving position. All electric devices can work;
❍ON: starting the engine.
The ignition switch is fitted with an electronic safety system that
requires the ignition key to be turned back to STOP if the engine
will not start, before the starting operation can be repeated.
fig. 21A0K0063m
If the ignition switch is tampered with (e.g.: at-
tempted theft), have it checked over by an Alfa
Romeo Authorised Service Provider as soon as pos-
sible.
Always remove the key when you leave your car
to prevent someone from accidentally operating
the controls. Remember to engage the handbrake.
Engage 1
stgear if the car is parked uphill or reverse if the
car is parked downhill. Never leave children unattended
in the car.
STEERING LOCK
Engagement
When the key is at STOP, remove the key and turn the steering
wheel until it locks.
Disengagement
Move the steering wheel slightly and turn the ignition key to MAR.
It is absolutely forbidden to carry out any after-
market operation involving steering system or
steering column modifications (e.g.: installation of
anti-theft device). This could badly affect performance and
safety, invalidate the warranty and also result in the non-
compliance of the car with approval requirements.
Never remove the key while the car is moving. The
steering wheel should lock automatically as soon
as it is turned. This also applies to when the car is
towed.
Page 55 of 297

51
GETTING
TO KNOW
YOUR CAR
SAFETY
STARTING
AND DRIVING
IN AN
EMERGENCY
SERVICING AND
MAINTENANCE
TECHNICAL
SPECIFICATIONS
CONTENTS
Heated seats
(for versions/markets, where provided)
With the key turned to MAR, press A button fig. 23 to switch the
function on/off. When the function is enabled, the LED on the but-
ton turns on.
Electric lumbar adjustment
(for versions/markets where provided)
With the key turned to MAR, press B button fig. 23 to switch the
function on/off. When the function is enabled, the LED on the but-
ton turns on.
fig. 23A0K0213m
ELECTRICALLY ADJUSTABLE FRONT SEATS
fig. 24
(for versions/markets, where provided)
The following controls are provided for adjusting the seats:
Multifunction A control:
❍front seat height adjustment (seat vertical movement);
❍seat lengthwise movement
B: Backrest angle and lumbar adjustment;
C: Driver’s seat position storing buttons.
fig. 24A0K0214m
Page 56 of 297

52
GETTING
TO KNOW
YOUR CAR
SAFETY
STARTING
AND DRIVING
IN AN
EMERGENCY
SERVICING AND
MAINTENANCE
TECHNICAL
SPECIFICATIONS
CONTENTS
Heated seats (for versions/markets, where provided)
With the key at MAR, turn the A ring fig.25 to turn the function
on/off. Heating can be set to 3 different levels (0 = seat heat-
ing off).
fig. 25A0K0215m
Memorising driver’s seat positions
The buttons C allow three different driver’s seat positions to be
memorised and recalled.
To memorise a seat position, adjust it with the various controls,
then press the button where you want to memorise the position
for several seconds. The performed memorisation is confirmed by
a beep.
When a new seat position is memorised, the previously memorised
position on the same button is automatically overwritten.
To recall a memorised position, press the relevant button briefly.
IMPORTANT Electric adjustment is only possible with the ignition
key turned to MAR-ON and for approximately 1 minute after turn-
ing it to STOP. The seat (driver's side or passenger's side) can be
moved after opening the relevant door for about 3 minutes, or as
long as the door is re-closed.
Page 60 of 297

56
GETTING
TO KNOW
YOUR CAR
SAFETY
STARTING
AND DRIVING
IN AN
EMERGENCY
SERVICING AND
MAINTENANCE
TECHNICAL
SPECIFICATIONS
CONTENTS
Rear view mirror electric folding
(for versions/markets where provided)
To fold back the mirrors press C button fig. 31. Press the button
once again to turn the mirrors back to the driving position.
Manual rear view mirror folding fig. 32
If required, the mirrors can be folded back manually from posi-
tion 1 to position 2.
IMPORTANT When driving, the mirrors should always be in posi-
tion 1.Adjusting the mirror
The mirrors can be adjusted/folded only if the ignition key is in
MAR position.
Select the mirror you wish to adjust using A device fig. 31:
❍device in position 1: left mirror selected;
❍device in position 2: right mirror selected.
To adjust the selected mirror, press B button in the four directions
shown by the arrows.
IMPORTANT Once adjustment is complete, turn A device to position
0 to prevent accidental movements.
fig. 31A0K0066mfig. 32A0K0052m
EXTERNAL REARVIEW MIRRORS
As the driver’s external rearview mirror is curved,
it may slightly alter the perception of distance.
Page 78 of 297

74
GETTING
TO KNOW
YOUR CAR
SAFETY
STARTING
AND DRIVING
IN AN
EMERGENCY
SERVICING AND
MAINTENANCE
TECHNICAL
SPECIFICATIONS
CONTENTS
SIDE LIGHTS AND DIPPED BEAM HEADLIGHTS
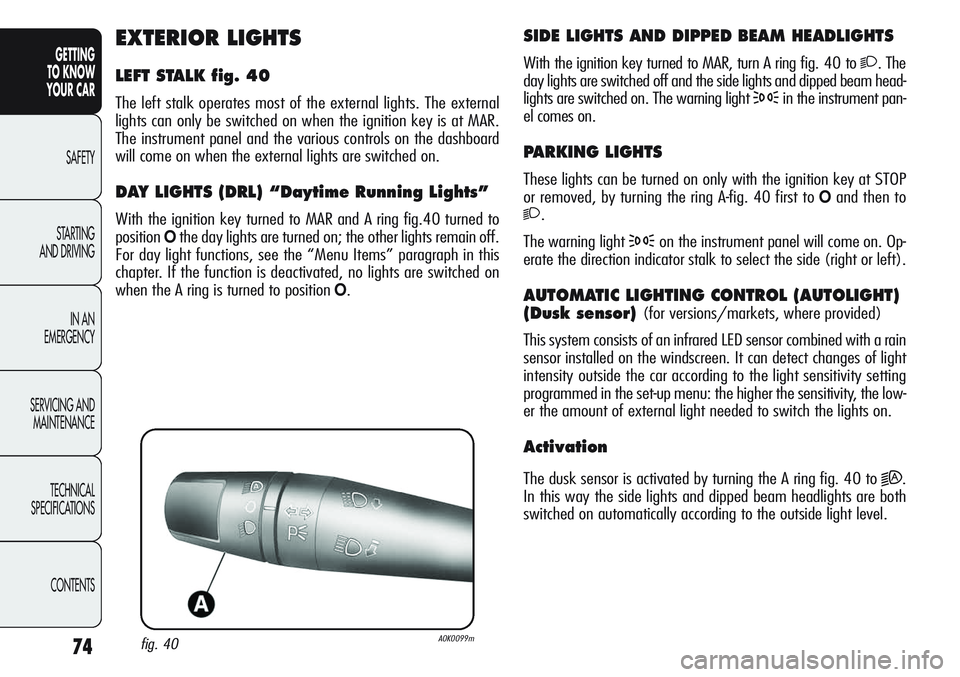
With the ignition key turned to MAR, turn A ring fig. 40 to 2. The
day lights are switched off and the side lights and dipped beam head-
lights are switched on. The warning light
3in the instrument pan-
el comes on.
PARKING LIGHTS
These lights can be turned on only with the ignition key at STOP
or removed, by turning the ring A-fig. 40 first to
Oand then to
2.
The warning light
3on the instrument panel will come on. Op-
erate the direction indicator stalk to select the side (right or left).
AUTOMATIC LIGHTING CONTROL (AUTOLIGHT)
(Dusk sensor)
(for versions/markets, where provided)
This system consists of an infrared LED sensor combined with a rain
sensor installed on the windscreen. It can detect changes of light
intensity outside the car according to the light sensitivity setting
programmed in the set-up menu: the higher the sensitivity, the low-
er the amount of external light needed to switch the lights on.
Activation
The dusk sensor is activated by turning the A ring fig. 40 to 2A.
In this way the side lights and dipped beam headlights are both
switched on automatically according to the outside light level.
EXTERIOR LIGHTS
LEFT STALK fig. 40
The left stalk operates most of the external lights. The external
lights can only be switched on when the ignition key is at MAR.
The instrument panel and the various controls on the dashboard
will come on when the external lights are switched on.
DAY LIGHTS (DRL) “Daytime Running Lights”
With the ignition key turned to MAR and A ring fig.40 turned to
position
Othe day lights are turned on; the other lights remain off.
For day light functions, see the “Menu Items” paragraph in this
chapter. If the function is deactivated, no lights are switched on
when the A ring is turned to position
O.
fig. 40A0K0099m
Page 80 of 297

76
GETTING
TO KNOW
YOUR CAR
SAFETY
STARTING
AND DRIVING
IN AN
EMERGENCY
SERVICING AND
MAINTENANCE
TECHNICAL
SPECIFICATIONS
CONTENTS
EXTERIOR COURTESY LIGHTS
This function lights up the vehicle and the space around it when
the doors are unlocked.
Activation
When the car is parked and the doors are unlocked by pressing the
Ëbutton on the remote control (or the boot is unlocked by press-
ing
R), the dipped beam headlights, side lights and number
plate lights are activated.
The lights remain lit for approximately 25 seconds unless the doors
and boot are locked once again, the doors or boot are opened
and closed or the instrument panel is activated. In these cases they
go out after 5 seconds.
The exterior courtesy lights can be enabled/disabled using the Set-
up Menu (see the paragraph “Menu Items” in this chapter).
“FOLLOW ME HOME” DEVICE
This device allows you to illuminate the area in front of the car
for a certain amount of time.
Activation
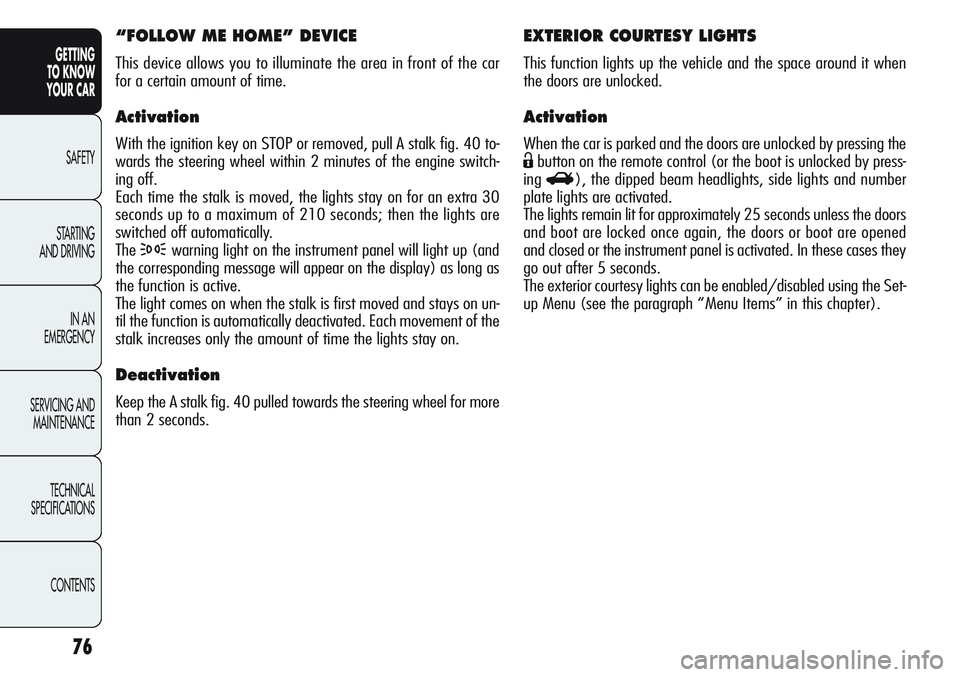
With the ignition key on STOP or removed, pull A stalk fig. 40 to-
wards the steering wheel within 2 minutes of the engine switch-
ing off.
Each time the stalk is moved, the lights stay on for an extra 30
seconds up to a maximum of 210 seconds; then the lights are
switched off automatically.
The
3warning light on the instrument panel will light up (and
the corresponding message will appear on the display) as long as
the function is active.
The light comes on when the stalk is first moved and stays on un-
til the function is automatically deactivated. Each movement of the
stalk increases only the amount of time the lights stay on.
Deactivation
Keep the A stalk fig. 40 pulled towards the steering wheel for more
than 2 seconds.