seats Alfa Romeo Giulietta 2013 Owner handbook (in English)
[x] Cancel search | Manufacturer: ALFA ROMEO, Model Year: 2013, Model line: Giulietta, Model: Alfa Romeo Giulietta 2013Pages: 292, PDF Size: 13.06 MB
Page 45 of 292

SEATSFRONT SEATS
All adjustments must be made with the car stationary.
Lengthwise adjustment
Lift the lever A fig. 20 and push the seat forwards or backwards: in
driving position your arms should rest on the rim of the steering
wheel.
After releasing the adjustment lever, always check that
the seat is locked on the guides by trying to move it
back and forth. If the seat is not locked into place,
it may unexpectedly slide and cause the driver to lose control of
the car.
Height adjustment
(for versions/markets, where provided)
Move lever B fig. 20 up or down until the desired height is achieved.
IMPORTANT Carry out the adjustment whilst seated in the driver's seat.
Backrest angle adjustment
Turn knob C fig. 20 until the desired position is reached.
For maximum safety, keep the back of your seat
upright, lean back into it and make sure the seat belt
fits closely across your chest and pelvis.
fig. 20
A0K0076
41GETTING TO
KNOW YOUR CARSAFETY
STARTING AND
DRIVING
IN AN EMERGENCY
SERVICING AND
MAINTENANCE
TECHNICAL
SPECIFICATIONS
INDEX
Page 46 of 292
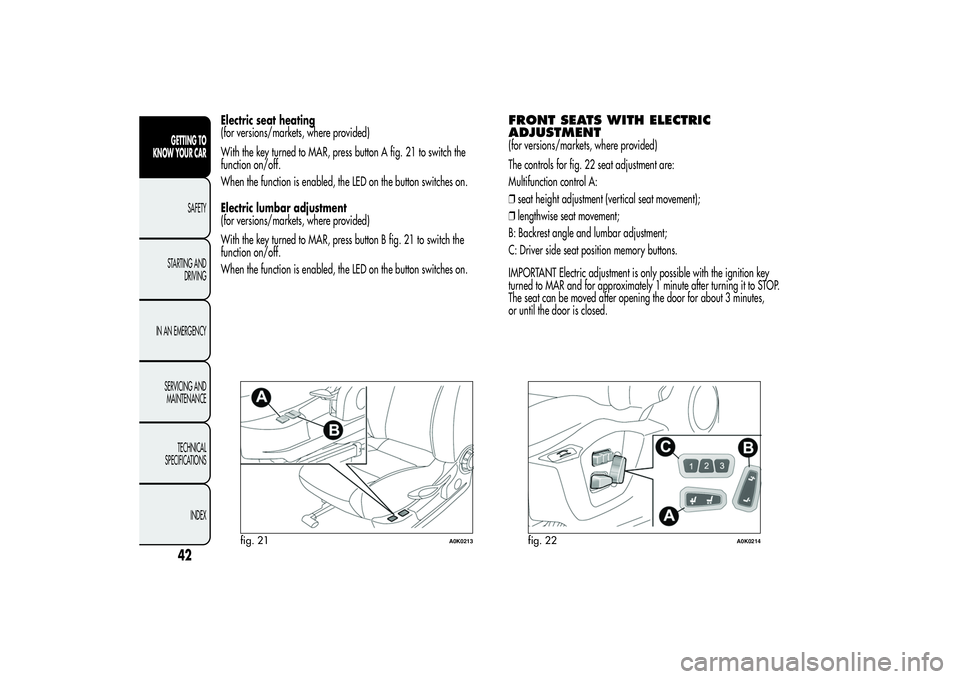
Electric seat heating
(for versions/markets, where provided)
With the key turned to MAR, press button A fig. 21 to switch the
function on/off.
When the function is enabled, the LED on the button switches on.
Electric lumbar adjustment
(for versions/markets, where provided)
With the key turned to MAR, press button B fig. 21 to switch the
function on/off.
When the function is enabled, the LED on the button switches on.
FRONT SEATS WITH ELECTRIC
ADJUSTMENT(for versions/markets, where provided)
The controls for fig. 22 seat adjustment are:
Multifunction control A:
❒seat height adjustment (vertical seat movement);
❒lengthwise seat movement;
B: Backrest angle and lumbar adjustment;
C: Driver side seat position memory buttons.
IMPORTANT Electric adjustment is only possible with the ignition key
turned to MAR and for approximately 1 minute after turning it to STOP.
The seat can be moved after opening the door for about 3 minutes,
or until the door is closed.
fig. 21
A0K0213
fig. 22
A0K0214
42GETTING TO
KNOW YOUR CAR
SAFETY
STARTING AND
DRIVING
IN AN EMERGENCY
SERVICING AND
MAINTENANCE
TECHNICAL
SPECIFICATIONS
INDEX
Page 47 of 292
Memorising driver’s seat positionsThe buttons C allow three different driver’s seat positions to be
memorised and recalled.
Memorisation and recall are possible with the ignition key in MAR
position and for 3 minutes after opening the driver's side door or until
the door is closed, even when the ignition key is in STOP position.
The memorisation of the position is confirmed by an acoustic signal.
To memorise a seat position, adjust it with the various controls, then
press the button where you want to memorise the position for several
seconds.
When a new seat position is memorised, the previously memorised
position on the same button is automatically overwritten.
Recalling a memorised position is also possible for about 3 minutes
after the doors are opened and about 1 minute after the ignition key is
turned to the STOP position.
To recall a memorised position, press the relevant button briefly.
Heated seats(for versions/markets, where provided)
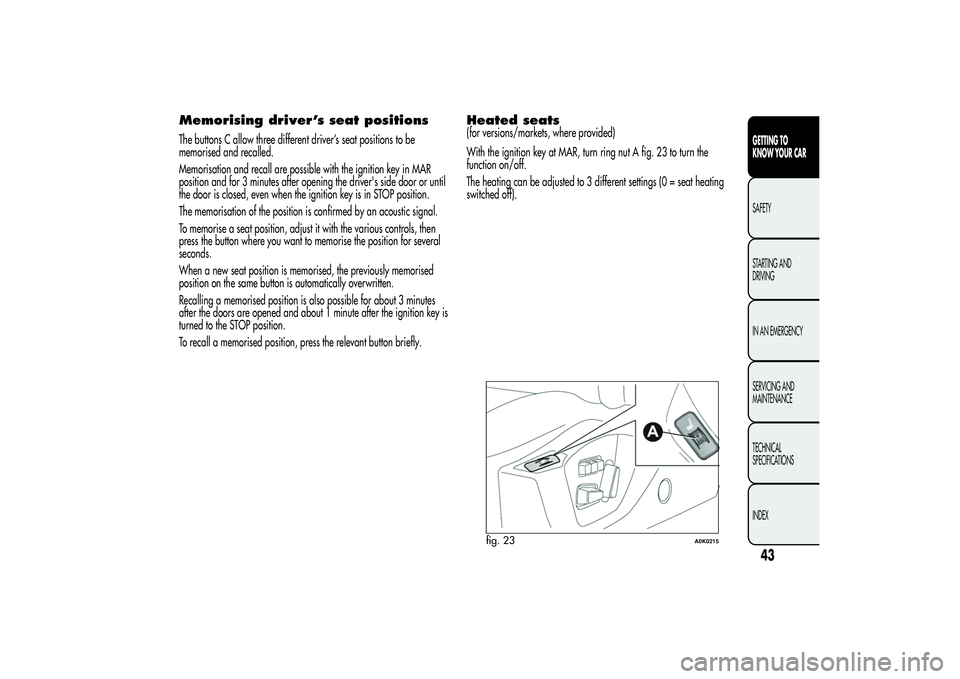
With the ignition key at MAR, turn ring nut A fig. 23 to turn the
function on/off.
The heating can be adjusted to 3 different settings (0 = seat heating
switched off).
fig. 23
A0K0215
43GETTING TO
KNOW YOUR CARSAFETY
STARTING AND
DRIVING
IN AN EMERGENCY
SERVICING AND
MAINTENANCE
TECHNICAL
SPECIFICATIONS
INDEX
Page 49 of 292
REARTwo height-adjustable head restraints are provided for the back seats
(to adjust the height see the previous paragraph).
On some versions a head restraint is also provided for the central seat.
To remove the head restraints:
❒raise the head restraints to their maximum height;
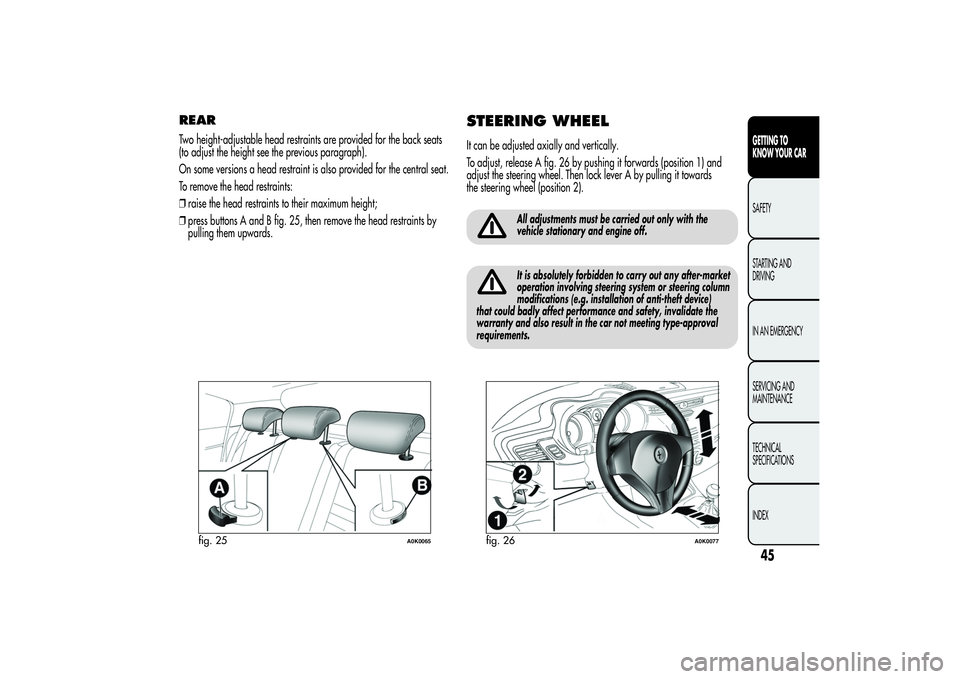
❒press buttons A and B fig. 25, then remove the head restraints by
pulling them upwards.
STEERING WHEELIt can be adjusted axially and vertically.
To adjust, release A fig. 26 by pushing it forwards (position 1) and
adjust the steering wheel. Then lock lever A by pulling it towards
the steering wheel (position 2).
All adjustments must be carried out only with the
vehicle stationary and engine off.It is absolutely forbidden to carry out any after-market
operation involving steering system or steering column
modifications (e.g. installation of anti-theft device)
that could badly affect performance and safety, invalidate the
warranty and also result in the car not meeting type-approval
requirements.
fig. 25
A0K0065
fig. 26
A0K0077
45GETTING TO
KNOW YOUR CARSAFETY
STARTING AND
DRIVING
IN AN EMERGENCY
SERVICING AND
MAINTENANCE
TECHNICAL
SPECIFICATIONS
INDEX
Page 54 of 292

CLIMATIC COMFORTDIFFUSERS1. Fixed upper diffuser – 2. Fixed upper diffusers – 3. Fixed side vents – 4. Adjustable side vents – 5. Adjustable centre vents – 6. Lower diffusers for
rear seats – 7. Adjustable vent for rear seats (for versions/markets, where provided)
fig. 35
A0K0107
50GETTING TO
KNOW YOUR CAR
SAFETY
STARTING AND
DRIVING
IN AN EMERGENCY
SERVICING AND
MAINTENANCE
TECHNICAL
SPECIFICATIONS
INDEX
Page 81 of 292

There is space to hold1×50clbottleand2×slimcans
simultaneously. The handbook can be inserted under the bottle holder
with the longest side facing the front of the car.
Do not travel with the glove compartments open: they
may injure the front seat occupants in the event of
an accident.
FRONT ARMREST(for versions/markets, where provided)
This is located between the front seats. To bring it to its standard use
position, push it downwards.
The front armrest is equipped with an inner storage compartment.
To access the compartment, position the armrest in the standard use
configuration (fully down) and then lift the cover with lining A fig. 55For correct use of the armrest specific measures must be followed for
the opening of the cover:
❒it must be opened only with armrest completely lowered;
❒to prevent content of the armrest from falling, the opening of the
cover is inhibited in positions other than "completely lowered".
NOTE During the armrest tilting stage (complete tilting upwards or
downwards), make sure the cover with lining is always closed
correctly.
fig. 55
A0K0166
77GETTING TO
KNOW YOUR CARSAFETY
STARTING AND
DRIVING
IN AN EMERGENCY
SERVICING AND
MAINTENANCE
TECHNICAL
SPECIFICATIONS
INDEX
Page 93 of 292

Emergency opening from the inside
Proceed as follows:
❒remove the rear head restraints and completely fold back the seats
(see the paragraph “Expanding the luggage compartment”);
❒push lever A fig. 71.CLOSINGLower the tailgate, pressing near the lock until you hear it click into
place.
There are handles B fig. 72 inside the tailgate to allow it to be closed
more easily.
IMPORTANT Before closing the luggage compartment make sure that
you have the keys since the luggage compartment is automatically
locked.
LUGGAGE COMPARTMENT
INITIALISATIONIMPORTANT If the battery is disconnected or the protection fuse blows,
the luggage compartment opening/closing mechanism must be
initialised as follows:
❒close all the doors and the luggage compartment;
❒Press the
button on the remote control;
❒Press thebutton on the remote control.
EXTENDING THE LUGGAGE
COMPARTMENTThe luggage compartment can be partially (1/3 or 2/3) or totally
extended by splitting the rear seat. See the descriptions in “Removing
the parcel shelf” and “Folding back the seats” paragraphs for how
to expand the luggage compartment.
fig. 71
A0K0069
fig. 72
A0K0181
89GETTING TO
KNOW YOUR CARSAFETY
STARTING AND
DRIVING
IN AN EMERGENCY
SERVICING AND
MAINTENANCE
TECHNICAL
SPECIFICATIONS
INDEX
Page 94 of 292

Removing the parcel shelf
Proceed as follows:
❒free the ends of the two parcel shelf B mounting links A fig. 73 by
removing the eyelets C from the mounting pins;❒free the pins A fig. 74 outside the shelf then remove the parcel shelf
B sliding it outwards.
❒after removal, the parcel shelf can be loaded sideways into the
luggage compartment or placed between the front seat backrests
and the folded-back rear seat cushions (with the luggage
compartment completely expanded).
Folding the seatsProceed as follows:
❒raise the headrests to the maximum height, press both buttons A and
B fig. 75 to the side of the two supports, then remove the head
restraints by sliding them upwards;
❒move the seat belts to the side, making sure that they are correctly
extended and not twisted;
❒raise lever A fig. 76 to fold the left or right side of the backrest and
then guide the backrest onto the cushion (when lever A is raised,
you will see a red band B).
fig. 73
A0K0070
fig. 74
A0K0182
90GETTING TO
KNOW YOUR CAR
SAFETY
STARTING AND
DRIVING
IN AN EMERGENCY
SERVICING AND
MAINTENANCE
TECHNICAL
SPECIFICATIONS
INDEX
Page 99 of 292

HEADLIGHTSLIGHT BEAM DIRECTIONThe correct orientation of the headlights is important for the driver's
comfort and safety as well as for all other road users. This is also
covered by a specific rule of the highway code.
The headlights must be correctly aligned to ensure the best visibility
conditions for yourself and others when driving with lights on. To check
and, if necessary, adjust, contact Alfa Romeo Authorized Services.HEADLIGHT ALIGNMENT CORRECTORThis device works with the ignition key in the MAR position and the
dipped headlights on.
Headlight alignment adjustment
To adjust, press the
and
fig. 81 buttons. The adjustment
position is shown on the display.
Position 0
one or two people in the front seats.
Position 1
4 people.
Position 2
4 people + load in luggage compartment.
Position 3
driver + maximum permitted load stowed in the luggage
compartment.
IMPORTANT Check the alignment every time that the load carried
changes.
IMPORTANT If the car is equipped with Bixenon headlights, the
headlight alignment is controlled electronically, as a consequence the
and
buttons are not present.
FOG LIGHT ALIGNMENT(for versions/markets, where provided)
To check and, if necessary, adjust, contact Alfa Romeo Authorized
Services.ADJUSTING THE HEADLIGHTS ABROADThe dipped headlights are aligned to comply with the regulations of
the country of purchase. When travelling in countries with opposite
driving direction, to avoid dazzling the drivers on the other side of the
road, you need to cover areas of the headlight according to the
Highway code of the country you are travelling in.
fig. 81
A0K0339
95GETTING TO
KNOW YOUR CARSAFETY
STARTING AND
DRIVING
IN AN EMERGENCY
SERVICING AND
MAINTENANCE
TECHNICAL
SPECIFICATIONS
INDEX
Page 121 of 292

Front seats (warning light
no. 1 = driver and
no. 5 = passenger)Driver
If the driver is the only occupant and their seat belt is not fastened,
when 20 km/h is exceeded or when travelling at a speed between 10
and 20 km/h for longer than 5 seconds, an acoustic signal cycle
will be started for the front seats (continuous acoustic signal for
6 seconds followed by a 90 second beep). The warning light will flash.
The warning lights will stay on constantly at the end of the cycle until
the engine is stopped. The acoustic signal will be interrupted
immediately when the driver’s seat belt is fastened and the warning
light will turn green.
The reminder cycle (acoustic and visual) will be repeated as described
above and the red warning light will flash if the seat belt is unfastened
again while travelling.
Passenger
A similar situation applies to the front passenger, with the difference
that the warning light turns green and the indication is also interrupted
when the passenger leaves the car.
If both front seat belts are unfastened a few seconds apart while the
car is travelling, the acoustic signal will refer to the most recent event
and the two warning lights will proceed with the visual indication
independently.
fig. 103
A0K0075
117GETTING TO KNOW
YOUR CARSAFETYSTARTING AND
DRIVING
IN AN EMERGENCY
SERVICING AND
MAINTENANCE
TECHNICAL
SPECIFICATIONS
INDEX