control Alfa Romeo MiTo 2012 Owner handbook (in English)
[x] Cancel search | Manufacturer: ALFA ROMEO, Model Year: 2012, Model line: MiTo, Model: Alfa Romeo MiTo 2012Pages: 262, PDF Size: 6.46 MB
Page 77 of 262
76GETTING TO KNOW YOUR CAR
SIDE LIGHTS/DIPPED BEAM HEADLIGHTS
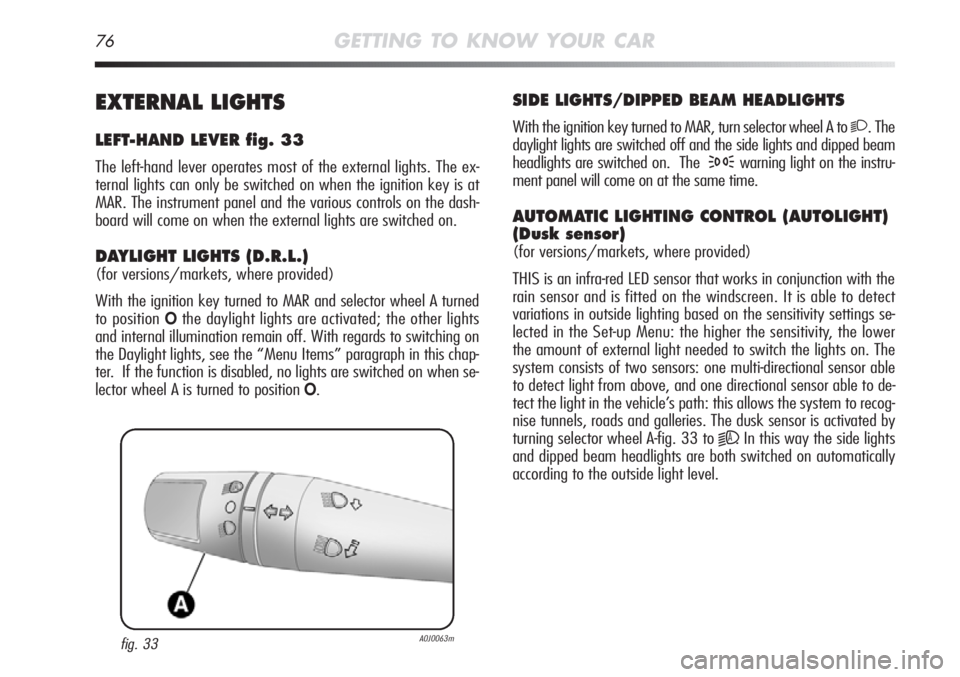
With the ignition key turned to MAR, turn selector wheel A to 2. The
daylight lights are switched off and the side lights and dipped beam
headlights are switched on. The
3warning light on the instru-
ment panel will come on at the same time.
AUTOMATIC LIGHTING CONTROL (AUTOLIGHT)
(Dusk sensor)
(for versions/markets, where provided)
THIS is an infra-red LED sensor that works in conjunction with the
rain sensor and is fitted on the windscreen. It is able to detect
variations in outside lighting based on the sensitivity settings se-
lected in the Set-up Menu: the higher the sensitivity, the lower
the amount of external light needed to switch the lights on. The
system consists of two sensors: one multi-directional sensor able
to detect light from above, and one directional sensor able to de-
tect the light in the vehicle’s path: this allows the system to recog-
nise tunnels, roads and galleries. The dusk sensor is activated by
turning selector wheel A-fig. 33 to
2A. In this way the side lights
and dipped beam headlights are both switched on automatically
according to the outside light level.
EXTERNAL LIGHTS
LEFT-HAND LEVER fig. 33
The left-hand lever operates most of the external lights. The ex-
ternal lights can only be switched on when the ignition key is at
MAR. The instrument panel and the various controls on the dash-
board will come on when the external lights are switched on.
DAYLIGHT LIGHTS (D.R.L.)
(for versions/markets, where provided)
With the ignition key turned to MAR and selector wheel A turned
to position
Othe daylight lights are activated; the other lights
and internal illumination remain off. With regards to switching on
the Daylight lights, see the “Menu Items” paragraph in this chap-
ter. If the function is disabled, no lights are switched on when se-
lector wheel A is turned to position
O.
fig. 33A0J0063m
Page 78 of 262
GETTING TO KNOW YOUR CAR77
1
MAIN BEAM HEADLIGHTS
With selector wheel A in position 2pull the lever towards the
steering wheel (stable position). The
1warning light will come
on in the instrument panel. To turn the main beams off, pull the
lever again towards the steering wheel (dipped beams will remain
on). It is not possible to switch on the main beam headlights in
fixed mode if the automatic lighting control system is active.
FLASHING THE HEADLIGHTS
Pull the lever towards the steering wheel (unstable position) re-
gardless of the position of selector wheel A. The
1warning light
will come on in the instrument panel.
DIRECTION INDICATORS
Push the lever to (stable) position:
❍upward adjustment: right-hand indicator ON;
❍downward adjustment: left-hand indicator ON.
Warning light
Îor¥will blink on the instrument panel. The di-
rection indicators are switched off automatically when the steering
wheel is straightened.
Lane change function
If you want to signal that you are changing lane, hold the left lever
in the unstable position for less than half a second. The direction
indicator on the selected side flashes three times and then switch-
es off automatically. IMPORTANT the sensor is not able to detect the presence of fog.
The fog lights must therefore be switched on manually if required.
When the lights are switched on by the sensor, the front and rear
fog lights ((for versions/markets, where provided) can also be
switched on. When the lights are automatically switched off, the
front and rear fog lights (if activated) are also switched off. The
next time the lights are switched on automatically, the fog lights
must be reactivated manually (if required).
With the sensor active, it is possible to flash the headlights but
the main beam headlights cannot be switched on. If you wish to
switch on the main beam headlights, rotate selector wheel
A-fig. 33 to
1and activate the fixed main beam headlights.
When the lights have been activated automatically and are then
switched off by the sensor, the dipped beam headlights are switched
off first, followed by the side lights a few seconds later.
If the sensor is activated but is malfunctioning, the side lights and
dipped beam headlights are switched on independently of the out-
side light level and the sensor failure is indicated on the instrument
panel display. It is also possible to deactivate the sensor and switch
on the side lights and dipped beam headlights.
Page 79 of 262
78GETTING TO KNOW YOUR CAR
EXTERIOR COURTESY LIGHTS
This function lights up the vehicle and the space around it when
the doors are unlocked.
Activation
When the vehicle is parked and the doors are unlocked by press-
ing the
Ëbutton on the remote control (or the luggage compart-
ment is unlocked by pressing
R), the dipped beam headlights,
side lights and number plate lights are activated.
The lights remain lit for approximately 25 seconds unless the doors
and luggage compartment are locked once again, the doors or lug-
gage compartment are opened and closed or the instrument pan-
el is activated. In this case they go out after 5 seconds.
The exterior courtesy lights can be enabled/disabled using the Set-
up Menu (see the paragraph on“Menu Items” in this chapter).
“FOLLOW ME HOME” DEVICE
This device allows you to illuminate the area in front of the car
for a certain amount of time.
Activation
With the ignition key on STOP or removed, pull lever A-fig. 33 to-
wards the steering wheel within 2 minutes of switching off the
engine.
The amount of time the lights remain on is extended by 30 sec-
onds at each movement of the lever, up to a maximum of 210 sec-
onds; after this the lights are switched off automatically.
The
3warning light on the instrument panel will light up (and
the corresponding message will appear on the display) as long as
the function is active.
The warning light comes on when the lever is operated and stays
on until the function is automatically deactivated. Each movement
of the lever increases the amount of time the lights stay on.
Deactivation
Keep the lever pulled towards the steering wheel for more than 2
seconds.
Page 80 of 262

GETTING TO KNOW YOUR CAR79
1
Moving the lever upwards (unstable position) limits operation to
the time the lever is held in this position. The lever will return to
position and the wiper will be automatically stopped when released.WINDOW WASHING
The right lever controls windscreen wiper/washer and heated rear
window wiper/washer operation.
WINDSCREEN WIPER/WASHER fig. 34
This only operates with the ignition turned to MAR. Selector wheel
A can take five different positions:
,intermittent (low speed);
Owindscreen wiper off;
AUTO rain sensor activation (for versions/markets, where pro-
vided) (the windscreen wipers adapt the operating speed
automatically to suit the intensity of the rain)
≤intermittent;
≥continuous slow;
¥continuous fast operation.
fig. 34A0J0064m
Do not use the windscreen wiper to remove lay-
ers of snow or ice from the windscreen. In such con-
ditions, the windscreen wiper may be subjected to
excessive stress and the motor protection which prevents
operation for a few seconds may trip. If operation is not
restored, even after turning the key and restarting the en-
gine, contact an Alfa Romeo Authorised Service.
“Smart washing” function
Pull the lever towards the steering wheel (unstable position) to op-
erate the windscreen washer jet. By keeping the lever pulled for
more than half a second, it is possible to operate the washer jet
and the wiper at the same time with just one movement.
The wiper stops working three strokes after releasing the lever. A
further stroke after approx. 6 seconds completes the wiping cycle.
Page 82 of 262
GETTING TO KNOW YOUR CAR81
1CRUISE CONTROL
(for versions/markets, where provided)
GENERAL INFORMATION
This is an electronic driving aid that allows you to drive at a speed
of above 30 km/h on long and straight dry roads (e.g. motor-
ways), at a preset speed without having to press the accelerator
pedal.
It is not recommended for use on extra-urban roads with traffic. Do
not use it in town.
DEVICE ENGAGEMENT
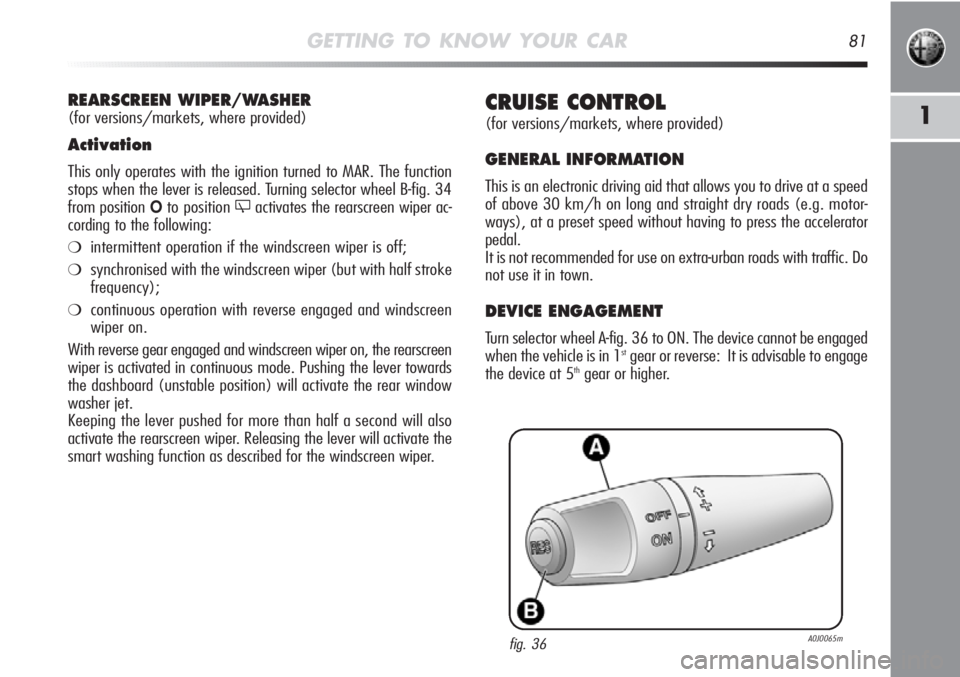
Turn selector wheel A-fig. 36 to ON. The device cannot be engaged
when the vehicle is in 1stgear or reverse: It is advisable to engage
the device at 5thgear or higher.
REARSCREEN WIPER/WASHER
(for versions/markets, where provided)
Activation
This only operates with the ignition turned to MAR. The function
stops when the lever is released. Turning selector wheel B-fig. 34
from position
Oto position 'activates the rearscreen wiper ac-
cording to the following:
❍intermittent operation if the windscreen wiper is off;
❍synchronised with the windscreen wiper (but with half stroke
frequency);
❍continuous operation with reverse engaged and windscreen
wiper on.
With reverse gear engaged and windscreen wiper on, the rearscreen
wiper is activated in continuous mode. Pushing the lever towards
the dashboard (unstable position) will activate the rear window
washer jet.
Keeping the lever pushed for more than half a second will also
activate the rearscreen wiper. Releasing the lever will activate the
smart washing function as described for the windscreen wiper.
fig. 36A0J0065m
Page 87 of 262
86GETTING TO KNOW YOUR CAR
CONTROLS
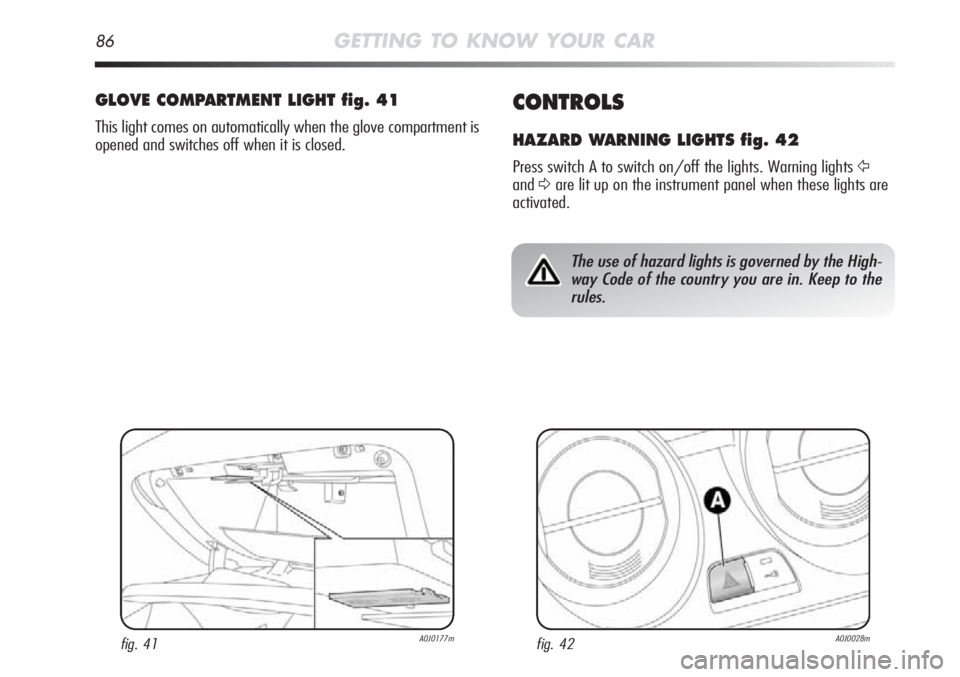
HAZARD WARNING LIGHTS fig. 42
Press switch A to switch on/off the lights. Warning lights Ÿ
andΔare lit up on the instrument panel when these lights are
activated.
GLOVE COMPARTMENT LIGHT fig. 41
This light comes on automatically when the glove compartment is
opened and switches off when it is closed.
fig. 41A0J0177mfig. 42A0J0028m
The use of hazard lights is governed by the High-
way Code of the country you are in. Keep to the
rules.
Page 96 of 262
GETTING TO KNOW YOUR CAR95
1DOORS
DOOR CENTRAL LOCKING/UNLOCKING
Locking from the outside
With the doors closed press button Áon the remote control or
turn the metal insert (located inside the key) in the driver-side door
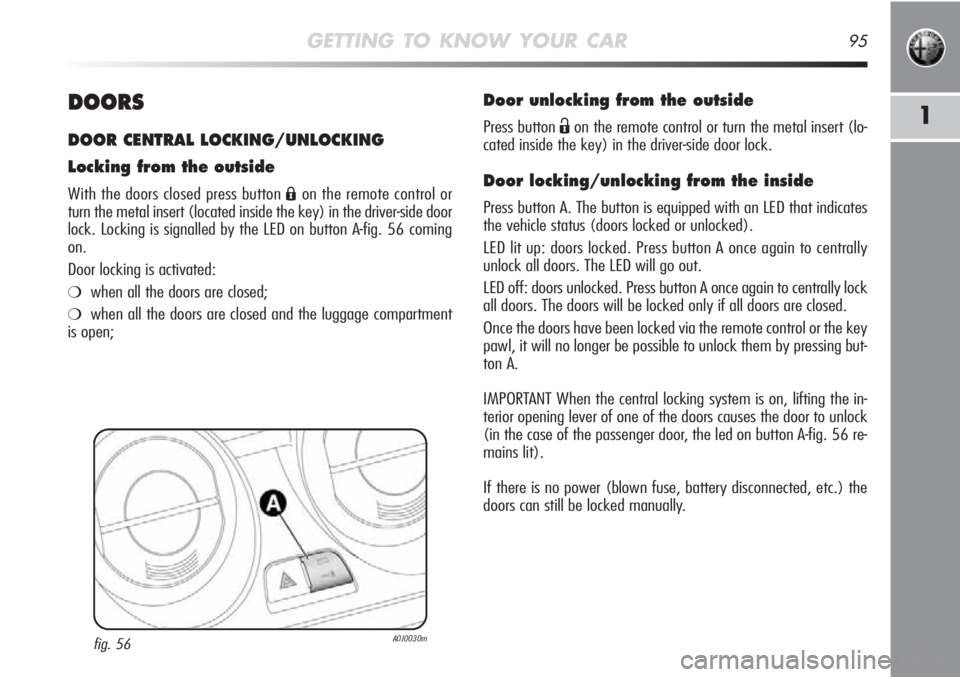
lock. Locking is signalled by the LED on button A-fig. 56 coming
on.
Door locking is activated:
❍when all the doors are closed;
❍when all the doors are closed and the luggage compartment
is open;
fig. 56A0J0030m
Door unlocking from the outside
Press button Ëon the remote control or turn the metal insert (lo-
cated inside the key) in the driver-side door lock.
Door locking/unlocking from the inside
Press button A. The button is equipped with an LED that indicates
the vehicle status (doors locked or unlocked).
LED lit up: doors locked. Press button A once again to centrally
unlock all doors. The LED will go out.
LED off: doors unlocked. Press button A once again to centrally lock
all doors. The doors will be locked only if all doors are closed.
Once the doors have been locked via the remote control or the key
pawl, it will no longer be possible to unlock them by pressing but-
ton A.
IMPORTANT When the central locking system is on, lifting the in-
terior opening lever of one of the doors causes the door to unlock
(in the case of the passenger door, the led on button A-fig. 56 re-
mains lit).
If there is no power (blown fuse, battery disconnected, etc.) the
doors can still be locked manually.
Page 97 of 262
96GETTING TO KNOW YOUR CAR
ELECTRIC WINDOWS
These are equipped with an automatic setting to raise and lower
the driver-side front window.
CONTROLS FOR
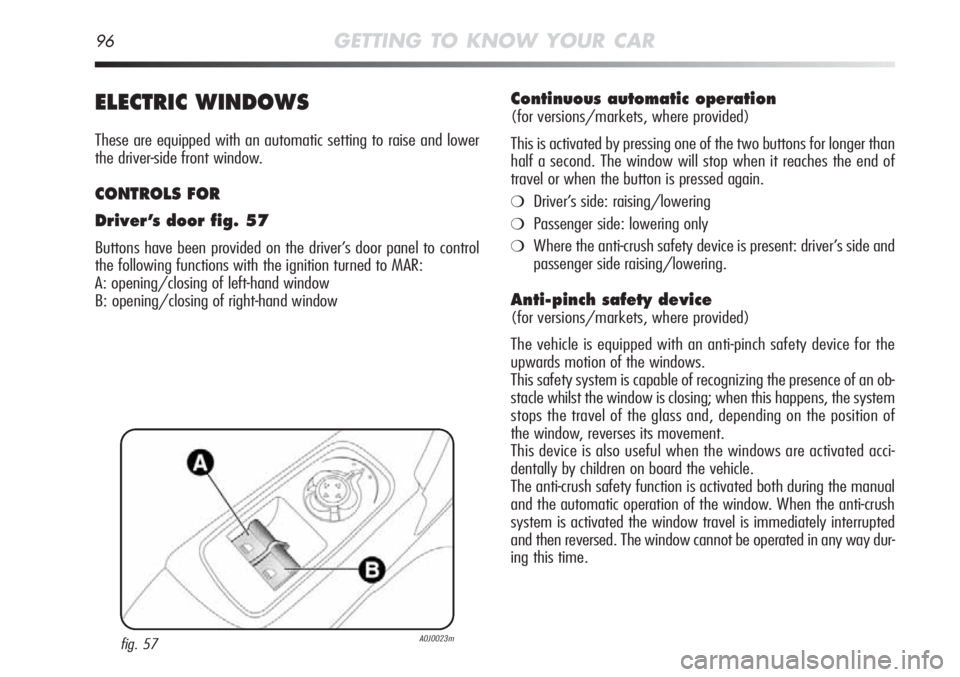
Driver’s door fig. 57
Buttons have been provided on the driver’s door panel to control
the following functions with the ignition turned to MAR:
A: opening/closing of left-hand window
B: opening/closing of right-hand window
Continuous automatic operation
(for versions/markets, where provided)
This is activated by pressing one of the two buttons for longer than
half a second. The window will stop when it reaches the end of
travel or when the button is pressed again.
❍Driver’s side: raising/lowering
❍Passenger side: lowering only
❍Where the anti-crush safety device is present: driver’s side and
passenger side raising/lowering.
Anti-pinch safety device
(for versions/markets, where provided)
The vehicle is equipped with an anti-pinch safety device for the
upwards motion of the windows.
This safety system is capable of recognizing the presence of an ob-
stacle whilst the window is closing; when this happens, the system
stops the travel of the glass and, depending on the position of
the window, reverses its movement.
This device is also useful when the windows are activated acci-
dentally by children on board the vehicle.
The anti-crush safety function is activated both during the manual
and the automatic operation of the window. When the anti-crush
system is activated the window travel is immediately interrupted
and then reversed. The window cannot be operated in any way dur-
ing this time.
fig. 57A0J0023m
Page 98 of 262
GETTING TO KNOW YOUR CAR97
1
IMPORTANT If the anti-pinch protection intervenes 5 times consec-
utively within 1 minute or a system failure is detected, the auto-
matic window closing function is inhibited. The window can then
only be operated in steps of half a second and the button must
be released following each step.
In order to restore the correct operation of the system, the relevant
window must be lowered.
IMPORTANT With ignition key at STOP or removed, the electric win-
dows remain active for about 3 minutes and are deactivated the
moment a door is opened.
IMPORTANT Where the anti-crush safety device is present, when
button
Ëon the remote control is pressed for more than 2 seconds,
the windows are opened, whilst when button
Áis pressed for more
than 2 seconds the windows are closed.
Passenger-side door
The passenger-side door is equipped with a button that controls
the opening/closing of the passenger-side window.
The system conforms to the 2000/4/EC standard
concerning the safety of passengers leaning out of
the passenger compartment.
Incorrect use of the electric windows may be dan-
gerous. Before operation, always check that no
passenger is at risk of being injured directly by the
moving window or by objects getting caught in or dragged
by the window. When leaving the car, always remove the
key from the ignition device to avoid the risk of injury due
to accidental operation of the electric windows.
Page 99 of 262
98GETTING TO KNOW YOUR CAR
Electric window system initialisation
The safety system must be re-initialised after disconnecting the bat-
tery or if the relevant protection fuse is blown.
Initialisation procedure:
❍fully close the window to be initialised manually;
❍after the window has reached the upper end of travel, hold the
up button pressed for at least one second.
IMPORTANT For versions/markets where provided, following the
disconnection of the power supply (replacing or disconnecting the
battery or replacing the protection fuse for the electric windows
control units), the automatic setting for the electric windows must
be reset.The reset operation should be carried out with the doors closed
according to the following procedure:
1. completely lower the driver-side window and keep the button
pressed for at least 3 seconds once the end of travel position
has been reached;
2. completely raise the driver-side window and keep the button
pressed for at least 3 seconds once the end of travel position
has been reached;
3. repeat stages 1 and 2 for the passenger-side window
4. check that the initialisation has taken place correctly by check-
ing the automatic operation of the windows.
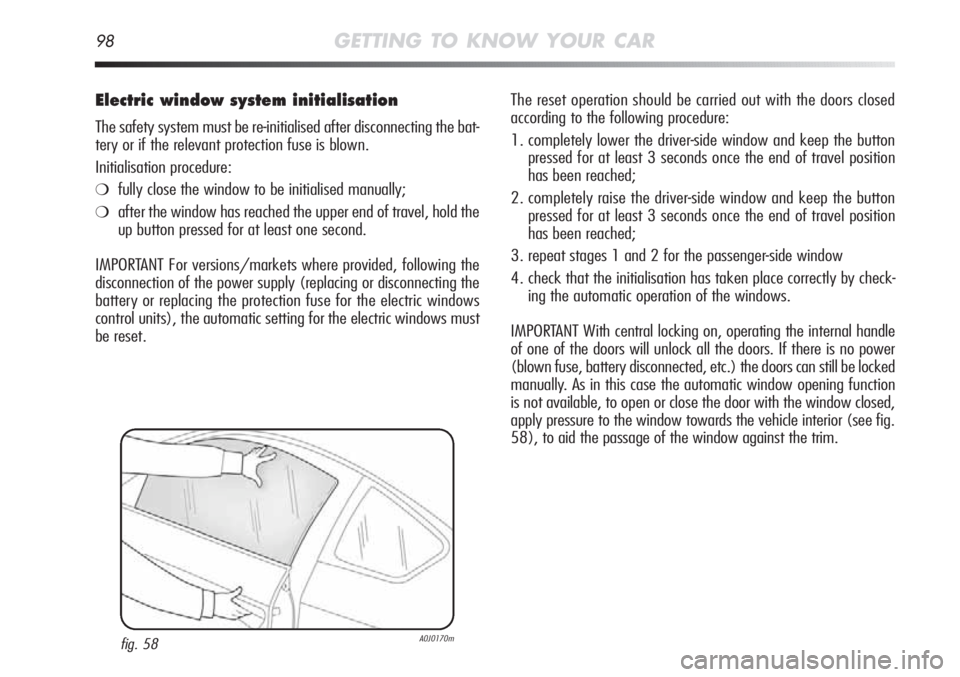
IMPORTANT With central locking on, operating the internal handle
of one of the doors will unlock all the doors. If there is no power
(blown fuse, battery disconnected, etc.) the doors can still be locked
manually. As in this case the automatic window opening function
is not available, to open or close the door with the window closed,
apply pressure to the window towards the vehicle interior (see fig.
58), to aid the passage of the window against the trim.
fig. 58A0J0170m