jump start Alfa Romeo MiTo 2017 Owner's Manual
[x] Cancel search | Manufacturer: ALFA ROMEO, Model Year: 2017, Model line: MiTo, Model: Alfa Romeo MiTo 2017Pages: 212, PDF Size: 4.36 MB
Page 105 of 212

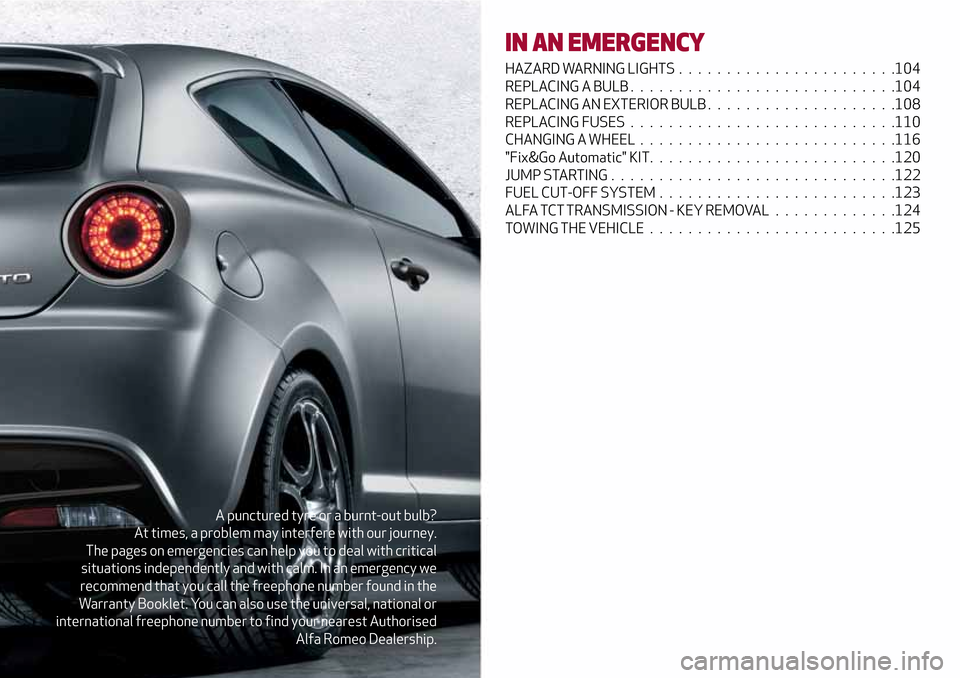
A punctured tyre or a burnt-out bulb?
At times, a problem may interfere with our journey.
The pages on emergencies can help you to deal with critical
situations independently and with calm. In an emergency we
recommend that you call the freephone number found in the
Warranty Booklet. You can also use the universal, national or
international freephone number to find your nearest Authorised
Alfa Romeo Dealership.
IN AN EMERGENCY
HAZARD WARNING LIGHTS . . . . . . .................104
REPLACING A BULB . . . . ........................104
REPLACING AN EXTERIOR BULB....................108
REPLACING FUSES . ...........................110
CHANGING A WHEEL ...........................116
"Fix&Go Automatic" KIT. . . . ......................120
JUMP STARTING . . . . ..........................122
FUEL CUT-OFF SYSTEM . ........................123
ALFA TCT TRANSMISSION - KEY REMOVAL . . . ..........124
TOWING THE VEHICLE ..........................125
Page 124 of 212

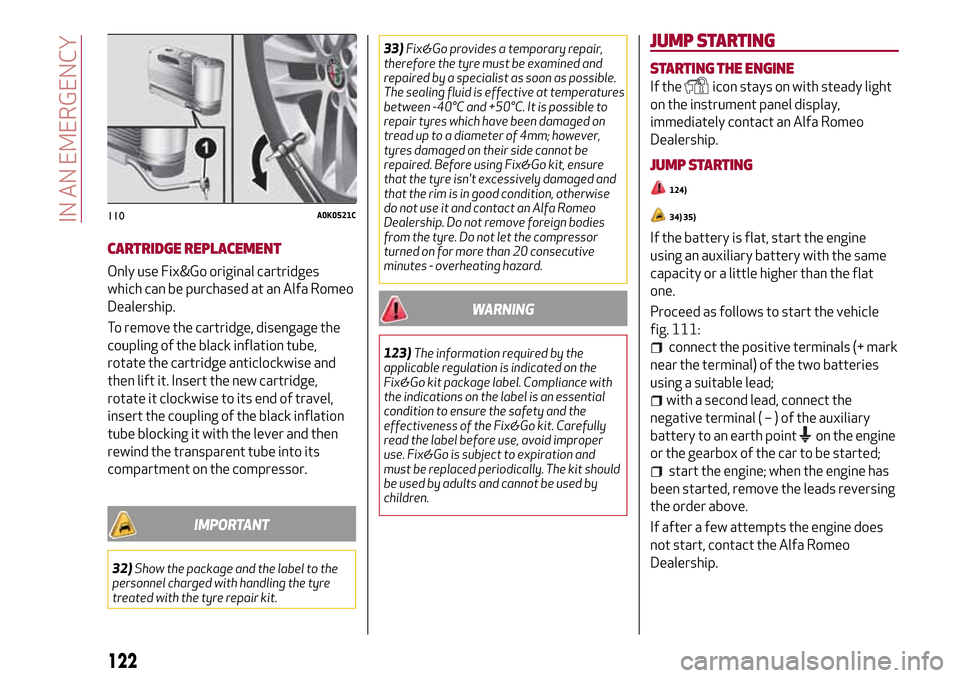
CARTRIDGE REPLACEMENT
Only use Fix&Go original cartridges
which can be purchased at an Alfa Romeo
Dealership.
To remove the cartridge, disengage the
coupling of the black inflation tube,
rotate the cartridge anticlockwise and
then lift it. Insert the new cartridge,
rotate it clockwise to its end of travel,
insert the coupling of the black inflation
tube blocking it with the lever and then
rewind the transparent tube into its
compartment on the compressor.
IMPORTANT
32)Show the package and the label to the
personnel charged with handling the tyre
treated with the tyre repair kit.33)Fix&Go provides a temporary repair,
therefore the tyre must be examined and
repaired by a specialist as soon as possible.
The sealing fluid is effective at temperatures
between -40°C and +50°C. It is possible to
repair tyres which have been damaged on
tread up to a diameter of 4mm; however,
tyres damaged on their side cannot be
repaired. Before using Fix&Go kit, ensure
that the tyre isn't excessively damaged and
that the rim is in good condition, otherwise
do not use it and contact an Alfa Romeo
Dealership. Do not remove foreign bodies
from the tyre. Do not let the compressor
turned on for more than 20 consecutive
minutes - overheating hazard.
WARNING
123)The information required by the
applicable regulation is indicated on the
Fix&Go kit package label. Compliance with
the indications on the label is an essential
condition to ensure the safety and the
effectiveness of the Fix&Go kit. Carefully
read the label before use, avoid improper
use. Fix&Go is subject to expiration and
must be replaced periodically. The kit should
be used by adults and cannot be used by
children.
JUMP STARTING
STARTING THE ENGINE
If theicon stays on with steady light
on the instrument panel display,
immediately contact an Alfa Romeo
Dealership.
JUMP STARTING
124)
34) 35)
If the battery is flat, start the engine
using an auxiliary battery with the same
capacity or a little higher than the flat
one.
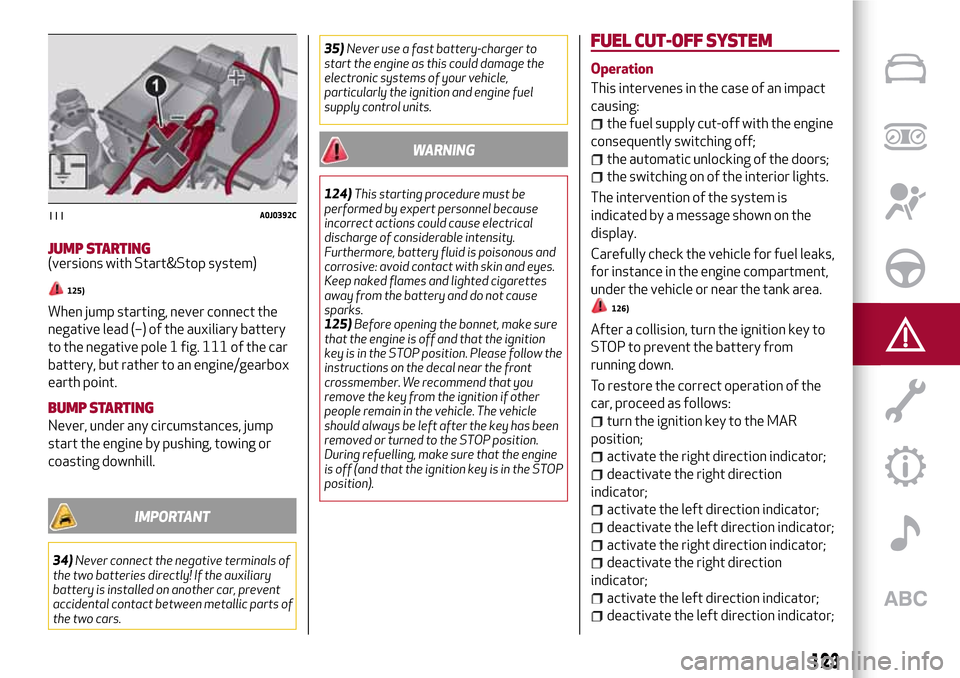
Proceed as follows to start the vehicle
fig. 111:
connect the positive terminals (+ mark
near the terminal) of the two batteries
using a suitable lead;
with a second lead, connect the
negative terminal(–)oftheauxiliary
battery to an earth point
on the engine
or the gearbox of the car to be started;
start the engine; when the engine has
been started, remove the leads reversing
the order above.
If after a few attempts the engine does
not start, contact the Alfa Romeo
Dealership.
110A0K0521C
122
IN AN EMERGENCY
Page 125 of 212

JUMP STARTING(versions with Start&Stop system)
125)
When jump starting, never connect the
negative lead (–) of the auxiliary battery
to the negative pole 1 fig. 111 of the car
battery, but rather to an engine/gearbox
earth point.
BUMP STARTING
Never, under any circumstances, jump
start the engine by pushing, towing or
coasting downhill.
IMPORTANT
34)Never connect the negative terminals of
the two batteries directly! If the auxiliary
battery is installed on another car, prevent
accidental contact between metallic parts of
the two cars.35)Never use a fast battery-charger to
start the engine as this could damage the
electronic systems of your vehicle,
particularly the ignition and engine fuel
supply control units.
WARNING
124)This starting procedure must be
performed by expert personnel because
incorrect actions could cause electrical
discharge of considerable intensity.
Furthermore, battery fluid is poisonous and
corrosive: avoid contact with skin and eyes.
Keep naked flames and lighted cigarettes
away from the battery and do not cause
sparks.
125)Before opening the bonnet, make sure
that the engine is off and that the ignition
key is in the STOP position. Please follow the
instructions on the decal near the front
crossmember. We recommend that you
remove the key from the ignition if other
people remain in the vehicle. The vehicle
should always be left after the key has been
removed or turned to the STOP position.
During refuelling, make sure that the engine
is off (and that the ignition key is in the STOP
position).
FUEL CUT-OFFSYSTEM
Operation
This intervenes in the case of an impact
causing:
the fuel supply cut-off with the engine
consequently switching off;
the automatic unlocking of the doors;
the switching on of the interior lights.
The intervention of the system is
indicated by a message shown on the
display.
Carefully check the vehicle for fuel leaks,
for instance in the engine compartment,
under the vehicle or near the tank area.
126)
After a collision, turn the ignition key to
STOP to prevent the battery from
running down.
To restore the correct operation of the
car, proceed as follows:
turn the ignition key to the MAR
position;
activate the right direction indicator;
deactivate the right direction
indicator;
activate the left direction indicator;
deactivate the left direction indicator;
activate the right direction indicator;
deactivate the right direction
indicator;
activate the left direction indicator;
deactivate the left direction indicator;
111A0J0392C
123
Page 208 of 212

Light beam direction..........34
Hill Holder system.............67
Identification data
chassis marking............153
engine marking............153
identification data plate.......152
Ignition device...............11
Installing a Universal Isofix child
restraint system............79
Instrument panel...............8
Interior lights................21
Interiors (cleaning)............149
Isofix child restraint system setup . . .79
Jack.....................116
Jump starting...............122
Keys.....................10
Key with remote control........10
Lifting the vehicle............147
Light bulbs
types of bulbs.............105
Luggage compartment
Extending the luggage
compartment..............34
Luggage compartment
initialisation...............34
Main beam headlights..........19
Main beam headlights (bulb
replacement)..............108
Mechanical key...............10
Menu items.................43MSR system................66
Multimedia
Power on/off.............187
Number plate lights (bulb
replacement)..............110
Parking lights................19
Parking sensors..............98
Parking the vehicle.............91
Passenger side front airbag.......82
Performance...............175
Pre-tensioners...............73
Load limiters..............73
Rain sensor.................22
Rear direction indicators (bulb
replacement)..............110
Rear fog light................20
Rear fog light/reversing light (bulb
replacement)..............110
Rear light clusters (bulb
replacement)..............109
Rear seat..................15
Rear view mirrors.............18
Rear window wiper/washer.......23
Reconfigurable multifunction
display................40,42
Refuelling.................169
Refuelling the vehicle..........100
Replacing a bulb.............104
exterior lights.............108
General instructions.........104Rims and tyres provided . . ......159
Safe Lock (device).............11
SBR system (Seat Belt Reminder). . . .72
Scheduled servicing . . . . . ......128
Scheduled Servicing Plan . . ......129
Screen wiper/washer . . . . . ......22
Seat belts . . . . ..............70
Seat belts (using) ..............70
Seats . . . . . . . ..............14
Servicing and maintenance
Demanding use of the car ......136
periodic checks . . . .........136
Setup menu .................43
Side airbags (Side bag - Window
bag) ....................86
Side bags (front side airbags) . . . . . .86
Side lights/brake lights (bulb
replacement). . . ...........110
Side lights/daytime running lights
(DRL) (bulb replacement) ......108
Side lights/dipped beam
headlights . . ..............19
Snow chains................164
Sport front seats ..............15
Start&Stop (system) . . . . . ......95
Starting the engine . . . . . . . . .90 ,122
Bump starting . ............123
Steering lock . . ..............11
Steering wheel . . . . ...........17
Technical data..............152
INDEX