start stop button Alfa Romeo Stelvio 2019 Owner's Manual
[x] Cancel search | Manufacturer: ALFA ROMEO, Model Year: 2019, Model line: Stelvio, Model: Alfa Romeo Stelvio 2019Pages: 244, PDF Size: 4.95 MB
Page 15 of 244
IGNITION DEVICE
OPERATION
1) 2) 3) 4) 5)
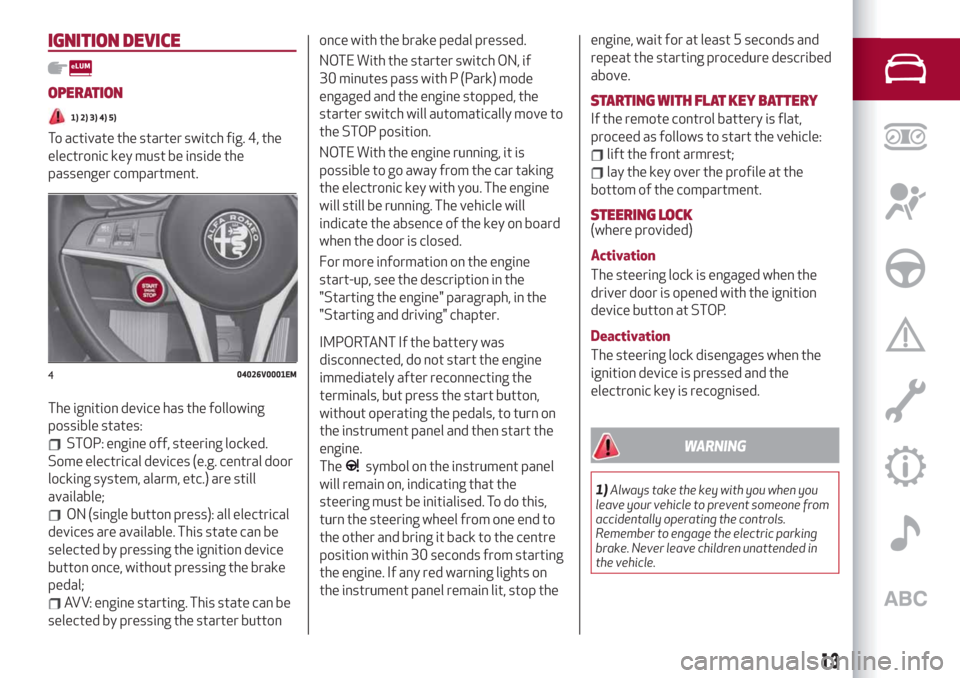
To activate the starter switch fig. 4, the
electronic key must be inside the
passenger compartment.
The ignition device has the following
possible states:
STOP: engine off, steering locked.
Some electrical devices (e.g. central door
locking system, alarm, etc.) are still
available;
ON (single button press): all electrical
devices are available. This state can be
selected by pressing the ignition device
button once, without pressing the brake
pedal;
AVV: engine starting. This state can be
selected by pressing the starter buttononce with the brake pedal pressed.
NOTE With the starter switch ON, if
30 minutes pass with P (Park) mode
engaged and the engine stopped, the
starter switch will automatically move to
the STOP position.
NOTE With the engine running, it is
possible to go away from the car taking
the electronic key with you. The engine
will still be running. The vehicle will
indicate the absence of the key on board
when the door is closed.
For more information on the engine
start-up, see the description in the
"Starting the engine" paragraph, in the
"Starting and driving" chapter.
IMPORTANT If the battery was
disconnected, do not start the engine
immediately after reconnecting the
terminals, but press the start button,
without operating the pedals, to turn on
the instrument panel and then start the
engine.
The
symbol on the instrument panel
will remain on, indicating that the
steering must be initialised. To do this,
turn the steering wheel from one end to
the other and bring it back to the centre
position within 30 seconds from starting
the engine. If any red warning lights on
the instrument panel remain lit, stop theengine, wait for at least 5 seconds and
repeat the starting procedure described
above.
STARTING WITH FLAT KEY BATTERY
If the remote control battery is flat,
proceed as follows to start the vehicle:
lift the front armrest;
lay the key over the profile at the
bottom of the compartment.
STEERING LOCK(where provided)
Activation
The steering lock is engaged when the
driver door is opened with the ignition
device button at STOP.
Deactivation
The steering lock disengages when the
ignition device is pressed and the
electronic key is recognised.
WARNING
1)Always take the key with you when you
leave your vehicle to prevent someone from
accidentally operating the controls.
Remember to engage the electric parking
brake. Never leave children unattended in
the vehicle.
404026V0001EM
13
Page 16 of 244
2)It is absolutely forbidden to carry out any
after-market operation involving steering
system or steering column modifications
(e.g. installation of anti-theft device) that
could adversely affect performance,
invalidate the warranty, cause SERIOUS
SAFETY PROBLEMS and also result in the
car not meeting type-approval
requirements.
3)Before leaving the vehicle, ALWAYS
engage the handbrake. On versions
equipped with automatic transmission,
activate mode P (Park) and press the ignition
device to set it to STOP. When leaving the
vehicle, always lock all the doors by pressing
the button on the handle.
4)For versions equipped with the Keyless
Start system, do not leave the electronic key
inside or near the car or in a place accessible
to children. Do not leave the vehicle with the
ignition device in ON position. A child could
activate the electric window winders, other
controls or even start the vehicle.
5)If the ignition device has been tampered
with (e.g. an attempted theft), have it
checked over by the Alfa Romeo Dealership
before driving again.ENGINE IMMOBILIZER
The Engine Immobilizer system prevents
unauthorised use of the vehicle
preventing to start the engine.
The system does not need to be
enabled/activated: operation is
automatic, regardless of the fact that the
vehicle's doors are locked or unlocked.
When the ignition device is set to ON, the
Engine Immobilizer system identifies the
code transmitted by the key. If the code
is recognised as valid, the Engine
Immobilizer system enables engine
starting.
When the ignition device is brought back
to STOP, the Engine Immobilizer system
deactivates the control unit controlling
the engine, thus preventing its starting.
For the correct engine starting
procedures, see the instructions in the
"Starting the engine" paragraph,
"Starting and driving" chapter.Irregular operation
If, during starting, the key code is not
correctly recognised, theicon is
displayed on the instrument panel (see
the instructions in the "Warning lights and
messages" paragraph, "Knowing the
instrument panel" chapter). This
condition leads to the engine switching
off after 2 seconds. In this case, bring the
ignition device to STOP and then to ON; if
it is still blocked, try with the other keys
provided. If it is still not possible to start
the engine, contact an Alfa Romeo
Dealership.
If the
icon is displayed while driving,
this means that the system is running a
self-diagnosis (e.g. due to a voltage drop).
If the display persists, contact an Alfa
Romeo Dealership.
14
KNOWING YOUR CAR
Page 22 of 244
ELECTRICALLY ADJUSTABLE FRONT
SEATS
5)
NOTE The conformation of the seats may
vary according to the versions.
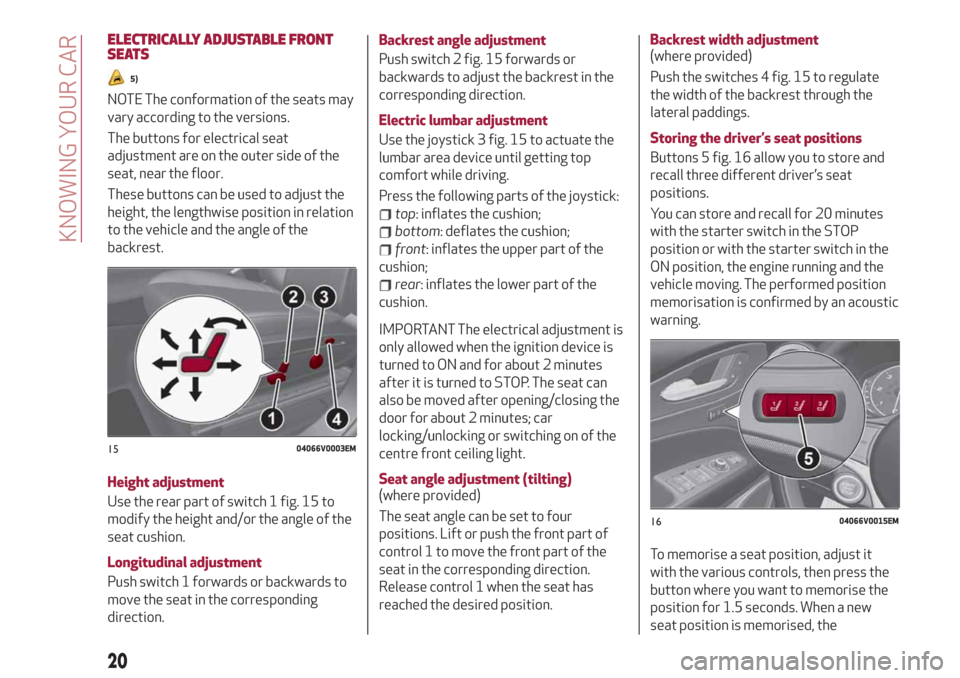
The buttons for electrical seat
adjustment are on the outer side of the
seat, near the floor.
These buttons can be used to adjust the
height, the lengthwise position in relation
to the vehicle and the angle of the
backrest.
Height adjustment
Use the rear part of switch 1 fig. 15 to
modify the height and/or the angle of the
seat cushion.
Longitudinal adjustment
Push switch 1 forwards or backwards to
move the seat in the corresponding
direction.Backrest angle adjustment
Push switch 2 fig. 15 forwards or
backwards to adjust the backrest in the
corresponding direction.
Electric lumbar adjustment
Use the joystick 3 fig. 15 to actuate the
lumbar area device until getting top
comfort while driving.
Press the following parts of the joystick:
top: inflates the cushion;
bottom: deflates the cushion;
front: inflates the upper part of the
cushion;
rear: inflates the lower part of the
cushion.
IMPORTANT The electrical adjustment is
only allowed when the ignition device is
turned to ON and for about 2 minutes
after it is turned to STOP. The seat can
also be moved after opening/closing the
door for about 2 minutes; car
locking/unlocking or switching on of the
centre front ceiling light.
Seat angle adjustment (tilting)
(where provided)
The seat angle can be set to four
positions. Lift or push the front part of
control 1 to move the front part of the
seat in the corresponding direction.
Release control 1 when the seat has
reached the desired position.Backrest width adjustment
(where provided)
Push the switches 4 fig. 15 to regulate
the width of the backrest through the
lateral paddings.
Storing the driver’s seat positions
Buttons 5 fig. 16 allow you to store and
recall three different driver’s seat
positions.
You can store and recall for 20 minutes
with the starter switch in the STOP
position or with the starter switch in the
ON position, the engine running and the
vehicle moving. The performed position
memorisation is confirmed by an acoustic
warning.
To memorise a seat position, adjust it
with the various controls, then press the
button where you want to memorise the
position for 1.5 seconds. When a new
seat position is memorised, the
1504066V0003EM
1604066V0015EM
20
KNOWING YOUR CAR
Page 23 of 244
previously memorised position on the
same button is automatically
overwritten.
Recalling a memorised position is also
possible for about 3 minutes after the
doors are opened and about 1 minute
after the engine is stopped. To recall a
memorised position, press the relevant
button briefly.
EASY ENTRY FUNCTION
The Easy Entry function is designed to
retract the driver side seat automatically
by 2.36 in (60 mm) to make it easier for
the driver to get in and out of the car.
The movement is activated only if the
seat is set to a driving position which is in
front of the B pillar of the car.
The function is associated with
electrically adjustable front seats for
each of the three stored positions.
The Easy Entry function can be
activated/deactivated using the Connect
system.Activating entrance mode
With the door open and the starter device
at STOP, the driver side seat will be in a
position retracted by 2.36 in (60 mm)
with respect to the driving position set by
the user.
When the door is closed and the starter
device is in the ON position, the seat will
automatically return to the set driving
position.
NOTE If the seat is moved manually while
it is still in retracted position, it will
remain in the new set position when the
car is entered again.
Activating exit mode
In order to help the driver get out of the
car, the driver side seat will move back by
2.36 in (60 mm) when the starter device
is in STOP mode and the driver side door
is opened.
NOTE Pressing any button on the seat
memory or control panel will immediately
interrupt the automatic positioning
function (antipanic function). The
operation must be repeated to complete
the function.
REAR SEATS
11)
The rear seats allow for:
three passengers.
SPLIT FOLDING REAR SEAT
Partial extension of the luggage
compartment (1/3 or 2/3)
6)
Extending the right side of the luggage
compartment (1/3 of the rear seat)
allows you to carry two passengers on
the left part of the rear seat, while
extending the left side (2/3 of the rear
seat) allows you to carry one passenger.
Proceed as follows:
completely lower the rear seat head
restraints;
place the seat belt so that it doesn't
impede the movement of the backrest
while tilting it;
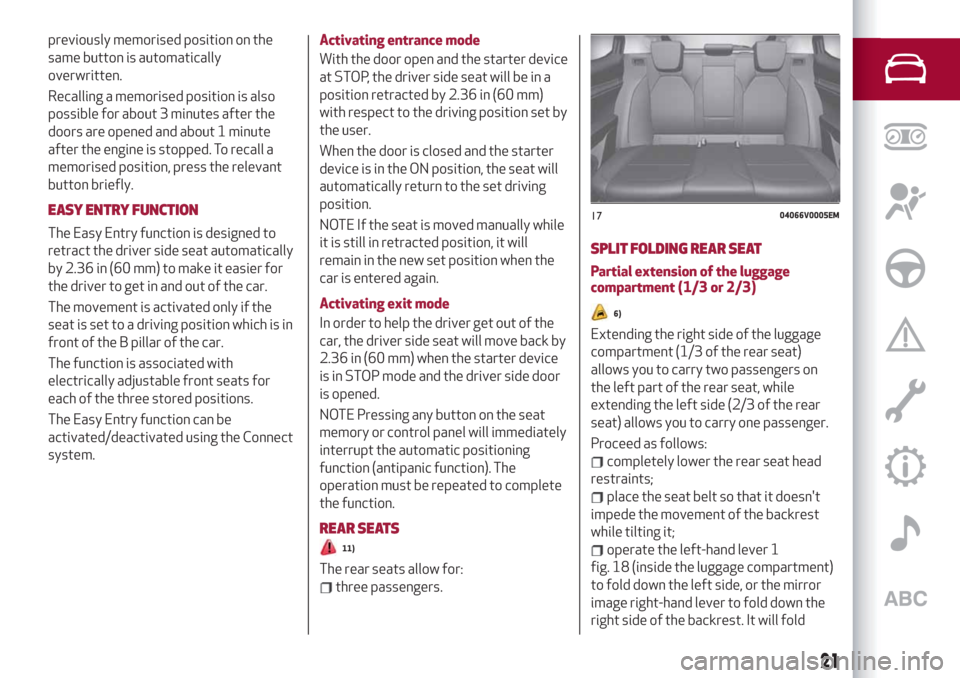
operate the left-hand lever 1
fig. 18 (inside the luggage compartment)
to fold down the left side, or the mirror
image right-hand lever to fold down the
right side of the backrest. It will fold
1704066V0005EM
21
Page 29 of 244
AUTO FUNCTION (Dusk sensor)
This is implemented by an infrared LED
sensor on the windscreen that works in
conjunction with the rain sensor. It is able
to detect variations in the outside light
level based on the light sensitivity set
through the Connect system.
The dusk sensor sensitivity can be
adjusted according to 3 levels: level
1=minimum sensitivity, level 2=average
sensitivity, level 3=maximum sensitivity.
The higher the sensitivity set, the lesser
is the external light variation needed to
switch the lights on (e.g. with a setting on
level 3 at sunset the headlights come on
earlier than levels 1 and 2).
Function activation
Turn the light switch to the
position.
IMPORTANT The function can only be
activated with the ignition device at ON.
Function deactivation
To deactivate the function, turn the light
switch to a position other than
.
DIPPED HEADLIGHTS
Turn the light switch toto switch on
the side lights, the lights on the
instrument panel and the dipped beam
headlights.
The
warning light switches on in the
instrument panel.
DAYTIME RUNNING LIGHTS (DRL) AND
SIDE LIGHTS (Daytime Running Lights)
(where provided)
17) 18)
With the ignition device turned to ON and
the light switch turned to position
the
daytime running lights are automatically
activated; the other lights and interior
lighting remain off.
Where provided, when the direction
indicators are activated, the
corresponding DRL will be dimmed (on
35W Bi-Xenon Headlamps, the DRL will
be turned off), until the direction
indicators are deactivated.
Where provided, the DRL can be
activated/deactivated from Connect
system, by selecting the following
functions in sequence on the main MENU:
"Settings", "Lights" and "Daytime Running
Lights".
IMPORTANT For markets where DRL use
is not required, these lights work as side
lights and they are switched on and off
jointly with the main beam headlights.
FRONT FOG LIGHTS
(where provided)
The fog light switch is integrated with the
light switch.
Press the
button to turn on the fog
lights with side lights and dipped beam
headlights on.To turn off the fog lights, press the
button again or turn the switch to the
position.
The fog lights are switched on with the
dipped beam headlights or DRL on (the
latter work as side lights) and are
switched on when switching on the main
beam headlights but not when the main
beam headlights are flashed only.
If the fog lights are not switched off
before stopping the engine, the next time
the engine is started they will switch on
again.
Cornering lights
(where provided)
The fog lights perform cornering
function. This function allows to
illuminate the road or a corner better by
lighting the corresponding fog light.
The cornering function can be
deactivated on the Connect system by
selecting the following functions in
sequence on the main menu: "Settings",
"Lights" and "Cornering Lights".
REAR FOG LIGHT
The rear fog light switch is integrated
with the light switch.
Press the
button to switch the light
on/off.
The rear fog light switches on only when
the dipped beam headlights or fog lights
27
Page 30 of 244
are switched on. The light can be
switched off by pressing the
button
again or by switching off the dipped
beam headlights.
When the engine is stopped with the rear
fog lights on, the next time the engine is
started the lights will, however, be off.
PARKING LIGHTS
They are switched on if, within a few
seconds from stopping the engine, the
light switch is put first in the
position
and then the
position. All side lights
switch on, if you want to leave only those
on one side (right/left) switched on, you
need to move the direction indicators
control on the position on the side you
wish to leave on.
When a front door is opened with the
light switch in position
, a tone will be
heard to inform the driver that the
parking lights are on.
The
warning light switches on in the
instrument panel.
IMPORTANT Turning the ignition switch
to ON turns off the parking lights, which
were on only on one side.
HEADLIGHTS OFF TIMER
The "Follow Me" function delays the
switching off of the headlights after the
car has been stopped.
The function can be enabled from theConnect system by selecting the
following functions from the main menu
in sequence: "Settings", "Lights" and
"Follow me"; the side lights and the
dipped beam headlights stay on for a
time that can be set between 30, 60 and
90 seconds.
Function activation
With the headlights on, take the ignition
device to the STOP position: the timer
starts when the light switch is turned to
the
position.
IMPORTANT To activate this function the
headlights must be deactivated within
2 minutes after the ignition device has
been taken to STOP.
Function deactivation
This function is deactivated by switching
on the headlights, the side lights or
bringing the ignition device to ON.
AFS FUNCTION (Adaptive Frontlight
System)
(where provided)
This is a system combined with Xenon
headlights (Bi-Xenon Headlamps 35W
version) which directs the main light
beam, horizontally and vertically, and
continuously and automatically adapts it
to the driving conditions round
bends/when cornering.
The system directs the light beam to light
up the road in the best way, taking intoaccount the speed of the car, the
bend/corner angle and the speed of
steering.
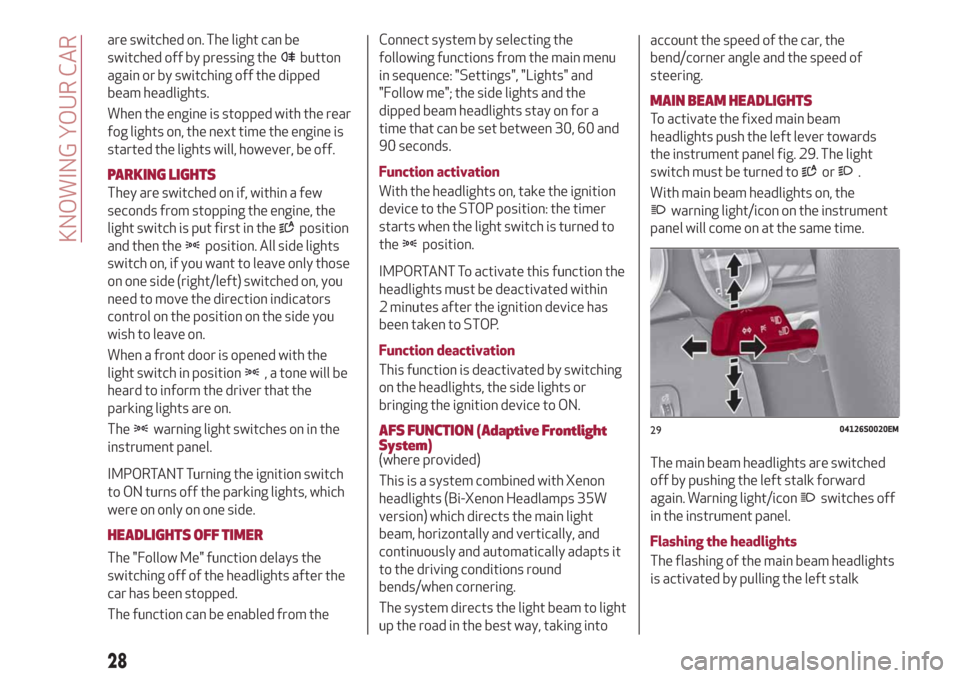
MAIN BEAM HEADLIGHTS
To activate the fixed main beam
headlights push the left lever towards
the instrument panel fig. 29. The light
switch must be turned to
or.
With main beam headlights on, the
warning light/icon on the instrument
panel will come on at the same time.
The main beam headlights are switched
off by pushing the left stalk forward
again. Warning light/icon
switches off
in the instrument panel.
Flashing the headlights
The flashing of the main beam headlights
is activated by pulling the left stalk
2904126S0020EM
28
KNOWING YOUR CAR
Page 36 of 244
Air flow to the windscreen and front
side window vents to
demist/defrost them.
Air flow at central and side
dashboard vents to ventilate the
chest and the face during the hot
season.
Air flow to the front and rear
footwell vents. This air distribution
setting heats the passenger
compartment most quickly, giving a
prompt sensation of warmth.
Air flow distributed between
footwell vents (hotter air) and
central and side dashboard vents
(cooler air). This air distribution
setting is useful in spring and
autumn on sunny days.
Air flow distributed between
footwell vents and windscreen and
front side window defrosting/
demisting vents. This distribution
setting allows the passenger
compartment to be warmed
effectively and prevents the
windows from misting.
Air flow distribution between
windscreen demisting/defrosting
vents and side and central
dashboard vents. This allows air to
be sent to the windscreen in
conditions of strong sunlight.
Air flow distribution to all diffusers
on the vehicle.
In AUTO mode, the air conditioner
automatically manages the air
distribution. When set manually, the air
distribution is indicated by the respective
symbols on the Connect system display
switching on.
START & STOP EVO
The automatic dual zone climate control
system manages the Start&Stop Evo
(engine off when the vehicle speed is
0 mph (0 km/h) to ensure adequate
comfort inside the vehicle.In particular, the climate control system
turns off the Stop & Start Evo if:
the climate control system is in AUTO
mode (LED on the button switched on)
and the temperature conditions inside
the car are far from a comfort
temperature;
the climate control system is in LO
maximum cooling;
the climate control system is in HI
maximum heating;
the climate control system is in the
MAX-DEF status.
With Stop & Start Evo on (engine off and
vehicle speed equal to 0 mph (0 km/h)),
the flow is reduced as much as possible,
to maintain the passenger compartment
comfort conditions for longer.
IMPORTANT
2)The system uses R1234yf coolant gas,
which does not pollute the environment in the
event of accidental leakage. Under no
circumstances use R134a and R12 fluids,
which are incompatible with the components
of the system.
34
KNOWING YOUR CAR
Page 39 of 244
Pressing button 2 again during automatic
movement of the roof will stop it.
BLIND MOVEMENT
The sun blind is electrically operated.
Press the
symbol on button 3fig. 37:
to open the sun blind.
Press button 3
symbol: to close the
sun blind.
The automatic motion can be interrupted
in any position by pressing button
3 again.
If the roof is open, the sun blind closing
control will also close the roof.
ANTI-PINCH DEVICE
The sun roof has an anti-pinch safety
system capable of detecting the
presence of an obstacle during the
closing movement: if this happens, the
system intervenes and the movement of
the roof is immediately reversed into
opening.
INITIALISATION PROCEDURE
Automatic operation of the sunroof must
be initialised again in case of faulty
sunroof operation.
IMPORTANT The anti-pinch safety
function is deactivated during the
initialisation procedure.
Proceed as follows:
press button 1 next to thesymbol
to bring the roof into completely closed
position;
bring the ignition device to STOP and
wait at least 10 seconds. Then set the
ignition device to AVV and start the
engine;
press thesymbol on button 1 and
hold it down; after 10 seconds you will
hear the electric motors of the roof and
blind stop in sequence;
release the button and within
5 seconds, press the
symbol on
button 1 and hold it down (until the cycle
end): the roof will automatically perform
a complete open and close cycle (to
indicate that the initialisation has been
successful). If this does not occur, the
procedure must be restarted from the
beginning.
WARNING
21)When leaving the vehicle, always make
sure you have the key with you to avoid the
risk of injury to those still inside the car due
to accidental operation of the sun roof.
Improper use of the roof can be dangerous.
Before and during operation, always check
that no-one is exposed to the risk of being
injured by the moving sunroof or by objects
getting caught or hit by it.
IMPORTANT
11)Do not open the sun roof if a roof rack or
crossbars are fitted. Do not open the sun
roof if there is snow or ice on it: you may
damage it.
37
Page 112 of 244
STARTING THE ENGINE
STARTING THE ENGINE
Before starting the engine, adjust the
seat, the interior rear view mirrors, the
door mirrors and fasten the seat belt
correctly.
Never press the accelerator pedal for
starting the engine.
If necessary, messages indicating the
starting procedure can be shown on the
display.
101) 102) 103)
30) 31) 33)
Proceed as follows:
engage the electric parking brake and
set the gear lever to P (Park) or N
(Neutral),
fully depress the brake pedal without
touching the accelerator;
briefly press the ignition button;
if the engine doesn't start within a few
seconds, you need to repeat the
procedure.
if the problem persists, contact an Alfa
Romeo Dealership.
PROCEDURE FOR DIESEL VERSIONS
32)
Proceed as follows:
engage the parking brake and set the
gear lever to P (Park) or N (Neutral);
fully depress the brake pedal without
touching the accelerator;
briefly press the ignition button;
if the engine doesn't start within a few
seconds, you need to repeat the
procedure.
If the problem persists, contact an Alfa
Romeo Dealership.
ENGINE STARTING FAILURE
Starting the engine with electronic key
battery (Keyless Start) run down or flat
If the ignition device does not respond
when the relevant button is pressed the
electronic key battery might be run down
or flat. Therefore, the system does not
detect the presence of the electronic key
on board the car and displays a dedicated
message.
In this case, follow the instructions in
paragraph "Starting with flat key battery"
in the "Knowing your car" chapter and
start the engine normally.
STOPPING THE ENGINE
33)
To stop the engine, proceed as follows:
park the car in a position that is not
dangerous for oncoming traffic;
engage P (Park) mode;
with engine idling, press the start
button.
Cars with electronic key (Keyless Start)
If the car speed is above 5 mph (8 km/h),
it is still possible to stop the engine if a
gear operating mode other than P (Park)
is selected. To switch off the engine in
this situation, hold down the ignition
device button for a while or press it
3 times in a row within a few seconds.
WARNING
101)It is dangerous to run the engine in
enclosed areas. The engine takes in oxygen
and releases carbon dioxide, carbon
monoxide and other toxic gases.
102)The electro-hydraulic braking system
is not active until the engine starts running.
So, the brake pedal travel will be longer than
normal. This does not indicate a fault.
103)Do not start the engine by pushing,
towing or driving downhill. These
manoeuvres may damage the catalytic
converter.
110
STARTING AND DRIVING
Page 116 of 244
AUTOMATIC TRANSMISSION
The vehicle is equipped with an 8-speed
automatic transmission.
The transmission can operate in two
different modes: “Automatic” or
“Sequential”.
GEAR LEVER
107) 108) 109)
34) 35)
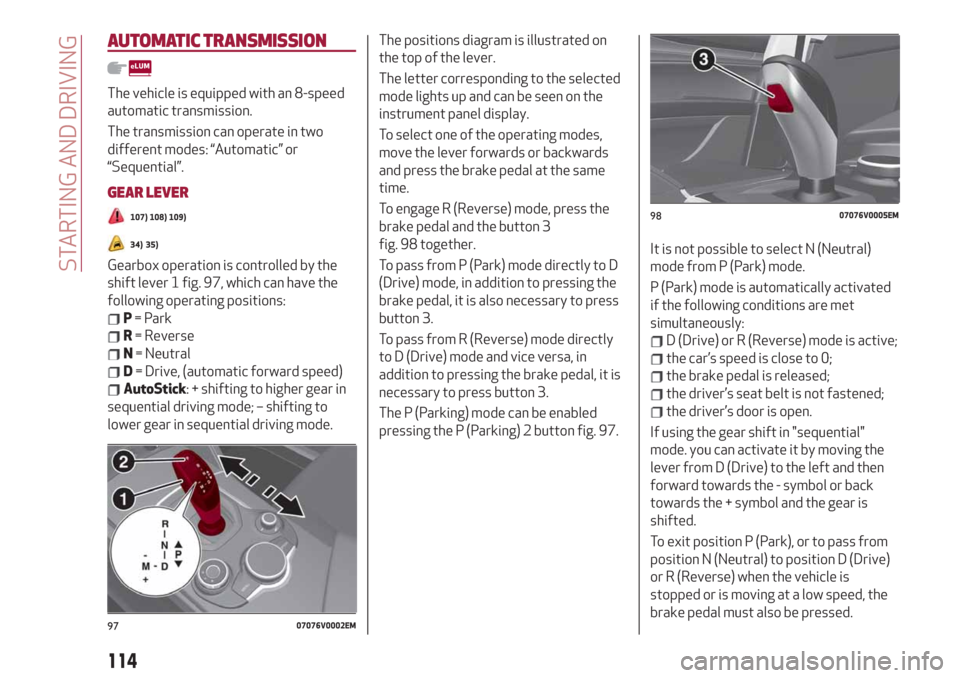
Gearbox operation is controlled by the
shift lever 1 fig. 97, which can have the
following operating positions:
P= Park
R= Reverse
N= Neutral
D= Drive, (automatic forward speed)
AutoStick: + shifting to higher gear in
sequential driving mode; – shifting to
lower gear in sequential driving mode.The positions diagram is illustrated on
the top of the lever.
The letter corresponding to the selected
mode lights up and can be seen on the
instrument panel display.
To select one of the operating modes,
move the lever forwards or backwards
and press the brake pedal at the same
time.
To engage R (Reverse) mode, press the
brake pedal and the button 3
fig. 98 together.
To pass from P (Park) mode directly to D
(Drive) mode, in addition to pressing the
brake pedal, it is also necessary to press
button 3.
To pass from R (Reverse) mode directly
to D (Drive) mode and vice versa, in
addition to pressing the brake pedal, it is
necessary to press button 3.
The P (Parking) mode can be enabled
pressing the P (Parking) 2 button fig. 97.It is not possible to select N (Neutral)
mode from P (Park) mode.
P (Park) mode is automatically activated
if the following conditions are met
simultaneously:
D (Drive) or R (Reverse) mode is active;
the car’s speed is close to 0;
the brake pedal is released;
the driver’s seat belt is not fastened;
the driver’s door is open.
If using the gear shift in "sequential"
mode. you can activate it by moving the
lever from D (Drive) to the left and then
forward towards the - symbol or back
towards the + symbol and the gear is
shifted.
To exit position P (Park), or to pass from
position N (Neutral) to position D (Drive)
or R (Reverse) when the vehicle is
stopped or is moving at a low speed, the
brake pedal must also be pressed.
9707076V0002EM
9807076V0005EM
114
STARTING AND DRIVING