Door lights Alfa Romeo Stelvio 2019 Owner's Manual
[x] Cancel search | Manufacturer: ALFA ROMEO, Model Year: 2019, Model line: Stelvio, Model: Alfa Romeo Stelvio 2019Pages: 244, PDF Size: 4.95 MB
Page 11 of 244
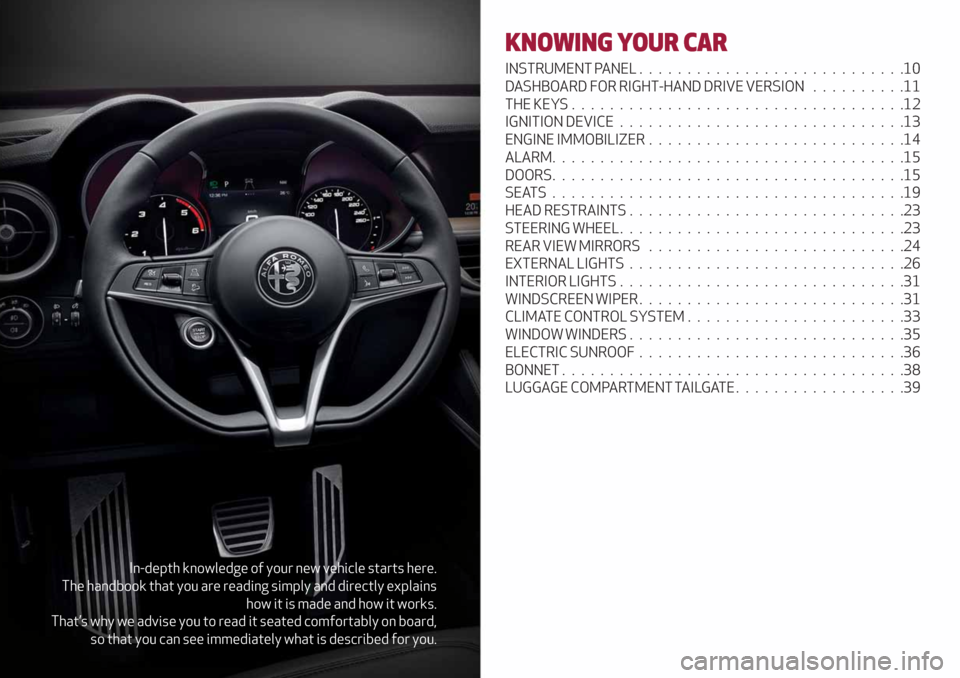
In-depth knowledge of your new vehicle starts here.
The handbook that you are reading simply and directly explains
how it is made and how it works.
That’s why we advise you to read it seated comfortably on board,
so that you can see immediately what is described for you.
KNOWING YOUR CAR
INSTRUMENT PANEL............................10
DASHBOARD FOR RIGHT-HAND DRIVE VERSION . . ........11
THEKEYS...................................12
IGNITION DEVICE..............................13
ENGINE IMMOBILIZER...........................14
ALARM.....................................15
DOORS.....................................15
SEATS.....................................19
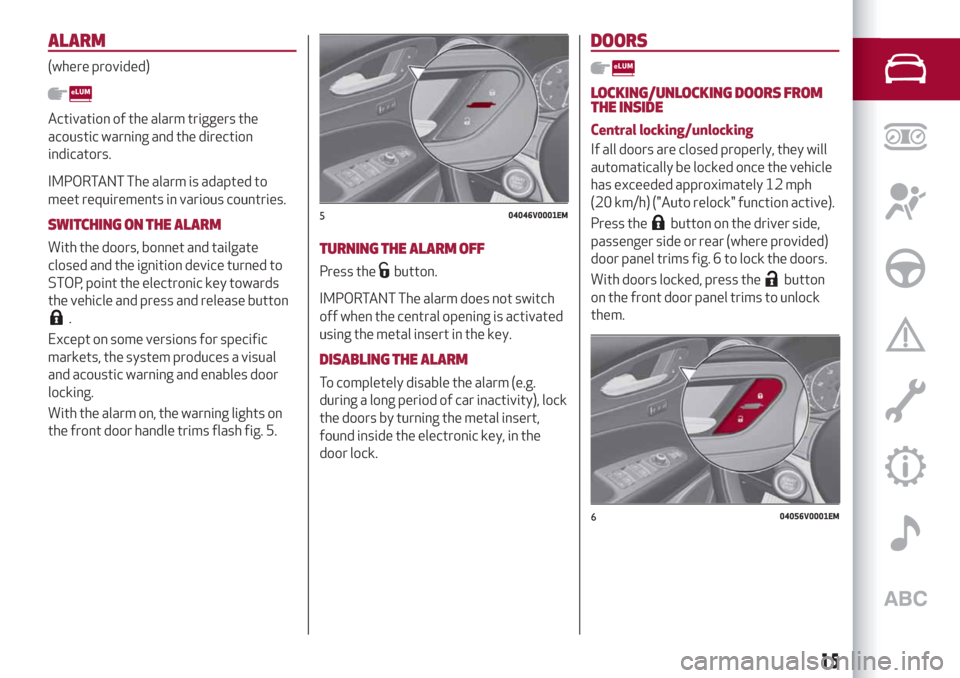
HEAD RESTRAINTS.............................23
STEERING WHEEL..............................23
REAR VIEW MIRRORS...........................24
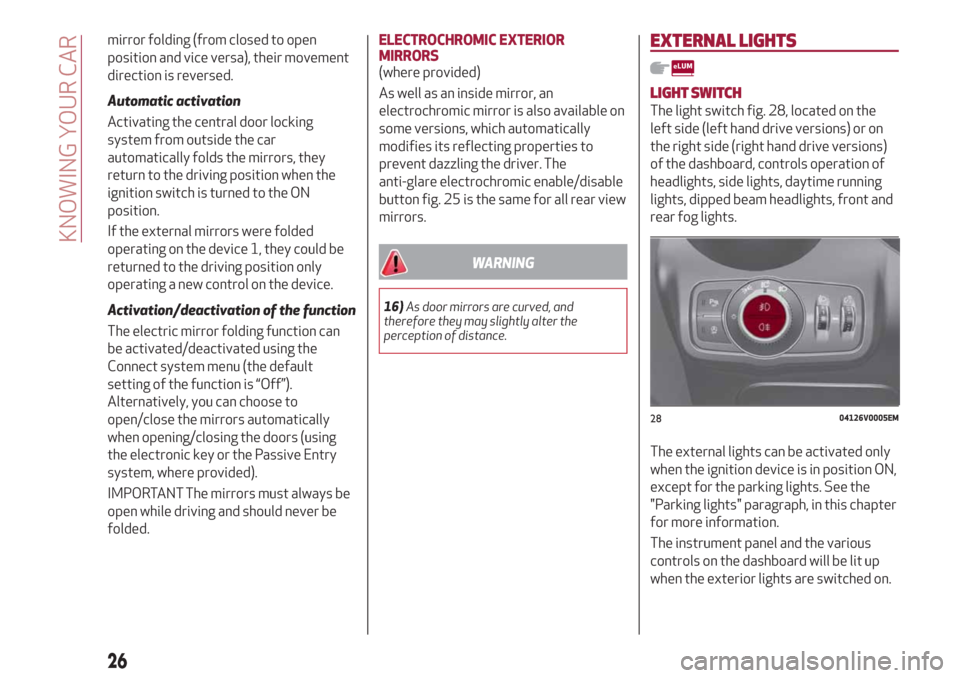
EXTERNAL LIGHTS .............................26
INTERIOR LIGHTS..............................31
WINDSCREEN WIPER . ...........................31
CLIMATE CONTROL SYSTEM.......................33
WINDOW WINDERS.............................35
ELECTRIC SUNROOF............................36
BONNET....................................38
LUGGAGE COMPARTMENT TAILGATE..................39
Page 14 of 244
THE KEYS
ELECTRONIC KEY
1)
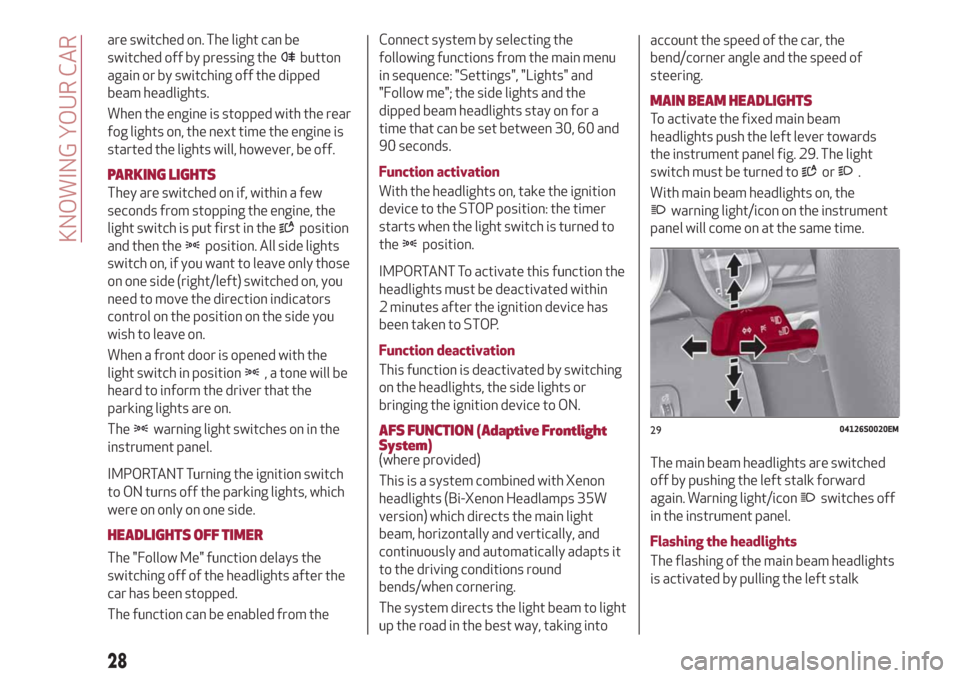
1)
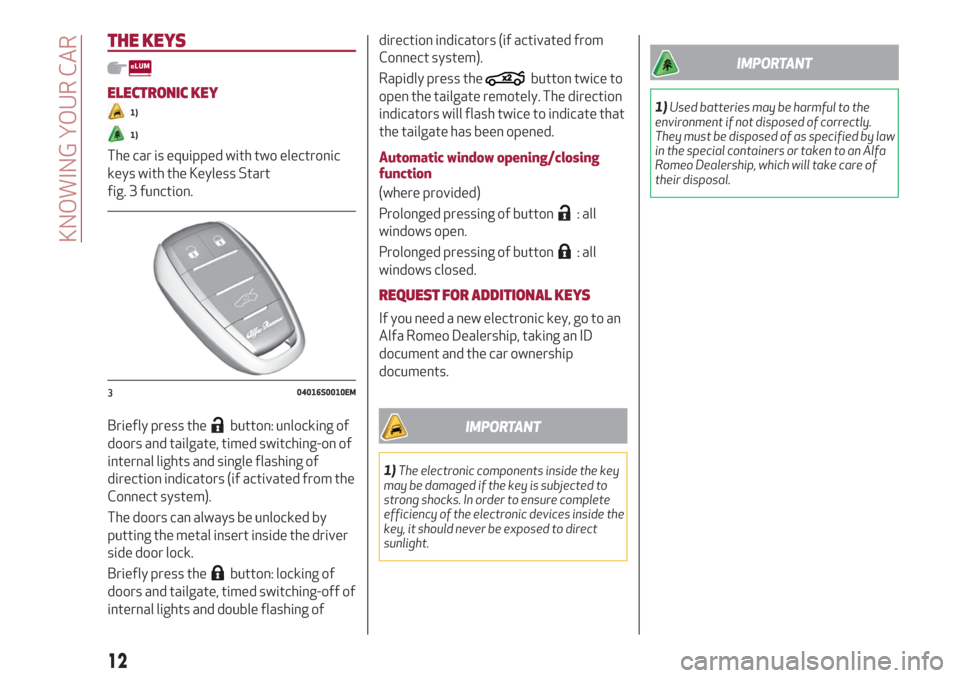
The car is equipped with two electronic
keys with the Keyless Start
fig. 3 function.
Briefly press the
button: unlocking of
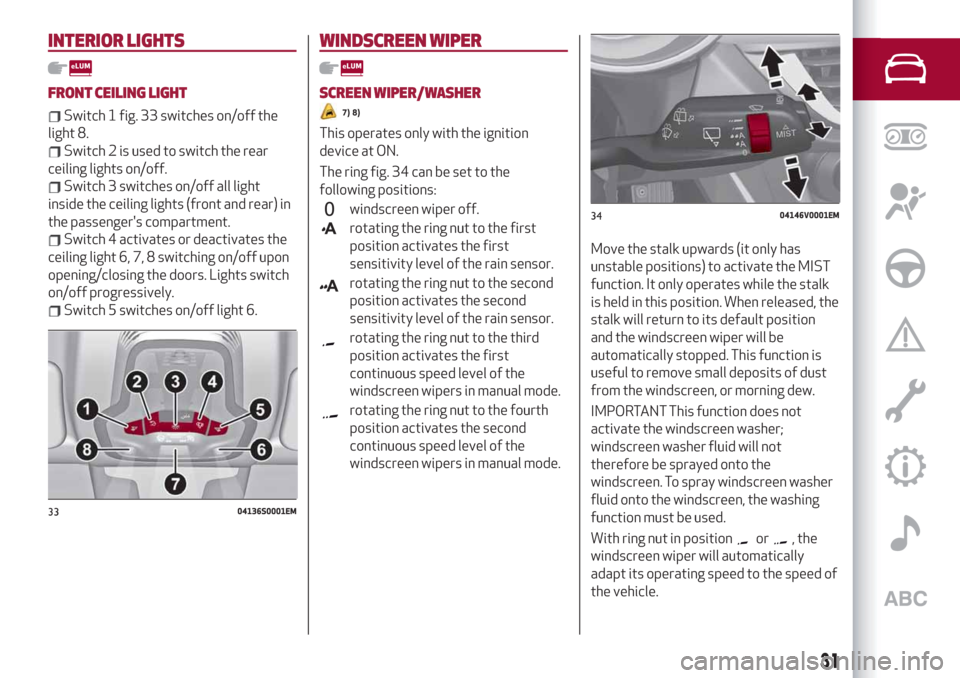
doors and tailgate, timed switching-on of
internal lights and single flashing of
direction indicators (if activated from the
Connect system).
The doors can always be unlocked by
putting the metal insert inside the driver
side door lock.
Briefly press the
button: locking of
doors and tailgate, timed switching-off of
internal lights and double flashing ofdirection indicators (if activated from
Connect system).
Rapidly press the
button twice to
open the tailgate remotely. The direction
indicators will flash twice to indicate that
the tailgate has been opened.
Automatic window opening/closing
function
(where provided)
Prolonged pressing of button
: all
windows open.
Prolonged pressing of button
: all
windows closed.
REQUEST FOR ADDITIONAL KEYS
If you need a new electronic key, go to an
Alfa Romeo Dealership, taking an ID
document and the car ownership
documents.
IMPORTANT
1)The electronic components inside the key
may be damaged if the key is subjected to
strong shocks. In order to ensure complete
efficiency of the electronic devices inside the
key, it should never be exposed to direct
sunlight.
IMPORTANT
1)Used batteries may be harmful to the
environment if not disposed of correctly.
They must be disposed of as specified by law
in the special containers or taken to an Alfa
Romeo Dealership, which will take care of
their disposal.
304016S0010EM
12
KNOWING YOUR CAR
Page 15 of 244
IGNITION DEVICE
OPERATION
1) 2) 3) 4) 5)
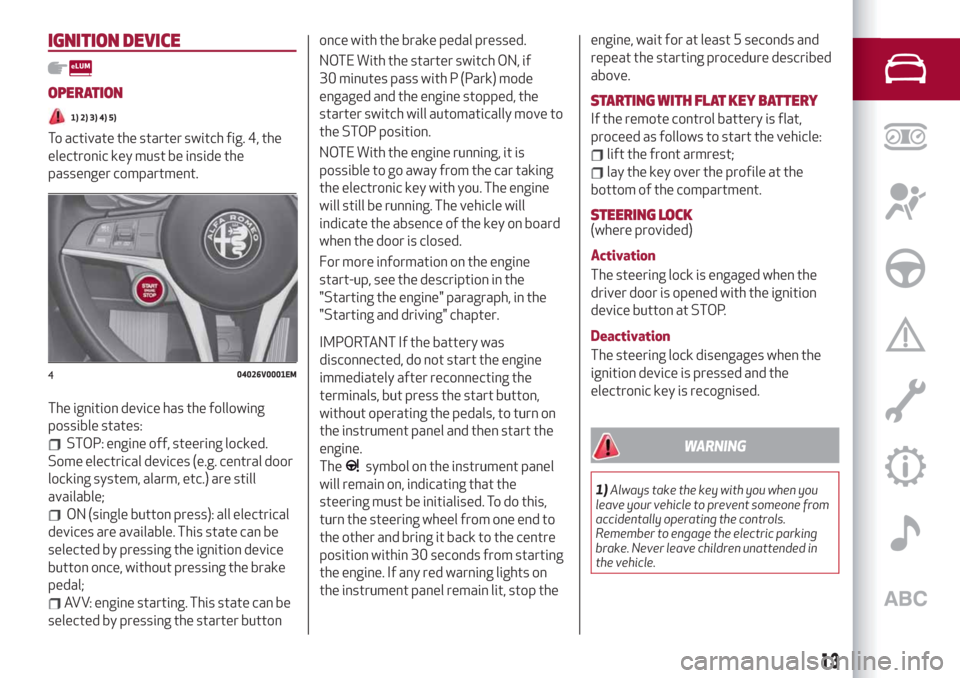
To activate the starter switch fig. 4, the
electronic key must be inside the
passenger compartment.
The ignition device has the following
possible states:
STOP: engine off, steering locked.
Some electrical devices (e.g. central door
locking system, alarm, etc.) are still
available;
ON (single button press): all electrical
devices are available. This state can be
selected by pressing the ignition device
button once, without pressing the brake
pedal;
AVV: engine starting. This state can be
selected by pressing the starter buttononce with the brake pedal pressed.
NOTE With the starter switch ON, if
30 minutes pass with P (Park) mode
engaged and the engine stopped, the
starter switch will automatically move to
the STOP position.
NOTE With the engine running, it is
possible to go away from the car taking
the electronic key with you. The engine
will still be running. The vehicle will
indicate the absence of the key on board
when the door is closed.
For more information on the engine
start-up, see the description in the
"Starting the engine" paragraph, in the
"Starting and driving" chapter.
IMPORTANT If the battery was
disconnected, do not start the engine
immediately after reconnecting the
terminals, but press the start button,
without operating the pedals, to turn on
the instrument panel and then start the
engine.
The
symbol on the instrument panel
will remain on, indicating that the
steering must be initialised. To do this,
turn the steering wheel from one end to
the other and bring it back to the centre
position within 30 seconds from starting
the engine. If any red warning lights on
the instrument panel remain lit, stop theengine, wait for at least 5 seconds and
repeat the starting procedure described
above.
STARTING WITH FLAT KEY BATTERY
If the remote control battery is flat,
proceed as follows to start the vehicle:
lift the front armrest;
lay the key over the profile at the
bottom of the compartment.
STEERING LOCK(where provided)
Activation
The steering lock is engaged when the
driver door is opened with the ignition
device button at STOP.
Deactivation
The steering lock disengages when the
ignition device is pressed and the
electronic key is recognised.
WARNING
1)Always take the key with you when you
leave your vehicle to prevent someone from
accidentally operating the controls.
Remember to engage the electric parking
brake. Never leave children unattended in
the vehicle.
404026V0001EM
13
Page 16 of 244
2)It is absolutely forbidden to carry out any
after-market operation involving steering
system or steering column modifications
(e.g. installation of anti-theft device) that
could adversely affect performance,
invalidate the warranty, cause SERIOUS
SAFETY PROBLEMS and also result in the
car not meeting type-approval
requirements.
3)Before leaving the vehicle, ALWAYS
engage the handbrake. On versions
equipped with automatic transmission,
activate mode P (Park) and press the ignition
device to set it to STOP. When leaving the
vehicle, always lock all the doors by pressing
the button on the handle.
4)For versions equipped with the Keyless
Start system, do not leave the electronic key
inside or near the car or in a place accessible
to children. Do not leave the vehicle with the
ignition device in ON position. A child could
activate the electric window winders, other
controls or even start the vehicle.
5)If the ignition device has been tampered
with (e.g. an attempted theft), have it
checked over by the Alfa Romeo Dealership
before driving again.ENGINE IMMOBILIZER
The Engine Immobilizer system prevents
unauthorised use of the vehicle
preventing to start the engine.
The system does not need to be
enabled/activated: operation is
automatic, regardless of the fact that the
vehicle's doors are locked or unlocked.
When the ignition device is set to ON, the
Engine Immobilizer system identifies the
code transmitted by the key. If the code
is recognised as valid, the Engine
Immobilizer system enables engine
starting.
When the ignition device is brought back
to STOP, the Engine Immobilizer system
deactivates the control unit controlling
the engine, thus preventing its starting.
For the correct engine starting
procedures, see the instructions in the
"Starting the engine" paragraph,
"Starting and driving" chapter.Irregular operation
If, during starting, the key code is not
correctly recognised, theicon is
displayed on the instrument panel (see
the instructions in the "Warning lights and
messages" paragraph, "Knowing the
instrument panel" chapter). This
condition leads to the engine switching
off after 2 seconds. In this case, bring the
ignition device to STOP and then to ON; if
it is still blocked, try with the other keys
provided. If it is still not possible to start
the engine, contact an Alfa Romeo
Dealership.
If the
icon is displayed while driving,
this means that the system is running a
self-diagnosis (e.g. due to a voltage drop).
If the display persists, contact an Alfa
Romeo Dealership.
14
KNOWING YOUR CAR
Page 17 of 244
ALARM
(where provided)
Activation of the alarm triggers the
acoustic warning and the direction
indicators.
IMPORTANT The alarm is adapted to
meet requirements in various countries.
SWITCHING ON THE ALARM
With the doors, bonnet and tailgate
closed and the ignition device turned to
STOP, point the electronic key towards
the vehicle and press and release button
.
Except on some versions for specific
markets, the system produces a visual
and acoustic warning and enables door
locking.
With the alarm on, the warning lights on
the front door handle trims flash fig. 5.
TURNING THE ALARM OFF
Press thebutton.
IMPORTANT The alarm does not switch
off when the central opening is activated
using the metal insert in the key.
DISABLING THE ALARM
To completely disable the alarm (e.g.
during a long period of car inactivity), lock
the doors by turning the metal insert,
found inside the electronic key, in the
door lock.
DOORS
LOCKING/UNLOCKING DOORS FROM
THE INSIDE
Central locking/unlocking
If all doors are closed properly, they will
automatically be locked once the vehicle
has exceeded approximately 12 mph
(20 km/h) ("Auto relock" function active).
Press the
button on the driver side,
passenger side or rear (where provided)
door panel trims fig. 6 to lock the doors.
With doors locked, press the
button
on the front door panel trims to unlock
them.
504046V0001EM
604056V0001EM
15
Page 28 of 244
mirror folding (from closed to open
position and vice versa), their movement
direction is reversed.
Automatic activation
Activating the central door locking
system from outside the car
automatically folds the mirrors, they
return to the driving position when the
ignition switch is turned to the ON
position.
If the external mirrors were folded
operating on the device 1, they could be
returned to the driving position only
operating a new control on the device.
Activation/deactivation of the function
The electric mirror folding function can
be activated/deactivated using the
Connect system menu (the default
setting of the function is “Off”).
Alternatively, you can choose to
open/close the mirrors automatically
when opening/closing the doors (using
the electronic key or the Passive Entry
system, where provided).
IMPORTANT The mirrors must always be
open while driving and should never be
folded.ELECTROCHROMIC EXTERIOR
MIRRORS
(where provided)
As well as an inside mirror, an
electrochromic mirror is also available on
some versions, which automatically
modifies its reflecting properties to
prevent dazzling the driver. The
anti-glare electrochromic enable/disable
button fig. 25 is the same for all rear view
mirrors.
WARNING
16)As door mirrors are curved, and
therefore they may slightly alter the
perception of distance.
EXTERNAL LIGHTS
LIGHT SWITCH
The light switch fig. 28, located on the
left side (left hand drive versions) or on
the right side (right hand drive versions)
of the dashboard, controls operation of
headlights, side lights, daytime running
lights, dipped beam headlights, front and
rear fog lights.
The external lights can be activated only
when the ignition device is in position ON,
except for the parking lights. See the
"Parking lights" paragraph, in this chapter
for more information.
The instrument panel and the various
controls on the dashboard will be lit up
when the exterior lights are switched on.
2804126V0005EM
26
KNOWING YOUR CAR
Page 30 of 244
are switched on. The light can be
switched off by pressing the
button
again or by switching off the dipped
beam headlights.
When the engine is stopped with the rear
fog lights on, the next time the engine is
started the lights will, however, be off.
PARKING LIGHTS
They are switched on if, within a few
seconds from stopping the engine, the
light switch is put first in the
position
and then the
position. All side lights
switch on, if you want to leave only those
on one side (right/left) switched on, you
need to move the direction indicators
control on the position on the side you
wish to leave on.
When a front door is opened with the
light switch in position
, a tone will be
heard to inform the driver that the
parking lights are on.
The
warning light switches on in the
instrument panel.
IMPORTANT Turning the ignition switch
to ON turns off the parking lights, which
were on only on one side.
HEADLIGHTS OFF TIMER
The "Follow Me" function delays the
switching off of the headlights after the
car has been stopped.
The function can be enabled from theConnect system by selecting the
following functions from the main menu
in sequence: "Settings", "Lights" and
"Follow me"; the side lights and the
dipped beam headlights stay on for a
time that can be set between 30, 60 and
90 seconds.
Function activation
With the headlights on, take the ignition
device to the STOP position: the timer
starts when the light switch is turned to
the
position.
IMPORTANT To activate this function the
headlights must be deactivated within
2 minutes after the ignition device has
been taken to STOP.
Function deactivation
This function is deactivated by switching
on the headlights, the side lights or
bringing the ignition device to ON.
AFS FUNCTION (Adaptive Frontlight
System)
(where provided)
This is a system combined with Xenon
headlights (Bi-Xenon Headlamps 35W
version) which directs the main light
beam, horizontally and vertically, and
continuously and automatically adapts it
to the driving conditions round
bends/when cornering.
The system directs the light beam to light
up the road in the best way, taking intoaccount the speed of the car, the
bend/corner angle and the speed of
steering.
MAIN BEAM HEADLIGHTS
To activate the fixed main beam
headlights push the left lever towards
the instrument panel fig. 29. The light
switch must be turned to
or.
With main beam headlights on, the
warning light/icon on the instrument
panel will come on at the same time.
The main beam headlights are switched
off by pushing the left stalk forward
again. Warning light/icon
switches off
in the instrument panel.
Flashing the headlights
The flashing of the main beam headlights
is activated by pulling the left stalk
2904126S0020EM
28
KNOWING YOUR CAR
Page 33 of 244
INTERIOR LIGHTS
FRONT CEILING LIGHT
Switch 1 fig. 33 switches on/off the
light 8.
Switch 2 is used to switch the rear
ceiling lights on/off.
Switch 3 switches on/off all light
inside the ceiling lights (front and rear) in
the passenger's compartment.
Switch 4 activates or deactivates the
ceiling light 6, 7, 8 switching on/off upon
opening/closing the doors. Lights switch
on/off progressively.
Switch 5 switches on/off light 6.
WINDSCREEN WIPER
SCREEN WIPER/WASHER
7) 8)
This operates only with the ignition
device at ON.
The ring fig. 34 can be set to the
following positions:
windscreen wiper off.
rotating the ring nut to the first
position activates the first
sensitivity level of the rain sensor.
rotating the ring nut to the second
position activates the second
sensitivity level of the rain sensor.
rotating the ring nut to the third
position activates the first
continuous speed level of the
windscreen wipers in manual mode.
rotating the ring nut to the fourth
position activates the second
continuous speed level of the
windscreen wipers in manual mode.
Move the stalk upwards (it only has
unstable positions) to activate the MIST
function. It only operates while the stalk
is held in this position. When released, the
stalk will return to its default position
and the windscreen wiper will be
automatically stopped. This function is
useful to remove small deposits of dust
from the windscreen, or morning dew.
IMPORTANT This function does not
activate the windscreen washer;
windscreen washer fluid will not
therefore be sprayed onto the
windscreen. To spray windscreen washer
fluid onto the windscreen, the washing
function must be used.
With ring nut in position
or, the
windscreen wiper will automatically
adapt its operating speed to the speed of
the vehicle.
3304136S0001EM
3404146V0001EM
31
Page 42 of 244
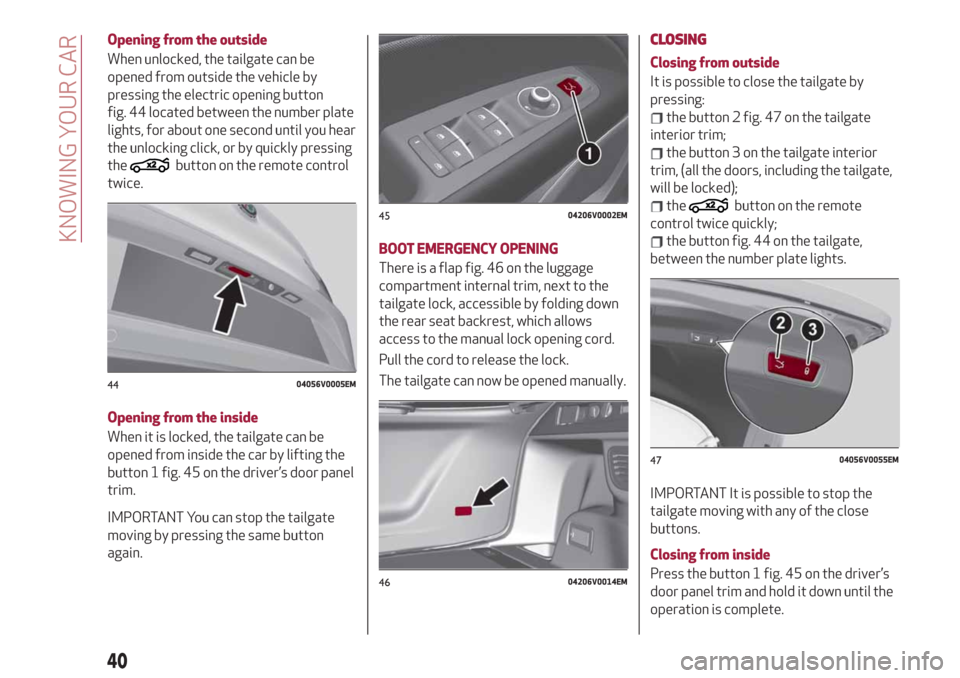
Opening from the outside
When unlocked, the tailgate can be
opened from outside the vehicle by
pressing the electric opening button
fig. 44 located between the number plate
lights, for about one second until you hear
the unlocking click, or by quickly pressing
the
button on the remote control
twice.
Opening from the inside
When it is locked, the tailgate can be
opened from inside the car by lifting the
button 1 fig. 45 on the driver’s door panel
trim.
IMPORTANT You can stop the tailgate
moving by pressing the same button
again.
BOOT EMERGENCY OPENING
There is a flap fig. 46 on the luggage
compartment internal trim, next to the
tailgate lock, accessible by folding down
the rear seat backrest, which allows
access to the manual lock opening cord.
Pull the cord to release the lock.
The tailgate can now be opened manually.
CLOSING
Closing from outside
It is possible to close the tailgate by
pressing:
the button 2 fig. 47 on the tailgate
interior trim;
the button 3 on the tailgate interior
trim, (all the doors, including the tailgate,
will be locked);
thebutton on the remote
control twice quickly;
the button fig. 44 on the tailgate,
between the number plate lights.
IMPORTANT It is possible to stop the
tailgate moving with any of the close
buttons.
Closing from inside
Press the button 1 fig. 45 on the driver’s
door panel trim and hold it down until the
operation is complete.
4404056V0005EM
4504206V0002EM
4604206V0014EM
4704056V0055EM
40
KNOWING YOUR CAR
Page 61 of 244
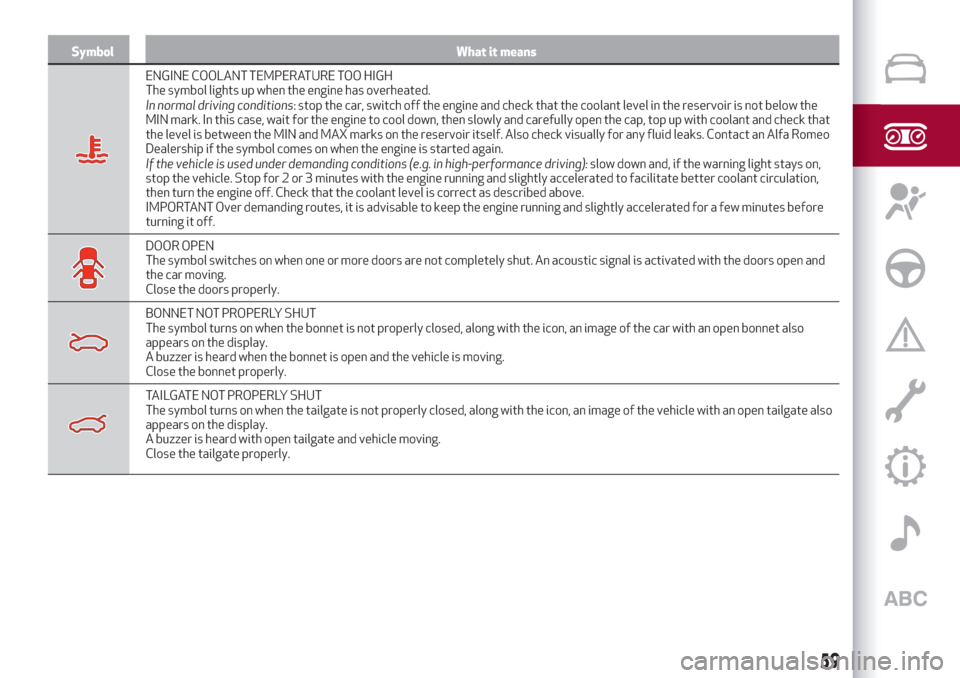
Symbol What it means
ENGINE COOLANT TEMPERATURE TOO HIGH
The symbol lights up when the engine has overheated.
In normal driving conditions: stop the car, switch off the engine and check that the coolant level in the reservoir is not below the
MIN mark. In this case, wait for the engine to cool down, then slowly and carefully open the cap, top up with coolant and check that
the level is between the MIN and MAX marks on the reservoir itself. Also check visually for any fluid leaks. Contact an Alfa Romeo
Dealership if the symbol comes on when the engine is started again.
If the vehicle is used under demanding conditions (e.g. in high-performance driving):slow down and, if the warning light stays on,
stop the vehicle. Stop for 2 or 3 minutes with the engine running and slightly accelerated to facilitate better coolant circulation,
then turn the engine off. Check that the coolant level is correct as described above.
IMPORTANT Over demanding routes, it is advisable to keep the engine running and slightly accelerated for a few minutes before
turning it off.
DOOR OPEN
The symbol switches on when one or more doors are not completely shut. An acoustic signal is activated with the doors open and
the car moving.
Close the doors properly.
BONNET NOT PROPERLY SHUT
The symbol turns on when the bonnet is not properly closed, along with the icon, an image of the car with an open bonnet also
appears on the display.
A buzzer is heard when the bonnet is open and the vehicle is moving.
Close the bonnet properly.
TAILGATE NOT PROPERLY SHUT
The symbol turns on when the tailgate is not properly closed, along with the icon, an image of the vehicle with an open tailgate also
appears on the display.
A buzzer is heard with open tailgate and vehicle moving.
Close the tailgate properly.
59