center console ALFA ROMEO STELVIO 2022 Owners Manual
[x] Cancel search | Manufacturer: ALFA ROMEO, Model Year: 2022, Model line: STELVIO, Model: ALFA ROMEO STELVIO 2022Pages: 256, PDF Size: 10.17 MB
Page 11 of 256
9
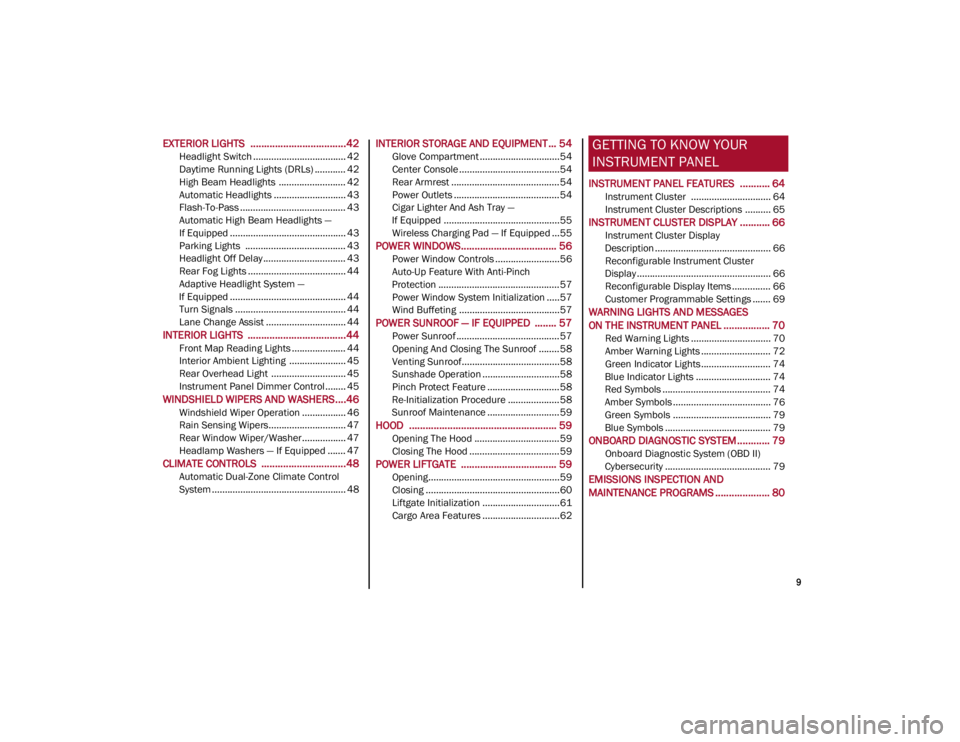
EXTERIOR LIGHTS ...................................42
Headlight Switch .................................... 42
Daytime Running Lights (DRLs) ............ 42
High Beam Headlights .......................... 42
Automatic Headlights ............................ 43
Flash-To-Pass ......................................... 43
Automatic High Beam Headlights —
If Equipped ............................................. 43 Parking Lights ....................................... 43
Headlight Off Delay ................................ 43
Rear Fog Lights ...................................... 44
Adaptive Headlight System —
If Equipped ............................................. 44 Turn Signals ........................................... 44
Lane Change Assist ............................... 44
INTERIOR LIGHTS ....................................44
Front Map Reading Lights ..................... 44
Interior Ambient Lighting ...................... 45
Rear Overhead Light ............................. 45
Instrument Panel Dimmer Control ........ 45
WINDSHIELD WIPERS AND WASHERS....46
Windshield Wiper Operation ................. 46
Rain Sensing Wipers.............................. 47
Rear Window Wiper/Washer................. 47
Headlamp Washers — If Equipped ....... 47
CLIMATE CONTROLS ...............................48
Automatic Dual-Zone Climate Control
System .................................................... 48
INTERIOR STORAGE AND EQUIPMENT ... 54
Glove Compartment ...............................54
Center Console .......................................54
Rear Armrest ..........................................54
Power Outlets .........................................54
Cigar Lighter And Ash Tray —
If Equipped .............................................55 Wireless Charging Pad — If Equipped ...55
POWER WINDOWS................................... 56
Power Window Controls .........................56
Auto-Up Feature With Anti-Pinch
Protection ............................................... 57 Power Window System Initialization .....57
Wind Buffeting .......................................57
POWER SUNROOF — IF EQUIPPED ........ 57
Power Sunroof ........................................ 57
Opening And Closing The Sunroof ........58
Venting Sunroof......................................58
Sunshade Operation ..............................58
Pinch Protect Feature ............................58
Re-Initialization Procedure ....................58
Sunroof Maintenance ............................59
HOOD ...................................................... 59
Opening The Hood ................................. 59
Closing The Hood ...................................59
POWER LIFTGATE ................................... 59
Opening...................................................59
Closing ....................................................60
Liftgate Initialization ..............................61
Cargo Area Features ..............................62
GETTING TO KNOW YOUR
INSTRUMENT PANEL
INSTRUMENT PANEL FEATURES ........... 64
Instrument Cluster ............................... 64
Instrument Cluster Descriptions .......... 65
INSTRUMENT CLUSTER DISPLAY ........... 66
Instrument Cluster Display
Description ............................................. 66 Reconfigurable Instrument Cluster
Display .................................................... 66 Reconfigurable Display Items ............... 66
Customer Programmable Settings ....... 69
WARNING LIGHTS AND MESSAGES
ON THE INSTRUMENT PANEL ................. 70
Red Warning Lights ............................... 70
Amber Warning Lights ........................... 72
Green Indicator Lights........................... 74
Blue Indicator Lights ............................. 74
Red Symbols .......................................... 74
Amber Symbols ...................................... 76
Green Symbols ...................................... 79
Blue Symbols ......................................... 79
ONBOARD DIAGNOSTIC SYSTEM ............ 79
Onboard Diagnostic System (OBD II)
Cybersecurity ......................................... 79
EMISSIONS INSPECTION AND
MAINTENANCE PROGRAMS .................... 80
22_GU_OM_EN_USC_t.book Page 9
Page 24 of 256
GETTING TO KNOW YOUR VEHICLE
22
IGNITION SWITCH
KEYLESS PUSH BUTTON IGNITION
This feature allows the driver to operate the
ignition switch with the push of a button as long
as the key fob is in the passenger compartment.
The START/STOP ignition button has several
operating modes. These modes are OFF, ACC,
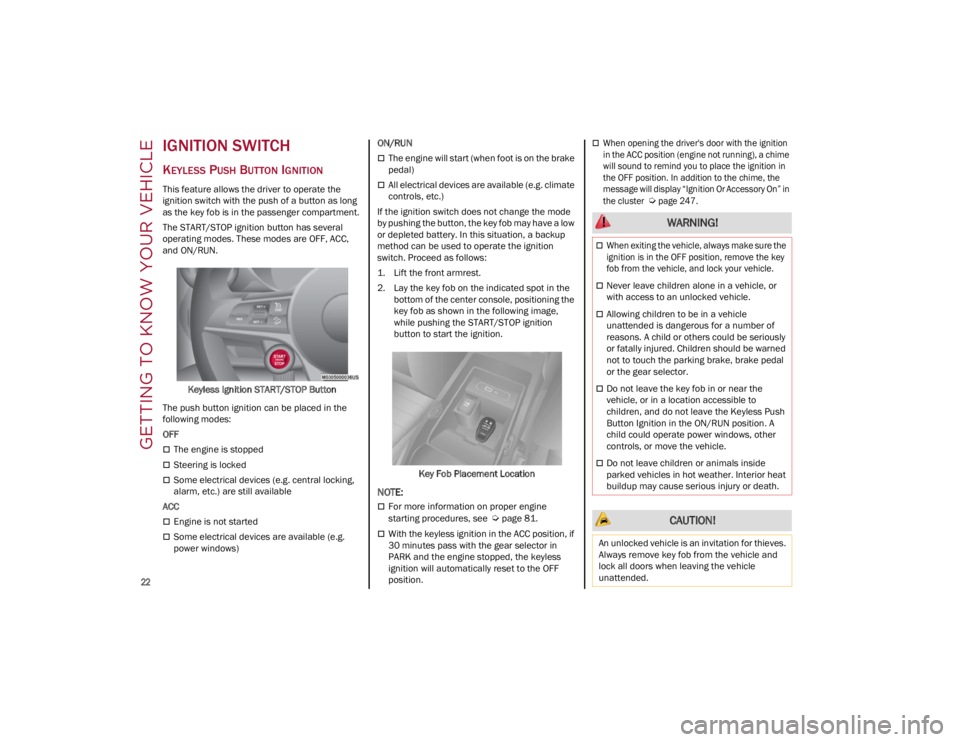
and ON/RUN.Keyless Ignition START/STOP Button
The push button ignition can be placed in the
following modes:
OFF
The engine is stopped
Steering is locked
Some electrical devices (e.g. central locking,
alarm, etc.) are still available
ACC
Engine is not started
Some electrical devices are available (e.g.
power windows) ON/RUN
The engine will start (when foot is on the brake
pedal)
All electrical devices are available (e.g. climate
controls, etc.)
If the ignition switch does not change the mode
by pushing the button, the key fob may have a low
or depleted battery. In this situation, a backup
method can be used to operate the ignition
switch. Proceed as follows:
1. Lift the front armrest.
2. Lay the key fob on the indicated spot in the bottom of the center console, positioning the
key fob as shown in the following image,
while pushing the START/STOP ignition
button to start the ignition.
Key Fob Placement Location
NOTE:
For more information on proper engine
starting procedures, see
Ú
page 81.
With the keyless ignition in the ACC position, if
30 minutes pass with the gear selector in
PARK and the engine stopped, the keyless
ignition will automatically reset to the OFF
position.
When opening the driver's door with the ignition
in the ACC position (engine not running), a chime
will sound to remind you to place the ignition in
the OFF position. In addition to the chime, the
message will display “Ignition Or Accessory On” in
the cluster
Ú
page 247.
WARNING!
When exiting the vehicle, always make sure the
ignition is in the OFF position, remove the key
fob from the vehicle, and lock your vehicle.
Never leave children alone in a vehicle, or
with access to an unlocked vehicle.
Allowing children to be in a vehicle
unattended is dangerous for a number of
reasons. A child or others could be seriously
or fatally injured. Children should be warned
not to touch the parking brake, brake pedal
or the gear selector.
Do not leave the key fob in or near the
vehicle, or in a location accessible to
children, and do not leave the Keyless Push
Button Ignition in the ON/RUN position. A
child could operate power windows, other
controls, or move the vehicle.
Do not leave children or animals inside
parked vehicles in hot weather. Interior heat
buildup may cause serious injury or death.
CAUTION!
An unlocked vehicle is an invitation for thieves.
Always remove key fob from the vehicle and
lock all doors when leaving the vehicle
unattended.
22_GU_OM_EN_USC_t.book Page 22
Page 37 of 256
35
NOTE:
After selecting a heating level, heat will be felt
within a few minutes.
The engine must be running for the heated
seats to operate.
The “minimum” setting is automatically
deactivated once a certain period of time has
elapsed.
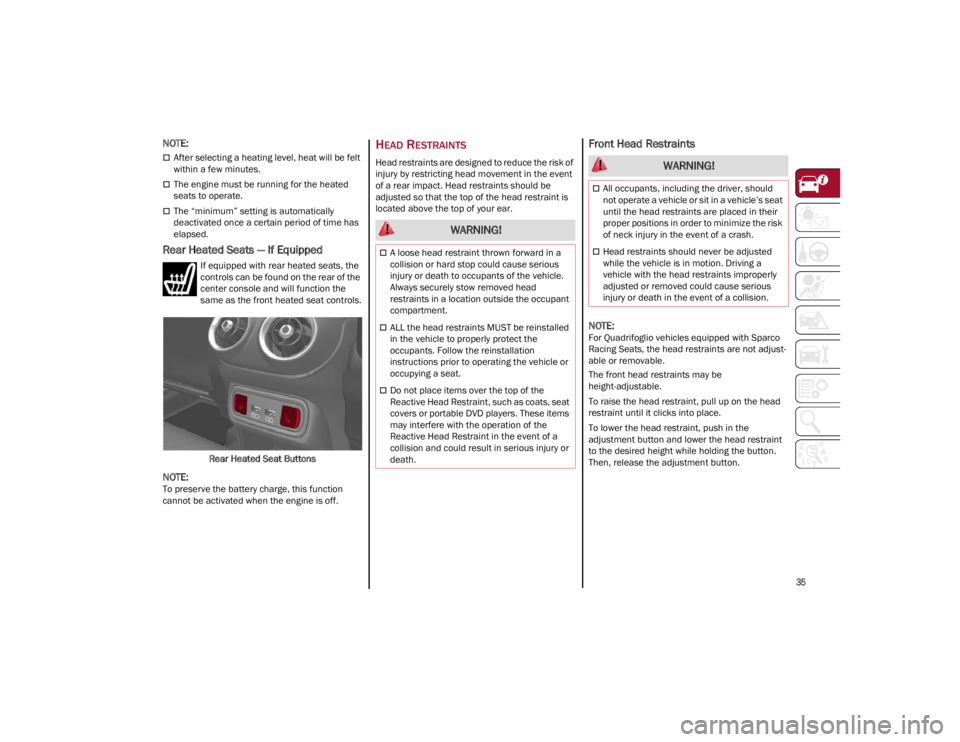
Rear Heated Seats — If Equipped
If equipped with rear heated seats, the
controls can be found on the rear of the
center console and will function the
same as the front heated seat controls.Rear Heated Seat Buttons
NOTE:
To preserve the battery charge, this function
cannot be activated when the engine is off.
HEAD RESTRAINTS
Head restraints are designed to reduce the risk of
injury by restricting head movement in the event
of a rear impact. Head restraints should be
adjusted so that the top of the head restraint is
located above the top of your ear.
Front Head Restraints
NOTE:
For Quadrifoglio vehicles equipped with Sparco
Racing Seats, the head restraints are not adjust -
able or removable.
The front head restraints may be
height-adjustable.
To raise the head restraint, pull up on the head
restraint until it clicks into place.
To lower the head restraint, push in the
adjustment button and lower the head restraint
to the desired height while holding the button.
Then, release the adjustment button.
WARNING!
A loose head restraint thrown forward in a
collision or hard stop could cause serious
injury or death to occupants of the vehicle.
Always securely stow removed head
restraints in a location outside the occupant
compartment.
ALL the head restraints MUST be reinstalled
in the vehicle to properly protect the
occupants. Follow the reinstallation
instructions prior to operating the vehicle or
occupying a seat.
Do not place items over the top of the
Reactive Head Restraint, such as coats, seat
covers or portable DVD players. These items
may interfere with the operation of the
Reactive Head Restraint in the event of a
collision and could result in serious injury or
death.
WARNING!
All occupants, including the driver, should
not operate a vehicle or sit in a vehicle’s seat
until the head restraints are placed in their
proper positions in order to minimize the risk
of neck injury in the event of a crash.
Head restraints should never be adjusted
while the vehicle is in motion. Driving a
vehicle with the head restraints improperly
adjusted or removed could cause serious
injury or death in the event of a collision.
22_GU_OM_EN_USC_t.book Page 35
Page 41 of 256
39
UNIVERSAL GARAGE DOOR
OPENER (HOMELINK®)
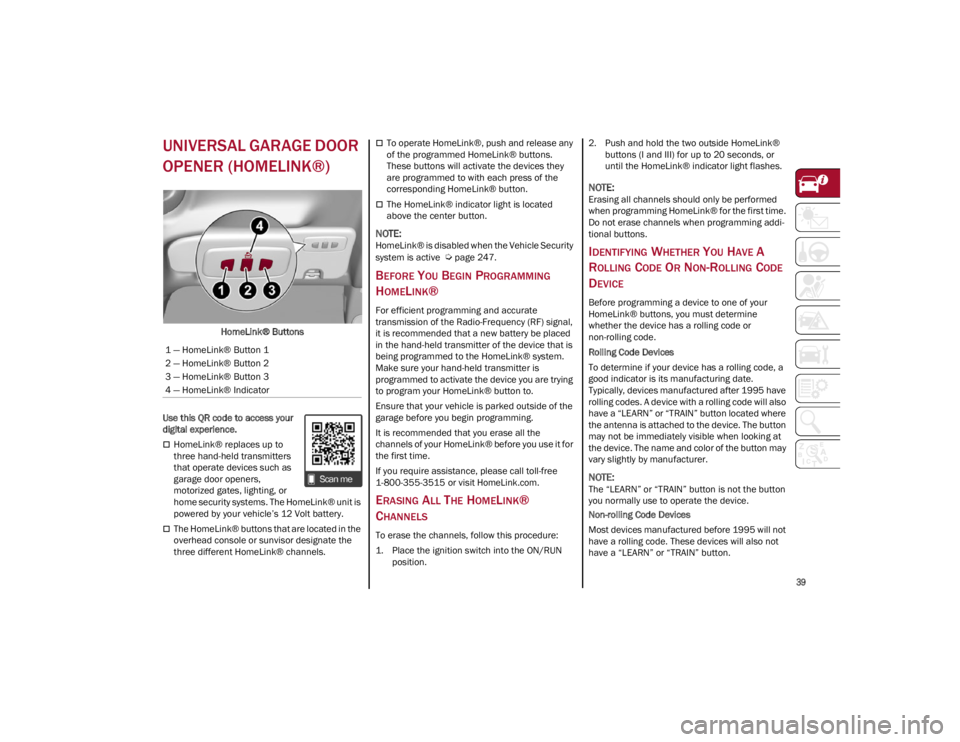
HomeLink® Buttons
Use this QR code to access your
digital experience.
HomeLink® replaces up to
three hand-held transmitters
that operate devices such as
garage door openers,
motorized gates, lighting, or
home security systems. The HomeLink® unit is
powered by your vehicle’s 12 Volt battery.
The HomeLink® buttons that are located in the
overhead console or sunvisor designate the
three different HomeLink® channels.
To operate HomeLink®, push and release any
of the programmed HomeLink® buttons.
These buttons will activate the devices they
are programmed to with each press of the
corresponding HomeLink® button.
The HomeLink® indicator light is located
above the center button.
NOTE:
HomeLink® is disabled when the Vehicle Security
system is active
Ú
page 247.
BEFORE YOU BEGIN PROGRAMMING
H
OMELINK®
For efficient programming and accurate
transmission of the Radio-Frequency (RF) signal,
it is recommended that a new battery be placed
in the hand-held transmitter of the device that is
being programmed to the HomeLink® system.
Make sure your hand-held transmitter is
programmed to activate the device you are trying
to program your HomeLink® button to.
Ensure that your vehicle is parked outside of the
garage before you begin programming.
It is recommended that you erase all the
channels of your HomeLink® before you use it for
the first time.
If you require assistance, please call toll-free
1-800-355-3515 or visit
HomeLink.com
.
ERASING ALL THE HOMELINK®
C
HANNELS
To erase the channels, follow this procedure:
1. Place the ignition switch into the ON/RUN
position. 2. Push and hold the two outside HomeLink®
buttons (I and III) for up to 20 seconds, or
until the HomeLink® indicator light flashes.
NOTE:
Erasing all channels should only be performed
when programming HomeLink® for the first time.
Do not erase channels when programming addi -
tional buttons.
IDENTIFYING WHETHER YOU HAVE A
R
OLLING CODE OR NON-ROLLING CODE
D
EVICE
Before programming a device to one of your
HomeLink® buttons, you must determine
whether the device has a rolling code or
non-rolling code.
Rolling Code Devices
To determine if your device has a rolling code, a
good indicator is its manufacturing date.
Typically, devices manufactured after 1995 have
rolling codes. A device with a rolling code will also
have a “LEARN” or “TRAIN” button located where
the antenna is attached to the device. The button
may not be immediately visible when looking at
the device. The name and color of the button may
vary slightly by manufacturer.
NOTE:
The “LEARN” or “TRAIN” button is not the button
you normally use to operate the device.
Non-rolling Code Devices
Most devices manufactured before 1995 will not
have a rolling code. These devices will also not
have a “LEARN” or “TRAIN” button.
1 — HomeLink® Button 1
2 — HomeLink® Button 2
3 — HomeLink® Button 3
4 — HomeLink® Indicator
22_GU_OM_EN_USC_t.book Page 39
Page 46 of 256
GETTING TO KNOW YOUR VEHICLE
44
REAR FOG LIGHTS
The rear fog light switch is located within the
headlight switch.
Push the button, located in the center of the
headlight switch, to turn the rear fog lights on/off.
The rear fog lights turn on only when the
headlights or parking lights are also turned on.
The lights can be turned off by pushing the
button again or by turning the headlight switch to
the O (off) position.
When the engine is stopped with the rear fog
lights on, they will be off the next time the engine
is started.
ADAPTIVE HEADLIGHT SYSTEM —
I
F EQUIPPED
This is a system combined with Xenon headlights
(Bi-Xenon 35 W headlamp, if equipped) which
directs the headlights horizontally, and contin -
uously and automatically adapts them to the driving
conditions around bends or when cornering.
The system directs the headlights to light up the
road in the best way, taking into account the
speed of the vehicle and the bend or corner
angle, as well as the speed at which the steering
wheel is turned.
The adaptive lights are automatically activated
when the vehicle is started.
TURN SIGNALS
Move the multifunction lever up or down to activate
the turn signals. The arrows on each side of the
instrument cluster flash to show proper operation.
The or turn signal will blink on the
instrument panel.
LANE CHANGE ASSIST
Lightly push the lever up or down once, without
moving beyond the detent, and the turn signal will
flash five times then automatically turn off.
To turn off the flashing before the end of the
cycle, move the lever in the opposite direction
until the first click (about half way).
INTERIOR LIGHTS
Courtesy lights are turned on when the front
doors are opened or when the dimmer control is
rotated to its farthest upward position. The glove
compartment light turns on automatically when
the glove compartment is opened and turn off
when it is closed. The door courtesy lights
illuminate when one of the front doors is opened,
and turn off when it is closed. The liftgate
courtesy lights turn on automatically when the
liftgate is opened and turn off when it is closed.
All of these lights turn on and off regardless of the
ignition status.
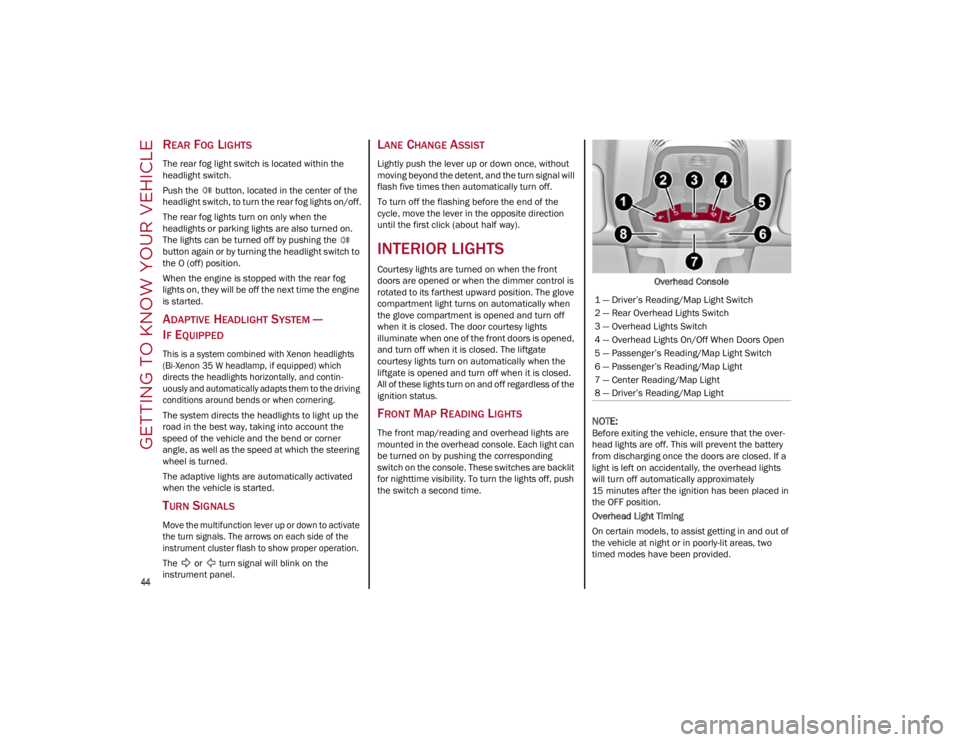
FRONT MAP READING LIGHTS
The front map/reading and overhead lights are
mounted in the overhead console. Each light can
be turned on by pushing the corresponding
switch on the console. These switches are backlit
for nighttime visibility. To turn the lights off, push
the switch a second time. Overhead Console
NOTE:
Before exiting the vehicle, ensure that the over
-
head lights are off. This will prevent the battery
from discharging once the doors are closed. If a
light is left on accidentally, the overhead lights
will turn off automatically approximately
15 minutes after the ignition has been placed in
the OFF position.
Overhead Light Timing
On certain models, to assist getting in and out of
the vehicle at night or in poorly-lit areas, two
timed modes have been provided.
1 — Driver’s Reading/Map Light Switch
2 — Rear Overhead Lights Switch
3 — Overhead Lights Switch
4 — Overhead Lights On/Off When Doors Open
5 — Passenger’s Reading/Map Light Switch
6 — Passenger’s Reading/Map Light
7 — Center Reading/Map Light
8 — Driver’s Reading/Map Light
22_GU_OM_EN_USC_t.book Page 44
Page 56 of 256
GETTING TO KNOW YOUR VEHICLE
54
INTERIOR STORAGE AND
EQUIPMENT
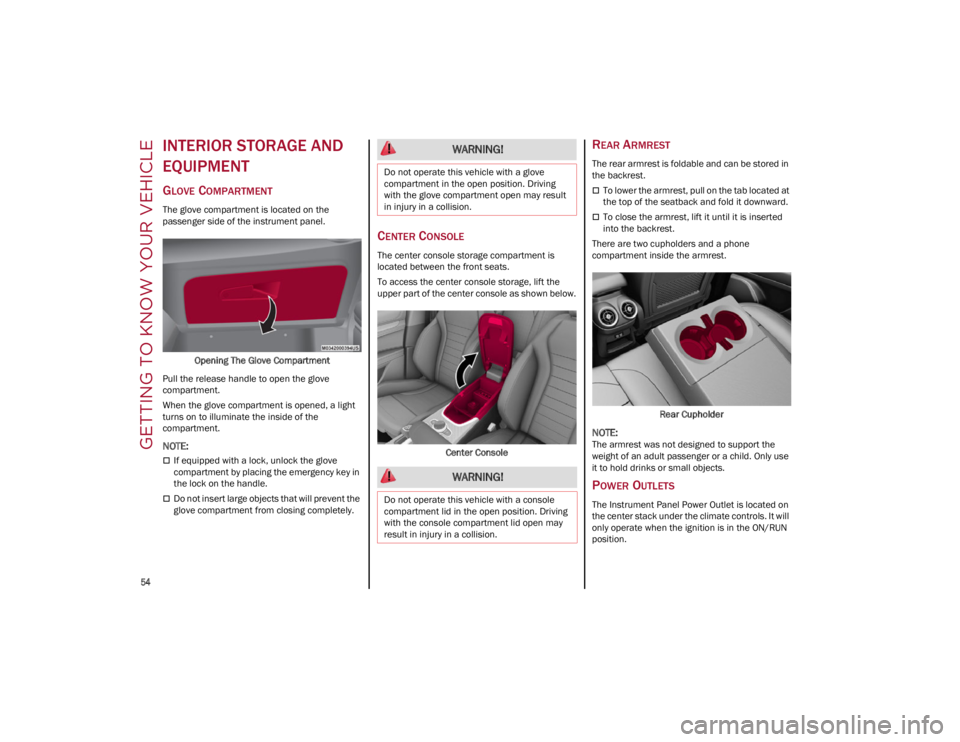
GLOVE COMPARTMENT
The glove compartment is located on the
passenger side of the instrument panel.Opening The Glove Compartment
Pull the release handle to open the glove
compartment.
When the glove compartment is opened, a light
turns on to illuminate the inside of the
compartment.
NOTE:
If equipped with a lock, unlock the glove
compartment by placing the emergency key in
the lock on the handle.
Do not insert large objects that will prevent the
glove compartment from closing completely.
CENTER CONSOLE
The center console storage compartment is
located between the front seats.
To access the center console storage, lift the
upper part of the center console as shown below.
Center Console
REAR ARMREST
The rear armrest is foldable and can be stored in
the backrest.
To lower the armrest, pull on the tab located at
the top of the seatback and fold it downward.
To close the armrest, lift it until it is inserted
into the backrest.
There are two cupholders and a phone
compartment inside the armrest.
Rear Cupholder
NOTE:
The armrest was not designed to support the
weight of an adult passenger or a child. Only use
it to hold drinks or small objects.
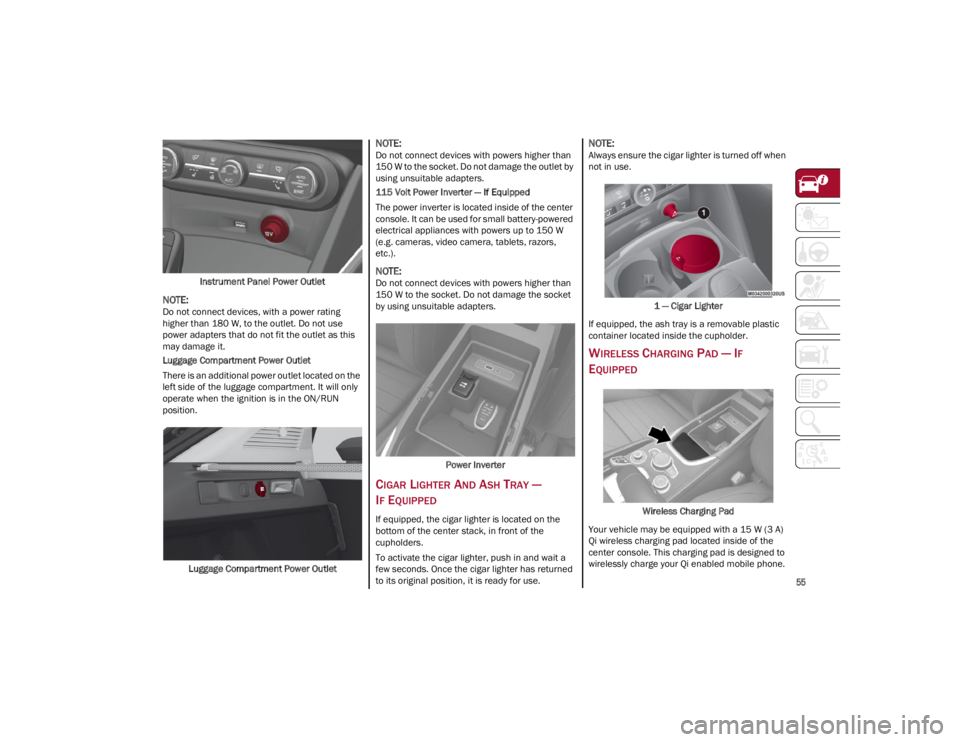
POWER OUTLETS
The Instrument Panel Power Outlet is located on
the center stack under the climate controls. It will
only operate when the ignition is in the ON/RUN
position.
WARNING!
Do not operate this vehicle with a glove
compartment in the open position. Driving
with the glove compartment open may result
in injury in a collision.
WARNING!
Do not operate this vehicle with a console
compartment lid in the open position. Driving
with the console compartment lid open may
result in injury in a collision.
22_GU_OM_EN_USC_t.book Page 54
Page 57 of 256
55
Instrument Panel Power Outlet
NOTE:
Do not connect devices, with a power rating
higher than 180 W, to the outlet. Do not use
power adapters that do not fit the outlet as this
may damage it.
Luggage Compartment Power Outlet
There is an additional power outlet located on the
left side of the luggage compartment. It will only
operate when the ignition is in the ON/RUN
position.Luggage Compartment Power Outlet
NOTE:
Do not connect devices with powers higher than
150 W to the socket. Do not damage the outlet by
using unsuitable adapters.
115 Volt Power Inverter — If Equipped
The power inverter is located inside of the center
console. It can be used for small battery-powered
electrical appliances with powers up to 150 W
(e.g. cameras, video camera, tablets, razors,
etc.).
NOTE:
Do not connect devices with powers higher than
150 W to the socket. Do not damage the socket
by using unsuitable adapters.
Power Inverter
CIGAR LIGHTER AND ASH TRAY —
I
F EQUIPPED
If equipped, the cigar lighter is located on the
bottom of the center stack, in front of the
cupholders.
To activate the cigar lighter, push in and wait a
few seconds. Once the cigar lighter has returned
to its original position, it is ready for use.
NOTE:
Always ensure the cigar lighter is turned off when
not in use.
1 — Cigar Lighter
If equipped, the ash tray is a removable plastic
container located inside the cupholder.
WIRELESS CHARGING PAD — IF
E
QUIPPED
Wireless Charging Pad
Your vehicle may be equipped with a 15 W (3 A)
Qi wireless charging pad located inside of the
center console. This charging pad is designed to
wirelessly charge your Qi enabled mobile phone.
22_GU_OM_EN_USC_t.book Page 55
Page 86 of 256
STARTING AND OPERATING
84
ENGINE BREAK-IN
RECOMMENDATIONS
ENGINE BREAK-IN
For both engines, use the following engine
break-in recommendations:
NOTE:
A new engine may consume some oil during its
first few thousand miles (kilometers) of opera-
tion. This should be considered a normal part of
the break-in period and not interpreted as an indi -
cation of a problem. Please monitor your oil level
during the break-in period and add oil as
required.
It is recommended for the operator to observe the
following driving behaviors during the new vehicle
break-in period:
0 to 100 miles (0 to 160 km):
Do not allow the engine to operate at idle for
an extended period of time.
Press the accelerator pedal slowly and not
more than halfway to avoid rapid acceleration.
Avoid aggressive braking.
Drive with the engine speed less than
3,500 RPM.
Maintain vehicle speed below 55 mph
(88 km/h) and observe local speed limits. 100 to 300 miles (160 to 483 km):
Press the accelerator pedal slowly and not
more than halfway to avoid rapid acceleration
in lower gears (FIRST to THIRD gears).
Avoid aggressive braking.
Drive with the engine speed less than
5,000 RPM.
Maintain vehicle speed below 70 mph
(112 km/h) and observe local speed limits.
300 to 500 miles (483 to 805 km):
Exercise the full engine RPM range, shifting
manually (paddles or gear shift) at higher RPM
when possible.
Do not perform sustained operation with the
accelerator pedal at wide open throttle.
Maintain vehicle speed below 85 mph
(136 km/h) and observe local speed limits.
For the first 1,500 miles (2,414 km):
Do not participate in track events, sport driving
schools, or similar activities during the first
1,500 miles (2,414 km).
NOTE:
Monitor engine oil with every refueling and add if
necessary. Oil and fuel consumption may be
higher through the first oil change interval.
ELECTRIC PARK BRAKE
(EPB)
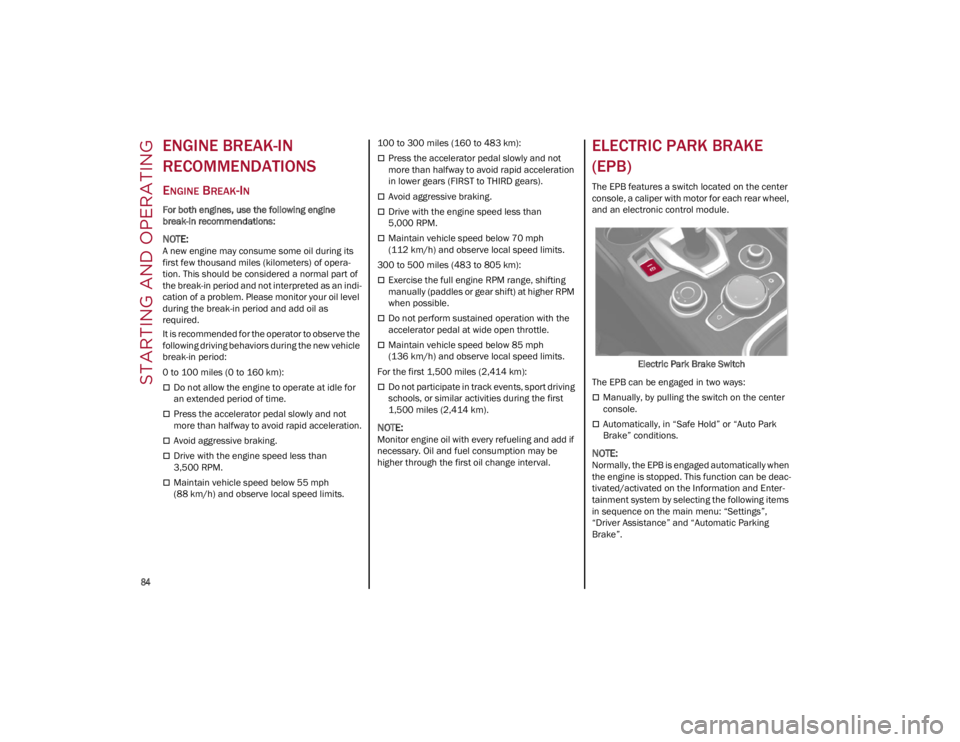
The EPB features a switch located on the center
console, a caliper with motor for each rear wheel,
and an electronic control module.
Electric Park Brake Switch
The EPB can be engaged in two ways:
Manually, by pulling the switch on the center
console.
Automatically, in “Safe Hold” or “Auto Park
Brake” conditions.
NOTE:
Normally, the EPB is engaged automatically when
the engine is stopped. This function can be deac -
tivated/activated on the Information and Enter -
tainment system by selecting the following items
in sequence on the main menu: “Settings”,
“Driver Assistance” and “Automatic Parking
Brake”.
22_GU_OM_EN_USC_t.book Page 84
Page 87 of 256
85
In addition to engaging the EPB, along with
steering and positioning chocks in front of the
wheels (when on a steep slope), you must always
place the vehicle in the PARK (P) mode before
leaving.
Should the vehicle battery be faulty, the battery
must be replaced in order to unlock the EPB.
Engaging The EPB Manually
Briefly pull the switch located on the center
console to manually engage the EPB when the
vehicle is stationary.
Noise may be heard from the rear of the vehicle
when engaging the EPB.
A slight movement of the brake pedal may be
detected when engaging the EPB with the brake
pedal pressed.
With the EPB engaged, the Brake Warning Light
on the instrument cluster display and the switch
will illuminate.
If, under exceptional circumstances, the use of
the brake is required with the vehicle in motion,
keep the switch on the center console pulled as
long as the brake action is necessary.The Brake Warning Light may turn on with the
hydraulic system temporarily unavailable; in this
case, braking is controlled by the motors.
The brake lights will also automatically turn on in
the same way as normal braking with the use of
the brake pedal.
Release the switch on the center console to stop
the braking action with the vehicle in motion.
If, through this procedure, the vehicle is braked
until a speed below 1.9 mph (2.0 km/h) is
reached and the switch is kept pulled, the parking
brake will definitively engage.
NOTE:
Driving the vehicle with the EPB engaged, or using
it several times to slow down the vehicle, may
cause severe damage to the braking system.
Disengaging The EPB Manually
In order to manually release the parking brake,
the ignition should be in the ACC position. Press
the brake pedal, and then push the switch on the
center console briefly.
Noise may be heard from the rear of the vehicle,
and a slight movement of the brake pedal may be
detected during disengagement.
After disengaging the EPB, the Brake Warning
Light on the instrument cluster display and the
light on the switch will turn off.
If the Brake Warning Light on the instrument
cluster display remains on with the EPB
disengaged, this indicates a fault: in this case,
contact an authorized dealer.
NOTE:
Always engage the EPB when parking the
vehicle to prevent injury or damage caused by
the unexpected movement of the vehicle.
Never use gear position PARK (P) instead of
the EPB.
CAUTION!
With the Electronic Parking Brake failure
warning light on, some functions of the EPB
are deactivated. In this case the driver is
responsible for brake activation and vehicle
parking in complete safety conditions.
WARNING!
Never leave children alone in a vehicle, or
with access to an unlocked vehicle.
Allowing children to be in a vehicle
unattended is dangerous for a number of
reasons. A child or others could be seriously
or fatally injured. Children should be warned
not to touch the parking brake, brake pedal
or the gear selector.
Do not leave the key fob in or near the vehicle
or in a location accessible to children. A child
could operate power windows, other
controls, or move the vehicle.
Be sure the parking brake is fully disengaged
before driving; failure to do so can lead to
brake failure and a collision.
Always fully apply the parking brake when
leaving your vehicle, or it may roll and cause
damage or injury.
22_GU_OM_EN_USC_t.book Page 85
Page 88 of 256
STARTING AND OPERATING
86
(Continued)
ELECTRIC PARK BRAKE (EPB)
O
PERATING MODES
The EPB may operate as follows:
“Dynamic Operating Mode”: this mode is
activated by pulling the switch repeatedly
while driving.
“Static Engagement and Release Mode”: with
the vehicle stationary, the EPB can be
activated by pulling the switch on the center
console once. Push the switch and the brake
pedal at the same time to disengage the
brake.
“Drive Away Release” — if equipped: the EPB
will automatically disengage with the driver
side seat belt fastened and the detection of an
action performed by the driver to move the
vehicle (DRIVE [D] or REVERSE [R]). This
feature can be turned on or off in the
Information and Entertainment System.
NOTE:
If the car is equipped with carbon ceramic brake
discs, it is necessary to fasten the seat belts or
turn off the EPB before starting to avoid damages
to the ceramic brake discs.
“Safe Hold”: if the vehicle speed is lower than
1.9 mph (2.0 km/h), the gear selector is not in
PARK (P) position and the driver's intention of
leaving the vehicle is detected, the EPB will
automatically engage to hold the vehicle in
safety conditions.
“Auto Park Brake”: if the vehicle speed is
below 1.9 mph (2.0 km/h), the EPB will
automatically engage when the gear selector
is in PARK (P) position. The light on the switch
located on the center console switches on together with the Brake Warning Light on the
instrument cluster display when the parking
brake is engaged and applied to the wheels.
Each automatic parking brake engagement
can be canceled by pushing the switch on the
center console and at the same time moving
the gear selector for the transmission to
position PARK (P).
SAFE HOLD
Safe Hold is a safety function that automatically
engages the EPB in the event of a dangerous
condition for the vehicle.
The EPB engages automatically to prevent
vehicle movement if:
The vehicle speed is below 1.9 mph
(2.0 km/h).
A transmission operating mode different from
PARK (P) is activated.
The driver's seat belt is not fastened.
The driver side door is open.
No attempts to apply pressure on the brake
pedal have been detected.
The vehicle is parked on roads with a slope of
more than 4%.
The “Safe Hold” function can be temporarily
disabled by pushing the EPB switch located on
the center console and the brake pedal at the
same time, with the vehicle stationary and the
driver side door open.
Once disabled, the function will activate again
when the vehicle speed reaches 12 mph (20 km/h)
or the ignition is cycled to OFF and then to ACC.
AUTOMATIC
TRANSMISSION
The vehicle is equipped with an electronically
controlled 8-speed automatic transmission
where gear shifting automatically takes place,
depending on the vehicle usage instantaneous
parameters (vehicle speed, grade, and
accelerator pedal position).
Manual gear shifting can still occur thanks to the
“Sequential” mode position for the gear selector.
WARNING!
It is dangerous to shift out of PARK or
NEUTRAL if the engine speed is higher than
idle speed. If your foot is not firmly pressing
the brake pedal, the vehicle could accelerate
quickly forward or in reverse. You could lose
control of the vehicle and hit someone or
something. Only shift into gear when the
engine is idling normally and your foot is
firmly pressing the brake pedal.
Unintended movement of a vehicle could
injure those in or near the vehicle. As with all
vehicles, you should never exit a vehicle
while the engine is running. Before exiting a
vehicle, always apply the parking brake, shift
the transmission into PARK, and turn the
ignition OFF. When the ignition is in the OFF
position, the transmission is locked in PARK,
securing the vehicle against unwanted
movement.
22_GU_OM_EN_USC_t.book Page 86