ECU ASTON MARTIN DB AR1 Q 2003 Owners Guide
[x] Cancel search | Manufacturer: ASTON MARTIN, Model Year: 2003, Model line: DB AR1 Q, Model: ASTON MARTIN DB AR1 Q 2003Pages: 279, PDF Size: 3.77 MB
Page 5 of 279
v
DB AR1 Owner's Guide Contents
Introduction
Vehicle Provenance iii
Warnings, Cautions and Notes vi
General Information vii
Reporting Safety Defects (USA) x
Reporting Safety Defects (Other Markets) x
Regular Checks xi
Glossary of Terms xii
Section 1 - Owner's Guide
Before Driving 1-A-1
Controls 1-B-1
Driving 1-C-1
Heating, Ventilation & Air Conditioning 1-D-1
Security System 1-E-1
Owner Maintenance 1-F-1
Specifications 1-G-1
Section 2 - Service Schedules & Service Records
Service Schedules 2-A-1
Service Records 2-B-1
Section 3 - Warranty and Emergency Service
Warranty 3-A-1
Aston Martin Emergency Service 3-B-1
Section 4 - Dealer Directory
Aston Martin Lagonda Ltd. Worldwide Dealer Directory 4-A-1
Section 5 - Index
Index 5-A-1
Page 13 of 279
A - Before Driving
1-A-1
Contents
Vehicle Keys ....................................................................................... 1-A-2
The Security System and Door Locks .................................................. 1-A-3
Rain Cover ......................................................................................... 1-A-7
Adjustments Before Driving .............................................................. 1-A-10
Seat Belts .......................................................................................... 1-A-14
Airbags............................................................................................. 1-A-20
Interior Storage ................................................................................. 1-A-22
Page 14 of 279

A - Before Driving
1-A-2
Vehicle Keys
Your DB AR1 is supplied with two sets of keys. Each set contains the
following:
• One ignition/door key
• One key number tag
• One key for the centre armrest storage box
• One alarm key fob
Security of Keys and Alarm Key Fobs
It is important to keep your keys and alarm key fobs in a safe place at all
times. Leaving them in a conspicuous place is an invitation for a thief to steal
them and consequently your car and belongings. Keep your key sets secure
at all times.
Remove the key number tags from each key set and keep them secure. They
will be required if you wish to obtain replacement keys.
ASTON MARTIN
Page 15 of 279

A - Before Driving
1-A-3
The Security System and Door Locks
Your DB AR1 is fitted with sophisticated security systems which protect your
car against theft. The alarm system is linked to the central locking system.
The following two pages describe the basic operations required to turn on
or off the alarm and at the same time to lock or unlock the car. The systems
are fully described in section 'E - Security Systems'.
Alarm Key Fob
Basic alarm functions are controlled using the alarm key fob which sends
radio signals to the alarm unit aerial near the rear window when either the
left or right key fob button is pressed.
The left button is used for turning the alarm system on/off and locking/
unlocking the car. The right button is used for unlocking the boot.
The key fob has a range of about 10 metres (30 feet) when operating with
no intervening obstructions.
Page 16 of 279

A - Before Driving
1-A-4
Unlocking the Car / Turning off the Alarm
To unlock the car and turn the alarm system off, approach to within 10
metres (30 feet) of the car and point the key fob towards the rear window.
Press the left button on the alarm key fob.
The exterior direction indicators flash three times, indicating that the alarm
has been switched off. At the same time, the central locking system unlocks
the car doors and fuel filler flap. Alarm sensing on the boot lock is also
switched off so that the boot may be opened without triggering the alarm.
Locking the Car / Turning on the Alarm
To turn the alarm system on and lock the car, stand within 10 metres (30 feet)
of the car and point the key fob towards the rear window. Press the left
button on the alarm key fob.
The direction indicators flash once as the alarm is switched on. Alarm
sensing is then operative on the door locks, bonnet and boot. At the same
time, the car doors, boot and filler flap are locked by the central locking
system.
Engine Immobiliser
The engine is immobilised by the Passive Anti-Theft System (PATS) and may
not be started until a correctly coded key is inserted and turned in the
ignition switch (See 'Security Systems' for a full description of PATS). The
PATS system is fully automatic and requires no intervention from the driver.
Page 21 of 279
A - Before Driving
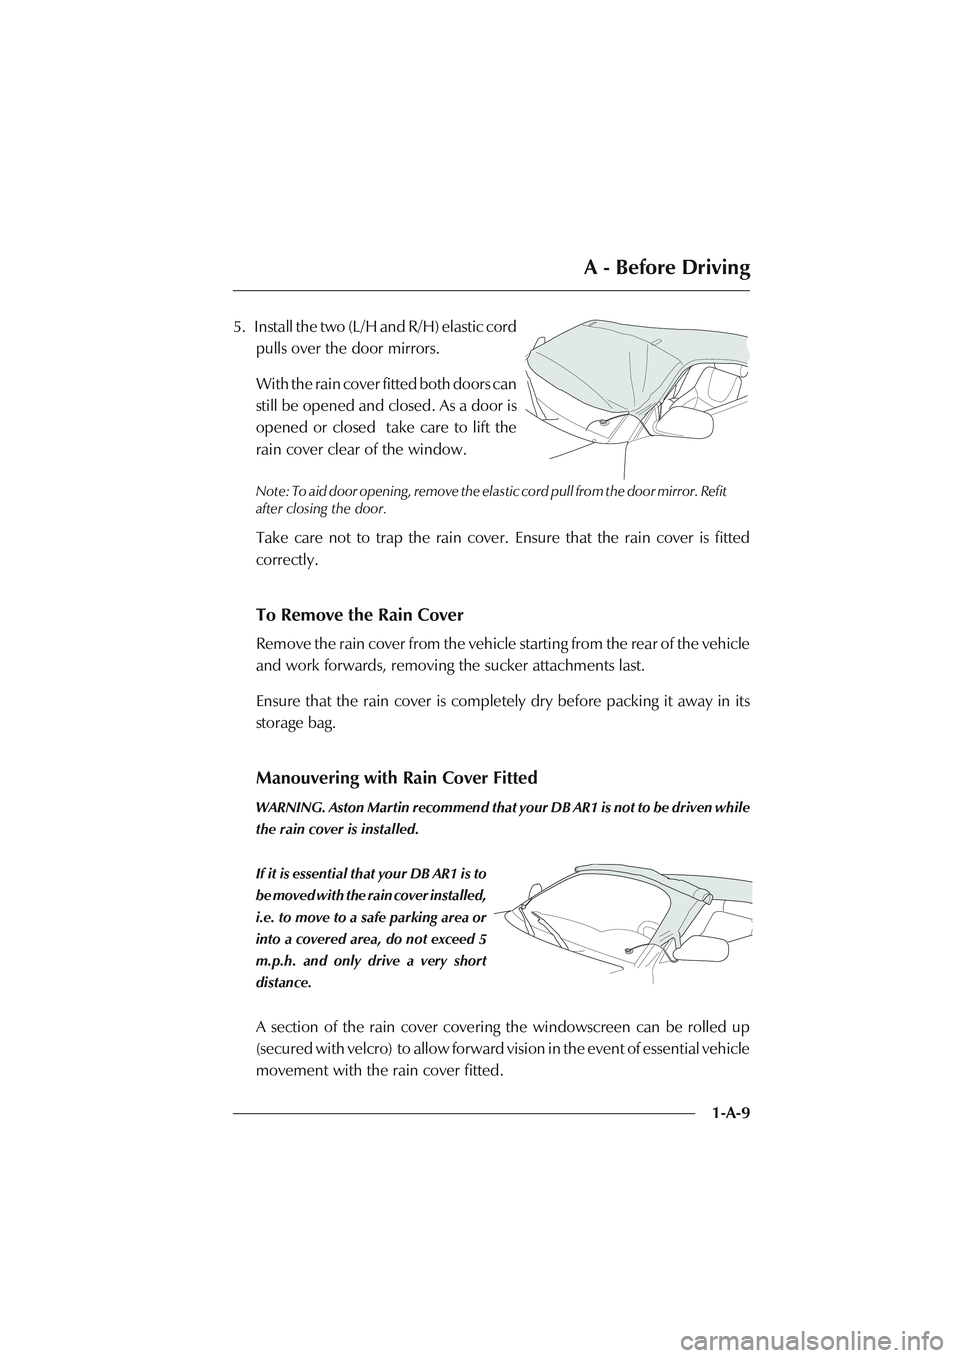
1-A-9 5. Install the two (L/H and R/H) elastic cord
pulls over the door mirrors.
With the rain cover fitted both doors can
still be opened and closed. As a door is
opened or closed take care to lift the
rain cover clear of the window.
Note: To aid door opening, remove the elastic cord pull from the door mirror. Refit
after closing the door.
Take care not to trap the rain cover. Ensure that the rain cover is fitted
correctly.
To Remove the Rain Cover
Remove the rain cover from the vehicle starting from the rear of the vehicle
and work forwards, removing the sucker attachments last.
Ensure that the rain cover is completely dry before packing it away in its
storage bag.
Manouvering with Rain Cover Fitted
WARNING. Aston Martin recommend that your DB AR1 is not to be driven while
the rain cover is installed.
If it is essential that your DB AR1 is to
be moved with the rain cover installed,
i.e. to move to a safe parking area or
into a covered area, do not exceed 5
m.p.h. and only drive a very short
distance.
A section of the rain cover covering the windowscreen can be rolled up
(secured with velcro) to allow forward vision in the event of essential vehicle
movement with the rain cover fitted.
Page 22 of 279
A - Before Driving
1-A-10
Adjustments Before Driving
When you get into the car you should check and, if necessary, adjust the
seat, steering wheel, interior and door mirrors, and secure your seat belt.
The controls for these functions are described on the following pages.
Steering Wheel
WARNING. Do not attempt to adjust the steering wheel whilst driving.
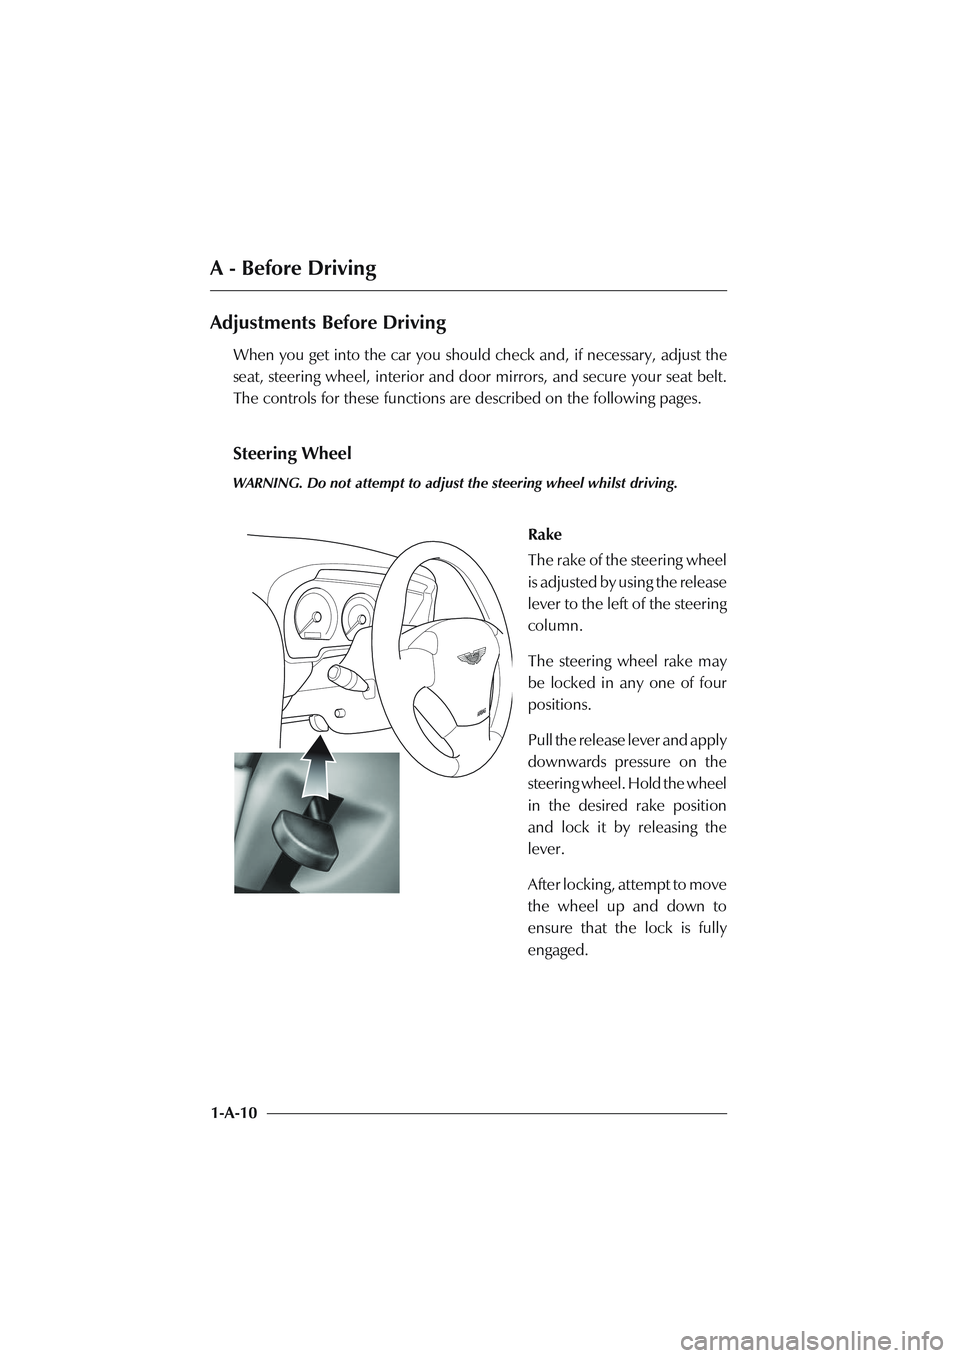
Rake
The rake of the steering wheel
is adjusted by using the release
lever to the left of the steering
column.
The steering wheel rake may
be locked in any one of four
positions.
Pull the release lever and apply
downwards pressure on the
steering wheel. Hold the wheel
in the desired rake position
and lock it by releasing the
lever.
After locking, attempt to move
the wheel up and down to
ensure that the lock is fully
engaged.
Page 26 of 279
A - Before Driving
1-A-14
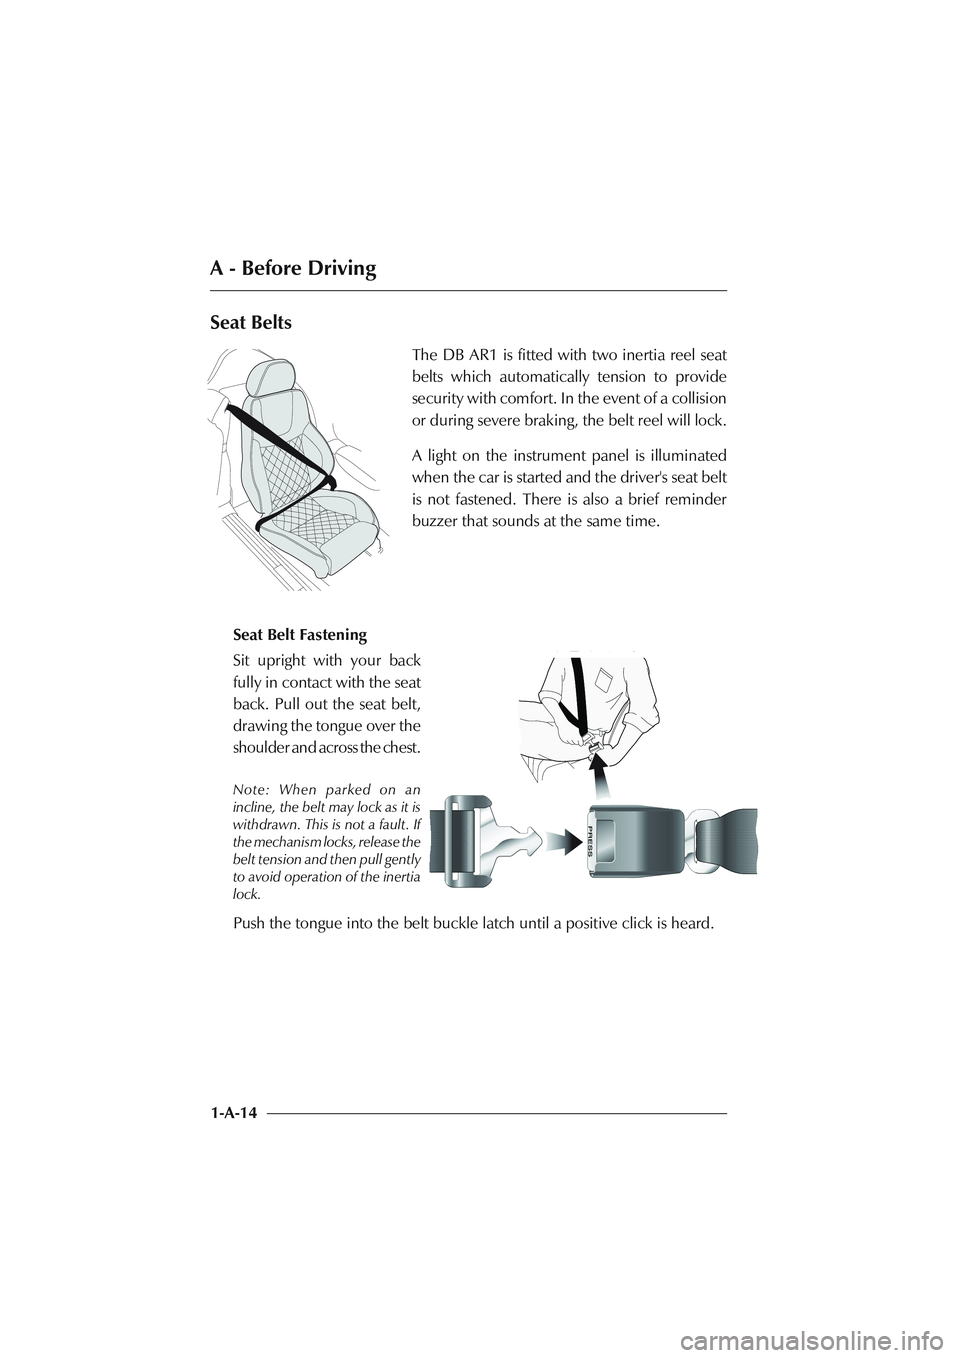
Seat Belts
The DB AR1 is fitted with two inertia reel seat
belts which automatically tension to provide
security with comfort. In the event of a collision
or during severe braking, the belt reel will lock.
A light on the instrument panel is illuminated
when the car is started and the driver's seat belt
is not fastened. There is also a brief reminder
buzzer that sounds at the same time.
Seat Belt Fastening
Sit upright with your back
fully in contact with the seat
back. Pull out the seat belt,
drawing the tongue over the
shoulder and across the chest.
Note: When parked on an
incline, the belt may lock as it is
withdrawn. This is not a fault. If
the mechanism locks, release the
belt tension and then pull gently
to avoid operation of the inertia
lock.
Push the tongue into the belt buckle latch until a positive click is heard.
Page 27 of 279
A - Before Driving
1-A-15 Pull upwards on the diagonal belt to ensure secure latching and to remove
all slack from the belt. Finally, double check that the lap belt is fitted snugly,
low down across the hips, and that there are no twists.
If it is necessary for an occupant to adjust their seat or seating position during
a journey, the belt tension might be disturbed. The occupant should
therefore (as soon as it is safe to do so) gently pull down the shoulder run of
the seat belt to create some slack and then immediately release it to re-
tension the belt for the new seating position.
Seat Belt Pretensioner
The seat belt pretensioner system is designed to hold vehicle occupants
against the seat back when a frontal collision occurs.
The seat belt pretensioner system works in conjunction with the airbag
system. In a serious frontal impact, as the airbags are triggered, the
pretensioners will also be triggered. These apply additional tension to the
front seat belts to hold the front seat occupants back in their seats.
Automatic Locking Retractors (ALR)
All vehicles are fitted with an ALR seat belt in the front passenger seat.
This system is designed to securely hold child seats. The ALR system
temporarily locks the belt securing the child seat.
Securing a Child Seat (ALR System)
Fit the child seat following the manufacturers instructions. Gently pull out
the relevant inertia reel seat belt until fully extended. The ALR system will
only engage at the maximum extension point of the seat belt.
Page 28 of 279
A - Before Driving
1-A-16Thread the belt tongue through the child seat as instructed by the
manufacturer. Engage the tongue into the belt buckle. Adjust the tongue
position on the belt if necessary to ensure that the lower belt run is tight and
then allow the upper run of the seat belt to fully retract until the child seat
is securely held. The ALR system will be heard 'clicking' as the seat belt
retracts. When fully retracted, pull down on the upper run of the belt to
check that the ALR lock has engaged.
Child Seat Removal (ALR System)
To remove the child seat, release the belt as normal and allow it to retract
through the seat frame. The ALR system will disengage when the belt is fully
retracted. The belt may then be worn when required as a normal inertia reel
belt. Once the ALR is disengaged, the belt must be fully extended to re-
engage the system on the next occasion that a child seat is fitted.
WARNINGS - Seat Belts - General
Wearing your seat belt is crucial to your safety. Not wearing a seat belt increases
the chance of serious injury or death in the event of an accident. Be sure that you
and your passengers always fasten their seat belts and use them properly even
though airbags are provided. Seat belt usage is mandatory in most countries and
should be used in accordance with local laws.
By reclining the seat back, you decrease the protection you get from the seat belt
in the event of a crash. Adjust the seat back to an upright position (approximately
90° to the seat base.
Make sure that the seat back is locked in place. Otherwise it could move forward
in a sudden stop or crash and cause injury.