manual top AUDI A3 CABRIOLET 2015 Owners Manual
[x] Cancel search | Manufacturer: AUDI, Model Year: 2015, Model line: A3 CABRIOLET, Model: AUDI A3 CABRIOLET 2015Pages: 302, PDF Size: 73.83 MB
Page 4 of 302
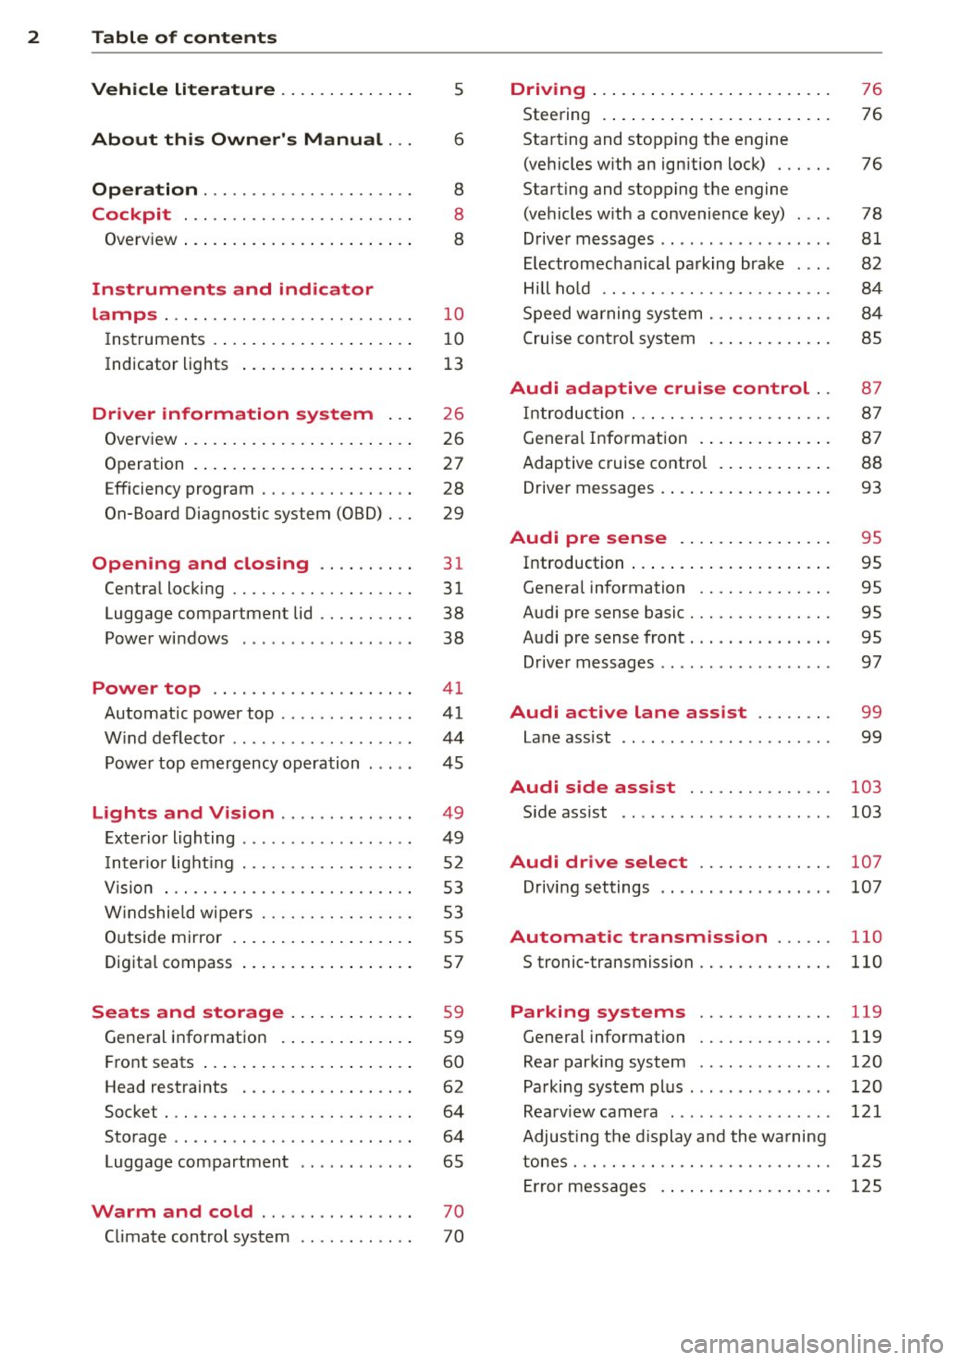
2 Table of contents Vehicle literature .. .. .. .. .. ... .
About this Owner's Manual ...
Operation .............. .... ... .
Cockpit ... ............. .... .. . .
Ove rv iew ... ... .. ..... ... .. .. ... .
Instruments and indicator
lamps ..... ............. .. .. .. . .
Ins truments . .. .. ..... ... .. .. ... .
Indicator lights ....... ... .. .. ... .
Driver information system .. .
Overview ... ... .. ..... ... .. .. ... .
Operation . .... .. ..... ... .. .. ... .
Efficiency program ........ .... ... .
On-Board Diagnostic system (OBD) . . .
Opening and closing .... .. ... .
Centra l loc king ........... .. .. ... .
Luggage compartment lid .. .. .. .. . .
Power windows
5
6
8
8
8
1 0
1 0
1 3
26
2 6
27
28
29
31
31
38
38
Power top . . . . . . . . . . . . . . . . . . . . . 41
Automatic power top ... ... .. .. .. . .
W ind deflecto r ............ ... .. . . 41
4 4
Power top emergency opera tion . . . . . 45
Lights and Vision .......... .. . .
Exte rior lighting .... ...... .. .. .. . .
I n ter io r light ing .......... .. .. .. . .
V 1s 1on . .. .. ............. ....... .
W indshie ld w ipers ...... .. .. .. .. . .
O utside mirror . .. ..... ... .. .. ... .
D ig ita l compass .. ..... ... .. .. ... .
Seats and storage ... .. .. .. .. . .
General info rmat ion . ... .. .. ... .. .
F ront seats .. .. .. ..... ... .. .. ... .
Head restraints .......... .. .. .. . .
Socket . .. .. .. . .......... .. .. ... .
Sto rage .. .. ... ....... ... .... .. . .
Luggage compartment
49
4 9
52
53
5 3
5 5
57
59
59
60
62
64
64
65
Warm and cold . . . . . . . . . . . . . . . . 70
Climate control system . . . . . . . . . . . . 70
Driving ... .... .. ... .. ..... .... . .
Stee ring . ..... .. .. ... ..... ... .. .
Starting and stopp ing t he engine
(ve hicles w ith an ign ition lock) ... .. .
Starting and stopp ing t he engine
(ve hicles w ith a convenience key) ... .
Drive r m essages .. ... .. .. ... ..... .
El ectromechanical pa rking brak e ... .
Hill ho ld .. .. .. . .............. .. .
S peed w arning system .......... .. .
C ruise con tro l system .. ..... ... .. .
76
76
76
78
81
82
84
8 4
8 5
Audi adaptive cruise control . . 8 7
In troduc tion ... .. ............... .
Genera l Info rmation . .. ..... ... .. .
Adaptive cruise contro l ...... .... . .
Drive r messages . .... .. ..... ... .. .
Audi pre sense .. .... .... ... .. .
Introduction ..... ... .. ..... .... . .
Genera l information ........... .. .
Audi pre sense basic .............. .
Audi pre sense front . .. ...... ... .. .
8 7
8 7
88
93
95
95
95
95
95
Driver messages . . . . . . . . . . . . . . . . . . 97
Audi active lane ass ist ..... .. .
Lane assist .. .. .. .......... ..... .
99
99
Audi side assist . . . . . . . . . . . . . . . 103
Side assist ...... ............... .
Audi drive select ............. .
Driving settings .. .... ... ...... .. .
Automatic transmission ..... .
S tronic-transmiss ion ........... .. .
Parking systems
General information ........... .. .
Rea r parki ng system ... ......... . .
Parking sys tem plus .............. .
Rea rv iew camera .... .. .. ... ..... .
Adjus ting t he d isplay a nd the wa rning
tones . .... .... ................. .
103
107
107
110
110
119
119
120
120
121
12 5
Er ror messages . . . . . . . . . . . . . . . . . . 125
Page 8 of 302
6 About this Owner's Manual
This owner's manua l contains important infor
mation, tips, suggestions and warnings for
using your veh icle.
Keep this owner's manual in your vehicle at all
times. This is especially important if you loan
your vehicle to others or sell it.
This owner's manual descr ibes the
equipment
range
specified for this mode l at the time of
printing. Individua l equipment options descri
bed may on ly be available at a later date or
may only be offered in certain countries .
Some sect ions in this owner's manua l do not
apply to a ll vehicles . When this is the case,
the beginning of the section indicates the
val
idity ,
for examp le "Applies to vehicles: with a
parking heater". Optional or vehicle-specific
equipment is also identified with an asterisk
"*"
The illustrations are designed as a general
guide and on your vehicle may look slightly
different than what is illustrated.
There is a
Table of Contents at the beginning
of this owner's manua l that lists all of the
topics covered in this book in the order that
they appear. There is also an alphabetical
In
dex at the end of this owner's manual.
All
directions, such as "left", "right", "front"
and "rear", are based on the vehicle's direc
tion of travel.
* Optional or vehicle-specific equipment
.,.. The section continues on the next page.
~ .&. Cross reference to a "WARNING" within
a sect ion.
If a page number is ind icated, the
WARNING is located outside of the sect ion.
& WARNING
T ext with this symbol contains important
information on safety and how to reduce
the risk of personal injury or death .
({I;) Note
Text with this symbol draws your attention
to potential sources of damage to your ve
hicle.
{® For the sake of the environment
Text with this symbo l contains information
about the environment and how you can
help protect it.
(D Tips
Text with this symbo l contains specia l tips
and other informat ion about gett ing the
most out of your vehicle and its features.
Page 11 of 302
M N ,....
> co ...... \!) 1.1'1
...... 1.1'1 ......
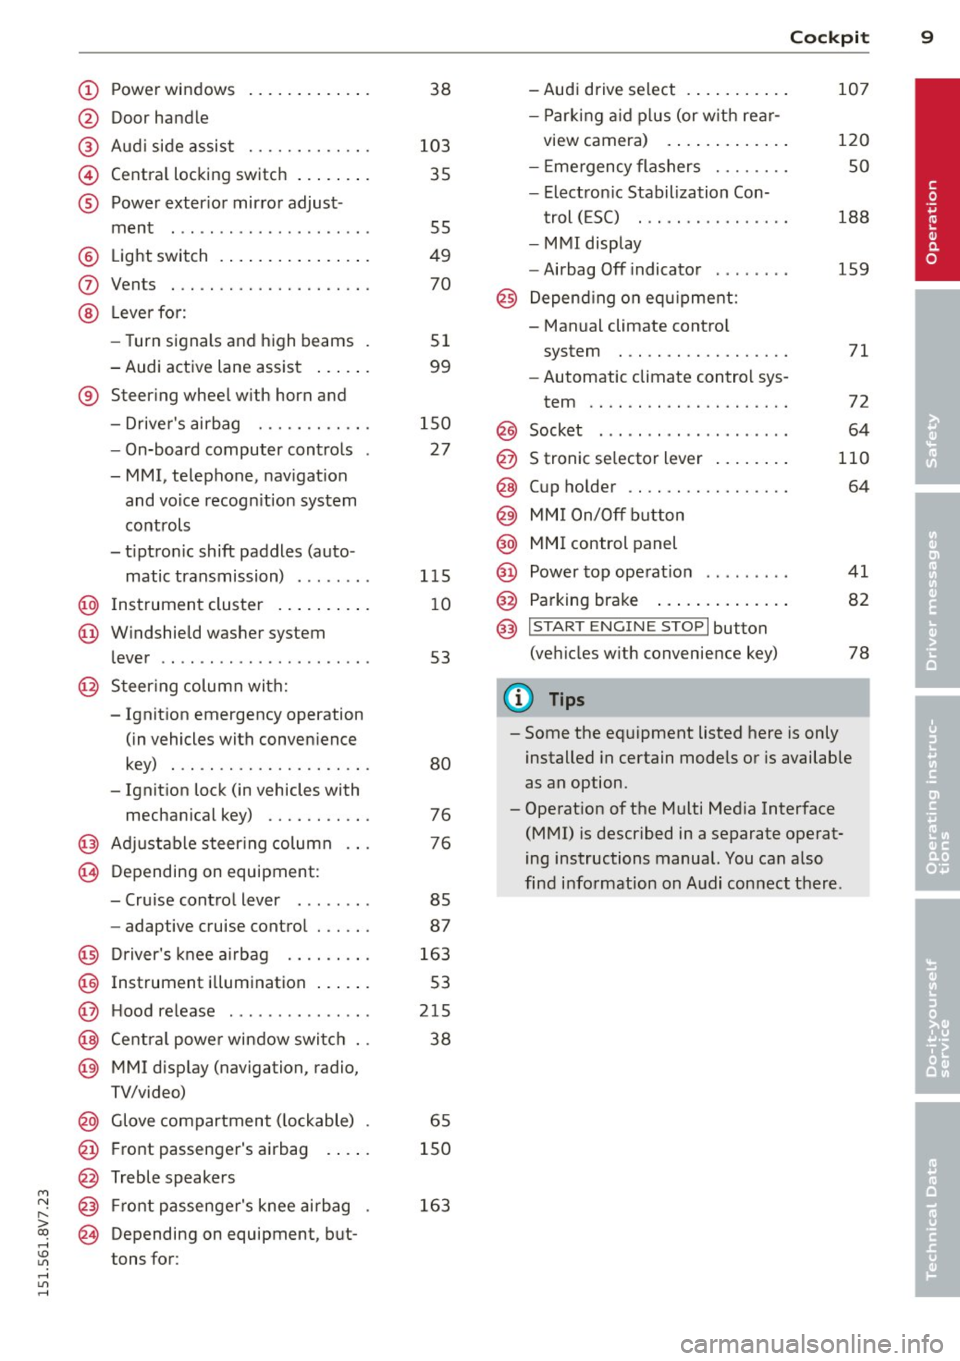
CD
@
®
©
®
®
(J)
®
Power windows
Door handle
Aud i side assist ........ .... .
Centra l locking switch ... .. .. .
Powe r exter ior mirror adjust
ment
Light switch . ... .... ... .. .. .
Vents
L eve r fo r:
- Turn signals and high beams .
- Audi active lane assist ... .. .
® Steer ing wheel w ith horn and
- Drive r's airbag ........... .
- On-board computer controls
-MMI, telephone, navigat ion
and voice recogn it ion system
controls
- tiptron ic shift paddles (auto-
matic transmission) ....... .
@ Instrument cluster .. ... .. .. .
@ W indshield washer system
l ever
' .................... .
@ S teer ing column with:
- Ignit ion emergency operation
(in vehicles with conven ience
key) . .. ................. .
- Ignit ion lock (in vehicles with
mechanical key) .......... .
@ Adjustable s teer ing column
@ Depending on equipment:
- Cruise contro l lever ....... . 38
103 35
55
49
70
51
99
150 27
1 15
1 0
53
80
76
76
85
- adaptive cruise contro l . . . . . . 87
@ Driver's knee a irbag . . . . . . . . . 163
@ Instrument i llumination . . . . . . 53
@ H ood re lease . . . . . . . . . . . . . . . 215
@ Centra l power window swi tc h . . 38
@ MMI disp lay (navigation, radio,
TV/video)
@ Glove compartment ( lockable) . 65
@ Front passenger 's airbag . . . . . 150
@ Treble speakers
@ Front passenge r's knee ai rbag .
@ Depending on equipment, b ut
tons for: 163
Cockpi
t 9
-Audi drive select . .. ..... .. .
- P arking a id p lus (or w ith re ar-
view camera) . .. .. .. ..... .
- E mergency flashers ....... .
- Elect ron ic Stabilization Con-
t rol ( ESC) . .. .... ........ .
- MMI display
- Airbag Off indicator .... ... .
@ Depend ing o n equ ipment:
- Manual climate contro l
system
- Automatic climate control sys
tem
.. .. .. .. .. .. .........
Socket
S tronic se lector lever ..... .. .
Cup holder .. .. ............ .
MM I On/Off b utton
@ MMI control panel
@ Power top ope rat ion ... ..... .
@ Parking brake .... .. .. ..... .
@ I S T ART ENGINE STOPI button
(vehicles w ith convenience key)
(D Tips
107
120
so
188
159
71
72
64
110
64
41
82
78
- Some the eq uipment listed here is only
installed in certain models or is available
as an option.
- Operat ion of the Multi Med ia Interface
(MMI) is described in a separate operat
ing instructions manual. You can a lso
find info rmat ion on A udi connect ther e.
•
Page 20 of 302
18 Instruments and indicator lamps
Active lane assist*
¢ page 100
Audi side assist*
¢page 105
Transmission
¢ page 116
USA model s:
Electromechanical parking brake
¢ page 19
Canada model s:
Electromechanical parking bra ke
¢page 19
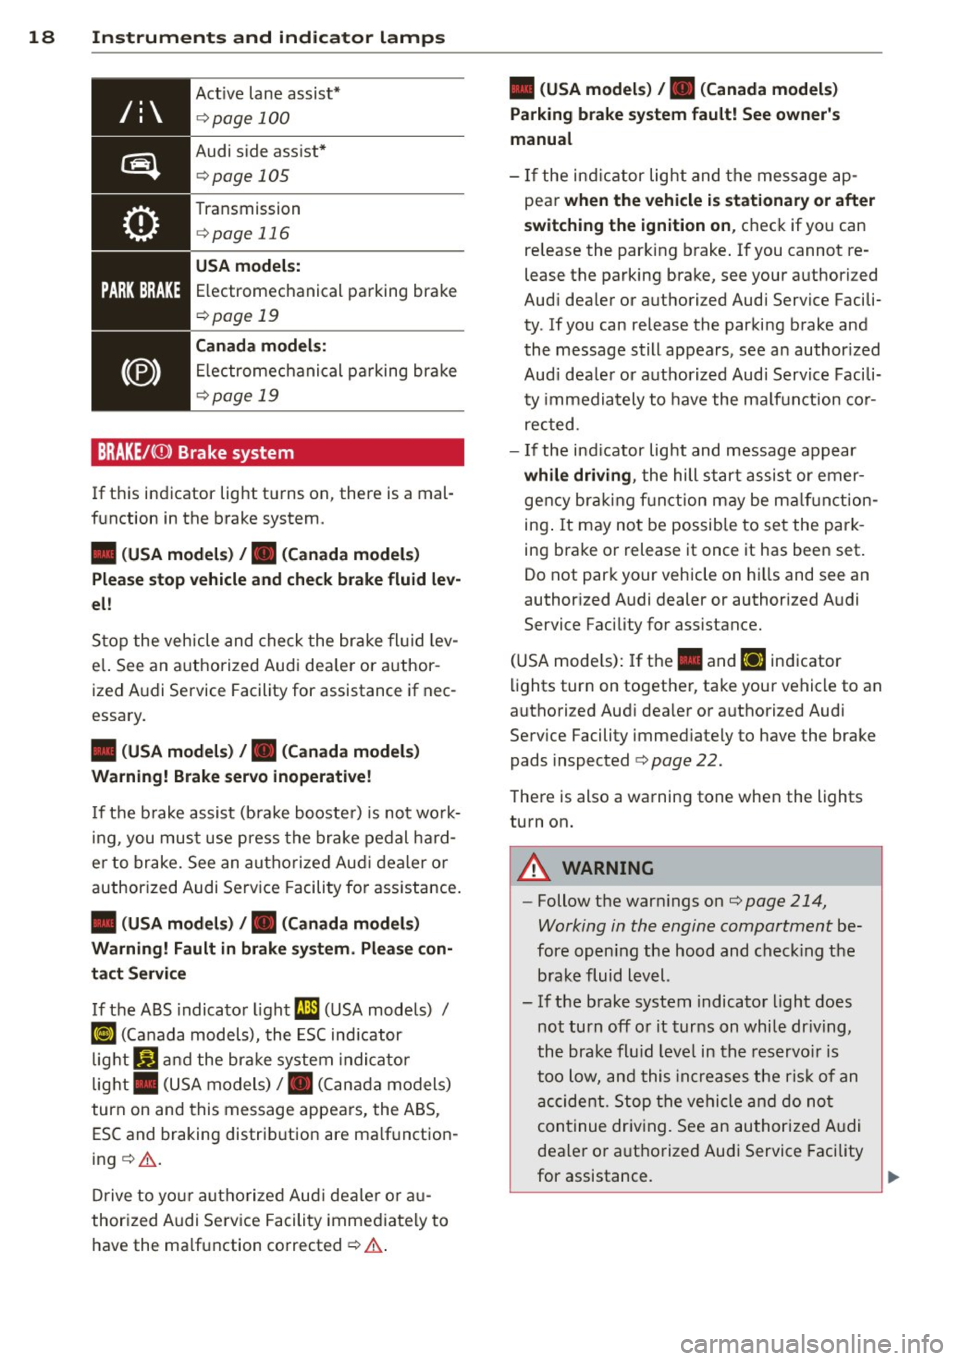
BRAKE/((i)) Brake system
If this indicator light tu rns on, there is a mal
function in the brake system.
• (USA models) , • (Canada models)
Please stop vehicle and check brake fluid lev
el!
Stop the vehicle and check the brake fluid lev
e l. See an a uthorized Audi dea le r or author
ized Audi Service Facility for assistance if nec
essary.
• (USA models) , • (Canada models)
Warning! Brake servo inoperative!
If the b rake assist (bra ke booste r) is not wo rk
in g, you must use press the brake pedal hard
e r to brake. See an authorized Aud i dealer or
authorized Audi Serv ice Facility fo r ass istance.
• (USA models) , • (Canada models )
Warning! Fault in brake sy stem . Please con
tact Service
If the ABS indicator light (;I (USA models) /
KO) (Canada models), the ESC ind icator
light
Jil and the brake system indicator
light . (USA models)/ . (Canada models)
turn on and this message appears, the ABS,
ESC and braking distrib ution are ma lf u nction
ing ¢.&. .
Drive to your authorized Aud i dealer o r au
thorized Audi Service Facility immediately to
have the ma lfunction corrected ¢.&. .
• (USA models) , • (Canada models)
Parking brake system fault! See owner's
manual
- If the ind icator light and the message ap
pear
when the vehicle is stationary or after
switching the ignition on ,
check if you can
re lease the parking brake. If you cannot re
lease the parking brake, see your authorized
Aud i dealer or authorized Audi Service Facili
ty . If you can release the parking brake and
the message still appears, see an author ized
Aud i dea ler or a uthorized Audi Service Facili
ty immediately to have the ma lfunction cor
rected.
- If the ind icator lig ht and message appear
while driving , the hill start assist or emer
gency braking function may be malf uncti on
ing . It may not be possib le to set the park
ing brake or release it once it has been set.
Do not park your vehicle on hills and see an
author ized Audi dealer or authorized A udi
Service Facility for assistance.
(USA mode ls) : I f the . and
liJ indicator
lights turn on together, take your vehicle to an
authorized Aud i dea ler or a uthorized Audi
Serv ice Facility immed iately to have the brake
pads inspected ¢
page 22.
There is also a warning tone when the lights
turn on.
A WARNING
-- Follow the warn ings on¢ page 214,
Working in the engine compartment
be
fore opening the hood and check ing the
brake fluid level.
- If the brake system indicator light does
not turn off or it turns on while dr iving,
the brake fluid leve l in the reservo ir is
too low, and this increases the risk of an
accident. Stop the vehicle and do not
continue driving. See an authorized Aud i
dealer or authorized Aud i Service Facility
for assistance. ..,.
Page 29 of 302
....,
N
r--. > co
rl I.O
"' rl
"' rl
On-board computer display
The on-boa rd comp uter display monitors the
d iffe rent memory levels:
- Sho rt-term memory (on-board computer
1)
- Long-term memory (on-board computer 2)
-Eff iciency p rogram
The fo llowing information can be displayed in
on-boa rd compute r
1 and 2 one after the oth
er.
- Date
- Estimated range based on current fuel leve l
- T rave l time
- Average consumption
- Average speed
- Distance
- Current fuel consumption
On-board computer D (short -te rm
mem ory )
The sho rt-term memory co llects d riving infor
mation from the time the ignition is switched
on until it is switched off . If you continue driv
ing
w ith in two hours after switc hing the igni
tion off, the new values a re included when cal
culating the cu rrent trip information .
If stop
ped for more the two hours, the short term
memory is automatically erased once you be
g in d riving.
On-board computer fJ (long-term
memory )
Unlike the short-term memory , the long -term
memory is not erased automa tica lly. You can
selec t the time pe riod for evaluat ing t rip in
formation yo urself.
Efficiency program ii
The eff ic iency program can help you to use
l ess fuel ¢
page 28.
(D Tips
-The on-board computer is controlled by
the left but ton fields on the multifunc
tion steering wheel.
- For information on using the other but
ton fields, such as the aud io, telephone*
Dr iver in formation system 2 7
and navigation* f unct ions, see the M MI
owner's manual.
Operation
Applies to veh icles: w ith driver information system
T he dr iver information system is controlled
with the multifunction steering wheel.
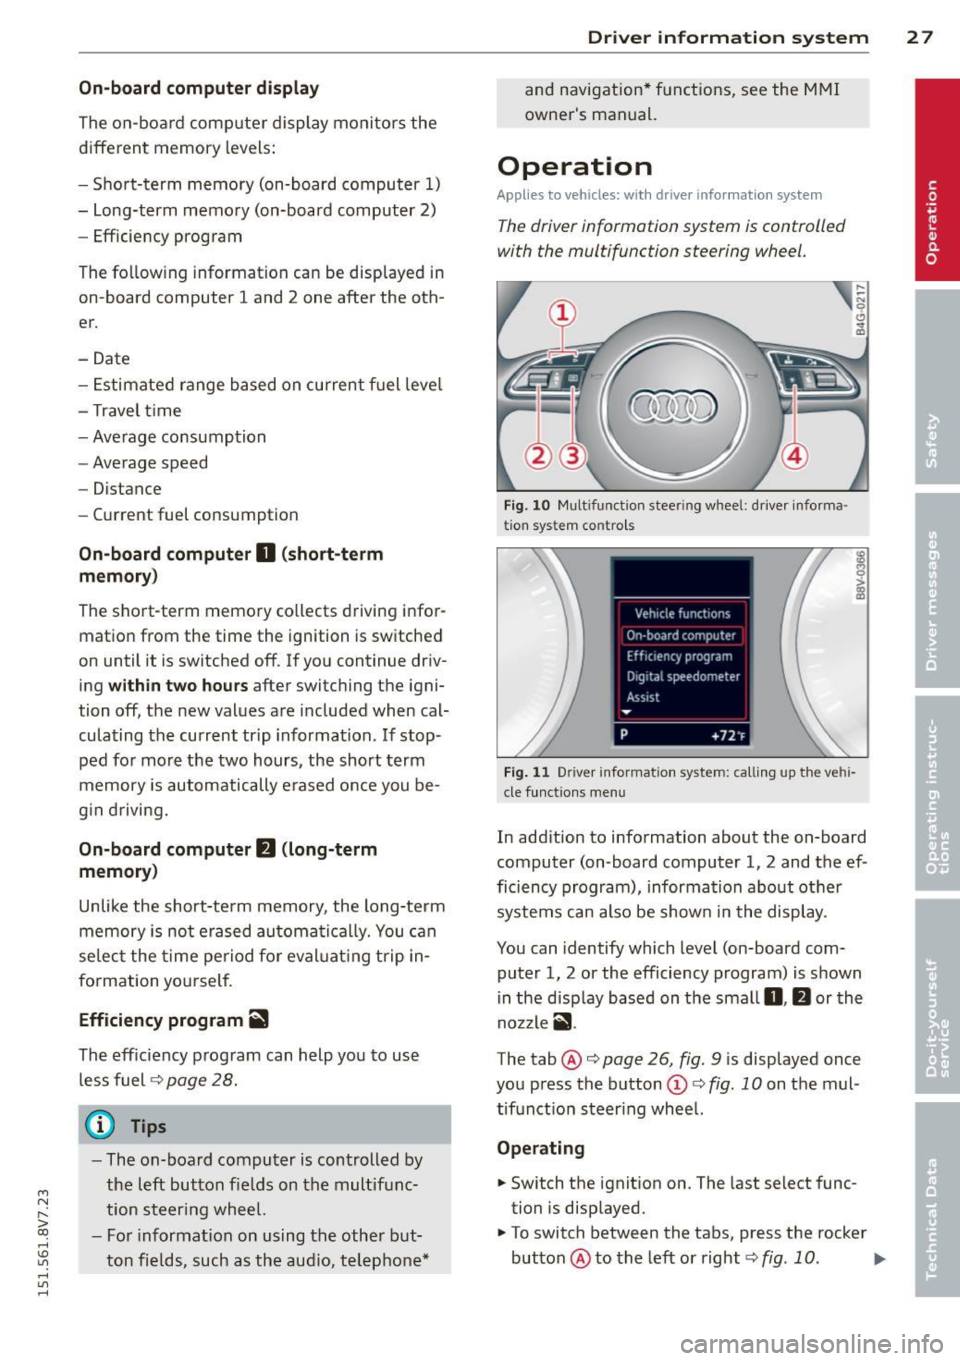
F ig . 1 0 Mu lt ifun ction s tee rin g w heel : d river i nforma
t ion s ystem c ontro ls
F ig . 1 1 Driv e r in forma tion syst em: calling up the vehi
cle funct io ns me nu
In add ition to information about the on-board
computer (on -board computer 1, 2 and the ef
ficiency program), informa tion about othe r
systems can also be show n in the display .
You can identify which level (on-board com
puter 1, 2 or the efficiency program) is shown
i n the d isp lay based on the sma ll
0, fJ or th e
no zzle
ii .
The tab@¢ page 26 , fig. 9 is displayed once
you press the b utton
(D ¢ fig. 10 on the mul
tif unctio n steer ing wheel.
Operating
.. Switch the ignit ion on. The last select func
tion is disp layed.
.,. To switch between the tabs, press the rocker
button @to the left or right¢
fig. 10. IJJJ,
Page 44 of 302
42 Power top
-Make sure no one will be injured by the
power top supports and other moving
components when opening and closing
the top.
- The headroom in the rear is reduced
when opening and closing the power top. Make sure the rear passengers keep
enough distance from the power top to
reduce the risk of injury.
- When operating the power top, visibility
to the rear is limited . Avoid operating the
top while driving in reverse.
(D Note
-To prevent damage to the power top:
- do not store any objects in the power
top storage compartment.
- make sure there is enough space above
the vehicle when opening or closing
the power top.
- To reduce the risk of damage, make sure
there are no sensitive objects in the pow
er top storage compartment's range of motion.
@ Tips
- To prevent the battery from draining un
necessarily, do not open or close the
power top repeatedly when the engine is
switched off.
- A message will appear in the instrument
cluster if there is a malfunction in the
power top c:>
page 43.
-The power top can also be operated
manually temporarily if there is a mal
function c:>
page 45, Power top emer
gency operation.
An authorized Audi
dealer or authorized Audi Service Facility
should diagnose and correct the cause of
the malfunction as soon as possible .
- If the vehicle is parked with the power
top open, the vehicle interior is not pro
tected from damaging weather or unau
thorized access. Lock any items you leave
behind in the luggage compartment.
Close the power top before leaving the
vehicle. - The
side windows automatically lower
slightly when opening or closing the
power top.
Power top convenience opening and
closing
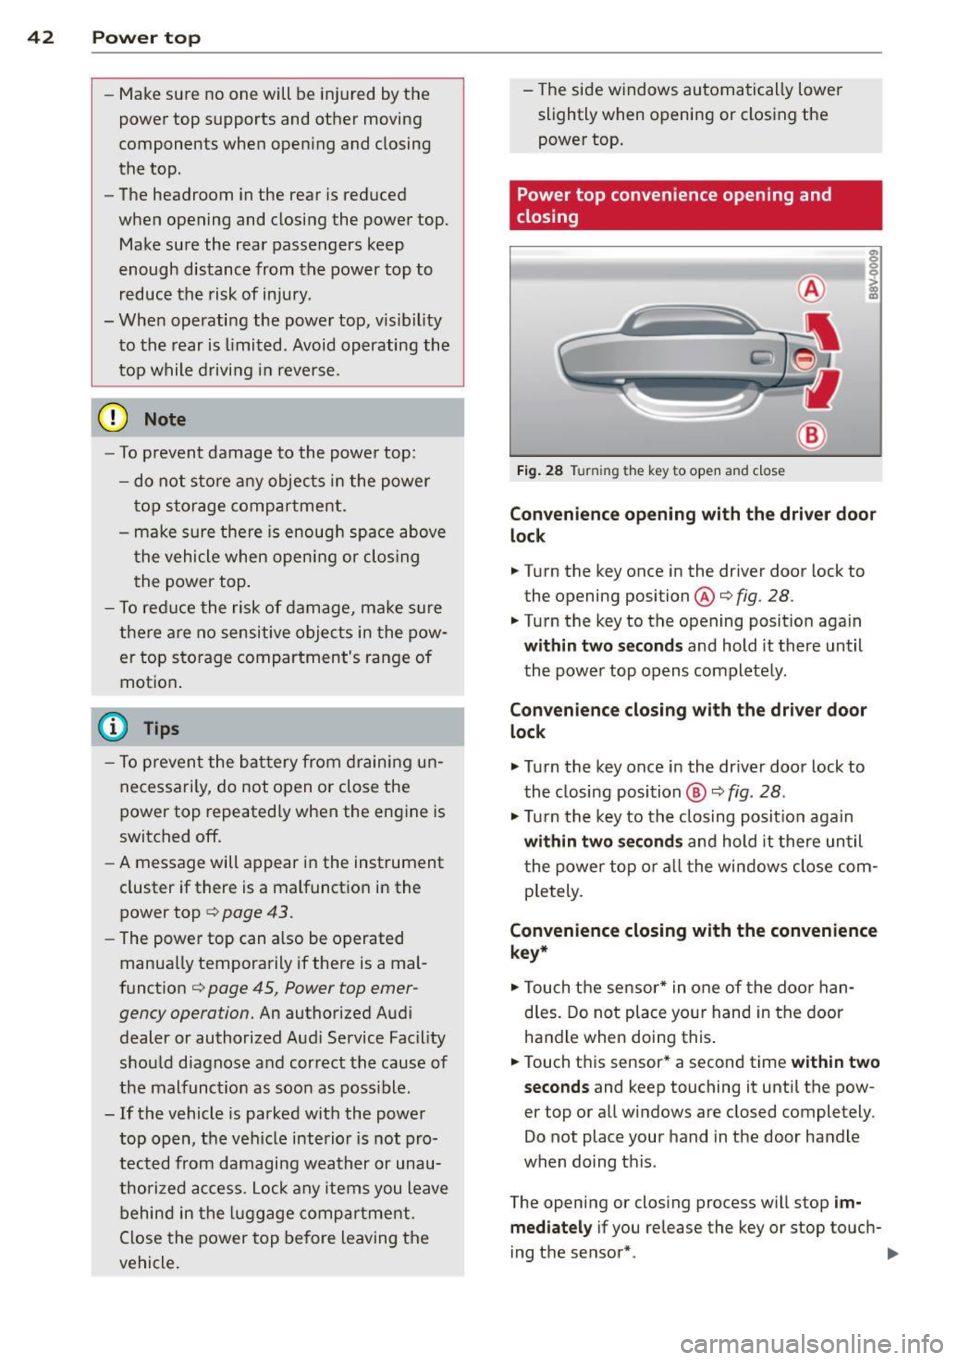
Fig. 28 Tu rnin g the key to open and close
Convenience opening with the driver door
lock
.. Turn the key once in the driver door lock to
the opening position@c:>
fig. 28.
.. Turn the key to the opening position again
within two seconds and hold it there until
the power top opens completely.
Convenience closing with the driver door
lock
.,. Turn the key once in the driver door lock to
the closing position @
c:> fig. 28.
.,. Turn the key to the closing position again
within two seconds and hold it there until
the power top or all the windows close com
pletely .
Convenience closing with the convenience
key*
.. Touch the sensor* in one of the door han
dles. Do not place your hand in the door
handle when doing this.
.. Touch this sensor* a second time
within two
seconds
and keep touching it until the pow
er top or all windows are closed completely .
Do not place your hand in the door handle
when doing this .
The opening or closing process will stop
im
mediately
if you release the key or stop touch-
ing the sensor*. ..,.
Page 47 of 302
M N ,....
> co ...... \!) 1.1'1
...... 1.1'1 ......
press lightly in the midd le o f the wind de
flector ® until the hand le locks in place .
... Raise the wind deflector completely .
Removing the wind deflector
... Fold the hand le @ ¢fig. 31 upward and
f o ld the w ind deflector frame back .
... Fold the hand le @ ¢fig.
31 upward and lift
the center of the wind deflector slightly @
¢fig . 32.
... Remove the w ind deflector from the mounts
in the side trim on the passenger's side.
... Pull the wind deflector out of the mounts on
the driver side and lift it out .
... Fold the w ind deflector together and store it
secu rely.
A WARNING
- Do not use the w ind de flector to secure
cargo.
- Be careful when ins tall ing so yo u do not
pinch your finge rs .
- Pay atten tion to the traffic when instal
ling the wind deflector. Install the win d
deflecto r from the s ide of the vehicle
that is away from traffic .
(D Note
Do not lean against the veh icle when in
s t all ing the wind deflecto r. H ard objec ts
and decorations on clothing s uch as belt
buckles can scratch the pai nt.
(D Tips
- The wind defle ctor works best when al l
of the windows are ro lled up wh ile driv
ing.
- Only store the wind deflector in the stor
age bag* when it is dry.
Power top 45
Power top emergency
operation
General information
The power top can be closed manually if there
is a malfun ction.
... Set the park ing brake.
... Open a ll wi ndows.
... Switch the ignit ion off .
... Pull the but ton @ for app rox ima tely 10 to
15 seconds to reduce the pressure in the
power top hydraulics ¢
page 41, fig. 2 7 .
Only close the power top manually in an emer
gency . Have a second person assist. Drive to
an a uthorized Audi dea ler or a uthorized Audi
Service Facility immediately to have the ma l
function corrected.
A WARNING
- There is a r isk of pinching the hands or
other peop le during all of the power top
emergency operation steps.
- Make sure all windows are lowe red d ur
ing eme rgency ope ration .
- Do no t rea ch into t he power top sup
po rts or other mov ing components .
- Never d rive when the powe r top is not
loc ked correctly. The w ind from dr iving
could cause the power top to open. This
can result in injuries and damage to the
vehicle.
(D Tips
The powe r top storage compartmen t cover
i s not latched afte r the emergency opera
tion is complete . Drive to an a uthorized
A udi dealer or authorized A udi Service Fa
cility immediately to have the malfunct ion
corrected.
-
•
Page 56 of 302
54 Lig ht s a nd Vis io n
A WARNING
-The rain sensor is only intended to assist
the driver. The driver is still responsible
for manually switching the w ipers on ac
cording to the v is ibility conditions.
- The windshield may not be treated w ith
water-repe lling windshie ld coat ing
agents. Unfavorable conditions, such as
wetness, darkness or low sun, can result in increased glare. W iper blade chatter is
also possible.
- Properly functioning windshie ld w iper
blades are required for a clear view and
sa fe driving
¢ page 54, Replacing
front windshield wiper blades.
0 Note
- In case of frost, make sure the wind shield wiper blades are not frozen to the
windshield. Sw itching on the windshield
wipers when the blades are frozen to the
windshield can damage the wiper blades.
- Prior to using a car wash, the windshield
wiper system must be switched off (lever
in position 0). This prevents unintention
al sw itching on and damage to the wind
shield wiper system.
- Do not use the wipers to remove ice from
the windows. Using windshield wipers as
ice scrapers destroys the wiper blades.
{D Tips
- The windshield wipers switch off when
the ignition is turned off. You can acti
vate the w indshield wipe rs after the igni
tion is switched back on by moving the
windsh ield wiper leve r to any pos ition.
- Worn or dirty windsh ield wiper blades
result in streaking. Th is can affect the
rain sensor function. Check your w ind
s h ield wiper blades regularly.
- The washer fluid nozzles in the w ind
shield washer system are heated* at low
temperatures when the ignit ion is on.
- When stopping temporarily, such as at a
traff ic light, the speed of the windsh ield wipers automatically reduces by one
lev
el.
- In vehicles with an MMI, you can switch
the rain sensor or off in the
Driver a ssi s
t a nce
menu.
Cleaning windshield wiper blades
Clean the wiper blades when you see wiper
streaks . Use a soft cloth and a glass cleaner .
.,. Place the windshie ld wiper arms in the serv
ice pos it ion
¢ page 54.
.,. Fold the windshield wiper arms away from
the windshield.
A WARNING
Dirty windsh ield wiper blades can impair
v is ion, wh ich increases the r isk of an acci
dent.
(D Note
If you see streaks again after clean ing the
wiper blades, the blades must be replaced
¢ page 54.
Replacing front windshield wiper blades
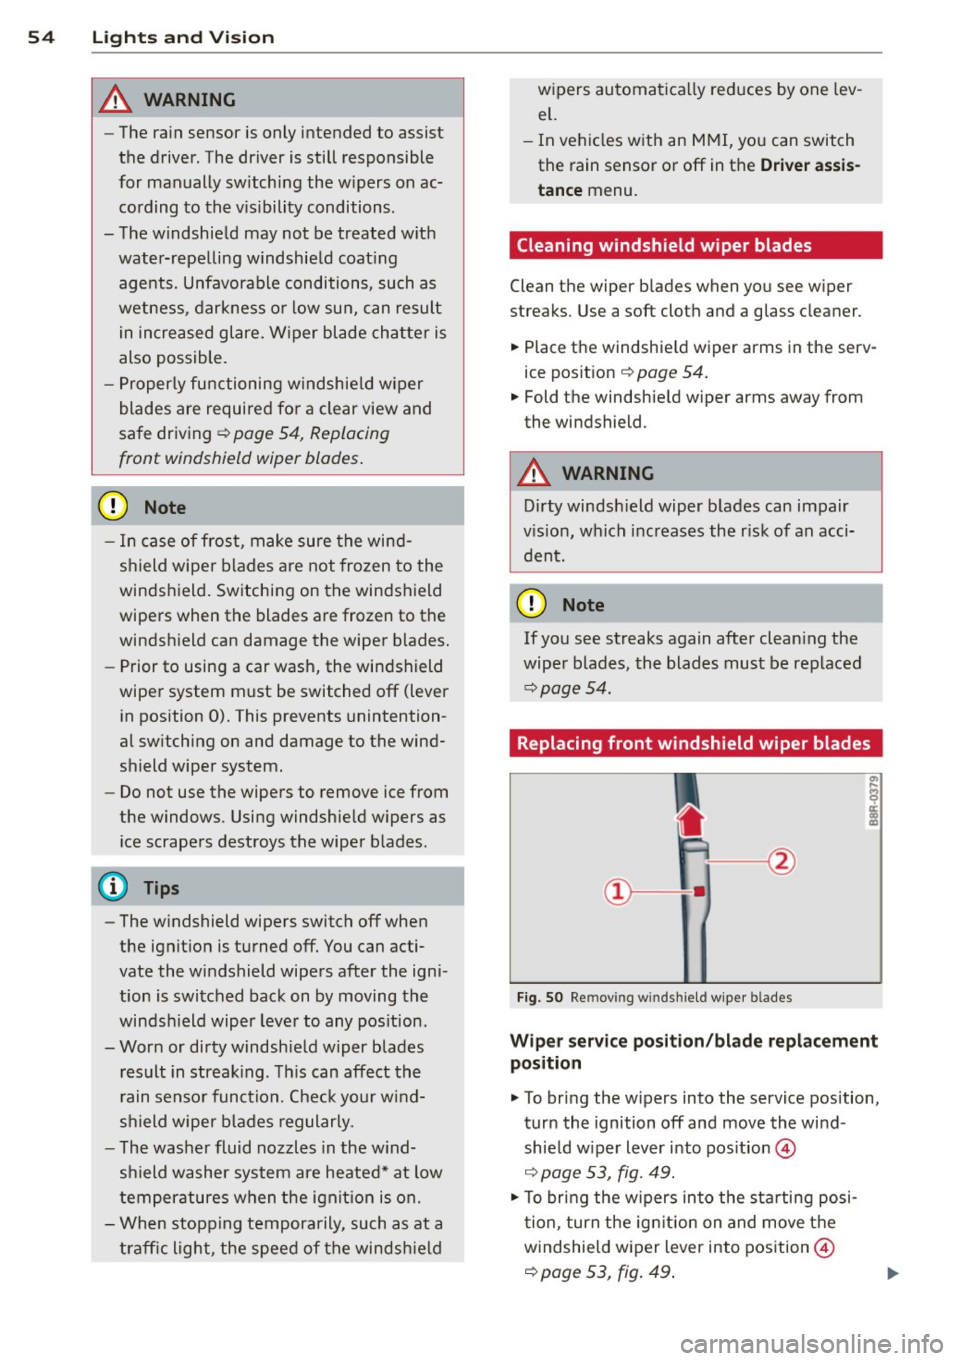
Fig. SO Re mov ing windshie ld wiper blades
W ipe r se rv ic e po sit ion /bl ad e re pl ace ment
pos ition
.,. To bring the w ipers into the service position,
turn the ignition off and move the wind
shield w iper lever into position @
¢ page 53, fig. 49.
.,. To bring the w ipers into the starting posi
tion, turn the ign ition on and move t he
windshield wiper lever into position@
¢ page 53, fig. 49 .
Page 62 of 302
60 Seats and st o rage
as possible <:!> page 62. Move the head re
straint so that it is as close to the back of
the head as possible.
A WARNING
Never place any objects in the driver's foot
we ll. An object could get into the pedal
area and interfere with pedal function . In
case of sudden b raking o r an accident, you
would not be ab le to brake o r acce le rate.
Front passenger's seat
Always move the front passenger seat into the rearmost position .
To avoid contact with the airbag while it is de
p loying, do not sit any closer to the instru
ment panel than necessary and always wear
the three-point safety belt provided adjusted
correctly . We recommend that you adjust the
passenger's seat i n the fol lowing ma nner:
,,. Bring the backres t up to an (a lmost) upr ight
pos it ion.
D o not ride w ith the seat reclined .
,,. For adjustable head restraints : adjust the
head res traint so the upper e dge is as even
as possib le w ith the top o f your head .
If tha t
is not possib le, try to adjust the head re
straint so that it is as close to th is position
as possible
<:!> page 62 . Move the head re
stra int so that it is as close to the back of
the head as possible.
,,. Place your feet on the floor in front of the
passenge r's seat .
Front seats
Manual seat adjustment
Applies to veh icles: w ith manually adjustab le seats
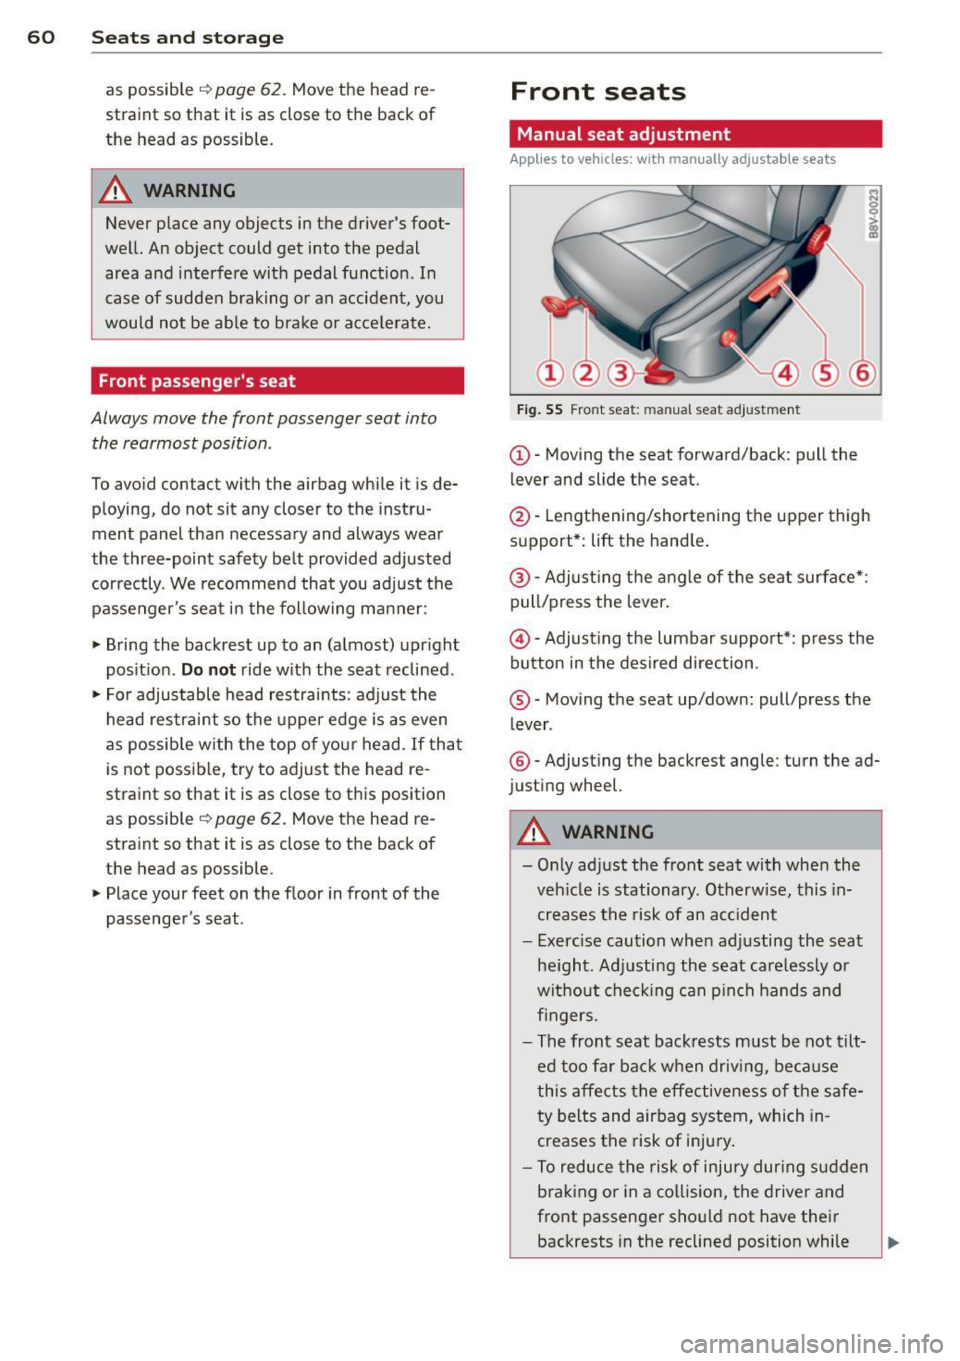
F ig. 55 Fro nt sea t: man ual seat adjustment
(D-Moving the seat forward/back : pull the
l ever and slide t he seat.
@ -Le ngt hening/shortening t he upper thigh
s u pport*: lift the handle.
@ -Adjust ing the angle of the seat sur face *:
pull/press the lever .
@-Adjust ing the lumbar support*: p ress the
button in the desired direction .
®-Moving the seat up/down : pull/press the
lever .
®-Adjust ing the backrest angle : turn the ad
j usting wheel.
A WARNING
- O nly ad just t he front seat with when the
veh icle is stationary. O therw ise, this in
creases t he risk of an accid ent
- Exerc ise caution when ad justing the seat
he ight . Ad justing the seat care less ly o r
wit hout checking can p in ch hands and
fi ngers .
- The front seat back rests must b e not tilt
ed too far ba ck when drivi ng, be ca use
this affects the effe ctiveness of the s afe
ty belts and airbag system, which in
creases the risk of inju ry .
- T o reduce the ris k of injury dur ing s udden
b raking or in a collision, the d rive r and
front passenger sho uld not have thei r
backrests in the reclined position while
Page 72 of 302
70 Warm and cold
Warm and cold Climate control system
Description
Different systems could be installed.
- manual climate control system* or
- automatic climate control system*
The
climate control system* cools and re
moves humidity from the air in the vehicle in
terior. It is the most effective when the win
dows and power top are closed. If there is a
build-up of heat inside the vehicle, ventila tion
can help to speed up the cooling process. Be
cause of this, the windows can be opened
from outside .
~ page 39, Convenience open
ing/closing
Pollutant filter
The pollutant filter removes pollutants such
as dust and pollen from the air .
Key recognition
You can store various settings for the manual
and automatic
climate control system* and
assign them to the key being used .
A WARNING
Poor visibility can lead to accidents.
- For safer driving, keep a ll windows free
of ice, snow and fog.
- Become familiar as quickly as possible
with the correct use and function of the
climate control system, especially with
the defrosting and defogging function .
- When the temperature is below freezing,
only use the windsh ield washer system
after the w indshield has been warmed by the cl
imate control system . The washer
fluid could freeze on the windshield and
impair visibility.
(D Note
- If you suspect that the climate control
system is damaged, switch the system
off to prevent further damage and have
it checked by an authorized Audi dealer
or authorized Audi Service Facility.
- Repairs to the Audi climate control sys
tem require special technical knowledge
and special tools. See an authorized Audi
dealer or authorized Audi Serv ice Facility .
® For the sake of the environment
Reducing the amount of fuel used also re
duces the amount of pollutants that enter
the air.
(D Tips
- To prevent interference with the heating
and cooling output and to prevent the
w indows from fogging over, the air in
take in front of the windshield must be
free of ice, snow or leaves.
- Condensation from the cooling system*
can drip and form a puddle of water un
der the vehicle. This is normal and does
not mean there is a leak.
- T he energy management system may
switch the seat heating* or rear window
defroster off temporari Ly. These systems
are available again as soon as the energy
balance has been restored.
- The flows through the vents under the
rear window. Make sure the openings are
not covered when placing clothing on the
luggage compartment cover.