brake pads AUDI A3 CABRIOLET 2016 Owners Manual
[x] Cancel search | Manufacturer: AUDI, Model Year: 2016, Model line: A3 CABRIOLET, Model: AUDI A3 CABRIOLET 2016Pages: 272, PDF Size: 67.88 MB
Page 17 of 272
<( co .... N ,.__
N .... 0 ,.__
> co
& Brake booster
Brake servo: limited functionality. You can con
tinue driving. Contact Service
There is a malfunction in the brake booster if this
message appears. The brake booster is available,
but its effectiveness is reduced. Braking behavior
may be different from how it normally functions
and the brake pedal may vibrate.
Drive to an authorized Audi dealer or authorized
Audi Service Facility immediately to have the
malfunction corrected.
BRAKE/((D) Brake system
If this indicator light turns on, there is a malfunc
tion in the brake system.
1111 (USA models) /. (Canada models)
Please stop vehicle and check brake fluid level!
Stop the vehicle and check the brake fluid level.
See an authorized Audi dealer or authorized Audi
Service Facility for assistance if necessary.
1111 (USA models) /. (Canada models)
Brake: malfunction! Please park vehicle safely
If the . indicator light turns on and this mes
sage appears, there is a brake booster malfunc
tion .
If the ABS indicator light
rJ]) (USA models) /
[I] (Canada models), the ESC indicator light J.il
and the brake system indicator light 1111 (USA
models)/ . (Canada models) turn on and this
message appears, then the ABS, ESC and braking
distribution are malfunctioning
c::> .&..
Do not continue driving. See an authorized Audi
dealer or authorized Audi Service Facility for as
sistance
c::> .&. .
1111 (USA models) /. (Canada models) Park
ing brake system fault! See owner's manual
- If the indicator light and the message appear
when the vehicle is stationary or after switch
ing the ignition on,
check if you can release the
parking brake . If you cannot release the park
ing brake, see your authorized Audi dealer or
authorized Audi Service Facility . If you can re-
Instruments and indicator lights
lease the parking brake and the message still
appears, see an authorized Audi dealer or au
thorized Audi Service Facility immediately to
have the malfunction corrected.
- If the indicator light and message appear
while
driving,
the hill start assist or emergency brak
ing function may be malfunctioning. It may not be possible to set the parking brake or release
it once it has been set . Do not park your vehicle
on hills and see an authorized Audi dealer or
authorized Audi Service Facility for assistance .
Applies to: USA models
If the 1111 and EiJ indicator lights turn on at the
same time, the brake pads are worn
<::>page 19.
.&_ WARNING
-Read and follow the warnings in
c::> page 188, Working in the engine com
partment
before opening the hood and
checking the brake fluid level.
- If the brake system indicator light does not
turn off or it turns on while driving, the
brake fluid level in the reservoir is too low,
and this increases the risk of an accident.
Stop the vehicle and do not continue driv
ing. See an authorized Audi dealer or au
thorized Audi Service Facility for assistance.
- If the brake system indicator light turns on
together with the ABS and ESC indicator
lights, the ABS/ESC regulating function may
be malfunctioning. Functions that stabilize
the vehicle are no longer available . This
could cause the rear of the vehicle to
swerve, which increases the risk that the ve
hicle will slide. Do not continue driving. See
an authorized Audi dealer or authorized
Audi Service Facility for assistance.
PARK/(®)/i®J, Electromechanical parking
brake
If the - (USA models)/ . (Canada models)
indicator light turns on, the parking brake was
set .
- (USA models) /. (Canada models) Cau-
tion: Vehicle parked too steep .,..
15
Page 20 of 272
<( co .... N r--N .... 0 r--> co
A WARNING ,~
If the ~ (USA models) /. (Canada mod
els) brake system indicator light turns on to
gether with the ABS and ESC indicator lights,
the ABS/ESC regulat ing funct ion may have
fai led. Functions that stabilize the vehicle are
no longer available. This could cause the vehi
cle to swerve, which increases the risk that
the vehicle will slide. Drive carefully to the
nearest author ized Audi dealer or authorized
Audi Service Facility and have the malfunction corrected.
@ Tips
For additional information on ESC and ABS,
refer to¢
page 116.
{0} Brake pads
IJ Brake pads!
The brake pads are worn.
Drive to an autho rized Aud i dea le r or authorized
Aud i Service Faci lity immediately to have the
b ra ke pads checked.
Applies to: USA models
The IJ indicator light turns on together with the
~ indicator light
·~ Hill hold assist
Hill hold assist: unavailable
If thP&) indicator light tu rns o n and this mes
sage appears, hill hold is not available.
II Manual control!
If this message appears, press the brake pedal.
Continue driving w ith the help of the park ing
brake. ¢
page 73
EPC Engine control (gasoline engine)
Applies to: veh icles with gasoline engines
If the ~ indicator light turns on if there is a
malfunction in the engine control.
Instruments and indicator lights
Drive slowly to an authorized Audi dea ler or au
thorized Audi Service Facility to have the engine
checked .
If the~ indicator light turns on when you start
the engine, there is an automatic start malfunc
tion. To start the engine, fo llow these steps:
- Vehicles with ignition lock¢
page 68, Auto-
matic start malfunction
- Veh icles with a conve nience key¢ page 70,
Automatic start malfunction.
a System indicator light (MIL)
The system indicator light (MIL) is pa rt of the On
Board Diagnostic system (OBD II) . The
II! sym
bol turns on when the ignition is switched on and
turns off again once the engine is started and
running at a steady idle speed. This indicates that
the MIL is functioning correctly .
The indicator light turns on if there is a malfunc
t ion in the engine electronics . See an authorized
Audi dealer or authorized Audi Service Fac ility to
have the malfunction corrected.
The system indicator light (MIL) may turn on if
the fuel filler cap is not closed correctly
¢ page 186.
For additional information, refer to ¢ page 21.
!? Engine speed limitation
Applies to : vehicles with engine speed limitation
(II Max . engine speed: XXXX rpm
The engine speed is automatically limited to the
speed displayed in the driver information system.
This protects the engine from overheating.
T he eng ine speed limitation deactivates once the
engine is no longer in the critical temperature
range and you have re leased the accelerator ped
al once.
If the engine speed limitation was activated by
an engine control malfunction, the~ indicato r
light also turns on . Make sure the engine speed
does not go above the speed displayed, for exam-
ple when downshifting. Drive to an authorized .,.
19
Page 66 of 272
<( co .... N ,.__
N .... 0 ,.__
> co
Driving
General information
The first 1,000 miles (1,500 km) and afterwards
The new engine needs to be run-in during the
first 1,000 miles (1,500 km) .
For the first 600 miles (1,000 kilom eter s):
.,. Do not use full throttle.
.,. Do not drive at engine speeds that are more
than 2/3 of the max imum permitted RPM .
.,. Avo id high engine speeds .
From 600 to 1,000 mile s (1 ,000 to
1 ,500 kilomete rs ):
.,. Speeds can gradually be increased to the maxi
mum perm issible road or engine speed .
During and aft er bre ak-in pe riod
.,. Do not rev the engine up to high speeds when it
is cold. This applies whether the transmission is
in
N (Neutral) or in gear .
After th e br eak-in p eriod
.,. Do not exceed maximum engine speed under
any circumstances .
.,. Upshift into the next higher gear
before reach
ing the red area at the end of the tachometer
scale
opage 10.
During the first few hours of driving, the engine's
internal friction is higher than later when all the
mov ing parts have been broken in. How well this
break-in process is done depends to a considera
b le extent on the way the veh icle is driven during
the first 1,000 miles (1,500 kilometers).
CD Note
Extremely high eng ine speeds are automati
cally reduced. However, these rpm lim its are
programmed for an engine well run-in, not a
new engine.
@) For the sake of the environment
Do not dr ive with unnecessarily high eng ine
speeds - upshifting early saves fuel, reduces
noise and protects the environment.
D riv ing
Driving through water on roads
Note the following to avo id vehicle damage when
driv ing th rough water, for examp le on flooded
roads:
- The water must not be any higher than the bot
tom of the vehicle body .
- Do not dr ive faster than walk ing speed .
.&, WARNING ..__
After driv ing through water or mud, the brak
i ng effect can be reduced d ue to moistu re on
the brake d iscs and bra ke pads. A few careful
brake applications should dry off the brakes.
CD Note
Vehicle components such as the engine,
transmission, suspension o r electrical system
can be severely damaged by d riving throug h
water.
(D Tips
- Determine the depth before dr iving through
water.
- Do not stop the vehicle, d rive in reverse or
switch t he engine off when d riving through
water .
- Keep in mind that oncom ing vehicles may
create waves that raise the water level and
ma ke it too deep for yo ur vehicle to drive
through safe ly.
- Avoid dr iv ing th rough salt wate r (cor rosion) .
Economical and environ
mentally-friendly driving
General
Your personal style of driving will determine the
economy of your vehicle, as well as exhaust and
noise levels.
Fuel economy, env ironmental impact, and wear
on your engine, brakes and t ires largely depend
on three factors:
- your personal driving style
- operat ing cond itions
- technical limitations
65
Page 118 of 272
Intelligent Technology
(D Tips
-ESC/ASR cannot be switched off or sport
mode cannot be switched on if the cruise
control system* or the adaptive cruise con
trol* is switched on.
- Malfunctions in the Audi magnetic ride may make it impossible to switch the ESC/ASR
off or to switch sport mode on.
Brakes
New brake pads
New brake pads do not achieve their full braking
effect during the first 250 mi (400 km). They must be "broken in" first. However, you can com
pensate for the slightly reduced braking force by
pressing firmly on the brake pedal. Avoid heavy
braking during the break-in period .
Wear
Brake pad
wear depends largely on the way the
vehicle is driven and on operating conditions .
This is especially true if you are driving frequently
in the city and on curves or with a sporty driving
style .
Operating noise
Noises may occur when braking depending on the
speed, braking force and outside conditions such
as temperature and humidity .
Effect of water and road salt
In certain situations, for example after driving
through water, in heavy rain, after overnight con densation or after washing your car, the braking
effect can be reduced by moisture or ice on the
brake rotors and brake pads. The brakes must be
"dried" first with a few careful brake applica
tions.
At higher speeds and with the windshield wipers
turned on, the brake pads press against the brake
rotors for a short amount of time. This action
which is not felt by the driver happens at regular
intervals and facilitates a better reaction time for
the brakes in wet weather .
The braking effect can also be reduced if you are
driving on salted roads and you do not apply the
118
brakes for long periods of time. The layer of salt
on the brake rotors and pads must be worn off
first when the brakes are applied.
Corrosion
Leaving the vehicle parked for long periods of
time , low mileage and avoiding heavy braking
can contribute to corrosion on the brake rotors
and dirty brake pads.
If you usually avoid heavy braking or if there is
corrosion present, occasional heavy braking at
high speeds is recommended to clean the brake
rotors and pads¢.&. .
Brake system malfunction
if you notice that the brake pedal travel has sud
denly gotten larger, then a brake circuit may have
failed. Drive to an authorized Audi dealer or au
thorized Audi Service Facility immediately to have
the problem corrected. On the way there, drive
with reduced speed and keep in mind that a long
braking distance and increased pressure on the
brake pedal will be necessary.
Low brake fluid level
When the brake fluid level is low, malfunctions in
the brake system may occur. The brake fluid level
is electronically monitored.
Brake booster
The brake booster amplifies the pressure you ap
ply to the brake pedal.
It only works when the en
gine is running.
A WARNING
- New brake pads do not achieve their full
braking effect during the first 250 mi
(400 km). They must be "broken in" first.
However, you can compensate for the
slightly reduced braking force by pressing
firmly on the brake pedal. Avoid heavy brak
ing during the break-in period.
- Only apply the brakes for the purpose of
cleaning the brake system when road and
traffic conditions permit. You must not en
danger other road users. This increases the
risk of an accident.
Page 119 of 272
<( co .... N r--N .... 0 r--> co
-On steep slopes, reduce the speed and se
lect a lower gear or lower selector lever po
sition. Dr ive as little as possible while press
ing the brake pedal and avoid putt ing your
left foot on the brake pedal while driving.
Th is co uld cause the brakes to overheat and
impai r the efficiency of the brakes.
- Do not let the brakes "g rind " by a lways
keeping your foot on the brake pedal. This
can cause the br akes to overhea t, i ncrease
wea r and incre ase braking dis tance unneces
sari ly.
- Certa in wea ther an d operat ing co ndi tio ns
s u ch as dr iving through wate r, d riving in
heavy ra in or d riving after washing your ve
hicle can impair the effectiveness of the
brakes . In the w inte r, ice may b uild up on
the brake pads, rotors and drums. Check
these components by braking ca refu lly . Ap
plying the brakes carefu lly severa l times
dr ies the brakes and removes ice bu ild-up .
- The effic iency of the brakes can also be im
paired by driving for long st retches on roads
cove red w ith salt without using the b rakes .
Yo u can remove sa lt deposits from the
bra ke rotors and pads by caref ully app lying
the brakes severa l t imes .
-If the front spoiler is damaged or you ins tall
ano ther spoiler, m ake sure the front wheel
bra kes are vent ilated p roper ly. O therwise,
the b rake system could overheat, whic h re
duces the ir effectiveness.
- Failure of a brake circuit impai rs b raking
performance, which increases braking dis
tance . Avoid driving the vehicle . Have it tow
ed to the nearest authorized Aud i dealer or
authorized Audi Service Fac ility .
- Never let the vehicle roll while the engine is
stopped because this increases the risk of an
acc ident.
- If the brake booster is not working, you will
have to press m uch ha rder on the brake
peda l to compensate for the lack o f the
booster .
0 Note
-Never let the bra kes " rub" by pressing the
pedal lightly when braking is not really nee-
Intellig ent Technology
essary . This causes the b rakes to overheat
and increases braking distance and causes
wear .
- Before driving on a long st retch with steep
slopes, reduce your speed and shift to the
next lower gear Th is makes use of the en
gine braking effect and relieves the brakes.
If you need to brake additionally, brake in
intervals and not continuously .
(D Tips
-If the brake booster is not work ing, you
must press the brake peda l with much more
force than normal.
- If you retrof it your vehicle with a front spo il
er, wheel covers or sim ilar items, make sure
that the air flow to the fro nt wheels is not
inter rupted . Otherwise the b rake system
can become too hot.
Electromechanical
steering
The electromechanical steering supports the
driver's steering movement s.
Power steering adapts electronically based on
the ve hicle speed .
T he veh icle st ill has f ull s teer ing f unct iona lity if
t h e power steering fails or when the engine is
stopped (towing) . To steer, you must app ly m uch
more force than usual.
Indicator lights and messages
• Do not driv e vehicle : steering defective
If this indicator light turns on and stays on and
t hi s message appears , the power steering may
have failed .
Do
not continue dr iv ing . See an author ized Audi
dealer or authorized A udi Se rvice Fac ility for as
s istance .
• Do not dr ive vehicle: steering defecti ve
There is a ma lfunction in the e lectronic steering
l ock. You cannot turn the ignition on. ..,.
119
Page 197 of 272
<( co ..... N
" N ..... 0 r--. > 00
Brake fluid
Checking brake fluid level
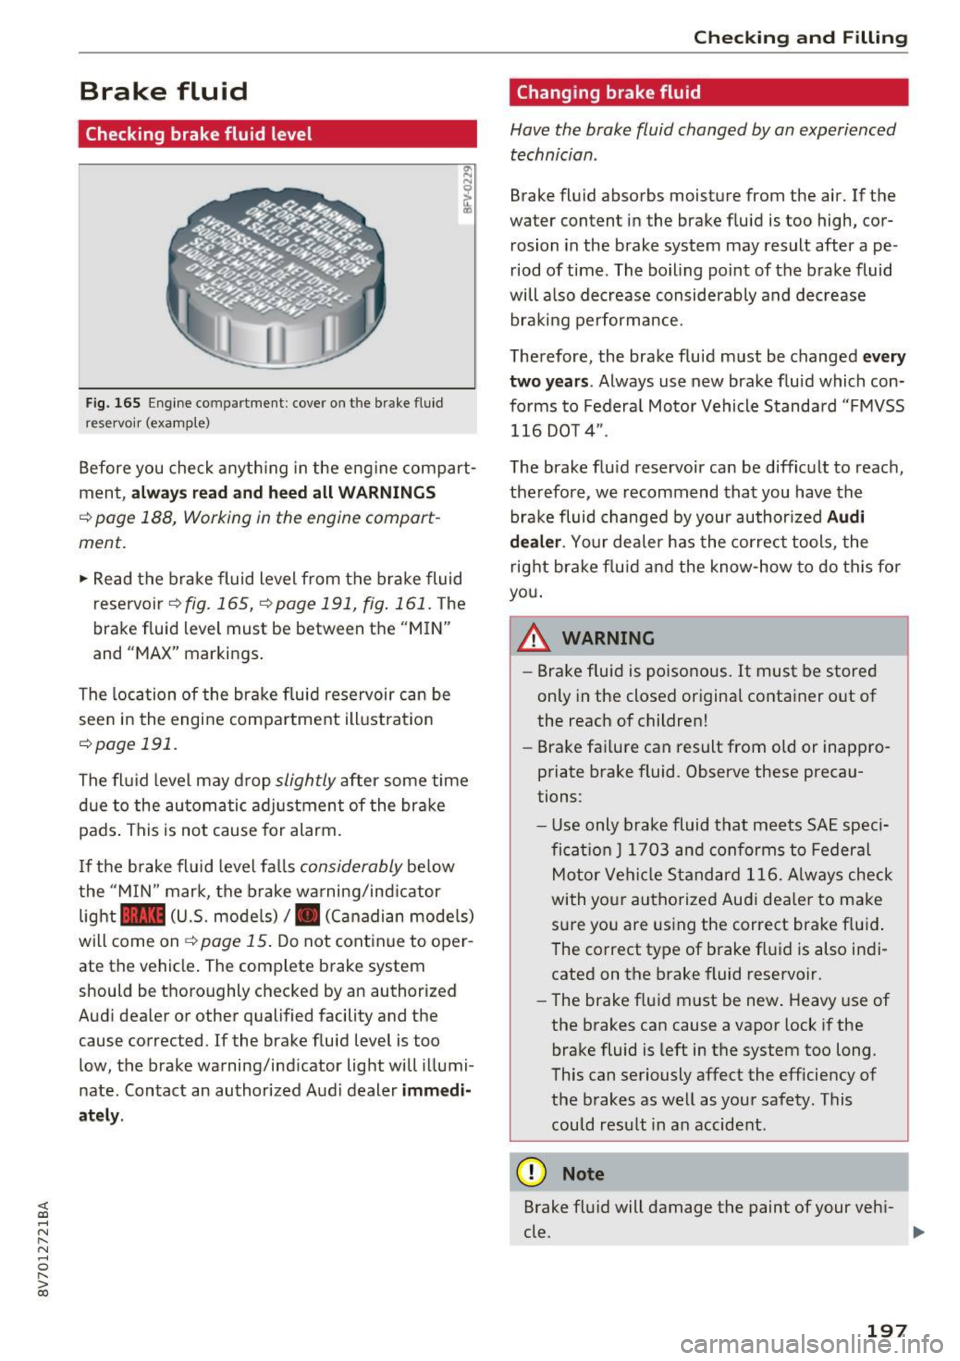
Fig. 165 Engine compartment : cover on t he brake fluid
reservoir (examp le)
"' N N
~ .,
Before you check anything in the engine compart
ment,
always read and heed all WARNINGS
¢page 188, Working in the engine compart
ment.
.,. Read the brake fluid level from the brake fluid
reservoir
~fig. 165, ¢page 191, fig. 161 . The
brake fluid level must be between the "MIN"
and "MAX" markings .
The location of the brake fluid reservoir can be
seen in the engine compartment illustration
¢page 191.
The fluid level may drop slightly after some time
due to the automatic adjustment of the brake
pads . This is not cause for alarm.
I f the brake fluid level falls
considerably below
the "MIN" mark, the brake warning/indicator
light
1111 (U.S. mode ls)/ . (Canadian models)
will come on¢
page 15. Do not continue to oper
ate the vehicle . The complete brake system
should be thoroughly checked by an authorized
Audi dealer or other qualified facility and the
cause corrected. If the brake fluid level is too
low, the brake warning/indicator light will illumi
nate. Contact an authorized Audi dealer
immedi
ately.
Checking and Filling
Changing brake fluid
Have the brake fluid changed by an experienced
technician.
Brake fluid absorbs moisture from the air. If the
water content in the brake fluid is too high, cor
rosion in the brake system may result after ape
riod of time . The boiling point of the brake fluid
will also decrease considerably and decrease braking performance.
Therefore, the brake fluid must be changed
every
two years. Always use new brake fluid which con
forms to Federal Motor Vehicle Standard "FMVSS
116 DO T 4" .
The brake fluid reservoir can be difficult to reach,
therefore, we recommend that you have the
brake fluid changed by your author ized
Audi
dealer. Your dealer has the correct tools, the
right brake fluid and the know-how to do this for
you.
A WARNING
- Brake fluid is poisonous. It must be stored
only in the closed original container out of
the reach of children!
- Brake failure can result from old or inappro
priate brake fluid . Observe these precau
tions:
- Use only brake fluid that meets SAE speci
fication
J 1703 and conforms to Federal
Motor Vehicle Standard 116. Always check
with your authorized Audi dealer to make
sure you are using the correct brake fluid .
The correct type of brake fluid is also indi
cated on the brake fluid reservoir.
- The brake fluid must be new. Heavy use of
the brakes can cause a vapor lock if the
brake fluid is left in the system too long.
This can seriously affect the efficiency of
the brakes as well as your safety. This
could result in an accident.
(D Note
Brake fluid will damage the paint of your vehi-
cle. ..,.
197
Page 258 of 272
Index
Automatic climate control system
re fer to Climate contro l system (automatic) .62
Automatic headlights . . . . . . . . . . . . . . . . . . . 43
Automatic post-co llision brak ing system . . 116
Automatic power top . . . . . . . . . . . . . . . . . . . 36
Automatic transm iss ion . . . . . . . . . . . . . . . . . 76
D riving t ips . . . . . . . . . . . . . . . . . . . . . . . . . . 78
E me rgency mode . . . . . . . . . . . . . . . . . . . . . 8 2
H ill descent contro l . . . . . . . . . . . . . . . . . . . 80
I gnition key safety in terlock . . . . . . . . . . . . 68
Kick -down . . . . . . . . . . . . . . . . . . . . . . . . . . . 81
L aunch Control-Program . . . . . . . . . . . . . . . 82
malfunct ion . . . . . . . . . . . . . . . . . . . . . . . . . 77
Selector leve r emergency re lease . . . . . . . . 83
Selector lever lock . . . . . . . . . . . . . . . . . . . . 77
Selector leve r pos itions . . . . . . . . . . . . . . . . 76
Shifti ng manually . . . . . . . . . . . . . . . . . . . . 8 1
Steer ing whee l w ith shift padd les . . . . . . . . 8 1
S troni c . . . . . . . . . . . . . . . . . . . . . . . . . . . . . 76
t ip tron ic . . . . . . . . . . . . . . . . . . . . . . . . . . . . 8 1
Automatic wipe/wash system . . . . . . . . . . . . 49
Auto Safety Hotline . . . . . . . . . . . . . . . . . . . 132
Ave rage cons umption . . . . . . . . . . . . . . . . . . . 24
Average speed . . . . . . . . . . . . . . . . . . . . . . . . 24
B
Battery . . . . . . . . . . . . . . . . . . . . . . . . . . . . . 198
Charge level . . . . . . . . . . . . . . . . . . . . . . . . 121
Charging . .. .. .. ............. .... 17,200
Energy management . . . . . . . . . . . . . . . . . 121
Important warnings . . . . . . . . . . . . . . . . . 199
I ndicato r light . . . . . . . . . . . . . . . . . . . . . . . 17
Ju mp sta rting . . . . . . . . . . . . . . . . . . . . . . . 24 4
L o cat ion . . . . . . . . . . . . . . . . . . . . . . . . . . . 199
Rep lac ing the bat tery . . . . . . . . . . . . . . . . 20 1
Wor king on the battery . . . . . . . . . . . . . . . 199
B attery (12 V)
W inte r operation . . . . . . . . . . . . . . . . . . . . 198
Before d riving . . . . . . . . . . . . . . . . . . . . . . . . 124
Belt tensione rs . . . . . . . . . . . . . . . . . . . . . . . 141
Blended gasoline . . . . . . . . . . . . . . . . . . . . . 184
Blower automatic Climate contro l system . . . . . . . 63
Booste r seats . . . . . . . . . . . . . . . . . . . . . . . . 174
258
Brake fl uid
Changing the brake f luid . . . . . . . . . . . . . . 197
Check ing the b rake fluid level . . . . . . . . . . 197
B rakes . . . . . . . . . . . . . . . . . . . . . . . . . . . . . . 118
B rake ass ist system . . . . . . . . . . . . . . . . . . 116
B rake booster . . . . . . . . . . . . . . . . . . . . . . . 118
Indicator light . . . . . . . . . . . . . . . . . . . . . . . 20
New bra ke pads . . . . . . . . . . . . . . . . . . . . . 118
Worn brake pads . . . . . . . . . . . . . . . . . . . . . 19
B rake system
B rake fl uid . . . . . . . . . . . . . . . . . . . . . . . . . 197
B rake fluid specifications for refill and re
placement . . . . . . . . . . . . . . . . . . . . . . . . . 197
Fl uid reservo ir . . . . . . . . . . . . . . . . . . . . . . 197
Br aking
Emergency b raking function . . . . . . . . . . . . 7S
Ind icator light . . . . . . . . . . . . . . . . . . . . . . . 15
Parking brake . . . . . . . . . . . . . . . . . . . . . . . . 73
Start ing on inclines . . . . . . . . . . . . . . . . . . . 75
B re ak- in per iod . . . . . . . . . . . . . . . . . . . . . . . . 65
Breaking in Newti res . ... ... .. .. ........ ..... .. 211
Bu lbs . . . . . . . . . . . . . . . . . . . . . . . . . . . . . . . 242
C
Californ ia Proposition 6S Warning . . . . . . . 189
Battery specific . . . . . . . . . . . . . . . . . . . . . 200
C apaci ties
F u el tan k .. .. .. .. .. .. .. ........... .. 251
Washer fluid reservoir . . . . . . . . . . . . . . . . 251
Care . . . . . . . . . . . . . . . . . . . . . . . . . . . . . . . . 224
also refer to Cleaning . . . . . . . . . . . . . . . . 224
Cargo area . . . . . . . . . . . . . . . . . . . . . . . . . . . 130
C argo bag . . . . . . . . . . . . . . . . . . . . . . . . . . . . 60
Cargo net . . . . . . . . . . . . . . . . . . . . . . . . . . . . 60
Catalytic converter . . . . . . . . . . . . . . . . . . . . 187
C D -ROM player (nav iga tion) . . . . . . . . . . . . . . 5 7
CD changer . . . . . . . . . . . . . . . . . . . . . . . . . . . 57
Centra l indicator ligh t . . . . . . . . . . . . . . . . . . 12
Centra l locking . . . . . . . . . . . . . . . . . . . . . . . . 27
Cen tra l locking sw itch . . . . . . . . . . . . . . . . . 31
Convenie nce key . . . . . . . . . . . . . . . . . . . . . . 30
Emergency lock ing . . . . . . . . . . . . . . . . . . . . 32
Fo ld ing the exterior mirro rs . . . . . . . . . . . . 31
Luggage compartment li d . . . . . . . . . . . . . . 33
Power window . . . . . . . . . . . . . . . . . . . . . . . 34
Page 266 of 272
Index
Resetting the trip odometer . . . . . . . . . . . . . 11
Retract New brake pads . . . . . . . . . . . . . . . . . . . . . 118
Retractor . . . . . . . . . . . . . . . . . . . . . . . . . . . . 138
Reverse (automatic transmission) . . . . . . . . . 76
Reversible mat . . . . . . . . . . . . . . . . . . . . . . . . 60
Right hand drive . . . . . . . . . . . . . . . . . . . . . . . 46
Rims . . . . . . . . . . . . . . . . . . . . . . . . . . . . . . . 219
Rollbar refer to Active rollover protection system 133
s
Safe driving habits
Safety 124
Airbag system . . . . . . . . . . . . . . . . . . . . . . 143
Belts . . . . . . . . . . . . . . . . . . . . . . . . . . . . . . 135
Cargo . . . . . . . . . . . . . . . . . . . . . . . . . . . . . 130
Correct seating position . . . . . . . . . . . . . . 125
Pedal area . . . . . . . . . . . . . . . . . . . . . . . . . . 129
Safety belt position . . . . . . . . . . . . . . . . . . . 139
Safety belts worn by pregnant women . . . 140
Safety belt pretensioner
Service and disposal . . . . . . . . . . . . . . . . . .
141
Safety belts .. .. .. ............ .... 135, 138
Cleaning . . . . . . . . . . . . . . . . . . . . . . . . . . . 226
Danger to passengers who do not wear a
safety belt . . . . . . . . . . . . . . . . . . . . . . . . . 136
Fa stening . . . . . . . . . . . . . . . . . . . . . . . . . . 138
Improperly worn . . . . . . . . . . . . . . . . . . . . 140
Indicator light . . . . . . . . . . . . . . . . . . . . . . . 17
Not worn . . . . . . . . . . . . . . . . . . . . . . . . . . 136
Safety belt position . . . . . . . . . . . . . . . . . . 139
Safety instructions . . . . . . . . . . . . . . . . . . . 13
7
Securing child safety seats . . . . . . . . . . . . 176
Special considerations for pregnant wom-
en . . . . . . . . . . . . . . . . . . . . . . . . . . . . . . . . 140
Unfasten ing . . . . . . . . . . . . . . . . . . . . . . . . 140
Warning/indicator light . . . . . . . . . . . . . . 135
Worn properly . . . . . . . . . . . . . . . . . . . . . . 137
Safety belt warning light . . . . . . . . . . . . . . . 135
Safety central locking . . . . . . . . . . . . . . . . . . . 32
Safety compliance sticker . . . . . . . . . . . . . . 250
Safety equipment . . . . . . . . . . . . . . . . . . . . . 124
Safety features for occupant restraint and
protection . . . . . . . . . . . . . . . . . . . . . . . . . . . 124
266
Safety instructions
for using child safety seats 169
for using safety be lts . . . . . . . . . . . . . . . . . 13 7
Monitoring the Advanced Airbag System . 157
Safety systems (indicator light) . . . . . . . . . . . 17
Screwdriver . . . . . . . . . . . . . . . . . . . . . . . . . . 230
Seat adjustment Head restraints . . . . . . . . . . . . . . . . . . . . . 127
Seat heating . . . . . . . . . . . . . . . . . . . . . . . . . . 64
Seating position Driver . . . . . . . . . . . . . . . . . . . . . . . . . . . . . 125
Front passenger . . . . . . . . . . . . . . . . . . . . . 126
How to adjust the front seats . . . . . . . . . . 126
Incorrect seat pos ition . . . . . . . . . . . . . . . 128
Occupants. . . . . . . . . . . . . . . . . . . . . . . . . . 125
Rear passengers. ... .. ............... 127
Seats adjusting . . . . . . . . . . . . . . . . . . . . . . . . . . . 53
Correct seat ing pos ition . . . . . . . . . . . . . . 125
Easy seat entry . . . . . . . . . . . . . . . . . . . . . . . 54
Folding . . . . . . . . . . . . . . . . . . . . . . . . . . . . . 58
Seats (number) . . . . . . . . . . . . . . . . . . . . . . . 135
Se lective wheel torque control . . . . . . . . . . 116
Selector lever (automatic transmission) Emergency operation . . . . . . . . . . . . . . . . . . 83
Position . . . . . . . . . . . . . . . . . . . . . . . . . . . . 76
Service and disposal Safety belt pretens ioner . . . . . . . . . . . . . . 141
Service interval display
with driver information system . . . . . . . . . 202
Setting clock . . . . . . . . . . . . . . . . . . . . . . . . . . 10
Setting date . . . . . . . . . . . . . . . . . . . . . . . . . . 10
Setting the temperature automatic climate control system . . . . . . . 62
Setting time . . . . . . . . . . . . . . . . . . . . . . . . . . 10
SETUP (basic setting) . . . . . . . . . . . . . . . . . . . 10
Shift paddles (automatic transmission) . . . . 81
Short-term memory . . . . . . . . . . . . . . . . . . . . 24
Side airbags Description . . . . . . . . . . . . . . . . . . . . . . . . . 161
How they work . . . . . . . . . . . . . . . . . . . . . . 163
Side assist . . . . . . . . . . . . . . . . . . . . . . . . . . . 103
Adjusting the brightness . . . . . . . . . . . . . . 105
Cleaning the sensors . . . . . . . . . . . . . . . . . 225
Sensor range . . . . . . . . . . . . . . . . . . . . . . . 104
switching on and off . . . . . . . . . . . . . . . . . 105
also refer to Side assist . . . . . . . . . . . . . . . 103