sensor AUDI A3 CABRIOLET 2016 Owners Manual
[x] Cancel search | Manufacturer: AUDI, Model Year: 2016, Model line: A3 CABRIOLET, Model: AUDI A3 CABRIOLET 2016Pages: 272, PDF Size: 67.88 MB
Page 16 of 272
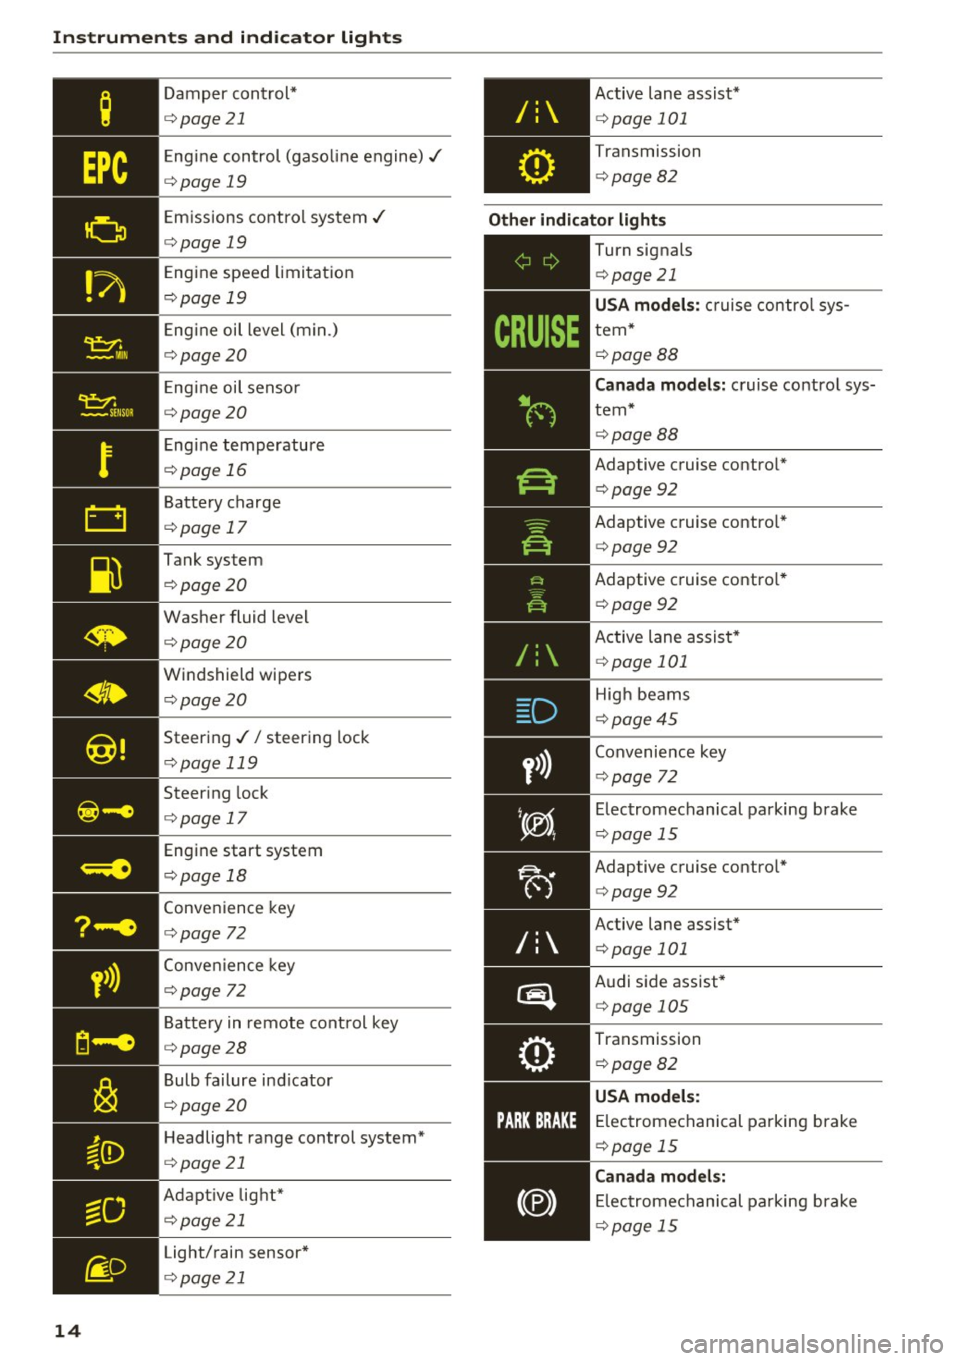
Instruments and indicator lights
y>))
14
Damper cont rol*
¢ page21
Engine control (gaso line engine)./
¢ page 19
Emiss ions control system./
¢ page 19
Eng ine speed limitat ion
¢ page 19
Engine oil level (min.)
¢page20
Engine oil senso r
¢page 20
Engine temperature
¢page 16
Battery charge
¢page 17
Tank system
¢ page20
Washer fluid level
¢page20
Windshield wipe rs
¢ page20
Steering .// steering lock
¢page 119
Steering lock
¢ page 17
Engine start system
¢page 18
Convenience key
¢page 72
Conve nience key
¢page 72
Batte ry in remote cont rol key
¢ page28
Bulb failure ind icator
¢ page20
Headlight ra nge control system*
¢ page 21
Adaptive light*
¢page 21
Light/rain sensor*
¢ page 21
Active lane assist*
¢page 101
Transmission
¢ page 82
Other indicator light s
/:
~-------------
Turn signals
¢page 21
USA model s: c ruise con tro l sys
tem*
¢ page 88
Canada model s: cruise contro l sys
tem*
¢ page 88
Adaptive cruise contro l*
¢ page 92
Adaptive c ruise contro l*
¢ page 92
Adaptive cruise contro l*
¢ page 92
Active lane assist*
¢ page 101
High beams
¢ page45
Convenie nce key
¢ page 72
Electromechanical parking brake
¢page 15
Adaptive cruise contro l*
¢ page 92
Active lane assist*
¢page 101
Audi side assist*
¢page 105
Transmission
¢page 82
USA model s:
E lec tromechanical parking brake
¢ page 15
Canada model s:
El ectromechanical pa rking brake
¢ page 15
Page 21 of 272
Instruments and indicator lights
Audi dealer or authorized Audi Service Facility im
m ediately to have the malfunction corrected.
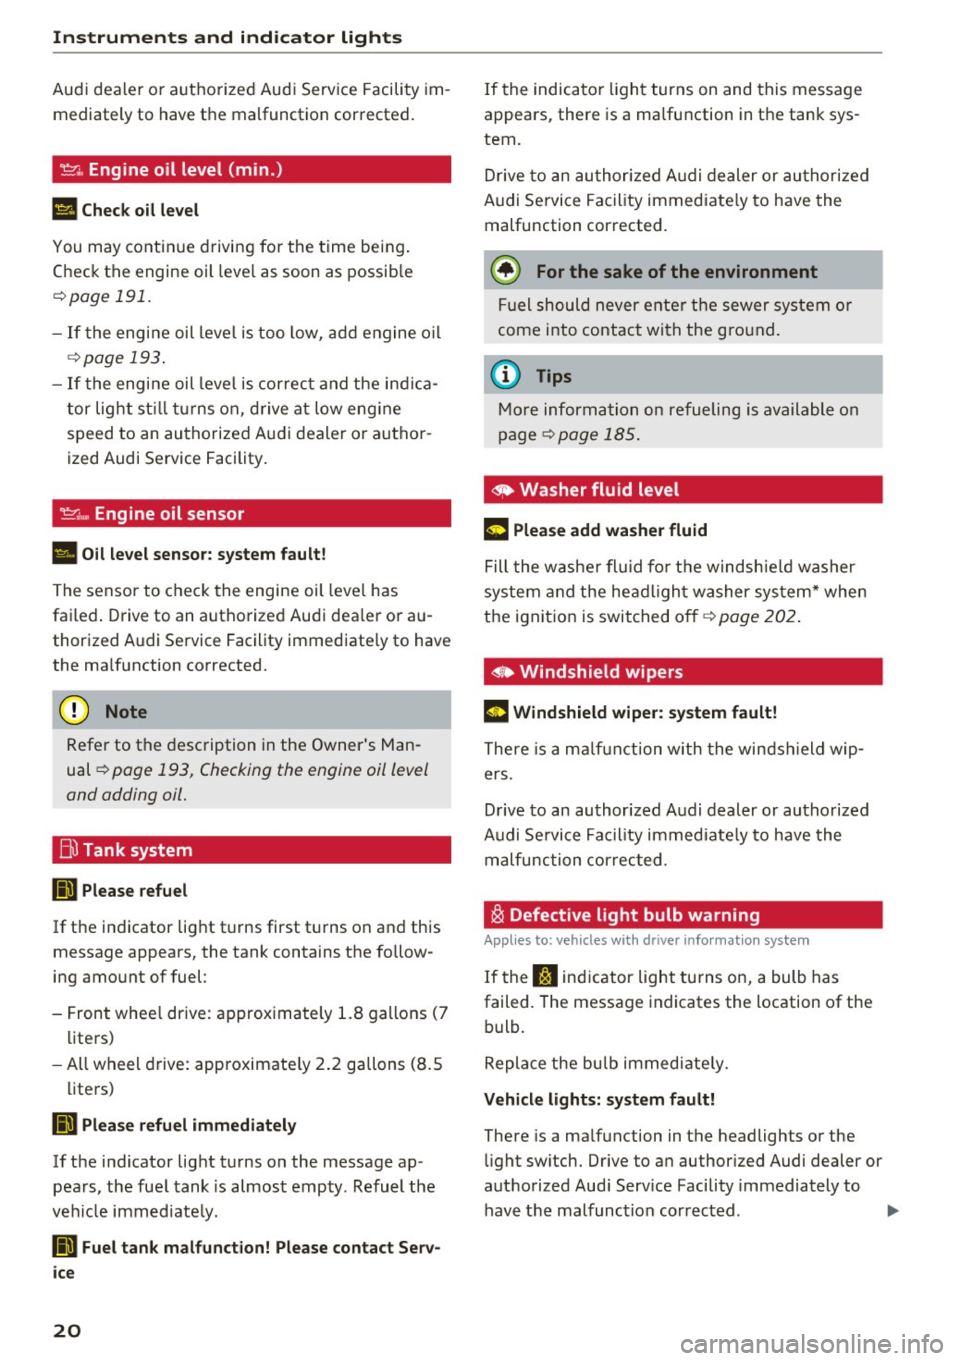
~ i. Engine oil level (min .)
Ill Check oil level
You may continue driving for the time being.
Check the engine oil level as soon as possible
r::!) page 191.
-If the engine oil level is too low, add engine oil
¢page 193 .
-If the engine oil level is correct and the indica
tor light st ill turns on, drive at low engine
speed to an authorized Audi dealer or author
ized Audi Service Facility.
~ .... Engine oil sensor
• Oil level sensor: system fault!
The sensor to check the engine oil level has
failed. Drive to an authorized Audi dealer or au
thorized Audi Service Facility immediately to have
the malfunction corrected.
(D Note
Refer to the description in the Owner's Man
ual ¢
page 193, Checking the engine oil level
and adding oil.
Bil Tank system
D Please refuel
If the indicator light turns first turns on and this
message appears, the tank contains the follow
ing amount of fuel :
- Front wheel drive: approximately 1.8 gallons (7
liters)
- All wheel drive: approximately 2.2 gallons (8.S
liters)
D Please refuel immediately
If the indicator light turns on the message ap
pears, the fuel tank is almost empty . Refuel the
vehicle immediate ly.
D Fuel tank malfunction! Please contact Serv
ice
20
If the indicator light turns on and this message
appears, there is a malfunction in the tank sys
tem.
Drive to an authorized Audi dealer or authorized
Audi Service Facility immediately to have the
malfunction corrected .
@ For the sake of the environment
Fuel should never enter the sewer system or
come into contact with the ground.
(D Tips
More information on refueling is available on
page
¢page 185.
.. Washer fluid level
C·w$ Please add washer fluid
Fill the washer fluid for the windshield washer
system and the headlight washer system* when
the ignition is switched off¢
page 202.
• Windshield wipers
m Windshield wiper: system fault!
There is a malfunction with the windsh ield wip
ers .
Drive to an authorized Audi dealer or authorized
Audi Service Facility immediate ly to have the
malfunction corrected .
~ Defective light bulb warning
Applies to: vehicles with driver info rmation system
If the J:i indicator light turns on, a bulb has
failed . The message indicates the location of the
bulb.
Replace the bulb immediately.
Vehicle lights: system fault!
There is a malfunction in the headlights or the
light switch. Drive to an authori zed Audi dealer or
authorized Aud i Service Facility immediately to
have the malfunction corrected .
...
Page 22 of 272
<( co .... N ,.__
N .... 0 ,.__
> co
A WARNING 1=
- Light bu lbs are under pressu re and can ex-
plode when bulbs are replaced, which in
c reases the risk of injury.
- With gas-disc harge lamps" (xe no n head
lights), the hig h-voltage component mus t
be hand led ap propr iately. Otherw ise, t her e
is a r is k of fatal in jury.
-
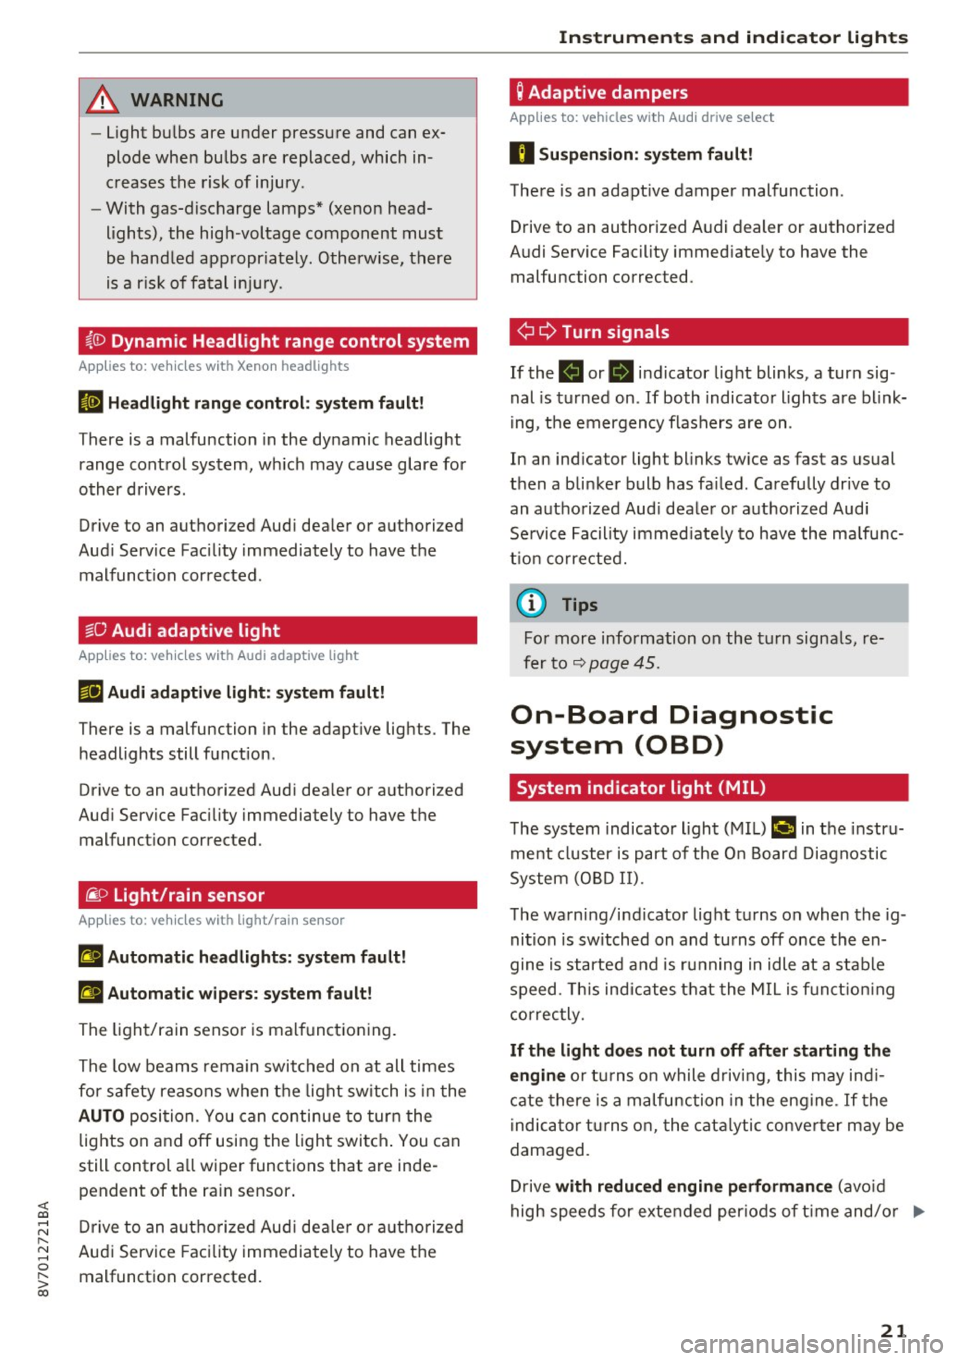
~(i) Dynamic Headlight range control system
App lies to: vehicles with Xenon headlights
El Headlight range control : sy stem fault!
There is a malfunction in the dy namic headlight
range cont rol sys tem, w hich may cause glare for
o ther driv ers .
Drive to an authorized Aud i dea ler or a uthorized
Aud i Service Fac ility immediately to have t he
mal funct ion corrected .
~O Audi adaptive light
Applies to: vehicles with Audi adaptive light
m;J Audi adaptive light: system fault!
There is a malfunction in the adapt ive lights. The
h eadlights still f unction .
Drive to an autho rized Aud i dea le r or a uthorized
Aud i Service Faci lity immediately to have the
malfunct ion corrected.
~ D Light/rain sensor
App lies to: vehicles with light/rain sensor
II Automatic headlights: system fault!
El Automatic wipers: system fault!
The ligh t/ra in senso r is ma lfunct io ni ng.
The low beams remain swi tched on at all times
fo r safety reasons when t he lig ht switch i s in the
AUTO posi tion. You can con tinue to tur n t he
lights on and
off usi ng the light swi tch . You can
still control a ll wiper functions that are inde
pendent of the ra in sensor .
Dr ive to an a utho riz e d Aud i de aler o r au thor ized
Aud i Service Faci lity immediately to have t he
malfunct ion corrected.
Instruments and ind icator lights
Q Adaptive dampers
Applies to: vehicles with Audi drive se lect
II Su spension : system fault!
The re is an adapt ive damper malfunction .
Drive to an authorized A udi dealer or authorized
A udi Se rvice Facility immed iate ly to have the
malfunction corrected.
¢i ¢ Turn signals
If the . or. in dicator light blinks, a tur n sig
nal is tu rned on .
If both indicato r ligh ts a re blink
i ng, t he e mergency flas hers are on .
In an ind icator light blinks tw ice as fast as usual
t h en a bli nke r bulb has fa iled. Carefu lly drive to
an a uth o rize d Aud i deale r or a uth ori zed Aud i
Se rvice Facility i mmed iate ly to have the ma lfu nc
t ion co rre cte d.
(D Tips
Fo r mor e information o n the turn signa ls, re
fer to
q page 4 5 .
On-Board Diagnostic
system (OBD)
System indicator light (MIL)
The system indicato r ligh t (M IL) ¢4 in t he instru
me nt cl uster is part of the O n Boar d D iagnostic
System (O BD II).
T he warn ing/i nd icator lig ht tu rns on when the ig
ni tion is sw itched on and tu rns
off once the en
gine is started a nd is r unning in idle at a s tab le
s p eed. This in dica tes t hat the MIL is f un ct io ning
correc tly.
If the light does not turn off after starting the
engine
o r tur ns o n while d riv in g, this may ind i
ca te there is a m alfunction in the en gine . If the
i ndica tor t urns o n, the cat alytic conve rter m ay be
damaged.
Dr ive
with reduced engine performance (avo id
hig h speeds for exte nded per io d s of t ime and/o r .,.
21
Page 28 of 272
<( co .... N r--N .... 0 r--> co
Opening and closing
Central locking
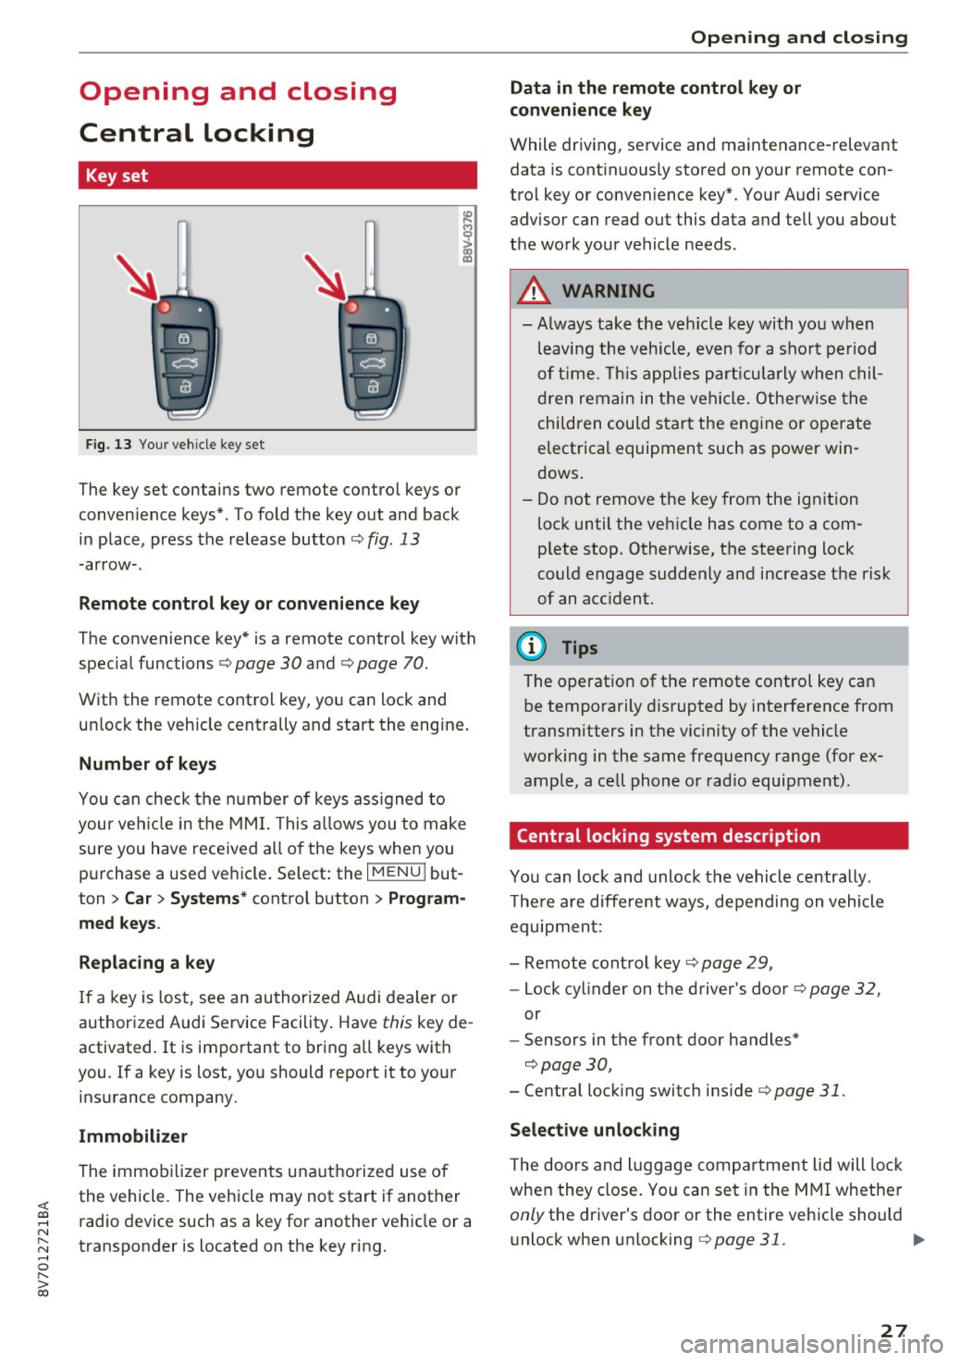
Key set
Fig. 13 Your vehicle key set
The key set contains two remote control keys or
conven ience keys*. To fold the key out and back
in place, press the release button ¢
fig. 13
-arrow-.
Remote control key or convenience key
The convenience key* is a remote control key with
special functions ¢
page 30 and¢ page 70.
With the remote control key, you can lock and
unlock the vehicle centrally and start the engine.
Number of keys
You can check the number of keys ass igned to
your vehicle in the MMI. This allows you to make
sure you have received all of the keys when you
purchase a used vehicle . Select: the
I MENU I but
ton
> Car > Systems* control button > Program
med keys.
Replacing a key
If a key is lost, see an authorized Audi dealer or
authorized Audi Service Facility. Have
this key de
activated.
It is important to bring all keys with
you . If a key is lost, you should report it to your
insurance company.
Immobilizer
The immobilizer prevents unauthorized use of
the vehicle . The vehicle may not start if another
radio device such as a key for another vehicle or a
transponder is located on the key ring.
Opening and closing
Data in the remote control key or
convenience key
While driving, service and maintenance-relevant
data is continuous ly stored on your remote con
trol key or convenience key*. Your Audi service advisor can read out this data and tell you about
the work your vehicle needs.
A WARNING
--- Always take the vehicle key with you when
leaving the vehicle, even for a sho rt period
of tim e. This applies particularly when chil
dren remain in the vehicle. Otherwise the
children could start the engine o r operate
electrica l equipment such as power win
dows .
- Do not remove the key from the ignition
lock until the veh icle has come to a com
p lete stop. Otherwise, the steering lock
could engage suddenly and increase the risk
of an acc ident.
(D Tips
The operation of the remote control key can
be temporarily disrupted by interference from
transmitters in the vicinity of the vehicle
working in the same frequency range (for ex
ample, a cell phone or rad io equipment) .
Central locking system description
You can lock and unlock the vehicle centrally.
T here are different ways, depending on vehicle
equipment:
- Remote control key¢
page 29,
-Lock cylinder on the driver's door ¢page 32,
or
- Sensors in the front door handles*
¢page 30,
- Central locking switch inside¢ page 31.
Selective unlocking
The doors and luggage compartment lid will lock
when they close. You can set in the MMI whether
only the dr iver 's door or the entire vehicle should
unlock when un locking
¢ page 31. .,..
27
Page 29 of 272
Opening and clo sin g
Autom atic locking (Auto L ock )
The Auto Lock funct ion locks all doors and the
luggage compartment lid once the speed has ex
ceeded approximately 9 mph (15 km/h).
The car is unlocked again once the ign ition key is
removed. In addition, the vehicle can be un locked
if the opening function in the power locking sys
tem switch is used or one of the door handles is
pu lled .
I n t he event of a crash with airbag deployment,
the doors automat ica lly unlock to allow access to
the v ehicle .
Anti-theft alarm system*
If t he anti- theft alarm system detects a vehicle
b reak-in, a udio and v isua l warning signals are
tr iggered.
The ant i-theft alarm system turns on automati
cally when you lock the vehicle .
It deactivates
when unlocking using the remote con trol key or
by to uch ing the sensor on the door handle (con
venience key) .
To sw itch the a la rm off, press the@ button on
the remote con trol key or convenience key or
sw itch the ignition on. The a la rm also stops auto
matica lly after a certain amou nt of time.
Turn signals
The turn s ignals flash tw ice when you un lock the
ve hicl e and flash once when you lock the vehicle .
I f the blinking continues, one of the doors or the
luggage compartment lid/hood is not closed or
the ignition is still switc hed on .
Unintentionall y locking your self out
There are safeguard s under the fo llow ing cond i
tions, which prevent you from lock ing your re
mote control key in the ve hicle:
- The vehicle will not lock when the driver 's door
is open
c> page 31.
- When locking using the~ button in the centra l
locking switch, the vehicle will not lock if a door
is open
c> page 31 .
-On vehicles with a convenience key*, the lug
gage compartment lid un locks aga in after do s-
28
ing if the most recent ly used key is in the lug
gage compartment.
Do no t lock your ve hicle w ith the remote cont rol
key or convenience key* until all doors and the
l uggage compartment li d are closed. This helps
to prevent you from locking yourself out acciden
ta lly.
{i) Tips
- Do not leave va luables unattended i n the ve
hicle. A locked ve hicle is not a safe!
- If the LED in the upper edge of the drive r's
door turns on for about 30 seconds after
the vehicle is locked, there is a malfunction
in the power locking or the anti-theft a larm
system* . Have the problem corrected by an
authorized Audi dealer or authorized Aud i
Service Facility.
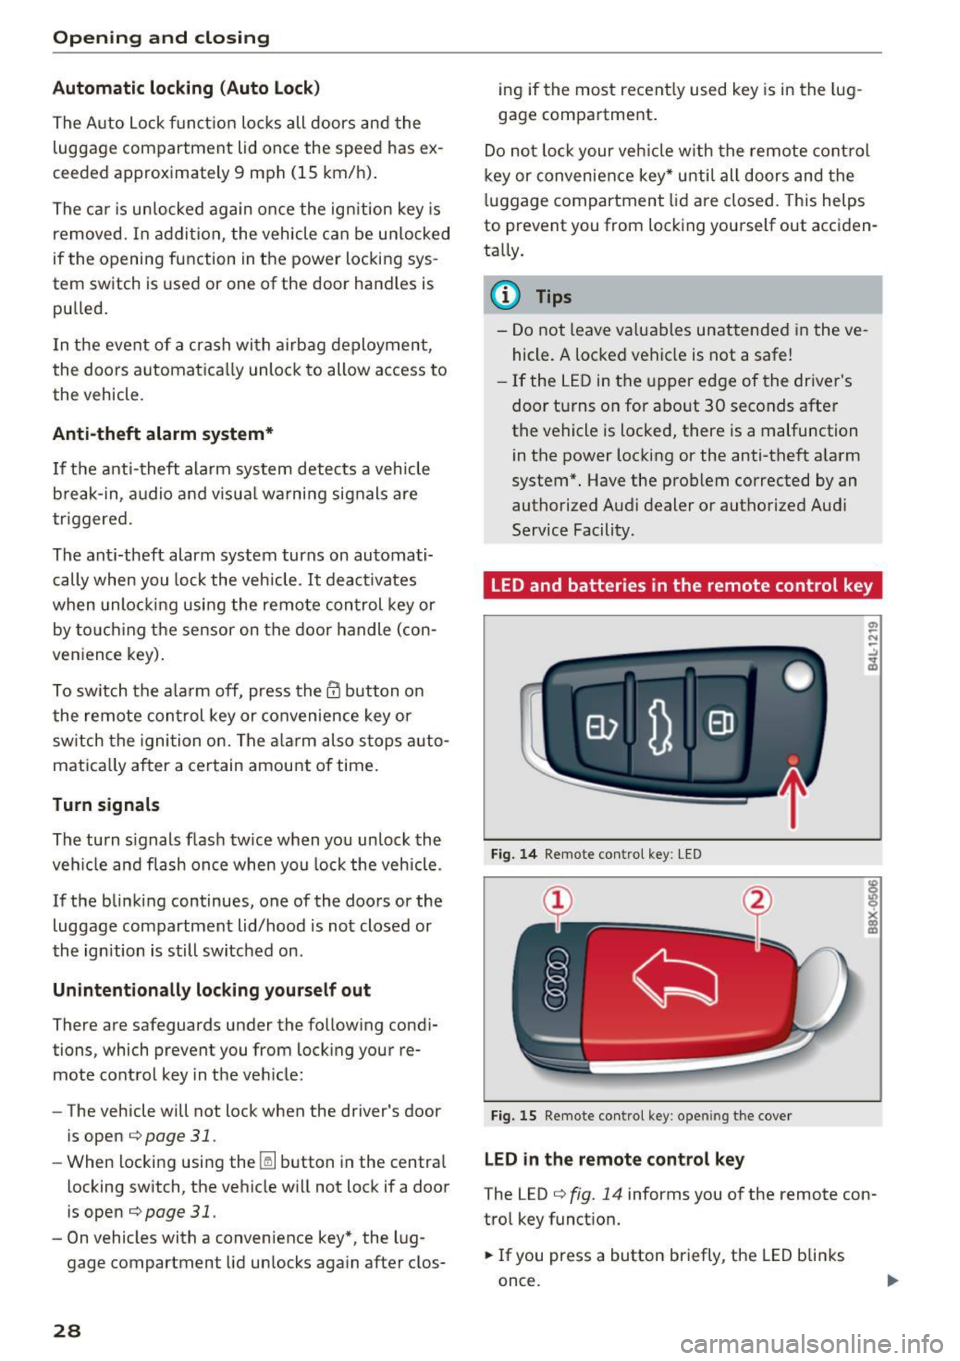
LED and batteries in the remote control key
Fig. 14 Remote control key : LED
Fig. 15 Remote con tro l key : o penin g the cover
LED in the remote control ke y
The LED c> fig. 14 info rms you of the remote con
tro l key funct ion.
.,. If you press a button briefly, the LED blinks
once.
Page 31 of 272
Opening and clo sin g
&_ WARNING
Read and follow all WARNINGS¢.& in Key
set on page 2 7
@ Tips
- Only use the remote control key or conven
ience key within view of the vehicle.
- Do not use the remote contro l when you are
inside the vehicle. Otherwise, you could un
i ntent ionally lock the vehicle. If you then
tried to start the engine or open a door, the
alarm would be triggered . If this happens,
press the un lock button@ .
- The vehicle can only be locked when these
lector lever is in the P posit ion.
- Only use the panic function in an emergen
cy.
Locking and unlocking with the
convenience key
App lies to : ve hicles with conve nien ce key
The front doors and the luggage compartment
lid can be unlocked and locked without using the
remote control key.
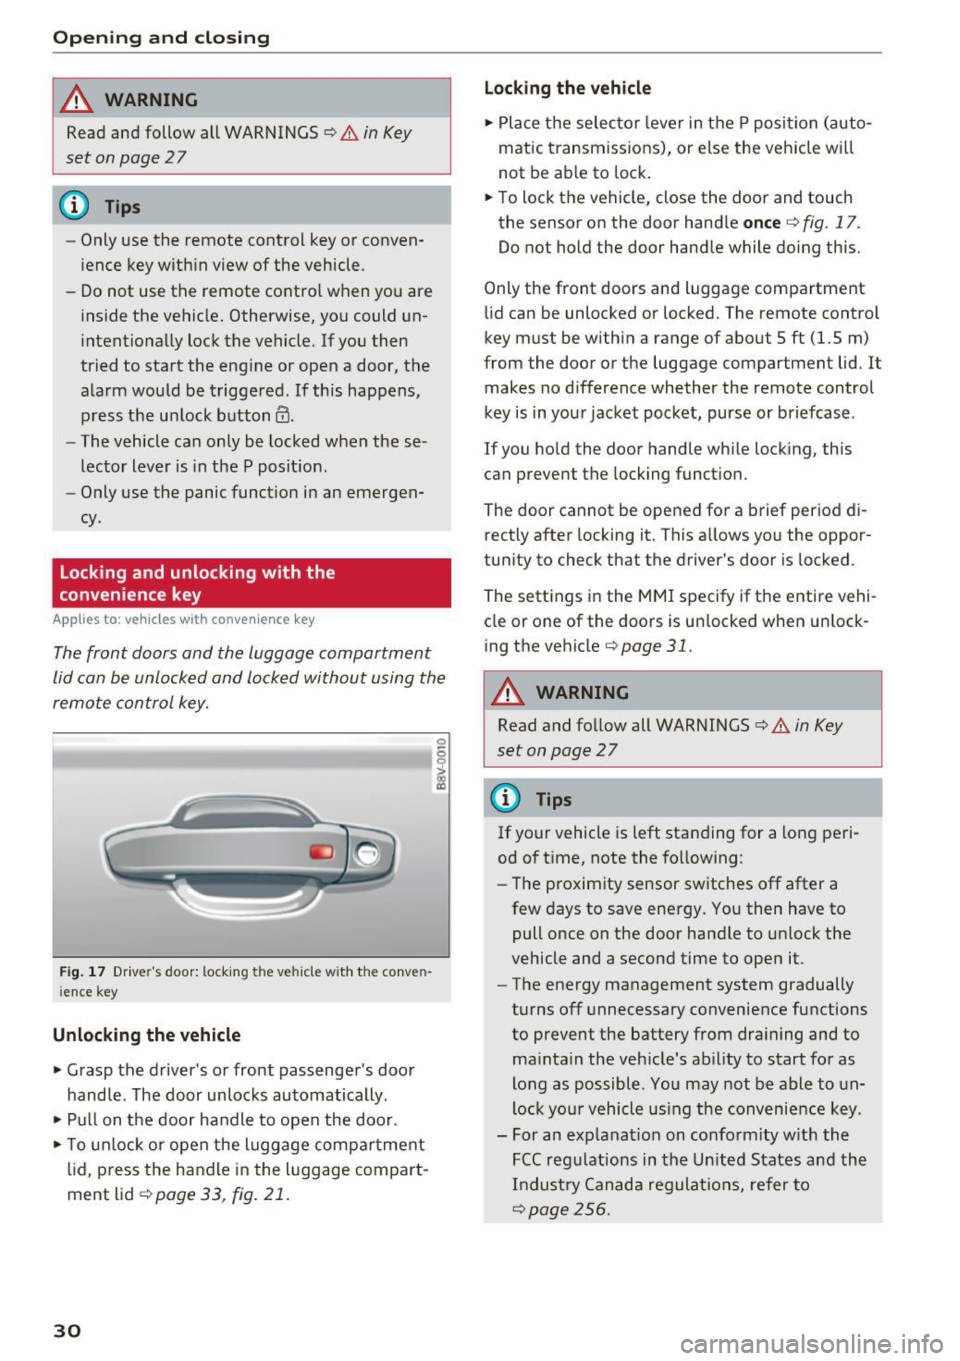
Fig . 17 Dr ive r's door: locking the ve hicle with the conve n
i ence key
Unlocking the vehicle
• Grasp the driver's or front passenge r's door
handle . The door unlocks automatically .
• Pull on the door handle to open the door.
• To unlock or open the luggage compa rtment
lid, p ress the handle in the luggage compart
ment lid ¢
page 33, fig. 21.
30
Lo cking the v ehicle
• Place the selecto r lever in t he P position (auto
matic transmiss ions), or else the veh icle wi ll
not be ab le to lock .
• To lock the vehicle, close the door and touch
the sensor on the door hand le
once ¢ fig. 17.
Do not hold the door handle while doing this.
Only the front doors and luggage compartment
li d can be unlocked or locked. The remote control
key must be within a range of about 5 ft (1.5 m)
from the door or the luggage compartment lid . It
makes no d ifference whether the remote control
key is in your jacket pocket, purse or briefcase .
If you ho ld the door handle wh ile locking, this
can prevent the locking function.
The door cannot be opened for a brief period di
rectly after locking it. This allows you the oppor
tun ity to check that the driver's door is locked .
The settings i n the MMI specify if the entire vehi
cle or one of the doors is un locked when un lock
ing the vehicle¢
page 31.
&_ WARNING
Read and follow all WARNINGS¢.& in Key
set on page
2 7
(D Tips
If your vehicle is left standing for a long peri
od of time, note the fo llowing:
- The proximity sensor switches off after a
few days to save energy. You then have to
pull once on the door handle to un lock the
vehicle and a second time to open it.
- The energy management system gradually
turns off unnecessary convenience functions
to prevent the battery from dra ining and to
ma inta in the vehicle's ab ility to start for as
long as possible. You may not be able to un
lock yo ur vehicle us ing the convenience key.
- For an explanat ion on co nfo rm ity w ith the
FCC reg ulations in the Un ited States and the
Industry Canada regulat ions, refer to
¢page 256.
Page 38 of 272
<( co ..... N
" N ..... 0 r--. > 00
distance from the power top to reduce the
risk of injury.
- When operating the power top, visibility to
the rear is limited. Avoid operating the top
while driving in reverse .
(D Note
- To prevent damage to the power top:
- do not store any objects in the power top
storage compartment.
- make sure there is enough space above
the vehicle when opening or closing the
power top.
- To reduce the risk of damage, make sure
there are no sensitive objects in the power
top storage compartment's range of mo
tion.
(D Tips
- To prevent the battery from draining unnec
essarily, do not open or close the power top
repeatedly when the engine is switched off.
- A message will appear in the instrument cluster if there is a malfunction in the power
top
~ page 38.
- The power top can also be operated manual ly temporari ly if there is a malfunction
~ page 40, Power top emergency opera
tion.
An authori zed A udi dealer or au thor
i zed Audi Service Facility should diag nose
and correct the cause of the malfunction as
soon as possib le .
- If the vehicle is parked with the power top open, the vehicle interior is not protected
from damaging weather or unauthorized ac
cess. Lock any items you leave behind in the
luggage compartment. Close the power top
before leaving the vehicle.
- The side windows automat ically lower
slightly when opening or closing the power
top.
P owe r top
Power top convenience opening and closing
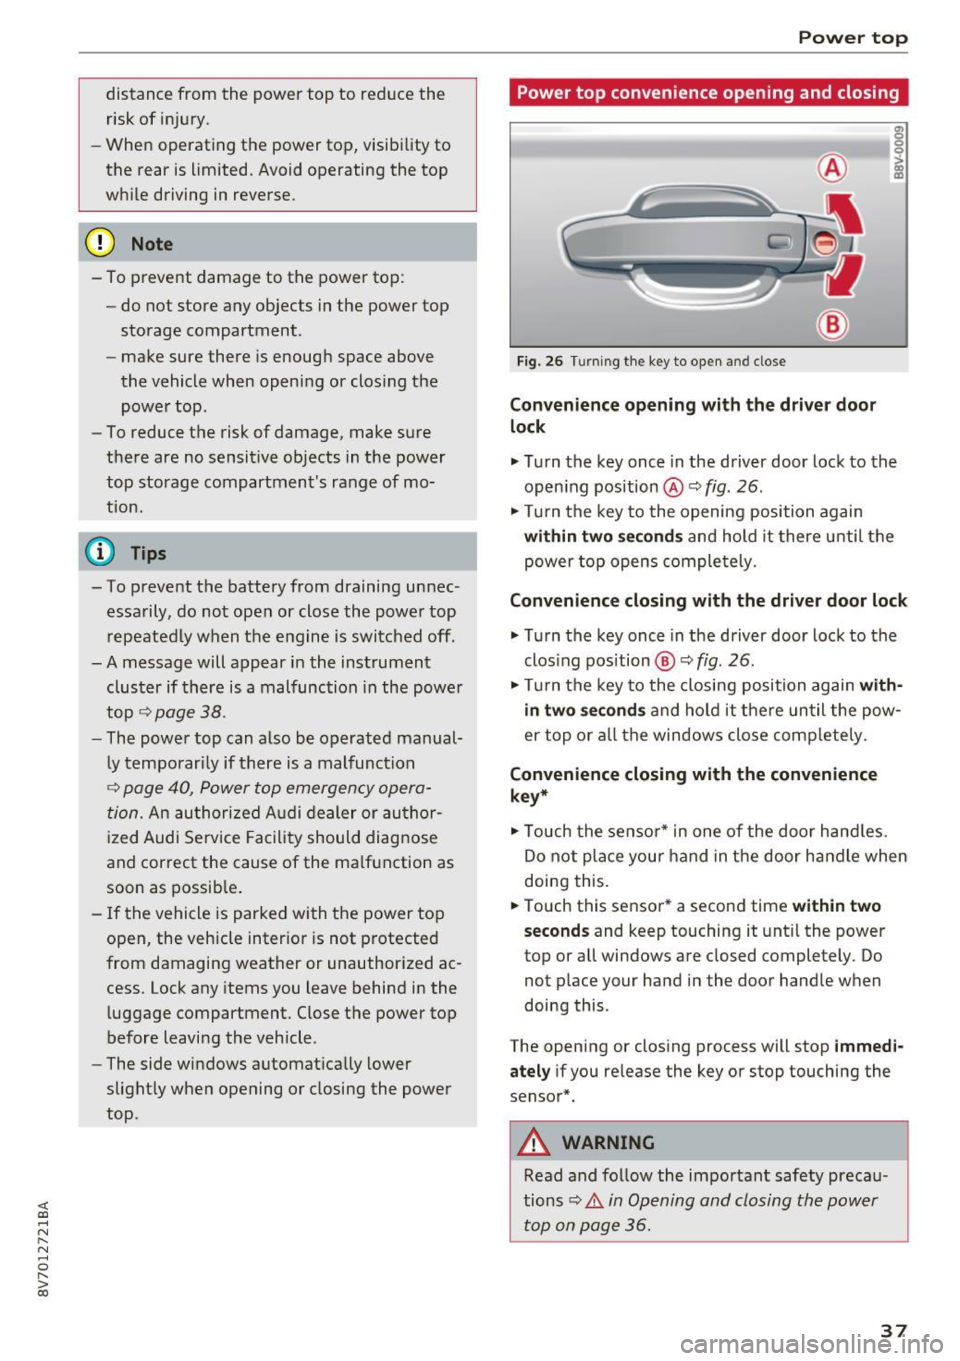
Fig. 26 Turning the key to open and close
Con ven ien ce opening with the dri ver door
lock
g: 0
0
>
18
.,. Turn the key once in the driver door lock to the
open ing position @ Q
fig. 26.
.,. Turn the key to the opening position again
within tw o seconds and hold it there unti l the
power top opens comple tely.
Conven ienc e closing with the driver door lock
.,. Turn the key once in the driver door lock to the
clos ing pos ition @Q
fig. 26.
.,. Turn the key to the closing position again w ith
in two second s
and ho ld it there un til the pow
er top or a ll the windows close comp letely .
Convenience closing with the convenience
ke y*
.,. Touch the senso r* in one of the door hand les.
Do not place your hand in the door handle when
doing this.
.,. Touch this sensor * a second time
w ith in tw o
sec ond s
and keep touching it unt il the power
top or a ll windows are closed completely. Do
not place your hand in the door handle when
doing this .
The opening or closing process will stop
imm ed i
ate ly
if you re lease the key or stop touching the
sensor*.
A WARNING
Read and follow the important safety precau
tions
~ .&. in Opening and closing the power
top on page 36 .
37
Page 45 of 272
Lights and Vision
When switched on, adaptive light adjusts to
curves depending on the vehicle speed and steer
ing wheel angle. This provides better lighting
through the curve. The system operates in a
speed range from approximately 6 mph (10 km/
h) to 68 mph (110 km/h) .
Static cornering light* -the cornering light
switches on automatically when the steering
wheel is turned at a ce rtain angle at speeds up to
approximately 44 mph (70 km/h) and when the
turn signal is activated at speeds up to approxi
mately 25 mph (40 km/h) . The area to the side of
the vehicle is illuminated better when turning.
Speed dependent light distribution* -The speed
dependent light distribution adapts the light in
towns and on highways or expressways . Intersec
tions can also be illuminated on vehicles with a
navigation system* .
Highway light function*
This function adapts the lighting for highway
driving based on vehicle speed .
A WARNING
-Automatic headlights* are only intended to
assist the driver. They do not relieve the
driver of responsibility to check the head
lights and to turn them on manually accord
ing to the current light and visibility condi
tions. For example, fog cannot be detected by the light sensors . So always switch on the
low beam under these weather conditions
and when driving in the dark ~D.
- Accidents could occur if you can not see the road ahead of you well and if others on the
road cannot see you . Always switch your
headlights on so that you can see the road
ahead of you and others can see your vehicle
from behind.
- The rear fog lights should only be turned on
in accordance with traffic regulations, to
prevent glare for traffic behind your vehicle.
-If the battery has been discharging for a
while, the parking light may switch off auto
matically. Always make sure your vehicle is
parked and adequately lit according to the
44
laws. Avoid using the parking lights for sev
eral hours.
- Please observe legal regulations when using
the lighting systems described.
(D Tips
- The light sensor for the automatic head
lights* is in the rearview mirror mount.
Therefore , do not place any stickers in this
area on the windshield.
- Some exterior lighting functions can be ad
justed
Q page 45.
- If you turn off the ignition while the exterior lights are on and open the door, you will
hear a warning tone.
- In some market-specific versions, the tail
lights do not turn on when switching on the
daytime running lights .
- In cool or damp weather, the inside of the
headlights, turn signals and tail lights can
fog over due to the temperature difference between the inside and outside. They will
clear shortly after switching them on . This
does not affect the service life of the light
ing.
-A message will appear in the instrument
cluster if there is a malfunction in the light
sensor
Q page 21 .
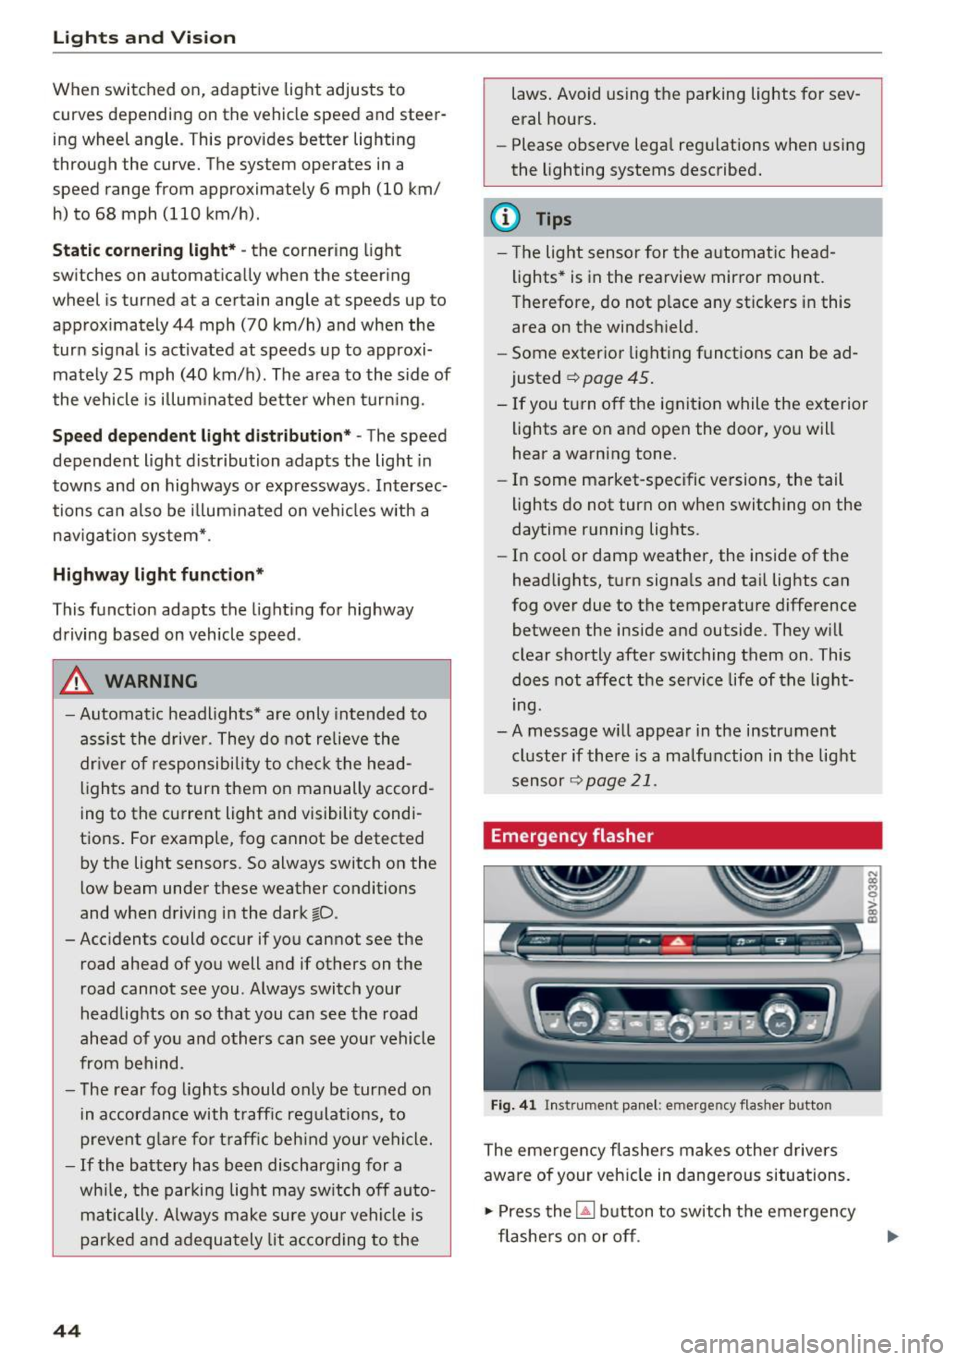
Emergency flasher
Fig. 41 Ins trumen t panel: e merge ncy flasher butto n
The emergency flashers makes other drivers
aware of your vehicle in dangerous situations.
.,. Press the~ button to switch the emergency
flashers on or off .
Page 50 of 272
<( co ..... N
" N ..... 0 r--. > 00
Sun visors
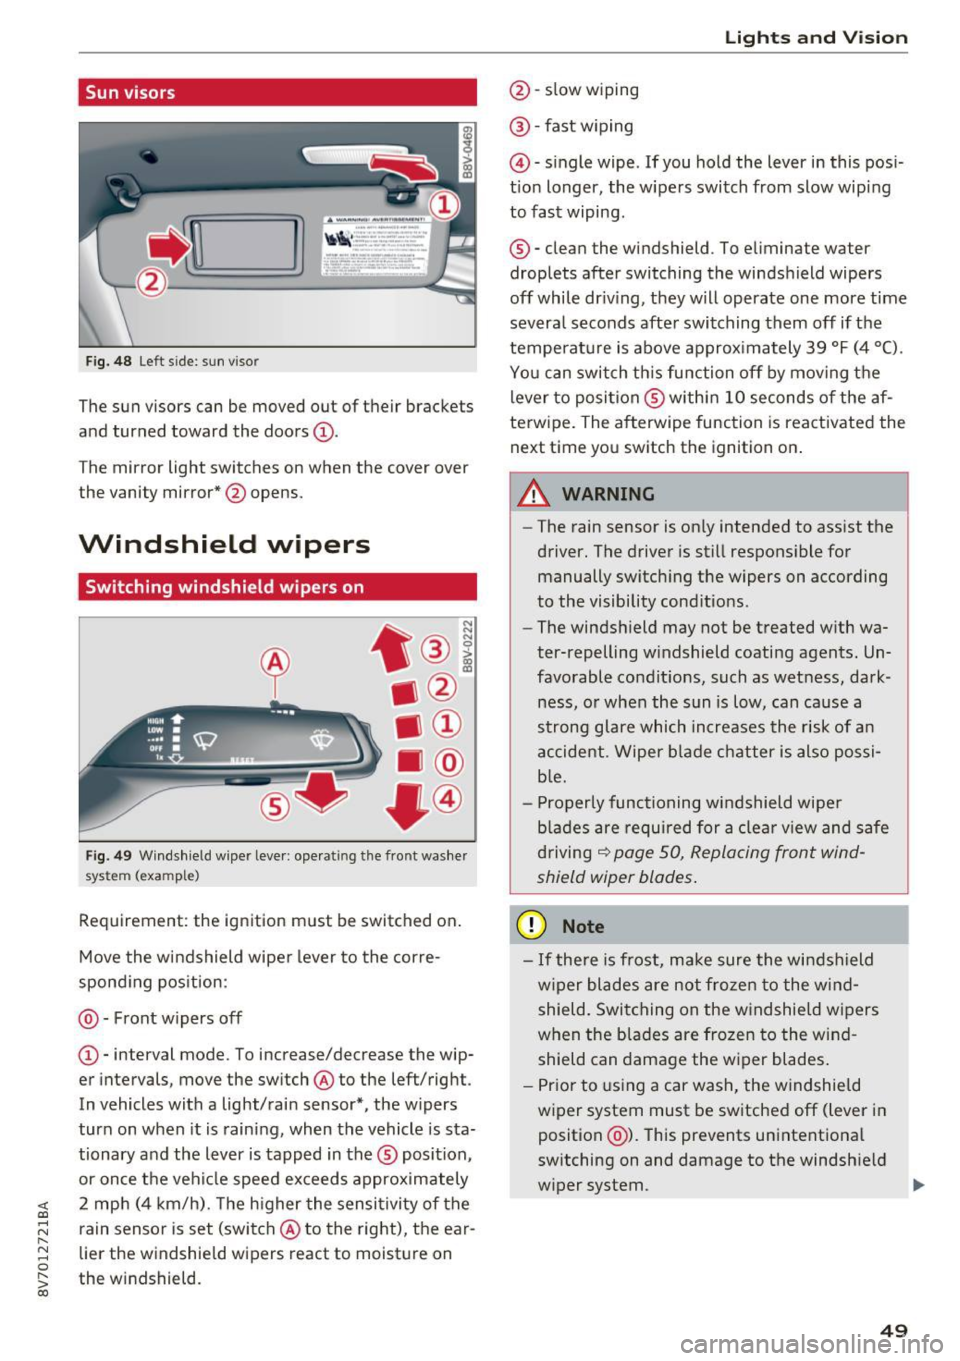
Fig. 48 Left s ide : sun viso r
The sun visors can be moved out of their brackets
and turned toward the doors
(D.
The mirror light switches on when the cover over
the vanity mirror* @opens.
Windshield wipers
Switching windshield wipers on
Fig. 49 Windshie ld w iper leve r: ope rat ing the front was her
sys tem (exa mple)
Requirement: the ignition must be switched on.
Move the windshield wipe r lever to the corre
spond ing position:
@ - Front w ipers off
@ -interval mode. To increase/decrease the wip
er intervals, move the sw itch @ to the left/right .
In vehicles with a light/rain sensor*, the w ipers
turn on when it is raining, when the vehicle is sta
tionary and the lever is tapped in the ® position ,
or once the vehicle speed exceeds approximately
2 mph (4 km/h). The h igher the sensitivity of the
rain sensor is set (switch @ to the right), the ear
lier the windshield wipers react to moisture on
the w indshield .
Lights and V ision
@ -slow wiping
@ -fast wiping
@ -single wipe . If you hold the lever in this posi
t ion longer, the wipers switch from slow wip ing
to fast wiping .
® -clean the windshield . To e liminate water
droplets after switching the windshield wipers
off while dr iv ing, they w ill operate one more time
severa l seconds afte r switching them off if the
temperature is above approx imately 39 °F (4 °C) .
You can switch this funct ion off by moving the
lever to posi tion ® withi n 10 seconds of the af
terw ipe. The afterwipe function is reactivated the
next time you switch the ignition on.
A WARNING
-
-The rain sensor is on ly intended to assist the
driver. The driver is still respons ible for
manually switching the wipers on according
to the visibility cond itions .
- The windsh ield may not be treated w ith wa
ter-repelling w indshield coating agents. Un
favorable condit ions, such as wetness, dark
ness, o r when the sun is low, can cause a
strong glare which increases the risk of an
accident. Wiper blade chatter is also possi
b le.
- Properly functioning windshield wiper
b lad es are required for a clear view and safe
driving
~ page 50, Replacing front wind
shield wiper blades.
(D Note
-If there is frost, make sure the windshield
w iper blades are not frozen to the wind
shield. Switching on the windshie ld w ipers
when the blades are frozen to the wind
shield can damage the w iper blades.
- Prior to using a car wash, the windshield
w iper system must be switched off (lever in
position @). This prevents unintentional
switching on and damage to the windsh ield
wiper system .
IJIJ.
49
Page 51 of 272
Lights and Vi sion
- Do not use the windshield wipers to clear ice
off the windshield. If you switch the wind
sh ield wipers on when the w indshield is icy,
the w iper blades w ill be damaged .
@ Tips
-The windshield wipers switch off when the
i gnition is turned off . You can activate the
windsh ield wipers after the ign ition is
switched back on by moving the windsh ield
wiper lever to any pos it ion.
- Worn or dirty windshield wiper blades result
i n streak ing. This can affect the ra in sensor
funct ion . Check your windshield wiper
blades regularly.
- The washer fluid nozzles in the w indshield
washer system are heated* at low tempera
tures when the ignition is on .
- When stopp ing tempora rily, such as at a
traffic light, the speed of the windshie ld
wipers automat ically reduces by one leve l.
- In vehicles with an MMI, you can switc h the
rain sensor on or
off in the Dr iver a ssistance
menu.
Cleaning windshield wiper blades
C le an the w iper blades when you see wipe r
strea ks. Use a soft clot h and a glass cleaner.
.,. Place the w indshield wipe r arms i n the se rvice
pos it ion ,=:,
page 50.
.,. Fo ld the w indshield wipe r arms away from the
winds hield.
A WARNING
Dirty windshield wipe r blades can impair vi
sion, which increases the risk of an accident .
CJ) Note
If you see st reaks aga in a fter cleaning the
wiper blades, the blades must be replaced ,=:,
page 50.
so
-
· Replacing front windshield wiper blades
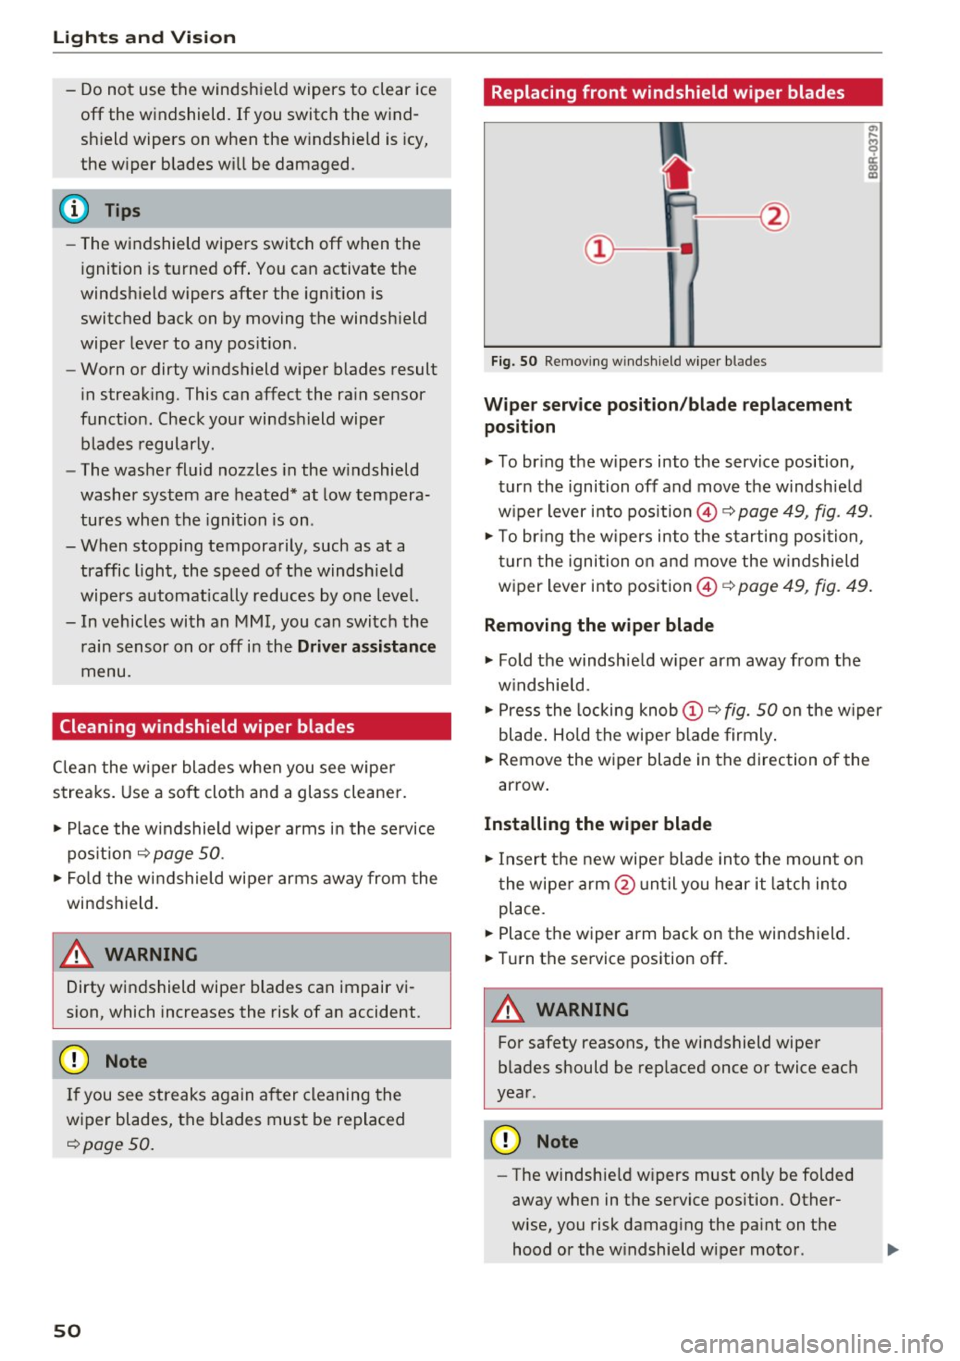
Fi g. 50 Remov ing w indsh ie ld w iper bl ades
Wipe r serv ice position /blade replacement
position
.,. To br ing the w ipers into the service position,
tur n the ignition off and move t he w indshie ld
w iper lever i nto pos ition @,=:,
page 49, fig. 49.
.,. To br ing t he w ipers into the starting posi tion ,
tu rn t he ignition o n and move the w indshield
w iper lever into pos ition ©
c:> page 49, fig. 49.
Removing the wiper blade
.,. Fold the windshie ld w iper arm away from the
w indshield .
.,. Press the locking knob
(D ,=:, fig. 50 on the w iper
blade . Ho ld the wipe r blade firmly .
.,. Remove the wiper blade in the direction of the
arrow .
Installing the wipe r blade
.,. Insert t he new wipe r blade in to the mount on
t he wipe r arm @ un ti l you hear it latch in to
place .
.,. Place the wiper arm back on the winds hield.
.,. Tur n the service position off .
A WARNING
-
For safety reasons, the windshield wipe r
b lades should be rep laced once or twice eac h
year .
Q) Note
-The w indshie ld w ipers must on ly be folded
away when in t he service position. Other
wise, you risk damag ing the pa int on the
hood or the w indshield wiper motor .