start stop button AUDI A3 SEDAN 2017 User Guide
[x] Cancel search | Manufacturer: AUDI, Model Year: 2017, Model line: A3 SEDAN, Model: AUDI A3 SEDAN 2017Pages: 400, PDF Size: 67.32 MB
Page 85 of 400
a, a, ..... N
" N ..... 0 N > 00
If the Start/Stop system has not turned off the
engine or if you have switched the Start/Stop sys
tem off manually, the ignition will not be auto
mat ically switched off and the engine w ill contin
ue to run
c:> ,& .
A WARNING
To reduce the risk of poisoning, never allow
the engine to run in confined spaces.
{!) Tips
If you select the D or N se lector lever position
in a vehicle with an automat ic transmission
after sh ift ing into reverse, the vehicle m ust
be driven fas ter than 6 m ph (10 km/h) in or
de r fo r the e ngine to switch off again.
Manually switching the Start/Stop system
on/off
Applies to: vehicles with Sta rt/Stop system
If you do not wish to use the system, you can
switch it off manually.
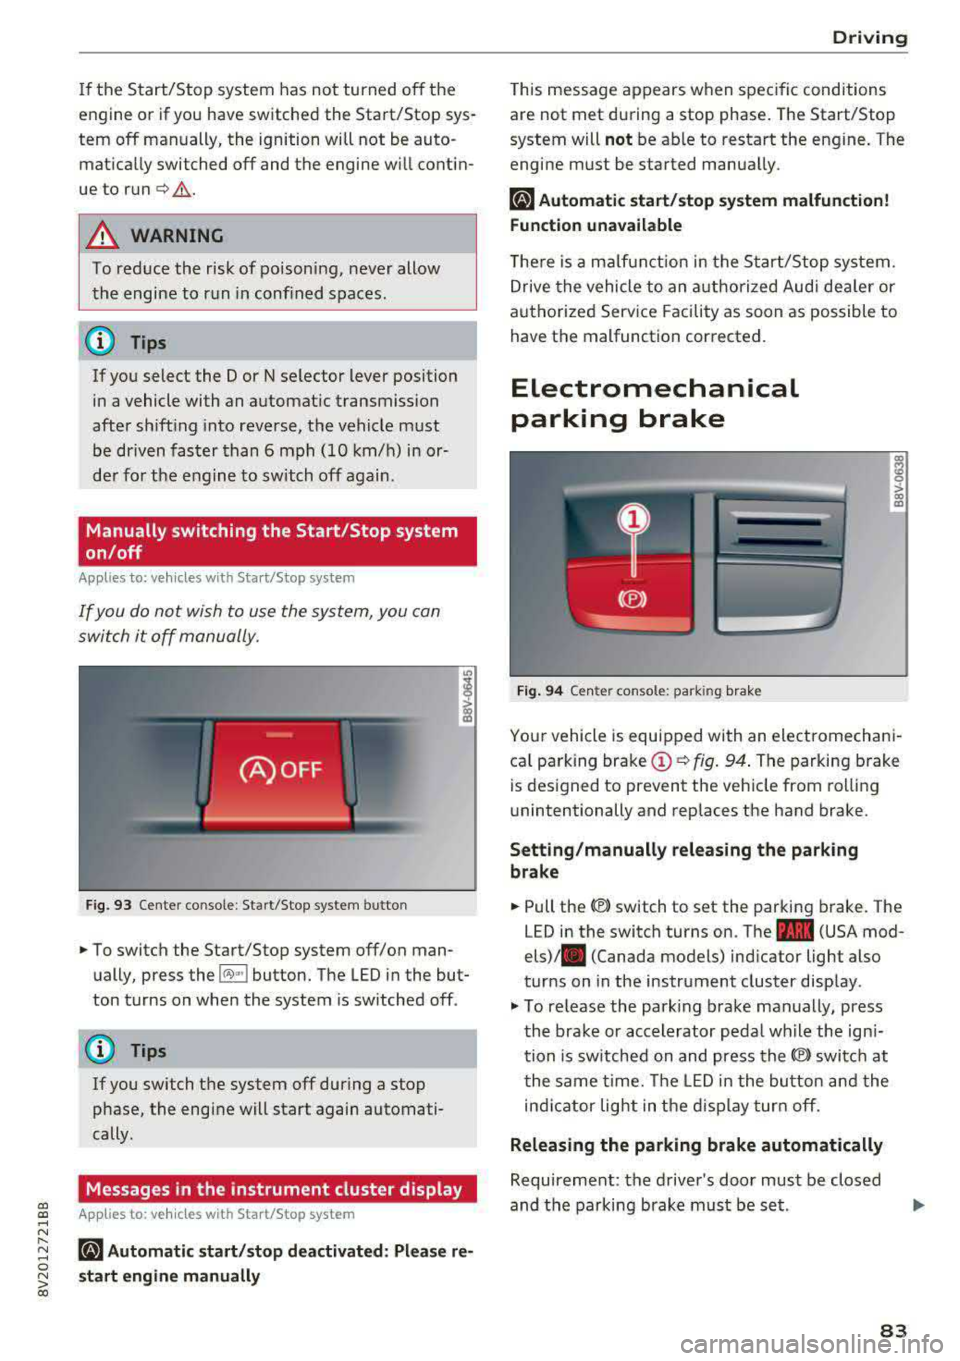
F ig . 93 Cen ter co nsole: Start/S top system button
-
"' To switch the Start/Stop system off/on man
ually, press the
l (A) ~I button. The LED in the but
ton turns on when the system is sw itched off .
@ Tips
If you switch the system off during a stop
phase, the engine will start again automati
cally.
Messages in the instrument cluster display
Applies to: veh icles with Start/Stop system
ml Automatic start /stop deactivated : Please re
s tart engine manually
D rivi ng
This message appears when spec ific conditions
are not met du ring a stop phase . The Start/Stop
system will
not be ab le to restart the engine. The
engi ne must be started manua lly .
ml Automati c start /stop system malfun ction!
Function unavailable
T he re is a m alfu nction in the S tart/Stop system.
Drive the vehicle to an a uth orized Aud i dea ler or
a uthori zed Serv ice Facility as soon as possible to
have the malfunction corrected.
Electromechanical
parking brake
F ig . 94 Cen ter console : park ing bra ke
ra 0 > co m
Yo ur vehicle is equipped with an electromechani
ca l parking brake
(D c:> fig. 94 . The parking brake
is des igned to prevent the veh icle from rol lin g
unintentionally and replaces the hand brake.
Setting /manually releasing the parking
brake
"' Pull the(®) switch to set the parking b rake. The
LED in the switch turns on. The
-(USA mod
els)/ . (Canada models) ind icator light also
turns on in the instrument cluster disp lay .
"'To re lease the park ing brake man ually, press
th e bra ke or accelerator peda l wh ile the ign i
tion is sw itched on and press the
(®) switc h at
t he same time. The LED i n the bu tton and the
in di cator light in the d isp lay turn off.
Releasing the parking brake automatically
Requireme nt: the driver's door must be closed
and the parking brake must be s et.
83
Page 89 of 400
CXl CXl .... N ,.__
N .... 0 N > 00
the lever back again will select the norma l D
mode. The instrument cluster display shows the
selected driv ing mode.
I n the
no rmal mode D, the transmission a uto
matica lly selects the suitab le gear ratio .
It de
pends on engine load, vehicle speed and driving
style.
The engine 's power reserves are used fully in the
Sport mode S . Shifting may become noticeab le
when accelerating .
To move from selector lever position N to D, yo u
must press the bra ke pedal and the veh icle mus t
be traveling less than 1 mph (2 km/h) or be sta
tionary ¢.&, .
A WARNING
Read and follow all WARNINGS.
-The vehicle can roll even if the ignition is
switched off.
-Never select R or P while driv ing, beca use
this increases the risk of an accident.
-Power is st ill transmitted to the wheels
when the eng ine is r unning at idle . To pre
vent the vehicle from "creeping", you must
keep your foot on the brake in all selector
lever positions (except P) when the engine is
running . Otherwise, th is increases the r isk
of an accident .
-Do not inadvertent ly press the acce lerator
peda l when the veh icle is stopped if a gear is
engaged . Otherwise the veh icle wi ll start to
move immediately, even i f the pa rking brake
is se t. T his cou ld res ult in a crash.
-Do not p ress the accelerator pedal when
changing the s elector leve r pos ition w hile
the vehicle is stationa ry and the engine is
running.
-Never leave yo ur vehicle with the engine
running wh ile in gear. If yo u m ust leave
yo ur vehicle when the engine is runn ing, set
the parking brake and move the selecto r lev
er to the P position.
- T o decrease the risk of an accident, t hese
lector lever must be in the P position and
the parking brake must be set before open ing the hood and wo rking on a running en-
D riv ing
gine . A lways read and follow the app licab le
warn ings
¢ page 316, Working in the en
gine compartment.
-Read and fo llowing a ll WARNINGS c> .&. in
Driving tips on page 88 .
(D Tips
-Audi drive select: Sporty shifting character
istics can be selected using the
Dynam ic
dr iving mode c> page 143 Sw ill appear in
the instrument cluster display instead of D.
-If you accidentally select N wh ile driving,
take your foot off the accelerator peda l im
mediately and wait for the eng ine to slow
dow n to idle before selecting Dor S.
-If the selector leve r does not engage, there
is a malfunct ion. The engine is disabled to
prevent the veh icle from drivi ng off unin
tentionally. To allow t he selecto r lever to
engage again, proceed as follows:
- >Briefly press the brake pedal.
-If the vehicle does not move forward or in
reverse even tho ugh a drive posit io n is se
lected, proceed as follows:
->If the vehicle does not move in the desired
direction, the system may not have engaged
the drive position correctly. Press the bra ke
peda l and select the dr ive position again.
- >If the vehicle still does not move in the de
sired d irection, there is a system malfunc
tion. See an autho riz ed Aud i dealer o r au
tho rized Audi Service Fac ility for assistan ce
t o have the system checked .
- If there is a powe r fail ure, the se lector lever
w ill not move ou t of the P posi tion. The
emergency re lease can be used if this hap
pens
¢ page 92.
(D Tips
P lug-i n hy brid drive *: the transm iss ion
swi tches automatically to the norma l mode D
if the
l""'I button¢ page 100 is p ressed wh ile
i n sport mode S.
87
Page 90 of 400
Driving
Driving tips
Applies to: ve hicles w ith a utomat ic tra nsm iss io ns
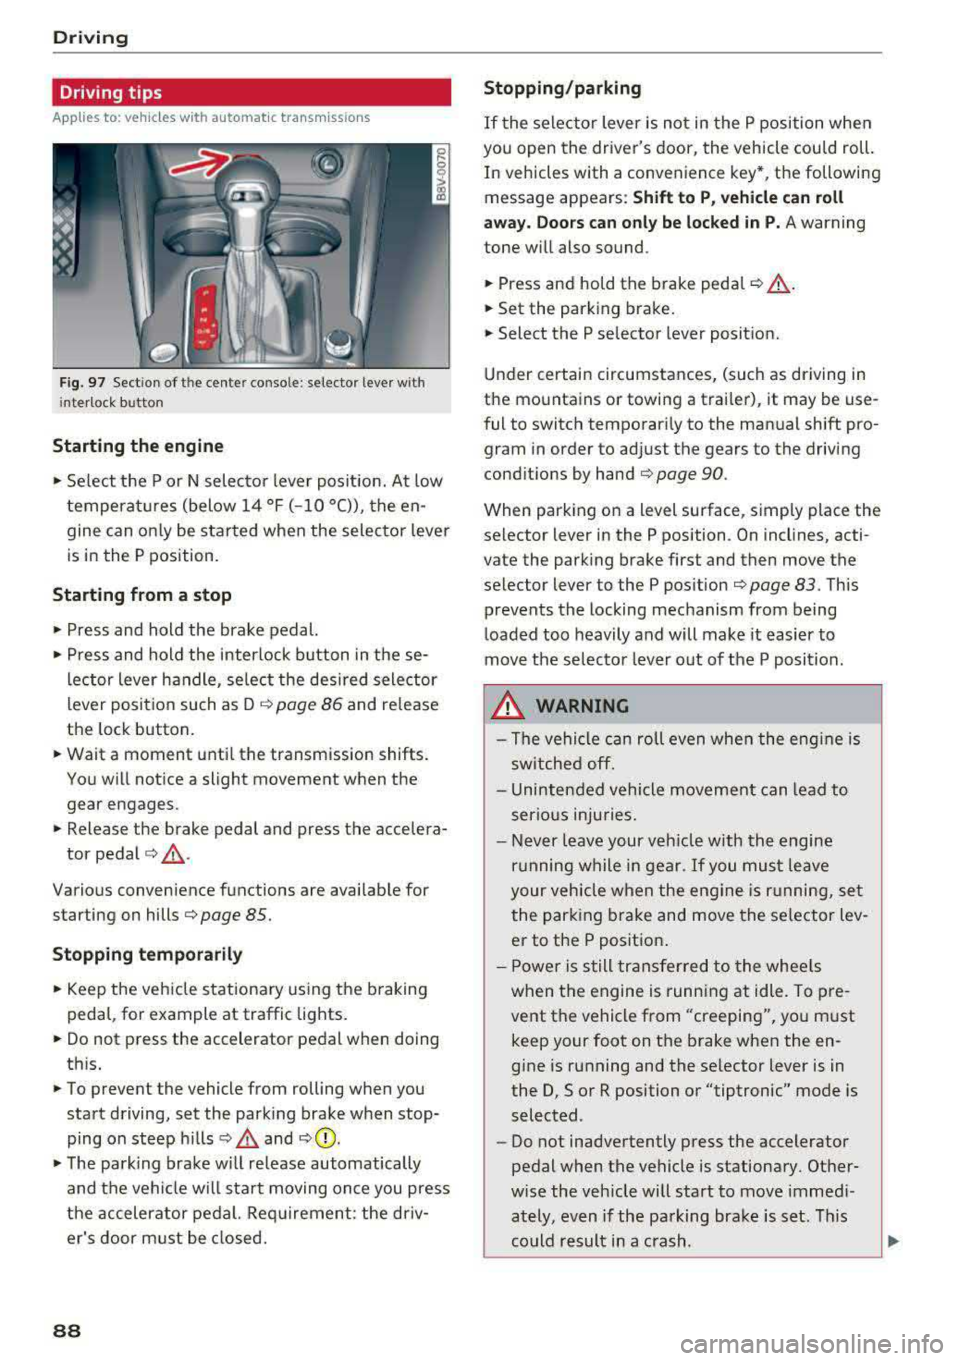
Fig. 97 Sect ion of the cente r conso le : se lector lever w ith
i nte rlock button
Starting the engine
• Se lect the P or N selec to r l ever posit ion. At low
temperat ures (below
14 °F (- 10 °C)), the en
gine can on ly be star ted when the selector lever
is in the P position.
Starting from a stop
• Press and hold the brake pedal.
• Press and hold the interlock button in these
l ector lever handle, se lect the des ired selector
lever posit io n such as D
c::> page 86 and release
the lock button.
• Wait a moment unti l the transmission shifts.
You w ill notice a slight movement when the
gear engages.
• Release the brake pedal and press the accelera-
tor pedal
c::> ,& .
Various convenience functions are ava ilab le for
starting on hills
c:::> page 85.
Stopping temporarily
• Keep the veh icle stationary using the b raking
peda l, for example at traffic lights.
• Do not press the accelerator pedal when doing
th is.
• To prevent the vehicle from rolling when you
start driving, set the park ing brake when stop
ping on steep hills
c::> .& and c::> 0.
• The park ing brake w ill release automatically
and t he veh icle wi ll sta rt moving on ce you press
the accelerator pedal. Req uirement: the driv
er's door m ust be closed.
88
Stopping/parking
If the sele ctor lever is not in the P position w hen
you open the driver's door, the vehicle cou ld roll.
In vehicles with a conven ience key *, the following
message appears:
Shift to P , vehicle can roll
away . Doors can only be locked in P.
A warning
tone w ill also sound.
• Press and hold the brake peda l c::> A.
• Set the parking brake.
• Select the P selector lever posit ion.
U nder certai n circumstances, (such as driving in
t h e mountains or towing a trai ler), it may be use
ful to switch temporar ily to the manual shift pro
gram in order to ad just the gears to the driving
cond it ions by hand
c:::> page 90.
When park ing o n a level sur face, s imply place the
se lector lever in the P position . On inclines, acti
vate the parking brake first and then move the
selector lever to the P pos ition
c:::> page 83 . This
prevents the locking mechanism from being
loaded too heavily and will make it easier to
move the selec tor lever o ut of the P posi tion.
.&_ WARNING
- The vehicle can ro ll even whe n the engi ne is
sw itche d off.
- Unin ten ded vehicle movement can lead to
s e rio us inju ries.
- Never leav e your ve hicle w ith th e engine
r u nning w hile in gear.
If you mus t leave
your veh icle when the eng ine is r unning, se t
the par king brake and move the se lector lev
er to the P position .
- P owe r is s till tran sfer red to the whee ls
when t he engine is runn ing at idle. To pre
vent the vehicle f rom "creeping", yo u m ust
keep your foot on t he brake when the en
gine is running and the se lector lever is in
the D, So r R position or "tiptronic" mode is
selected.
- Do not inadvertently press the accelerator
pedal when the vehicle is stationa ry. Ot her
w ise the veh icle will start to move immed i
ately, even if the parking b ra ke is set. T his
c o uld result in a c rash.
Page 93 of 400
CXl CXl .... N ,.__
N
Requirement: the engine must be at operating
temperature and the steering whee l must not be
turned.
.,. Deact ivate ll the Start/Stop system*
¢ page 83. The LED in the ~ button turns on.
.,. With the engine running, press the l.t, O FFj but
ton briefly one time .
.,. Pull the selector lever back out of the D/S posi
t ion briefly to select the S posit ion, or press it
toward the right into the tiptronic pos ition or
select the
D ynamic driving mode in drive se
lect*
¢ page 143 .
.,. Press the b rake peda l firmly with you r left foot
and hold it all the way down for at least one
second .
.,. At the same time, press the gas pedal all the
way down with your right foot unti l the engine
reaches and stays at a high RPM level.
.,. Remove your left foot from the brake.
A WARNING
- Always adapt yo ur driv ing to the traffic flow .
- Only use Launch Control when road and traf-
fic cond itions allow it and other dr ivers will
not be endangered or impacted by your driv
ing and the vehicle's acceleration .
- Please note that the drive whee ls can sp in
and the vehicle can break away when sport
mode is switched on, especially when the
road is s lippery.
- Once the vehicle has started moving, press
the
I ~ OFF j button briefly to tu rn the sport
mode off.
@ Tips
-The transmiss ion temperature may increase
s ignificantly after us ing the launch cont rol
program.
If that happens, the program may
not be available for a few m inutes. It w ill be
available again after a cool-down pe riod.
-When accelerating using the la unch control
program, all veh icle parts are subject to
heavy loads. Th is can lead to increased
wear .
8 1
> It is not pos sib le to deact iv a te t he system w it h all vers io n s N iii of th e tran sm is s ion.
D riv ing
Emergency mode
Applies to: vehicles with automatic transmissions
In the event of a system malfunction, there is an
emergency program .
If all of the selector lever positions are highlight
ed with a light background in the instrument
cluster display, there is a system malfunct ion and
the transmission is running i n the emergency
program. The veh icle can sti ll be driven in emer
gency mode, but only with red uced speed and
not in all gears . In some cases, the vehicle
can
not d riv e in revers e .
([) Note
If the transm ission runs in eme rgency mode,
drive to a n author ized A udi dealer or author
i zed Audi Se rvice Facility immed iate ly to have
the malfunction corrected .
Transmission malfunction
Applies to: vehicles with automatic transmissions
• Tran smission: malfunction! Please stop ve
hicle and shift t o P
There is a ma lfunction in the transm ission. Park
the vehicle secure ly and do not continue driving.
See an author ized Audi dealer or authorized Audi
Service Facility for assistance .
• Transmis sion overheat ing! Plea se stop the
ve hicle!
The tra nsmission is too hot and can become dam
aged. Stop and le t the transmiss ion cool w ith the
engine r unning (at idle) in the P se lector lever po
sition . Then the indicator light and the message
turn off, drive to an authorized A udi dealer or au
thori zed Audi Serv ice Facility immediately to have
the malfunction corrected. If the indicator light
and the driver message do not turn off, do not
continue driving . See an authorized Aud i dealer
or authorized Audi Serv ice Facility for ass istance.
[!l Tran smiss ion malfunction : you can continu e
driving
.,,.
91
Page 98 of 400
e-tron
for the high-voltage battery can lead to serious damage and/or a decrease of the capacity
void coverage under the New Vehicle Limited
Warranty.
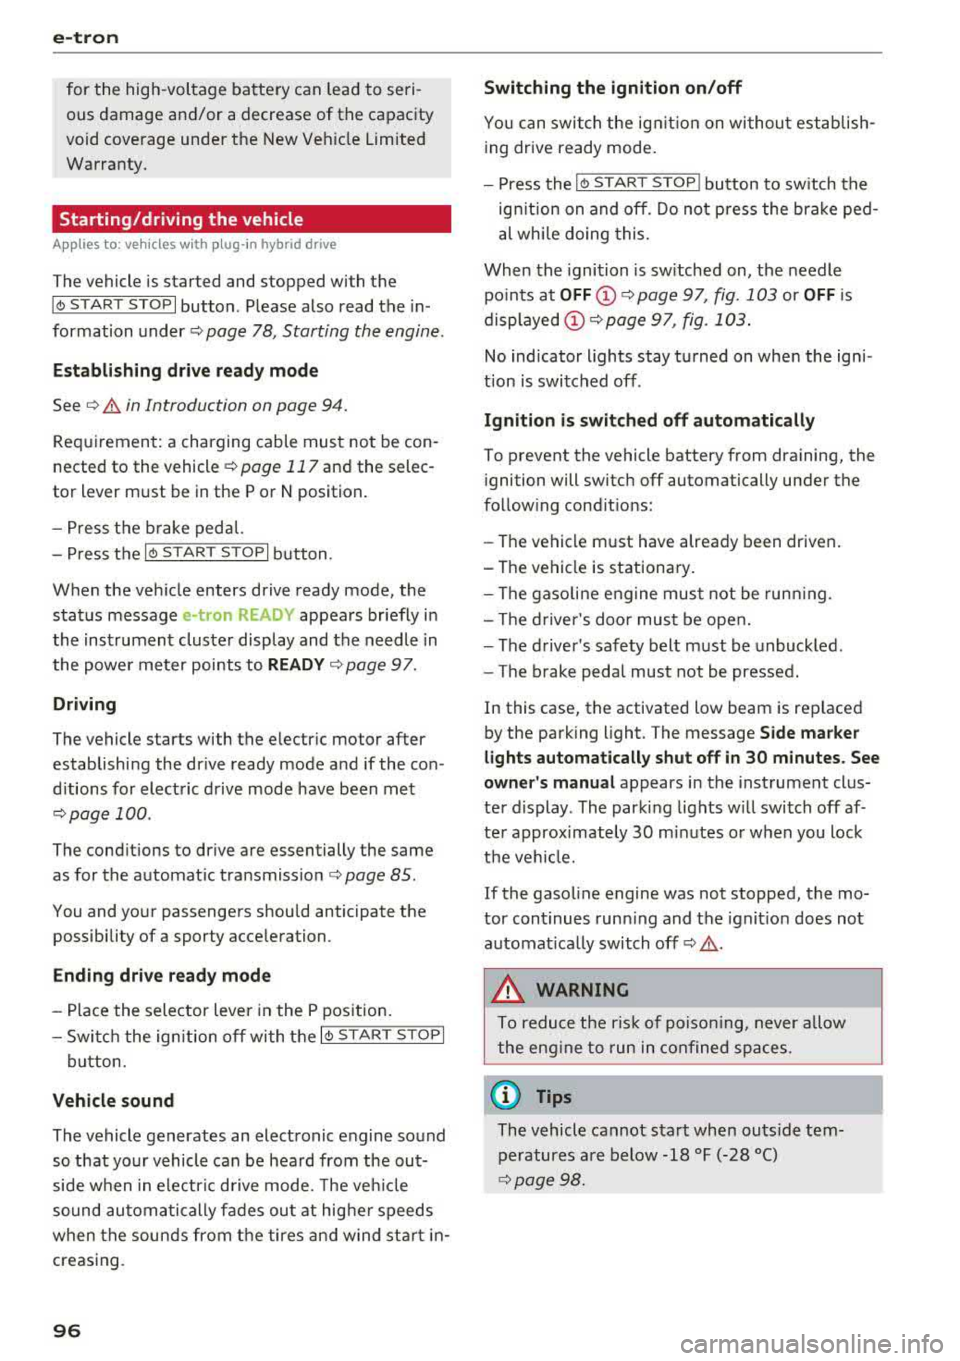
Starting/driving the vehicle
Applies to: ve hicles w ith plug -in hybrid drive
The vehicle is started and stopped with the
I START STOP I button. Please also read the in
formation under
c::> page 78, Starting the engine .
Establishing drive ready mode
See c::> A in Introduction on page 94.
Requirement: a charging cable must not be con
nected to the vehicle
c::> page 117 and the selec
tor lever must be in the P or N position.
- Press the brake pedal.
- Press the
I STAR T STOPI button .
When the vehicle enters drive ready mode, the
status message
e-tron READY appears briefly in
the instrument cluster display and the needle in
the power meter points to
READY c::> page 97.
Driving
The vehicle starts with the electric motor after
establishing the dr ive ready mode and if the con
ditions for electric drive mode have been met
c::> page 100.
The conditions to drive are essentially the same
as for the automatic transmission
c::> page 85 .
You and your passengers should anticipate the
possibility of a sporty acce leration.
Ending drive ready mode
- Place the selector lever in the P position.
- Switch the ignition off with the
I STAR T STOPI
button.
Vehicle sound
The vehicle generates an electronic engine sound
so that your vehicle can be heard from the out
side when in electr ic drive mode. The veh icle
sound automatically fades out at higher speeds
when the sounds from the tires and wind start in
creasing.
96
Switching the ignition on/off
You can switch the ignition on without establish
ing drive ready mode.
- Press the
I START STOP ! button to switch the
ign ition on and off. Do not press the brake ped
al whi le doing this.
When the ignition is sw itched on, the needle
points at
OFF @c::>page 97, fig. 103 or OFF is
displayed @c::>page97, fig .103.
No indicator lights stay turned on when the igni
tion is switched off .
Ignition is switched off automatically
To prevent the vehicle battery from draining, the
ignition will switch off automatically under the
follow ing cond it ions:
- The vehicle must have already been driven.
- The vehicle is stationary.
- The gasoline engine must not be runn ing .
- The driver's door must be open.
- The driver's safety belt must be unbuckled .
- The brake pedal must not be pressed.
In this case, the activated low beam is replaced
by the parking light. The message
Side marker
lights automatically shut off in
30 minutes. See
owner's manual
appears in the instrument clus
ter display . The parking lights w ill switch off af
ter approx imately 30 minutes or when you lock
the veh icle.
If the gasoline engine was not stopped, the mo
tor continues runn ing and the ignit ion does not
automat ica lly switch off
c::> A .
A WARNING
To reduce the risk of poisoning, never allow
the eng ine to run in confined spaces.
(D Tips
The vehicle cannot start when outs ide tem
peratures are below-18 °F (-28 °C)
c::> page 98.
-
Page 127 of 400
CXl CXl .... N ,.__
N .... 0 N > 00
Switch ing the ign ition o ff will erase the stored
speed .
Switching off automatically
[ij;{ij~i~ (USA model s)11) (Canada models )
Speed control system : currently unavailable.
See owner's manual
The c ruis e contro l syst em was a utomat ica lly
turned off be ca use the system has dete cted a
mal funct ion th at is imp air in g t he cr uise con trol
f u nction. Try switc hing t he cr uise con trol system
on again la ter .
A WARNING
You s hould only resume the stored s peed if it
is not too high for exist ing traffic condit ions.
Otherwise you can increase the r isk of an acci
de nt.
Lap timer
Introduction
Appl ies to : vehicles with lap t imer
You can measure and analyz e lap times with the
lap tim er in the display.
Opening the lap timer
.. Open the first Vehicle tab (t rip computer) using
the
l <1 1> I butto n on the mult ifunct ion steer ing
wheel.
• Applies to: vehicles with analog instrument
cl uster: Press
thP l== I button on the m ultifu nc
t io n s teer ing whee l an d sele ct
Lap timer in t he
me nu.
• Applies to: vehicles with A udi virtual cockpit: on
t h e m ultif unct io n steer ing whee l, select: left
contro l button
> Lap times.
Operating the lap timer
• O n t he mult if u nct io n steer ing whee l, t urn t he
l eft thumbwhee l
0 ¢ page 13 or (D ¢ page 16
until t he desired menu i tem is dis played in the
inst rument cluste r.
• Press the left thumbwhee l to confirm the selec
t ion.
Assistance systems
A WARNING
Your focus shou ld always be on dr iv ing you r
vehicle safe ly . As the driver , you have com
pl ete res pons ibility for safety in traff ic . O nl y
use the functi ons such as the la p tim er in su ch
a way th at yo u always maint ain com plete con
t rol over yo ur vehicle in all traffic situations.
(D Tips
You can retr ieve informa tion from t he tr ip
com puter while t he la p timer stopwa tch is
run nin g.
Lap times and timing
Applies to: vehicles with lap t imer
R eq uireme nt: t he lap tim er mus t be ope n
¢page 1 25.
Timing laps
-
.. To s ta rt tim ing, select Lap 1 -press OK or Start
lap 1
in t he m enu .
• App lies to: veh icles with Audi virtual cockpit: to
s t ar t t im ing au tom atic ally w hen yo u start dr iv
in g, selec t
Start lap 1 by driving off or Start by
driving off
i n the menu .
• To measure t he lap time, select New lap -press
OK or New lap
in the menu . This sta rts tim ing
the next lap at the same t ime.
A fter completing , the difference betwee n the
l ast lap and the p revious best lap t ime will be in
dicated with
a" -"/ . or "+ "/ • .
Pausing timing and displaying a split time
• To i nsert a pause m , sele ct Pause in the menu .
• To cont in ue timing, se lect Press OK to resume
or Resume in the menu.
• To display a sp lit t ime, select Split time in the
menu. The split
time [~] appears for approx i
mate ly 10 seconds in the instr ument cluster.
The tim ing of the current lap continues .
Resetting tim ing
• Using the mult ifunct io n steer ing whee l, select
Reset or Reset times in the menu.
125
Page 131 of 400
a, a, ..... N
" N ..... 0 N > 00
The stored speed in the LED line is erased.
@ Indicator lights
It -Adaptive cruise control is switched on. No
vehicles are detected ahead. The stored speed is
maintained .
B-A vehicle driving ahead was detected. The
adaptive cruise control system regulates the
speed and distance to the vehicle ahead and
brakes/accelerates automatically.
r51 -Adaptive cruise control is switched on. Ave
hicle was detected ahead. Your vehicle remains
stopped and will not start driv ing automat ically.
•-The automatic braking is not enough to
maintain a sufficient distance to a veh icle driving
ahead. You must intervene
c::> page 132, Driver
intervention request.
@ Instrument cluster display
I f adaptive cruise control is not shown in the in
strument cluster display, yo u can call it up using
the mu ltifunction steering wheel buttons
c::> page 13.
Based on the g raphics in the disp lay, you can de
termine if the system is maintaining a distance to
a vehicle ahead and what that distance to th is ve
hicle is:
No vehicle -no vehicle was detected driving
ahead.
Silver vehicle -a veh icle was detec ted dr iv in g
ahead .
Red vehicle -request for driver intervention
<=:>page 132 .
The five distance bars on the gauge © represent
the set d istance (refer to
c::> page 131 for infor
mat ion on how to change the distance) .
If you
fal l below the selected distance, the distance
bars become red from the bottom upward.
A WARNING
If you press the !SETI button when driving at
speeds below 20 mph (30 km/h), the vehicle
accelerates automatically up to 20 mph (30
Assistance systems
km/h), which is the minimum speed that can
be set.
(D Tips
-If you switch the ignition or the adaptive
cruise control system off, the set speed is
erased for safety reasons .
-The e lectronic stabilization control (ESC)
and the anti-slip -regulation (ASR) are auto
matically switched on when the adaptive
cruise control is switched on.
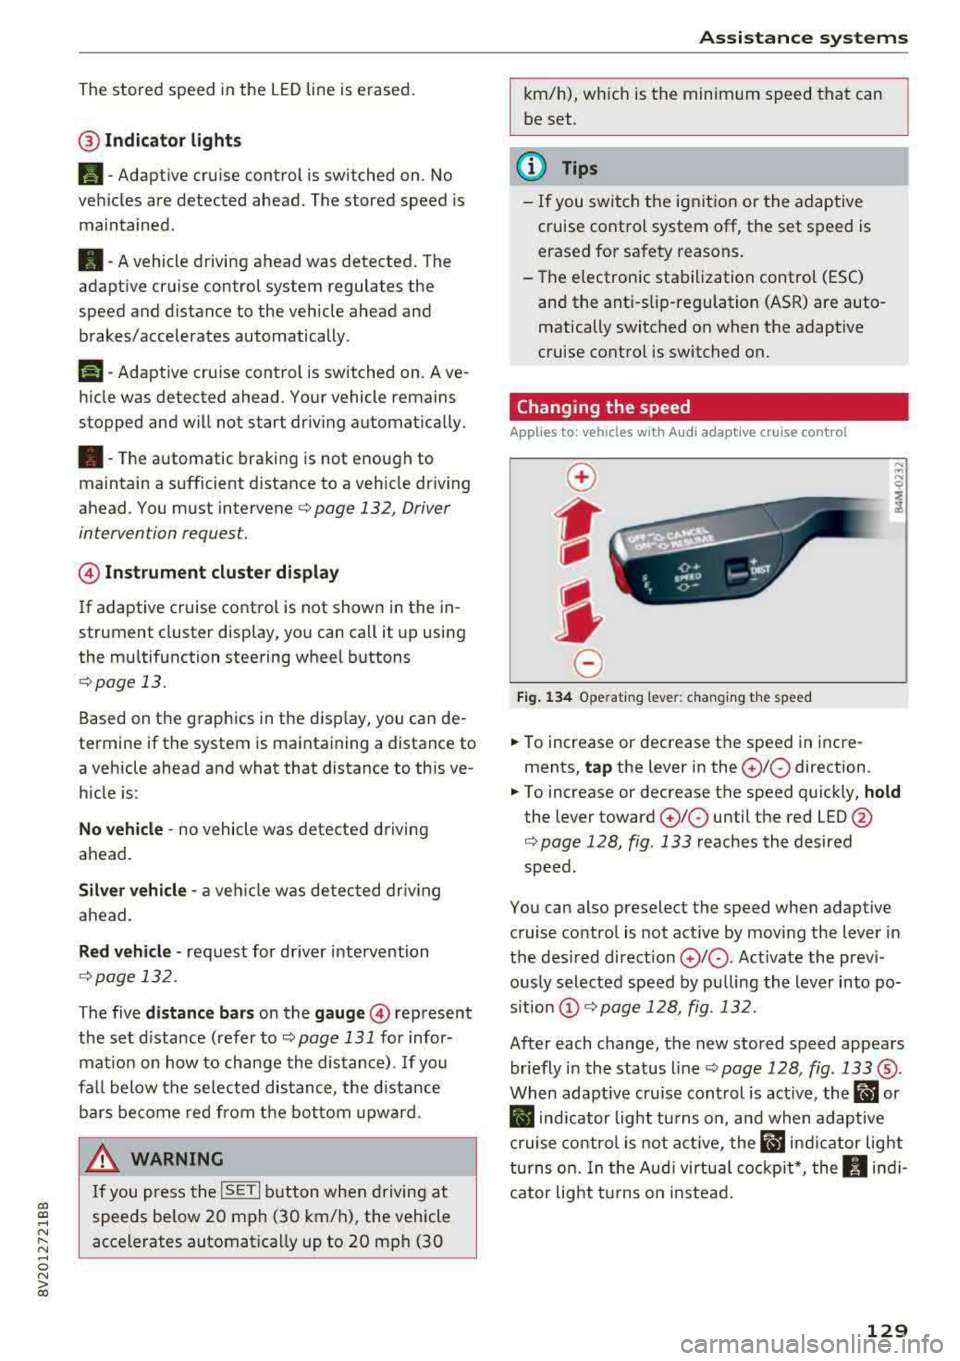
Changing the speed
Applies to: vehicles with Audi adaptive cruise control
0
f
J
0
Fig. 134 Operat ing lever: changing the speed
.. To increase or decrease the speed in incre
ments,
tap the lever in the 0 10 direction .
.. To increase or decrease the speed quickly, hold
the lever toward 010 until the red LED @
c::> page 128, fig. 133 reaches the desired
speed.
You can also preselect the speed when adaptive cruise control is not active by moving the lever in
the desired direction
0 10 . Act ivate the previ
ously selected speed by pulling the lever into po
s ition
@ c::> page 128, fig . 132.
After each change, the new stored speed appears
briefly in the status line
c::> page 128, fig. 133 ®·
When adaptive cru ise control is active, the ill or
• indicator light turns on, and when adaptive
cruise control is not active, the
ill ind icator light
turns on. In the Audi virtual cockpit*, the
II indi
cator light t urns on instead.
129
Page 205 of 400
CXl CXl .... N ,.__
N .... 0 N > 00
-If a contact is grayed out in the d irectory,
this contact has neither a destination no r an
address assigned to them.
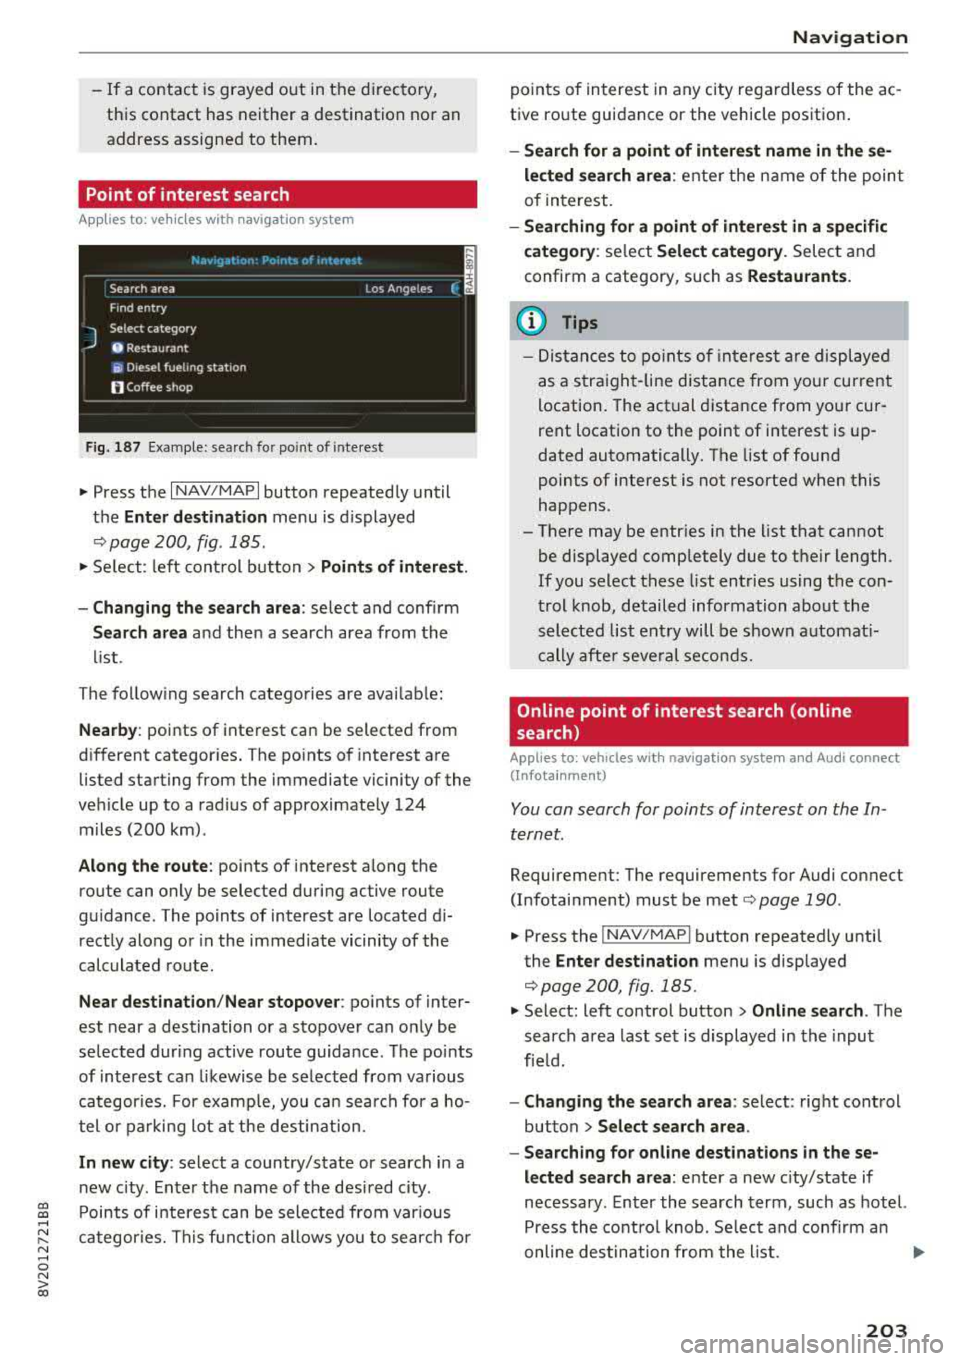
Point of interest search
App lies to: ve hicles with navigation system
N.-w1gat1on . Po1nb of interest i
__ S_ e_ a_r_c _
h _a_ r_e _
a ______________ L _o _s _ A_ n_ g_ e_l_ e_s __ (_. ~
J
Find entry
Select category
0 Restaurant
ii) Diesel fueling station
fJ Coffee shop
Fig . 187 Exa mple: se arch fo r po int of inte rest
"' Press the I NAV/MAPI button repeated ly until
t h e
Enter de stination menu is displayed
,:::;, page 200, fig . 185.
"' Se lect : left con trol but ton > Points of interest .
-Changing the search area : select and confirm
Search area and then a search area from the
li st.
The follow ing search catego ries are avai lab le :
Nearby : points of inte rest ca n be selected from
d ifferent categor ies. The po ints of interest a re
listed starting from the immediate vicinity of the
ve hicle up to a rad ius of approximate ly 124
m iles (200 km) .
Along the route : points of interest a long the
ro ute can only be selected d uring active route
gu idance . The points of interest are located d i
rect ly along or in the immed iate vicinity of the
calculated route .
Near destination /Near stopover : points of inter
est near a destination or a stopover can on ly be
se lected during active route guida nce. The po ints
of interest can likewise be se lected from various
categor ies. For examp le, you ca n sea rch for a ho
tel or parking lot at the destin ation.
In new city : select a country/state or search in a
n ew c ity . E nte r th e name of the desi red c ity .
P oints of i nte res t can be sele cted from var ious
ca tegor ies. Th is f unct ion allows you to sear ch for
Navigation
po ints of interest in any city re gard less of the ac
t ive ro ute guidance or the vehicle pos ition .
-Search for a point of int ere st name in these
lected search area :
enter the n ame of the poin t
of interest.
- Searching for a point of interest in a specific
category :
select Select category . Select and
confirm a category, such as
Restaurants .
(D Tips
-Distances to poin ts of i nte res t are displ aye d
as a s tra ight-line d ist ance from your current
location . The actual d istance from you r cur
rent locat ion to the point of interest is up
dated automatically . The list of found
points of interest is not resorted when this
happens.
-There may be entr ies in the list that cannot
be displayed completely due to t he ir length .
If you select these list entries using the con
tr ol knob , detailed information about the
sel ected list e ntry will be shown a utomat i
c ally af te r seve ral second s.
Online point of interest search (on line
search)
Appl ies to: vehicles with navigat ion system and Aud i connect
(Infotainment)
You can search for points of interest on the In
ternet.
Requirement: The requirements for Audi co nnect
(Infotainment) mus t be met
,:::;, page 190 .
"'Press the !NAV/MAPI button repeatedly until
the
Enter destination menu is displayed
,:::;,page 200, fig.185.
"' Select: left control button > Online search . The
search a rea last se t is displayed in the inpu t
fie ld.
-Changing the search area : select: right cont rol
button
> Select search area .
-Searching for online destinations in these
lected search area :
ente r a new c ity/state if
necessary . E nter the search term , such as hotel.
Press the contro l knob . Se lect and confi rm an
online des tination fro m the list.
..,.
203
Page 206 of 400
Navig ation
-Se arching for onl ine d estination s in a specific
categor y:
select and confirm Se lect catego ry.
Se lect and confirm a category, such as Rest au
r a nts .
Find which search areas are available under
¢ page 203, Point of interest search.
You can sea rch fo r on line dest ina tions using the
voice recognition system
¢ table on page 173.
{I) Tips
Always read t he chapte r¢ page 196, Audi
c onnect (Infotainment) general informa tion.
Accessing destinations from myAudi
account
A pp lies to: ve hicles w ith naviga tion sys tem and Audi co nn ect
(I nfota inmen t)
Import individual destinations from your myAudi
account into the
MMI.
Requirement:
The requirements for Audi connect (Infotain ment) must be met
¢ page 190.
You must have a registered myAudi account at
my.aud iusa.com . You must have a vehicle as
signed to your myAudi acco unt and you must
have stored one or more destinations .
~ Press the I NAV/MAPI button repeatedly until
the
Enter de stin ation menu is displayed
¢ page 200, fig. 185.
~ Se lect: left control button > m yAudi cont act s.
~ If necessary, enter your myAudi user data or
your myAud i PIN¢
page 190 . The contacts
stored in myAudi are d isp layed .
-Select and confirm a contact .
-Select and confirm a private or business desti -
nation.
- Se lect and confirm
Start route guidance .
(D Tips
-You only need to enter the myAud i user data
one time .
-You can receive your myA udi PIN if you have
set up a myAudi account.
204
- Additiona l information can be found under
www.audiu sa .com /audiconnect .
Entering a destination using geo
coordinates
App lies to : vehicles wit h navigat ion syste m
~ Press the I NAV/MAPI button repeatedly until
the
Enter dest inat ion me nu is displayed
¢ page 200, fig . 185 .
~ Sele ct: left control button > Geographi cal coor ·
dinate s.
-Select latitud e/longitude .
-Press the contro l knob to set the individual val -
ues .
- Turn the control knob to the left/right to
change the selected va lue.
- Select and confirm
Start route guidance .
Adding a stopover
App lies to : vehicles wit h naviga tion syste m
You con enter an additional destination when
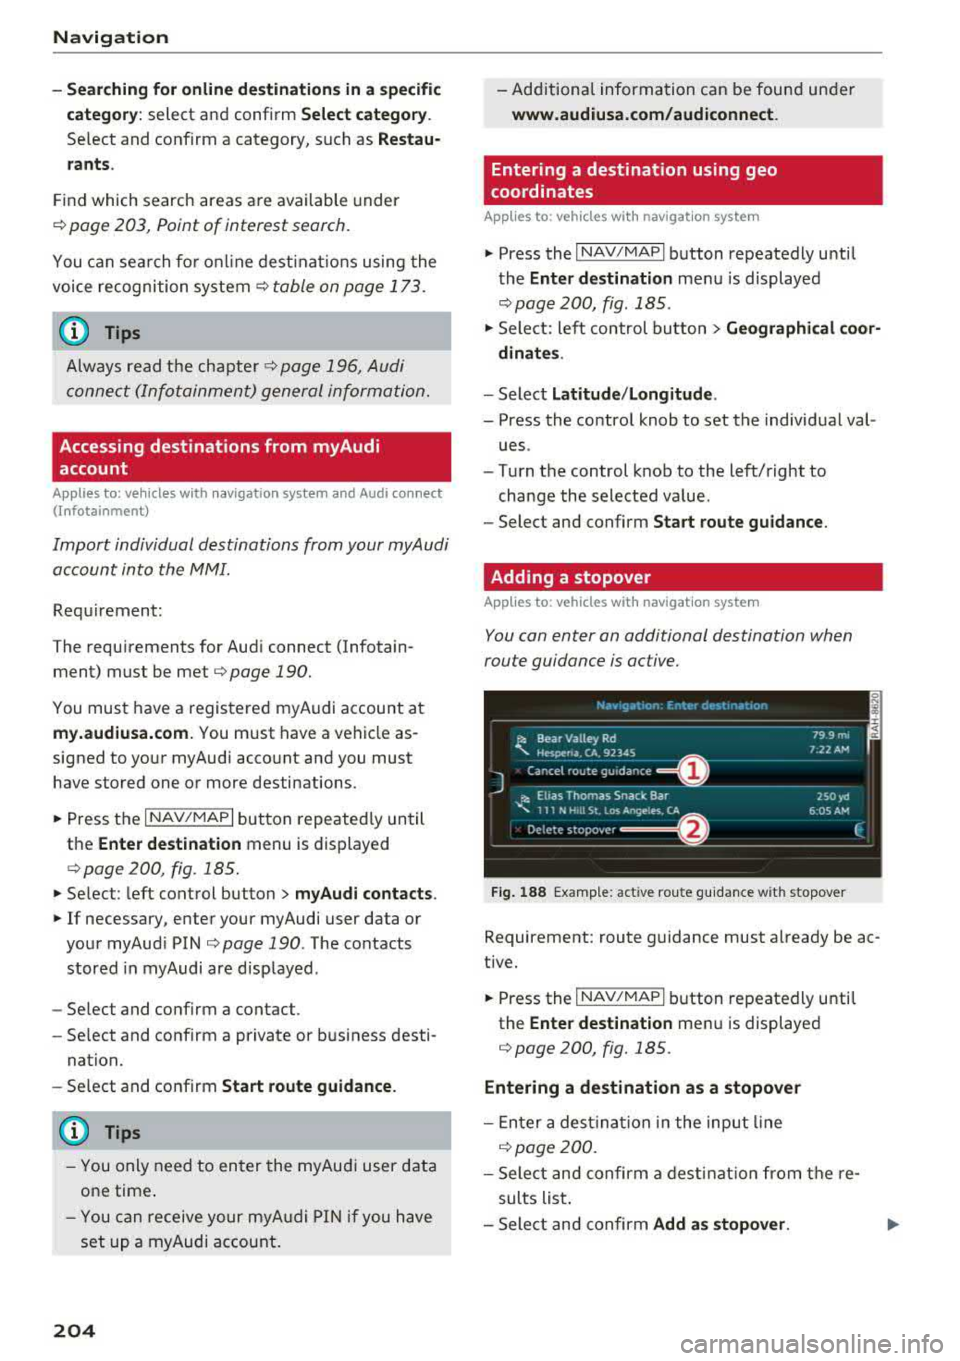
route guidance is active.
Nac,,gat1on Er.tcr de'iot1r.ar.1on ~-
---------== = ==----,:.-jl: Bear Valley Rd 79 9 mi
'-,. Hesperia. CA, 9234S 7:22 AM
Cancel route gu idance ______ _
::, Elias Thomas Snack Bar
-..;: 111 N Hill St. Los Angeles. CA
De lete stopovc-r ====~ If}
J 250yd
6:05 AM
Fig. 188 Examp le: act ive route g uidance w it h stopover
Requirement: route guidance must already be ac
tive.
~ Press the I NAV/MAPI b utton repeatedly unti l
the
Ente r dest ination me nu is displayed
¢ page 200, fig. 185.
Entering a destination as a stopover
-En ter a des tina tion in the input line
q poge 200 .
-Select and confirm a desti nat ion from the re
sults list .
-Select and confirm Add as stopo ver . jll,,
Page 208 of 400
Navigation
Personal route
assistance
App lies to: ve hicles w ith navigat ion system
Your MMI can learn your frequently driven routes
and, depending on the current vehicle position,
suggest route guidance (for example, your daily commute to work and back).
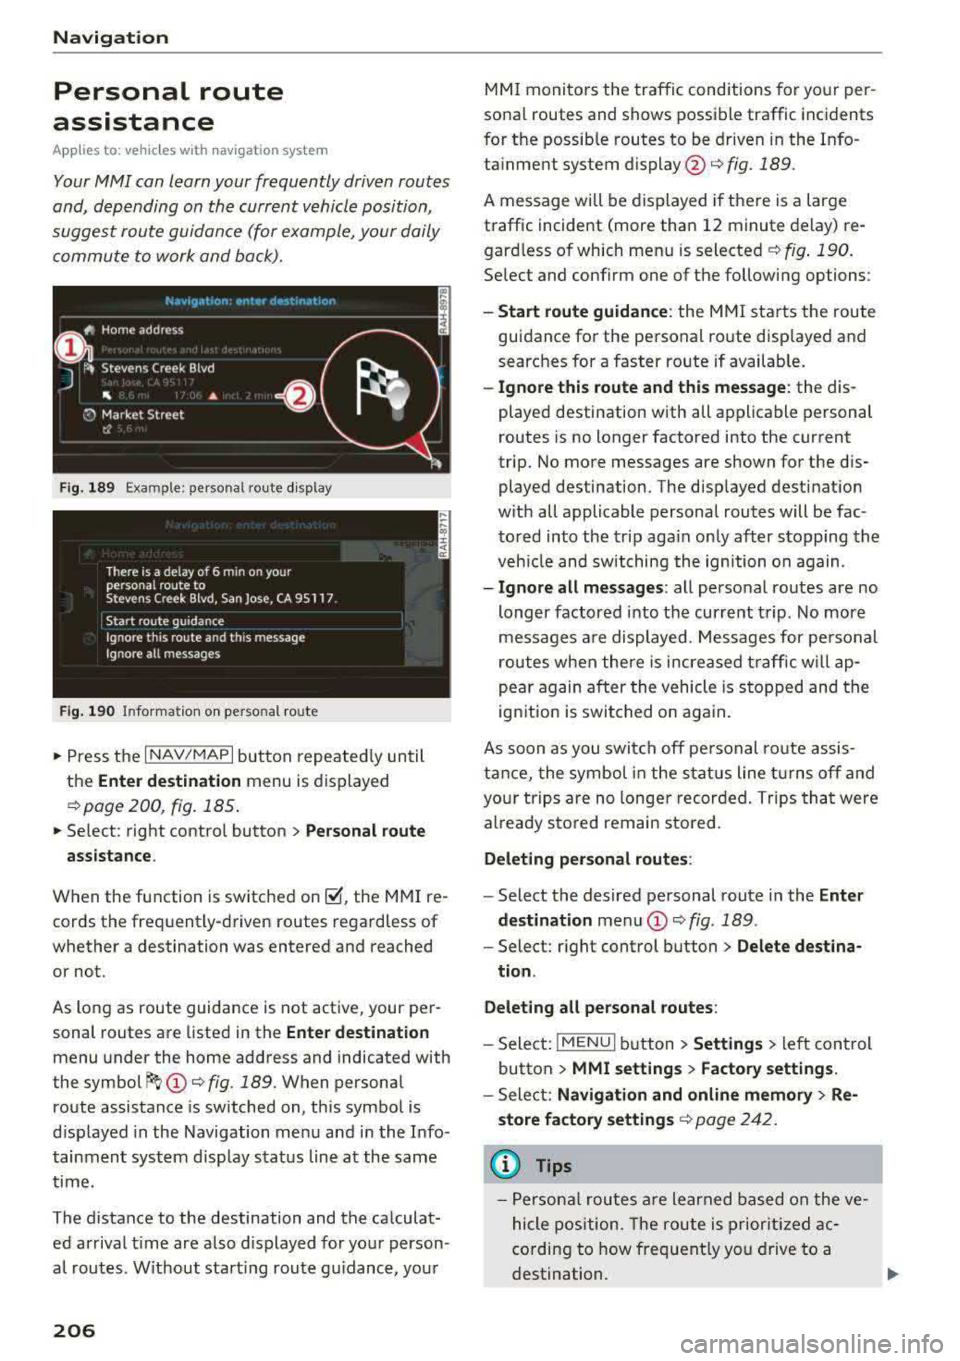
Fig. 189 Exa mple: perso nal rou te display
Fig . 190 In forma tion on personal ro ute
.,. Press the I NAV/MAPI button repeated ly until
the
Enter destination menu is displayed
qpage 200 , fig . 185.
... Select : right contro l button > Personal route
assistance .
When the function is switched on~, the MMI re
cords the frequently-driven routes regardless of
whether a destination was entered and reached
or not .
As long as route guidance is not act ive, your per
sonal routes are listed in the
Enter destination
menu under the home address and indicated with
the
symbol ~ (D q fig. 189. When personal
route assistance is switched on, this symbol is
displayed in the Navigation menu and in the Info
tainment system disp lay status line at the same
time.
The distance to the destination and the calculat ed arrival time are also d isplayed for your person
al routes. Without start ing route gui dance, your
206
MMI monitors the traffic conditions for your per
sona l routes and shows possible traffic incidents
for t he possib le routes to be driven in the Info
ta inment system
display @q fig. 189.
A message will be displayed if there is a large
traffic incident (more than 12 minute delay) re
gardless of which menu is selected
¢fig . 190.
Select and confirm one of the following options :
-Start route guidance: the MMI starts the route
guidance for the personal ro ute disp layed and
searches for a faster route if available.
- Ignore this route and this message: the dis
played destination with all applicable personal
routes is no longer factored into the current
trip. No more messages are shown for the dis
played destination. The displayed destination
w ith all applicable personal routes will be fac
tored into the trip again on ly after stopping the
veh icle and switching the ignition on again.
-Ignore all messages : all personal routes are no
longer factored into the current trip. No more
messages are displayed . Messages for pe rsonal
routes when there is increased traffic will ap
pear again after the vehicle is stopped and the
ignition is switched o n again.
As soon as you switch off personal route assis
tance, the symbol in the status line turns off and
your trips are no longer recorded. Trips that were
already stored remain sto red .
Deleting personal routes :
-Select the desired personal route in the Enter
destination
menu (D ¢ fig. 189.
-Select: r ight control button> Delete destina
tion .
Deleting all personal routes:
-Select: !MENU I button> Settings > left control
button >
MMI settings > Factory settings.
-Sele ct: Navigation and online memory > Re·
store factory settings
¢ page 2 42.
(D Tips
-Personal routes are learned based on the ve
hicle position. The route is prioritized ac
cording to how frequently you drive to a
destination.