reset AUDI A3 SEDAN 2018 Owners Manual
[x] Cancel search | Manufacturer: AUDI, Model Year: 2018, Model line: A3 SEDAN, Model: AUDI A3 SEDAN 2018Pages: 404, PDF Size: 62.3 MB
Page 5 of 404
u. 00 .-< N l' N .-< 0 N > 00
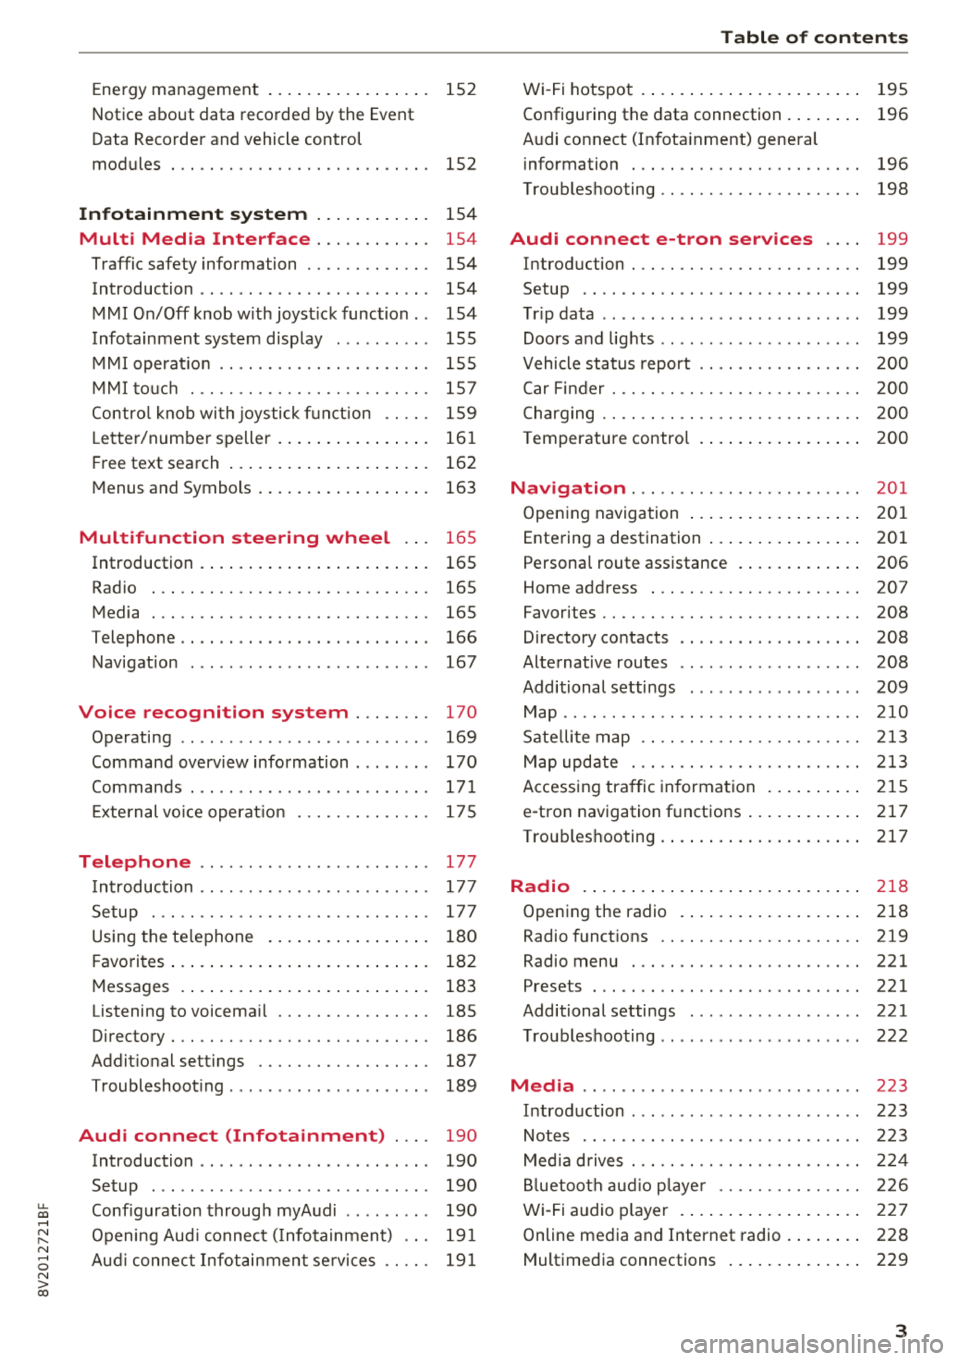
Energy management . . . . . . . . . . . . . . . . . 152
Notice about data recorded by the Event
Data Recorder and vehicle control
modules . . . . . . . . . . . . . . . . . . . . . . . . . . . 152
Infotainment system . . . . . . . . . . . . 154
Multi Media Interface . . . . . . . . . . . . 154
Traffic safety information . . . . . . . . . . . . . 154
Introduction . . . . . . . . . . . . . . . . . . . . . . . . 154
MMI On/Off knob w ith joyst ick function . . 154
Infotainment system display . . . . . . . . . . 155
M MI operat io n . . . . . . . . . . . . . . . . . . . . . . 155
M MI to uch . . . . . . . . . . . . . . . . . . . . . . . . . 157
Contro l knob wi th joystick f unct ion . . . . . 159
L e tter/number speller . . . . . . . . . . . . . . . . 16 1
F ree text search . . . . . . . . . . . . . . . . . . . . . 162
M enus and Symbols . . . . . . . . . . . . . . . . . . 163
Multifunction steering wheel . . . 16 5
Introduction . . . . . . . . . . . . . . . . . . . . . . . . 165
Radio . . . . . . . . . . . . . . . . . . . . . . . . . . . . . 165
Media . . . . . . . . . . . . . . . . . . . . . . . . . . . . . 165
Telephone . . . . . . . . . . . . . . . . . . . . . . . . . . 166
Navigation . . . . . . . . . . . . . . . . . . . . . . . . . 167
Voice recognition system . . . . . . . . 170
Operating . . . . . . . . . . . . . . . . . . . . . . . . . . 169
Command overv iew information . . . . . . . . 170
Commands . . . . . . . . . . . . . . . . . . . . . . . . . 171
E xte rnal vo ice operat ion 175
Telephone . . . . . . . . . . . . . . . . . . . . . . . . 177
I ntroduction . . . . . . . . . . . . . . . . . . . . . . . . 177
Setup . . . . . . . . . . . . . . . . . . . . . . . . . . . . . 177
Using the te lephone . . . . . . . . . . . . . . . . . 180
F avorites . . . . . . . . . . . . . . . . . . . . . . . . . . . 182
M essages . . . . . . . . . . . . . . . . . . . . . . . . . . 183
Listening to voicema il . . . . . . . . . . . . . . . . 185
Directory . . . . . . . . . . . . . . . . . . . . . . . . . . . 186
Addit ional se ttings . . . . . . . . . . . . . . . . . . 187
Troubleshoot ing . . . . . . . . . . . . . . . . . . . . . 189
Audi connect (Infotainment) . . . . 190
Introduction . . . . . . . . . . . . . . . . . . . . . . . . 190
Setup . . . . . . . . . . . . . . . . . . . . . . . . . . . . . 190
Conf iguration throug h myAudi . . . . . . . . . 190
Opening Aud i connect ( Info tainment) . . . 191
Aud i connect Infotainment se rvices . . . . . 191
Table of content s
Wi-Fi hotspot . . . . . . . . . . . . . . . . . . . . . . . 195
Configuring the data connection . . . . . . . . 196
Audi connect (I nfota inment) gene ral
information . . . . . . . . . . . . . . . . . . . . . . . . 196
Troub leshooting . . . . . . . . . . . . . . . . . . . . . 198
Audi connect e-tron services . . . . 199
Introduction . . . . . . . . . . . . . . . . . . . . . . . . 199
Setup . . . . . . . . . . . . . . . . . . . . . . . . . . . . . 199
T rip data ...... .. .. ................ . 199
Doors and lights .. .. ................ . 199
Vehicle status report . . . . . . . . . . . . . . . . . 200
Car Fi nder . . . . . . . . . . . . . . . . . . . . . . . . . . 200
C harging . . . . . . . . . . . . . . . . . . . . . . . . . . . 200
T emperature contro l . . . . . . . . . . . . . . . . . 200
Navigation . . . . . . . . . . . . . . . . . . . . . . . . 20 1
Open ing navigation . . . . . . . . . . . . . . . . . . 2 01
Entering a destination . . . . . . . . . . . . . . . . 201
Persona l route assistance . . . . . . . . . . . . . 206
Home address . . . . . . . . . . . . . . . . . . . . . . 207
Favorites . . . . . . . . . . . . . . . . . . . . . . . . . . . 208
D irectory co ntacts . . . . . . . . . . . . . . . . . . . 208
Alternative routes . . . . . . . . . . . . . . . . . . . 208
Additional settings . . . . . . . . . . . . . . . . . . 209
Map...... .. .. .. .. ............... .. 210
Sate lli te map . . . . . . . . . . . . . . . . . . . . . . . 213
Map upd ate . . . . . . . . . . . . . . . . . . . . . . . . 213
Accessing tra ffic in forma tion . . . . . . . . . . 215
e -tron navigation f unctions . . . . . . . . . . . . 217
Troub leshooting . . . . . . . . . . . . . . . . . . . . . 217
Radio .. .. .. .... .. ... .. ..... ... .. .. 2 18
Opening the radio . . . . . . . . . . . . . . . . . . . 218
Radio funct ions . . . . . . . . . . . . . . . . . . . . . 219
Radio menu . . . . . . . . . . . . . . . . . . . . . . . . 221
Presets . . . . . . . . . . . . . . . . . . . . . . . . . . . . 2 21
Additional settings . . . . . . . . . . . . . . . . . . 221
T roubleshooting . . . . . . . . . . . . . . . . . . . . . 222
Media ........ .. .. ................ . 223
Introduction . . . . . . . . . . . . . . . . . . . . . . . . 223
Notes . . . . . . . . . . . . . . . . . . . . . . . . . . . . . 223
Med ia d rives . . . . . . . . . . . . . . . . . . . . . . . . 224
Bl uetoo th aud io p laye r . . . . . . . . . . . . . . . 226
Wi -Fi a udio p layer . . . . . . . . . . . . . . . . . . . 227
Online media and Internet radio . . . . . . . . 228
Multimedia connections . . . . . . . . . . . . . . 229
3
Page 12 of 404
Cockpit overview
Instrument cluster
Instrument cluster overview
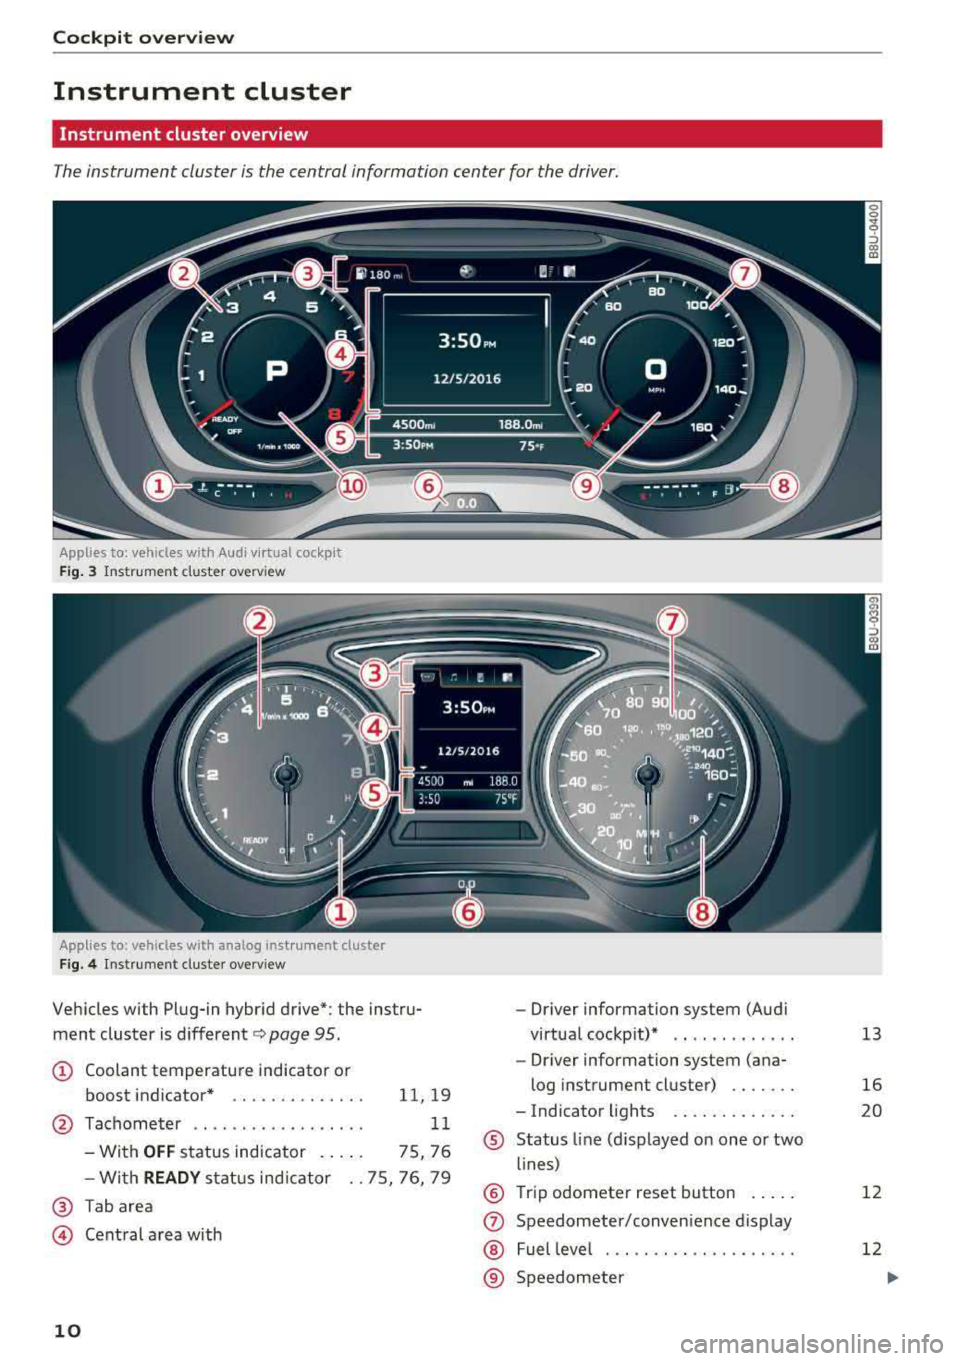
The instrument cluster is the central information center for the driver.
Applies to : vehicles wit h Aud i v ir tual cock pit
Fig. 3 Instrument cluster overv iew
Applies to: vehicles with analog inst rument cluster
Fig . 4 Instrument cluster overview
Vehicles with Plug-in hybrid drive*: the instru
ment cluster is different
c::> page 95.
(D Coolant temperature indicator or
boost indicator*
11, 19
@ Tachometer . . . . . . . . . . . . . . . . . . 11
- With
OFF status indicator . . . . . 75, 76
- With
READY status indicator .. 75, 76, 79
® Tab area
© Central area with
10
-Driver information system (Audi
virtual cockp it)* .. .... ...... .
- Dr iver information system (ana-
log instrument cluster) ...... .
- Indicator lights
® Status line (displayed on one or two
lines)
® Trip odometer reset button .....
(J) Speedometer/convenience display
@ Fuel leve l ... .. .... .......... .
® Speedometer 13
16
20
12
12
Page 14 of 404
Cockpit overv iew
CD Note
The needle in the tachometer @ Q page 10,
fig. 4 or¢ page 10, fig. 3 may only be in the
red area of the gauge for a short time or there
is a risk of engine damage. The location where
the red zone beg ins varies depending on the
eng ine .
@ For the sake of the environment
Upshifting early helps you to save fuel and re
duces operating noise .
Fuel level
The display@¢ page 10, fig. 4 or ¢ page 10,
fig. 3 only functions when the ign ition is swi tch
ed on . When the display has reached the reserve
mark, a red LED appe ars and the
rD indica to r
light t urns on ¢
page 28. The LED blinks red
when the f uel level is very low .
For the tank capacity in yo ur vehicle , refer to the
Te chnical Data
¢ page 38 2.
CD Note
Never d rive until the tank is comple tely emp
t y. The irregular supp ly of fuel that resul ts
from that can ca use engine misfi res . U ncom
bus ted fuel will the n enter the e xhaus t sys
tem . This can cause overheating and damage
to the cata lytic conve rter .
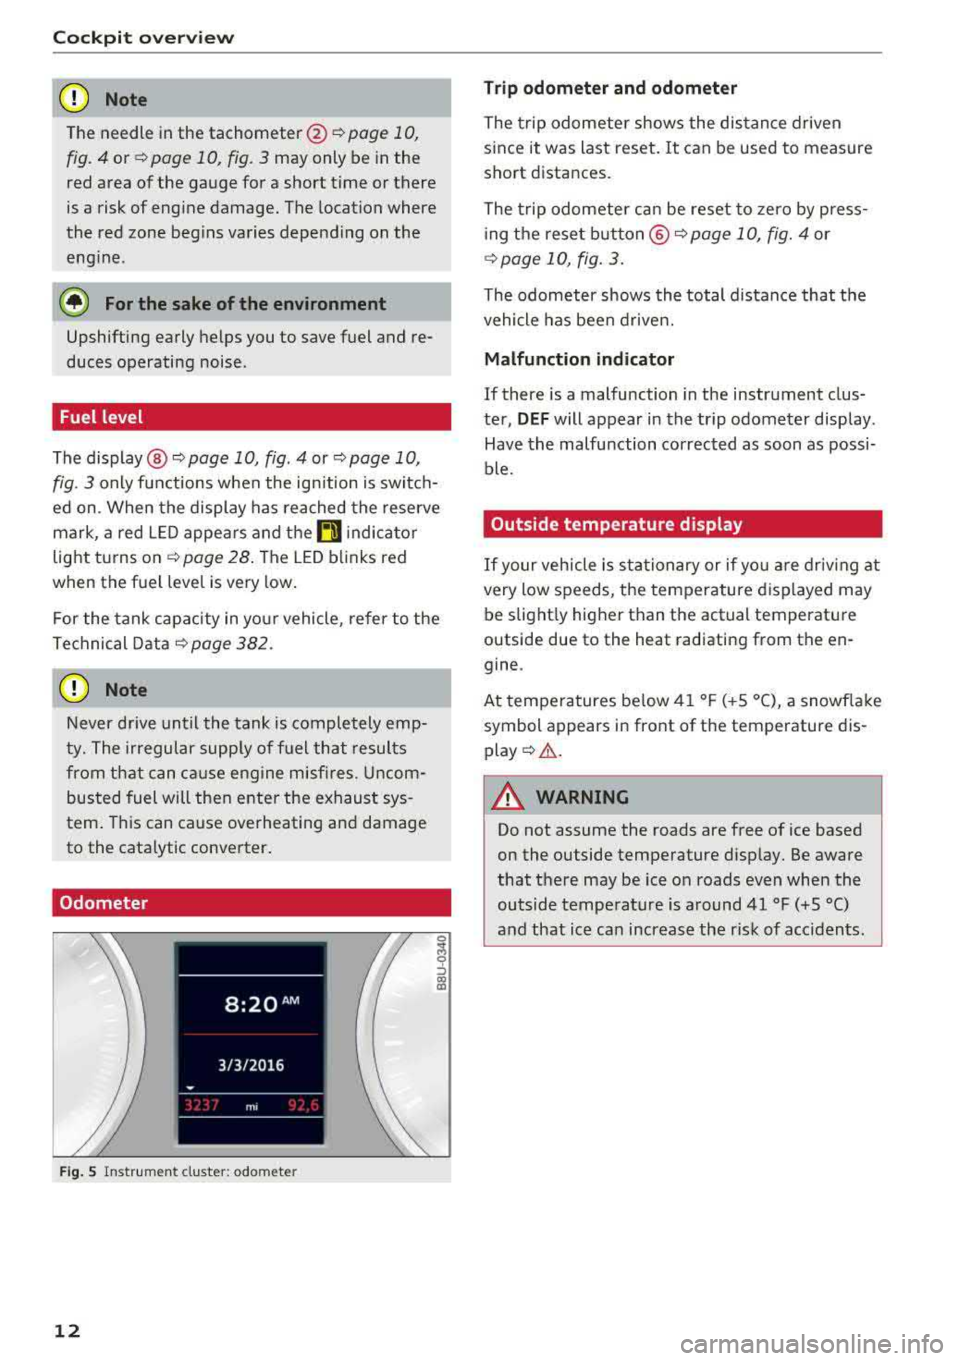
Odometer
Fig. S Instru me nt clust er: odo meter
12
Trip odometer and odometer
The trip odometer shows the dis tance driven
s ince it was last reset. It can be used to measure
short d istances.
The trip odometer ca n be reset to zero by p ress
i ng t he rese t button ®¢
page 10, fig. 4 or
¢page 10, fig. 3.
The odometer shows the total d istance that t he
vehicle has been drive n.
Malfunction indicator
If there is a malfunction in the instrument clus
te r,
DEF will appear in the trip odome ter display .
Have the malfunction corrected as soon as possi
ble.
Outside temperature display
If your vehicle i s sta tionary or if yo u are driv ing at
very low speeds, t he temperature d isplayed may
be slight ly higher than the actual temperatu re
outside due to the heat radiating from the en
gine .
At temperatures be low 41 °F (+S °C), a snowf lake
symbol appears in front of t he temperature dis
play ¢.&. .
A WARNING
Do not assume the roads are free of ice based
on the outside tempe rature disp lay. Be aware
that t here may be ice on roads even when the
outside temp erature is around 41 °F (+5 °C)
and that ice can increase the risk of accidents .
Page 20 of 404
Cockpit overview
Resetting values to zero
Requirement: the Fuel consumption, Short-term
memory or Long-term memory
display must be
selected.
.,. T o reset the values in t he respect ive memory to
zero, press and hold the left thumbwheel on
the multif unction steering whee l for one sec
ond. Or
.,. On the multifunction steering whee l, select:
the right control button
> Reset values* .
The following displays are available, depending
on vehicle equipment:
- Date and
time r=> page 243
-Plug-in hybr id drive : range r=> page 97
-Average consumpt io n
- Short-term memory overview
- Long-term memory overview
- Energy consumers
r=> page 18
-Driver assistance r=> page 120
The sh o rt -term memo ry collects driving informa
tion from the time the ignit ion is switched on un
t il it is switched off. If yo u continue driv in g with
in two hours aft er switching the ignition off, the
new values are included when calcu lating the cur
rent trip information.
Unlike the short-term memory , the long-term
memory is not erased automatica lly. Yo u can se
lect the time period for evaluating trip informa
tion yourself.
Fuel consumption
The current fuel consumpt ion can be shown us
ing a bar graph
r=> fig. 14. The average consump
tion stored in the short-term memory is also dis
p layed . If the bar is green, your vehicle is saving
fue l through the following function:
-Recuperation : electrical energy can be stored in
the vehicle battery when the vehicle is coasting
or driving downhill. The bar will move toward
0.
Energy consumers*
The Energy consumers view lists other equip
men t that is currently affecting fuel consump
tion. The display shows up to t hree energy con -
18
sumers. The eq uipment using the most power is
li sted first . If more than three items using power
are switched on, the eq uipment that is c urrent ly
using the most power is displayed. A chart also
shows you the current tota l of a ll other consum
ers .
Q) Tips
The date, time of day and time and date for
mat can be set in the Infota inment system
r=> page 2 43.
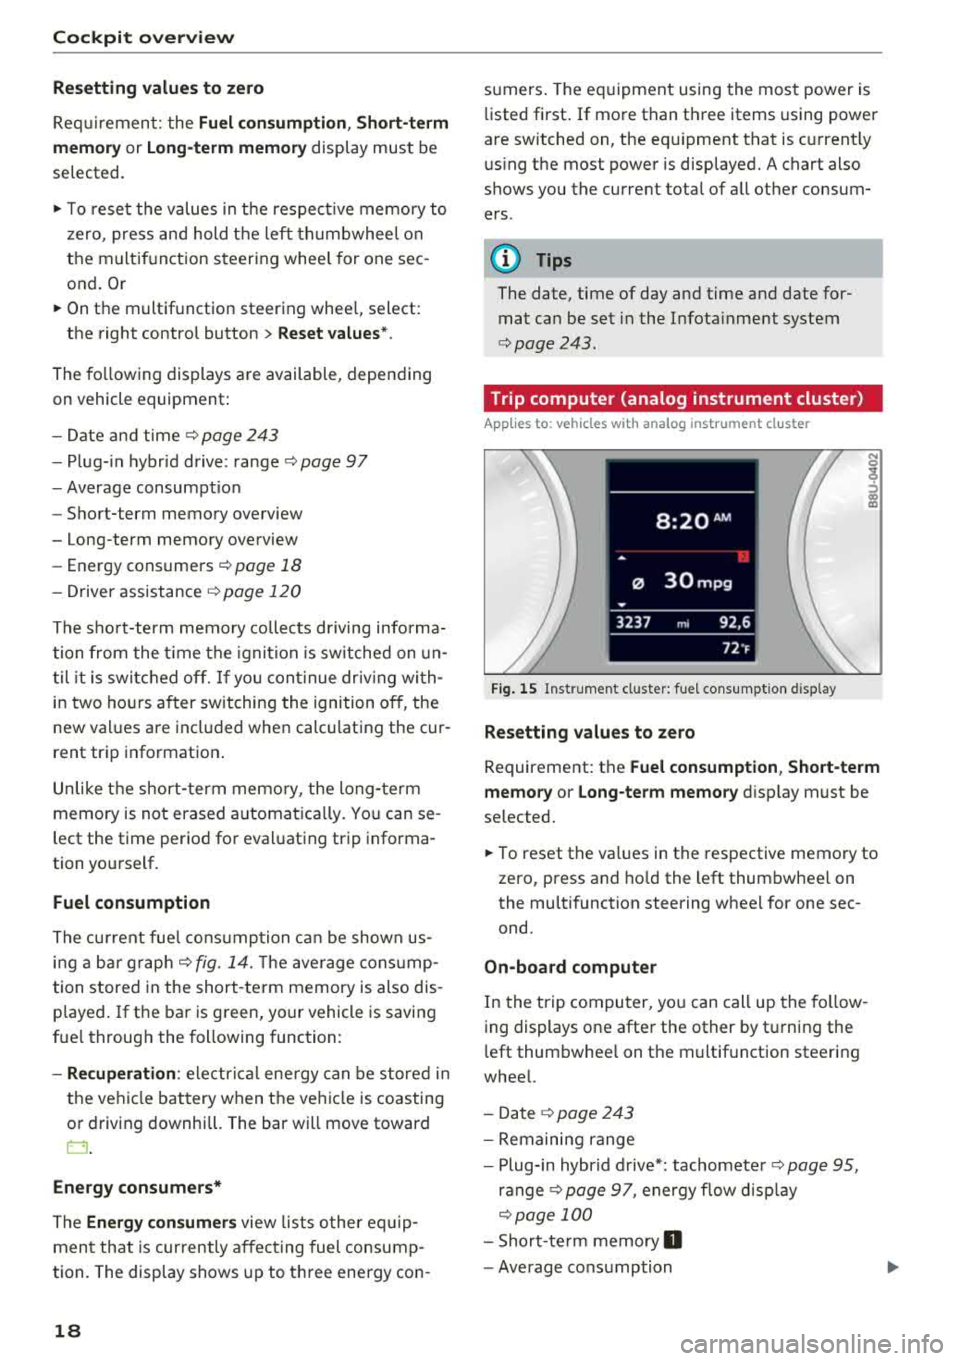
Trip computer (analog instrument cluster)
Applies to: vehicles wit h analog inst rument cl uster
Fig. 15 Instrument cl uster: fuel consumpt ion d isp lay
Resetting values to zero
N 0
9
ffl
Requirement: the Fuel consumption , Short-term
memory or Long-term memory
display must be
selected.
.,. To reset the va lues in the respective memory to
zero, press and hold the left thumbwheel on
the multifunction steering wheel for one sec
ond.
On-board computer
In the trip computer, you can call up the follow
ing displays one after the other by t urning the
l eft thumbwhee l on the multifunction steering
wheel.
- Date
r=> page 243
-Remaining range
- Plug-in hybr id drive*: tachomete r
r=> page 95,
ranger=> page 97, energy flow display
r=>page 100
-Short-te rm memory 0
-Average consumption
Page 21 of 404
u. 00 .-< N l' N .-< 0 N > 00
-Lon g-term memory fJ
- En gine o il temper ature*
The sho rt-term memo ry co llects driving informa
tion from the t ime the ignition is sw itched on un
til it is switched off. If yo u cont inue dr iv ing wi th
in two ho urs after sw itching the ign ition off, t he
new val ues a re in clu ded when calculat ing the cur
rent trip information .
Unlike the s hort-term memo ry , the long -te rm
memory is not e rased a utoma tically. Yo u ca n se
l ect the time period fo r eval uat ing trip informa
tion yo urself .
(D Tips
The date, time of d ay and time and d ate fo r
mat can be set in the Infotainment system
r::!) page 2 43 .
Efficiency program
Applies to: vehicles with efficiency program
Resetting values to zero
~ T o reset the va lues in t he respective memory to
zero, press and hold the left thumbwhee l on
the m ultif unct ion steer ing whee l for one sec
ond.
The efficiency program can help you to use less
f u el. It evaluates driving informat ion in reference
to fuel consumption and shows other equipment i n fluencing consumption. Economy t ips provide
adv ice for efficient driving .
T he efficiency program receives distance and con
sumpt ion data from the short-term memory. If
the data in the effic iency program is deleted, the
va lues in the s hort -term memory are also reset .
T he fo llow ing additional displays may be availa
b le in the efficiency program, depending on vehi
cle equipment:
- Other equipment : other equipment that is cur
rently affecting fue l consumption is listed in
the efficiency program. The d isp lay shows up to
t h ree other equipment items. The equipmen t
us ing the most power is listed first . If more
than three items us ing power are switched on,
the equ ipment that is currently using the most
Coc kpit o ver view
powe r is d isp layed. A chart also shows you the
current total of all other consumers.
- Economy tip s: in ce rtain s ituations, economy
tips appea r automatically for a s hort time in
the efficiency prog ram . If you follow these
economy tips, you can reduce yo ur vehicle's fue l
consumption. To turn an economy message off immed iate ly after it appears, press any button
on the multifunct io n steer ing wheel.
Engine oil temperature display and boost
indicator
Applies to: vehicles with engine oil temperature display/boost
indicator
Engine oil temperature ind icator
Applies to: vehicles with analog instrumen t cl uste r
The eng ine o il temperature is o nly show n in the
lap timer display
<:!) page 122 .
Applies to: vehicles with Audi virtual cockpit
The engine oi l temperat ure is on ly shown i n the
enhanced view or in the sport
view* ¢ page 14.
When eng ine o il temperatures are low, the dis
play--- °F (--- °C) appea rs in the instr ument clus
te r.
The eng ine has reached its operating tempera
ture whe n the eng ine oil temperat ure is between
176 °F (80 °C) and 248 °F (120 °C) unde r no rma l
driv ing cond it ions. The e ng in e o il tempe rature
may be hig he r i f t here is heavy engine load and
high tempe ra tures o utsid e. This is no t a cause fo r
conce rn as long as
the .¢ page 25 or Ell
¢ page 28 indicator lights do not t urn on.
Boost indicator
Applies to: vehicles with Audi virtual cockpit
The boost ind ic a tor is o nly show n in t he en
hanced view or in the spo rt view*
r::!) page 14.
The current engine load (meaning the current
boost pressure) is ind icated by a bar.
19
Page 22 of 404
Cockpit overv ie w
Shift light indicator
Applies to: vehicles with shift light indicator
The s hift lig ht ind icator informs t he d river when
t he rpm limit is reached .
Accessing the shift light indicator
Requirement: tiptron ic mode must be act ivated
c:> page88 .
.-Se lect the sport view c:> page 14. The sh ift light
indicator is d ispl ayed with green , yellow and
red ranges in the upper areas of the tachome
ter .
The s hift lig ht indicator w ill blink red when ap
proaching the engine speed lim it. Shift to the
next h ighest gear at the right time .
Sport displays
Applies to: vehicles with Audi virtual cockpit and sport dis
plays
Depending on the vehicle equ ipment, the sport
d isp lays may i nclude the G-meter, the engine da
ta and the tire p ressure mo nitoring system .
Accessing the sport displays
.-Open the first vehicle functions tab using the
I 4 1>1 button on the multifunction steering
whee l.
.- Se lect o n the multifunction stee ring wheel: left
contro l butto n >
Sport display s .
.- T urn the left thumbwheel on the mult ifunct ion
stee ring wheel u ntil the des ired sport display
appea rs in the ins trumen t cluste r.
G meter*
The G meter displays the longitudina l and latera l
acceleration . Th e max imum values that are
reached are sto red and d isp layed when the vehi
cle is s tat io nary.
.- To reset the stored values, se lect on the multi
funct io n steer ing wheel: r ight control b utton>
Reset value s.
Engine data*
The engine data displays the cur rent power and
torque.
20
Tire Pressure Monitoring System*
The tire press ure monitor ing sys tem d isp lays the
cu rrent tire press ures and tempe ra tu re. Also see
c:> page 350 , Tire pressure monitoring system.
Indicator lights
Description
The ind icator lights in the instrument clus ter
blink or tur n on. They ind icate fu nctions or mal
func tions.
Messages may appear w ith some indicator ligh ts .
A war ning s ignal will sound at the same time .
The ind icator lights and messages in the inst ru
ment clus ter d isp lay can be cove red by ot he r dis
plays . You can have these d isp laye d again in the
driver information system by opening the second
Vehicle tab (messages) using the
14 1>I b utton o n
the m ultif unction steering whee l. If there a re
severa l ma lfunctions, you can display them one
at a t ime us ing the thumbw heel.
Some indicator lights in the display can disp lay in
severa l co lors.
Lt Central indicator light
If the . or Q indicator light turns on, check
the instr ument cluster d isp lay for more informa
tion .
Applies to: vehicles with monoch rome display
If a message appears toget her with a central in
dicator light . or
d. the cen tra l ind icator light
will indicate the priority of the warning . If a
wh ite ind icator light also appea rs , the cen tra l in
dica tor light w ill have its ow n colo r. Fo r example ,
if ll appea rs togethe r with . , read the descr ip
t ion
for • .
Overview
Some indicator lights t urn on briefly as a f unction
c h eck w hen you switch the ignition on. These sys
tems a re marked with a ./ in the fo llow ing tab les.
If one of these ind icator lights does not turn on,
there is a malfunct io n in that sys tem.
IIJJ,,
Page 70 of 404
Warm and cold
Warm and cold Climate control system
Description
The climate control system circulates , warms or
coo ls, and removes humid ity from the air in the
veh icle interior . It is the most effective when the
windows and panorama g lass roof* or power top*
are closed. If there is a build-up of heat inside
the vehicle, ventilation can help to speed up the
coo ling process.
Pollutant filter
The pollutant filter removes pollutants such as
dust and po llen from the air.
Key recognition
Various sett ings are stored and ass igned to the
remote control key being used.
These settings are different when the power top* is open or closed .
Presetting
Several functions can be preset in the Infotain
ment system.
Select in the Infotainment system:
IMENU ! but
ton
> Vehicle > left control button > Air condi
tioning
A WARNING
Poor visibility can lead to accidents.
- For safer driving, keep all windows free of
ice, snow and fog.
- Become familiar with the correct use and
function of the climate control system as
quickly as poss ible, espec ia lly with the de
frosting and defogging functions.
- When the temperature is below freezing, only use the windsh ield washer system after
68
the windshield has been warmed by the cli
mate control system. The washer fluid could
freeze on the windshie ld and impair visib ili
ty .
@ Note
-If you suspect that the climate contro l sys
tem is damaged, switch the system off to
prevent further damage and have it checked
by an authorized Aud i dealer or authorized
Audi Serv ice Facility.
- Repa irs to the Aud i climate control system
require special technical knowledge and
special tools . See an authorized Aud i dealer
o r authorized Aud i Serv ice Facility .
@ For the sake of the environment
-To save fuel, turn off the climate control
system cooling mode by press ing the A/C
button. This w ill also reduce emissions . The
climate control system is off when the LED
in the button turns off.
- In vehicl es w ith the efficie ncy prog ram*,
yo u can find other consumpt ion information
and more economy tips ¢ page 19.
© Tips
- To prevent int erference with the heat ing
and cooling output and to prevent the win
dows from fogging over, the air intake in
front of the windshie ld must be free of ice,
snow or leaves.
- Condensation from the cooling system* can
drip and form a pudd le of water under the
vehicle . This is normal and does not mean
there is a leak.
- Th e energy management system may tem
porarily switc h off certain functions, such as
the seat heating* or rear window defogger.
These systems are ava ilable again as soon
as the energy supply has been restored.
Page 115 of 404
u. 00 .-< N l' N .-< 0 N > 00
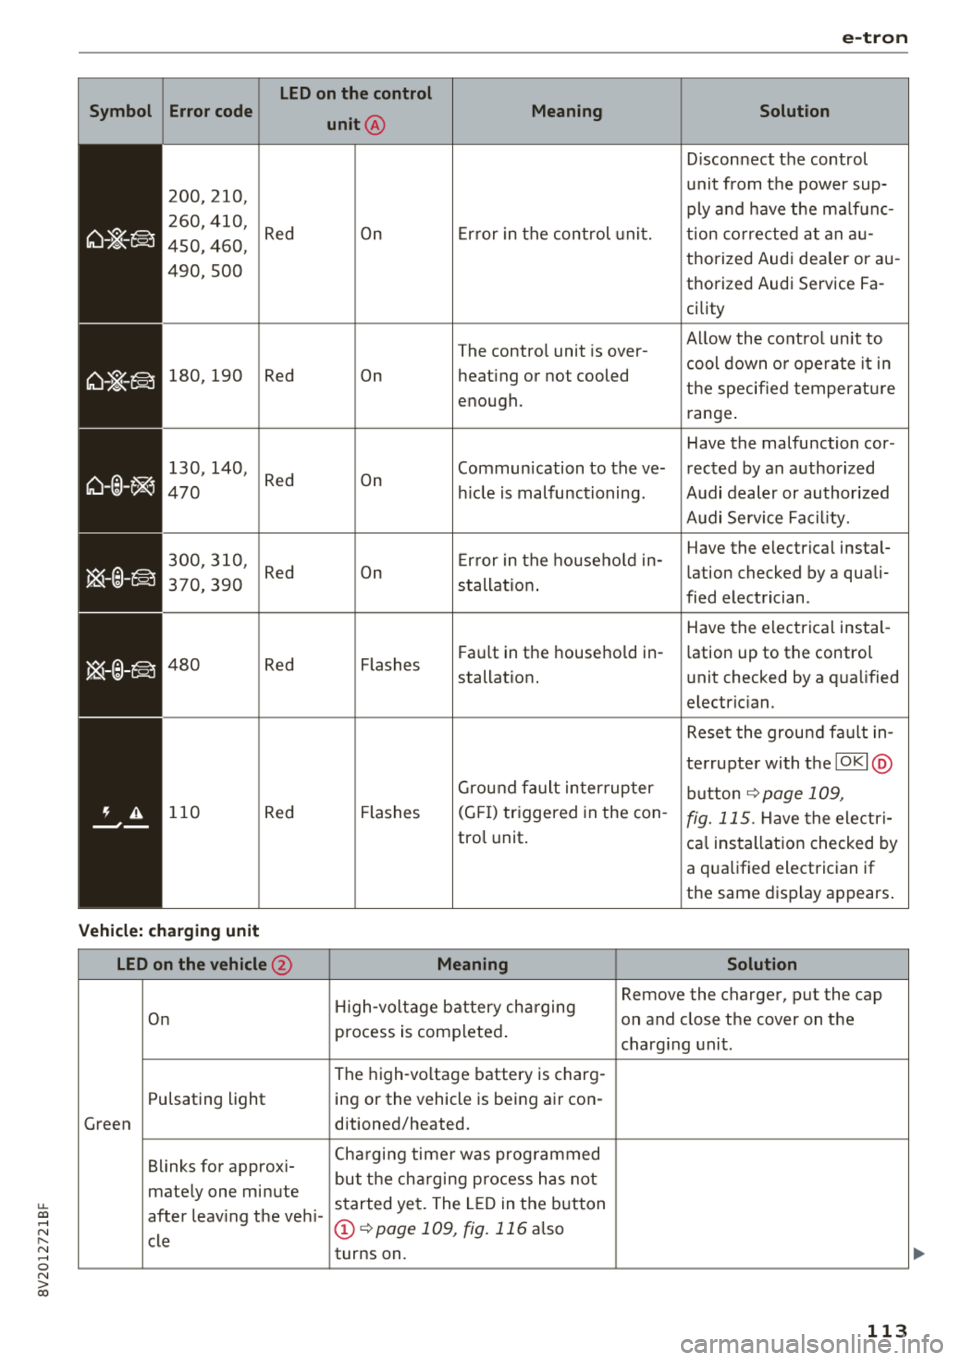
e-tron
LED on the control
S y mbol Error code
unit
@
Meaning
Solution
Disconnect the control
200,210, unit from the power sup-
ply and have the ma lfunc-
260, 410,
Red On Er ror in the con trol unit. t ion co rrected at an a u-450, 460, thorized Audi dea ler or au-
490,500 thorized Audi Service Fa -
cility
The control unit is over-Allow the control unit to
cool down o r ope rate it in
180,190 Red On heat ing or not cooled
the specified temperatu re
enough.
range.
Have the malfunction cor-
1 30, 140,
Red On Communication to the ve- rected by an authorized 470 h
ide is malfunctioning. Audi dealer or authorized
Audi Service Fac il ity.
300,310, E rror in the househo ld in- Have the
electrical instal-
Red On lation checked by a quali-
370,390 sta llat i on .
fied electrician.
Have the electrica l instal-
480 Red Flashes F
au lt in the househo ld in-
lation up to the contro l
sta llation. unit checked
by a qualified
electric ian.
Reset the ground fa ult in-
terrupter with the
IOKI @
Ground fa ult inter rup ter
button ¢page 109,
110 Red Flashes (G
FI) triggered in the con-fig. 115. Have the electr i-
tro l unit .
cal installation checked by
a qua lified electrician if
the same display appears .
Vehicl e: charging unit
LED on the vehicle @ Meaning Solution
High-voltage battery charging Remove
the charger, put the cap
On on and close the cover on the
process is completed .
charging unit .
The high -voltage battery is charg-
Pulsating light ing or the vehicle is being air con -
Green ditioned/heated.
Blinks for approx i- Cha
rgi ng time r was prog rammed
but the charging process has not
mately one minute
started yet. The LED in the button
after leaving the veh i-
CD ¢page 109, fig. 116 a lso
cle turns on .
113
Page 124 of 404
Ass is tanc e system s
A WARNING
You should only resume the stored speed if it
is not too high for existing traffic condit ions.
Otherwise you can increase the r isk of an acci
dent .
Lap timer
Introduction
Applies to: vehicles with lap timer
You can measure and analyze lap times with the
lap timer in the display.
Opening th e lap timer
i.. Open the first Vehicle tab (t rip computer) using
t h e
l
whee l.
i.. Applies to: vehicles with analog instrument
cluster: Press the
[gJ button on the m ultifunc
tion steering whee l and select
Lap t imer in the
menu .
... Applies to: vehicles with Audi virtual cockpit: on
the multifunction steering wheel, select: left
contro l button
> Lap times .
Operating the lap t ime r
... On the multifunction steering whee l, turn the
l eft thumbwhee l
(J) ¢page 13 or (D ¢page 16
unt il the desired menu item is d isplayed in the
instrument cluster .
... Press the left thumbwheel to confirm the selec
tion .
A WARNING
Your foc us should always be on d riving your
vehicle safely. As the drive r, you have com
ple te responsibi lity for safety in traffic. Only
use the functions s uch as the lap timer in such
a way that you always maintain comp lete con
trol over your vehicle in all traffic situations.
(D Tips
You can ret rieve information from the trip
computer while the lap timer stopwatch is
running .
122
-
Lap times and timing
Applies to: vehicles with lap timer
Requirement: the lap time r must be open
¢ page 122.
Timing laps
... To start timing, select Lap 1 - pre ss OK or S tart
lap 1
in the menu .
i.. Applies to: vehicles with Audi virtual cockpit: to
start t iming au tomatically when yo u start dr iv
ing, select
S tart lap 1 by driving off or St art by
dri ving off in the menu .
... To measure the lap time, select New lap - pre ss
OK or New lap
in t he menu . This starts timing
the next lap at the same t ime .
After completing, the d ifference between the
l ast lap and the previous best lap time will be in
dicated with
a" -"/ . or "+ "fll .
Pausing timing and displaying a split time
i.. To insert a pause m , sele ct Pau se in the menu.
i.. To cont inue tim ing, select Pre ss OK to re sume
or Re sume in the menu .
... T o display a sp lit time, select Split time in the
menu. The split time
r~1 appears for approxi
mate ly 10 seconds in the instrument cluster .
The timing of the current lap continues.
Re setting timing
... Using the mult ifunct ion steer ing whee l, select
Reset or Reset time s in the menu.
(D Tips
-A max imum of 30 lap t imes (analog instru
ment cl uster) or 99 lap times (Audi virtua l
cockpit*) can be measured.
- If tim ing is paused, you can continue i t later
even if you switch the ignition off.
- Saved lap times cannot be individually de
leted from the total results .
- T he save d la p timer va lues w ill remain after
switching the ignition off.
Page 167 of 404
u. 00 .-< N l' N .-< 0 N > 00
Multifunction steering
wheel
Introduction
Applies to: vehicles with multifunction steering wheel
In the driver information system display, you can
control numerous Infotainment functions using
the multifunction steering wheel plus*
<=:> page 13 or the multifunct ion steering wheel*
c> page 16.
You can control additional Infotainment func
tions us ing the MMI control panel
c> page 154 in
the Infota inment system display .
A WARNING
Direct your full attention to dr iv ing. As the
dr iver, yo u have complete respons ibility fo r
safety in t raffic. Only use the functions in
-
such a way that you a lways maintain com
plete control over yo ur vehicle in a ll traffic sit-
uations.
Radio
Applies to: vehicles with multifunction steering wheel and ra
dio
Requ irement: radio mode must be started
c> page 218 and the rad io/med ia tab m ust be
d isp layed.
.,. Press either the El butto n or the left control
button
<=:> page 14, depend ing on veh icle equ ip
ment.
Depending on vehicle equipment, the following
functions may be availab le in the driver informa
tion system.
- Se lecting th e fr equ ency band : select and con
firm a frequency band .
-Se lecting a station from th e pr esets li st *: se
lect :
Preset s> the desired radio station .
-Selecting a station from the sta tion list *: se
lect and confirm a radio station .
-Selecting a station from the presets li st : se
lect :
Preset s> the desired radio station .
-Opening a med ia source : select and confirm
Sw itch to medi a. Multifunction
ste ering wheel
Additional settings
Applies to: vehicles with Audi virtual cockpit
- Select: r ight cont rol b utton > desired entry.
Depend ing on the funct ion selected, the follow
i ng additional settings may be possible:
- Sho w "Now Pla ying" screen : see c>page 222.
Media
Applies to: vehicles with multifunction steering wheel and
media
Requirement: a media drive must contain audio/
video files
c> page 224 and the radio/media tab
must be disp layed.
.,. Press eithe r the @Jbutton o r the left contro l
button
c> page 14, depending on vehicle equip
ment .
Depend ing on ve hicle equ ipment, t he following
f unct ions may be ava ilable in the dr iver informa
tion system.
- Sele cting a media sourc e: select and confirm a
so urce su ch as the
"SD ca rd".
- Playing an audio /vid eo fil e: select and confirm
a t rack/fi le.
- Pau sing /resuming pla yback : press the right
t humbwhee l@ c> page 15, fig. 11 . To resume
p layback, press the rig ht th umbwhee l again.
Applies to: vehicles with analog instrument cluster
-Sw itching to radio : select and confirm a fre
quency band (such as
FM ).
Applies to: vehicles with Audi virtual cockpit
-Swit ching to the radio : select and confirm
Swit ch to radio .
- Opening additional tra ck information :
select :
r igh t con trol button
> Show "Now Playing "
sc reen.
For additional information, see
c> page235 .
(D Tips
- The media dr ives do not p lay fi les t hat are
protected by ORM and t hat are iden tified
with the symbol
{n .
- Ple ase note th at within a med ia so urce in
t he drive r informa tion system, only p lay lists
that were selected through the MMI control
pane l can be played
ca:> page 233 . ..,.
165