AUDI A4 1995 B5 / 1.G Engine Oil Level Checking Manual PDF
Manufacturer: AUDI, Model Year: 1995,
Model line: A4,
Model: AUDI A4 1995 B5 / 1.G
Pages: 111, PDF Size: 1.26 MB
AUDI A4 1995 B5 / 1.G Engine Oil Level Checking Manual PDF
A4 1995 B5 / 1.G
AUDI
AUDI
https://www.carmanualsonline.info/img/6/1117/w960_1117-0.png
AUDI A4 1995 B5 / 1.G Engine Oil Level Checking Manual PDF
Trending: lock, steering, sport mode, height, check oil, ignition, AUX
Page 71 of 111
70
Note:
Try using corners of the headlight housings or
two screws that are the same height and as far
apart as possible on the vehicle.
- Carefully tighten hand wheel without changing
Beamsetter position.
- Find correct State or Province Inclination %
specification for the low beam adjustment (If
there is no local specification use 1.2%).
Note:
DO NOT use the Inclination % molded into the
plastic of the headlight housing near the
headlight adjustment screws; it is for Europe
only!
- Set Beamsetter "Scaled wheel" to the proper low
beam inclination %.
- Adjust height (vertical) alignment first. Turn
headlight height adjuster screw to align the
upper edge of the flat portion of the beam with
the center horizontal line of the grid on the
Beamsetter pattern screen.
Pa
ge 71 of 111 Descri
ption of wor
k
11/20/2002 htt
p://127.0.0.1:8080/audi/servlet/Dis
play?action=Goto&t
yp
e=re
pair&id=AUDI.B5.ME01.01.6
Page 72 of 111
71
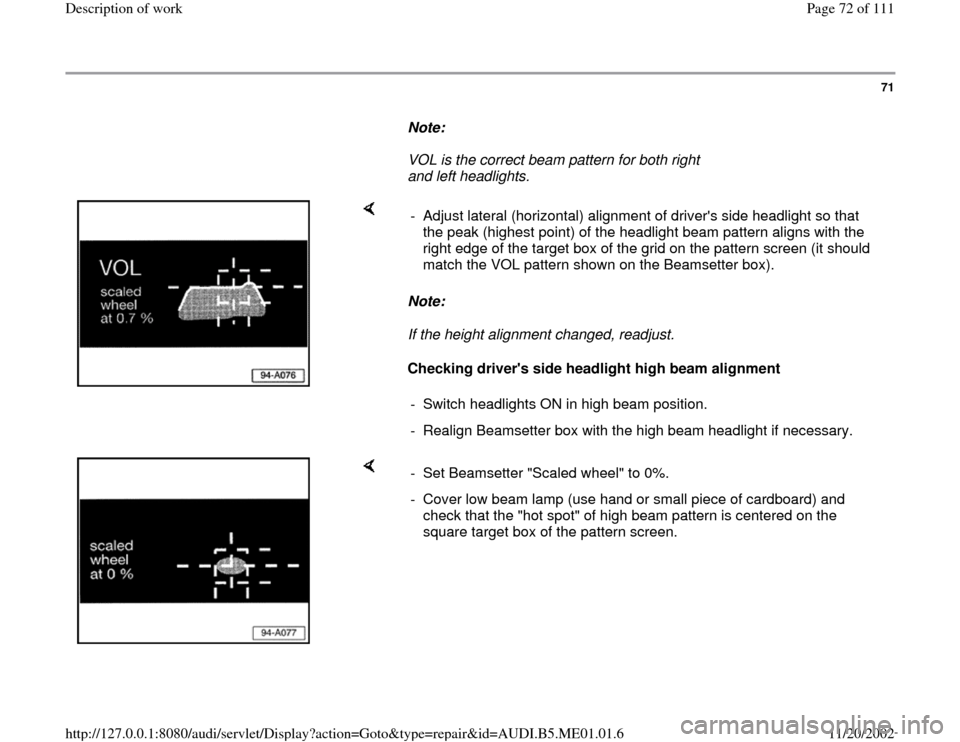
Note:
VOL is the correct beam pattern for both right
and left headlights.
Note:
If the height alignment changed, readjust.
Checking driver's side headlight high beam alignment - Adjust lateral (horizontal) alignment of driver's side headlight so that
the peak (highest point) of the headlight beam pattern aligns with the
right edge of the target box of the grid on the pattern screen (it should
match the VOL pattern shown on the Beamsetter box).
- Switch headlights ON in high beam position.
- Realign Beamsetter box with the high beam headlight if necessary.
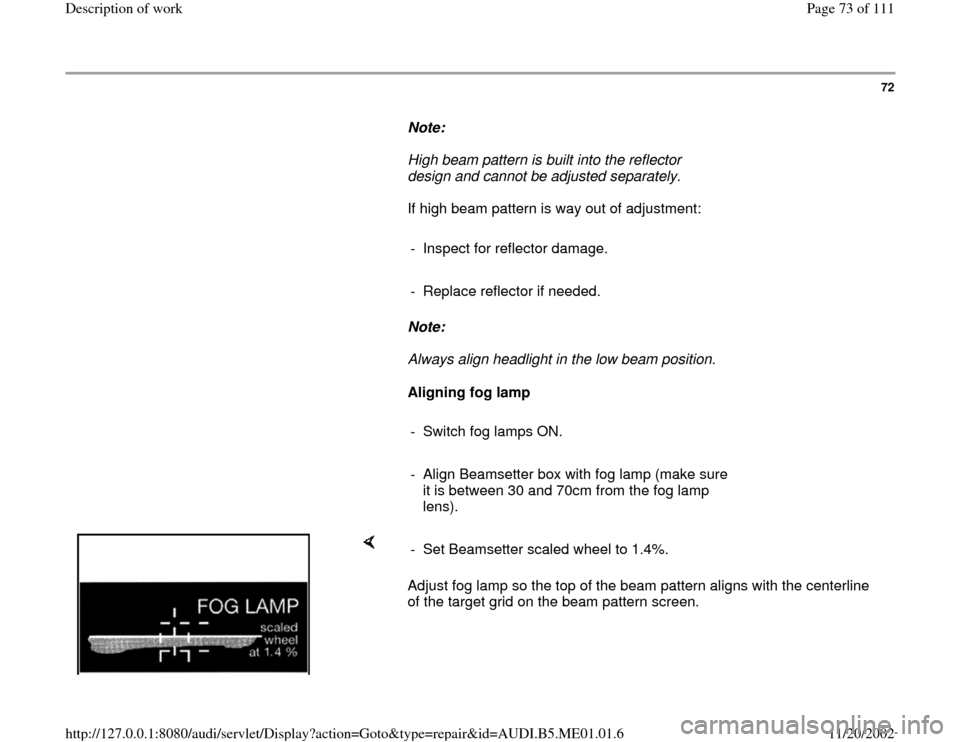
- Set Beamsetter "Scaled wheel" to 0%.
- Cover low beam lamp (use hand or small piece of cardboard) and
check that the "hot spot" of high beam pattern is centered on the
square target box of the pattern screen.
Pa
ge 72 of 111 Descri
ption of wor
k
11/20/2002 htt
p://127.0.0.1:8080/audi/servlet/Dis
play?action=Goto&t
yp
e=re
pair&id=AUDI.B5.ME01.01.6
Page 73 of 111
72
Note:
High beam pattern is built into the reflector
design and cannot be adjusted separately.
If high beam pattern is way out of adjustment:
- Inspect for reflector damage.
- Replace reflector if needed.
Note:
Always align headlight in the low beam position.
Aligning fog lamp
- Switch fog lamps ON.
- Align Beamsetter box with fog lamp (make sure
it is between 30 and 70cm from the fog lamp
lens).
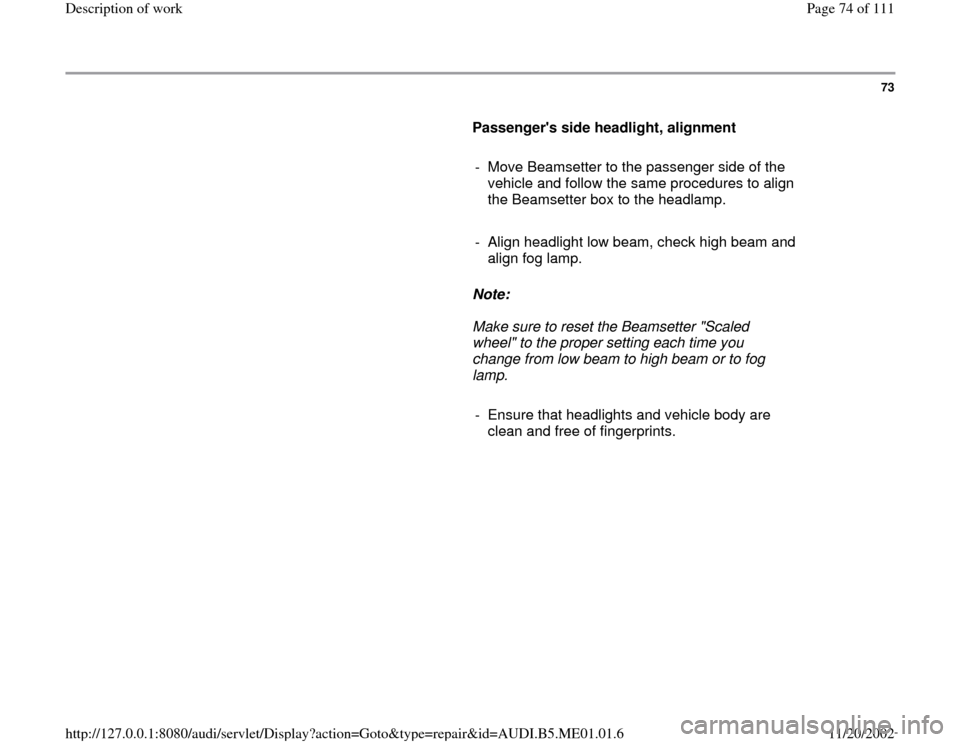
Adjust fog lamp so the top of the beam pattern aligns with the centerline
of the target grid on the beam pattern screen. - Set Beamsetter scaled wheel to 1.4%.
Pa
ge 73 of 111 Descri
ption of wor
k
11/20/2002 htt
p://127.0.0.1:8080/audi/servlet/Dis
play?action=Goto&t
yp
e=re
pair&id=AUDI.B5.ME01.01.6
Page 74 of 111
73
Passenger's side headlight, alignment
- Move Beamsetter to the passenger side of the
vehicle and follow the same procedures to align
the Beamsetter box to the headlamp.
- Align headlight low beam, check high beam and
align fog lamp.
Note:
Make sure to reset the Beamsetter "Scaled
wheel" to the proper setting each time you
change from low beam to high beam or to fog
lamp.
- Ensure that headlights and vehicle body are
clean and free of fingerprints.
Pa
ge 74 of 111 Descri
ption of wor
k
11/20/2002 htt
p://127.0.0.1:8080/audi/servlet/Dis
play?action=Goto&t
yp
e=re
pair&id=AUDI.B5.ME01.01.6
Page 75 of 111
74
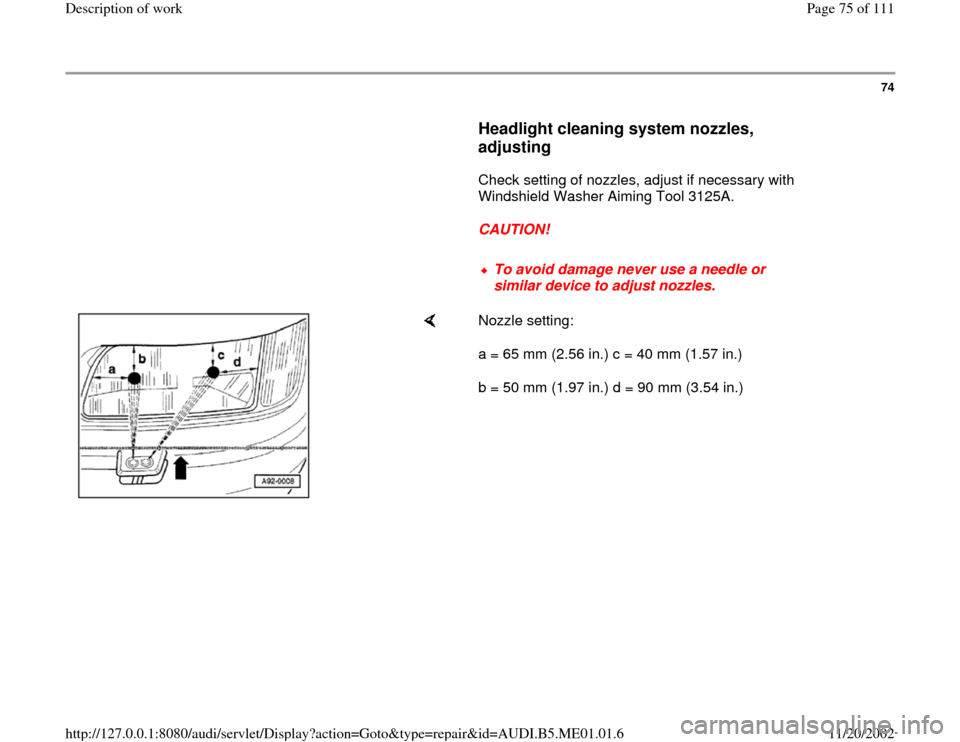
Headlight cleaning system nozzles,
adjusting
Check setting of nozzles, adjust if necessary with
Windshield Washer Aiming Tool 3125A.
CAUTION!
To avoid damage never use a needle or
similar device to adjust nozzles.
Nozzle setting:
a = 65 mm (2.56 in.) c = 40 mm (1.57 in.)
b = 50 mm (1.97 in.) d = 90 mm (3.54 in.)
Pa
ge 75 of 111 Descri
ption of wor
k
11/20/2002 htt
p://127.0.0.1:8080/audi/servlet/Dis
play?action=Goto&t
yp
e=re
pair&id=AUDI.B5.ME01.01.6
Page 76 of 111
75
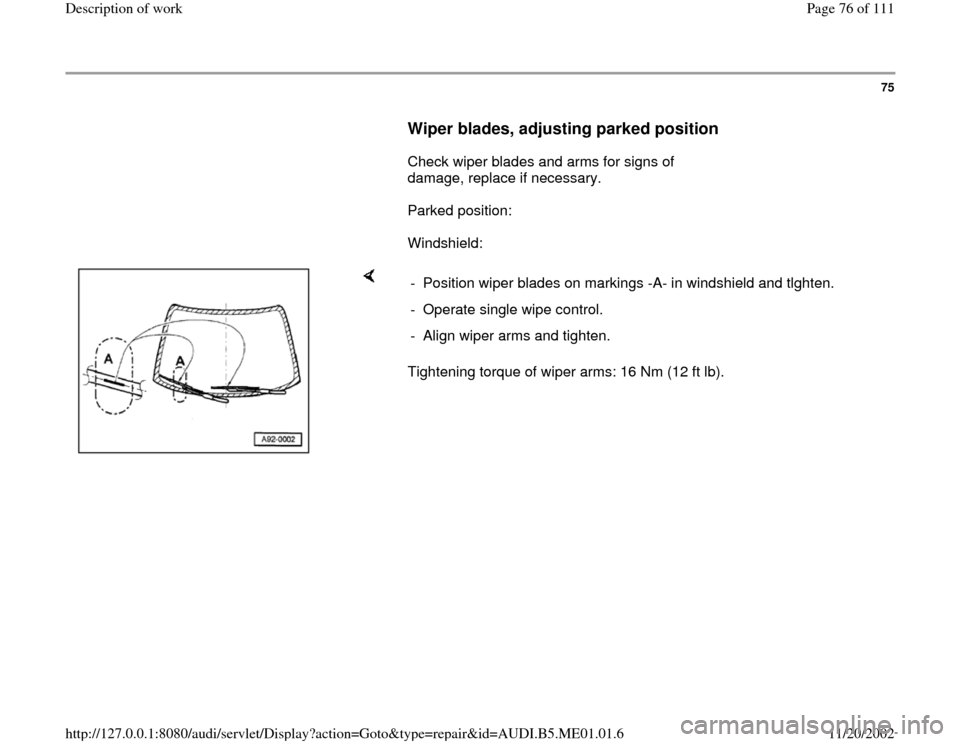
Wiper blades, adjusting parked position
Check wiper blades and arms for signs of
damage, replace if necessary.
Parked position:
Windshield:
Tightening torque of wiper arms: 16 Nm (12 ft lb). - Position wiper blades on markings -A- in windshield and tlghten.
- Operate single wipe control.
- Align wiper arms and tighten.
Pa
ge 76 of 111 Descri
ption of wor
k
11/20/2002 htt
p://127.0.0.1:8080/audi/servlet/Dis
play?action=Goto&t
yp
e=re
pair&id=AUDI.B5.ME01.01.6
Page 77 of 111
76
Wiper blade contact angle, adjusting
Note:
Possible causes of wiper blade chatter:
Scratched windshield
Rubber part of wiper blade is out of the frame or
torn
Windshield wiper arms/blades are loose or
bent
Wiper blades are waxy or buckled
If none of these causes apply to the problem,
then the angle of the wiper arms to the
windshield must be checked and if necessary
adjusted before replacing the wiper blades.
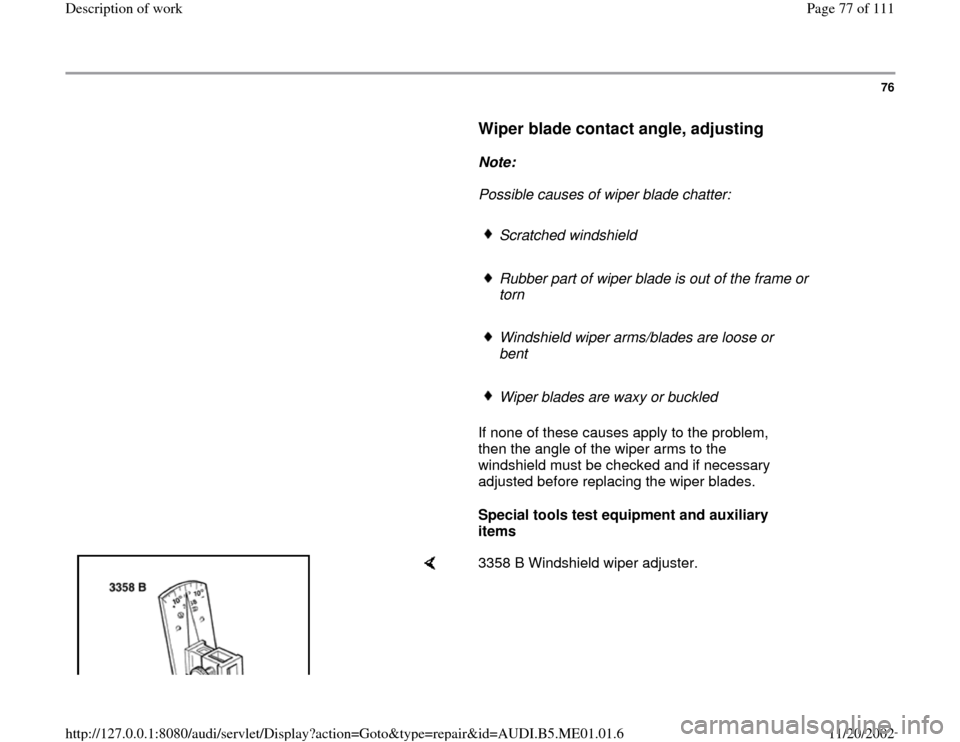
Special tools test equipment and auxiliary
items
3358 B Windshield wiper adjuster.
Pa
ge 77 of 111 Descri
ption of wor
k
11/20/2002 htt
p://127.0.0.1:8080/audi/servlet/Dis
play?action=Goto&t
yp
e=re
pair&id=AUDI.B5.ME01.01.6
Page 78 of 111
77
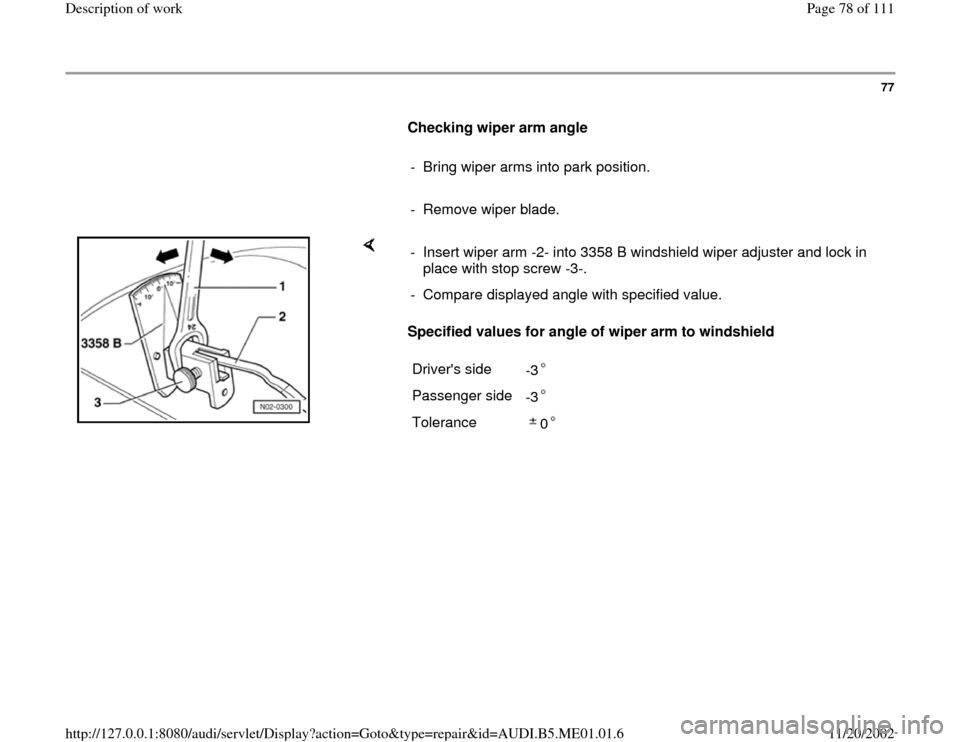
Checking wiper arm angle
- Bring wiper arms into park position.
- Remove wiper blade.
Specified values for angle of wiper arm to windshield - Insert wiper arm -2- into 3358 B windshield wiper adjuster and lock in
place with stop screw -3-.
- Compare displayed angle with specified value.
Driver's side
-3 Passenger side
-3 Tolerance
0
Pa
ge 78 of 111 Descri
ption of wor
k
11/20/2002 htt
p://127.0.0.1:8080/audi/servlet/Dis
play?action=Goto&t
yp
e=re
pair&id=AUDI.B5.ME01.01.6
Page 79 of 111
78
Adjusting wiper arms
- Bring wiper arms into park position.
- Remove wiper blade.
- Place wiper arm -2- in 3358 B windshield wiper adjuster and lock in
place with stop screw -3-.
- Place 24 mm open end wrench -1- onto adjusting device as shown and
set wiper arm -2- to specified value (arrow)
Specified values Page 77
.
- Loosen stop screw -3- and remove wiper arm -2- from adjusting device.
- Again place wiper arm -2- into windshield wiper adjuster and again lock
in place with stop screw -3-.
- Compare displayed angle with specified value.
Specified values Page 77
.
- If necessary, repeat setting and checking procedure until specified
value is attained.
- Remove adjusting device and install wiper blade.
Pa
ge 79 of 111 Descri
ption of wor
k
11/20/2002 htt
p://127.0.0.1:8080/audi/servlet/Dis
play?action=Goto&t
yp
e=re
pair&id=AUDI.B5.ME01.01.6
Page 80 of 111
79
Radio anti-theft coding, activating
See Radio Owner's Manual.
Pa
ge 80 of 111 Descri
ption of wor
k
11/20/2002 htt
p://127.0.0.1:8080/audi/servlet/Dis
play?action=Goto&t
yp
e=re
pair&id=AUDI.B5.ME01.01.6
Trending: power steering, wheel, wheel bolt torque, parking brake, battery, service interval, coolant temperature
