ECU AUDI A4 1997 B5 / 1.G AWM Engine Cooling System Components Workshop Manual
[x] Cancel search | Manufacturer: AUDI, Model Year: 1997, Model line: A4, Model: AUDI A4 1997 B5 / 1.GPages: 38, PDF Size: 0.7 MB
Page 1 of 38
19-1
Cooling system components,
removing and installing
WARNING!
Hot steam can escape when opening the cap
on the expansion tank: Cover the cap with a
cloth and open carefully.
Note:
When the engine is warm the cooling system is
under pressure. If necessary release pressure
before beginning repair work.
Secure all hose connections with the correct
hose clips (same as original equipment):
Parts Catalog
Hose clip pliers VAG 1921 are recommended
when installing spring type clips.
Replace all gaskets and seals.
The arrow markings on the coolant lines and on
the ends of the hoses must be aligned with
each other.
Pa
ge 1 of 38 Coolin
g system com
ponents, removin
g and installin
g
11/21/2002 htt
p://127.0.0.1:8080/audi/servlet/Dis
play?action=Goto&t
yp
e=re
pair&id=AUDI.B5.GE06.19.1
Page 12 of 38
19-9
Recommended mixture ratios:
Frost
protection
to
Anti-freeze
concentration
G
012A8
D 1)
Water
1)
-25 C
-35 C
40%
50% 3.0 l
3.5 l 4.0 l
3.5 l
1) Coolant quantity: 7.0 liters (may vary
depending upon the vehicle equipment)
- Install lower coolant hose and secure.
Note:
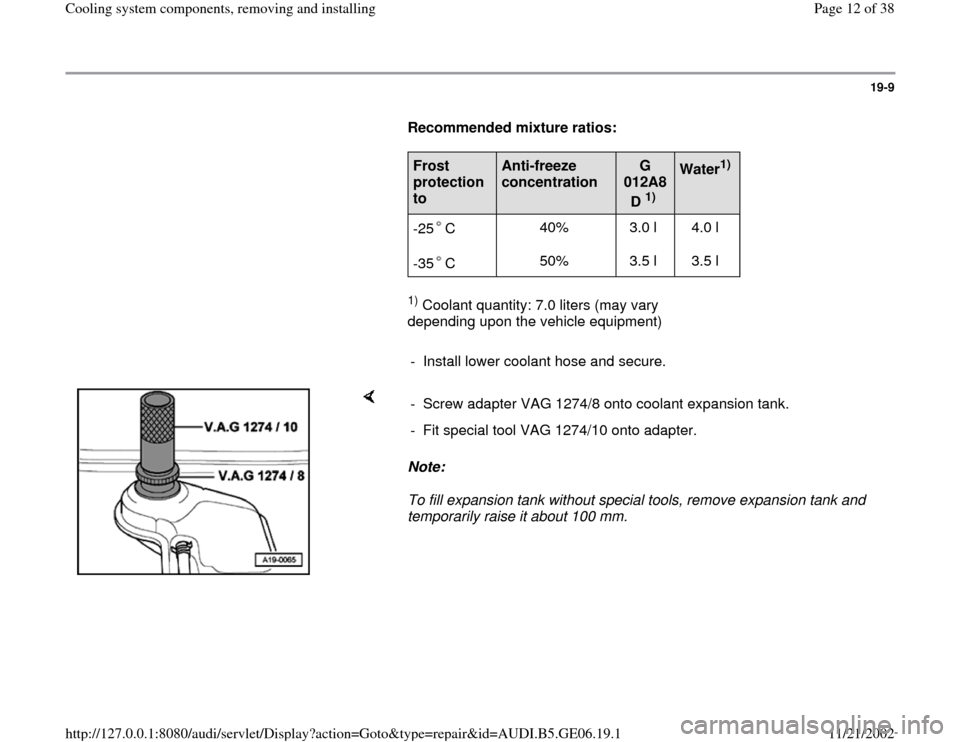
To fill expansion tank without special tools, remove expansion tank and
temporarily raise it about 100 mm. - Screw adapter VAG 1274/8 onto coolant expansion tank.
- Fit special tool VAG 1274/10 onto adapter.
Pa
ge 12 of 38 Coolin
g system com
ponents, removin
g and installin
g
11/21/2002 htt
p://127.0.0.1:8080/audi/servlet/Dis
play?action=Goto&t
yp
e=re
pair&id=AUDI.B5.GE06.19.1
Page 16 of 38
19-13
Removing
Engine in vehicle.
Lock carrier must be in service position
Page 13
-1 .
- Drain coolant Page 19
-4 .
- Remove ribbed belt and tensioner for ribbed belt
Page 13
-18
.
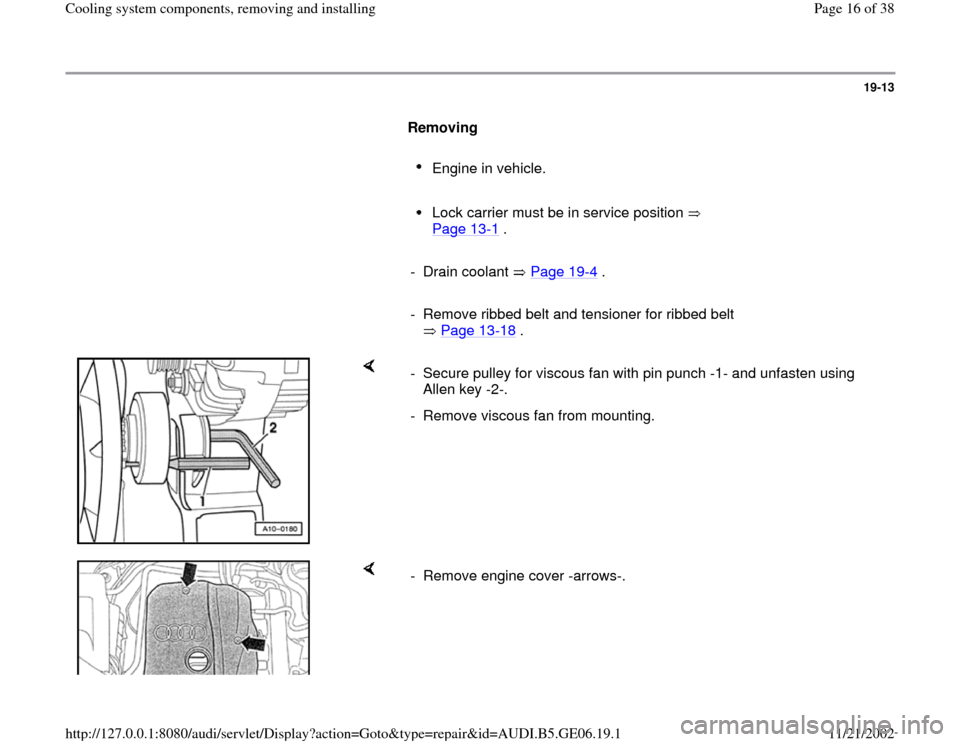
- Secure pulley for viscous fan with pin punch -1- and unfasten using
Allen key -2-.
- Remove viscous fan from mounting.
- Remove engine cover -arrows-.
Pa
ge 16 of 38 Coolin
g system com
ponents, removin
g and installin
g
11/21/2002 htt
p://127.0.0.1:8080/audi/servlet/Dis
play?action=Goto&t
yp
e=re
pair&id=AUDI.B5.GE06.19.1
Page 17 of 38
19-14
- Mark direction of rotation of belt with chalk or felt
pen.
- Remove top and center toothed belt guard
Page 13
-35
.
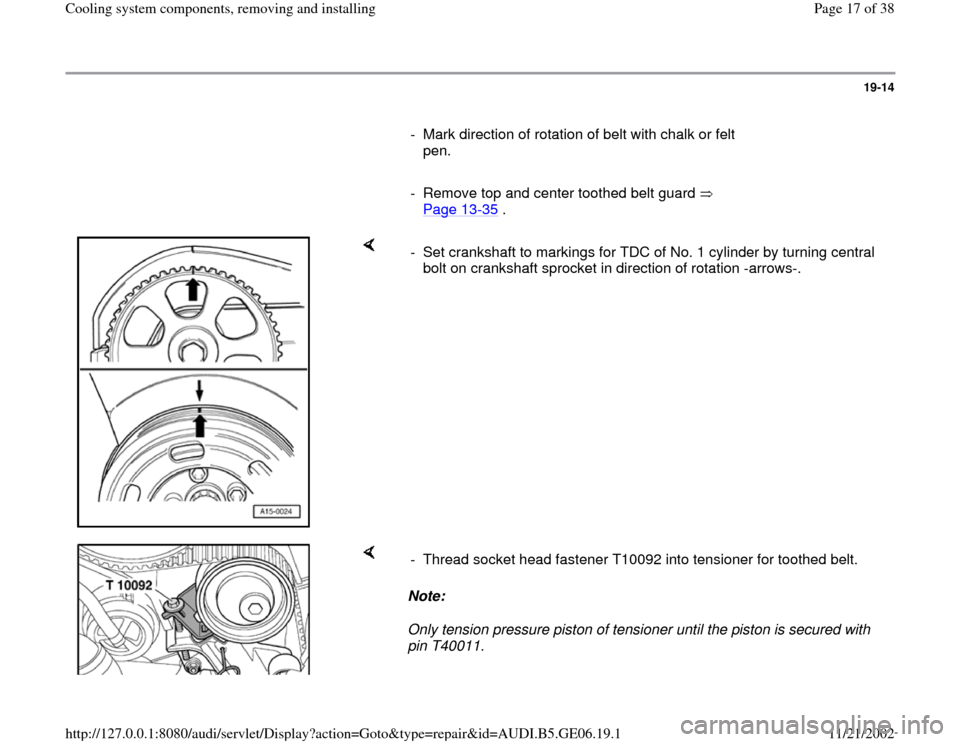
- Set crankshaft to markings for TDC of No. 1 cylinder by turning central
bolt on crankshaft sprocket in direction of rotation -arrows-.
Note:
Only tension pressure piston of tensioner until the piston is secured with
pin T40011. - Thread socket head fastener T10092 into tensioner for toothed belt.
Pa
ge 17 of 38 Coolin
g system com
ponents, removin
g and installin
g
11/21/2002 htt
p://127.0.0.1:8080/audi/servlet/Dis
play?action=Goto&t
yp
e=re
pair&id=AUDI.B5.GE06.19.1
Page 18 of 38
19-15
- Take toothed belt off camshaft sprocket and
coolant pump.
Note:
The vibration damper and lower toothed belt
guard do not have to be removed.
The toothed belt should be left in position on
the crankshaft sprocket.
Before removing the coolant pump, cover
toothed belt with a cloth to protect from coolant.
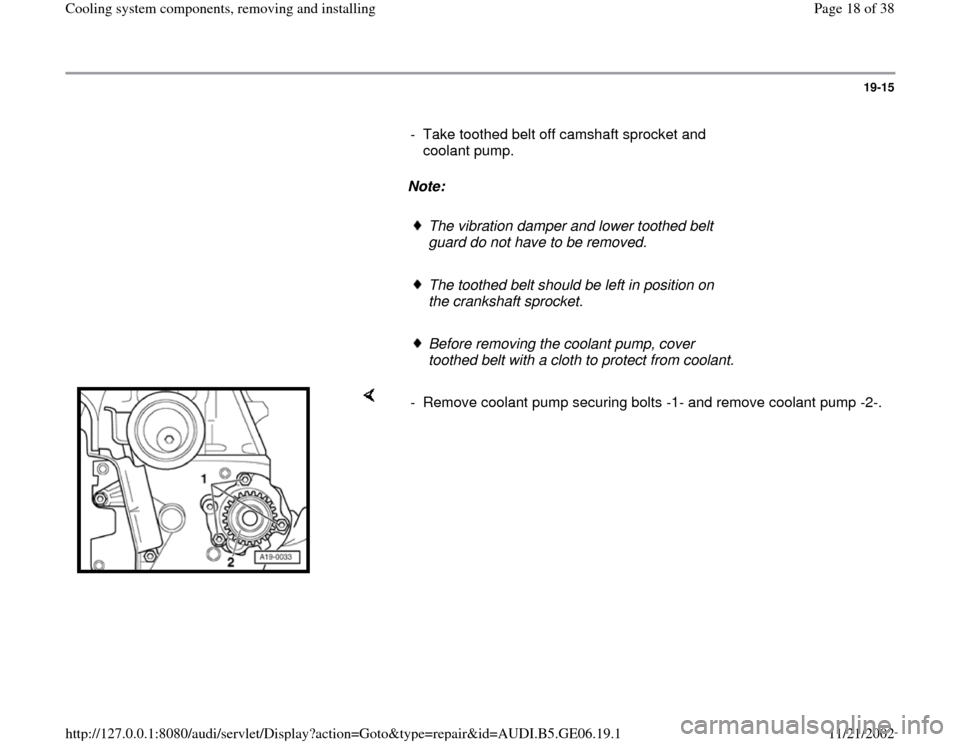
- Remove coolant pump securing bolts -1- and remove coolant pump -2-.
Pa
ge 18 of 38 Coolin
g system com
ponents, removin
g and installin
g
11/21/2002 htt
p://127.0.0.1:8080/audi/servlet/Dis
play?action=Goto&t
yp
e=re
pair&id=AUDI.B5.GE06.19.1
Page 22 of 38
19-19
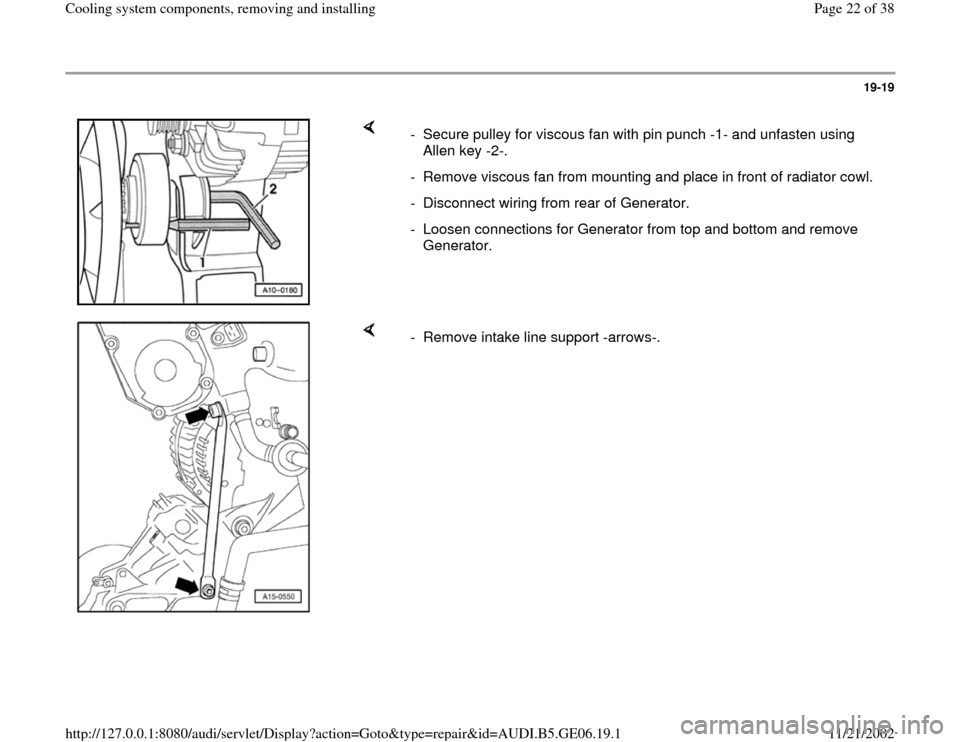
- Secure pulley for viscous fan with pin punch -1- and unfasten using
Allen key -2-.
- Remove viscous fan from mounting and place in front of radiator cowl.
- Disconnect wiring from rear of Generator.
- Loosen connections for Generator from top and bottom and remove
Generator.
- Remove intake line support -arrows-.
Pa
ge 22 of 38 Coolin
g system com
ponents, removin
g and installin
g
11/21/2002 htt
p://127.0.0.1:8080/audi/servlet/Dis
play?action=Goto&t
yp
e=re
pair&id=AUDI.B5.GE06.19.1
Page 33 of 38

19-30
Note:
To prevent damage to the condenser and
refrigerant lines/hoses, ensure that the lines and
hoses are not stretched, kinked or bent.
Note:
Protect fender panel from damage. - Remove air cowls from radiator -4- (left and right).
- Remove securing bolts -1- and -2- for condenser.
- Disconnect connector -3- from air conditioner pressure switch -F129-.
- Pull condenser up out of its bracket, pivot toward side and secure to
right-hand front wheel with wire.
- Release two retaining pins for radiator and pull out upward -arrows-.
- Pivot radiator toward front and lift out.
Pa
ge 33 of 38 Coolin
g system com
ponents, removin
g and installin
g
11/21/2002 htt
p://127.0.0.1:8080/audi/servlet/Dis
play?action=Goto&t
yp
e=re
pair&id=AUDI.B5.GE06.19.1