clock AUDI A4 1997 B5 / 1.G Three Way Halogen Headlights Workshop Manual
[x] Cancel search | Manufacturer: AUDI, Model Year: 1997, Model line: A4, Model: AUDI A4 1997 B5 / 1.GPages: 16, PDF Size: 0.32 MB
Page 1 of 16
94-1
Headlights, servicing
Three-way halogen headlights, overview
CAUTION!
Disconnect the battery Ground (GND) strap
before working on the electrical system.
Notes:
Before disconnecting the battery, determine the
correct coding for the anti-theft radio.
After reconnecting the battery, check and
activate the vehicle's electrical equipment
(radio, clock, comfort and convenience
features, etc.) as outlined in this Repair Manual
or the Owner's Manual.
Pa
ge 1 of 16 Headli
ghts, servicin
g
11/20/2002 htt
p://127.0.0.1:8080/audi/servlet/Dis
play?action=Goto&t
yp
e=re
pair&id=AUDI.B5.EE01.94.1
Page 4 of 16
94-4
High intensity gas discharge (Xenon)
headlights, overview
CAUTION!
Disconnect the battery Ground (GND) strap
before working on the electrical system.
Notes:
Before disconnecting the battery, determine the
correct coding for the anti-theft radio.
After reconnecting the battery, check and
activate the vehicle's electrical equipment
(radio, clock, comfort and convenience
features, etc.) as outlined in this Repair Manual
or the Owner's Manual.
Some procedures could affect the headlight
beam adjustment, requiring that it be reset
Page 94
-8 .
Repair Manual, Maintenance
Adjusting spray for headlights washer nozzles
Page 92
-17
.
Pa
ge 4 of 16 Headli
ghts, servicin
g
11/20/2002 htt
p://127.0.0.1:8080/audi/servlet/Dis
play?action=Goto&t
yp
e=re
pair&id=AUDI.B5.EE01.94.1
Page 11 of 16
94-11
Headlight beam adjusting motor (high
intensity gas discharge -Xenon-
headlights), removing and installing
Note:
Always adjust headlights after headlight beam
adjusting motors are removed, installed or
replaced Page 94
-8 .
Removing
- For right headlight, remove back portion of
intake air duct.
- Remove cover from headlight housing.
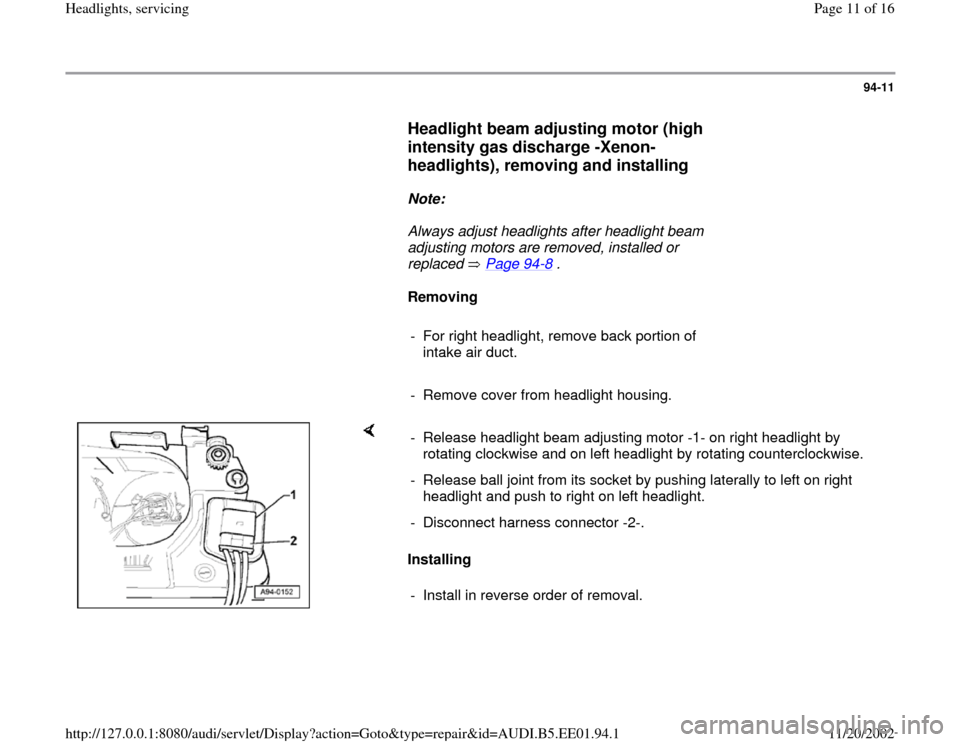
Installing - Release headlight beam adjusting motor -1- on right headlight by
rotating clockwise and on left headlight by rotating counterclockwise.
- Release ball joint from its socket by pushing laterally to left on right
headlight and push to right on left headlight.
- Disconnect harness connector -2-.
- Install in reverse order of removal.
Pa
ge 11 of 16 Headli
ghts, servicin
g
11/20/2002 htt
p://127.0.0.1:8080/audi/servlet/Dis
play?action=Goto&t
yp
e=re
pair&id=AUDI.B5.EE01.94.1
Page 12 of 16
94-12
High intensity gas discharge (Xenon)
headlight bulbs, replacing
Replacing Xenon bulb for low beam
Removing
- Remove cover from headlight housing.
WARNING!
HIGH VOLTAGE!
Disconnect the battery Ground (GND) strap
before working on parts of the Xenon
headlight which are labeled with the yellow
high voltage symbol.
Notes:
Before disconnecting the battery, determine the
correct coding for the anti-theft radio.
After reconnecting the battery, check and
activate the vehicle's electrical equipment
(radio, clock, comfort and convenience
features, etc.) as outlined in this Repair Manual
or the Owner's Manual.
Pa
ge 12 of 16 Headli
ghts, servicin
g
11/20/2002 htt
p://127.0.0.1:8080/audi/servlet/Dis
play?action=Goto&t
yp
e=re
pair&id=AUDI.B5.EE01.94.1
Page 13 of 16
94-13
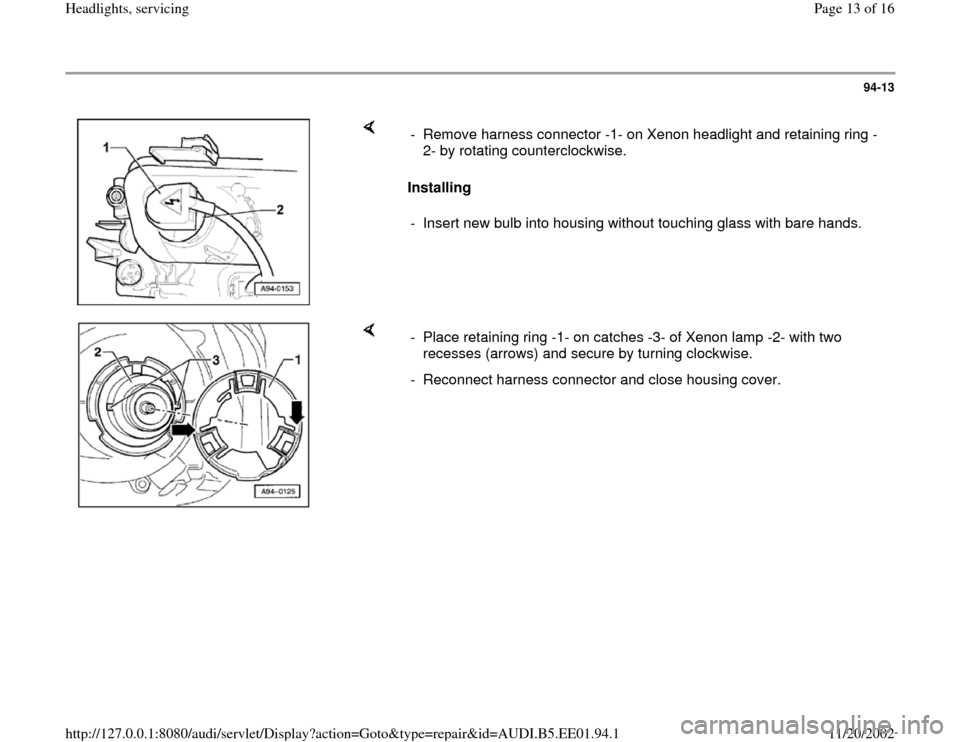
Installing - Remove harness connector -1- on Xenon headlight and retaining ring -
2- by rotating counterclockwise.
- Insert new bulb into housing without touching glass with bare hands.
- Place retaining ring -1- on catches -3- of Xenon lamp -2- with two
recesses (arrows) and secure by turning clockwise.
- Reconnect harness connector and close housing cover.
Pa
ge 13 of 16 Headli
ghts, servicin
g
11/20/2002 htt
p://127.0.0.1:8080/audi/servlet/Dis
play?action=Goto&t
yp
e=re
pair&id=AUDI.B5.EE01.94.1
Page 15 of 16
94-15
Ignitor for gas discharge lamps -N195-
(Xenon), removing and installing
WARNING!
HIGH VOLTAGE!
Disconnect the battery Ground (GND) strap
before working on parts of the Xenon
headlight which are labeled with the yellow
high voltage symbol.
Notes:
Before disconnecting the battery, determine the
correct coding for the anti-theft radio.
After reconnecting the battery, check and
activate the vehicle's electrical equipment
(radio, clock, comfort and convenience
features, etc.) as outlined in this Repair Manual
or the Owner's Manual.
Removing
- Remove cover from headlight housing.
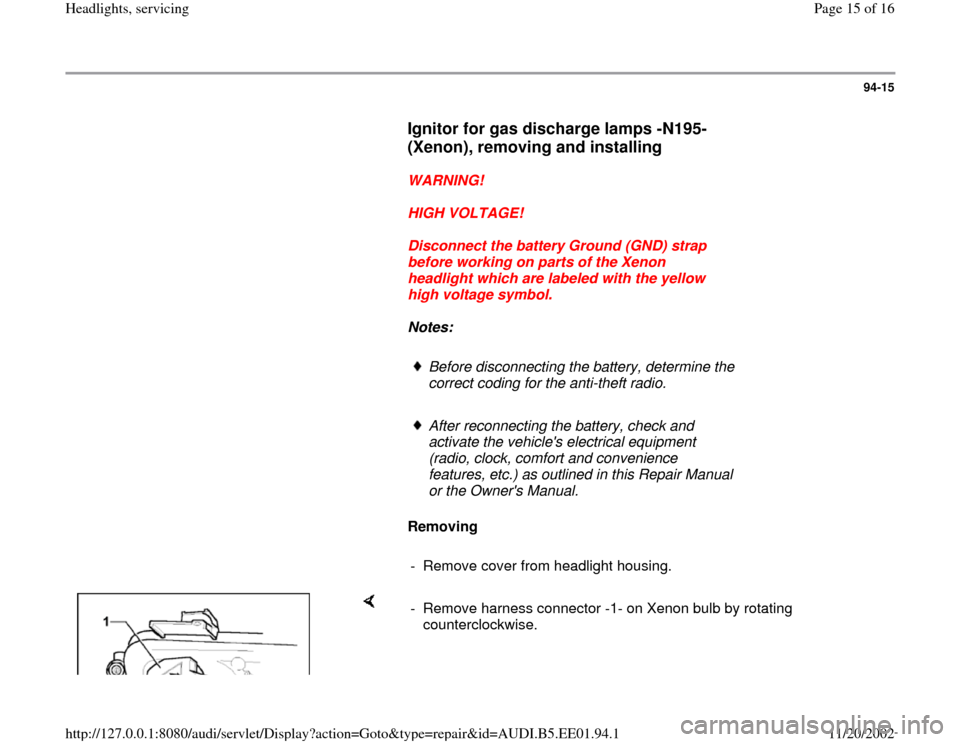
- Remove harness connector -1- on Xenon bulb by rotating
counterclockwise.
Pa
ge 15 of 16 Headli
ghts, servicin
g
11/20/2002 htt
p://127.0.0.1:8080/audi/servlet/Dis
play?action=Goto&t
yp
e=re
pair&id=AUDI.B5.EE01.94.1