key AUDI A4 AVANT 2008 User Guide
[x] Cancel search | Manufacturer: AUDI, Model Year: 2008, Model line: A4 AVANT, Model: AUDI A4 AVANT 2008Pages: 368, PDF Size: 46.19 MB
Page 63 of 368
See also:::::, page 59, "Locking and unlocking the vehicle from
inside". •
Emergency locking
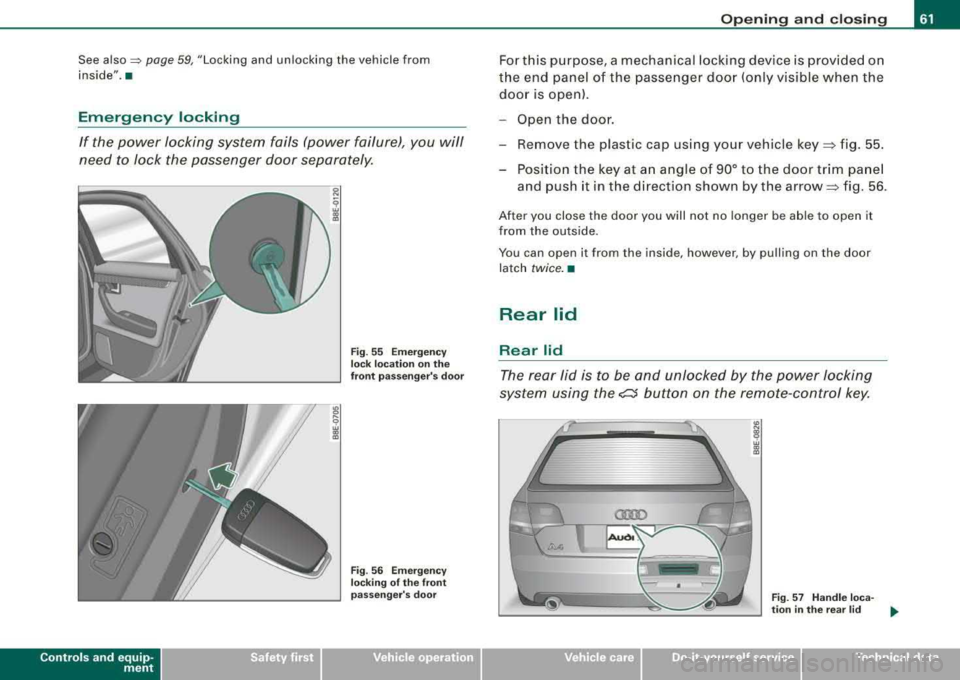
If the power locking system fails (power failure), you will
need to lock the passenger door separately.
Controls and equip
ment
Fig . 55 Emergency
lock location on the
front passenger's door
Fig . 56 Emergency
locking of the front
passenger's door
Opening and closing
For this purpose, a mechanical locking device is provided on
the end panel of the passenger door (only visible when the
door is open).
- Open the door.
- Remove the plast ic cap using your vehicle
key ~ fig. 55.
- Position the key at an angle of 90° to the door trim panel and push it in the direction shown by the
arrow ~ fig. 56.
After you close the door you will not no longer be able to open it
from the outside .
You can op en it from the insid e, however , by pulling on the door
latch
twice. •
Rear lid
Rear lid
The rear lid is to be and unlocked by the power locking
system using the
e::5 button on the remote-control key.
-
Fig. 57 Handle loca-
tion in the rear lid _,.,
irechnical data
Page 65 of 368
-Open the cover panel holding the emergency warning
triangle @=>
page 62, fig. 58.
-To unlock the rear lid, swing the cover panel upwards and
pull out the red plastic cord as indicated by the arrows
=> page 62, fig. 59 -arrows -.•
Remote rear lid release
c:::::5
You can open the rear lid from inside the vehicle using a
switch in the driver's door.
To unlock rear lid
Fig. 60 Driver's door,
rear bottom: remote
rear lid release
-Pull the switch c:::5 => fig. 60 in the driver's door.
To open rear lid
-Raise the rear lid. •
Controls and equip
ment
Opening and closing
Child safety lock in the rear doors
The child safety lock prevents the rear doors from being
opened from the inside.
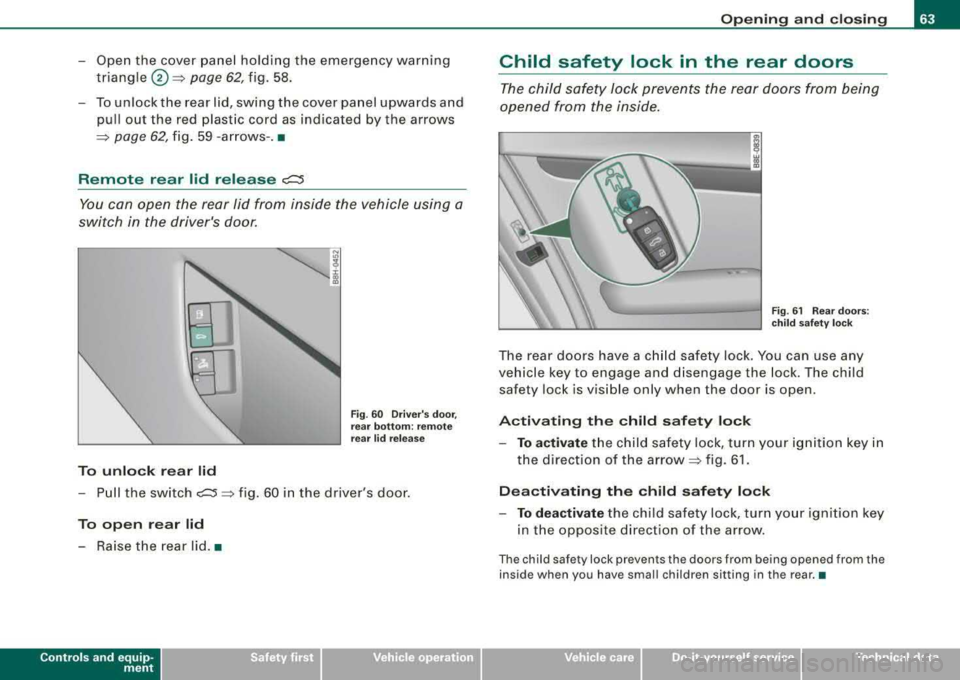
Fig. 61 Rear doors:
child safety lock
The rear doors have a child safety lock. You can use any
vehicle key to engage and disengage the lock. The child
safety lock is visible only when the door is open.
Activating the child safety lock
-To activate the child safety lock, turn your ignition key in
the direction of the
arrow=> fig. 61.
Deactivating the child safety lock
-To deactivate the child safety lock, turn your ignition key
in the opposite direction of the arrow.
The child safety lock prevents the doors from being opened from the
inside when you have small children sitting in the rear.•
Technical data
Page 66 of 368

Openin g and closing
Anti-theft alarm system
Description
The anti-theft alarm triggers an alarm if anyone attempts
to break int o the vehicle.
The anti-theft alarm system triggers an audible alarm and turns on
t he emergency flasher if an unauthorized interference with the
vehic le is sensed by the system .
How is the anti-theft al arm sy stem swit ched on ?
The anti -theft alarm system is switched on when you lock the
dr iver's door manually using your key, o r w hen you use the remote
control. The system is activated approximate ly 30 seconds after the
vehic le is locked. T he indicator light on top of the door trim s tart
flashing rapidly for 30 seconds and then b link slowly.
How is th e anti -theft alarm system switched off ?
The anti-theft alarm system is switched off only when you use the
r emote contro l to unlock your vehicle. If you do not open a doo r
within 60 seconds after you have un locked with the remote control,
the vehicle wi ll loc k itse lf aga in automat ical ly .
If you lock just the driver's door using your key , the front
passenger 's door, the rear and the fue l filler flap remain locked.
I f you use the veh icle key to unlock the driver's door, the other
doors , the rear lid and the fuel tank flap will remain locked . The
a lar m system wil l not be deactivated u nless you insert the key in the
ignition switch within 15 seconds and turn on the ignition . If you fail
to do this, the alarm wi ll sound.
Wh en w ill t he anti th eft ala rm sys tem b e trigg ere d?
When the vehicle is locked, the ala rm system monitors and pr otects
the fo llowing parts of the vehic le:
• engine compartment
• luggage compartment •
doors
• veh ic le incline
• ignition
• factory installed radio .
When the system is activated , the alarm will be triggered if one of
the doors, the engine hood or the rear lid are opened, or if the igni
tion is turned on or the radio removed or if the vehicle incline has
been changed .
The anti -theft alarm system wi ll also go off when you unlock the rear
lid with yo ur key and open it. The alarm is switched off again when
you c lose the rear lid .
The anti -theft alarm system wil l also go off when the battery is
disconnected.
You can also trigger the alarm by pressing the PANIC button on your remote c ontro l. This wil l a lert other people in case of emergency.
Press the
PANI C button again to turn off the a larm .
How i s the anti-theft alarm switched off when
trigg ere d ?
The ala rm system is switched off when you un lock the veh ic le using
the remote contro l or when the ignition is switched on . The a larm
wi ll also switch itse lf off when it co mes to the end of its cyc le .
Em ergen cy flash er
The emergency flasher wil l b link briefly when the doors, engine
hood and rear lid are properly closed .
I f the emergency flashers do not blink, check the doors, engine hood
and rear l id to make sure t hey are proper ly c losed . If you close a
door, the hood or the rear lid with the anti -theft a larm switched on,
the emergency flas hers wil l b link only after you have closed the
door or lid .
.,_
Page 67 of 368

[ i J Tips
• For the anti-theft a larm system to function properly, make sure
all vehicle doors and windows are closed before leaving the vehicle.
• When you open the vehicle from the driver's door using the key,
the central locking switch will work only after you have switched on
the ignition .•
$ Tilt sensors ~
The tilt sensors trigger an alarm if they detect vehicle
movement.
Fig. 62 Driver's door,
rear bottom: tilt sensor
switch
Switch off the tilt sensors if you are going to have your
vehicle transported.
Switch off the tilt sensors
- Press the switch~ located in the driver's door~ fig. 62.
- Lock the vehicle.
Controls and equip
ment
Opening and closing
When you turn off the tilt sensors, the diode in the switch -IQ will illu
minate. Also, the indicator light in the door trim will illuminate for
about three seconds . After you lock the vehicle, the indicator light
in the door trim will blink quickly for about three seconds. After that,
the blinking slows down.
The next time the vehicle is locked, the tilt sensors are automatically
turned on again. •
Power windows
Controls
Fig. 63 Driver's door :
power window
switches
The switches are located in the driver's door. The front passenger's
door has a own power window switch of its own .
To open/close If the respective switch is pushed or pulled, the
window will, respectively .
Switches for front door windows
@ operates the window in the driver 's door.
@ operates the window in the front passenger's door.
irechnical data
Page 68 of 368
Opening and closing
Switches for rear windows
© operates the left rear window.
@ operates the right rear window.
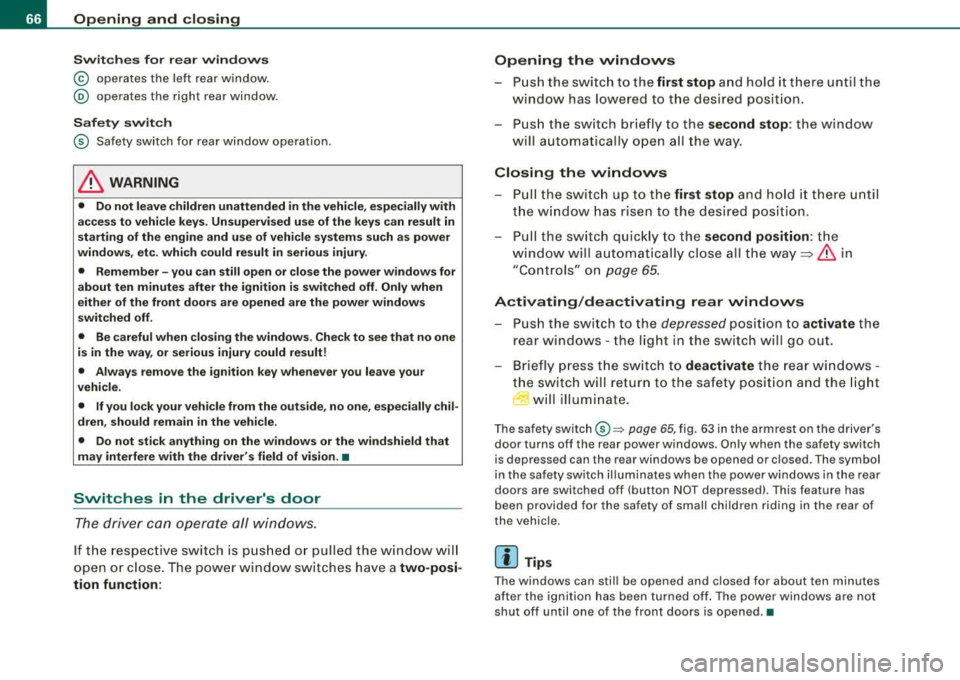
Safety switch
© Safety switch for rear window operation.
_& WARNING
• Do not leave children unattended in the vehicle, especially with
access to vehicle keys. Unsupervised use of the keys can result in
starting of the engine and use of vehicle systems such as power
windows, etc. which could result in serious injury.
• Remember -you can still open or close the power windows for
about ten minutes after the ignition is switched off. Only when
either of the front doors are opened are the power windows
switched off.
• Be careful when closing the windows. Check to see that no one
is in the way, or serious injury could result!
• Always remove the ignition key whenever you leave your
vehicle.
• If you lock your vehicle from the outside, no one, especially chil
dren, should remain in the vehicle.
• Do not stick anything on the windows or the windshield that
may interfere with the driver's field of vision. •
Switches in the driver's door
The driver can operate all windows.
If the respective switch is pushed or pulled the window will
open or close. The power window switches have a
two-posi
tion function:
Opening the windows
- Push the switch to the first stop and hold it there until the
window has lowered to the desired position.
- Push the switch briefly to the
second stop: the window
wi ll automatically open all the way.
Closing the windows
- Pull the switch up to the first stop and hold it there until
the window has risen to the desired position.
- Pull the switch quickly to the
second position: the
window will automatically close all the
way => & in
"Controls" on page 65.
Activating/deactivating rear windows
- Push the switch to the depressed position to activate the
rear windows - the light in the switch will go out.
- Briefly press the switch to deactivate the rear windows -
the switch will return to the safety position and the light
~ will illuminate.
The safety switch©~ page 65, fig. 63 in the armrest on the driver's
door turns off the rear power windows. Only when the safety switch
is depressed can the rear windows be opened or closed . The symbol
in the safety switch illuminates when the power windows in the rear
doors are switched off (button NOT depressed) . This feature has
been provided for the safety of small children riding in the rear of
the vehicle.
[ i] Tips
The windows can still be opened and closed for about ten minutes
after the ignition has been turned off. The power windows are not
shut off until one of the front doors is opened .•
Page 70 of 368
Opening and clo sing
You can still close or open the sunroof for up to ten minut es after
y ou have switched off the igni tion with the key remaining in the igni
tion lock. If either door is opened , powered opera tion of the sunroof
wi ll be deactivated .
[ i ] Tips
Always close the roof completely if you are going to park and leave
your vehicle unattend ed. •
Ap plies to ve hic les : w ith po wer s unroof
Sliding /tilting the power sunroof open
Sliding the power sunroof open to the comfort position
kee ps wind noise to a minimum.
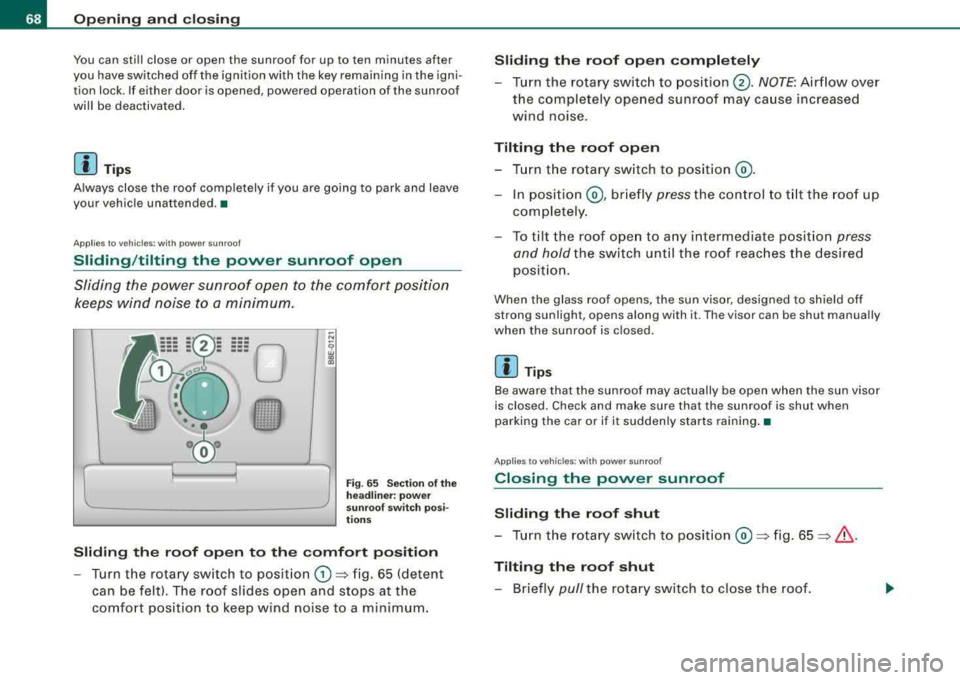
Fig . 6 5 S ectio n of the
h eadliner: p ow er
s un roof sw itch p osi
ti ons
Sliding the roof open to the comfort position
- Turn the rotary sw itch to posit ion G) => fig. 65 (detent
can be felt). The roof slides open and stops at the
comfo rt pos ition to keep wind noise to a m inimum .
Sliding the roof open completely
- Turn the rotary swi tc h to position @. NOTE : Airflow over
the complete ly opened sunroof may ca use increased
wind noise.
Tilting the roof open
- T urn the rotary sw itch to posit ion @ .
- In position @, br iefly pre ss the c ontrol to t ilt the roof up
co mpletely .
- To til t the roof ope n to a ny intermediate positio n
press
and hold
the sw itch unt il the roof reac hes the desired
p osi tion.
When the glass roof opens, the sun visor , designed to sh ield off
strong sunlight , opens along with it . The visor can be shut manually
when the sunroof is c losed .
[ i] Tips
Be aware that the sunroof may actually be open when the sun visor
is closed . Check and make sure that the sunroof is shut when
parking the car or if it suddenly starts raining .•
Ap plies to ve hicl es: wit h power sunroof
Closing the power sunroof
Sliding the roof shut
- Tu rn the rotary sw itch to posit ion @ =>fig. 65 => & .
Tilting the roof shut
- Briefly pull the rotary sw itch to close the roof.
Page 71 of 368
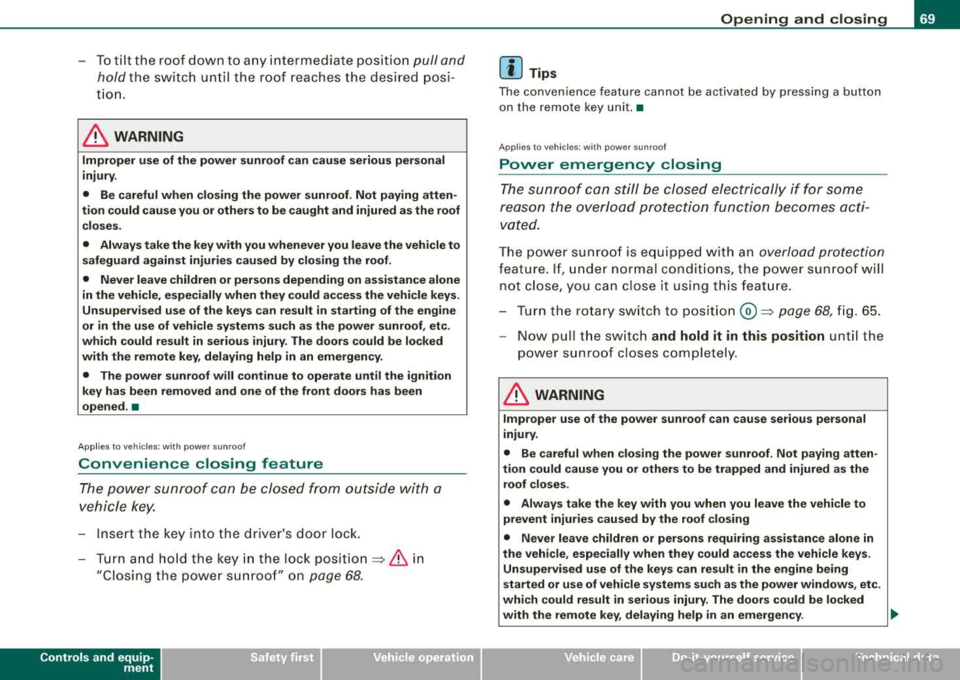
-To tilt the roof down to any intermediate position pull and
hold
the switch until the roof reaches the desired posi
tion.
& WARNING
Improper use of the power sunroof can cause serious personal
injury.
• Be careful when closing the power sunroof. Not paying atten
tion could cause you or others to be caught and injured as the roof
closes.
• Always take the key with you whenever you leave the vehicle to
safeguard against injuries caused by closing the roof.
• Never leave children or persons depending on assistance alone
in the vehicle, especially when they could access the vehicle keys.
Unsupervised use of the keys can result in starting of the engine
or in the use of vehicle systems such as the power sunroof, etc.
which could result in serious injury . The doors could be locked
with the remote key, delaying help in an emergency.
• The power sunroof will continue to operate until the ignition
key has been removed and one of the front doors has been
opened. •
Applies to vehic les: w ith powe r sunroof
Convenience closing feature
The power sunroof can be closed from outside with a
vehicle key.
-Insert the key into the driver's door lock.
-Turn and hold the key in the lock pos ition => & in
"Closing the power sunroof" on
page 68.
Controls and equip
ment
Opening and closing
[ i] Tips
The convenience feature cannot be activated by pressing a button
on the remote key uni t. •
Ap plies to vehic les: wit h p ower sunroof
Power emergency closing
The sunroof can still be closed electrically if for some
reason the overload protection function becomes acti
vated.
The power sunroof is equipped with an overload protection
feature. If, under normal conditions, the power sunroof will
not close , you can close it using this feature.
-Turn the rotary switch to position@=> page 68, fig. 65.
-Now pull the switch and hold it in this position until the
power sunroof closes completely.
& WARNING
Improper use of the power sunroof can cause serious personal
injury.
• Be careful when closing the power sunroof. Not paying atten
tion could cause you or others to be trapped and injured as the
roof closes.
• Always take the key with you when you leave the vehicle to
prevent injuries caused by the roof closing
• Never leave children or persons requiring assistance alone in
the vehicle, especially when they could access the vehicle keys.
Unsupervised use of the keys can result in the engine being
started or use of vehicle systems such as the power windows, etc.
which could result in serious injury. The doors could be locked
with the remote key, delaying help in an emergency .
...
Page 72 of 368
Opening and closing
& WARNING (continued)
• The power sunroof will continue to operate until the ignition
key has been removed and one of the front doors has been
opened .•
App lies to vehic les : wit h power sunroof
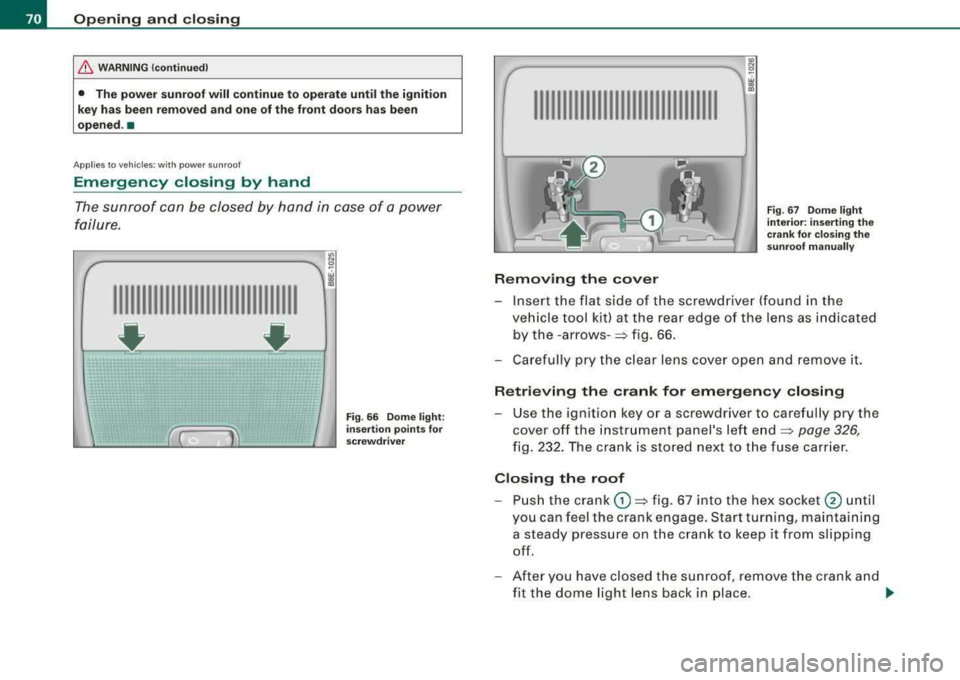
Emergency closing by hand
The sunroof can be closed by hand in case of a power
failure.
IIIIIIIIIIIIIIIIIIIIIIIIIIIIIIII
- ~ ~
Fig . 66 Dome light:
insertion points for
screwdriver
IIIIIIIIIIIIIIIIIIIIIIIIIIIIIIII
Removing the cover
Fig . 67 Dome light
interior: inserting the
crank for closing the
sunroof manually
-Insert the flat side of the screwdriver (found in the
vehicle tool kit) at the rear edge of the lens as indicated by the
- arrows- => fig. 66.
- Carefully pry the clear lens cover open and remove it.
Retrieving the crank for emergency closing
-Use the ignition key or a screwdriver to carefully pry the
cover off the instrument panel's left end
=> page 326,
fig. 232. The crank is stored next to the fuse carrier.
Closing the roof
-Push the crank (D => fig. 67 into the hex socket @ until
you can feel the crank engage. Start turning, maintaining
a steady pressure on the crank to keep it from slipping
off.
- After you have closed the sunroof, remove the crank and
fit the dome light lens back in place .
~
Page 100 of 368
Seats and storage
! w
--------..Jgj
Fig. 98 Seat cushion
adjustment: switch
motions
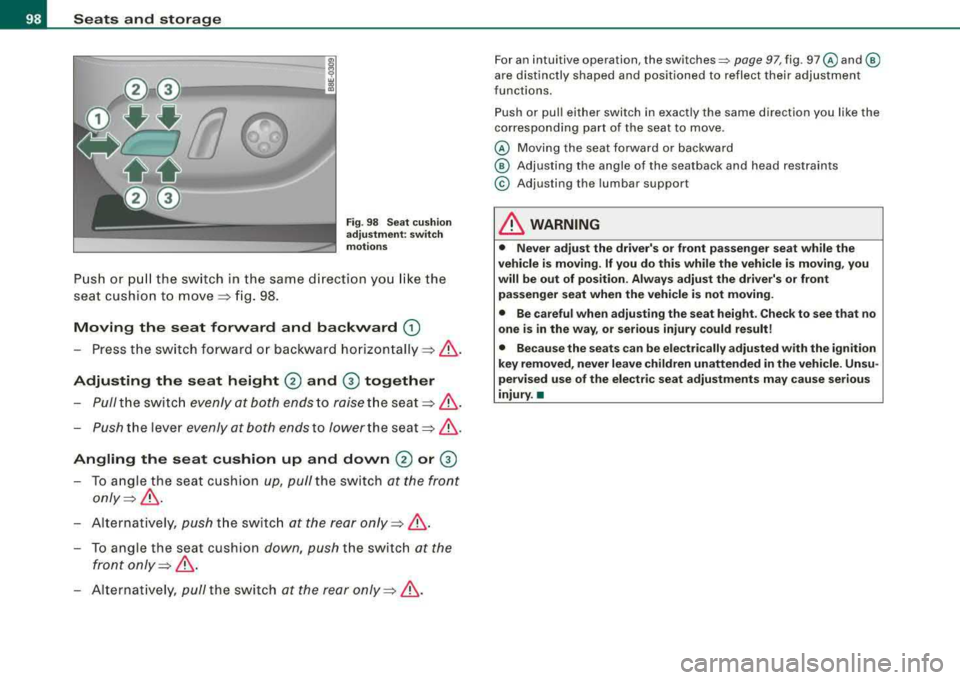
Push or pull the switch in the same direction you like the
seat cushion to
move => fig. 98.
Moving the seat forward and backward
G)
- Press the switch forward or backward horizontally =>& .
Adjusting the seat height 0 and @ together
Pull the sw itch evenly at both ends to raise the
seat=>& .
-Push the lever evenly at both ends to lower the seat=>& .
Angling the seat cushion up and down 0 or @
- To angle the seat cushion up, pull the switch at the front
only=>& .
Alternatively, push the switch at the rear only=> &.
-To angle the seat cushion down, push the switch at the
front
only => &.
- Alternatively , pull the switch at the rear only=>& .
For an i ntui tive operation , the sw itches~ page 97, fig . 97@ and ®
are distinctly shaped and positioned to reflect their adjustment
f u nctions.
Push or pull ei ther switch in exactly the same direct ion you l ik e t he
corresponding part of the seat to move .
@ Moving the seat forward or backward
® Adjusting the angle of the seatback and head restraints
© Adjusting the lumbar s uppor t
& WARNING
• Never adjust the driver's or front passenger seat while the
vehicle is moving.
If you do this while the vehicle is moving , you
will be out of position. Always adjust the driver's or front
passenger seat when the vehicle is not moving.
• Be careful when adjusting the seat height . Check to see that no
one is in the way, or serious injury could result!
• Because the seats can be electrically adjusted with the ignition
key removed, never leave children unattended in the vehicle. Unsu
pervised use of the electric seat adjustments may cause serious
injury. •
Page 103 of 368
________________________________________________ S_ e_ a
_ t_
s _a_ n_d _ s_t _o _ r_ a_ g~ e __ ffllll
Memory buttons
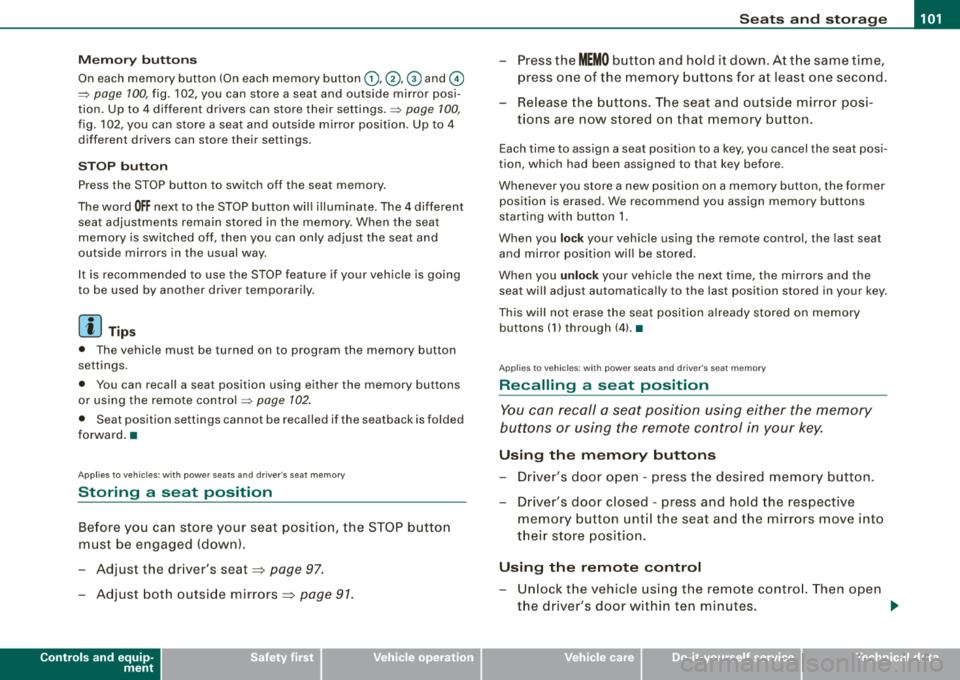
On each memory button (On each memory button G) ,@ , G) and ©
=> page 100, fig. 102 , you can sto re a sea t and outside mirror posi
tion . Up to 4 different drivers can store their
settings .=> page 100,
fig. 102 , you can sto re a seat and outside mirro r position . Up to 4
d iffer ent driv ers can stor e their s ettings .
ST OP b utton
Press the STOP button to switch off the seat memory.
The word
OFF next to the STOP button wi ll illuminate. The 4 different
sea t adjust ments remain stored in th e memory . When the s eat
memory is switched off, then you can only adjust the seat and
outsid e mirrors in th e usual way .
It is recommended to use the STOP feature if your vehicle is going
to be used by another driver temporarily .
[ i ] Ti ps
• The vehicle must be turned on to p rogram the memory button
settings .
• You can recall a seat posi tion using either the memory bu ttons
or using the remote contro l
=> page 102.
• Seat position settings cannot be re ca lled if the s eat back is folded
forward. •
Applies t o vehi cle s: w ith po wer seats and driver's seat memory
Storing a seat position
Before you can store your seat position, the S TOP button
must be engaged (down) .
-Adjust the driver 's seat => page 97 .
Adjust both outside mirrors=> page 91.
Controls and equip
ment
-Press the MEMO button and hold it down. A t th e same time,
press one of the memory buttons for at least one seco nd.
-Re lease the buttons . The seat and outside mirror pos i-
t ions are now stored on that memory button.
Each time to assign a sea t position to a key , you ca ncel the seat posi
t ion, wh ich had be en assigned to that key befor e.
Whenever you store a new pos it ion on a memory button, the former
position is erased. W e recommend you assign m emory buttons
starting with button 1.
When you
l ock your vehicle using the remote control, the las t seat
and mirror position wil l be stored.
When you
unl ock your vehic le the next t ime, the mirrors and the
seat wi ll adjust automat ica lly to the last pos ition stor ed in your k ey .
This wil l not erase the seat posi tion a lready stored on memory
buttons (1) th rough (4).
•
App lies to veh ic les: w ith power seats and d river 's se at memory
Recalling a seat position
You can recall a seat position using either the memory
buttons or using the remote control in your key.
Usin g th e memory buttons
-Driver's door open -press the desired memo ry button.
-Driver's door c losed -press and hold the respective
memory button unt il the seat and the m irrors move into
t h eir store posi tion .
U sing th e remote control
-Un lock the vehicle using the remote contro l. Then open
the driver's door w ithin ten minutes . .,._