battery AUDI A4 AVANT 2008 Owners Manual
[x] Cancel search | Manufacturer: AUDI, Model Year: 2008, Model line: A4 AVANT, Model: AUDI A4 AVANT 2008Pages: 368, PDF Size: 46.19 MB
Page 20 of 368

Instruments and warnin g/indi cat or li ghts
Se rv ice re mi nder
As soon as less than 1,200 m iles (2,000 ki lometers) of driving are left
before the next due service, the fo llowing message wi ll be disp layed
when you switc h on the ignition:
SE RV IC E IN 1 ,200 Ml (2,000 KM )··· DA YS
After about five seconds the display switches back. Each time you
sw itch on the ignition, the distance wil l be updated until the next
service date is reached .
Ser vic e due
If service is due immediately, SERVI CE! wil l appear in the display
immediately after switching on the ignition . The disp lay switches
back after about five seconds.
Re settin g th e dis pl ay
Your authorized Audi dealer wi ll reset the disp lay after performing
t he scheduled service. If the service is not performed by an autho
ri zed Audi dealer, the display must then be reset as follows :
• Switch off the ignition .
• Press and hold the Service button
G):::::, page 17, fig . 8, then
switch on the ignition . One of the following messages appears in
the display:
S ER VIC E IN ···· MILE S or SERVIC E!.
• Press the reset button 0 unti l either of the fol lowing messages
appears in the disp lay :
SERV IC E IN ···· MILE S··· DAYS or SER VIC E!
After about five seconds the display switches back .
[ i ] Tip s
• Do not reset the display between service interva ls . Doing so will
resu lt in an incorrect d isp lay.
• The service display information wi ll remain intact even if the
battery is disconnected .
• If a pr iority 1 mal funct ion is detected (red symbol), you cannot
display the distance remaining. •
Reset button
The "0.0" button:::::, page 17, fig. 8 0 performs the fol lowing func
t ions:
R es etting th e trip od om ete r
The upper odome ter (tr ip odometer):::::, page 15 can be reset back to
zero by pressing the reset button.
R ese ttin g th e se rv ic e int erva l
The service interva l display :::::, page 17 can be reset by pressing t he
reset button (first se lect the "reset" mode in the service indicator
display). •
Page 24 of 368

Instruments and warnin g/indi cat or li ghts
Safety belts i
This warning/indicator light reminds y ou to put on your
safety belt.
The .ft warning/indicator light i lluminates when the ignition is
switched on to remind the driver and (on USA mode ls only) any front
passenger to put on the safety belt. Additiona lly, an acoustic
warn ing (gong) w ill also sound.
For more
information~ page 176 , "Safety belt warning light 4". •
Turn signals ¢ ¢
The in dicator light flashes when you use either turn
signal.
Whenever you use the left ¢ or the right ¢ turn signal, the indicator
l ight flashes. W hen you use the emerge ncy flasher, both indicator
lights f lash .
I f one of the turn signal light bulbs burn out, the turn signal will
flash twice as fast as normal. •
Electronic Stabilization Program (ESP) fJ
The warning/indicator ligh t monit ors the electr onic s tabi
lization program.
The ~ warning/indicator light has the fol lowing functions:
• it flashes while you are driving, when the ESP is working .
• it illuminates when you switch on the ignition for approximately
2 seconds as a funct ion check.
• it illuminates when there is a ma lfunction in the ESP.
• it illuminates after the battery has been disconnected .
• it illuminates continuous ly when the ESP is switched off . •
it illuminates if there is a malfunction in the ABS, since the ESP
is part o f the ABS system.
If the ESP warning/indicator light illuminates and stays on after you
have started the engine, this may mean that the control system has
temporar ily switched o ff the ESP . If this is case, you can reactivate
the ESP by switching the ignition off and then on again . The
warning/indicator light should go out to show that the system is
ful ly functional again .
I f the battery terminals were disconnected and re -connected, the
vehic le was jump started or the battery is very weak, the ESP sensor
system goes through a learning p rocess for the firs t few yards.
D uring th is time, t he ind icator l ight i llu minates. It goes out as soo n
as the learning process is comp lete.
For more information about the
ESP ~ page 236. •
Generator 0
T his warning/indicator light detects a malfunction in the
generator or i n t he vehicle's elec trical system.
T he O warning/indicator light i lluminates w hen you switch on the
ignition and must go out after the engine has started .
I f the
O warni ng/ind icator light illum inates while you a re driv ing,
you shou ld contact your authorized Audi dealer . Since the vehicle
battery is dischargi ng, you should sw itch off any unnecessary elec
trical consumers (for example, the air conditioner) .
0 Note
If the _JL warning/indicator light (ma lfunction in the engine coo ling
system) i n the instrument cluster shou ld
i llumi nate ~ page 31, stop
the ve hicle and turn o ff the engine . The coo lant pump is not work ing
-this can cause engine damage! •
Page 35 of 368

[ i J Tips
• The engine oil pressure symbol ~ is not an indicator for a low
engine oil level. Do not rely on it . Instead , check the oil level in your
engine at regular interval s, preferably each time you refuel , and
always before going on a long trip.
• The yellow oil level warning indication requires oil refill or
workshop service without delay . Do not wait until the red oil pre s
s ure warning symbol
~ starts to fla sh before you respond to the
low oil level warning
-... . By then , your engine may already have
s uffered serious damage. •
Yellow symbols
A yellow symbol means WARNING .
Yellow symbols mean:
Controls and equip
ment
Fig . 2 0 Display : lo w
fu el lev el warn ing
( priority 2 )
Driver information display
Low fuel leve l ~ page34
Check engine oil level ~ page34
Engine oil sensor malfunction ~ page34
-
Light/rain* senso r defective ~ page34
Worn b rake pad s ~ page34
USA models: ~ page34 Speed wa rn ing 1 ..
Canada models: ~ page34 Speed wa rning 1
Dyn amic headl ight ra nge con-
~ page34 trol* defect ive
W inds hield washer fluid level low
~ page34
-
USA models : ~ page34 Speed warn ing 2
Canada models : ~ page34 Speed war ning 2
Battery voltage too high or too
~ page35 low
Defective light bulb
~ page35
Adaptiv e light* defective ~ page35
Ye llow symbo ls ind icate a p riority 2 mal funct ion - Warning!
When a yellow symbo l appears, a warning tone wil l sound
once.
Check the displaye d functio n as so on as possi ble. I f more than one ._
irechnical data
Page 37 of 368
Battery voltage low .::::3
If the symbol illuminates, contact your authorized Audi dealer
and have the following components inspected:
• drive belt
• generator
• battery charge
Also see if the generator warning/indicator light illuminates
=> page 22. •
Defective light bulb warning ~
The defective light bulb warning tells you when a vehicle
light bulb has become defective.
If a defective bulb has been detected by the system or a light bulb
burns out, the symbol wi th a message appears in the display to
tell you which bulb is burnt out and where it is located . For example :
REAR LEFT TURN SIGNAL
After 5 seconds, the message d isappears . If you want to reca ll the
message into the display, press the CHECK button.
There are three reasons why the defective bulb message wou ld
appear in the display:
• the light bulb has burnt
out => page 328.
• the fuse is "blown"=> page 326, "Replacing a fuse" .
• the wire connec tion to the light bulb is defective .
Have the bulb replaced or the connection repaired by your autho
rized Audi Service department .
& WARNING
• Light bulb s are pres sur ized and c ou ld expl ode whi le they are
be ing changed causing seri ou s pe rso nal inju ry .
Controls and equip
ment
Dri ver inf orma tio n di spl ay
& WARNI NG ( conti nued )
• Work with due care wh en h andling th e high-vol tage s ecti on of
gas disch arge (xe non
I la mp s*. Fa ili ng to d o so could result in de ath
or se riou s inj ury !
•
Ap plie s to veh ic les: with a dapt iv e ligh t
Adaptive light defective
When th is symbol illuminates, it means that adaptive light is
defective. Go to an authorized dea lership to have the headlights or
the control unit for the adaptive light repa ired. •
Speed warning system
Overview
The speed warning system helps you to keep your driving
speed below a
set speed limit.
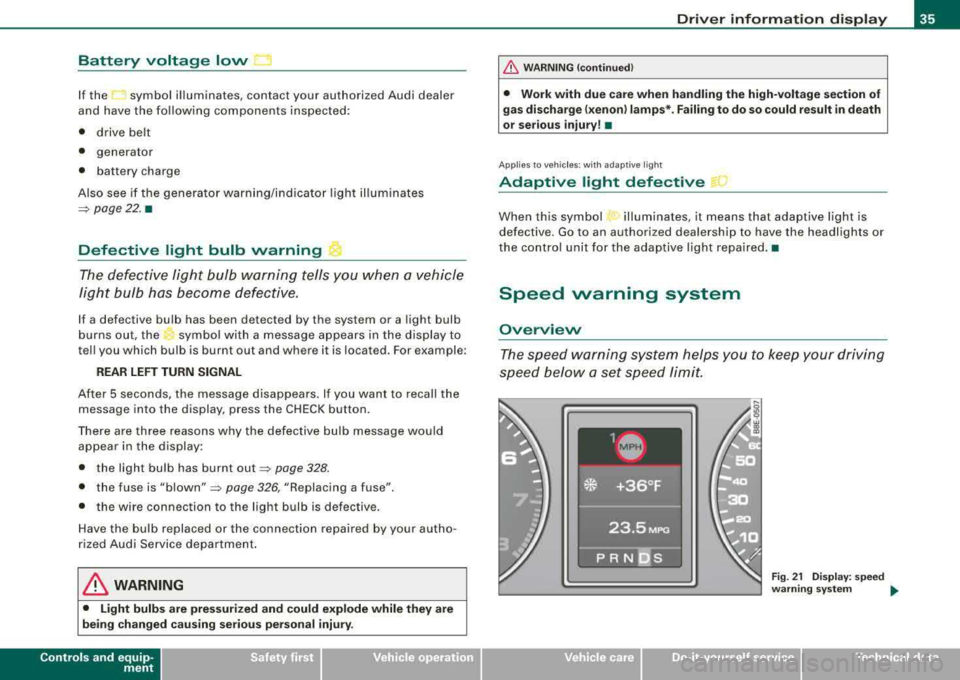
Fig . 21 Disp lay : s pee d
wa rning syste m
.,.
irechnical data
Page 42 of 368
Driver inf ormation di spl ay
You can reset the following values to zero using th e reset button:
• driving time
• average mileage
• average speed
The trip computer will not operate unless the ignition is on. When
you turn on the ignition, the function that was in use the last time
you turned the ignition off, wil l appear in the display . Briefly press
the function selector switch
@ or the reset button ® to set the
driving time
alarm=> page 40.
[ i ] Tips
All stored values w ill be lost if the veh ic le battery is disconnected. •
Applies to vehicles: with trip computer
Cruising range
The cruising range display helps you plan your trips.
The estimated cruising range in miles (kilometers) appears in the
d isplay . Th is te lls you how far you r vehicle wi ll be able to trave l with
the amount of fuel left in the tank and with the same driving style .
The disp lay counts down in 6 mile- (10 km-) s teps.
The cruising range is ca lculated based on the fuel consumption for
the last 18 miles (30 km). If you drive conservatively, the cruising
range wi ll increase .•
App lies to vehicles: with trip computer
Driving time
The driving time display reminds you when it is time to
take a break.
The length of time that you have been driving since you last rese t
the memory appears in this display. If you want to keep track of your driving
time from a given point in time, reset the memory at this
point in time by press ing the reset
butto n=> page 39, fig. 28 @ .
Sin gle -trip m emor y
If you stop driv ing for more than 2 hours , the driv ing t ime value will
be reset automatically .
Complete-trip memory
The driving time va lue remains in memory when the ignition is off.
When you resume driving, t he additio nal driving ti me is added on to
the previous value.
D riv in g time alarm
After you have been driving for two hours, the display wil l automat
ica lly switch to the driving t ime d isplay
2 :00 . The driving t ime
display wil l also flash. This driving time alarm reminds the driver to
take a break fro m driv ing.
To turn off the driving time alarm, briefly press the function selector
switch or the rese t button
~ page 39, fig . 28.
If you continue your trip or take a break o f
less than ten minutes, a
new a larm wi ll be disp layed at driving times of
4 :00 , 6 :00 etc.
However, the driving time alarm counter wi ll be reset if you take a
break of more than ten minutes. •
Applies to vehicles: with tr ip computer
Average fuel consumption
The average mileage indica tion allows you to anticipate
your refueling stops well ahead in time.
Th e average fuel economy i n MPG (1/100 km) s ince you last cleared
the memory appears in this display. You can use this disp lay to
adjust your driving technique to achieve a desired mi leage. I f you
want to determine the fuel economy for a new time period, reset the
memo ry using the reset
button => page 39, fig. 28 . After you have
reset the display, a zero will appear for the first 100 feet (30 metres) . .,_
Page 55 of 368
Master key with remote control
The remote control allows you to lock or unlock the
vehicle electronically.
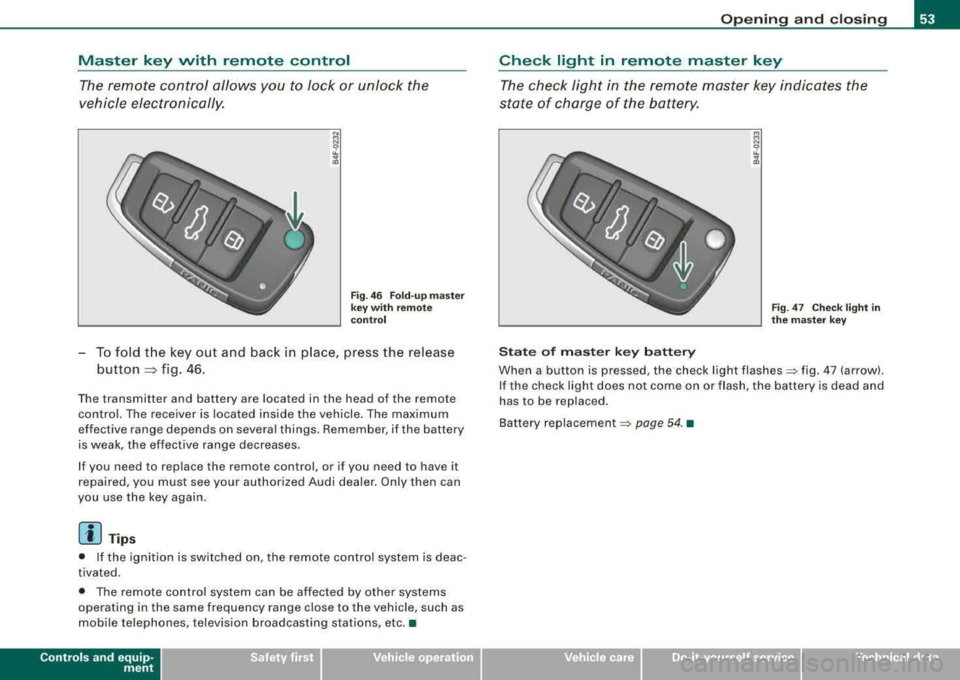
Fig . 46 Fold-up master
key with remote
control
-To fold the key out and back in place, press the release
button
~ fig . 46 .
Th e transmitt er and battery are located in the head o f the remo te
control. The receiver is located inside the vehicle. The maximum
effec tive range depends on several things. Remember, if the battery
is weak, the effective range decreases.
If you need to replace the remote control , o r if you need to have it
repaired, you must see your authorized Audi dealer. Only then can
you use the key again.
[ i] Tips
• If the ignition is switched on, the remote control system is deac
tivated .
• The remote control system can be affected by other systems
operating in the same frequency range close to the vehicle, such as
mobile telephones, television broadcasting stations, etc. •
Controls and equip
ment
Opening and closing
Check light in remote master key
The check light in the remote master key indicates the
state of charge of the battery.
State of master key battery
Fig . 47 Check light in
the master key
When a button is pressed , the check light flashes=:. fig . 47 (arrow) .
If the check light does not come on or flash, the battery is dead and
has to be replaced.
Ba ttery
replacem ent =:. page 54. •
irechnical data
Page 56 of 368
Opening and clo sing
Master key battery replacement
Each master key contains a battery housed under the
cover.
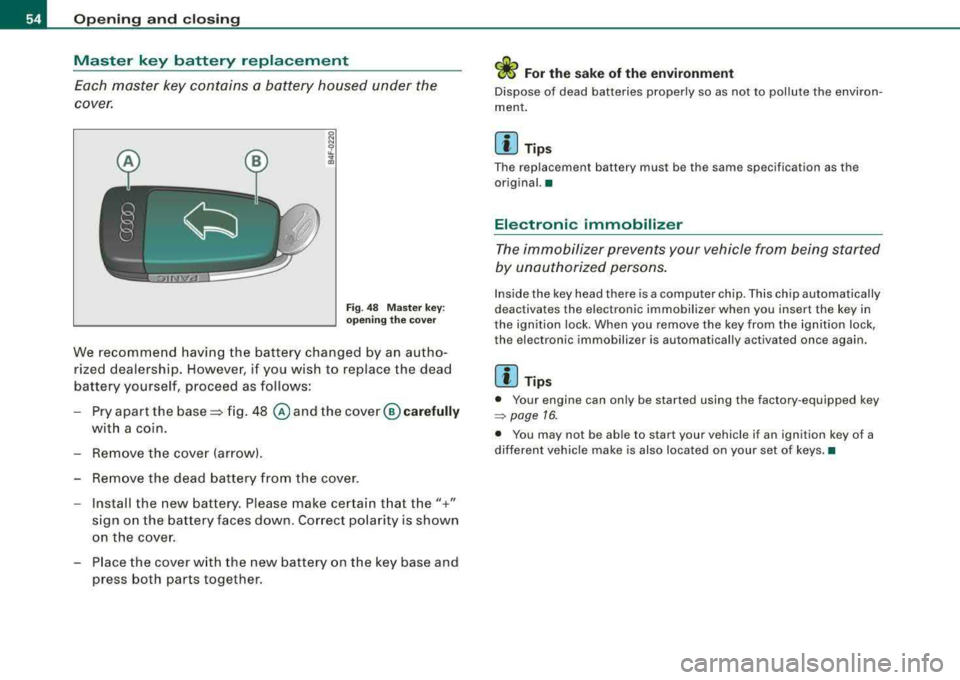
F ig. 48 Mas ter key:
o p enin g the cover
We recommend having the battery changed by an autho
rized dealership. However, if you wish to replace the dead
battery yourself, proceed as follows:
- Pry apart the
base~ fig. 48 @ and the cover ® car efully
with a coin .
- Remove the cover (arrow).
- Remove the dead battery from the cover .
- Install the new battery. Please make certain t hat the"+"
sign on the battery faces down . Correct polarity is shown
on the cover.
- Place the cover w ith the new battery on the key base and
press both parts together.
ffi For the sake of the environment
Dispose of dead batteries properly so as not to pollute the environ
ment .
[ i ] Tip s
The replacement battery must be the same specification as the
original. •
Electronic immobilizer
The immobilizer prevents y our vehicle from being started
b y u nau thor ized pers ons.
Inside the key head there is a computer ch ip. Th is ch ip automatically
deactivates the e lectronic immobilizer when you insert the key in
the ignit ion lock. When you remove the key from t he ignition lock,
the electron ic immobili zer is automatical ly activated once again .
[ i ] Tips
• Your engine can only be started using the factory -equipped key
=> page 16.
• You may not be able to start your vehicle if an ignition key of a
different vehicle make is also located on your set of keys. •
Page 58 of 368
Opening and clo sing
& W ARNI NG (c onti nued )
• Do not le ave ch ildr en in side th e vehicle uns upervi sed. In an
em erge ncy it would be i mpos sible to open t he doors from the
out side w it h out the key .
[ i] Tips
• In the event of a crash with airbag deployment all locked doors
wi ll be automatically unlocked to give access to the vehicle occu
pants from the outside .
• If the power locking system should fail, you can still open the
fue l tank flap in an emergency =>
page 271.
• You are well advised not to keep va luables inside an unattended
vehicle, visible or not. Even a properly locked vehicle cannot provide
the security of a safe!
•
Keyless entry remote control
General description
The remote controls allows you to :
• lock or unlock the vehicle
• selectively unlock the rear lid.
The turn signals will flash briefly whenever you lock or unlock the
veh ic le . Also, the interior light will come on or go off whenever you
open or close the driver's door.
T he transmitter and battery are located in the head of the remote
control. The receiver is located inside the vehicle. The maximum
effective range depends on several things. Remember, if the battery
is weak, the effective range decreases .
The remote-contro l key contains a fold-out key that you can use to
manually lock or unlock the vehicle and to start the engine . I
f you need to replace the remote control, or if you need to have it
repaired, you must see your authorized Audi dealer. Only then can
you use the key again .•
Unlocking and locking the vehicle with the
remote control
How the remote cont rol works.
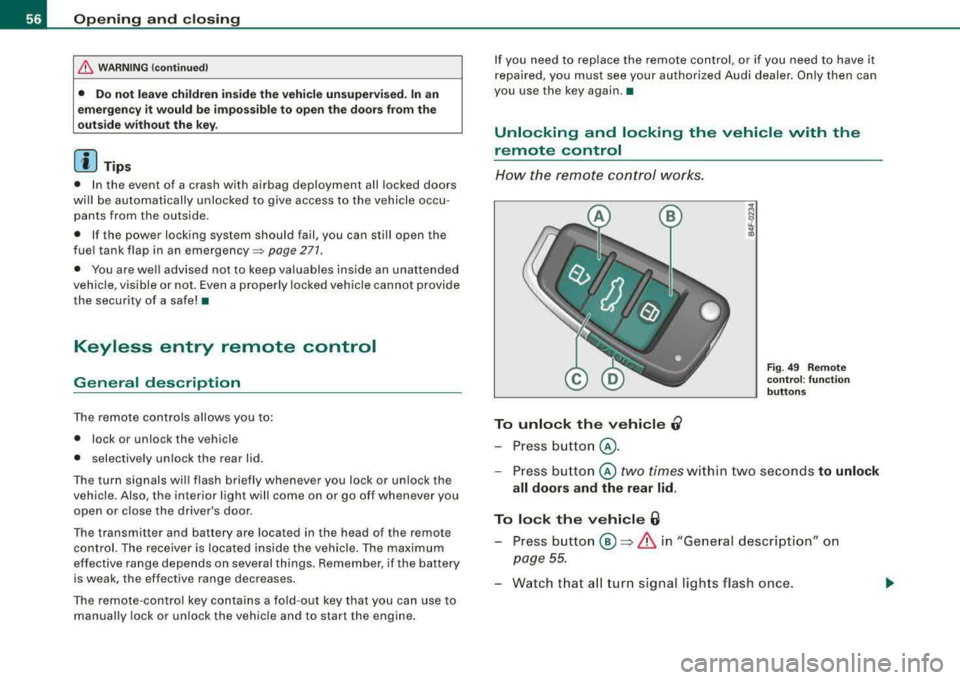
To unlock the vehicle 0
- Press button @.
Fig. 4 9 Rem ote
co ntrol: fu nct ion
b utto ns
- Press bu tton @ two times within two seconds to unlock
all doors and th e rear lid .
To lock the v ehi cle 6
- Press button ® => & in "General description" on
page
55.
- Watch that a ll turn signal lights flash once .
Page 66 of 368

Openin g and closing
Anti-theft alarm system
Description
The anti-theft alarm triggers an alarm if anyone attempts
to break int o the vehicle.
The anti-theft alarm system triggers an audible alarm and turns on
t he emergency flasher if an unauthorized interference with the
vehic le is sensed by the system .
How is the anti-theft al arm sy stem swit ched on ?
The anti -theft alarm system is switched on when you lock the
dr iver's door manually using your key, o r w hen you use the remote
control. The system is activated approximate ly 30 seconds after the
vehic le is locked. T he indicator light on top of the door trim s tart
flashing rapidly for 30 seconds and then b link slowly.
How is th e anti -theft alarm system switched off ?
The anti-theft alarm system is switched off only when you use the
r emote contro l to unlock your vehicle. If you do not open a doo r
within 60 seconds after you have un locked with the remote control,
the vehicle wi ll loc k itse lf aga in automat ical ly .
If you lock just the driver's door using your key , the front
passenger 's door, the rear and the fue l filler flap remain locked.
I f you use the veh icle key to unlock the driver's door, the other
doors , the rear lid and the fuel tank flap will remain locked . The
a lar m system wil l not be deactivated u nless you insert the key in the
ignition switch within 15 seconds and turn on the ignition . If you fail
to do this, the alarm wi ll sound.
Wh en w ill t he anti th eft ala rm sys tem b e trigg ere d?
When the vehicle is locked, the ala rm system monitors and pr otects
the fo llowing parts of the vehic le:
• engine compartment
• luggage compartment •
doors
• veh ic le incline
• ignition
• factory installed radio .
When the system is activated , the alarm will be triggered if one of
the doors, the engine hood or the rear lid are opened, or if the igni
tion is turned on or the radio removed or if the vehicle incline has
been changed .
The anti -theft alarm system wi ll also go off when you unlock the rear
lid with yo ur key and open it. The alarm is switched off again when
you c lose the rear lid .
The anti -theft alarm system wil l also go off when the battery is
disconnected.
You can also trigger the alarm by pressing the PANIC button on your remote c ontro l. This wil l a lert other people in case of emergency.
Press the
PANI C button again to turn off the a larm .
How i s the anti-theft alarm switched off when
trigg ere d ?
The ala rm system is switched off when you un lock the veh ic le using
the remote contro l or when the ignition is switched on . The a larm
wi ll also switch itse lf off when it co mes to the end of its cyc le .
Em ergen cy flash er
The emergency flasher wil l b link briefly when the doors, engine
hood and rear lid are properly closed .
I f the emergency flashers do not blink, check the doors, engine hood
and rear l id to make sure t hey are proper ly c losed . If you close a
door, the hood or the rear lid with the anti -theft a larm switched on,
the emergency flas hers wil l b link only after you have closed the
door or lid .
.,_
Page 69 of 368
Switch in the front passenger's door and on
the rear doors
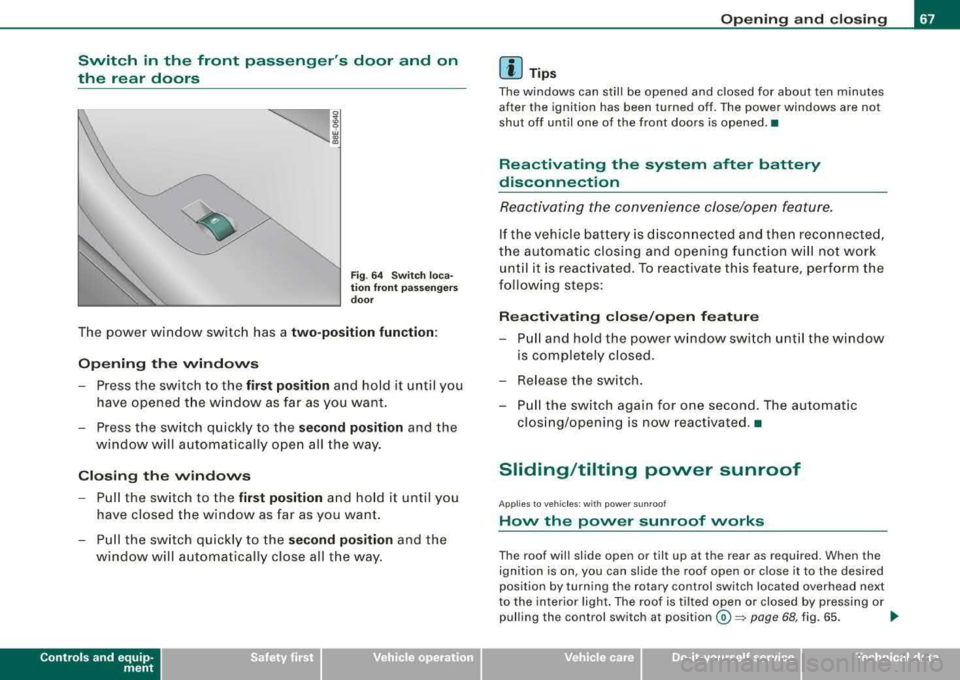
Fig . 6 4 Switch loca
t ion fr ont pass enge rs
d oo r
The power window sw itch has a two -position function :
Opening the windows
Press the switch to the fir st po sition and hold it until you
have opened t he wi ndow as far as you want .
- Press the switch q uickly to the
sec ond position and the
window will automa tically open all the way.
Closing th e windows
- Pull the switch to the first po sition and ho ld it until you
ha ve closed t he window as far as you want .
- P ull the sw itch quickly to the
s e cond po sition and the
window will a utoma tically close all t he way.
Controls and equip
ment
Op ening and closing
[ i] Tip s
The windows can still be opened and closed for about ten minutes
after the ignition has been turned off. The power windows are no t
shut off until one of the front doors is opened .•
Reactivating the system after battery
disconnection
Re activating the convenience close/open feature.
If the vehicle b attery is discon nected an d th en reconnecte d,
t h e automatic closing and opening function wi ll no t work
unti l it is react ivated. To reactivate this feature, perform the
following steps :
Reactivating close /op en feature
- Pu ll and ho ld the power w indow switch until the window
is completely closed .
- Release the switch .
- Pu ll the switch again for one second . The automat ic
clos ing/opening is now reactivated .•
Sliding/tilting power sunroof
A pp lies to v ehic les : wi th pow er s unroof
How the power sunroof works
The roo f will slide open or t ilt up at the rear as required. Wh en the
ignition is on , you can slide the roof open or close it to the desired
posit ion by turning th e rotary control switch located overh ead next
to the interior light . The roof is tilted open or closed by pressing or
pulling the control switch at
position @~ pag e 68, fig. 65. ..
Technical data