steering AUDI A5 CABRIOLET 2015 Owners Manual
[x] Cancel search | Manufacturer: AUDI, Model Year: 2015, Model line: A5 CABRIOLET, Model: AUDI A5 CABRIOLET 2015Pages: 268, PDF Size: 66.88 MB
Page 4 of 268
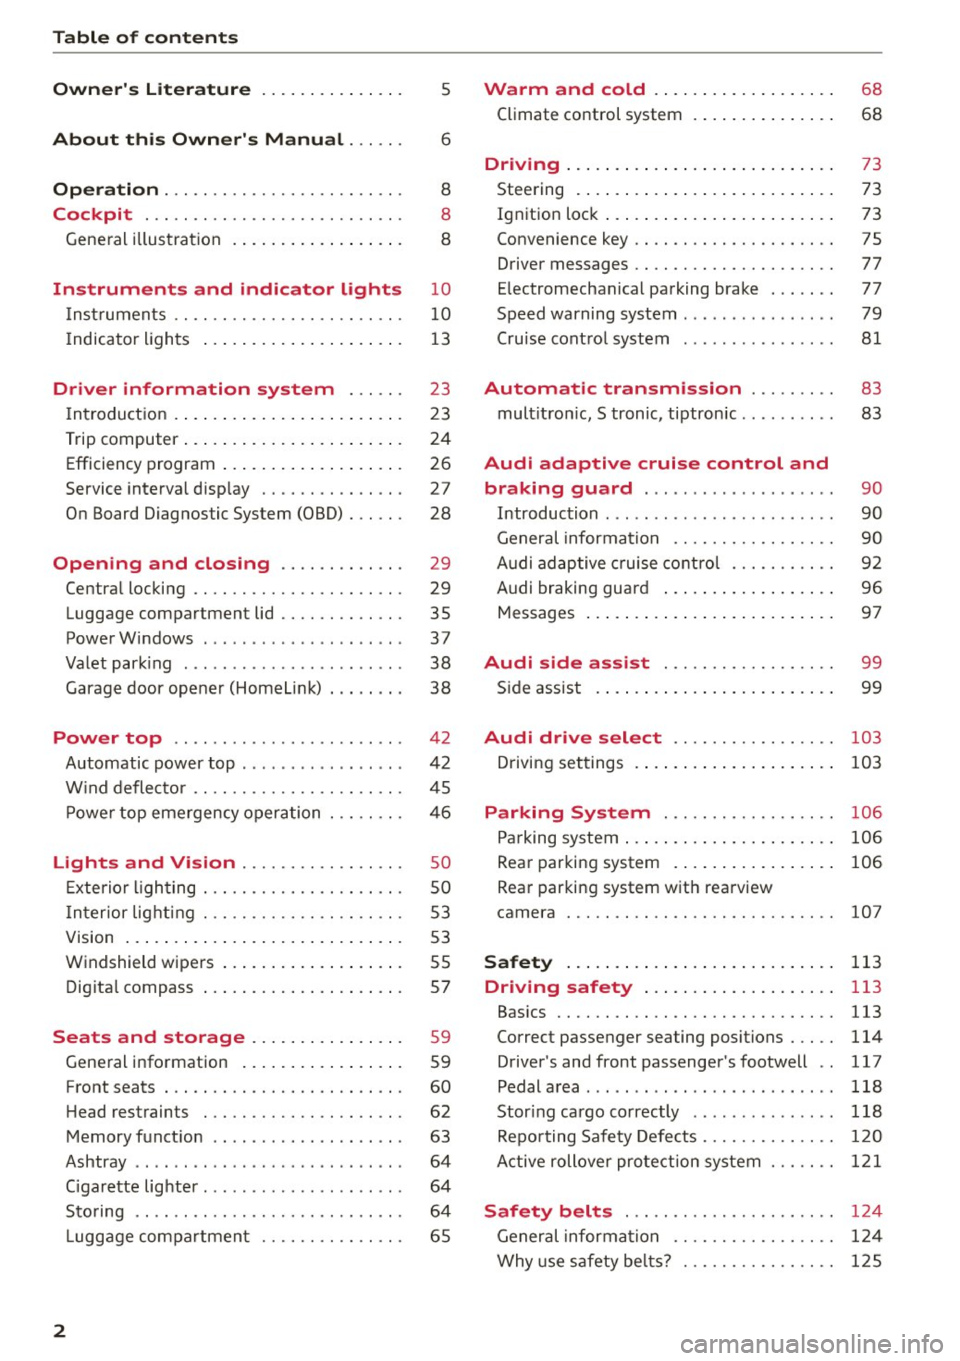
Table of contents
Owner's Literature
5
About this Owner's Manual . . . . . . 6
Operation . . . . . . . . . . . . . . . . . . . . . . . . . 8
Cockpit . . . . . . . . . . . . . . . . . . . . . . . . . . . 8
Gene ral illus tra tion . . . . . . . . . . . . . . . . . . 8
Instrument s and indicator lights 10
I nstruments . . . . . . . . . . . . . . . . . . . . . . . . 10
I ndicator ligh ts . . . . . . . . . . . . . . . . . . . . . 1 3
Driver information system . . . . . . 23
I n troduct ion . . . . . . . . . . . . . . . . . . . . . . . . 23
Trip computer . . . . . . . . . . . . . . . . . . . . . . . 24
Efficiency program . . . . . . . . . . . . . . . . . . . 26
Service interval disp lay . . . . . . . . . . . . . . . 2 7
On Board Diagnos tic System (OBD) . . . . . . 28
Opening and closing . . . . . . . . . . . . . 29
Centra l locking . . . . . . . . . . . . . . . . . . . . . . 29
Luggage compar tment lid . . . . . . . . . . . . . 35
PowerWindows . . . . . . . . . . . . . . . . . . . . . 37
Va let park ing . . . . . . . . . . . . . . . . . . . . . . . 38
Garage door opener (HomeLi nk) . . . . . . . . 38
Power top . . . . . . . . . . . . . . . . . . . . . . . . 4 2
Automatic power top . . . . . . . . . . . . . . . . . 42
W ind defle ctor . . . . . . . . . . . . . . . . . . . . . . 45
P owe r top eme rgency operation . .. .. .. .
Lights and Vision ............ .. .. .
Exterio r lighting .............. .. .. .. .
I n terior light ing ... ... .. .... .. .. .. .. . 4
6
so
so
5 3
V1s1on . . . . . . . . . . . . . . . . . . . . . . . . . . . . . 5 3
W indshield wipers . . . . . . . . . . . . . . . . . . . 5S
Dig ita l compass . . . . . . . . . . . . . . . . . . . . . 57
Seats and storage ....... .. .. ... . .
Gene ral info rmation ..... ... .. .. .. .. .
Front seats . .. .. ............. .. .. .. .
H ead restrain ts ... ... .. ...... .. .. .. .
Memory f unct io n ........ ... .. .. .. .. .
Ashtray ...... .. ................ ... .
C igarette lig hter .... .. ... ..... .. .. .. . 59
59
60
62
63
64
64
Sto ring . . . . . . . . . . . . . . . . . . . . . . . . . . . . 64
L uggage compa rtmen t . . . . . . . . . . . . . . . 65
2
Warm and cold .. .. ... . .... ... .. . .
Climate control system . ... .... ... .. . .
68
68
Dr1v1ng ... .. .... .. .. .. .. .. .... ... .. 73
Steering . . . . . . . . . . . . . . . . . . . . . . . . . . . 73
Ignition loc k . . . . . . . . . . . . . . . . . . . . . . . . 73
Convenience key . . . . . . . . . . . . . . . . . . . . . 75
Driver messages . . . . . . . . . . . . . . . . . . . . . 77
E lectromechanical pa rking brake . . . . . . . 77
Speed warning system . . . . . . . . . . . . . . . . 79
Cru ise cont ro l system . . . . . . . . . . . . . . . . 81
Automatic transmission . . . . . . . . . 83
mult itron ic, S tronic, tiptron ic . . . . . . . . . . 83
Audi adaptive cruise control and
braking guard . . . . . . . . . . . . . . . . . . . .
90
Introduction . . . . . . . . . . . . . . . . . . . . . . . . 90
General informa tio n . . . . . . . . . . . . . . . . . 90
Audi adaptive cruise cont rol . . . . . . . . . . . 92
Audi braking guard . . . . . . . . . . . . . . . . . . 96
Messages . . . . . . . . . . . . . . . . . . . . . . . . . . 97
Audi side assist . . . . . . . . . . . . . . . . . . 99
S ide assist . . . . . . . . . . . . . . . . . . . . . . . . . 99
Audi drive select . . . . . . . . . . . . . . . . . 103
Driving set tings . . . . . . . . . . . . . . . . . . . . . 10 3
Parking System ... ........... .. . .
Parking system ..... .... .. .... ... .. . .
Rear par king system . .... . .... ... .. . .
Rea r par king syst em with rea rview
came ra 106
106
106
10
7
Safety . . . . . . . . . . . . . . . . . . . . . . . . . . . . 113
Driving safety . . . . . . . . . . . . . . . . . . . . 113
Bas ics .... .. .. .. .. .. ............. . .
Correct p assenger seating positions . .. . .
D river's and front passenger's footwell ..
Pedal a rea ..... ... ................. .
Stor ing ca rgo correctly ... ... ... ... .. .
Repo rting Safety Defe cts .......... .. . .
A ctive rollove r pro tect ion system 113
114
1
17
118
118
120
1 2 1
Safety belts . . . . . . . . . . . . . . . . . . . . . . 124
General informa tion . . . . . . . . . . . . . . . . . 1 24
Why use safety be lts? . . . . . . . . . . . . . . . . 1 25
Page 5 of 268
M N
ci u.. co ,...., \!) 1.1'1
N 1.1'1 ,....,
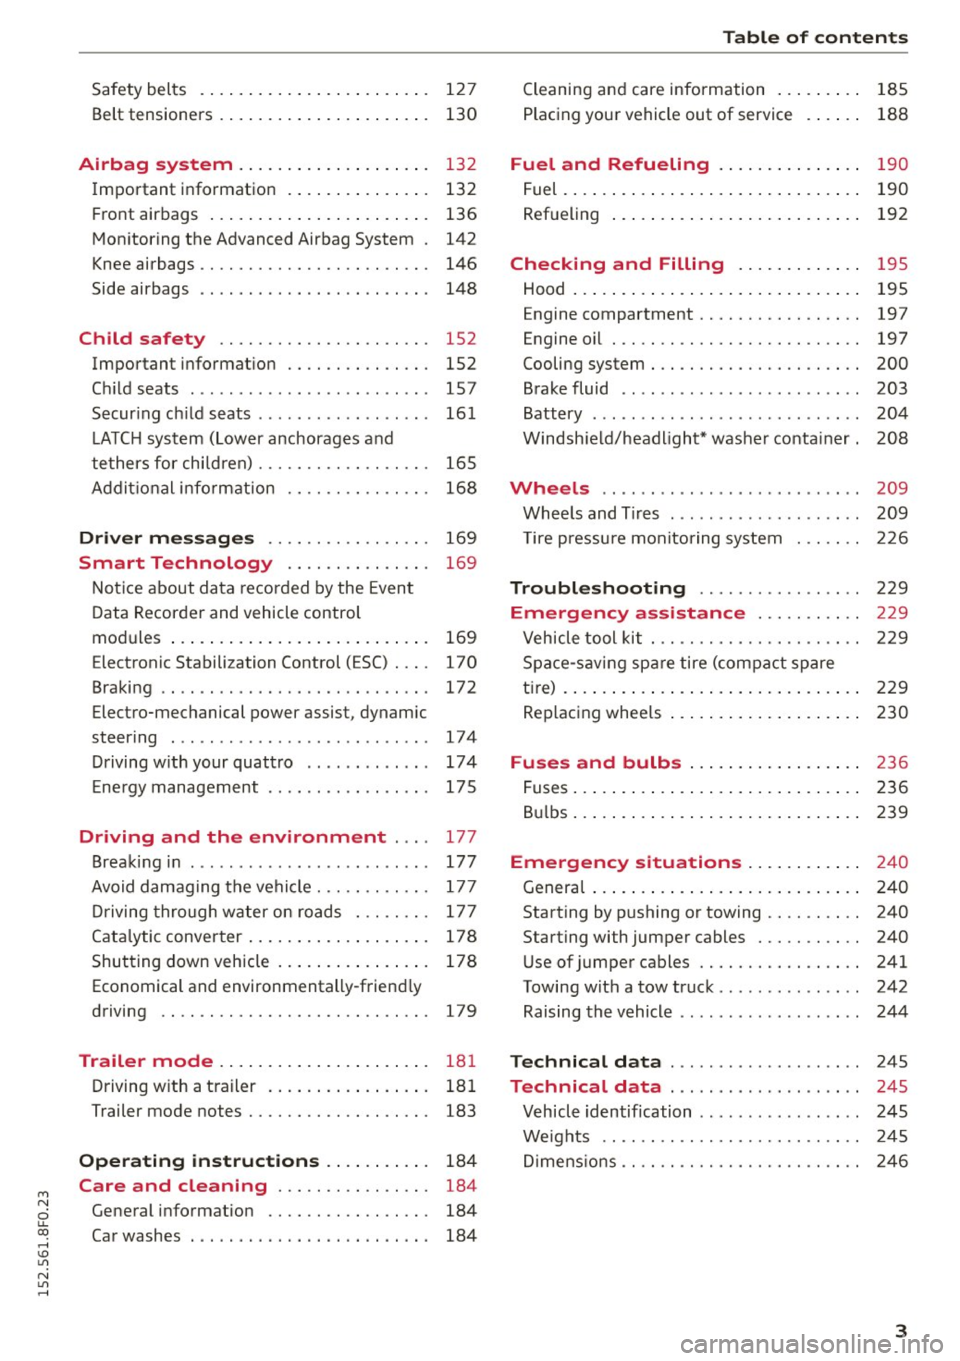
Safety belts . . . . . . . . . . . . . . . . . . . . . . . . 12 7
Belt tensioners . . . . . . . . . . . . . . . . . . . . . . 130
Airbag system ............... .. ... 132
Important information . . . . . . . . . . . . . . . 132
Fr ont airbags . . . . . . . . . . . . . . . . . . . . . . . 136
Monitoring the Advanced Airbag System . 142
Knee airbags . . . . . . . . . . . . . . . . . . . . . . . . 146
Side airbags . . . . . . . . . . . . . . . . . . . . . . . . 148
Child safety . . . . . . . . . . . . . . . . . . . . . . 152
Important information . . . . . . . . . . . . . . . 152
Ch ild seats . . . . . . . . . . . . . . . . . . . . . . . . . 157
Securing child seats . . . . . . . . . . . . . . . . . . 16 1
L A TCH system (Lower anchorages and
tethers for children) . . . . . . . . . . . . . . . . . . 165
Additional information 168
Driver messages . . . . . . . . . . . . . . . . . 169
Smart Technology . . . . . . . . . . . . . . . 169
Notice about data recorded by the Event
Dat a Recorder and vehicle control
modules . . . . . . . . . . . . . . . . . . . . . . . . . . . 169
Electronic Stabili zation Control ( ESC) . . . . 170
Braking . . . . . . . . . . . . . . . . . . . . . . . . . . . . 172
Electro-mechanical power assist, dynamic
steering . . . . . . . . . . . . . . . . . . . . . . . . . . . 174
Driving with your quattro . . . . . . . . . . . . . 17 4
E ne rgy management . . . . . . . . . . . . . . . . . 175
Driving and the environment . . . . 177
Breaking in . . . . . . . . . . . . . . . . . . . . . . . . . 177
Avoid damaging the vehicle . . . . . . . . . . . . 177
Driving through water on roads . . . . . . . . 177
Catalytic converter................... 178
Shutting down vehicle . . . . . . . . . . . . . . . . 178
Economical and environmentally -friend ly
driving . . . . . . . . . . . . . . . . . . . . . . . . . . . . 179
Trailer mode . . . . . . . . . . . . . . . . . . . . . . 181
Driving with a t railer . . . . . . . . . . . . . . . . . 181
Trailer mode notes . . . . . . . . . . . . . . . . . . . 183
Operating instructions . . . . . . . . . . . 184
Care and cleaning . . . . . . . . . . . . . . . . 184
General information . . . . . . . . . . . . . . . . . 184
Car washes . . . . . . . . . . . . . . . . . . . . . . . . . 184
Table of contents
Cleaning and care information . . . . . . . . . 185
Placing your vehicle out of service . . . . . . 188
Fuel and Refueling . . . . . . . . . . . . . . . 190
Fuel . . . . . . . . . . . . . . . . . . . . . . . . . . . . . . . 190
Refueling . . . . . . . . . . . . . . . . . . . . . . . . . . 192
Checking and Filling . . . . . . . . . . . . . 195
Hood . . . . . . . . . . . . . . . . . . . . . . . . . . . . . . 195
Engine compartment . . . . . . . . . . . . . . . . . 197
Engine oil . . . . . . . . . . . . . . . . . . . . . . . . . . 197
Cooling system . . . . . . . . . . . . . . . . . . . . . . 200
Brake fluid . . . . . . . . . . . . . . . . . . . . . . . . . 203
Battery . . . . . . . . . . . . . . . . . . . . . . . . . . . . 204
Windshield/headlight* washer container. 208
Wheels ...... .. .. ........ ...... ... 209
Wheels and Tires . . . . . . . . . . . . . . . . . . . . 209
T ire pressure monitoring system 226
Troubleshooting . . . . . . . . . . . . . . . . . 229
Emergency assistance . . . . . . . . . . . 229
Vehicle tool kit . . . . . . . . . . . . . . . . . . . . . . 229
Space-saving spare tire (compact spare
tire) . . . . . . . . . . . . . . . . . . . . . . . . . . . . . . . 229
Replacing wheels . . . . . . . . . . . . . . . . . . . . 230
Fuses and bulbs . . . . . . . . . . . . . . . . . . 236
Fuses.............................. 236
Bulbs. . . . . . . . . . . . . . . . . . . . . . . . . . . . . . 239
Emergency situations . . . . . . . . . . . . 240
General . . . . . . . . . . . . . . . . . . . . . . . . . . . . 240
Starting by pushing or towing . . . . . . . . . . 240
Start ing with jumper cables . . . . . . . . . . . 240
Use of jumper cables . . . . . . . . . . . . . . . . . 241
Towing with a tow truck . . . . . . . . . . . . . . . 242
Raising the vehicle . . . . . . . . . . . . . . . . . . . 244
Technical data . . . . . . . . . . . . . . . . . . . . 245
Technical data . . . . . . . . . . . . . . . . . . . . 245
Vehicle identification . . . . . . . . . . . . . . . . . 245
Weights . . . . . . . . . . . . . . . . . . . . . . . . . . . 24S
Dimensions . . . . . . . . . . . . . . . . . . . . . . . . . 246
3
Page 11 of 268
M N
ci u.. co ,...., \!) ..,.,
N ..,., ,....,
CD
@
®
©
®
®
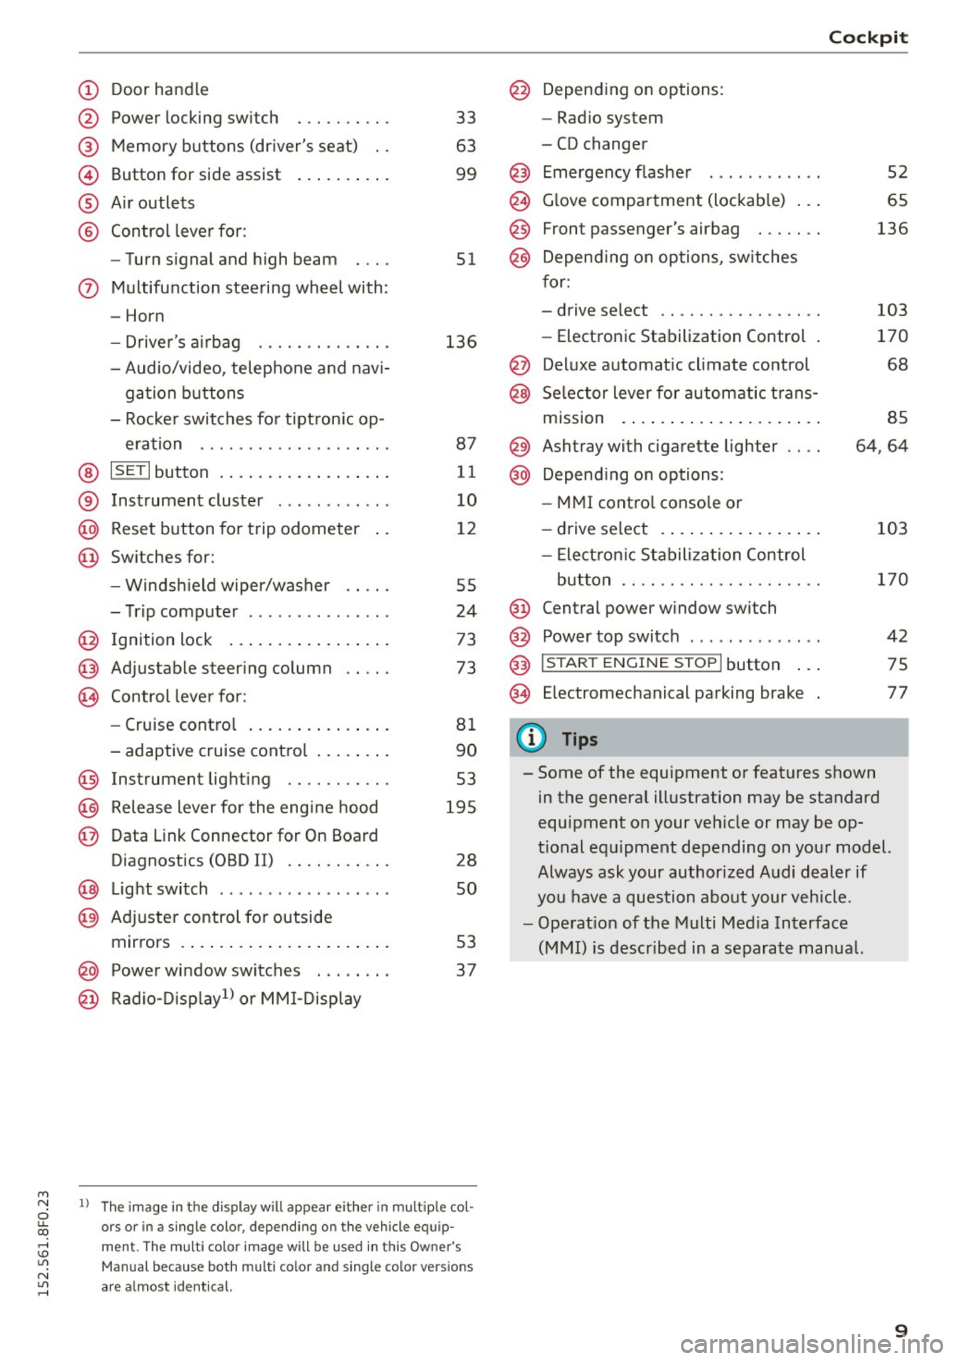
Door handle
Power locking switch
Memory buttons (driver's seat) . .
Button for side assist
A ir outlets
Control lever for :
- Turn signal and high beam
0 Multifunction steering wheel with :
- Horn
- Driver's airbag ....... .... .. .
- Audio/video, telephone and navi-
gation buttons
- Rocker switches for tiptronic op-
eration ................... .
@ ISETI button ................. .
® Instrument cluster ..... .. .. .. .
@
@ Reset button for trip odometer
Switches for:
- Windsh ield wiper/washer
- Trip computer . ....... .. .. .. .
I gnition lock ................ .
Adjustable steering column
Control lever for:
- Cruise control .............. .
- adaptive cruise control ....... .
@ Instrument lighting ........ .. .
@ Release lever for the engine hood
@ Data Link Connector for On Board
Diagnostics (OBD II) ........ .. .
@ Light switch ........ ... .. .. .. .
@ Adjuste r control for outside
mirrors . ... .............. ... .
@ Power window switches ... .... .
@ Radio-Disp lay1l or MMI-Display
33
63
99
51
136
87
11
10
12
55
24
73
73
81
90
53
195
28
so
53
37
l ) The image in t he d is pl ay w ill appear e ither in multiple col
o rs or in a single colo r, depending on the vehicle e quip
ment. The mult i color image will be u sed in this Owner 's
Manual because both multi co lo r an d single colo r ve rs io n s
are a lmost identical.
@
@
@
Depending on options:
- Radio system
- CD changer
Emergency flasher
Glove compartment (lockable) .. .
Front passenger's airbag ...... .
Depend ing on options, switches
for:
- drive select .. .............. .
- Electronic Stabilization Control .
Deluxe automatic climate control
Selector lever for automatic trans-
mission . ..... .............. .
@) Ashtray with cigarette lighter
@ Depending on options:
- MMI control console or
- drive select . ............... .
- Electron ic Stabilization Control
button ...... ... .......... . .
@ Central power window switch
@ Power top switch . ... ..... ... . .
@ I START ENGINE STOPI button .. .
@ Electromechanical parking brake
0) Tips
Cockpit
52
65
136
103
170
68
85
64,64
103
170
42
75
77
- Some of the equipment or features shown in the general illustration may be standard
equipment on your vehicle or may be op
tional equipment depending on your model.
Always ask your authorized Audi dealer if
you have a question about your vehicle.
- Operation of the Multi Media Interface
(MMI) is described in a separate manua l.
9
Page 15 of 268

M N
ci u.. co ,...., \!) 1.1"1
N 1.1"1 ,....,
Indicator lights
Description
The indicato r lights i n the inst rument cluste r
bli nk or tur n on. They i ndi cate functions o r mal
f u nctions¢ &.
M essages may appear with some i nd icator lights .
A wa rni ng sig nal w ill sound at the same time.
The messages disap pear aga in after a s ho rt time.
To display a message ag ain, press the
ISE TI but
t on ¢
page 11. If several malfunc tions occur,
each of t he i ndicator/warning lamps will be dis
p layed in success ion for about two seconds at a
time.
Some ind icators ligh ts in the disp lay can turn on
in severa l colors.
8_ WARNING
- Failure to heed warning lights and other im
portant vehicle information may res ult in
serious persona l injury o r vehicle damage .
- Whenever sta lled or stopped for repa ir,
move the vehicle a safe distance off the
road, stop the engine, and t urn on the emer
ge ncy flasher ¢
page 52.
-The engine compartment of any mot or vehi
cle is a potentia lly hazardous area. Before
yo u check any thing in the engine compar t
ment, stop th e engi ne a nd let it cool dow n.
Always exercise extreme ca utio n w hen wor k
ing unde r the hood ¢
page 195.
Overview
Some in dica tor lights tu rn on b riefly to che ck the
f u nction o f that system when you swi tch the ig ni
tion o n. These systems are marked w ith a./ in
the following tables .
If one of these indicator
lights does not turn on, there is a malfunction in
that system.
Red indicator light s
--------------
US A models:
Brake system./
¢ page 15
Instruments and indicator lights
Canada model s:
Br ake sy stem ./
¢page 15
USA models:
Electromechanica l pa rking bra ke
¢ page 16
Canad a models:
Elec tromech ani cal p arking brake
¢ page 16
Safety be lts
¢ page 16
Electromechan ical steer ing ./
¢page 174
Battery
¢page 16
En gine oi l pressure
¢ page 17
Engine o il level
¢ page 17
En gine cooling sys tem
¢ page 1 7
Steering co lumn lock
¢ page 18
Ignitio n lock
¢ page 18
USA models:
Speed warning system
¢ page 79
Canad a models:
Speed warning system
¢ page 79
Adap tive cruise cont ro l./
¢ page 9 2
Yellow indicator lights
--------------
Power top ope rat ion
¢ page4 2
Elec tronic Stabili zation Cont ro l
( E SC) ./
¢page 18
Electronic Stabilization Contro l
(ESC) ./
¢page 18
13
Page 16 of 268

Instruments and indicator lights
"O~ I I ~ .,
14
Electronic Stabilization Control
( E SC)
<=:> page 170
USA models :
Anti-lock braking system (ABS) de
fective./
c::> page 19
Canada models :
Anti-lock braking system (ABS) de
fective./
<=:> page 19
USA models :
Safety systems ./
<=:>page 19
Canada model s:
Safety systems ./
<=:>page 19
Worn brake pads
c::>page20
Electromechanical parking brake
<=:>page 16
Tire pressure monitoring
system./
c::> page 2 2 7
Tire pressure moni toring sys tem
c::> page 2 2 7
Elect ro nic power control./
c::>page20
Malfunct ion ind icator Lamp (MIL)
./
c::> page20
Engine speed limit ation
c::> page20
Engine oil level
<=:> page 17
Engine oil sensor
c::> page20
Batte ry
<=:> page 16
Ta nk sys tem
c::> page20
Warm up e ng ine*
c::> page 191
Windsh ie ld washer fluid level
<=:> page 21
Windshie ld wipers
<=:> page 21
Remote contro l key
<=:> page 75
Battery in remo te control key
<=:> page 31
Defec tive light bulb wa rning
<=:> page 21
Fog lights
<=:>page 21
Rear fog lig ht(s)*
<=:> page 21
Headlight range control*
<=:> page 21
Adaptive light*
<=>page 21
Light -/rain sensor*
<=> page 21
Adaptive dampers*
<=>pag e22
Spor t differen tial *
<=>page22
Ig nition loc k
<=>page2 2
Steering co lumn lock
<=> page 18
Electromechanica l steer ing,
dynam ic steer ing*
./ <=:> page 174
Transmission
- mu ltit ronic, tiptronic
<=> page 88
- S tronic c::> page 88
Transmission
- S tronic
<=> page 88
Other indicator light s
--------------
Turn signals
<=>page22
Page 20 of 268
Instruments and indicator lights
cooling system -you could damage your en
gine .
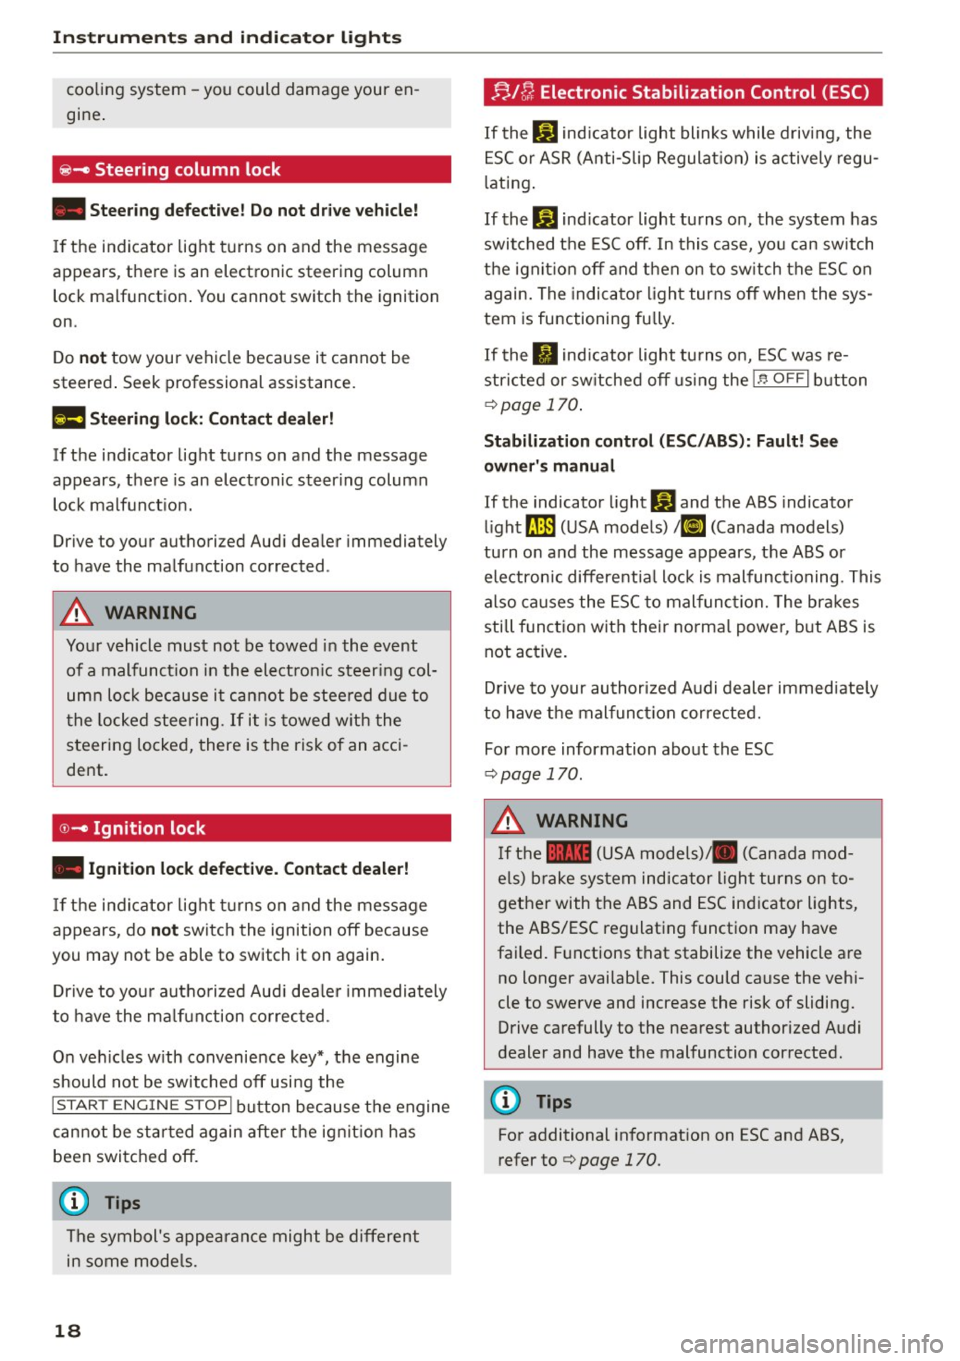
~- Steering column lock
• Steering defecti ve! Do not dri ve vehicle!
If the indicator light t urns on and the message
appears, the re is an electronic st eering column
lock malf unction . You cannot switch th e ignition
on.
Do
not tow your vehicle because it cannot be
st eered . Seek professional assistance.
£II Steerin g loc k: Co ntact d ealer!
If t he indicator light turns on and the message
appears, the re is an elect ron ic steer ing column
lock malfunct ion.
Drive to your au th ori zed Aud i dea ler immediately
to have the malfunction corrected .
A WARNING
Your vehicle must not be towed in the event
of a malfunct ion in the elect ron ic steer ing col
um n lock because i t ca nn ot be stee red due to
t he locke d steering.
If it i s towed w ith the
steering locked, there is the risk of an acci
dent .
©-Ignition lock
• Ignition lock defecti ve. Contact dealer!
If the ind icator lig ht tur ns on and the message
appears, do
not swi tc h t he ignition off because
you may not be able to switch it on again.
-
D rive to yo ur auth orized Aud i dea le r i mmedia tely
t o have the m alfu nction co rrec ted .
On ve hicles w ith convenience key*, the engine
should not be sw itched off usi ng the
I S TAR T E NGIN E ST OP ! but ton because the engine
cannot be st arted again afte r the ignit ion h as
been switc hed off.
(D Tips
T he symbol 's appearan ce might be d ifferent
in some mode ls.
18
r;. I[/; Electronic Stabilization Control (ESC)
If the b1 ind icator light blinks while driving , the
E SC or ASR (A nti-Slip Regulat ion) is actively regu
l ati ng .
If the
b1 ind icator light turns on, the system has
swit ched the ESC off . In this case, yo u can switch
t h e ign ition off and t hen on to sw itch the ESC on
again. The indica tor ligh t turns off when the sys
tem is functioning fu lly.
If the . indicator light tu rns on, ESC was re
stri cted or sw itched off using the
1.$ O FF I button
c:> page 170 .
Stabilization control (ESC /ABS ): Fault! See
owner' s manual
If the indicato r light BJ and the ABS indicator
li ght
[IlJ (USA models) ;tlJ (Canada models)
turn o n and the message appears, the ABS or
e lectronic differe ntia l lock is malfunc tioning. This
also ca us es the ESC to mal func tion. The br akes
sti ll fu nct ion with thei r no rma l powe r, b ut ABS is
not active.
D rive to your au thor ized A udi dealer immed iate ly
to h ave t he mal funct ion cor rected.
Fo r more information abo ut the ESC
c:> page 170.
A WARNING
If th e 11111 (USA models) JII (Canada mod
e ls) brake syste m indic ator ligh t turn s on to
gether with the ABS and ESC ind icator lights,
the ABS/ESC regulat ing f unction may have
failed. Functions that stabilize the vehicle a re
no longer availab le. This could cause the vehi
cle to swerve and increase the risk of sliding. Drive carefully t o the nea rest authorized Audi
dealer and have the malfunction cor rected.
(D Tips
For additional informat ion on ESC and ABS,
refer to
c:> page 170.
-
Page 33 of 268
M N
ci LL co
rl I.O
"' N
"' rl
-Do not remove the key from the ignition lock
until the vehicle has come to a complete
stop. Otherwise the steering column lock
could suddenly engage -causing the risk of
an acc ident.
(D Tips
- The operation of the remote control key can
be temporar ily disrupted by interference
from transmitters in the vicinity of the vehi
cle work ing in the same frequency range
(e .g. a cell phone, rad io equipment) .
- For security reasons, replacement keys are only available from author ized Audi dealer.
- For Declarat ion of Compliance to United
States FCC and Industry Canada regulations
<::;>page 251.
Removing the mechanical key
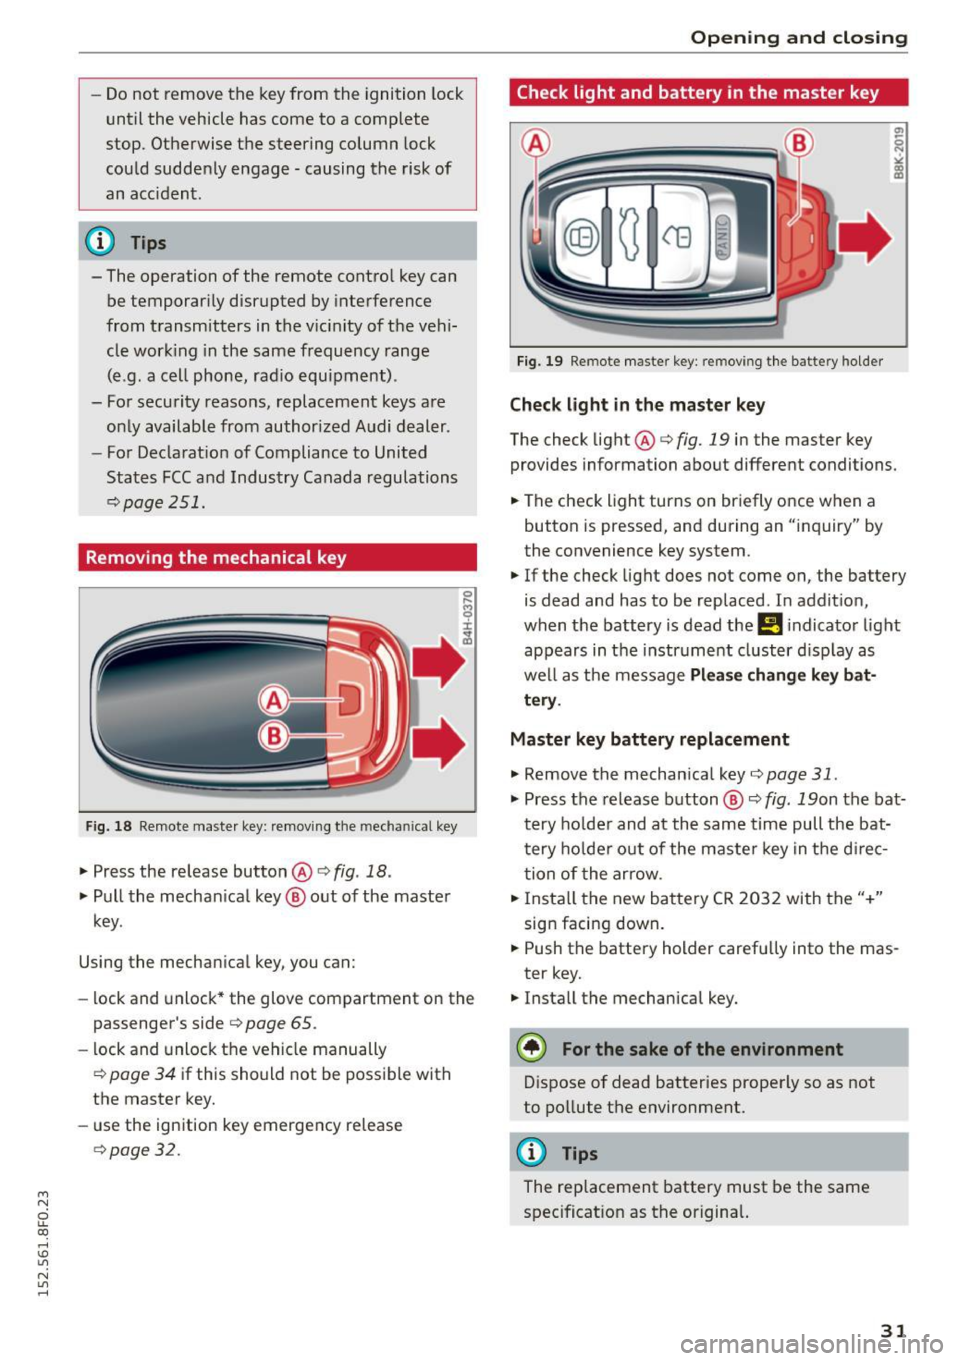
F ig. 18 Remote maste r key: remov ing the mechanical key
.,. Press the release button @ i:> fig. 18 .
.,. Pull the mechan ical key @ out of the master
key .
Using the mechan ical key, you can:
- lock and unlock* the glove compartment on the
passenger's side
i:> page 65 .
-lock and unlock the vehicle manually
i=> page 34 if this should not be possible w ith
the master key.
- use the ignition key emergency release
i=>page 32.
Open ing and clo sing
Check light and battery in the master key
Fig. 19 Remote master key: removing th e battery holder
Check light in the master key
The check light @i=> fig. 19 in the master key
provides information about different conditions.
.,. The check light turns on briefly once when a
button is pressed, and during an "inquiry" by
the convenience key system.
.,. If the check light does not come on, the battery
is dead and has to be replaced. In addit ion,
when the battery is dead the
!I i ndicator light
appears in the instrument cluster d isp lay as
well as the message
Pl ea se change k ey bat
tery .
Master key battery replacement
.,. Remove the mechan ical key i:> page 31 .
.,. Press the release button@~ fig. 19on the bat·
tery ho lder and at the same time pull the bat
tery ho lder out of the maste r key in the d irec
tion of the arrow .
.,. Insta ll the new battery CR 2032 with the"+"
sign facing down .
.,. Push the battery holder carefu lly into the mas·
ter key.
.,. Insta ll the mechanical key.
@) For the sake of the env ironment
Dispose of dead batteries properly so as not
to pollute the environment.
@ Tips
The replacement battery must be the same
spec ificat ion as the origina l.
31
Page 52 of 268
Lights and Vi sion
Lights and Vision
Exterior Lighting
Switching the lights on and off
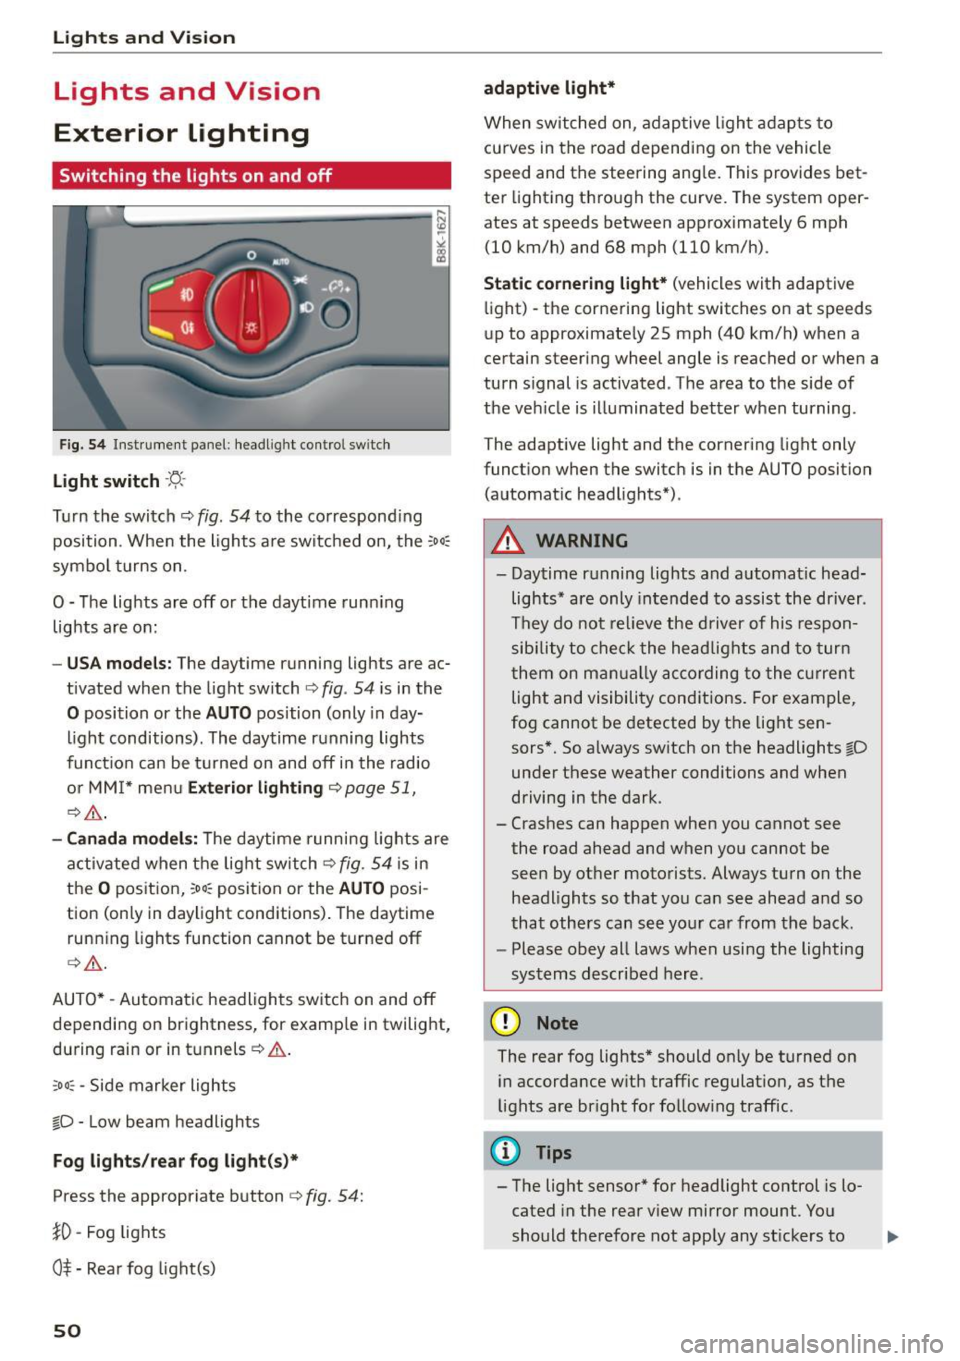
Fig. 54 Inst rume nt pane l: headl ig h t co ntrol switc h
Light switch ·'t/-·
Tu rn the switch ¢ fig. 54 to the co rr e spond ing
position . Whe n the lights a re switched on, the
:oo,
symbo l turns on.
0 -The lights are off or the daytime runn ing
lights are on:
- USA models : The daytime running lights are ac
tivated when the light switch ¢
fig. 54 is in the
0 position or the AUTO position (only in day
li ght conditions). The daytime running lights
funct io n can be turned on and off in the radio
o r MM I* men u
Exterior lighting ¢ page 51,
c:?,& .
-Canada model s: T he daytime r unni ng lights are
activated when the lig ht switch
C?fig. 54 is in
t h e
O pos it ion, 300, position or the AUTO posi
tion (only in daylight conditions) . The daytime
runn ing lights function cannot be turned off
¢ ,A .
AUTO* -Au tomatic headlights swi tch on and off
depending on brightness, for examp le in twilight,
during rain or in tu nnels ¢
A.
:oo , -Side marker lights
fO -Low beam headlights
Fog lights /rear fog light(s )*
Press the appropriate button c:? fig. 54:
}0 -Fog lights
O* -Rea r fog light(s)
50
adaptive light*
When switched on, adap tive ligh t ad ap ts to
curves in the road depending on the vehicle
speed and the steering ang le. This provides bet
ter light ing through the curve. The system oper
ates at speeds between approximately 6 mph
(10 km/h) and 68 mph (110 km/h).
Static cornering light* (vehicles with adaptive
li ght) -the corne ring light switches on at speeds
up to approximate ly 25 mph (40 km/h) when a
certain steering wheel angle is reached or when a
turn s ignal is act ivated . T he area to the side of
the ve hicle is illuminated better when turning .
The adaptive light and the cornering light only
funct io n when the switc h is in the AUTO position
(automat ic head lights*) .
A WARNING
- Daytime r unning lights and a utomat ic head
lights* are only intended to as sist the driver .
T h ey do not re lieve the driver of his respon
sibility to c heck t he hea dlights and to tur n
t hem on m anually ac co rding to the cur rent
light and visibili ty conditions. Fo r exam ple,
fog cannot be detected by the light sen
sors*. So a lways sw itch on the headlights
l[D
under these weather conditi ons and when
driving in the dark.
- Crashes can happen when y ou cannot see
the road ahead and when you cannot be
seen by ot her moto rists. Always tu rn on the
headlights so that yo u ca n see ahead a nd so
that othe rs can see yo ur ca r from the back.
- Please obey all laws when usi ng the lighting
sys tems described here.
(D Note
The rear fog lights* should on ly be turned on
i n accordance w ith traffic regulat ion, as t he
lights are br ight for follow ing traffic.
{!) Tips
- The light sensor* for headlight control is lo
cated in the rear v iew mirror mount. Yo u
should the refore not app ly any st ickers to
Page 61 of 268
M N
ci u.. co ,...., \!) 1.1'1
N 1.1'1 ,....,
Seats and storage
General information
Why is your seat adjustment so important?
The safety belts and the airbag system can only
provide maximum protection if the front seats are correctly adjusted.
There are various ways of adjusting the front
seats to provide safe and comfortable support
for the driver and the front passenger. Adjust
your seat properly so that:
- you can easily and quickly reach all the switches
and controls in the instrument panel
- your body is properly supported thus reducing
physical stress and fatigue
- the safety belts and a irbag system can offer
maximum protection
¢ page 132.
In the following sections, you will see exactly
how you can best adjust your seats.
There are special regulations and instructions for installing a child safety seat on the front pas
senger's seat. Always follow the information re
garding child safety provided in¢
page 152,
Child safety.
A WARNING -
Refer to¢ page 113, Driving safety for im
portant information, t ips, suggestions and
warnings that you should read and follow for
your own safety and the safety of your pas senge rs.
A WARNING
Incorrect seating position of the dr iver and all
other passengers can resu lt in serious person
al injury.
- Always keep your feet on the floor when the
vehicle is in motion -never put your feet on
top of the instrument pane l, out of the win
dow or on top of the seat cushion. This ap
plies especially to the passengers . If your
seating pos it ion is incorrect, you increase
the risk of injury in the case of sudden brak
ing or an accident. If the airbag inflates and
Seat s and stor age
the seating position is incorrect, this cou ld
result in personal injury or even death.
- It is important for both the driver and front
passenger to keep a distance of at least
10 inches (25 cm) between themselves and
the steering wheel and/or instrument panel.
If you're sitting any closer than this, the air
bag system cannot protect you properly. In
addition, the front seats and head restraints must be adjusted to your body height so
that they can give you max imum protect ion.
- Always try to keep as much distance as pos
sible between yourself and the steer ing
wheel or instrument pane l.
- Do not adjust the driver's o r front passeng
er 's seat while the veh icle is moving. Your
seat may move unexpectedly, causing sud
den loss of vehicle control and persona l in
jury.
If you adjust your seat whi le the vehicle
is moving, you are out of position.
Driver's seat
The correct seat position is important for safe
and relaxed driving.
We recommend that you adjust the dr iver's seat
in the following manner:
"' Adjust the seat in fore and aft direction so that
you can eas ily push the pedals to the floor
while keeping your knees slightly bent¢.&,
in
Why is your seat adjustment so important? on
page 59.
"' Adjust the seatback so that when you sit with
your back against the seatback, you can still
grasp the top of the steering wheel.
"' App lies to veh icles w ith adjustable head re
straints: Adjust the head restraint so the upper
edge is as even as possible with the top of your
head.
If that is not possible, try to adjust the
head restra int so that it is as close to th is posi
t ion as possible ¢
page 62.
A WARNING
Never place any objects in the driver's foot
well. An object could get into the pedal area
and interfere with pedal funct ion. In case of
-
59
Page 75 of 268
M N
ci LL co
rl I.O
"' N
"' rl
Driving
Steering
Manually adjustable steering wheel
The steering wheel position is fully adjus table up
and down and forward and back .
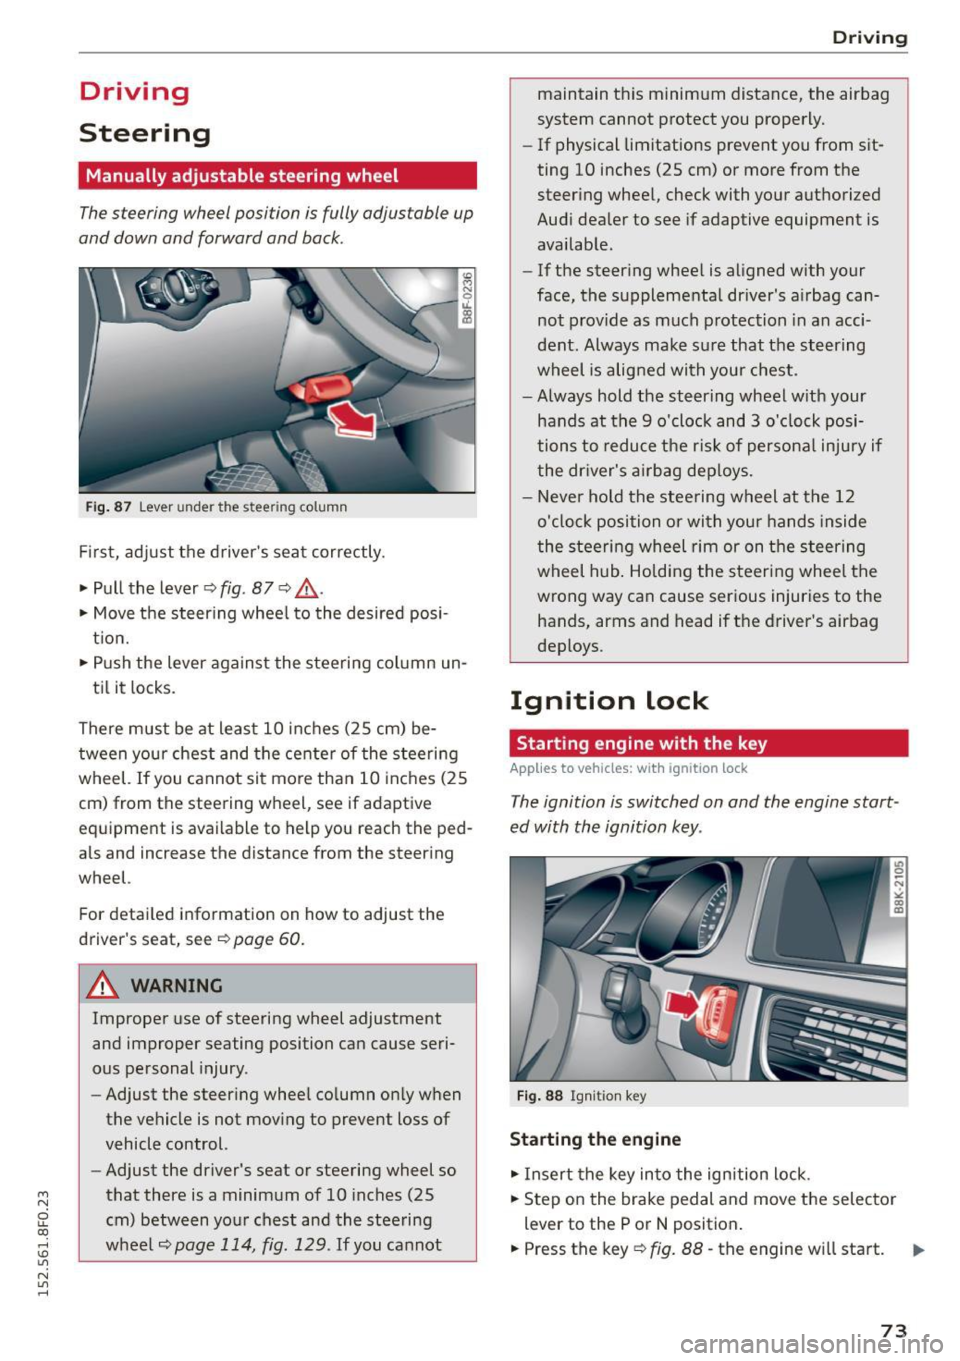
Fig. 87 Lever under the st eering column
First, adjust the driver's seat correctly.
• Pull the lever~
fig. 87 <=? .&, .
• Move the steering wheel to the desired posi
tion.
• Push the lever against the steering column un-
til it locks.
There must be at least 10 inches (25 cm) be tween your chest and the center of the steering
wheel. If you cannot sit more than 10 inches (25
cm) from the steering wheel, see if adaptive
eq uipm ent is available to help you reach the ped
als and increase the distance from the steering
wheel.
Fo r detailed information on how to adjust the
driver's seat, see
~page 60 .
.&_ WARNING
Improper use of steering wheel adjustment
and improper seating position can cause seri
ous personal injury.
- Adjust the steering wheel column only when
the vehicle is not moving to prevent loss of
vehicle control.
- Adjust the driver's seat or steering wheel so
that there is a minimum of 10 inches (25
cm) between your chest and the steering
wheel
~page 114, fig. 129 . If you cannot
-
Driving
maintain this minimum distance, the airbag
system cannot protect you properly.
-If phys ical limitations prevent you from sit
ting 10 inches (25 cm) or more from the
steering wheel, check with your authorized
Audi dealer to see if adaptive equipment is
available.
- If the steering wheel is aligned with your
face, the supplemental driver's airbag can
not provide as much protection in an acci
dent. Always make sure that the steering
wheel is aligned with your chest.
- Always hold the steering wheel with your
hands at the 9 o'clock and 3 o'clock posi
tions to reduce the risk of personal injury if
the driver's airbag deploys.
- Never hold the steering wheel at the 12
o'clock position or with your hands inside
the steering wheel rim or on the steering
wheel hub. Holding the steering wheel the
wrong way can cause serious injuries to the
hands, arms and head if the driver's airbag
deploys .
Ignition lock
Starting engine with the key
Applies to vehicles: with ignition lock
The ignition is switched on and the engine start
ed with the ignition key .
Fig. 88 Ignition key
Starting the engine
• Insert the key into the ignition lock .
• Step on the brake pedal and move the selector
lever to the P or
N position.
• Press the key~
fig. 88 -the engine will start.
73