check engine AUDI A5 COUPE 2016 Owners Manual
[x] Cancel search | Manufacturer: AUDI, Model Year: 2016, Model line: A5 COUPE, Model: AUDI A5 COUPE 2016Pages: 264, PDF Size: 66.92 MB
Page 5 of 264
.... N
0 Ico ....
Important information . . . . . . . . . . . . . . . 129
F ront a irbags . . . . . . . . . . . . . . . . . . . . . . . 133
Mon itoring the Advanced Airbag System . 139
K nee airbags . . . . . . . . . . . . . . . . . . . . . . . . 143
Side airbags . . . . . . . . . . . . . . . . . . . . . . . . 145
Side curtai n airbags . . . . . . . . . . . . . . . . . . 14 8
Ch ild safety . . . . . . . . . . . . . . . . . . . . . . 151
Important information . . . . . . . . . . . . . . . 151
Ch ild seats . . . . . . . . . . . . . . . . . . . . . . . . . 156
Secur ing c hild seats . . . . . . . . . . . . . . . . . . 160
L ATCH system ( Lowe r ancho rages and
te thers for chi ldren) . . . . . . . . . . . . . . . . . 164
Addit ional information
168
Driver messages . . . . . . . . . . . . . . . . . 169
Intelligent Technology . . . . . . . . . . 169
N otice about data recorded by the Event
Data Recorde r and vehicle control
modules . . . . . . . . . . . . . . . . . . . . . . . . . . . 169
Elect ronic Stabilization Control (ESC) . . . . 170
Brak ing . . . . . . . . . . . . . . . . . . . . . . . . . . . . 172
Elect ro-mechan ica l power ass ist, dynamic
steer ing . . . . . . . . . . . . . . . . . . . . . . . . . . . 174
Dr iving w ith your quat tro . . . . . . . . . . . . . 17 4
E ne rgy ma nagement . . . . . . . . . . . . . . . . . 17 5
Driving and the environment ... . 177
B reaking in . . . . . . . . . . . . . . . . . . . . . . . . . 177
Avoid damaging the vehicle . . . . . . . . . . . 177
D riving throug h water on roads . . . . . . . . 177
Cata lytic converter . . . . . . . . . . . . . . . . . . . 178
Shutting down vehicle . . . . . . . . . . . . . . . . 178
Economical and environmentally-friendly
driving . . . . . . . . . . . . . . . . . . . . . . . . . . . . 179
Trailer mode . . . . . . . . . . . . . . . . . . . . . 181
Driving w ith a trailer . . . . . . . . . . . . . . . . . 181
Trai ler mode notes. . . . . . . . . . . . . . . . . . . 183
Operating instructions . . . . . . . . . . . 184
Care and cleaning . . . . . . . . . . . . . . . . 184
Ge neral information . . . . . . . . . . . . . . . . . 184
Ca r washes . . . . . . . . . . . . . . . . . . . . . . . . . 184
Pl acing your ve hicle out of se rvice . . . . . . 185
Table of contents
Fuel and Refueling . . . . . . . . . . . . . . .
186
Fuel. ... .. .. .. .. .. .... . ..... ... .. .. 186
Refueling . . . . . . . . . . . . . . . . . . . . . . . . . . 188
Checking and Filling . . . . . . . . . . . . . 191
Hood . . . . . . . . . . . . . . . . . . . . . . . . . . . . . . 191
Engine compartment . . . . . . . . . . . . . . . . . 193
Engine oil . . . . . . . . . . . . . . . . . . . . . . . . . . 193
Cooling system . . . . . . . . . . . . . . . . . . . . . . 196
Brake fl uid .. .. .. .. .... ...... ... .. .. 199
Battery . . . . . . . . . . . . . . . . . . . . . . . . . . . . 200
W indsh ield/headlight* washer conta iner. 204
Wheels ........ .. ................. 205
Whee ls and Tires . . . . . . . . . . . . . . . . . . . . 205
T ire p ressure monito ring sys tem 222
Troubleshooting . . . . . . . . . . . . . . . . . 225
Emergency assistance . . . . . . . . . . . 225
Vehicle too l ki t . . . . . . . . . . . . . . . . . . . . . . 225
Space -sav ing spare tir e ( compac t spare
t ire) . . . . . . . . . . . . . . . . . . . . . . . . . . . . . . . 225
Replacing w heels . . . . . . . . . . . . . . . . . . . . 226
Fuses and bulbs . . . . . . . . . . . . . . . . . . 232
Fuses ... .. .. .. .. .. .... . ..... ... .. .. 232
B ul bs . . . . . . . . . . . . . . . . . . . . . . . . . . . . . . 235
Emergency situations . . . . . . . . . . . . 236
Genera l . . . . . . . . . . . . . . . . . . . . . . . . . . . . 236
Start ing by pushing or tow ing . . . . . . . . . . 236
Start ing with jumper cables . . . . . . . . . . . 236
Use of jumper cables . . . . . . . . . . . . . . . . . 237
T ow ing with a tow t ruck . . . . . . . . . . . . . . 238
Raising the vehicle . . . . . . . . . . . . . . . . . . . 240
Technical data . . . . . . . . . . . . . . . . . . . . 241
Technical data . . . . . . . . . . . . . . . . . . . . 241
Vehicle iden tification . . . . . . . . . . . . . . . . . 241
Weig hts . . . . . . . . . . . . . . . . . . . . . . . . . . . 241
Di mens ions . . . . . . . . . . . . . . . . . . . . . . . . . 242
Capaci ties . . . . . . . . . . . . . . . . . . . . . . . . . . 2 42
Gasoline engines . . . . . . . . . . . . . . . . . . . . 243
Consumer informat ion ...... .. .. 244
War ranty coverages . . . . . . . . . . . . . . . . . . 244
Operating your vehicle outside the U.S.A.
or Canada . . . . . . . . . . . . . . . . . . . . . . . . . . 244
3
Page 13 of 264
,-1 N
0 1-CX)
,-1 I.Cl U"I
,-1 I.Cl ......
A WARNING
-Always observe the warning in ¢ page 191,
before opening t he hood and checking the
engine coolant level.
- Never open the engine hood if you see or
hear steam, or if you see engine coolant
dr ipping from the engine compartment. You
cou ld burn yourself. Let the engine cool off
firstsothatyoucannothearo rseeany
steam or engine coo lant.
0 Note
- Mounting additional lights or accessories in
front of the air inlets reduces the cooling ef
fect of the radiator. At h igh outside temper
atu res or high engine load, the engine could
overheat.
- The front spoiler has been designed to prop
erly distribute the cooling air when the vehi
cle is moving. If the spoiler is damaged, this
could reduce the cooling effect and the en
gine could then overheat. Ask your author
ized Audi dealer for assistance.
Tachometer (engine rev counter )
The tachometer indicates the engine RPM (revo
lutions per minutes).
If engine RPM drops below 1,500, you should
downshift to the next lower gear. The red area at
the end of the scale indicates maximum permis
sible eng ine RPM after the break-in period. Be
fore reaching this area, move the selector lever
to position D/5 or ease your foot off the accelera
tor pedal.
(D Note
The tachometer needle@¢ page 10, fig. 3
should only briefly be in the red zone: you
could damage your eng ine! The beginning of
the red zone varies depending on the engine.
@ For the sake of the environment
Upshifting early saves fuel and reduces en
gine noise.
Instruments and indicator lights
~button
Fig. 4 SET button in the instrument cluster
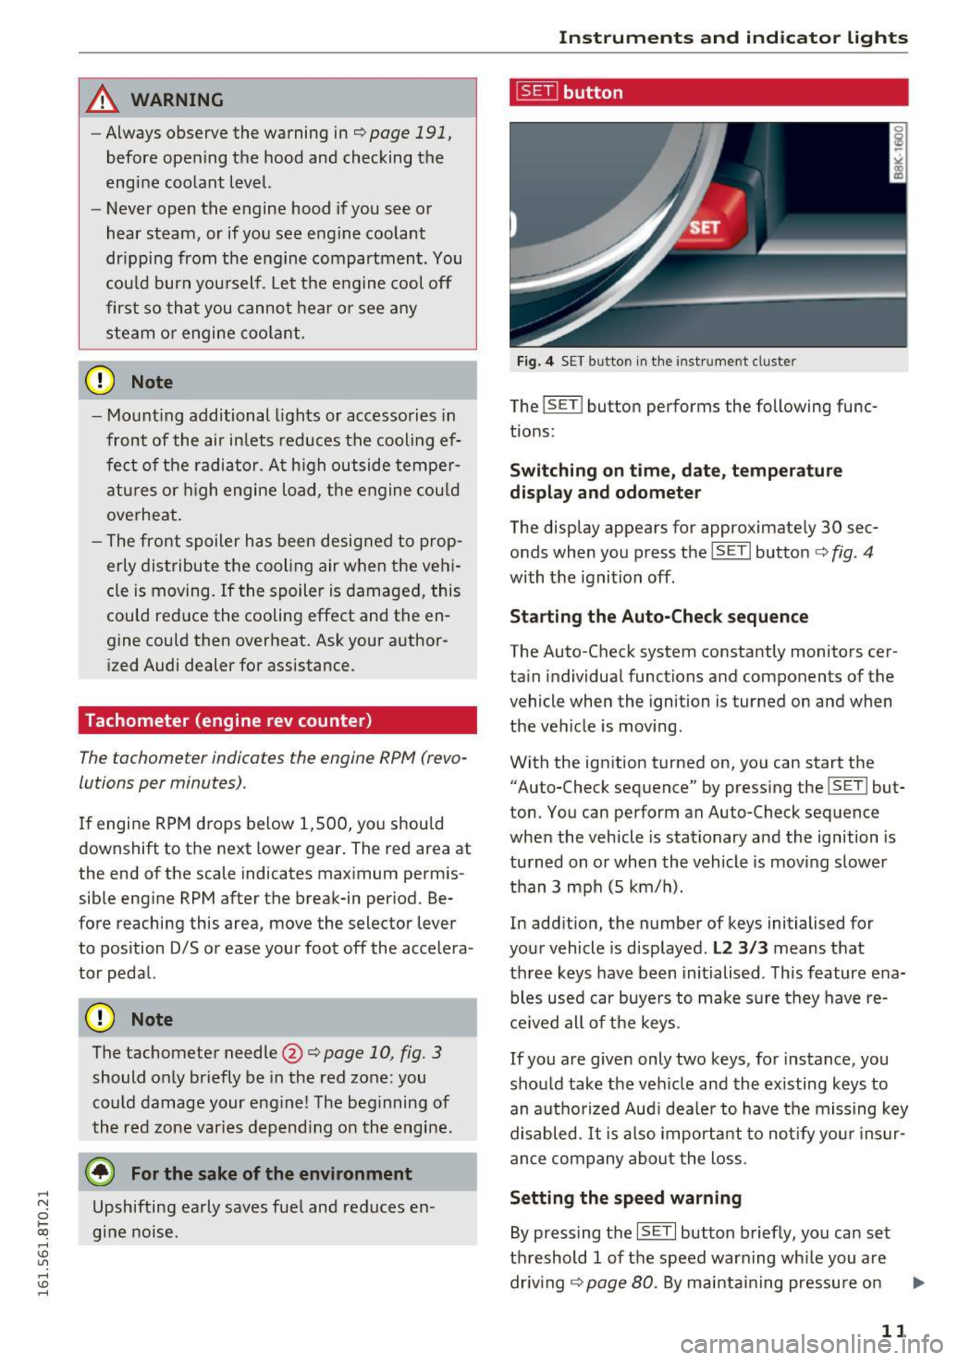
The !SET I button performs the following func
tions:
Switching on time, date, temperature
display and odometer
The display appears for approximately 30 sec
onds when you press the
ISETI button¢ fig . 4
with the ignition off.
Starting the Auto-Check sequence
The Auto-Check system constantly monitors cer
tain indiv idual functions and components of the
vehicle when the ignition is turned on and when
the vehicle is moving.
With the ignition turned on, you can start the
"Auto-Check sequence" by pressing the
! SETI but
ton. You can perform an Auto-Check sequence
when the vehicle is stat ionary and the ignition is
turned on or when the vehicle is moving slower
than 3 mph (5 km/h).
In addition, the number of keys initialised for
your vehicle is displayed.
L2 3/3 means that
th ree keys have been initialised. This feature e na
bles used car buye rs to make su re they have re
ceived all of the keys.
If you are given only two keys, for instance, you
should take the veh icle and the existing keys to
an authorized Audi dealer to have the missing key
disabled. It is also important to notify your insur
ance company about the loss.
Setting the speed warning
By pressing the ISETI button briefly, you can set
threshold 1 of the speed warning wh ile you are
driv ing
¢page 80. By ma intaining pressure on
11
Page 15 of 264

.... N
0 Ico ....
Description
The indicator lights i n the inst rument cluste r
b link or t urn on. They ind icate func tions or ma l
f u nctions ¢& .
Messages may appea r with some indica to r li ghts.
A wa rni ng sig nal w ill sound at the same time.
The messages disappear aga in after a short t ime.
To d isp lay a mess age ag ai n, p ress t he
ISE TI bu t
ton ¢
page 11. If severa l ma lf u nctions occur,
each of the indicator/warning lamps will be dis
p layed i n succession for abo ut two seconds at a
time.
Some ind icators ligh ts in the disp lay can turn o n
in several colo rs.
8_ WARNING
- Failure to heed warning lights and other im
portant vehicle informat ion may result in
serious persona l injury or vehicle damage.
- Whenever sta lled or stopped for repair,
move th@ vehicle a safe distance off th@
road , stop the engine, and turn on t he
eme rgency flasher ¢
page 46.
-The engine compartment of any motor vehi
cle is a potentia lly hazardous a rea . Befo re
yo u check any thing in the engine compart
m en t, stop the engi ne a nd let it cool dow n.
Alway s exe rcise ex treme c aution w hen work
ing unde r the ho od ¢
page 191.
Overview
Some in dicator lights turn o n briefly to che ck the
f u nction o f that system when you swi tch the ig ni
tion o n. These systems are marke d with a ./ in
the following tables . If one of these indicator
lights does not turn on, there is a malfunction in
that system.
Red indicator lights
--------------
US A models:
Brake system ./
¢page 15
Instruments and ind icator lights
Canada model s:
Br ake system ./
¢page 15
USA models:
Electromechanical parking brake
¢ page 16
Canada models:
El ectromec hanic al p arking b rake
¢ page 16
Safety be lts
¢ page 16
Electromechanical steering ./
¢page 174
Battery
¢page 16
Engine oi l pressu re
¢ page 17
En gine o il level
¢ page 17
En gine cooling sys tem
¢ page 17
Steering co lumn lock
¢ page 18
Ig nitio n lock
¢ page 18
USA models:
Speed warning system
¢page 79
Canada models:
Speed warning system
¢page 79
Ad ap tive cruise cont ro l./
¢ page 91
Yellow indicator lights
--------------
Elec tronic Stab ilizati on Contro l
(ESC) ./
¢page 18
El ec tronic Stab ilization Contro l
( ES C) ./
¢page 18
Electronic Stab ilization Contro l
(ESC)
¢ page 170
13
Page 17 of 264
.... N
0 I-co ....
c:> page 91
Adaptive cr uise control*
c:> page 91
High beam
c:> page45
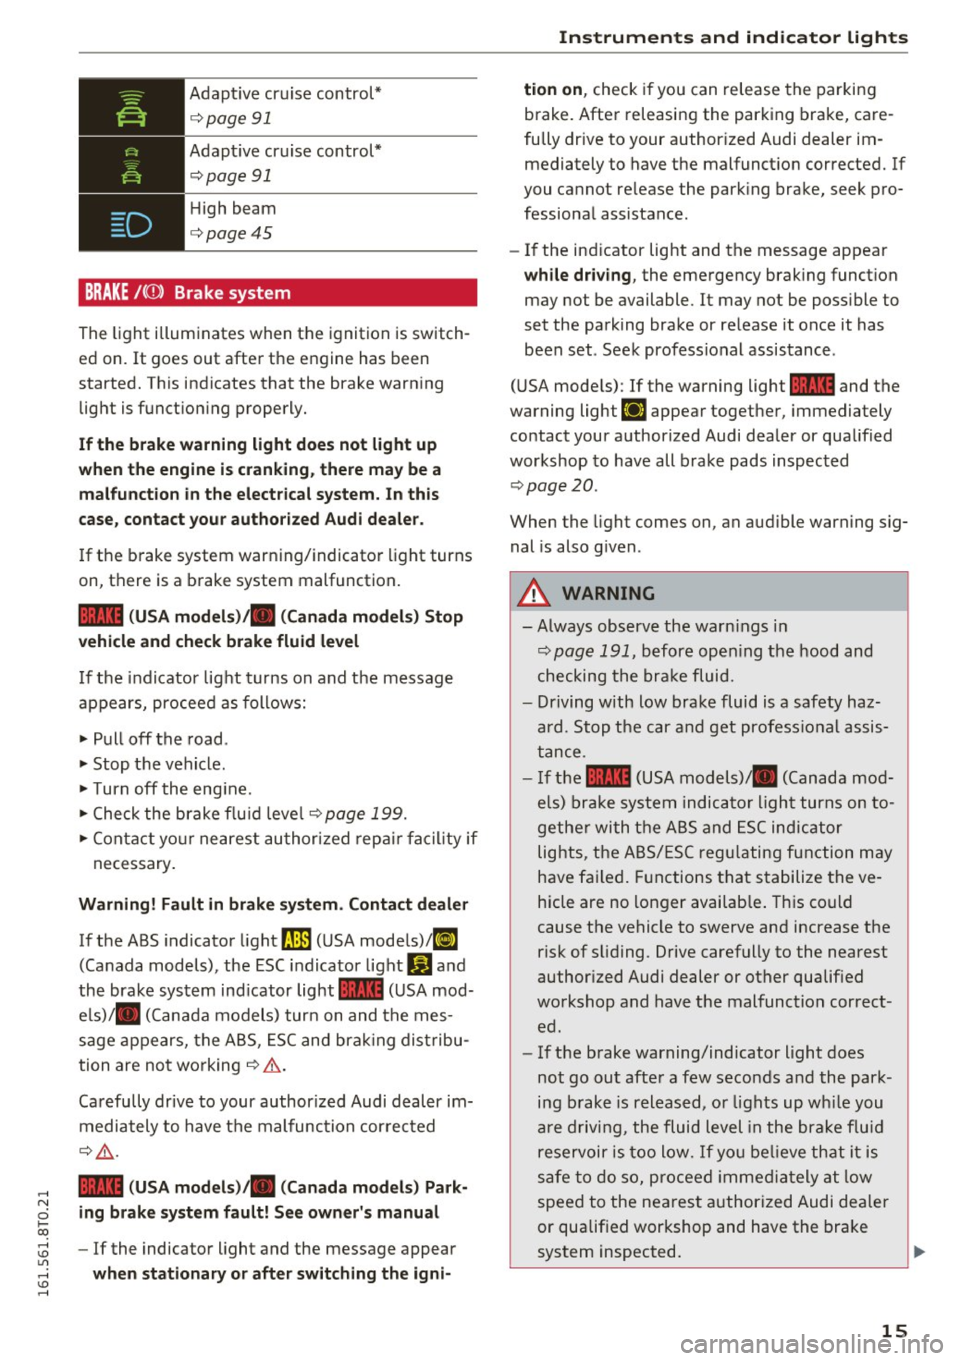
BRAKE /((J)) Brake system
The light illuminates when the ignition is switch
ed on.
It goes out afte r the engine has been
started. T his indicates that the brake warn ing
light is f unct ion ing properly.
If the brake warning light does not light up
when the engine i s crank ing , there may be a
malfunction in the electrical system. In th is
case , contact your author ized Audi dealer .
If the b rake system warn ing/indicato r light turns
on, there is a b rake system malfunction.
1111 ( USA models )/. (Canada models) Stop
vehicle and check brake fluid level
I f the in dicator lig ht t urns on and t he message
appears, procee d as follows:
.,. Pull off the road .
.. Stop t he vehicle .
.,. Turn off the eng ine .
.,. Check the brake flu id leve l
c:> page 199.
.,. Con tact yo ur nearest au thor ized rep air f aci lity if
ne cessary.
Warning! Fault in brake system. Contact dealer
If the ABS indicato r light fJIE) (U SA mode ls)/ li]
(Canada models), the ESC indica tor light Wand
the brake sys tem ind icator light
1111 (USA mod
e ls)/ . (C anada models) tur n on and the mes
sage appears, t he A BS, ES C and bra king dis tribu
tion are no t wo rking
c:> .&. .
Ca refully drive to your author ized Audi dealer im
m ediately to have t he m alf unc tion cor rec ted
¢ .&, .
1111 (USA models )/. (Canada models ) Park
ing brake system fault! See owner's manual
- If the indicator light and the message appear
when stationary or after switching the igni-
Instruments and ind icator lights
tion on , check if you can rele ase the parki ng
brake. After releasing the par king brake, care
fully dr ive to your author ized Audi dealer im
mediately to have the malfunct ion corrected. If
you cannot re lease the park ing bra ke, seek pro
fessiona l assistance.
- If the ind icator light and the message appear
while driving , the emergency brak ing funct ion
may not be available. It may not be poss ible to
set the pa rk ing brake or re lease it once it has
been set . See k profess ional assis tance.
( U SA mode ls) : If the warning light
1111 and the
warning light
EiJ appear togethe r, immediately
contact your author ized Audi dea ler or qualified
workshop to have all b rake pads inspec ted
c:> page20 .
When the light comes on, an audible warning sig
nal is also g iven .
A WARNING
--Always observe the warn ings in
c:> pag e 191, befo re open ing the hood and
checking the bra ke fluid.
- Driving with low bra ke fluid is a safety haz
ard . Stop the car an d get profess io nal assis
t a nce .
- I f the
1111 (USA models)/ . (Canada mo d
els) brake sys te m indic at or li ght tur ns on to
ge the r with the A BS and ESC indic ator
lig hts , the A BS/ES C regu latin g fun ction m ay
h ave fa iled . Functions t hat s ta b ilize the ve
hicle are no longer availab le . T his co uld
cause t he ve hicle to swerve an d increase the
risk of s liding. Drive carefully to the nearest
author ized Audi dealer or ot her qualified
wo rkshop and have t he malfunc tion c orrect
e d .
- If the b rake warning/indicator light does
not go ou t aft er a f ew seco nds and th e park
ing b rake is r eleased, o r lights up wh ile you
a re drivi ng, the flui d level in the bra ke f lu id
rese rv o ir i s too lo w.
If yo u be lieve th at it is
saf e to do so, proceed immedia tely at lo w
speed to the ne ares t au thorized Au di de aler
or qualified workshop and have the bra ke
sys tem inspected .
15
Page 19 of 264
9:::1: Engine oil pressure
The red engine oil pressure warning symbol re
quires immediate service or repair . Driving with a
low-oil-pressure indication is likely to inflict se
vere damage to the engine.
• Turn off engine! Oil pressure too low
If the indicator lig ht t urns on and the message
appears, the oi l pressu re is too low.
~ P ull off the road.
~ Stop t he vehicle .
~ Turnoff the engine.
~ Check the engine oil level¢ page 195 .
~ If the engine oil leve l is too low, add engine oi l
¢
page 195. Make sure that t he oil pressure
warning symbol. appears no longe r in the
display before you s ta rt driving ag ain.
~ If the engi ne oil leve l is cor rect and t he i ndic a
tor lig ht still tur ns on, turn t he eng ine
off and
do not continue driving . Seek p ro fessional as
s istance .
(D Tips
- The engine oil pressure symbol. is not
an indicator for a low engine oil level. Do
not rely on it. Instead, check the oil level in
your engine at regular intervals, preferably each time you refuel, and always before
going on a long trip.
- The yellow oil level warning indication
Ill
requires oil refill or workshop service with
out delay . Do not wait until the red oil
pressure warning. starts to flash before
you respond to the low oil level warning
Ill . By then , your engine may already have
suffered serious damage .
~ . Engine oil level
• WARNING: Please add oil immediately
If the indicator lig ht and the message ap pear,
a dd engine o il i mm edi ate ly
¢page 193.
;::; Ill Add oil, max XX XX l. You may cont. driv .
0
~ When the symbol II and driver message appea r, ,....,
~ add the amount of oi l appea ring in the display at
:;;: the next opportunity
¢ page 193. ,....,
Instruments and ind icator lights
-L Eng ine cooling system
A malfunction in the engine cooling system must
be repaired as soon as possible .
• Turn off engine and check coolant level
If the indicator light turns on and the message
appea rs, the coo lant tempe rat ure is too high o r
t h e coo lant leve l is too low.
~ Pull off the ro ad.
~ Stop the vehicle.
~ Tur noff th e engine.
~ Check coolant leve l ¢ page 19 7 .
~ Add coo lant if necessary¢ page 198 .
~ Continue dr iv ing only afte r the e ngine coolant
warni ng/ indicator light goes out .
~ Contact your authorized Audi dealer for assis-
t ance if necessa ry.
If the engi ne coo lant level is correct , then t he ra
dia to r f an may be the cause of t he mal func tion .
• Coolant temperature! Let engine run with
vehicle stationary
If the indicator lig ht tur ns on and the messa ge
appea rs, let the engine run a t idle for a few mi
nutes to c ool down.
A WARNING
-- If yo ur vehicle should break down for me
cha nica l o r ot her reasons, park at a safe dis
t ance from mov ing t raff ic, t urn off t he e n
g in e a nd turn on the haz ard warning lights
¢ p age 46, Em ergency fla she rs.
- N ever open t he hood if you see o r hear
s te am or coo lant esca p in g fr om th e engine
co mpartm ent - you ris k being scald ed . W ait
un til yo u can no longe r see or hear steam or
coo lant escapin g.
- T he engi ne compart ment of an y vehicl e is a
d anger ous are a. B efore y ou perfo rm any
wo rk in the eng ine com partment, t urn of
the eng ine a nd a llow it to cool. Follow t he
warn ing stickers
¢page 191.
(D Note
Do not con tinue dr iv in g if the . symbol i llu-
minates. The re is a malf u nction in the engine
IJi,,,
17
Page 22 of 264
Instruments and indicator lights
(0) Worn brake pads
EiJ Brake pads!
If the warn ing light illum inates, immed iate ly
contact your authorized A ud i dealer o r qualified
wo rkshop to have all brake pads inspected. O n
USA models the wa rni ng lig ht
EiJ comes on to
gethe r wi th the war ning l igh t
1111 . Both sets of
b rake pads on an ax le m ust always be rep lace d at
the same time .
A WARNING
Driv ing with bad bra kes can ca use a co llision
and ser ious personal in jury.
- If the wa rning light
EiJ and the warning
light
11111 ) w ith the message Brake pads !
comes on in the instrument cl uster display,
i mmediately contact your author ized Audi
dealer or qualified workshop to have all
bra ke pads checked o r rep laced if necessary.
EPC Electronic power control
This warning/indicator light monitors the elec
tronic power control .
-
The~ warni ng/indicator light (Electronic Powe r
Control) ill uminates when you switch the ign ition
on as a function check.
(D} Tips
If this wa rning/in dicator light ill uminates
wh ile you are driving, then there is a mal func
tion in the eng ine electron ics. Have the ma l
function corrected as soon as possib le by yo ur
author ized A udi dealer or a qualified repair fa
cility .
0 Malfunction Indicator Lamp (MIL)
The Malfunc tion Ind ica tor Lam p (M IL) is part of
the On-Boa rd Di ag nosti c (O BD II) system. The
symbo l
('4 lights up whe n the ignition is swi tch
e d on and wi ll turn off after the engine has sta rt·
e d and has sett led at a constant idle speed . This
i n dicates that the MIL is working p roperly.
l) - : USA mode ls onl y
20
The wa rning lig ht ill uminates w hen the re is a
malfunction in the engine electronic system.
Contact yo ur aut ho rized Aud i dea le r and have the
malfunction corrected .
An impro per ly closed fue l filler cap may also
ca use the MIL light to illuminate ¢
page 188 .
For more info rm ation c::> page 29 .
!?) Engine speed limitation
App lies to vehicles : wi th engine speed limitatio n
lfl Do not exceed max. engine speed of XXXX
rpm
The lfl symbo l illu min ates when the re is an en
gine co ntro l ma lf u nct ion. The~ indica tor ligh t
in the instrument clus ter also illum ina tes . T he
engine spee d is limited to the s peed displayed in
the d river info rmation system. Keep in mind t hat
the engine speed w ill not exceed the value dis
played in the driver information system, for ex
amp le w hen downshifting.
D rive to your authorized A udi dealer immediate ly
to have the mal function cor rected .
~~. Engine oil sensor
• Oil level! Sensor defective
If the symbol illuminates, contact your author
i zed Audi dealer and have the oil sensor inspect
ed . Until yo u have this done, chec k the oi l level
each time you refuel just to be on the safe side
¢ page 195.
Bu Tank system
Ii] Please refuel
If the indicato r light turns on for the first time
and t he message appea rs, the re are about
2.1 -2.4 gallons (7 • 9 lite rs) of fuel left in the
ta nk. Time to refuel ¢
page 188 .
Ii] Fuel tank system malfunct ion! Contact deal -
er ..,.
Page 25 of 264
,-1 N
0 1-CX)
rl I.Cl U"I
,-1 I.Cl ......
Driver information
system
Introduction
The Driver information display inside the instru
ment cluster provides you, the driver, with im
portant information.
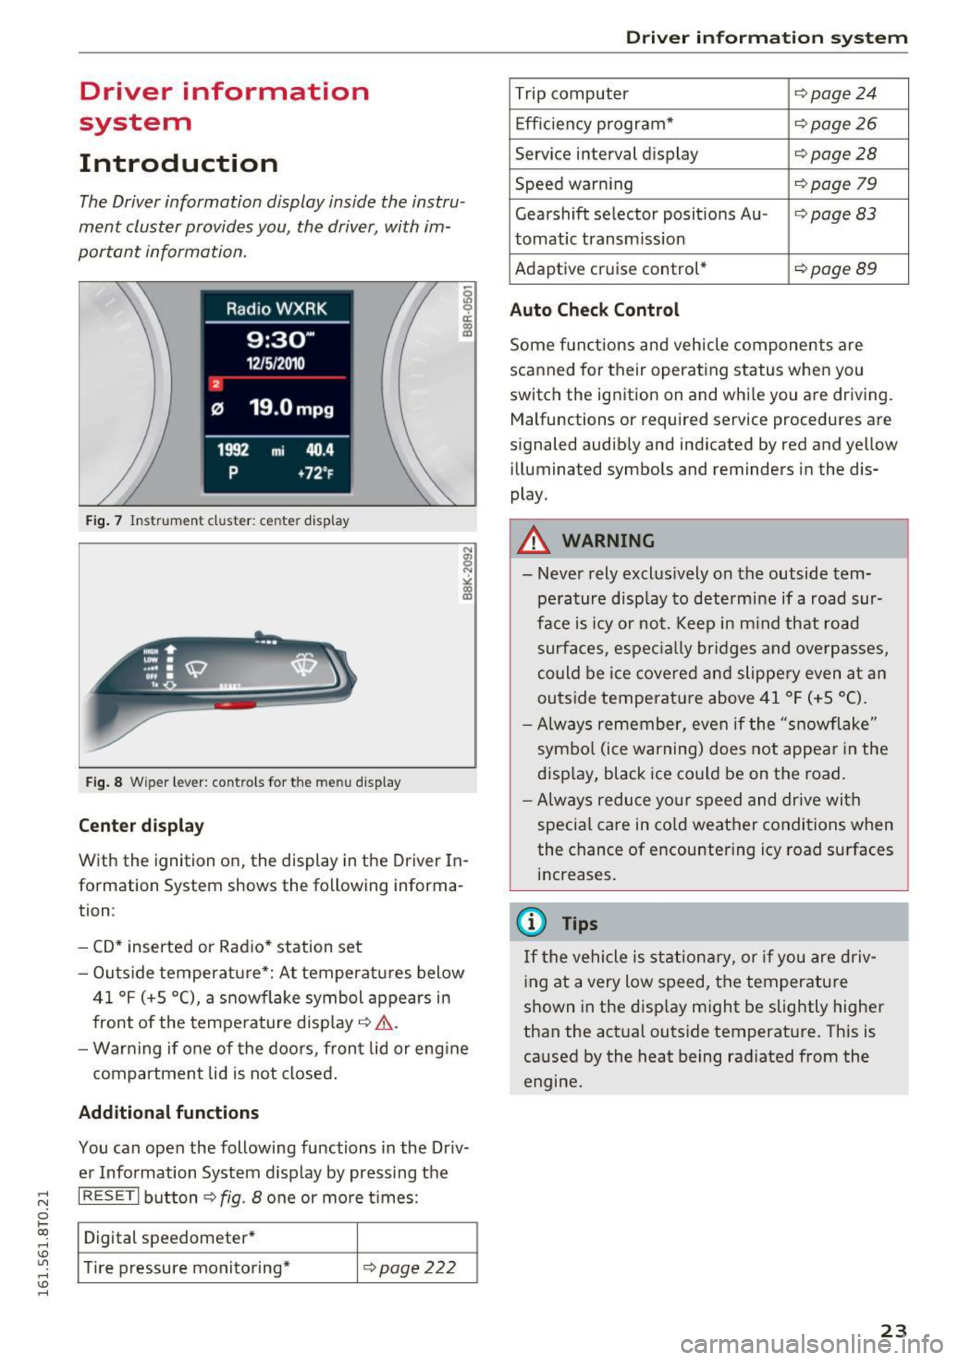
Fig. 7 Instrument cluster: ce nter display
Fig. 8 Wipe r lever: contro ls for the menu display
Center display
With the ignition on, the display in th e Driver In
formation System shows the following informa
tion :
- CD* inserted or Radio* station set
- Outs ide temperature*: At temperatures below
41 °f (+S
0
(), a snowflake symbol appears in
front of the temperature display¢ ,1,. .
- Warning if one of the doors, front lid or engine
compartment lid is not closed.
Additional functions
You can open the following functions in the Driv
er Information System display by pressing the
I RESETI button¢ fig. 8 one or more t imes :
Digital speedometer*
Tire pressure monitoring*
¢pag e222
Driver in forma tion system
Trip computer ¢page24
Efficiency program* ¢page26
Service interval display ¢page28
Speed warning ¢page 79
Gearshift selector posit ions Au -i=>page83
tomatic transm ission
Adaptive cruise control*
¢ page89
Auto Check Control
Some functions and vehicle components are
scanned for their operating status when you
switch the ignition on and while you are driving. Malfunctions or required service procedures are
signaled audibly and indicated by red and yellow
illum inated symbols and reminders in the dis
play.
A WARNING
--
- Never rely exclus ively on the outside tem
pe rature display to determine if a road sur
face is icy or not. Keep in m ind that road
surfaces, especially bridges and overpasses,
could be ice covered and slippery even at an
outside temperat ure above 41 °f (+S °C).
- Always remember, even if the "snowflake"
symbol (ice warning) does not appear in the
display, black ice could be on the road.
- Always reduce your speed and dr ive with
specia l care in cold weather conditions when
the chance of encountering icy road surfaces
increases.
(j) Tips
If the vehicle is stationary, or if you are driv
ing at a very low speed, the temperature
shown in the disp lay might be slightly higher
than the actual outside temperature. This is
caused by the heat being radiated from the
engine.
23
Page 74 of 264
Driving
Driving
Steering
Manually adjustable steering wheel
The steering wheel position is fully adjustable up
and down and forward and back .
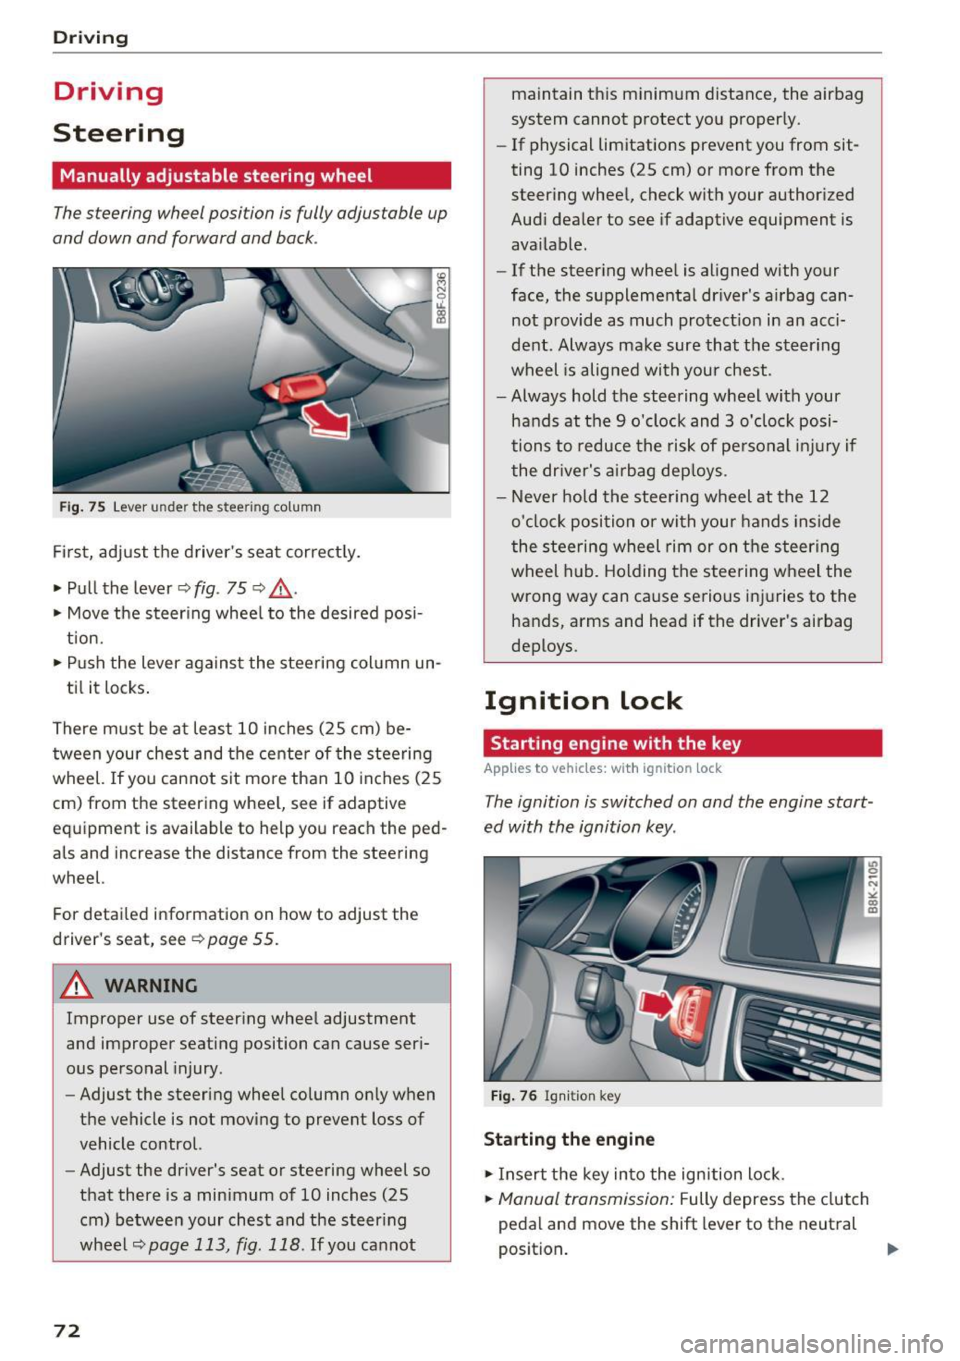
Fig. 75 Lever under the steering column
First, adjust the driver's seat correctly.
• Pull the lever¢
fig. 75 ¢ .&_ .
• Move the steering wheel to the desired posi
tion.
• Push the lever against the steering column un-
til it locks.
There must be at least 10 inches (25 cm) be tween your chest and the center of the steering
wheel. If you cannot sit more than 10 inches (25
cm) from the steering wheel, see if adaptive
equipment is available to help you reach the ped
als and increase the distance from the steering
wheel.
For detailed information on how to adjust the
driver's seat, see
¢page 55.
A WARNING
Improper use of steering wheel adjustment
and improper seating position can cause seri
ous personal injury.
- Adjust the steering wheel column only when
the vehicle is not moving to prevent loss of
vehicle control.
- Adjust the driver's seat or steering wheel so
that there is a minimum of 10 inches (25
cm) between your chest and the steering
wheel
¢page 113, fig. 118 . If you cannot
72
maintain this minimum distance, the airbag
system cannot protect you properly.
- If physical limitations prevent you from sit
ting 10 inches (25 cm) or more from the
steering wheel, check with your authorized
Audi dealer to see if adaptive equipment is
available.
- If the steering wheel is aligned with your
face, the supplemental driver's airbag can
not provide as much protection in an acci
dent. Always make sure that the steering
wheel is aligned with your chest.
- Always hold the steering wheel with your
hands at the 9 o'clock and 3 o'clock posi
tions to reduce the risk of personal injury if
the driver's airbag deploys.
- Never hold the steering wheel at the 12
o'clock position or with your hands inside
the steering wheel rim or on the steering
wheel hub. Holding the steering wheel the
wrong way can cause serious injuries to the
hands, arms and head if the driver's airbag
deploys.
Ignition lock
Starting engine with the key
Applies to vehicles: wit h ignition lock
The ignition is switched on and the engine start
ed with the ignition key .
Fig. 76 Ignition key
Starting the engine
• Insert the key into the ignition lock.
• Manual transmission: Fully depress the clutch
pedal and move the shift lever to the neutral
position. ..,.
Page 87 of 264
.... N
0 I-co ....
~ Remove your foot from the brake pedal and ac
ce lerate .
Stopp ing tempo raril y
~ Keep the veh icle stat ionary using t he b raking
peda l, for example at traffic lights.
~ Do not press the accelerator pedal when doing
this.
~ To prevent the vehicle from rolling when you
start driving, set the park ing brake when stop
ping on steep inclines¢&, .
~ The parking brake w ill release automatically
and the vehicle w ill start moving once you press
the accelerator pedal.
Stopping /parking
If the selector lever is not in the P position when
you open the driver's door, the vehicle could roll. The message
Tran smission: Car may roll! Shift
to park! appears.
~ Press and hold the brake pedal unt il the vehicle
has come to a complete stop .
~ Apply the parking brake ¢ page 78, Parking .
~ Select the P selector leve r pos ition ¢ ,&.
Stopp ing on an incline
~ Always press the brake pedal to hold the vehi
cle in place and prevent it from "rolling back"
¢ &, . Do
not try to prevent the vehicle from
"ro lling back " when a gear is engaged by in
c reasing the engi ne speed ¢0 .
Starting on an incline
~ Activate the parking brake .
~ With the driving gear selected, press the accel
erator peda l carefully. The parking brake will
re lease automatically if your seat belt is fas
tened .
Unde r certain c ircumstances, such as dr iv ing in
the mountains, it may be useful to switch tempo rari ly to the manua l shift program in orde r to ad
just t he gears to the d rivi ng conditions by hand
¢ page 86.
On slopes, activate the parking brake first and
then move the selector lever to the P pos it ion.
Autom atic tran sm iss ion
This prevents too m uch stress from being placed
on the locking mechanism .
A WARNING ,-
-The vehicle can also ro ll when the eng ine is
stopped.
- Unintended vehicle movement can ca use se
rio us injury .
- Never leave your vehicle with the engine
r u nning while in gear. If you must leave
your veh icle when the engine is running, ac
tivate the pa rking brake and move the selec
tor lever to P .
- Power is still transmitted to the wheels
when the engine is runn ing at idle . To pre
vent the vehicle from "creepi ng", you must
keep your foot on the b rake when the en
g ine is r un ning and the selector lever is in D/
Sor R or "ti ptroni c" mode is selected.
- D o not press the acce le rator peda l when
cha nging t he se lecto r lever position while
t he vehicle is sta tionary and the engine is
r u nning .
- Never s hift into R or P wh ile driving.
- Before d riving down a s teep slope, reduce
your speed a nd s hift into a lowe r gear w it h
" t i pt ronic".
- Do not ride the brakes or press the brake
pedal too often o r too long when dr iv ing
down a hill. Const ant brak ing c auses t he
brakes to overheat and s ubstant ially re
duces bra king performance, increases brak
ing distance or causes comp lete fai lure of
the brake system.
- To prevent the vehicle from rol ling bac k
when stopp ing on inclines, always hold it in
p lace with the brake peda l or park ing brake.
- Never hold the vehicle on an incline with a
slipping clutch. The clutch opens a utomati
cally when it becomes too hot from the
overload. An ind icator lamp@] illuminates
a nd a driver message appears
¢ page 87
when the clu tch is over loaded .
- If the engine must rema in running, never
have any d riving position engaged when
checking unde r the hood . Make s ure these
lecto r lever has se cu rely engage d and is
lo ck ed in P with the par kin g b rake set
85
Page 174 of 264
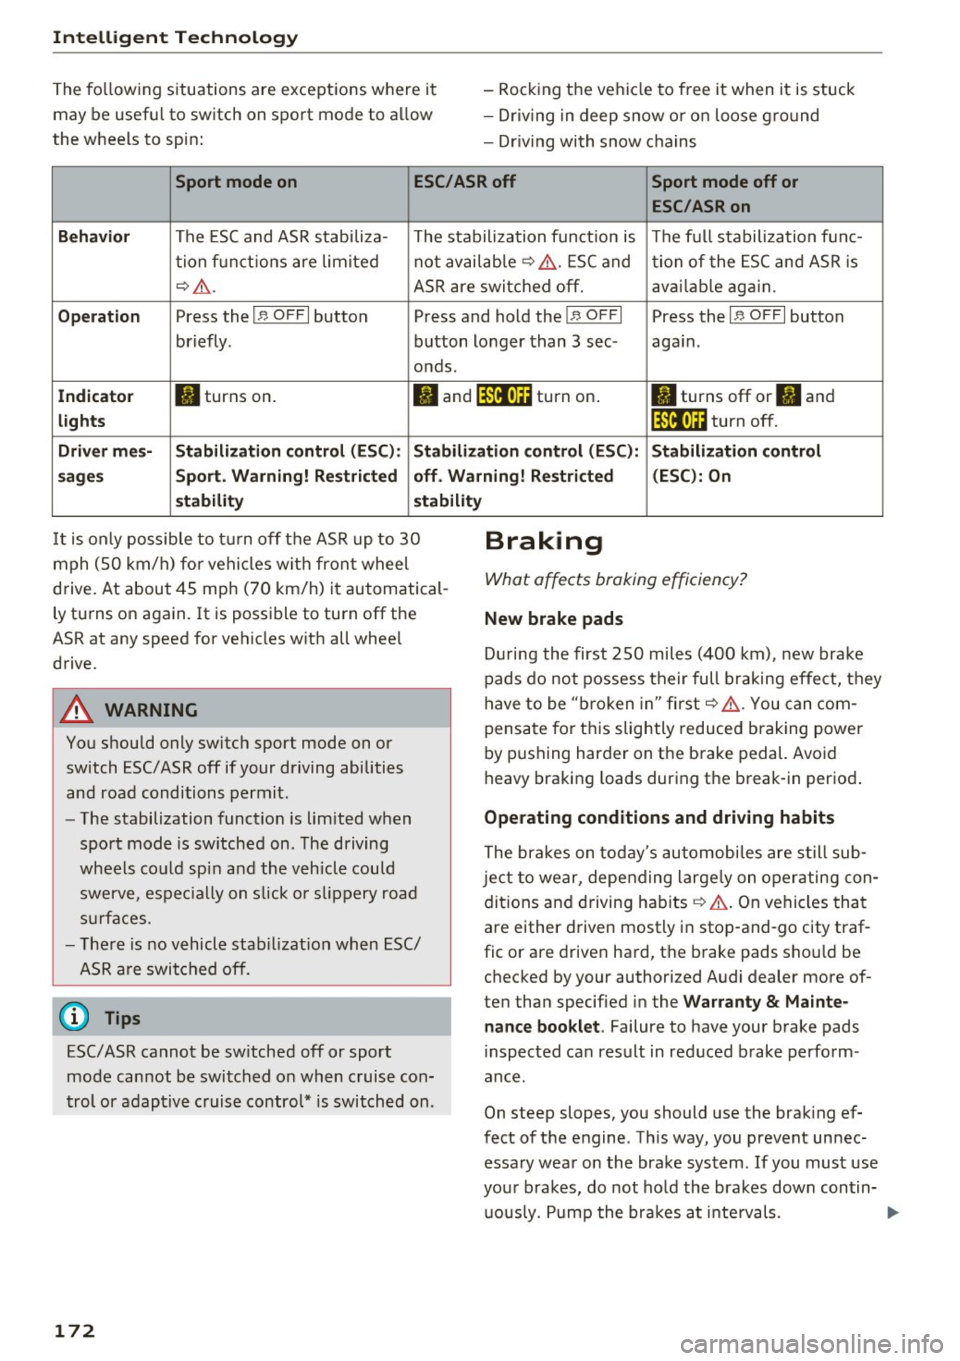
Intelligent Technology
The fo llowing s ituations are exceptions where it
may be useful to switch on sport mod e to a llow
the wheels to sp in : -
Rock ing the vehicle to free it when it is stuck
- Dr iv ing in deep snow or o n loose g ro und
- Dr iving with snow chains
Sport mode on ESC/ASR off Sport mode off or
ESC/ASRon
Beha vior
The ESC and ASR stabiliza- The stabilization funct ion is The f ull stabilization fun c-
t ion f un ct ions are lim ited not availab
le ¢ ,&. . ESC and
tion of the ESC and ASR is
¢ .&. .
ASR are switched off. ava ilab le aga in.
Op era tion Press the I 1> OFF I button Press and hold the !1> O FFI Press the I,, OFF I button
briefly . button longer than 3 sec- again.
onds .
In dicato r II turns on.
• and lf'lii•li~ turn on . II turns off or II and
light s lf'lii•l~~ turn off.
Driv er m es- Stabilization contr ol (E S C): Stabilization control (ESC ): Stabilization control
s age s Sport. Warning! Restri cted off . Warning ! Re stri cted (ESC
): On
s t a bilit y stabilit y
It is only possible to t urn off the ASR up to 30
mph (SO km/h) fo r vehicles w ith front wheel
d rive. At about 45 mph (70 km/h) it automatical
ly tu rns on again. It is possible to turn off the
ASR at any speed for vehicles w ith all whee l
drive .
A WARNING
You should only switch sport mode on or
switch ESC/ASR off if your driving abilities
and road conditions permit .
-
-The stabilization function is limited when
sport mode is sw itched on . The driving
wheels co uld spi n and the vehicle could
swerve , espec ia lly on s lick o r slippery road
s ur faces.
- The re is no vehicle stab ilizat ion when ESC/
ASR a re switched off.
(D Tips
ESC/ASR cannot be sw itched off or sport
mode cannot be switched on when cruise co n
t rol or adaptive cruise control* is switched on .
172
Braking
What affects braking efficiency?
New brake pads
D ur ing the first 250 miles (400 km) , new brake
pads do not possess their full b raking effe ct, they
have to be "b roken in" first ¢,&. . You can com
pensa te for th is slightly reduced b raking power
by p ushing harder on the brake pedal. Avo id
heavy braking loads dur ing the break-in period .
Operating conditions and driving habits
The brakes on today's automobi les are s till sub
je ct to wear, depending large ly on operating con
dit ions and driving habits ¢.&. . On vehi cles that
a re either driven mostly i n stop-and-go city traf
fic or are drive n hard, the b rake pads sho uld be
checked by your authorized A udi dealer more of
ten than specified in the
Wa rrant y & Mainte
nance book let .
Failure to have your brake pads
i nspected can result in reduced brake perform
ance .
On steep slopes, you should use the brak ing ef
fect of the engine . Th is way, you prevent unnec
essary wear on the brake system . If you must use
your brakes, do not ho ld the bra kes down contin
u ously. P ump the bra kes at inte rvals.