door control AUDI A6 2005 C5 / 2.G Electrics System Training Manual
[x] Cancel search | Manufacturer: AUDI, Model Year: 2005, Model line: A6, Model: AUDI A6 2005 C5 / 2.GPages: 92, PDF Size: 4.42 MB
Page 25 of 92
Downloaded from www.Manualslib.com manuals search engine 27
1 The driver puts his/her hand into the finger well
of the door handle. The sensor for outer door
handle contact G415 sends the information
"Finger in finger well" to the antenna read-in unit
for keyless access authorisation J723.
2 The antenna read-in unit sends an alarm signal
to the vehicle key via the antenna for access and
start authorisation R134.
3 The antenna read-in unit sends a signal to the
vehicle key via all the antennae for access and
start authorisation.
4 Based on the signals, the vehicle key determines
the position on the vehicle and sends
information to the antenna for central locking
and anti-theft warning system R47.
5 The antenna for central locking and anti-theft
warning system receives the information.
The information is forwarded by the switch for
access and start authorisation E415 to the
control unit for access and start
authorisation J518, where it is evaluated.6 The control unit for access and start
authorisation sends the information "Opening
vehicle" on to the central control unit for the
convenience system J393 and to the door control
unit, whose door handle initiated the key query.
7 The door control unit, which received the
instruction from the control unit for access and
start authorisation, activates the lock unit, which
unlocks the door.
8 The central control unit for the convenience
system J393 sends the information "Opening
vehicle – Advanced Key" to CAN Convenience.
9 The normal unlocking process takes place.
This involves disarming, unlocking,
acknowledgement flashing and switching on of
the interior light. In addition to
acknowledgement flashing, the control unit for
access and start authorisation also sends the
lock status to the vehicle key via the switch for
access and start authorisation and the antenna
for central locking and anti-theft warning
system R47.
Page 52 of 92
Downloaded from www.Manualslib.com manuals search engine 54
The tilt sensor for the anti-theft warning system is
integrated directly in control unit 2 for on-board
power supply J520 in the new Audi A6 ‘05.
The fluid-filled sensor registers changes in the
vehicle tilt both transversely and longitudinally,
thereby preventing incorrect triggering as a result of
shaking through viscous fluid and electronic delay.
The current tilt values can be read out using
measured-value blocks.
Diagnosis
– Measured-value blocks
Measured-value blocks are available for the
following functions:
– Servotronic
– Sliding roof
– Tilt angle
–Actuator test
Checks can be carried out for the following
functions, depending on the version:
– Glove compartment release
– Servotronic valve
– Sliding roof activation (can be measured
using a multimeter on the on-board power
supply control unit, sliding roof does not
open, however, if it is not released by the
central control unit for the convenience
system)
–Coding
The High-Line version of control unit 2 for
on-board power supply J520 must be coded for
the following functions:
– Tilt sensor (with or without)
– Sliding roof (with or without)
Convenience electrics
Note
The tilt sensor function can be switched off
using a button in the driver’s door panel.
Reference
For further information on the tilt sensor
function, please refer to the SSP 254,
Audi A4 ‘01 – Technology.
Tilt sensor for anti-theft warning system
Page 54 of 92
Downloaded from www.Manualslib.com manuals search engine 56
326_121
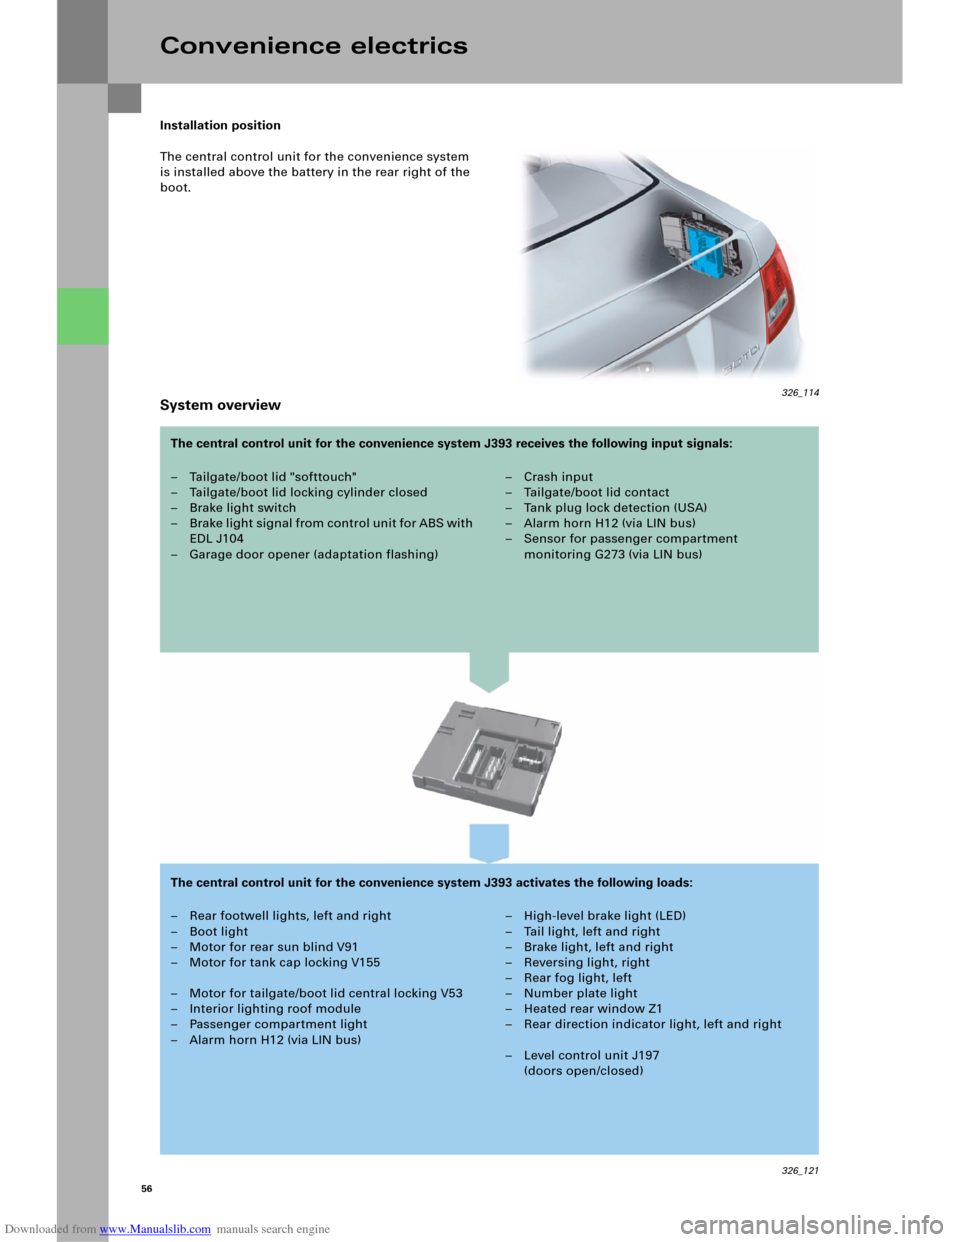
Installation position
The central control unit for the convenience system
is installed above the battery in the rear right of the
boot.
System overview
Convenience electrics
– Tailgate/boot lid "softtouch"
– Tailgate/boot lid locking cylinder closed
– Brake light switch
– B rake li ght signal from control u ni t fo r ABS with
EDL J104
– Garage door opener (adaptation flashing)– Crash input
– Tailgate/boot lid contact
–Tank plug lock detection (USA)
– Alarm horn H12 (via LIN bus)
– Sensor for passenger compartment
monitoring G273 (via LIN bus)
– Rear footwell lights, left and right
– Boot light
– Motor for rear sun blind V91
– Motor for tank cap locking V155
– Motor for tailgate/boot lid central locking V53
– Interior lighting roof module
– Passenger compartment light
– Alarm horn H12 (via LIN bus)– High-level brake light (LED)
– Tail light, left and right
–Brake light, left and right
– Reversing light, right
–Rear fog light, left
– Number plate light
– Heated rear window Z1
– Rear direction indicator light, left and right
– Level control unit J197
(doors open/closed) The central control unit for the convenience system J393 receives the following input signals:
The central control unit for the convenience system J393 activates the following loads:
326_114
Page 55 of 92

Downloaded from www.Manualslib.com manuals search engine 57
Interior lighting control
Standard equipment function
The standard function includes activating the inside
light in the roof lining, the front footwell lights, the
glove compartment light and the boot light.
The central control unit for the convenience
system J393 activates the inside light in the roof
lining, the boot light and the glove compartment
light directly via its own outputs and inputs. The
control unit for on-board power supply J519
activates the front footwell lights via CAN messages
from the central control unit for the convenience
system J393.
Additional equipment function (light package)
The light package additional equipment also
includes a door contour light in every door as well
as footwell lights (front and rear), which are based
on LED technology. The door contour lighting is
activated by the door control unit, which receives
the CAN messages for this from the central control
unit for the convenience system J393.
Page 57 of 92
Downloaded from www.Manualslib.com manuals search engine 59
326_120
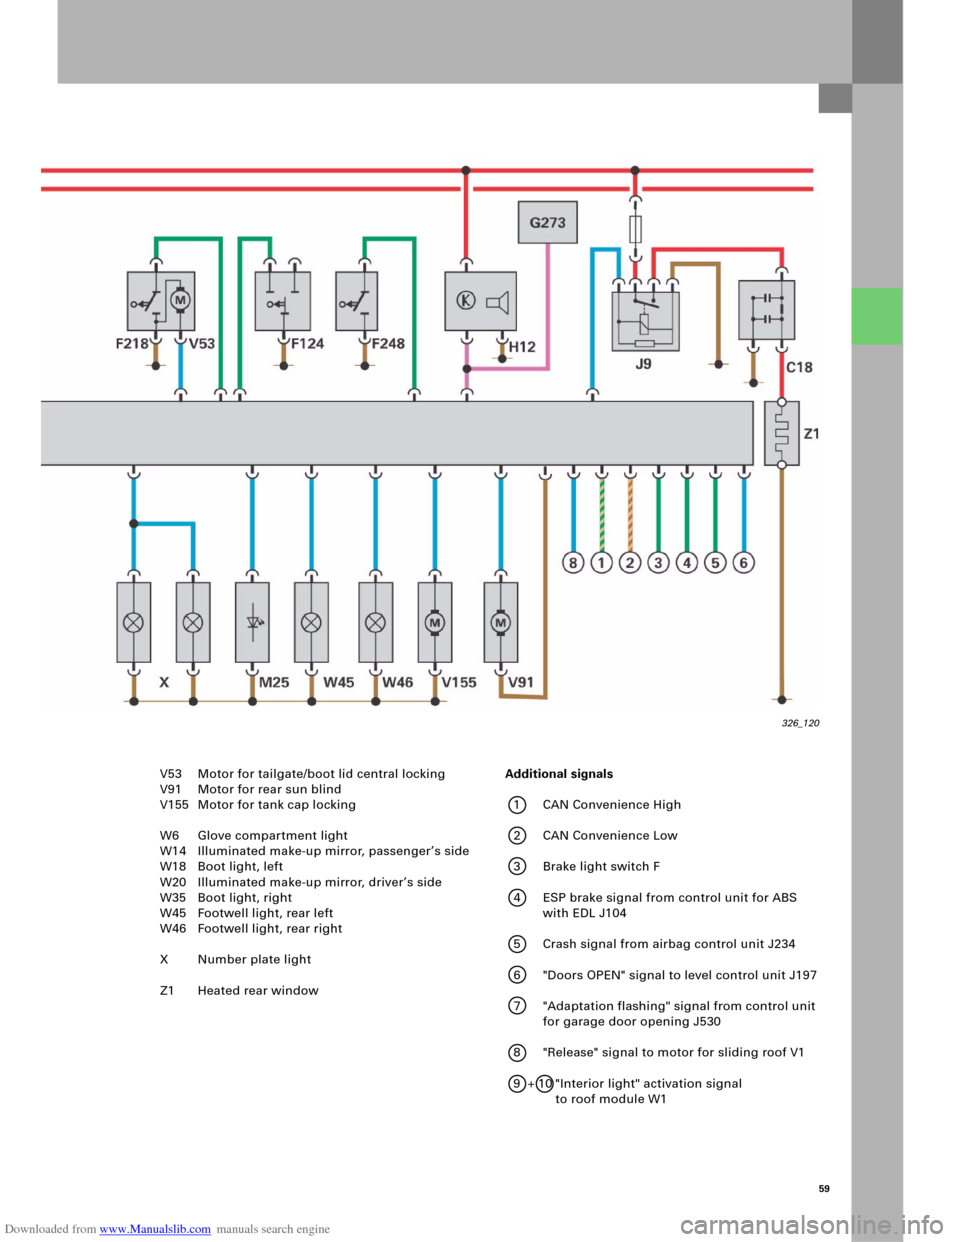
V53 Motor for tailgate/boot lid central locking
V91 Motor for rear sun blind
V155 Motor for tank cap locking
W6 Glove compartment light
W14 Illuminated make-up mirror, passenger’s side
W18 Boot light, left
W20 Illuminated make-up mirror, driver’s side
W35 Boot light, right
W45 Footwell light, rear left
W46 Footwell light, rear right
X Number plate light
Z1 Heated rear window Additional signals
1CAN Convenience High
2CAN Convenience Low
3 Brake light switch F
4 ESP brake signal from control unit for ABS
with EDL J104
5 Crash signal from airbag control unit J234
6 "Doors OPEN" signal to level control unit J197
7 "Adaptation flashing" signal from control unit
for garage door opening J530
8 "Release" signal to motor for sliding roof V1
9 + 10 "Interior light" activation signal
to roof module W1
Page 58 of 92
Downloaded from www.Manualslib.com manuals search engine 60
Diagnosis
The central control unit for convenience
system, J393, has the usual diagnostic functions,
such as read fault memory, read measured value
blocks, adaptation, coding, as well as selective and
sequential actuator test at its disposal.
Actuator test
The selective actuator test initiated by the diagnosis
tester can be used to check the following actuators:
– Indicator light for safe central locking K133
(in door rim)
– Lock central locking signal (once)
– Activate safe locking for doors (once)
– Unlock central locking signal
– Lock filler flap
– Unlock filler flap
– Lamp for left brake light M9
– Lamp for right brake light M10
– Lamp for high-level brake light M25
– Lamps for tail light, left
– Lamp for parking light, left M43
– Lamps for tail light, right
– Lamp for parking light, right M44
– Lamp for reversing light, left M16
– Lamp for reversing light, right M17
– Lamp for direction indicator light, rear left M6
– Lamp for direction indicator light, rear right M8
– Lamp for rear fog light, left L46
– Lamp for rear fog light, right L47
Coding
This diagnostic option can be used to perform
coding, for example, for these functions:
– Anti-theft warning system
– Central locking (normal/selective)
–Tilt sensor
– Passenger compartment sensor
– Convenience function via radio
–Right-hand traffic
–Avant detection
–Rear sun blind
Convenience electrics
Note
In addition to the selective actuator test,
the diagnosis software also includes the option
of a sequential actuator test.
– Number plate light X
– Boot light W3
– Footwell light, rear left W45
– Footwell light, rear right W46
– Activation of rear lid remote unlocking
(rotary latch opens, closing aid moves up)
– Motor for rear sun blind (rear sun blind moves in
both directions)
– Signal for rear window heater activation
–Interior lighting
– Acknowledgement of anti-theft warning system
horn
–RoW/USA
–Light package
– Tank cap lock detection
– Equipment (Basic/High-Line)
–Sliding roof
– Multi-function control unit (taxi/emergency
doctor/fire brigade, installed/not installed)
Page 61 of 92

Downloaded from www.Manualslib.com manuals search engine 63
The door control units have a similar functionality to
those used in the Audi A8 ´03 and are used in the
Audi A6 ’05 with appropriately adapted functions
and actuation features.
The separate installation of the door control unit
and the power windows motor is new here.
Stand-by master function
As in the Audi A8 ´03, the door control unit on the
driver’s side J386 controls central locking if the
central control unit for the convenience system
J393 fails. If there is no co mmunic atio n b etw een the
driver’s-side door control unit J386 and the central
control unit for the convenience system J393, the
other door control units evaluate the information
from the driver’s-side door control unit directly.
In this case, it is no longer possible to open the
vehicle via remote control or Advanced Key.
Diagnosis
The address words 42, 52, 62 and 72 "Door
electronics" offer diagnostic options, such as
measured-block reading, coding or the selective /
sequential actuator test (the selective actuator test
is used for the targeted activation of actuators).
Versi on s
Low-Line and High-Line versions of the door control
units are used.
The High-Line version includes the following
functions, for example:
– Advanced Key
– Memory switch block
– Ambient lighting
–Area lighting
–Folding mirrors
– Automatic anti-dazzle mirror
– Electric child-lock
Installation position of driver’s-side door control unit J386326_139
Door control units J386 - J389
326_102
Page 62 of 92

Downloaded from www.Manualslib.com manuals search engine 64
System overview
Convenience electrics
– Power windows switch
– Internal locking switch
– Actuating elements for central locking
– Actuating elements for central locking
(Safe mode)
– Outer door handle switch (optional)
– Central locking button for outer door handle
– Boot release switch E164– Switch for remote unlocking and
filler flap E204
–Child-lock button E318
– Mirror adjustment change-over switch E48
–Mirror adjustment switch E43
– Mirror adjustment switch with
folding function E168
– Switch for alarm system off E217 (optional)
– Switch for passenger compartment monitoring
(optional) E183
Additional signals for front doors
– Operator unit for memory
– Mirror position sensor
Additional loads for driver’s door
– Contact switch in lock barrel
driver’s side F241
– Central locking motors
– Central locking motors (Safe mode)
– Door warning lights
–Entry lights
– Lighting for inside door handle
– Ambient lighting for doors (optional)Additional loads for front doors
– Mirror adjustment motors
– Mirror folding motors
– Heated door mirrors
– Automatic anti-dazzle mirror
– Entry light in door mirror,
driver’s side and passenger’s side
Additional loads for rear doors
–Lamp for rear ashtray lightAdditional loads for driver’s door
– Lock status LED for passenger’s door
– Indicator light for safe central locking
– Indicator light for tilt sensor K188
(optional)
– Indicator light for passenger compartment
monitoring deactivation K162 (optional)
– Indicator light for memory SET
326_109
The door control units receive the following input signals:
The door control units activate the following loads:
Page 64 of 92

Downloaded from www.Manualslib.com manuals search engine 66
Input and output signals
(driver’s seat)
Convenience electrics
Function
The control unit for seat adjustment powers the
positioning motors in the seat directly using its load
outputs. The position detection function of the
positioning motors is implemented using hall
sensors. The driver’s-side door control unit reads in
switch information from the operator unit for
memory, driver’s seat E97 as voltage-coded
information and sends this via CAN Convenience to
the control unit for seat adjustment with
steering-column adjustment memory J136.
The control unit for seat adjustment with
steering-column adjustment memory reads in
information from the switch for fore-and-aft and
height adjustment, driver’s seat E61, the switch for
backrest adjustment, driver’s seat E96 and the
switch for tilt adjustment, driver’s seat E222 directly.
The driver’s-side door control unit J386 reads in the
button information "Seat memory emergency-Off"
and supplies this discretely as well as in the form of
a CAN Convenience message to the control unit for
seat adjustment with steering-column adjustment
memory J136. Comfort functions, such as seat
symmetry positioning and comfort side view as well
as radio code allocation to a memory location, are
implemented using settings in the Multimedia
Interface (MMI).
Data bus diagnosis interface J533
Door control unit, driver's side J386Switch for fore-and-aft and height
adjustment, driver’s seat E61
Switch for backrest adjustment,
driver’s seat E96
Switch for tilt adjustment,
driver’s seat E222
Control unit for seat adjustment with
steering-column adjustment memory
J136
Operator unit for memory,
driver’s seat E97Discrete lead for
"Seat memory emergency-Off" signalPositioning motors
326_117
Page 65 of 92

Downloaded from www.Manualslib.com manuals search engine 67
Seat symmetry positioning
The "Symmetry positioning, driver’s seat/
passenger’s seat" option, which is available in the
MMI, can be used to move the passenger’s seat into
a symmetrical position in relation to the driver’s
seat. The MMI sends a corresponding instruction to
the driver’s seat control unit via the
CAN Convenience bus. The control unit then sends
the current seat position and a control instruction to
the passenger’s seat control unit, which positions
its motors accordingly.
Comfort side view
The "Comfort side view" option moves the
passenger’s seat into a position that hides the
vehicle’s B-pillar, thereby ensuring that the driver
has the best possible view out of the vehicle.
The function can be selected via the MMI, where the
signal is transmitted in the same way as for the
"Seat symmetry positioning" function.
Memory retrieval
Radio code memory
Memory settings are retrieved using the radio code. Personal button memory
Settings are retrieved and stored using the memory
buttons in the door panel.
The stored memory settings can be retrieved in
the following ways.
326_138
326_116