instrument cluster AUDI A6 2014 User Guide
[x] Cancel search | Manufacturer: AUDI, Model Year: 2014, Model line: A6, Model: AUDI A6 2014Pages: 304, PDF Size: 76.32 MB
Page 43 of 304
What to do after a malfunction
The one-touch open and close function must
be reactivated if the battery has been discon
nected.
.,. Pull and hold the power window switch until
the window is fully closed.
.,. Release the switch and then pull it again for
at least one second.
Valet parking
The valet parking feature protects the lug
gage compartment from unauthorized ac cess.
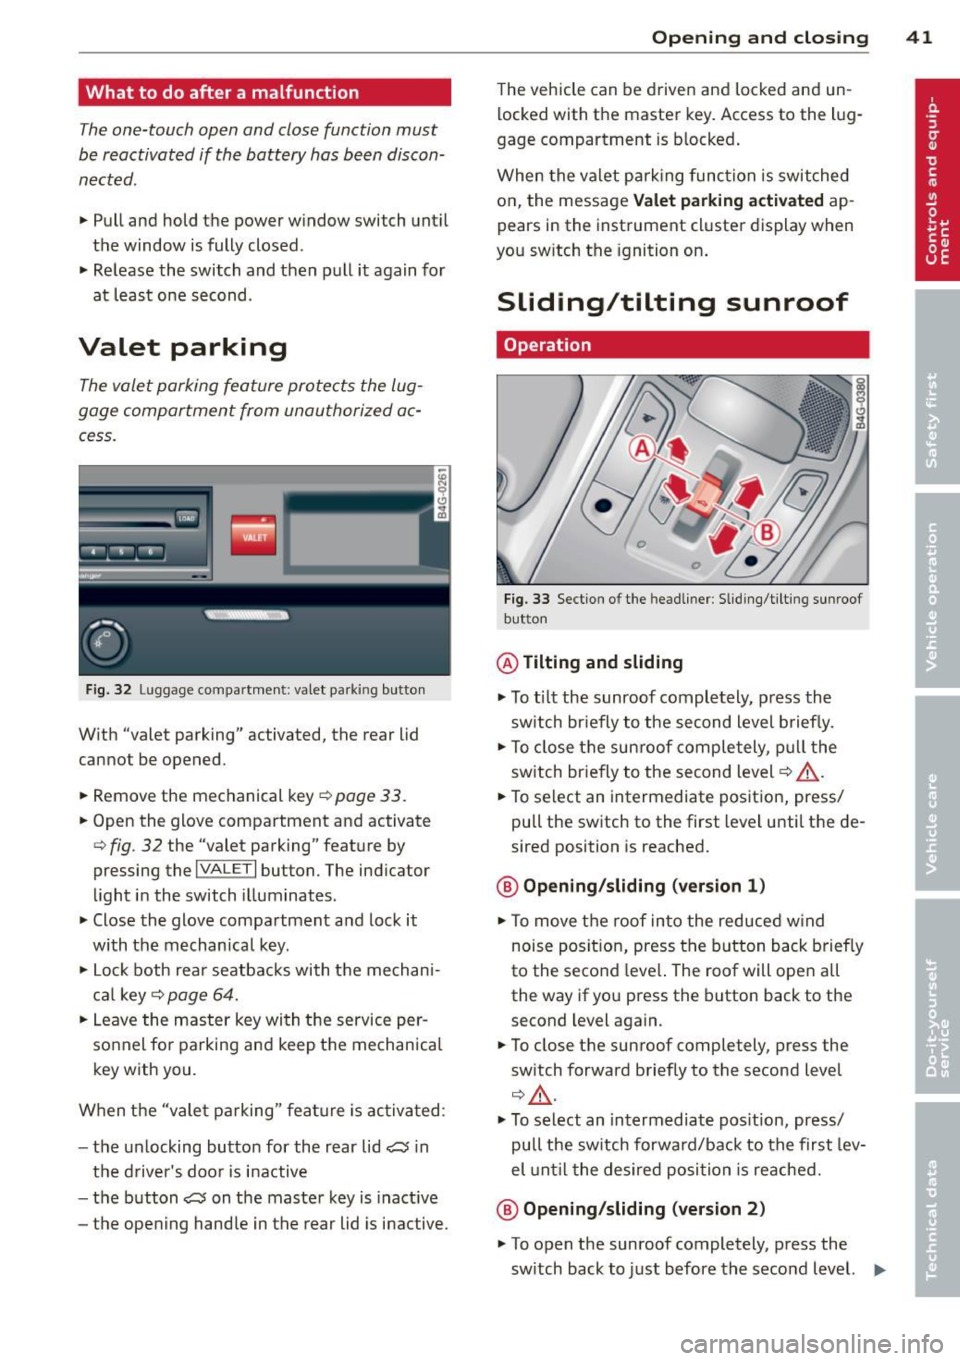
Fig. 32 Lugg age compartment: valet parking button
With "valet parking" activated, the rear lid
cannot be opened.
.,. Remove the mechanical key
¢ page 33.
.,. Open the glove compartment and activate
¢ fig . 32 the "valet parking" feature by
pressing the
I VALET I button. The indicator
light in the switch illuminates .
.,. Close the glove compartment and lock it
with the mechanical key.
.,. Lock both rear seatbacks with the mechan i
cal key ¢
page 64.
.,. Leave the master key with the service per
sonnel for parking and keep the mechanical
key with you.
When the "vale t parking" feature is activated :
- the un locking button for the rear lid
a in
the driver's door is inactive
- the button
a on the master key is inactive
- the opening handle in the rear lid is inactive.
Opening and closing 41
The vehicle can be driven and locked and un
locked with the master key. Access to the l ug
gage compartment is blocked.
When the valet park ing function is switched
on, the message Valet parking activated ap
pears in the instrument cluster display when
you sw itch the ignition on .
Sliding/tilting sunroof
Operation
Fig. 33 Section of the headliner: Sliding/ti lting sunroof
button
@ Tilting and sliding
.,. To tilt the sunroof completely, p ress the
sw itch briefly to the second level briefly.
.,. To close the sunroof completely , pull the
switch briefly to the second level¢_&. .
.,. To select an intermediate position, press/
pull the switch to the first level until the de
sired position is reached.
@ Opening /sliding (version 1)
.,. To move the roof into the reduced w ind
noise posit ion, press the button back briefly
to the second leve l. The roof will open all
the way if you press the button back to the
second level again.
.,. To close the sunroof completely, press the
sw itch forward briefly to the second level
¢,&. .
.,. To select an intermediate position, press/
pull the sw itch forwa rd/back to the first lev
el until the desired posi tion is reached.
@ Opening/sliding (version 2)
.,. To open the sunroof completely, press the
sw itch back to just before the second level. .,.
Page 46 of 304
44 Clear vision
& WARNING
-Automatic headlights are only intended
to assist the driver . They do not relieve
the driver of his responsibility to check
the headlights and to turn them on man
ually according to the current light and
visibility conditions. For example, fog
cannot be detected by the light sensors.
So always switch on the headlights
io
under these weather conditions and
when driving in the dark.
- Crashes can happen when you cannot see
the road ahead and when you cannot be
seen by other motorists. Always turn on
theheadlightssothatyoucanseeahead and so that others can see your car from
the back .
- Please observe legal regulations when
using the lighting systems described .
(D Note
The rear fog lights should only be turned
on in accordance with traffic regulation, as
the lights are bright for following traffic.
{D) Tips
- The light sensor* for automatic head
light range control* is located in the rear
view mirror mount . You should therefore
not apply any stickers to the windshield
in this area in order to prevent malfunc
tions or failures .
- In the event of a light sensor malfunc
tion, the driver is notified in the instru
ment cluster display ~
page 23 .
-You will hear a warning tone if you open
the driver door when the exterior lights
are switched on.
- In cool or damp weather, the inside of
the headlights, turn signals and tail lights can fog over due to the tempera
ture difference between the inside and
outside. They will clear shortly after
switching them on. This does not affect
the service life of the lighting.
Emergency flasher
The emergency flasher makes other motorists
aware that you or your vehicle are in an emer
gency situation .
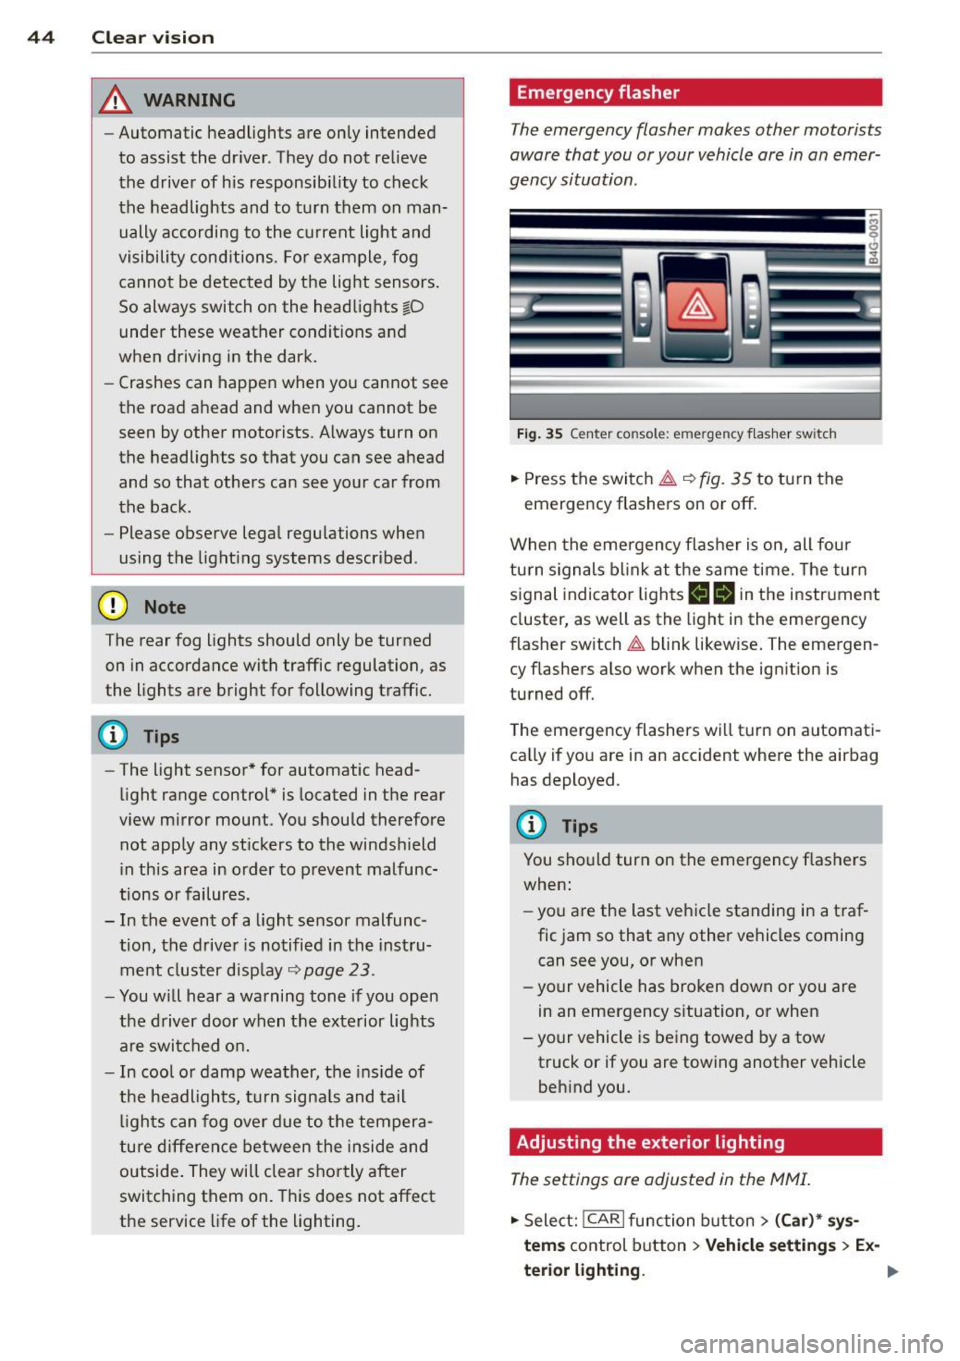
Fig. 35 Ce nte r co nso le: em erg en cy flash er sw itc h
.. Press the switch~~ fig. 35 to turn the
emergency flashers on or off.
When the emergency flasher is on, all four
turn signals blink at the same time. The turn
signal indicator lights
B Nin the instrument
cluster, as well as the light in the emergency
flasher switch
~ blink likewise. The emergen
cy flashers also work when the ignition is
turned off.
The emergency flashers will turn on automati
cally if you are in an accident where the airbag
has deployed.
@ Tips
You should turn on the emergency flashers
when:
- you are the last vehicle standing in a traf
fic jam so that any other vehicles coming
can see you, or when
- your vehicle has broken down or you are
in an emergency situation, or when
-your vehicle is being towed by a tow
truck or if you are towing another vehicle
behind you.
Adjusting the exterior lighting
The settings ore adjusted in the MMI.
.. Select: !CARI function button> (Car)* sys
tems
control button > Vehicle settings > Ex-
terior lighting.
Ill>
Page 47 of 304
Automatic headlights
You can adjust the following settings in the
Automatic headlights menu:
Headlights activation time -You can adjust if
the headlights switch on
Early, Med . or Late
according to the sensitivity of the ligh t sensor.
Audi adaptive light* -You can switch adaptive
light
On and Off.
Daytime running lights
USA models:
You can switch the dayt ime run
n ing lights
on and off .
Canada models :
The function cannot be
turned off . It is activated automatically each
time the ignition is switched on. This menu
item is shown "greyed out" .
Coming home, Leaving home
The coming home function illuminates the
area outside the vehicle when you switch the
ignition off and open the driver's door. To turn
the function on, select
Lights when leaving
car > On .
The leaving home function illuminates the
area outside the vehicle when you un lock the
vehicle. To turn the funct ion on, select
Lights
when unlocking car > On .
The coming home and leaving home functions
only operate when it is dark and the light
switch is in the
AUTO position. Clear
vision 45
Turn signals and high beam lever
The lever on the left side of the steering col
umn is used to operate the turn signals and
the high beam as well as
the headlight flash
er.
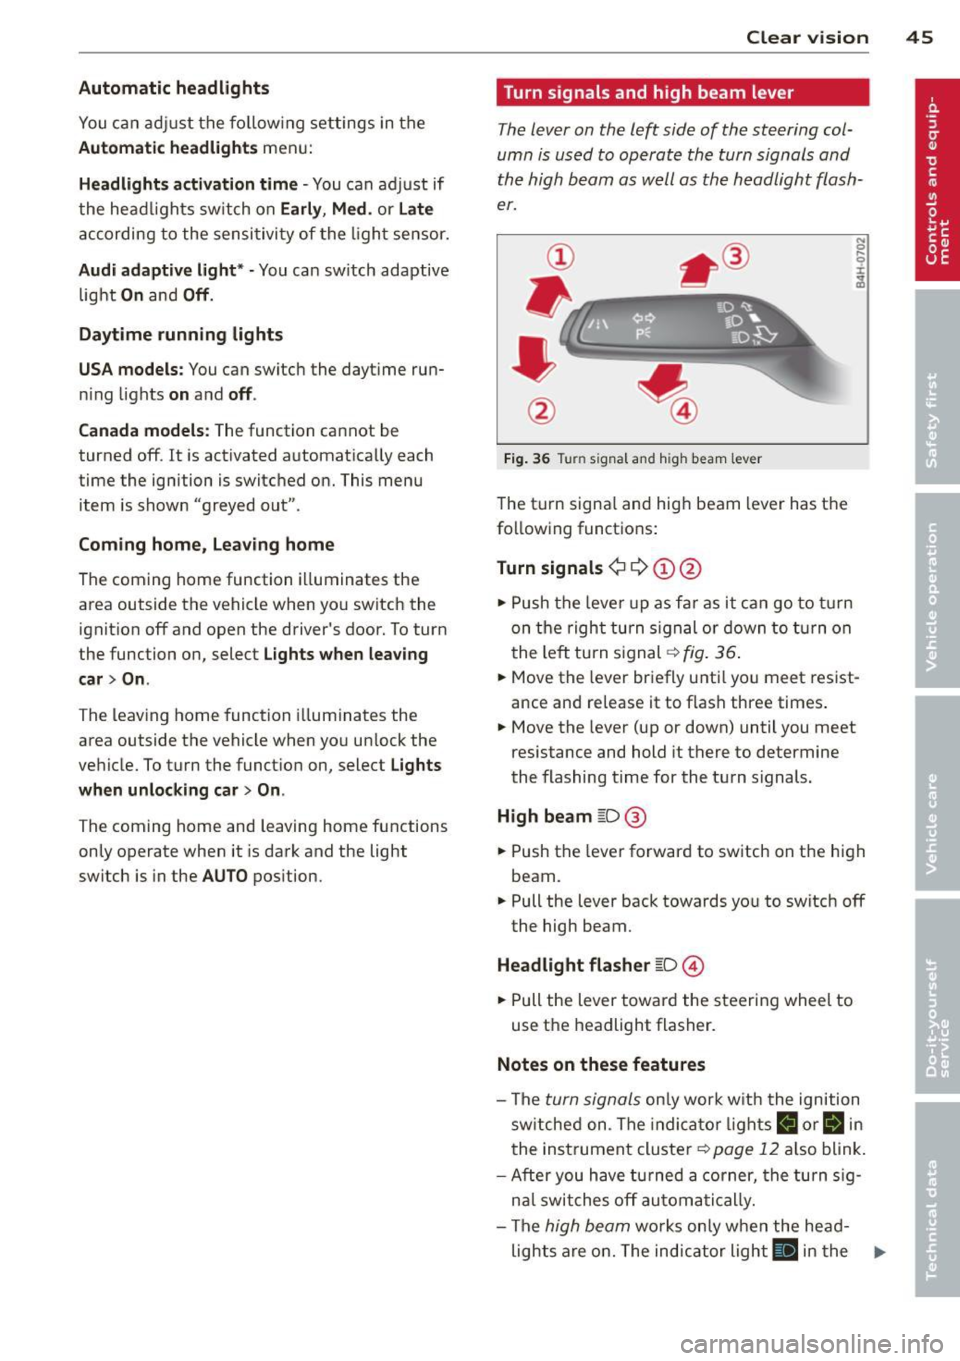
Fig. 36 Tu rn signal and high beam lever
The turn signal and high beam lever has the
following functions:
Turn signals ¢ 9 ©@
.,. Push the lever up as fa r as it can go to turn
on the right turn signa l or down to turn on
the left tu rn s ignal ¢
fig. 36.
.. 0 ....
~
... Move the lever briefly unti l you meet resist
ance and re lease it to flash three times.
.,. Move the lever (up or down) until you meet
resistance and hold it there to determine
the flashing time for the turn signals.
High beam ~D @
... Push the lever forward to switch on the high
beam .
.,. Pull the lever back towards you to switch off
the high beam.
Headlight flasher ~D ©
... Pull the lever toward the steering wheel to
use the headlight flasher.
Notes on these features
-The turn signals on ly work w ith the ignition
sw itched on. The indicator l ights
B or Bin
the instrument cluster¢ page 12 also blink.
-After you have turned a corner, the turn sig-
n al switches off automatically.
- The
high beam works only when the head-
lights are on. The indicator light
El in the .,.
Page 48 of 304
46 Clear vis ion
instrument cluste r illuminates when the
high beams are on.
- T he
headlight flash er works only as long as
yo u hold the lever - even if there are no
l ights turned on. The indicator light
II in
the instrument cluster il luminates when you
use the headlight flasher.
A WARNING
Do not use the high beam or headlight
flasher if you know that these could blind
oncoming traffic.
Interior lights
Front and rear interior lighting
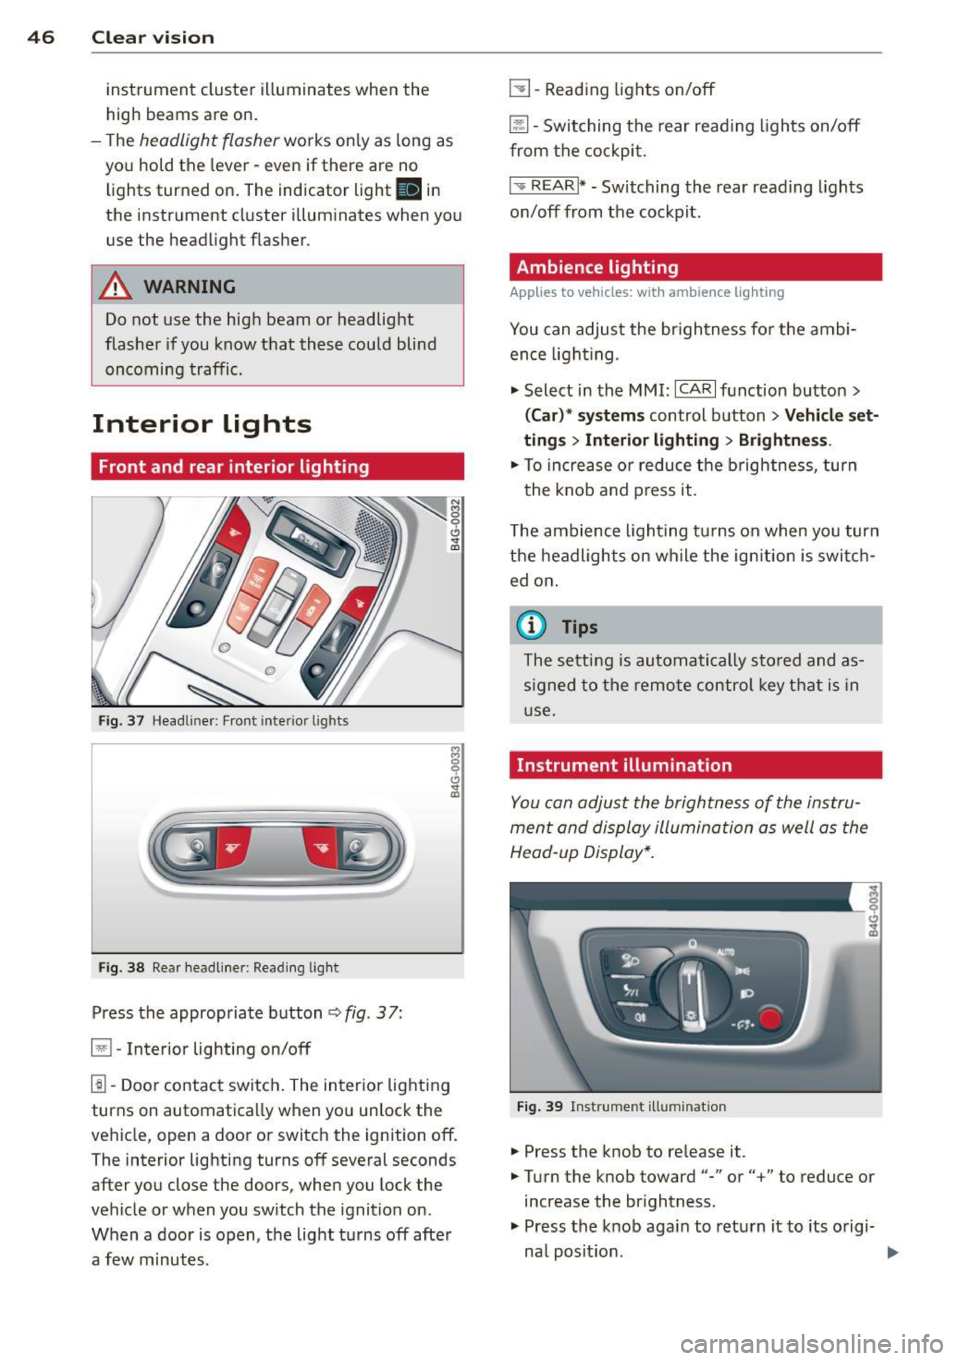
Fi g. 37 Headliner: Front interior ligh ts
Fig . 38 Re ar headli ne r: Readi ng light
Press the appropriate button q fig . 3 7:
El -Interior lighting on/off
I]]-Door contac t sw itch . The inter ior lighting
turns on automatica lly when you unlock the
vehicle, open a door or switch the ignition off.
The interior lighting turns off several seconds
after you close the doors, when you lock the
vehicle or when you sw itch the ignition on.
When a door is open, the light t urns off afte r
a few minutes.
L:!l -Read ing lights on/off
~ - Switching the rear read ing lights on/off
from the cockpi t.
I" REARI * -Switching the rear reading lights
o n/off from the cockpit.
Ambience lighting
Applies to vehicles: w ith amb ience lighting
You can adjust the br ightness for the ambi
ence ligh tin g.
.. Select in the MMI:
ICA RI function button>
(Car )* sys tem s control button > Vehicle set
ting s
> Interi or lighting > Brightne ss.
.. To increase or reduce the b rightness, turn
t he knob and press it .
T he ambience light ing tu rns on when you turn
the headlights on wh ile the ign ition is swi tc h
ed on.
(D Tips
The setti ng is automati cally sto red and as
s igned to the remo te contr ol key t hat i s in
u se.
Instrument illumination
You can adjust the brightness of the instru
men t and di splay illumination a s well as the
Head-up Display*.
Fi g. 39 Instrume nt illumina tion
... Press the knob to release it.
.. Turn the knob toward"-" or"+" to reduce or
increase the br ightness .
.. Press the knob aga in to return it to its o rigi-
na l posit ion . ...
Page 74 of 304
7 2 Warm and cold
(D Note
To avoid damage to the heating e lements
in the seats, do not kneel on the seats or
place heavy loads on a small area of the
seat .
Setup
Applies to vehicles: with four-zone a utomat ic clima te con·
tro l
The climate control system setup is accessed
through the MMI .
.,. Se lect : I CAR I func tion button> (Car )* sys·
terns
con trol but ton > AC .
Rear cabin settings*
When th is fu nction is selected, all sett ings for
the rear can be adjusted through the climate
control sys tem in the cockpit. The cl imate
con trol sys tem se tt ings cannot be adjusted in
the rea r seat at the same time. This func tion
switches
o ff after a certain period of time or
when one of the dia ls in the cockp it is press
ed .
Auto recirculation*
The sensit ivity level of the au tomatic rec ircu
lation mode can be set at vario us leve ls from
off to sensit ive. The recirculation mode is con
trolled a utomat ica lly. You must p ress the ~
button if fog forms on the windows.
Footwell temperature
You can adju st the footwell temperat ure so
that it is cooler or wa rme r.
Supplementary heater*
The supplementary heater warms the interio r
of veh icles with diesel engines * mo re quick ly .
T he s upplementa ry he ater is cont ro lled au to
mat ic all y in the
Aut o setting .
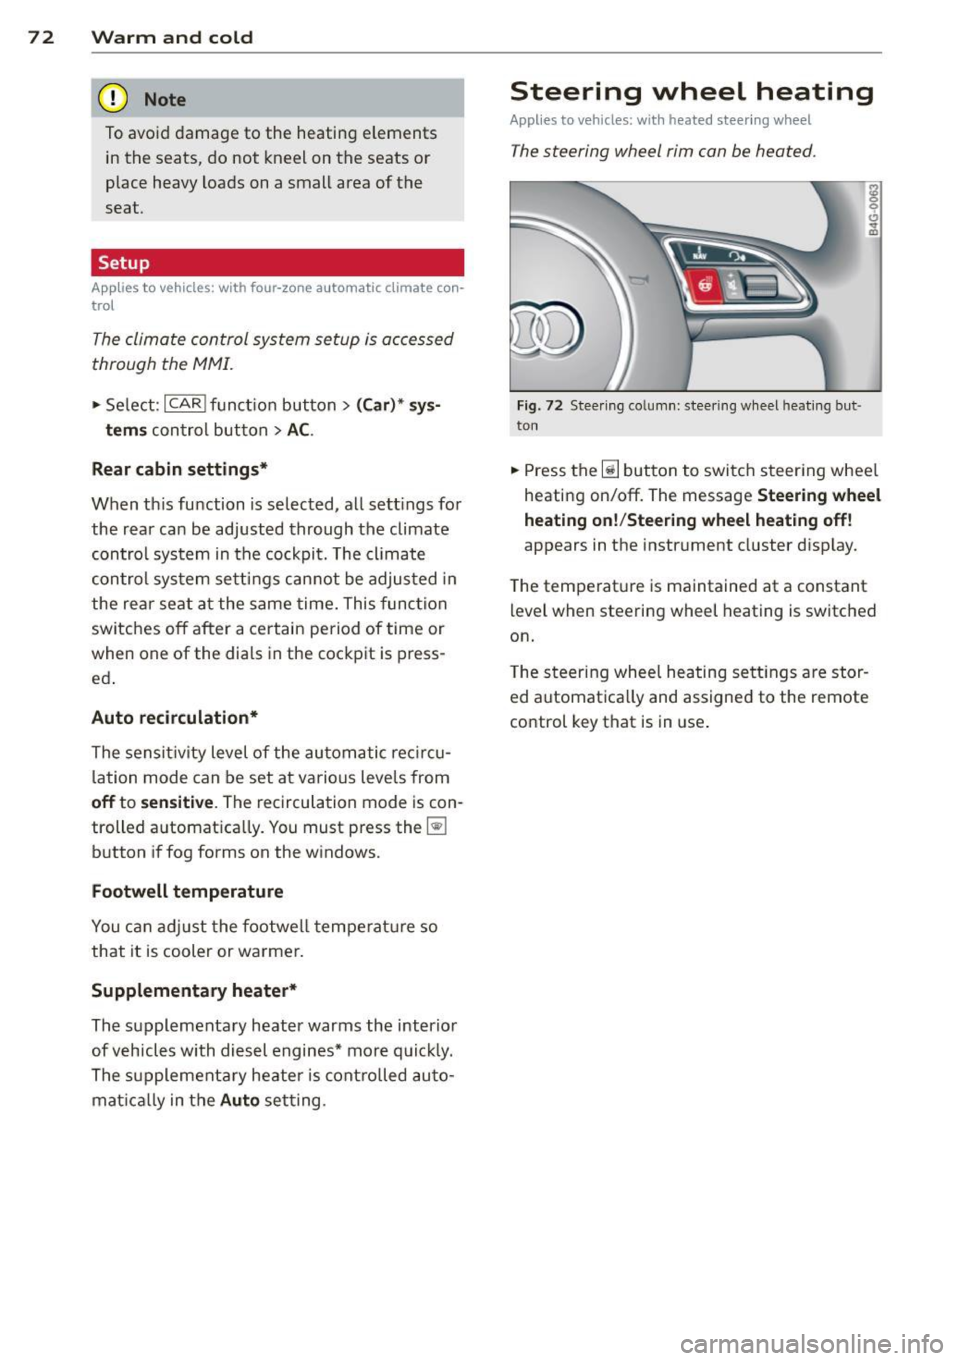
Steering wheel heating
App lies to vehicles: wi th hea ted s tee rin g whe el
The steering wheel rim can be heated .
Fig. 72 Stee ring co lu mn : stee rin g w heel hea tin g but ·
ton
.,. Press the~ button to switch steering whee l
heating on/off. The message
Steering wheel
heating on !/Steering wheel heating off !
appears in the instrument cluster d isp lay.
T he temperat ure is maintained at a constant
l evel when steering wheel heating is switched
on.
T he steering wheel hea ting se tt ings are stor
ed automat ica lly and assigne d to the remote
control key that is in use .
Page 78 of 304
76 On the road
switched off. It can a lso switch on again
after some time if the coolant tempera
ture rises as the result of a heat buildup
or if the engine is hot and the engine
compartment is addit ionally heated by
the sun's rays.
(D Note
D o not stop the engine immediate ly afte r
hard or extended driving . Keep the engine
running for approximately two minutes to
prevent excessive heat build-up.
Driver message in the instrument
cluster display
Turn off ignition b efo re leaving car
This message appears and a war ning tone
sounds if yo u open the dr ive r's door when the
ignition is switched on.
Pres s brake pedal to start en gine
This message appears if you press the
I STAR T ENGINE ST OP ! button to start the en
g ine and do not depress the brake pedal. The
engine can on ly be started if the brake pedal
i s depressed.
!I ls k ey in the vehicle ?
If the indicator light turns on and the mes
sage appears, the remote control key was re
moved from the vehicle while the engine was
running . If the ignit ion key is not in the vehi
cle you w ill not be ab le to switch on the ig ni
tion o r restart the eng ine after it has been
switched off. Yo u wi ll also not be able to lock
the vehicle from the outside.
Shift to P , otherwise vehicle can roll away .
Doors do not lo ck if le ver i s not in P .
This message appears for safety reasons
along w ith an audib le warn ing tone if the P
selecto r lever posit io n is not engaged when
stopping the eng ine with the
I START ENGINE STOP! button. Select the P se
lector lever posit io n. Otherw ise the veh icle
could roll and it cannot be locked.
mJ Ke y is not re cogni zed . H old back of ke y
a ga in st marked are a. See owner' s manual.
If the indicator ligh t turns on and this mes
sage appears, there is a malf unct ion
r::!;> page 76.
Tu rn off ignition before l ea v ing car. B attery
i s d isc harging
This message appears if the driver's door is
opened wh ile the ignition is switched on. Al
ways switch off the igni tion if you are leaving
the vehi cle. See also
r::¢,page 81.
Shift to P and turn off ignition before l eav
ing car, oth erwi se v ehicl e can roll away
This message appears if the driver's door is
opened wh ile the ignition is switched on and
t h e selecto r lever is not in the P posi tion. Shift
the selecto r lever into the P pos ition and
switch off the ignit ion when you exit the vehi
cl e. Otherw ise the vehicle cou ld roll. See also
r::¢,page 81.
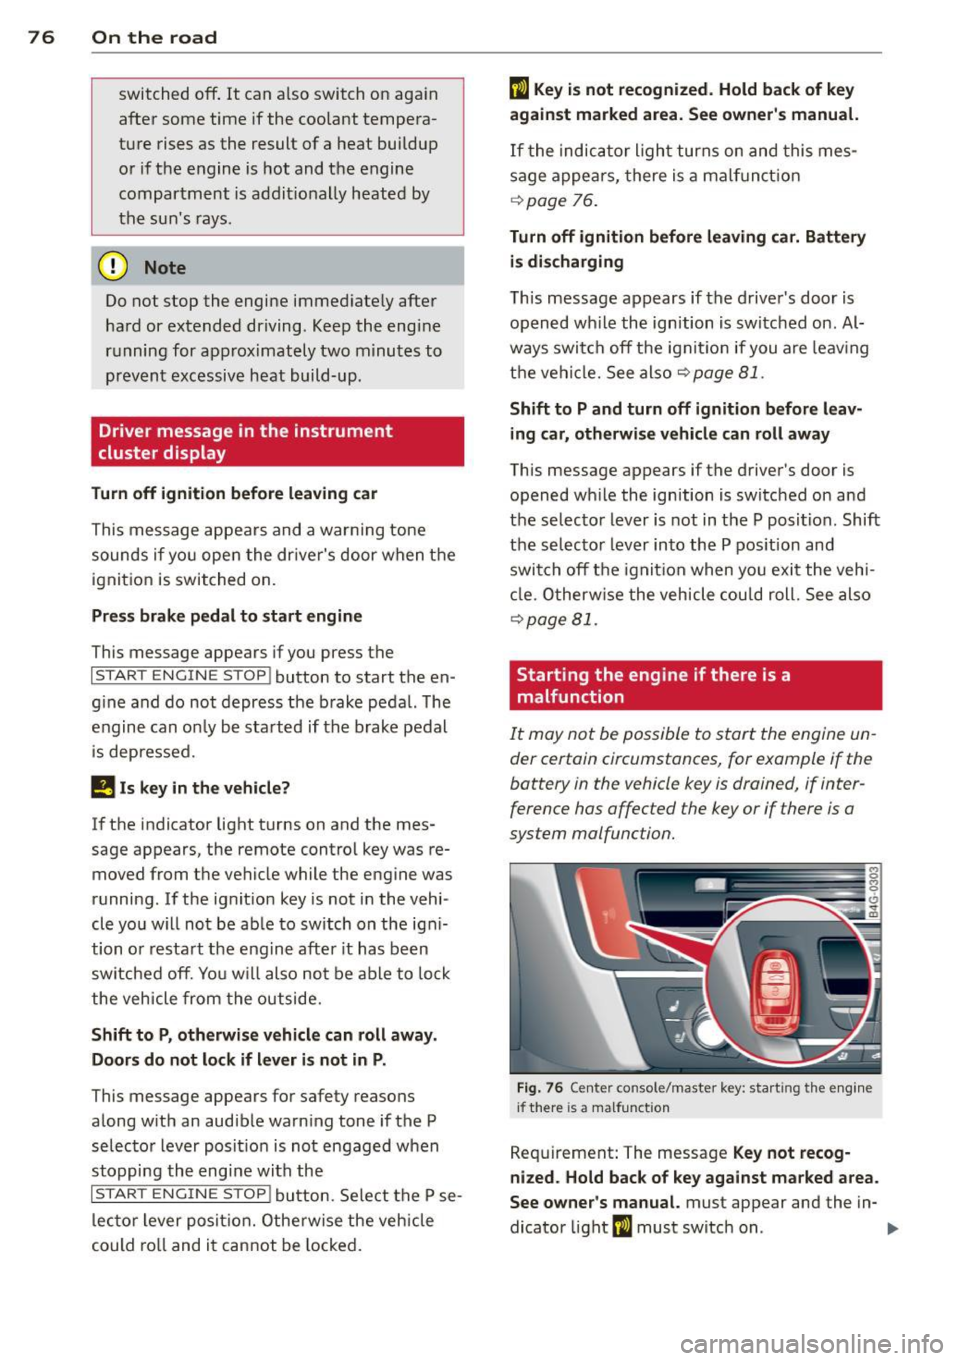
Starting the engine if there is a
malfunction
It may not be possible to start the engine un
der certain circumstances, for example if the
battery in the vehicle key is drained, if inter
ference has affected the key or if there is a
system malfunction.
F ig . 76 Center console/master key: starting the eng ine
i f there is a malfunct ion
Requirement: The message Key not recog
nized . Hold back of ke y against marked are a.
See o wne r's manual.
must appear and the in-
dicator light
ml must switch on. .,..
Page 79 of 304
.. Hold the master key vertically in the loca
tion indicated
y>>) c::> fig. 76.
.. Press the brake pedal
c:;, A in Starting the
engine on page 75.
.. Press the l~S_T_A_R_T_ E_N_ G_ I_ N _ E_ S_T_ O_ P~ I button . The
engine will start .
.. Drive to your author ized Audi dealer imme
diately to have the malfunction co rrected .
('O Tips
You can view the message again by press
ing the
! START ENGINE STOP I button.
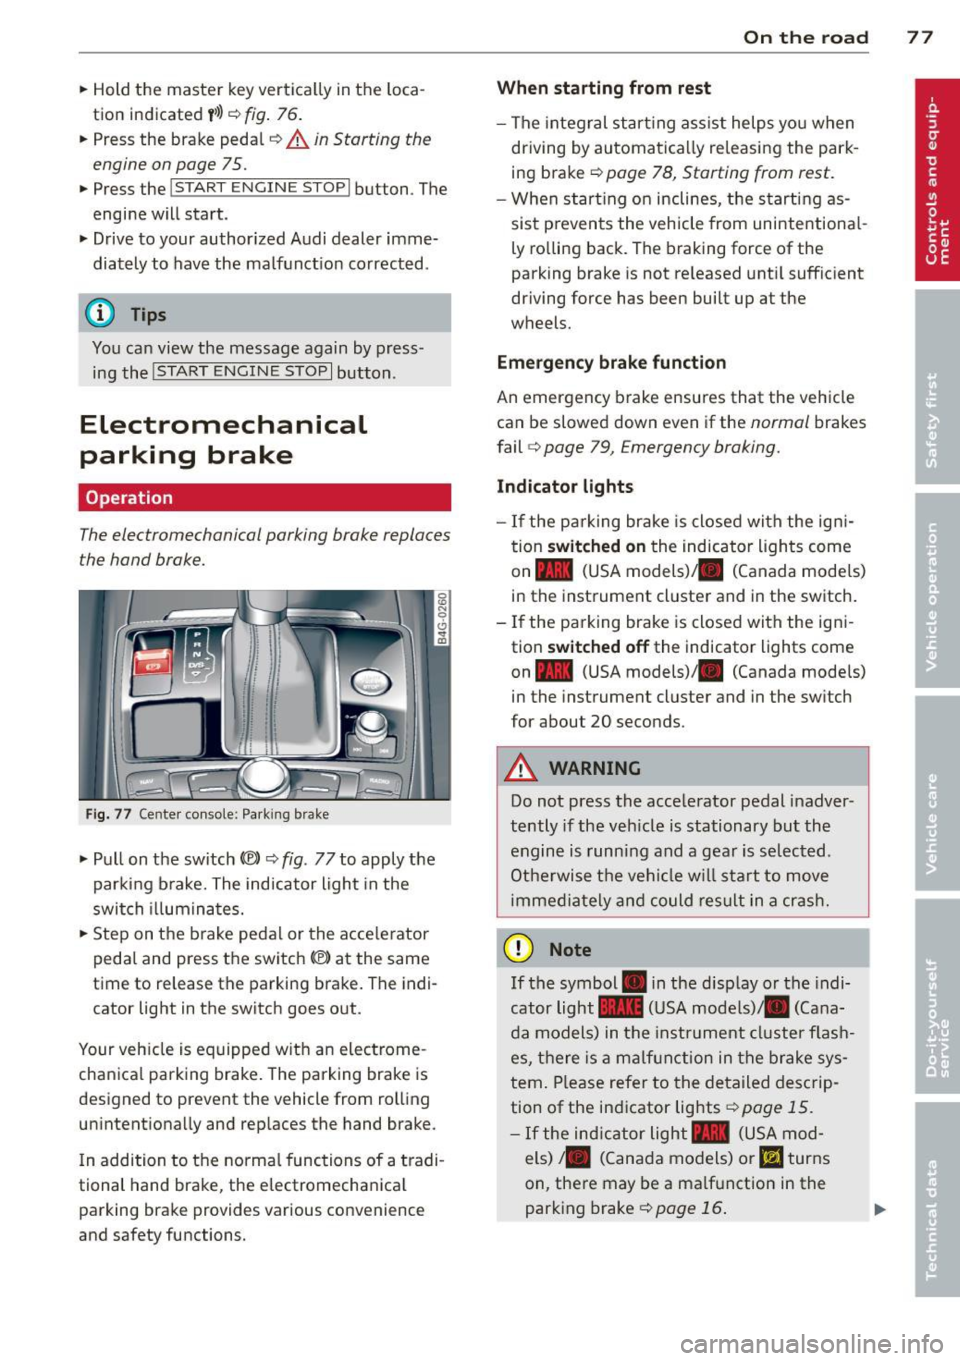
Electromechanical
parking brake
Operation
The electromechanical parking broke replaces
the hand broke.
Fig. 77 Center console: Park ing brake
.. Pull on the switch (®) c::> fig. 77 to apply the
parking brake. The indicator light in the
switch illuminates .
.. Step on the brake pedal or the acce le rator
pedal and press the switch(®) at the same
time to release the parking brake. The indi
cator light in the switch goes out.
Your veh icle is equipped w ith an electrome
chanica l park ing brake. The parking brake is
designed to prevent the vehicle from rolling
un intentiona lly and rep laces the hand brake.
I n addition to the normal functions of a tradi
tional hand brake, the electromechanica l
parking brake provides various convenience
and safety functions.
On the road 77
When starting from rest
-The integral start ing assist helps you when
driving by automatically re leasing the park
ing brake
c::> page 78, Starting from rest .
- When start ing on inclines, the starting as
sist p revents the vehicle from unintentiona l
ly rolling back. The braking force of the
parking brake is not re leased until sufficient
driving force has been built up at the
wheels.
Emergency brake function
An emergency brake ensures that the vehicle
can be slowed down even if the
normal brakes
fail
c:;, page 79, Emergency broking.
Indicator lights
- If the pa rking brake is closed with the ign i
tion
switched on the indicator lights come
on - (USA
models) ,tl (Canada models)
in the instrument cluster and in the switch.
- If the parking brake is closed with the igni
tion
switched off the indicator lights come
on - (USA
models) ,tl (Canada models)
in the instrument cluster and in the sw itch
for about 20 seconds.
A WARNING
Do not press the accelerator pedal inadver
tently if the veh icle is stationary but the
engine is running and a gear is selected .
Otherwise the vehicle w ill start to move
imm ediately and could result in a crash.
(D Note
If the symbol . in the disp lay or the indi
cator light
1111 (USA models)/. (Cana
da models) in the instr ument cluster fla sh
es, there is a malfunction in the brake sys
tem. Please refer to the detailed descrip
tion of the indicator lights
c::>poge 15.
-If the indicato r light - (USA mod-
els) /. (Canada models) or
11',1 turns
on, there may be a malf un ction in the
parking brake
c::>poge 16.
Page 82 of 304
80 On the road
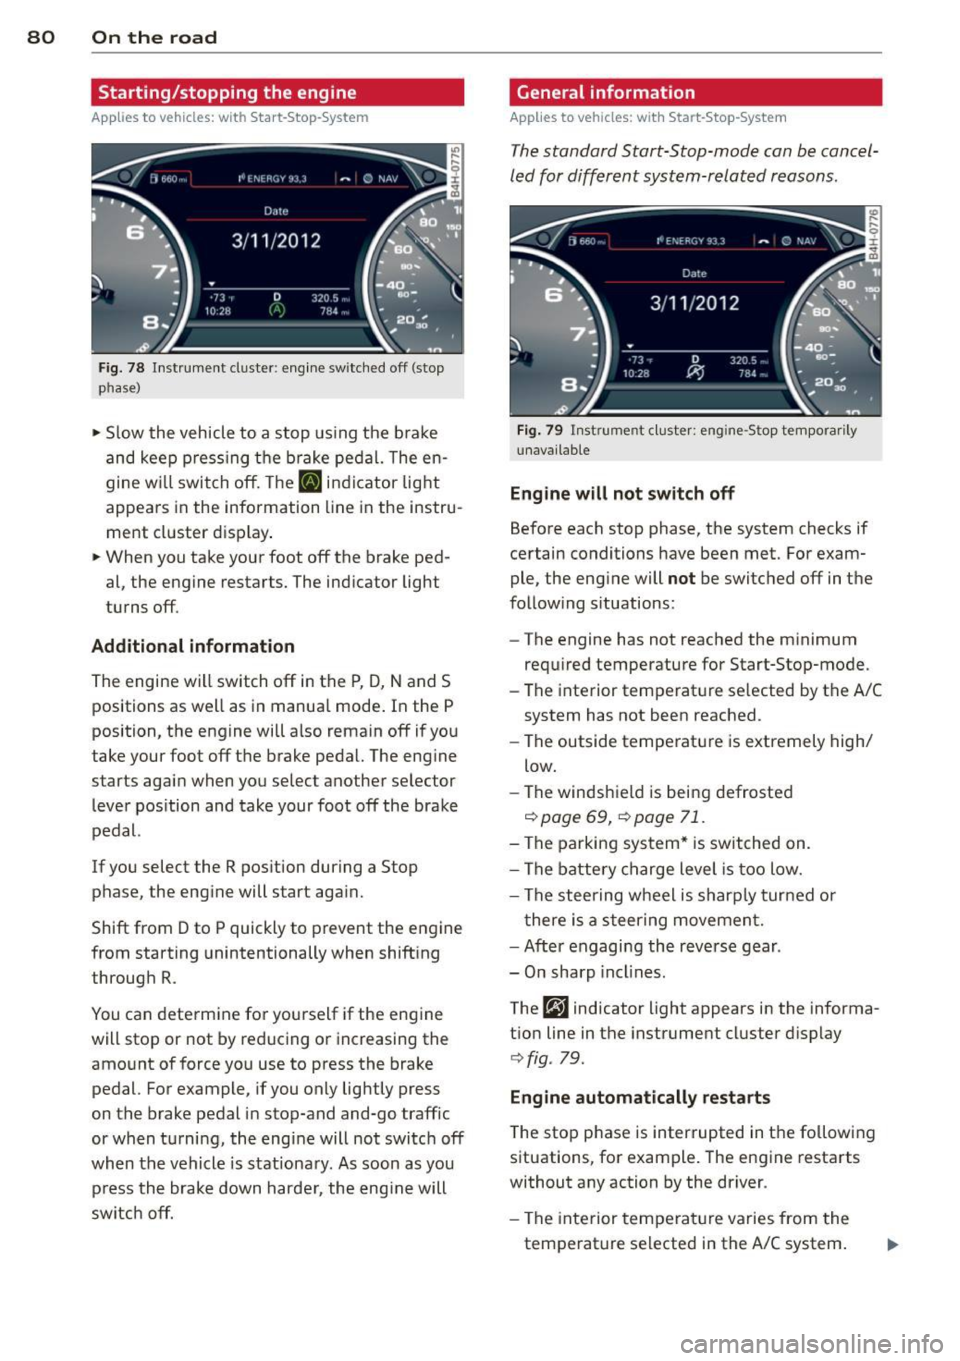
Starting/stopping the engine
Applies to vehicles: with Start-Stop-Syste m
Fig. 78 Instrument duster : eng ine sw itched off (stop
phase)
.. Slow the vehicle to a stop us ing the bra ke
and keep p ress ing t he b rake pedal. The en
gine w ill switch off. The
[IJ in dicator light
appears in the information line in the instru
ment cluster d isplay .
.. When you take your foot off the brake ped
al, the engine restarts. The indicator light
turns off.
Additional information
The engine wi ll switch off in the P, D, N and S
positions as well as in manua l mode . In the P
position, the engine wi ll also remain off if you
take your foot off the brake pedal. The eng ine
starts again when you select another se lector
lever pos ition and take your foot off the brake
pedal.
If you select the R pos ition during a Stop
phase, the engine will start again.
Shift from D to P quickly to prevent the engine
from start ing unintentionally when shift ing
through R .
You can determine for yourself if the eng ine
will stop or not by reducing or increasing the
amount of force you use to press the brake pedal. For example, if you only lightly press
on the brake pedal in stop-and and-go traffic
or when turni ng, the engine will not switch off
when the vehicle is stationa ry . As soon as you
p ress the brake down harde r, the eng ine will
switch off.
General information
Applies to vehicles: with Start -Stop-System
The standard Start-Stop-mode can be cancel
led for different system-related reasons.
Fig. 79 Inst rume nt cluster: eng ine -S top te mporarily
un ava ilab le
Eng ine w ill not sw itch off
Before each stop phase, the system checks if
certain conditions have been met. For exam
ple, the eng ine will
not be switched off in the
follow ing s ituations :
- The engine has not reached the minimum
requ ired temperature for Start-Stop-mode.
- The interior temperat ure se lected by the A/C
system has not been reached.
- The outside temperatu re is extremely high/
low .
- The windshield is being defrosted
i=:> page 69, i=:> page 71.
- The parking system* is switched on.
-The battery charge level is too low.
- The steering wheel is sharply tur ned o r
t here i s a steer ing movemen t.
- After engaging the reverse gear .
- O n sharp incl ines.
The
r,J indicator light appears in the informa
t ion line in the instrument cluster d isplay
¢ fig . 79.
Engine automatically resta rts
T he stop p hase is inter rupted in the following
situations, for example . The engine resta rts
without any action by the driver .
- The interior tempera ture varies from the
temperature selected in the A/C system .
Page 83 of 304
-The windshield is being defrosted
Q page 69, ~ page 71 .
-The brake peda l is pressed several times in a
row.
- The battery charge level becomes too low.
- High power consumption .
Switching the ignition automatically
To prevent the battery from draining, the igni
tion will switch off
automatically when all of
the following conditions have been met:
- The vehicle has already been driven .
- The engine has been turned off by the Start-
Stop-System*.
- The driver's door is opened .
- The driver's seat belt is removed.
- The bra ke peda l is not pressed down.
- The vehicle is stationary.
In this case, the activated low beam will be re
placed by the side marker lights. The side
marker lights will switch off after approx i
mately 30 minutes or when you lock the vehi
cle .
If the Start-Stop System has
not turned off
the engine or if you have switched the Start
Stop system off manually, the ignition wil l
not
be automatically switched off and the engine
will continue to run ~,& .
& WARNING
Never allow the engine to run in confined
spaces -danger of asphyxiation.
(0 Tips
If you shift into the D, N or S positions af
ter shifting into reverse, the vehicle must
be driven faster than 6 mph (10 km/h) in
order for the engine to switch off again .
On the road 81
Switching the Start-Stop-System on/off
manually
Applies to veh icles: w ith Star t-Stop-Sys te m
If you do not wish to use the system, you can
switch it off manually.
=~-
-~ ---
' I~ -
--
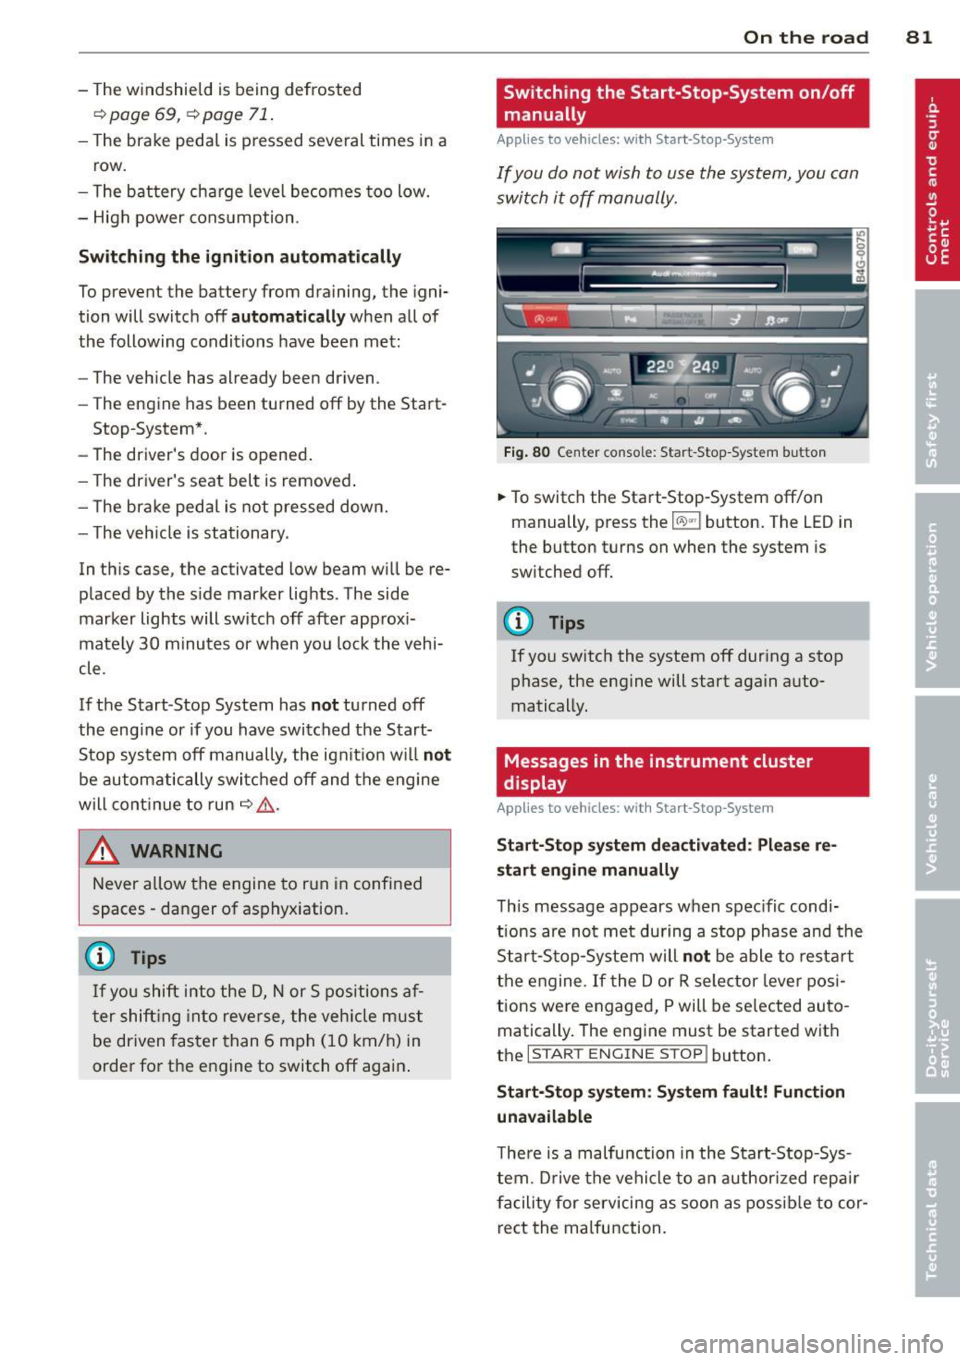
Fig. 80 Center console: Start-Stop-System button
.,. To switch the Start-Stop-System off/on
manually, press the
1 (1() ~·1 button. The LED in
the button turns on when the system is
switched off.
(D Tips
If you switch the system off during a stop phase, the engine will start again auto
matically.
Messages in the instrument cluster
display
A pp lies to veh icles : w ith S tart-Stop -Sys tem
Start-Stop system deactivated: Please re
start engine manually
This message appears when spec ific condi
tions are not met during a stop phase and the
Start-Stop-System will
not be able to restart
the engine . If the Dor R selector lever posi
tions were engaged, P will be selected auto
matically. The engine must be started with
the
I START ENGINE STOP! button.
Start-Stop system: System fault! Function
unavailable
There is a malfunction in the Start-Stop-Sys
tem . Drive the vehicle to an authorized repair
facility for servicing as soon as possible to cor
rect the malfunction.
Page 84 of 304
82 On the road
Speed warning system
Introduction
The sp eed warning system helps you to stay
und er a specified maximum speed .
The speed warning system warns you if you
are exceeding the maximum speed that you
have set . You will hear a warning tone when
your speed exceeds the stored value by ap prox imately 3 mph (3 km/h) . An indicator
light . (USA models)/ . (Canada mode ls) in
the instrumen t cluster display also t urns on at
the same time . The indicator light
a;m
turns off when the speed decreases below the
stored maximum speed.
Sett ing a th res hold is re commended if yo u
wou ld like to be reminded when you reach a
certain maximum speed. Situations where you
may want to do so include driving in a country
with a general speed limit or if there is a
specif ied max imum speed for winter tires.
(1} Tips
Even tho ugh your vehicle is equipped with
a speed warning system, you should st ill
watch the speedometer to make sure you are not driving faster than the speed lim it.
Setting the threshold
You can set, change and delete the threshold
in the
MMI.
.,.. Se lect: I CAR I function button> (Car)* sy s
tems
control button > D rive r assist > Speed
warning .
You can set any threshold between 20 mph
(30 km/h) and lS0 mph (240 km/h). Settings
can each be adjusted in increments of 6 mph
(10 km/h).
Cruise control
Switching on
Applies to veh icles: w ith cruise control
The cruise control system makes it possible to
drive at a constant speed starting at 20 mph
(30 km/h) .
0
f
~
0
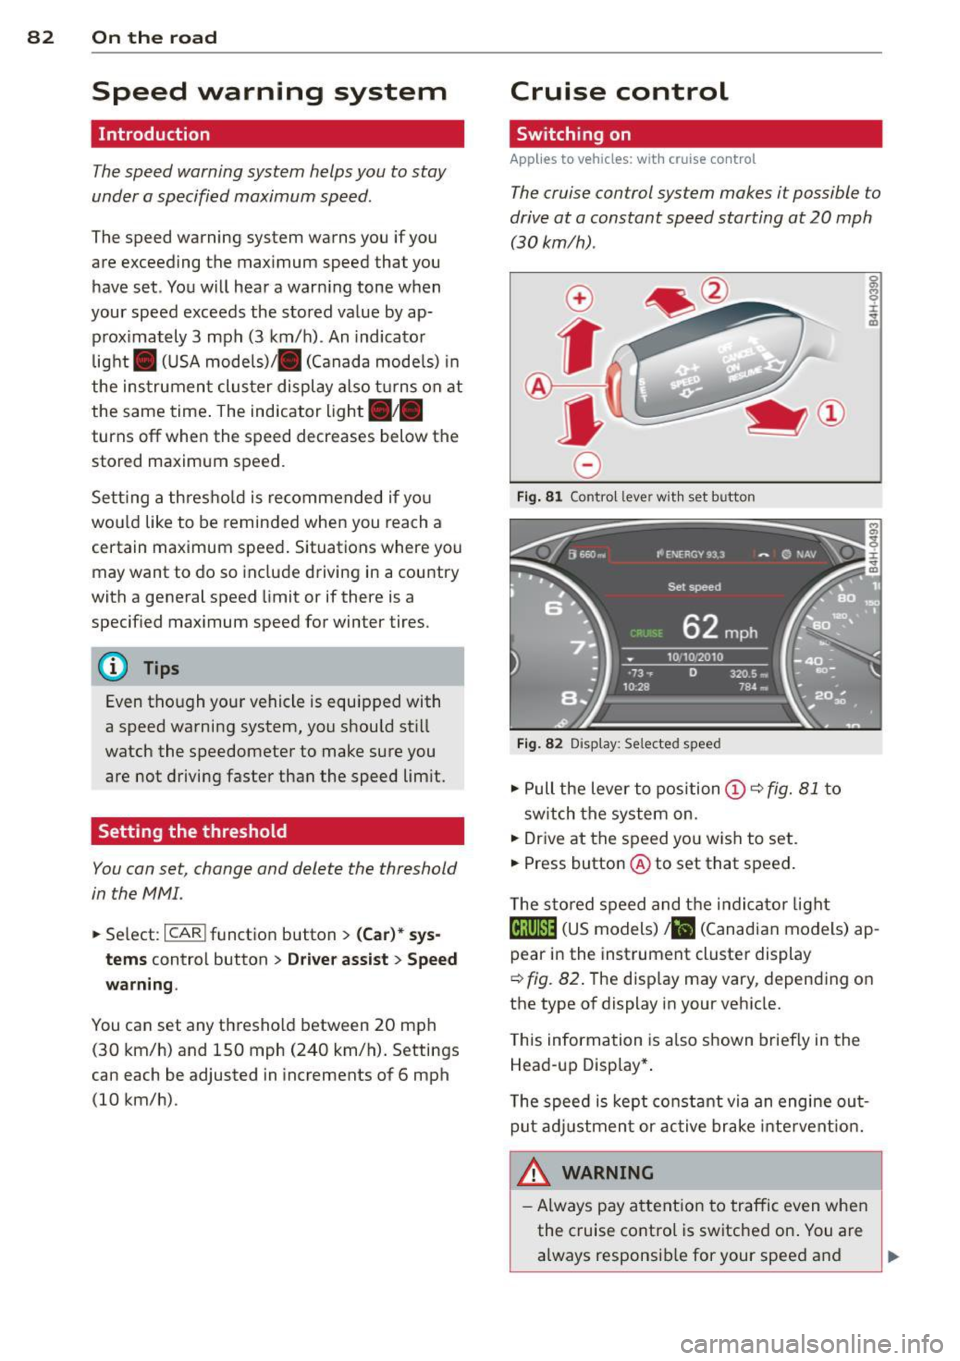
Fig. 8 1 Contro l leve r wit h set b utto n
Fig . 82 Disp lay: Se lecte d sp eed
.,.. Pull the lever to position (D ¢ fig. 81 to
sw itch the system on.
.,.. Drive at the speed you wish to set .
.,.. Press button ® to set that speed.
T he s to red speed and t he indicator light
@;\~~14 (US models) !Iii (Canadian models) ap
pear in the instrument cluste r display
¢ fig. 82 . The disp lay may vary, depend ing on
the type of display in your vehicle.
T his information is also shown briefly in the
Head-up Disp lay* .
T he speed is kept constant via an engine out
put ad justmen t or active brake inte rvent ion.
_& WARNING
=
- Always pay a ttent ion to traffic even when
the cruise control is switched on . You are
always responsib le for your speed and .,.