steering wheel AUDI A6 2016 Owners Manual
[x] Cancel search | Manufacturer: AUDI, Model Year: 2016, Model line: A6, Model: AUDI A6 2016Pages: 294, PDF Size: 73.88 MB
Page 4 of 294
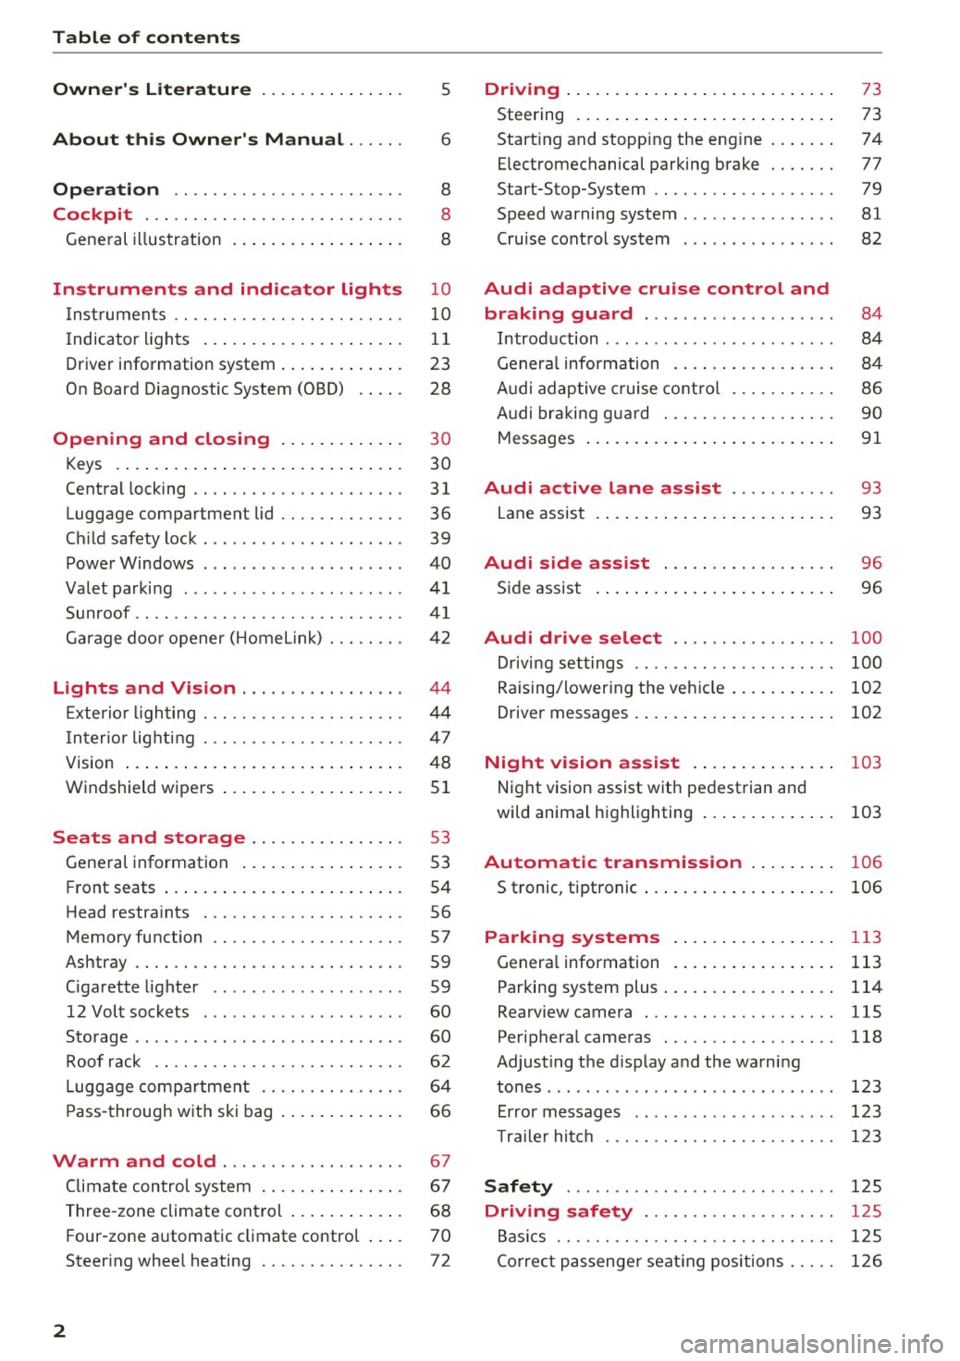
Table of contents
Owner's Literature
5
About this Owner's Manual . . . . . . 6
Operation . . . . . . . . . . . . . . . . . . . . . . . . 8
Cockpit . . . . . . . . . . . . . . . . . . . . . . . . . . . 8
General illustration . . . . . . . . . . . . . . . . . . 8
Instruments and indicator lights 10
Instruments . . . . . . . . . . . . . . . . . . . . . . . . 10
Indicator ligh ts . . . . . . . . . . . . . . . . . . . . . 11
Driver information system . . . . . . . . . . . . . 23
On Board Diagnostic System (OBD) . . . . . 28
Opening and closing . . . . . . . . . . . . . 30
Keys . . . . . . . . . . . . . . . . . . . . . . . . . . . . . . 30
Central locking . . . . . . . . . . . . . . . . . . . . . . 31
Luggage compartment lid . . . . . . . . . . . . . 36
Ch ild safety lock . . . . . . . . . . . . . . . . . . . . . 39
Power Windows . . . . . . . . . . . . . . . . . . . . .
40
Va let parking . . . . . . . . . . . . . . . . . . . . . . . 41
Sunroof. . . . . . . . . . . . . . . . . . . . . . . . . . . . 41
Garage door opener (Home link) . . . . . . . . 42
Lights and Vi sion . . . . . . . . . . . . . . . . . 44
E xterior lighting . . . . . . . . . . . . . . . . . . . . . 44
I n terior lighting . . . . . . . . . . . . . . . . . . . . . 47
V1s1on . . . . . . . . . . . . . . . . . . . . . . . . . . . . . 48
Windshield wipers . . . . . . . . . . . . . . . . . . .
51
Seats and storage . . . . . . . . . . . . . . . . 53
General information . . . . . . . . . . . . . . . . . 53
Fr ont seats . . . . . . . . . . . . . . . . . . . . . . . . . 54
Head restra ints . . . . . . . . . . . . . . . . . . . . .
56
Memory function . . . . . . . . . . . . . . . . . . . . 57
Ashtray . . . . . . . . . . . . . . . . . . . . . . . . . . . . 59
C igarette lighter . . . . . . . . . . . . . . . . . . . . 59
12 Volt sockets . . . . . . . . . . . . . . . . . . . . . 60
Storage . . . . . . . . . . . . . . . . . . . . . . . . . . . . 60
Roof rack . . . . . . . . . . . . . . . . . . . . . . . . . . 62
Luggage compartment . . . . . . . . . . . . . . . 64
Pa ss- throug h w it h ski bag . . . . . . . . . . . . . 66
Warm and cold . . . . . . . . . . . . . . . . . . . 6 7
Climate control system . . . . . . . . . . . . . . . 67
Three-zone climate control . . . . . . . . . . . . 68
F our-zone automatic climate control . . . . 70
Steering wheel heating . . . . . . . . . . . . . . . 72
2
Driving .... . .. .. .. .. ... . .. .... ... . .
Steering . ... .. .. .. .. .. .. .. .... ... . .
73
73
Starting and stopping the eng ine . . . . . . . 74
E lectromechanical parking brake . . . . . . . 77
Start-Stop-System . . . . . . . . . . . . . . . . . . . 79
Speed warning system . . . . . . . . . . . . . . . .
81
Cruise cont rol system . . . . . . . . . . . . . . . . 82
Audi adaptive crui se control and
braking guard . . . . . . . . . . . . . . . . . . . .
84
Introduction . . . . . . . . . . . . . . . . . . . . . . . . 84
General information . . . . . . . . . . . . . . . . . 84
Audi adaptive cruise control . . . . . . . . . . . 86
Audi braking guard . . . . . . . . . . . . . . . . . . 90
Messages . . . . . . . . . . . . . . . . . . . . . . . . . .
91
Audi active lane as sist . . . . . . . . . . . 93
Lane assist . . . . . . . . . . . . . . . . . . . . . . . . . 93
Audi side as sist . . . . . . . . . . . . . . . . . . 96
Side assist . . . . . . . . . . . . . . . . . . . . . . . . . 96
Audi drive select . . . . . . . . . . . . . . . . . 100
Driving settings . . . . . . . . . . . . . . . . . . . . . 100
Raising/lowering the vehicle . . . . . . . . . . . 102
Driver messages . . . . . . . . . . . . . . . . . . . . . 102
Night vision a ssist . . . . . . . . . . . . . . . 103
Night vision assist with pedestrian and
wild animal h ighlighting . . . . . . . . . . . . . .
103
Automatic transmission . . . . . . . . . 106
5 tronic, t iptronic . . . . . . . . . . . . . . . . . . . . 106
Parking systems . . . . . . . . . . . . . . . . . 113
General information . . . . . . . . . . . . . . . . . 113
Parking system plus . . . . . . . . . . . . . . . . . . 114
Rearv iew camera . . . . . . . . . . . . . . . . . . . . 115
Periphera l cameras . . . . . . . . . . . . . . . . . . 118
Adjusting the display and the warning
tones . . . . . . . . . . . . . . . . . . . . . . . . . . . . . .
123
Error messages . . . . . . . . . . . . . . . . . . . . . 123
Trail er hi tch . . . . . . . . . . . . . . . . . . . . . . . . 123
Safety ..... .. .. .. .. ... ..... ..... .. 125
Driving safety . . . . . . . . . . . . . . . . . . . . 125
Basics . . . . . . . . . . . . . . . . . . . . . . . . . . . . . 125
Correct passenger seating positions . . . . . 126
Page 5 of 294
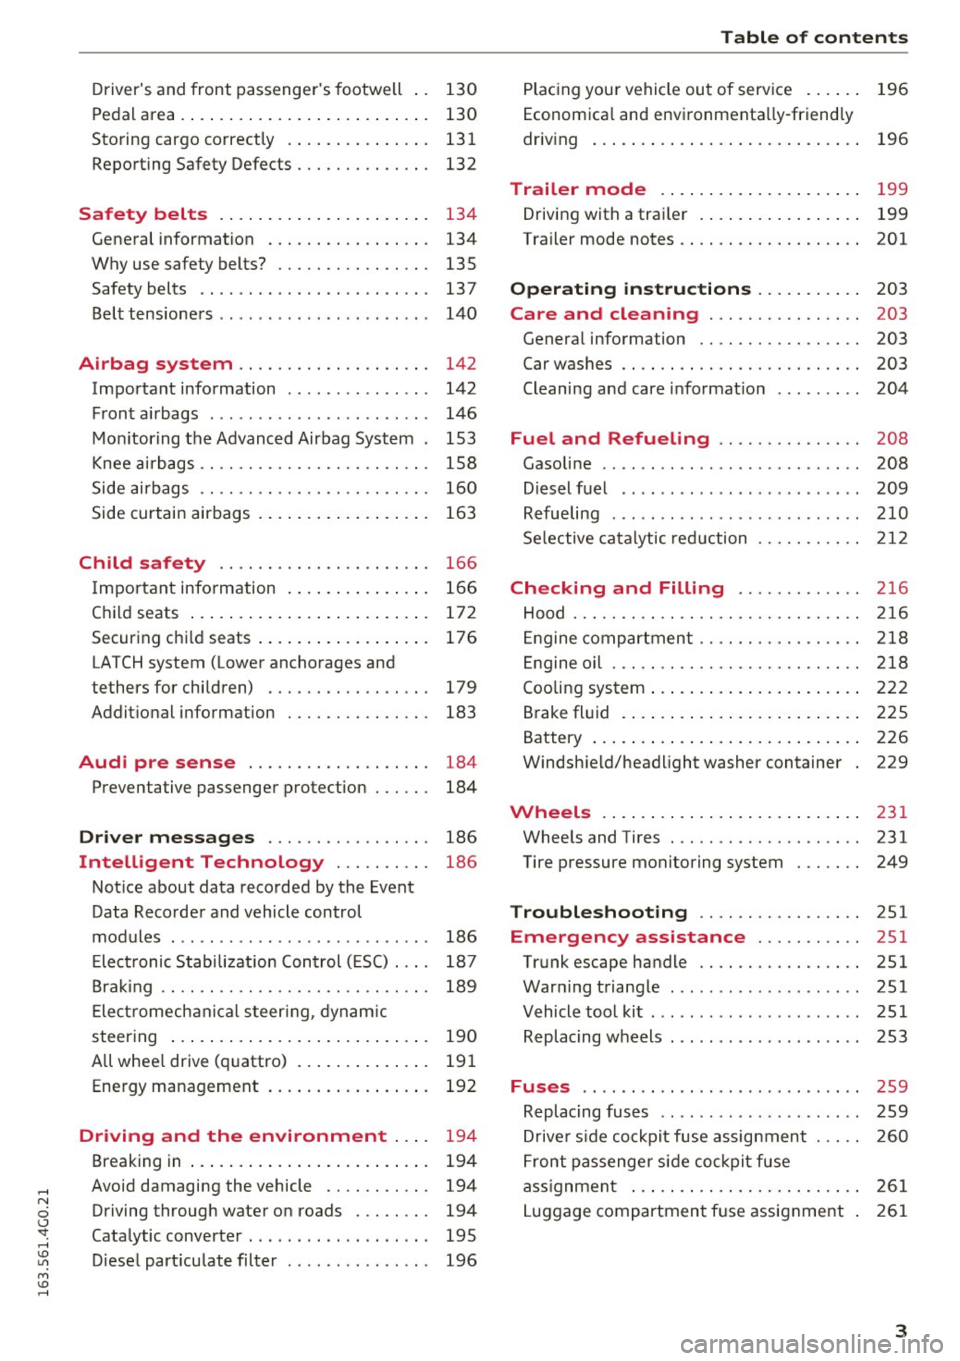
Driver's and front passenger 's footwell . . 130
Pe dal area . . . . . . . . . . . . . . . . . . . . . . . . . . 130
Sto ring cargo correctly . . . . . . . . . . . . . . . 131
Repo rting Safety Defects . . . . . . . . . . . . . . 132
Safety belts . . . . . . . . . . . . . . . . . . . . . . 134
Gene ral information . . . . . . . . . . . . . . . . . 134
Why use safety belts? . . . . . . . . . . . . . . . . 135
Safety belts . . . . . . . . . . . . . . . . . . . . . . . . 137
Belt tens ione rs . . . . . . . . . . . . . . . . . . . . . . 140
Airbag system . . . . . . . . . . . . . . . . . . . . 142
Important information . . . . . . . . . . . . . . . 142
F ront ai rbags . . . . . . . . . . . . . . . . . . . . . . . 146
M oni toring the Advanced Airbag Syst em . 153
K nee ai rbags . . . . . . . . . . . . . . . . . . . . . . . . 158
Side airbags . . . . . . . . . . . . . . . . . . . . . . . . 160
Side curtai n airbags . . . . . . . . . . . . . . . . . . 163
Child safety . . . . . . . . . . . . . . . . . . . . . . 166
I mportant inform ation . . . . . . . . . . . . . . . 166
C hil d seats . . . . . . . . . . . . . . . . . . . . . . . . . 17 2
Securing ch ild seats . . . . . . . . . . . . . . . . . . 176
LATCH system (Lower anchorages and
tethers for children) . . . . . . . . . . . . . . . . . 179
Addit ional information
183
Audi pre sense . . . . . . . . . . . . . . . . . . . 184
Preventative passenger protection 184
Driver messages . . . . . . . . . . . . . . . . . 186
Intelligent Technology . . . . . . . . . . 186
Not ice about data recorded by the Event
Data Recorde r and vehicle control
modules . . . . . . . . . . . . . . . . . . . . . . . . . . . 186
E lect ronic Stabili zat ion Control ( ESC) . . . . 187
Bra king . . . . . . . . . . . . . . . . . . . . . . . . . . . . 189
E le ctr omech anica l steer ing, dynam ic
steering . . . . . . . . . . . . . . . . . . . . . . . . . . . 190
A ll whee l drive (q uattro) . . . . . . . . . . . . . . 19 1
Ene rgy management . . . . . . . . . . . . . . . . . 192
Driving and the environment . . . . 194
Breaking in . . . . . . . . . . . . . . . . . . . . . . . . . 194
Avoid damaging the vehicle . . . . . . . . . . . 194
Driving throug h wate r on roads . . . . . . . . 194
Catalytic converter . . . . . . . . . . . . . . . . . . . 195
D iese l part iculate filte r . . . . . . . . . . . . . . . 196
Table of contents
Plac ing you r vehicle out of serv ice . . . . . . 196
Econ om ica l and envi ronmenta lly-friend ly
driv ing . . . . . . . . . . . . . . . . . . . . . . . . . . . . 196
Trailer mode . . . . . . . . . . . . . . . . . . . . . 199
Driving with a trai ler . . . . . . . . . . . . . . . . . 199
Trailer mode notes .. ............... .. 201
Operating instructions . . . . . . . . . . . 203
Care and cleaning . . . . . . . . . . . . . . . . 203
Genera l information . . . . . . . . . . . . . . . . . 203
Car washes . . . . . . . . . . . . . . . . . . . . . . . . . 203
Cleaning and care informat ion 204
Fuel and Refueling . . . . . . . . . . . . . . . 208
Gasoline . . . . . . . . . . . . . . . . . . . . . . . . . . . 208
Diesel f uel . . . . . . . . . . . . . . . . . . . . . . . . . 209
Refue ling ... .. .. .. .... ...... ... .. .. 210
Se lective cata lytic red uction 212
Checking and Filling . . . . . . . . . . . . . 216
Hood ..... .... .. ................. .. 216
En gine compartment ............. .. .. 218
En gine oi l . . . . . . . . . . . . . . . . . . . . . . . . . . 218
Cooling sys tem . . . . . . . . . . . . . . . . . . . . . . 2 22
Brake fl uid . . . . . . . . . . . . . . . . . . . . . . . . . 225
Battery . . . . . . . . . . . . . . . . . . . . . . . . . . . . 226
Windsh ield/headlight washer container 229
Wheels .. .. .. .. .. ... .. ..... ... .. .. 231
Whee ls and Tires . . . . . . . . . . . . . . . . . . . . 231
Tire p ressure monitoring system
249
Troubleshooting . . . . . . . . . . . . . . . . . 251
Emergency assistance . . . . . . . . . . . 251
Trunk escape handle . . . . . . . . . . . . . . . . . 251
War ning t riang le . . . . . . . . . . . . . . . . . . . . 251
Vehicle tool ki t . . . . . . . . . . . . . . . . . . . . . . 251
Replacing w heels . . . . . . . . . . . . . . . . . . . . 253
Fuses .......... .. ................. 259
Replacing fuses . . . . . . . . . . . . . . . . . . . . . 259
D rive r side cockpit fuse assignmen t
F ront passenge r sid e co ckpit fuse 2
60
ass ignment . . . . . . . . . . . . . . . . . . . . . . . . 2 61
L uggage compartment fuse assignment . 261
3
Page 11 of 294
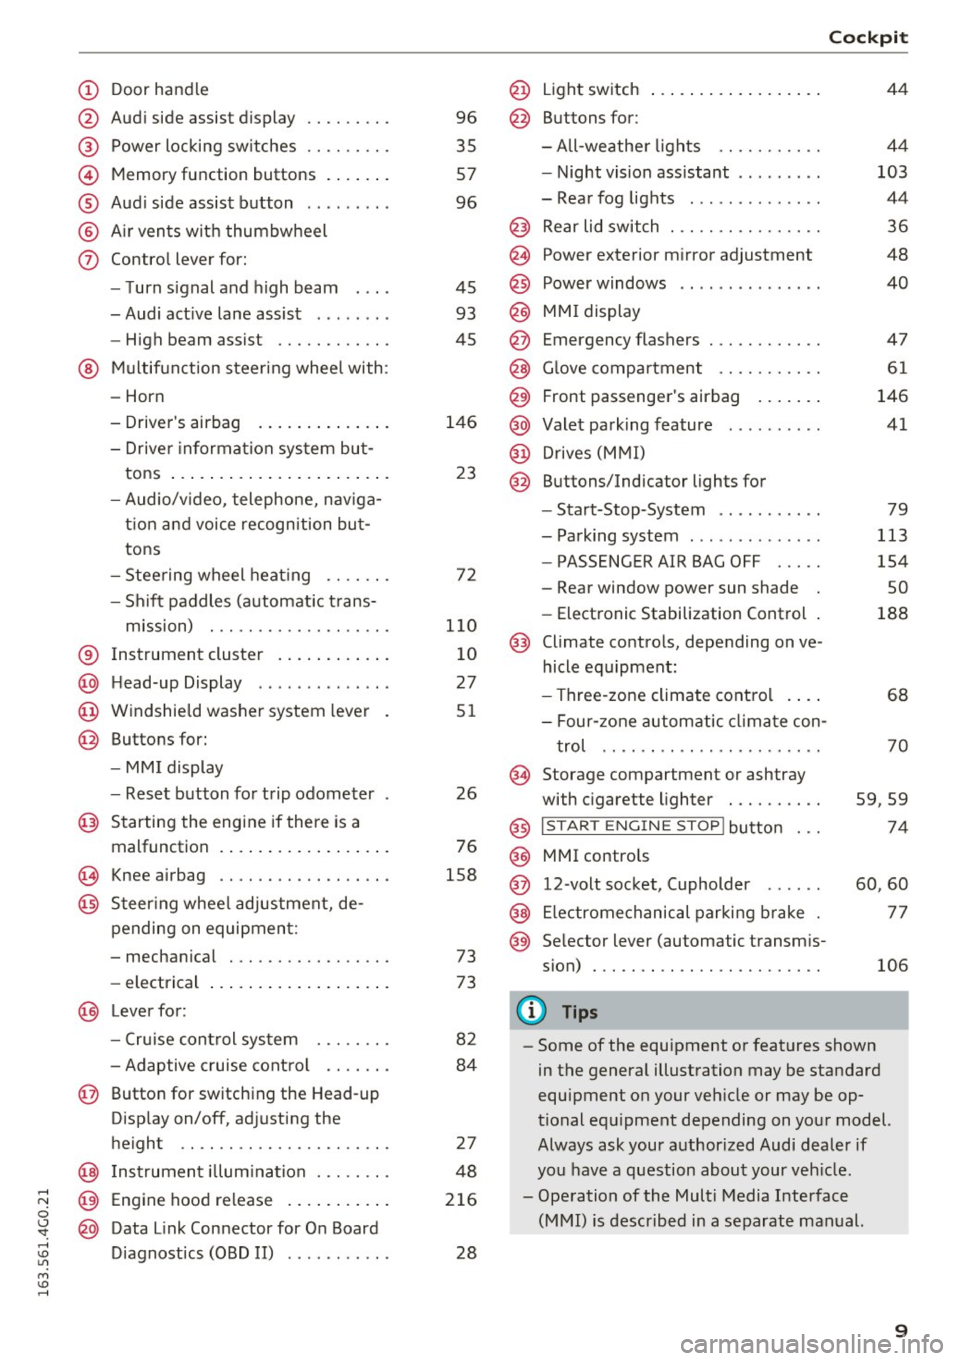
(!) Door handle
@
®
©
®
®
(j)
Audi side assist display
Power locking sw itches ...... .. .
Memory function buttons ..... . .
Audi side assist button .. .. ... . .
A ir vents with thumbwheel
Control lever for:
- T urn signal and high beam
- Audi act ive lane assist . .. ... . .
- High beam assist ......... .. .
@ Multifunction steering wheel with:
- Horn
- Driver's airbag ............ . .
- Driver information system but-
tons ... .. ................ . .
- Audio/v ideo, telephone, nav iga
t ion and voice recognition but
tons
- Stee ring wheel heating ...... .
- Shift paddles (automatic trans-
mission) . .. ........... .. .. .
® Instrument cluster .......... . .
@ H ead-up Display .... ..... ... . .
@ Windshield washer system lever
@ Buttons for:
- MM I display
- Reset button for trip odometer
@ Starting the engine if there is a
malfunction ................ . .
'3 Knee airbag
@ Steering wheel adjustment, de
pending on equipment:
- mechanical .............. .. .
- electrical
@ Lever for:
- Cruise control system
- Adaptive cruise control .... .. .
@ Button for switching the Head-up
Disp lay on/off, adjusting the
height .. .. ............... .. .
@ Instrument illumination ....... .
;::: @ Engine hood release ......... . .
0
~ @ Data Link Connector for On Board ,....,
~ Diagnostics (OBD II) . ..... ... . .
M v:, ,....,
96
35
57
96
45
93
45
146
23
72
110 10
27
51
26
76
158
73
73
82
84
27
48
216
28
@ Light switch ... .............. .
@ Buttons for:
- All-weather lights
- Night vision assistant .. ...... .
- Rear fog lights ............. .
@ Rear lid switch . .............. .
@ Power exterior mirror adjustment
@ Power windows .. ...... ...... .
@) MMI display
@ Emergency flashers ........... .
@ Glove compartment .......... .
@ Front passenger's airbag ...... .
@ Valet parking feature ......... .
@ Drives (MMI)
@ Buttons/Indicator lights for
- Start-Stop-System .. . .. .. ... .
- Parking system ....... ...... .
- PASSENGER AIR BAG OFF .... .
- Rear window power sun shade
- Electronic Stabilization Control .
@ Climate controls, depending on ve
hicle equipment:
- Three-zone climate control ....
- Four-zone automatic climate con-
trol .. .... .. .... .......... .
@ Storage compartment or ashtray
with cigarette lighter ......... .
@ I S TAR T ENGIN E ST OP I button
@
@ MMI controls
12 -volt socket, (upholder
@) Electromechanical parking brake
@ Selector lever (automatic transmis-
sion) ... .... .. .............. .
{D Tips
Cockpit
44
44
103
44
36
48
40
47
61
146 41
79
113
154
50
188
68
70
59,59
74
60,60
77
106
- Some of the equipment or features shown
in the general illustration may be standard
equipment on your vehicle or may be op
tional equipment depending on your model.
Always ask your authorized Audi dealer if
you have a question about your veh icle.
- Operation of the Multi Media Interface
(MMI) is described in a separate manual.
9
Page 13 of 294
-Never open the engine hood if you see or
hear steam, or if you see engine coolant
dripping from the engine compartment. You
could burn yourself. Let the engine cool off
first until you can no longer see or hear steam or coolant escap ing .
Q) Note
-Mounting additional lights or accessories in
front of the air inlets reduces the cooling ef
fect of the radiator. At h igh outside temper
atures or h igh engine load, the engine cou ld
ove rheat.
- The front spoiler has been designed to prop
erly distribute the cooling air when the veh i
cle is moving.
If the spoiler is damaged, this
could red uce the cooling effect and the en
gine could then overheat . Ask your author
ized Audi dealer for assistance.
Tachometer
The tachometer displays the engine speed in rev
olutions per minute (RPM).
You shou ld shift to the next lowest gear when
the speed is below 1500 RPM. The beginning of
the red zone in the tachometer indicates the maximum permissib le engine speed for all gears
once the engine has been broken in and when it is
warmed up to operating temperature. Before reaching the red zone, you should shift into the
next h igher gear, choose the Dor S selector lever
position, or remove your foot from the accelera
tor pedal.
CD Note
The tachometer needle© c::> page 10, fig. 3
should only be in the red zone br iefly: other
w ise, this increases the risk of e ngine dam-
age. The location where the red zo ne begins
varies depend ing on the eng ine.
@, For the sake of the environment
Upshifting early helps you to save fuel and re
duce operating noise.
In strum ents an d ind ic a to r ligh ts
Fuel level
The fue l gauge only works when the ignition is
on.
If t h e fue l level drops below 2.6 gallons (10
lite rs), the bottom LED turns red and the indica
tor light
t]J turns on c::> page 21. The bottom
LED blinks red when the fue l level is very low.
T he possible range based on the c urrent fue l lev
el is shown in tab@c::>
page 23, fig . 4 .
Fo r the tank capacity in your veh icle, refer to the
T echn ica l Data c::>
page 2 71.
CD Note
Never drive until the tank is completely emp
ty. The irregu la r supply of fuel that resu lts
from that can cause t he engine to m isfire. Un
combusted f uel w ill then en ter the exha ust
system . This can cause ove rheating and dam
age to the catalytic converter.
Indicator lights
Description
T he ind icator lights in the instrument cluster
blink or turn on. They i ndicate functions o r mal
funct ions c::>
.&,.
Messages may appear with some ind icator lights.
A war ning s ignal will sound at the same time.
T he ind icator lights and messages in the ce nte r
of the disp lays may be replaced by other displays.
T o s how them again, select the tab for indicator
li gh ts and messages using the m ultifunction
steering wheel c::>
page 23. If there are several
malfunctions, you can display them one at a time
us ing the thumbwheel.
Some indicators lights in the display can t urn on
in several colors.
A WARNING
- Fai lure to heed wa rning lights and other im
portant vehicle information may result in
serious personal injury or vehicle damage.
- Whenever stalled or stopped for repair,
move the vehicle a safe d istance off the
road, stop the engine, and turn on the
emergency flasher c::>
page 47.
11
Page 26 of 294
Instruments and indicator lights
-You can select the units used for tempe ra
ture, speed and other measurements in the
MMI.
- For information on the audio/video and nav
igation* functions, refer to the separate
MM I owner's manual.
Operation
The driver information system is operated using
the buttons on the multifunction steering wheel .
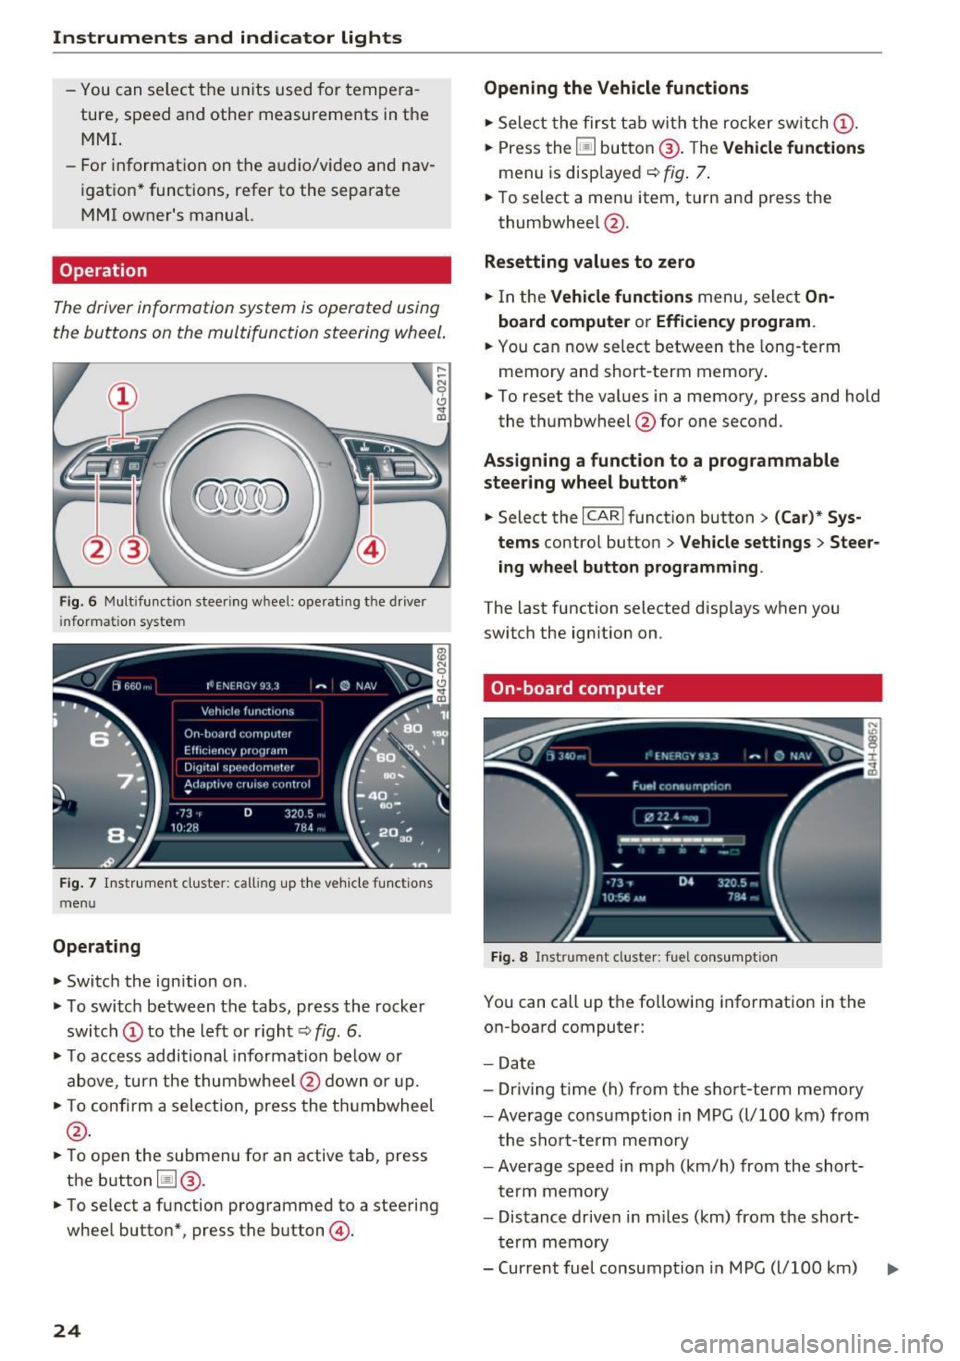
Fig. 6 Multifunction steering wheel: operating the driver
info rmation system
Fig . 7 In str um en t cluster: calling up the vehicle functions
menu
Operating
• Switch the ignition on.
• To switch between the tabs, press the rocker
switch (!) to the left or right~
fig. 6.
• To access additional information below or
above, turn the thumbwheel @down or up.
.,. To confirm a selection, press the thumbwheel
@.
• To open the submenu for an active tab, press
the button ~@.
....
-N 9 (!:I .,. OJ
• To se lect a function programmed to a steering
wheel button*, press the button@.
24
Opening the Vehicle functions
.,. Select the first tab with the rocker switch @ .
.,. Press the~ button @. T he
Vehicle functions
menu is displayed ~ fig . 7 .
.,. To select a menu item, turn and press the
thumbwheel @.
Resetting values to zero
.,. In the Vehicle functions menu, select On
board computer or Efficiency program.
.,. You can now select between the long-term
memory and short-term memory .
• To reset the values in a memory, press and hold
the thumbwheel @for one second.
Assigning a function to a programmable
steering wheel button*
.,. Select the I CAR I function button > (Car)* Sys
tems
control button > Vehicle settings > Steer
ing wheel button programming .
The last function selected disp lays when you
switch the ignition on .
On-board computer
Fig. 8 Instrument cluster: fuel consumption
You can call up the following information in the
on-board computer:
- Date
- Dr iv ing t ime (h) from the short-term memory
- Average consumption in MPG (l/100 km) from
the short-term memory
-Average speed in mph (km/h) from the short
term memory
- Distance driven in miles (km) from the short
term memory
- Current fuel consumption in MPG (l/100 km)
Page 28 of 294
Instrumen ts and ind icator ligh ts
Econom y tip s
In certain s ituations, economy tips appear auto
matica lly for a sho rt time in the efficiency pro
gram
c:> fig. 10. If you fo llow these economy tips,
you can reduce your vehicle's fuel consumption.
To t urn an economy tip off immed iate ly after it
appears, press any button on the multifunction
steering wheel.
(D Tips
- If you e rase the data in the efficiency pro
gram, the values in the on-board computer
will a lso be reset.
- Once you have turned an economy tip off, it
will only appear again after you turn the ig
nition on again .
- The economy t ips are not displayed in every
instance, but rather in intervals over a peri
od of t ime.
Odometer
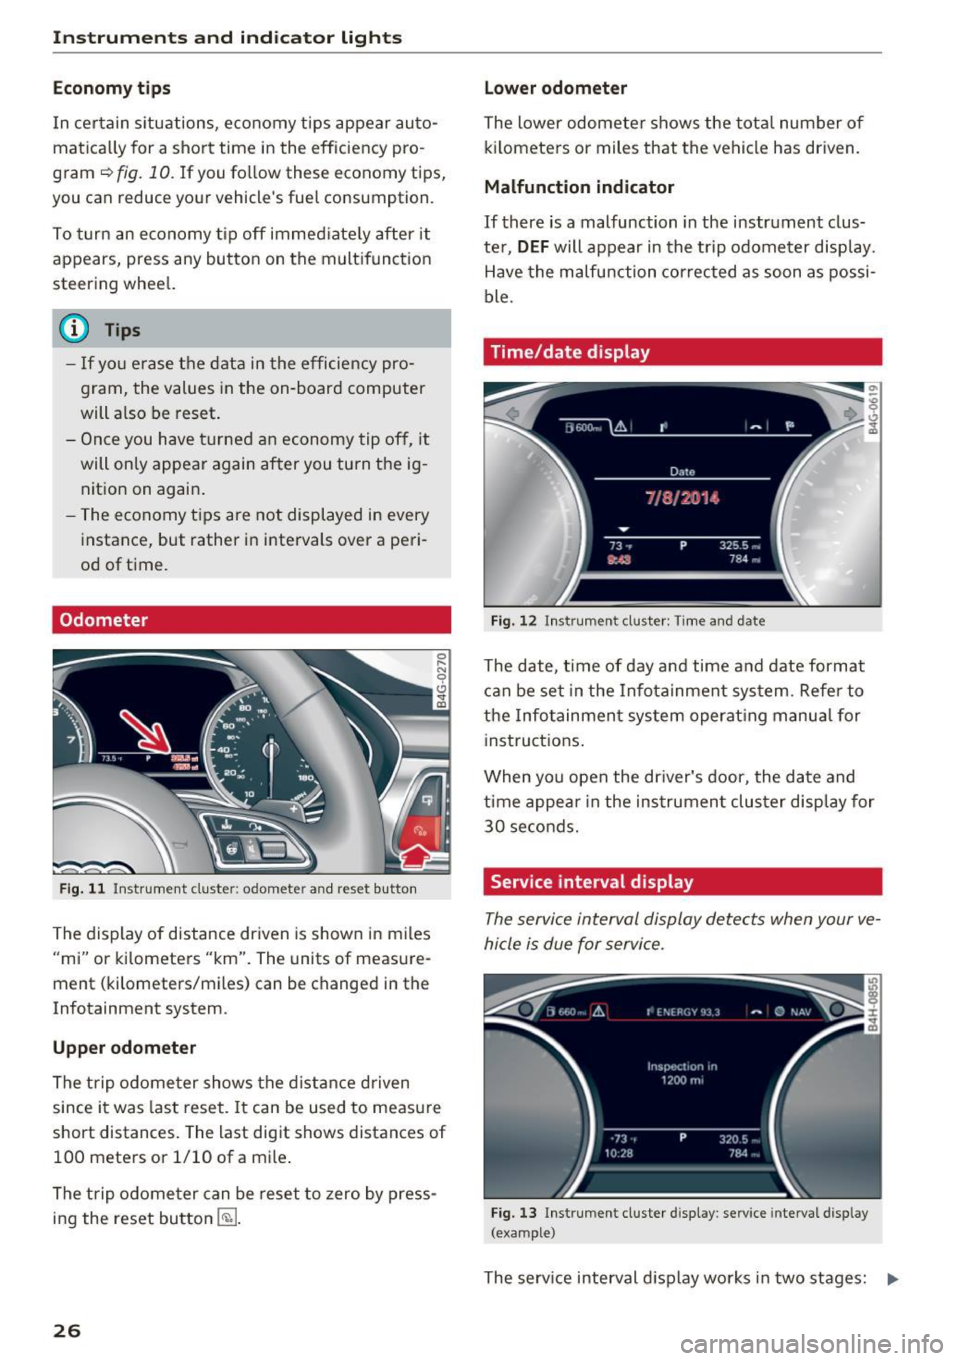
F ig . 1 1 Instrument cluster: odometer and reset button
The display of distance dr iven is shown in miles
"mi" or kilometers "km". The units of measure
ment (kilometers/m iles) can be changed in the
Infotainment system.
Upp er odometer
The trip odome ter shows the d istance driven
since it was last reset. It can be used to measure
short distances. The last digit shows distances of 100 meters or 1/10 of a mile .
The trip odome ter can be reset to zero by press
ing the reset bu tton
E§J .
26
Lo wer odom eter
The lower odomete r shows the tota l number of
k ilometers or miles that the vehicle has driven.
Malfunction indicator
If there is a malfunction in the instrument clus
ter,
DEF will appear in the trip odometer display.
Have the malfunction corrected as soon as possi
ble.
Time/date display
Fig. 12 Instrument cluster: Time and date
The date, time of day and time and date format
can be set in the Infotainment system. Refer to
the Infotainment system operat ing manu al for
inst ructions.
When you open the dr iver's door, the date and
time appear in the instrumen t cluster display for
30 seconds.
Service interval display
The service interval display detects when your ve
hicle is due for service.
Fig. 13 Instrument cluster display: service interval d isplay
(example)
The serv ice interval display works in two stages: II>
Page 32 of 294
Opening and closing
Opening and closing
Keys
Key set
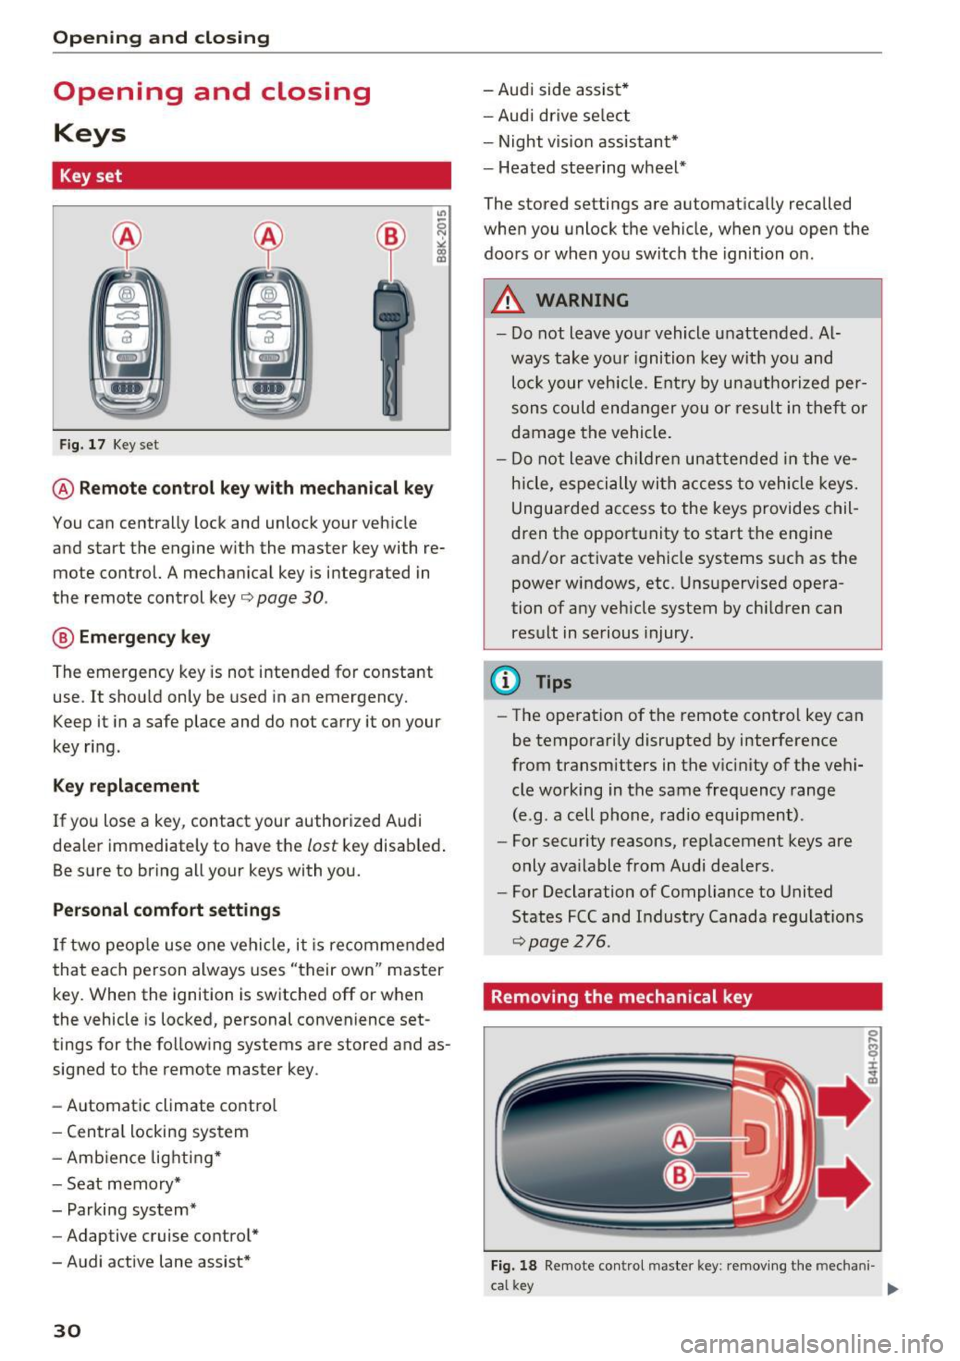
Fig. 17 Key set
@ Remote control key with mechanical key
You can centrally lock and unlock your vehicle
and start the engine w ith the master key with re
mote control. A mechanical key is integrated in
the remote control key¢
page 30.
@ Emergency key
The emergency key is not intended for constant
use. It shou ld only be used in an emergency.
Keep it in a safe place and do not carry it on your
key ring.
Key replacement
If you lose a key , contact your authorized Audi
dealer immediately to have the
lost key disab led .
Be sure to bring all your keys with you.
Personal comfort settings
If two people use one vehicle, it is recommended
that each person always uses "their own" master
key. When the ignition is switched off or when
the vehicle is locked, personal convenience set
tings for the following systems are stored and as
signed to the remote master key .
- Automatic climate contro l
- Central locking system
- Amb ience lighting*
- Seat memory*
- Parking system*
- Adaptive cruise control*
- Audi active lane assist*
30
-Audi side assist*
- Audi drive select
- Night vision assistant*
- Heated steering wheel*
The stored settings are automatically recalled
when you unlock the vehicle, when you open the
doors or when you switch the ignition on.
A WARNING
-
-Do not leave your vehicle unattended. Al
ways take your ignition key with you and
loc k your vehicle . Entr y by unautho rized per
sons could endanger yo u or result in theft or
damage the vehicle.
- Do not leave children unattended in the ve
hicle, especially with access to vehicle keys.
Unguarded access to the keys provides chil
dren the opport unity to start the engine
and/or activate vehicle systems s uch as the
power windows, etc. Unsupervised opera
tion of any vehicle system by ch ildren can
result in serious injury .
(D Tips
-The operation of the remote control key can
be temporarily disrupted by interference
from transmitters in the v icinity of the vehi
cle working in the same frequency range
(e.g . a cell phone, radio equipment).
- For security reasons, replacement keys are
only ava ilable from Audi dealers .
- For Declaration of Compliance to United
States FCC and Industry Canada regulations
~page 276.
Removing the mechanical key
Fig. 18 Remote contro l maste r key : removing the mecha ni-
ca l key .,..
Page 47 of 294
.... N
0 CJ '
-In cool or damp weather, the inside of the
headlights, turn signals and tai l lights can
fog over due to the temperature difference
between the inside and outside. They will
clear short ly after switching them on. This
does not affect the service life of the light
i ng.
Turn signals and high beam lever
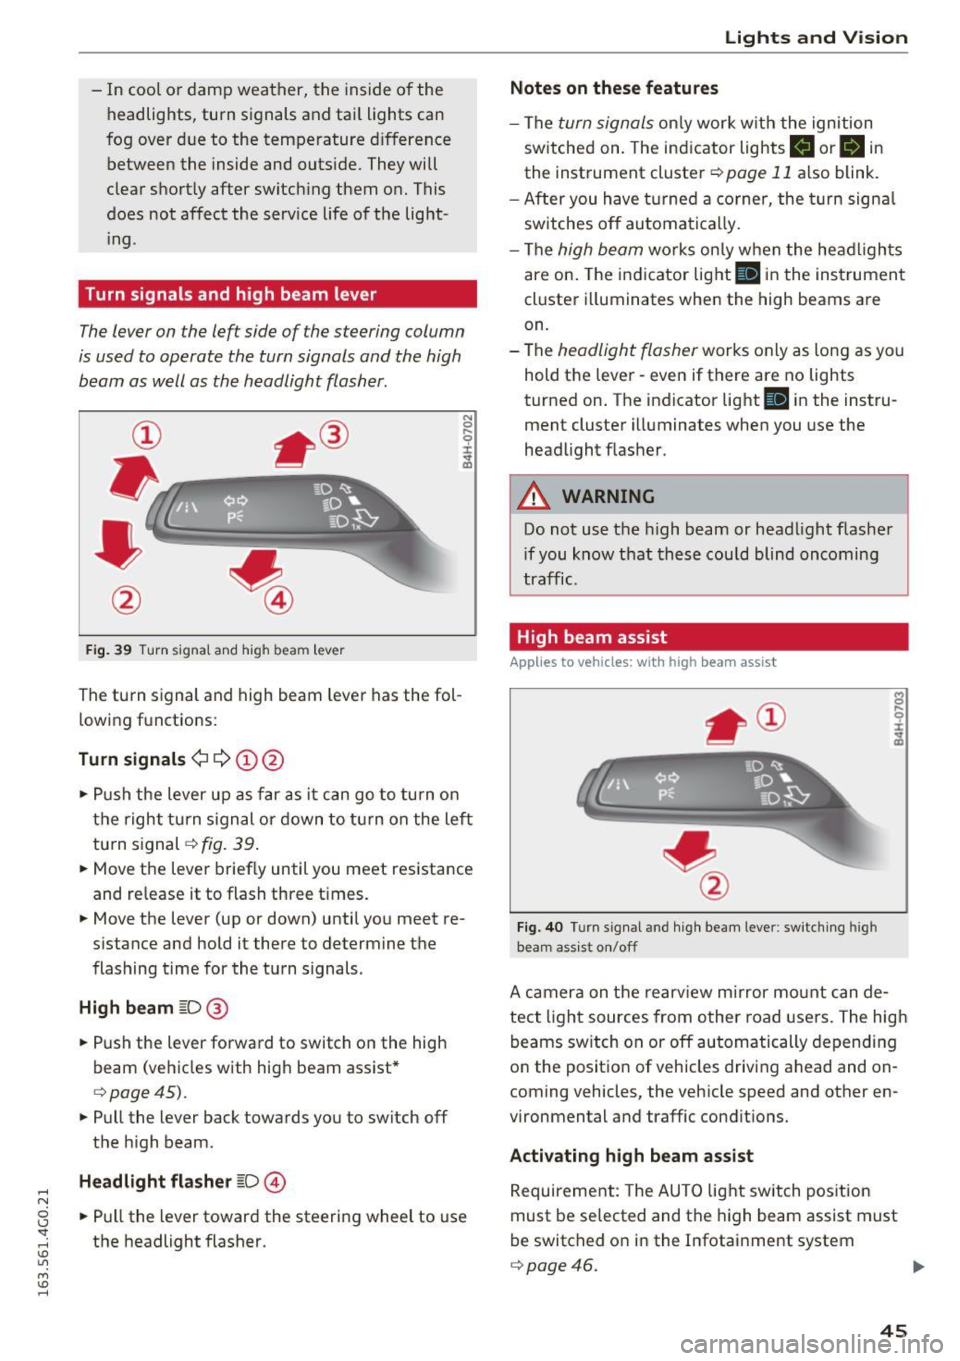
The lever on the left side of the steering column
is used to operate the turn signals and the high
beam as well as the headlight flasher.
F ig . 39 Turn signal and high beam lever
The turn s ignal and high beam lever has the fol
lowing fu nctions:
Turn signals¢¢ (!)@
N
0
..... 0
~ IJl
• Push the lever up as far as it can go to turn on
the right turn s ignal or down to turn on the left
turn signal¢
fig. 39 .
• Move the lever brief ly until you meet resistance
and re lease it to flash three times.
• Move the lever (up or down) until you meet re
s istan ce and hold it there to determine the
flashing time for the turn signals.
High beam ~D@
• Push the lever forward to switch on the high
beam (vehicles with high beam assist*
¢ page45).
• Pull the lever back towards you to switch off
the high beam .
Headlight flasher ~D@
• Pull the lever toward the steering wheel to use
the headlight flasher .
Lights and V ision
Notes on these features
-The turn signals only work w ith the ignition
sw itched on. The indicator lights
B or B in
the instrument cluster¢ page 11 also blink.
- After you have turned a corner , the turn signa l
switches off automatically.
- The
high beam works on ly when the headlights
are on. The indicator light
II in the instrument
cluster illuminates when the high beams are
on.
- The
headlight flasher works only as long as yo u
hold the lever -even if there are no lights
turned on. The indicator light
Iii in the instru
ment cluster illuminates when you use the
headlight flasher .
A WARNING
-Do not use the high beam or headlight flasher
i f you know that these could blind oncoming
traffic.
High beam assist
Applies to veh icles: w ith high beam assist
Fig. 40 Turn signal and high beam lever: switching high
beam assist on/off
A camera on the rearview mirror mount can de
tect light sources from other road users. The high
beams switch on or off automatically depending
on the posit ion of vehicles driving ahead and on
coming vehicles, the vehicle speed and other en
vironmental and traffic conditions.
Activating high beam assist
Requirement: The AUTO light switch position
must be selected and the high beam assist must
be switched o n in the Infotainment system
¢page 46.
45
Page 55 of 294
Seats and storage
General information
Why is your seat adjustment so important?
The safety belts and the airbag system can only
provide maximum protection if the front seats are corr ectly adjusted .
There are various ways of adjusting the front
seats to provide safe and comfortable support
for the driver and the front passenger . Adjust
your seat properly so that:
- you can easily and quickly reach all the switches
and controls in the instrument panel
- your body is properly supported thus reducing
physical stress and fatigue
- the safety belts and a irbag system can offer
maximum protection
<=:> page 142.
In the following sections, you will see exact ly
how you can best adjust your seats.
There are spec ial regulations and instr uctions for
installing a child seat on the front passenger's
seat . Always fo llow the information regarding
child safety provided in¢
page 166, Child safe
ty .
A WARNING
Incorrect seating position of the driver and all
other passengers can result in serious person
al injury .
- Always keep your feet on the floor when the
vehicle is in motion - never put your feet on
top of the instrument pane l, o ut of the win
dow or on top of the sea t cushion. This ap
plies espe cially to the passengers.
If your
seating pos it ion is inco rrect, yo u increase
the risk of injury in the case of sudden brak
ing or an accident. If the ai rbag inf lates and
the seating position is incorrect, this cou ld
result in personal injury or even death.
- It is important for both the driver and front
passenger to keep a d istance of at least
10 inches (25 cm) between themselves and
the steering wheel and/or instrument pan el. If you're s itting any closer than this, the
airbag system can not protect you properly.
Seat s and sto rage
In addition, the front seats and head re
stra ints must be adjusted to your body
he ight so that they can g ive you maximum
protection .
- Always try to keep as much distance as pos
sible between yourself and the steer ing
wheel or instrument panel.
- Do not adjust the driver's or front passeng
er's seat while the veh icle is moving . Your
seat may move unexpectedly, causing sud
den loss of vehicle contro l and personal in
jury.
If yo u ad just yo ur seat while the veh icle
is moving, you a re o ut of pos ition.
Driver's seat
The correct seat position is important for safe
and relaxed driving.
We recommend that you adjust the dr iver's seat
i n the following manner:
.. Adjust the seat in fore and aft direction so that
you can eas ily push the pedals to the floor
while keeping yo ur knees slightly bent<=:>.&,
in
Why is your seat adjustment so important? on
page
53 .
.,. Adjust the bac krest so that when you s it w ith
your back agains t the backrest, yo u can st ill
grasp the to p of the steering wheel.
.. For adj ustab le head restraints : adjust the head
restraint so the upper edge is as even as possi
ble with the top of your head. If that is not pos
sible, try to adjust the head restraint so that it
is as close to this posit ion as possible
<=:> page 56 . Move the head restra int so that it
is as close to the back of the head as poss ible .
A WARNING
Neve r pla ce any objects in the dr iver's foot
well. An objec t could ge t into the pedal area
a nd interfe re with pedal func tion. In case of
sud den braking or an accident, you would no t
be ab le to b rake o r accelerate .
-
53
Page 60 of 294
Seats and storage
Remote Memory button
control key
Driver Driver
Front
passen-
ger
Seat X X X
Steering wheel* X
X
Both exterior X X
mirrors*
Remote control key
Applies to vehicles: w ith memory function
The driver 's seat profile con be assigned to the
remo te control key when the vehicle is locked.
• Se lect : the ICARI function button > (Car)* Sys
tems
control button > Vehicle settings > Driv
er's seat
> Remote control key > On.
(D Tips
If you do not wish to have the seat profile for
another driver assigned to the remote contro l
key, switch the memory function off in the In
fotainment system or using the IOFFI button
r::::;,poge 58.
Memory buttons
Applies to vehicles: with memory function
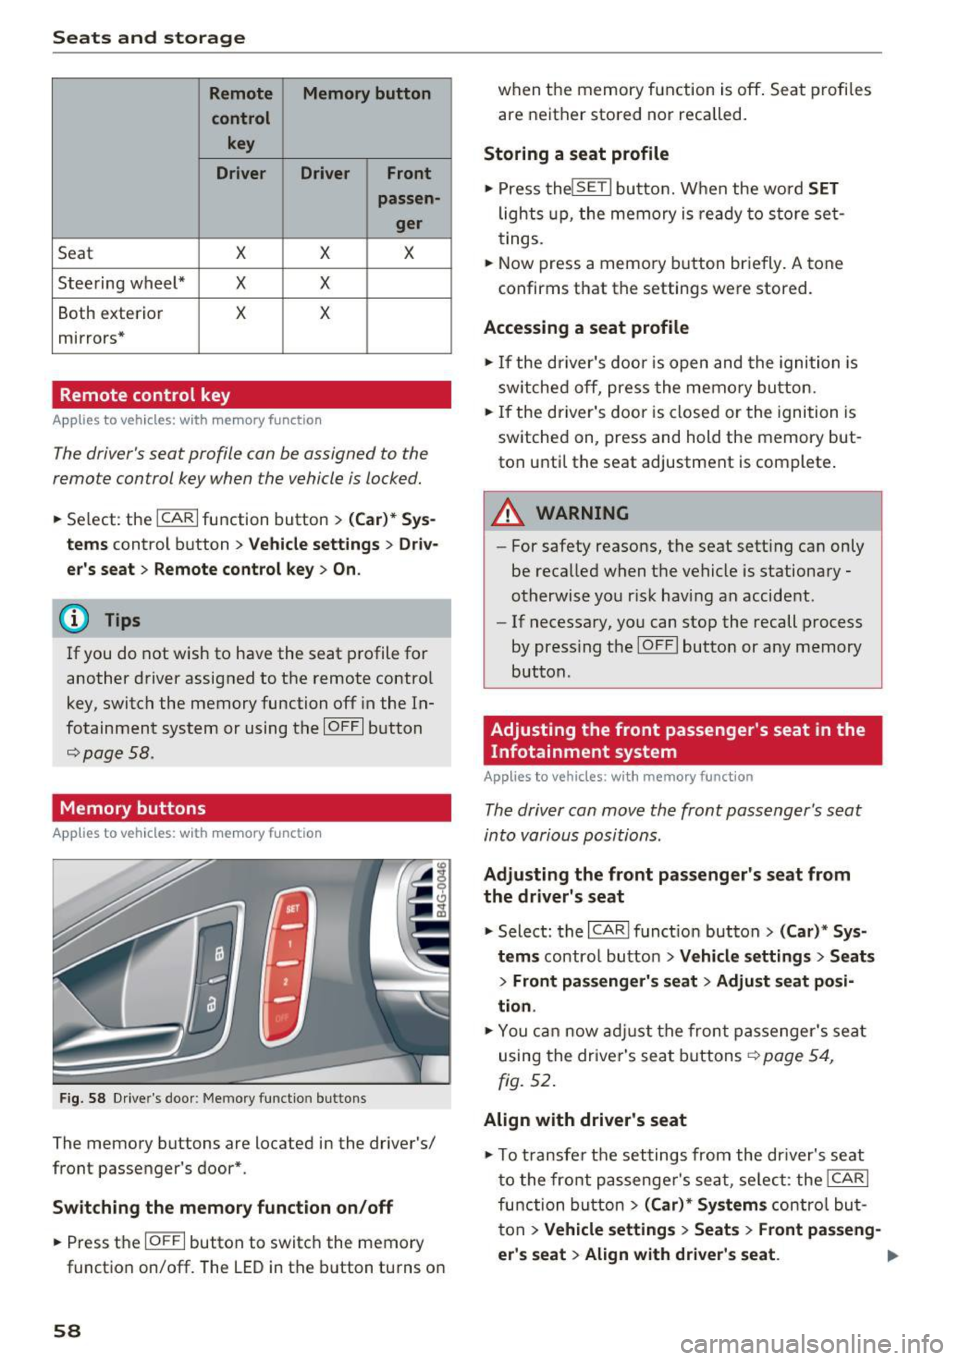
F ig. 58 Drive r's door : Me mory funct io n button s
The memory buttons are located in the driver's/
front passenger 's door*.
Switching the memory function on/off
• Press the IO FFI button to switch the memory
functio n on/off. The
LED in the button turns on
58 when the memory function is off
. Seat profiles
are neither stored nor recalled.
Storing a seat profile
• Press thelSE TI button. When the word SET
lights up, the memory is ready to store set
tings .
• Now press a memo ry button briefly.
A tone
confirms that th e settings were stor ed.
Accessing a seat profile
• If the driver's door is open and the ignition is
sw itched off, press the memory button.
• If the driver's door is closed or the ignition is
switched on, press and hold the memory but
ton until the seat adjustment is complete .
A WARNING
-For safety reasons, the seat sett ing can only
be recalled when the vehicle is stationary -
otherwise you r isk having an accident .
- If necessary, you can stop the recall process
by press ing the IOF FI butto n or any memory
button .
Adjusting the front passenger's seat in the
Infotainment system
Applies to vehicles: with memory function
The driver con move the front passenger's seat
into various positions .
Adjusting the front passenger's seat from
the driver's seat
• Select: the I CARI function button > (Car)* Sys
tems
control button > Vehicle settings > Seats
> Front passenger's seat > Adjust seat posi
tion .
• You can now adjust the front passenger's seat
using the driver's seat buttons
r:::;, page 54,
fig. 52.
Align with driver's seat
""To transfer the settings from the dr iver's seat
to the front passenge r's seat, se lect : the
I CAR I
function button
> (Car)* Systems contro l but
ton
> Vehicle settings > Seats > Front passeng-
er 's seat
> Align with driver 's seat . .,.