display AUDI A6 2017 User Guide
[x] Cancel search | Manufacturer: AUDI, Model Year: 2017, Model line: A6, Model: AUDI A6 2017Pages: 280, PDF Size: 70.24 MB
Page 25 of 280
co
co
.... N
" N .... 0 0 <.,;) 'SI'
Unlike the short-term memory, the long -term
memory is not erased automatica lly. Yo u can se
l ect the time period for evaluat ing trip informa
tion yourself .
F or some veh icle functions, you can access the
driving information from the short -term memory
i n the
line @¢poge21, fig. 5.
Fuel consumption
The cu rrent fue l co nsu mption c an be shown us
i ng a ba r g rap h
¢fig . 8 . The aver age consum p
tion stored in the short -term memory is also dis
p layed . If the bar is green, your vehicle is saving
fuel throug h one of the following functions:
-Re cuperation : electr ical ene rgy can be store d in
the vehicle battery when t he vehicle is coasting
or driving downhill. The bar will move toward
0 .
-Cylinder on demand system* : the engine auto
matically switches four cylinde rs off when low
er powe r output is required and other condi
tions are met. This change is not noticeab le to
t h e passengers.
(]} Tips
The date, time of day and t ime and date for
mat can be set in the Infotainment system
¢page 24.
Efficiency program
Applies to: ve hicles with effic ie ncy p rogram
F ig. 9 In str ume nt cluste r: ot her equ ipment
Driver in forma tion system
Fig. 10 Instrument cluster: econo my t ip
T he eff ic iency p rogram can help you to use less
fuel. It shows o ther cons umers th at are using
f uel and e co nomy tip s give a dvice on how to drive
efficie ntly. The eff ic ien cy pr ogr am receives dis
tance and consumption data from the on -board
computer.
To dis play the eff icien cy p rogram, o pen the
Vehi
cle functions
m enu and select the Efficiency pro
gram
menu item.
Other consumers
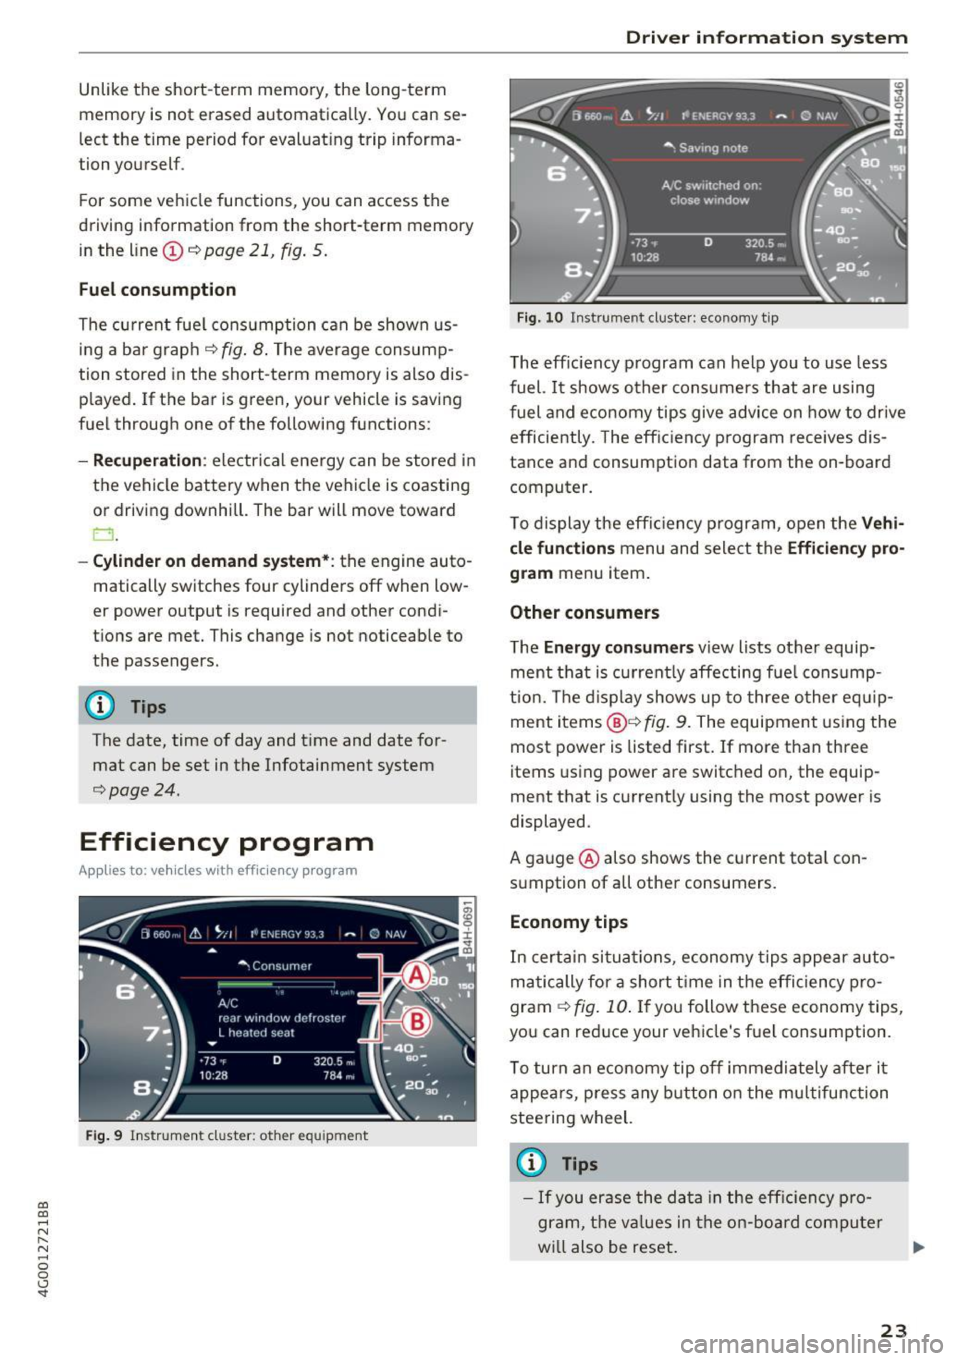
The Energy con sumers view lists other equip
ment that is c urren tly affe cting f ue l cons ump
tio n. Th e displ ay shows up to three o ther eq uip
ment items @¢
fig. 9. The equipment using the
most power is listed first. If more than three
items using power are switched on, the equip
ment that is current ly using the most power is
displayed.
A ga uge @ also shows the c urrent tota l con
s u mption of all othe r consumers.
Economy tips
In c ertai n sit ua tio ns, economy tips appe ar auto
ma tic ally for a short t ime in the e ffic iency pro
gram
¢ fig . 10 . If you follow these economy tips,
yo u can red uce your vehicle's fuel cons umption.
T o turn an e cono my tip off immedia tely afte r it
appea rs, p ress any button o n the mu ltifun ction
stee ring wheel.
© Tips
- If you era se the d ata in t he eff ic ien cy pr o
gram, t he v alues in the on -boar d compu te r
wi ll also be reset .
23
Page 26 of 280
Driver information system
-Once you have turned an economy tip off, it
will only appear again after you turn the ig
nit ion on again .
- The economy tips are not displayed in every
instance, but rather in intervals over a peri
od of t ime .
Odometer
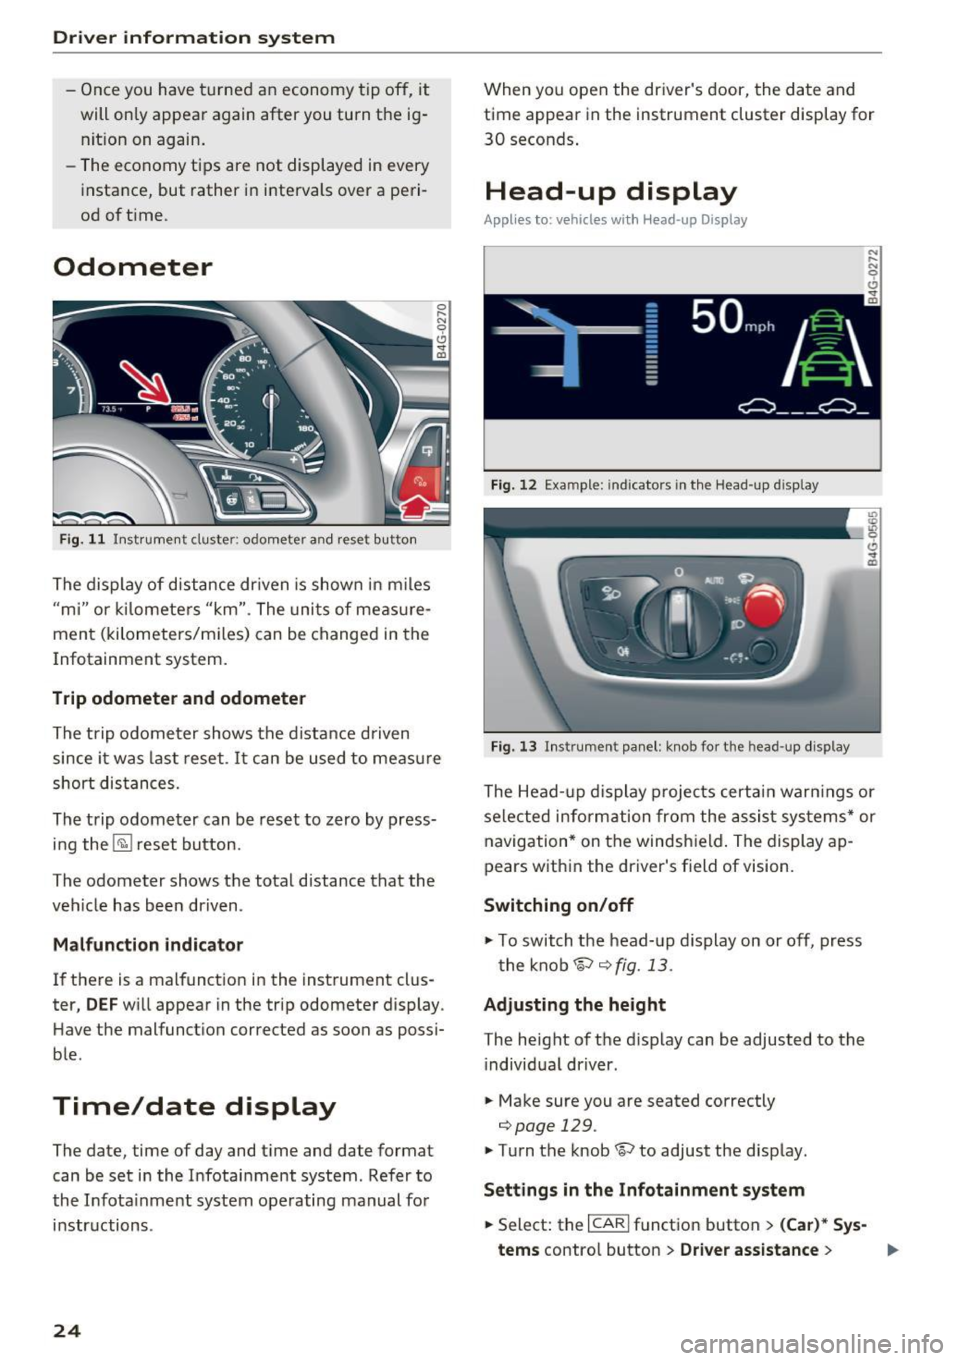
Fig. 11 Inst rume nt cluster : odometer and reset butto n
The display of d istance dr iven is shown in miles
"m i" or kilometers "km". The units of measure
ment (kilometers/m iles) can be changed in the
I nfotainment system.
Trip odometer and odometer
The trip odometer shows the distance driven
since it was last reset . It can be used to measure
short distances.
The trip odometer can be reset to zero by press
ing the ~ reset button.
The odometer shows the total distance that the
veh icle has been driven.
Malfunction indicator
If there is a malfunction in the instrument clus
ter,
DEF will appear in the trip odometer display.
H ave the malfunction corrected as soon as possi
ble.
Time/date display
The date, time of day and time and date format
can be set in the Infota inment system. Refer to
the Infota inment system operating manual for
instructions .
24
When you open the driver's door, the date and
time appear in the instrument cluster display for
30 seconds .
Head-up display
Applies to: vehicles with Head-up Display
Fig. 12 Example: indicators in the Head -up display
Fig. 13 Instrument panel: knob for t he head -up di splay
The Head-up display projects certain warn ings or
selected information from the assist systems* or
navigation* on the windshield. The display ap
pears within the driver's field of vision.
Switching on/off
"" To switch the head-up dis play on or off, press
the knob~
q fig. 13.
Adjusting the height
The height of the d isplay can be adjusted to the
i ndividual driver.
"" Make sure you are seated correctly
qpage 129.
"" Turn the knob~ to adjust the display.
Settings in the Infotainment system
""Select: the I CARI function button > (Car)* Sys-
tems
contro l button > Driver assistance > .,.
Page 27 of 280
Hea d-u p di spl ay> Head- up di spla y conten ts or
Displ ay brigh tn ess.
Di spla y content
In the Infotainment system, you can specify
which information should be displayed: For ex
ample, th is can include navigation informat ion *,
Adaptive cruise control* or night vision assist*.
The display of certa in info rmation and some of
the red indicator lights cannot be h idden in the
I nfotainment system.
Displ ay brightness
You can adjust the display br ightness in the Info
tainment system. The display brightness decreas
es automatically as the amount of light decreas
es. The backgro und brightness is adjusted with
the instrument il lumination
c::> page 44 .
(D Note
To prevent scratches on the g lass cove ring the
head- up d isplay, do not place any objects in
the projection opening.
(D Tips
- Sunglasses w ith polar izat ion fi lters and u n
favorab le lighting conditions can have a
negative effect on the display.
- An optim um display depends on the seat
pos ition and the height adjustment of the
head -up display.
- A specia l windshield is needed for the head
up display function.
- Fo r information on cleaning, refer to
c::> ta
ble on page 233.
On Board Diagnostic
System (OBD)
Malfunction Indicator Lamp (MIL)
The Malfunction Ind icator Lamp (MIL) a in the
instr ument cluster is part of the On-Board Diag
nostic (OBD II) system.
~ The warning/indicator light i lluminates when the ....
~ ign it ion is switched on and goes ou t after the en-N .... 0 0 <.,;) 'SI"
Driver info rm atio n sys tem
gine starts and the idle has stab ilized. This indi
cates that the MIL is working properly.
If th e light does not go ou t after the eng ine is
sta rted, or i llum inates while you are driving, a
malfunction may exist in the engine system. If
the light illuminates, the catalytic converter
could be damaged.
Cont inue driving
with redu ced p ower (avoiding
sustained high speeds and/or rapid accelera
tions) and have the condition corrected. Contact
your authorized Audi dealer.
If the ligh t illum ina tes, the electronic speed lim
iter may also be malfunctioning. For more infor
mation
c::> page 26, Electronic speed limiter.
An impro perl y close d fuel fi ller cap may al so
ca use the
MIL li g ht to illuminate c::> page 192.
On-Board Diagnostics
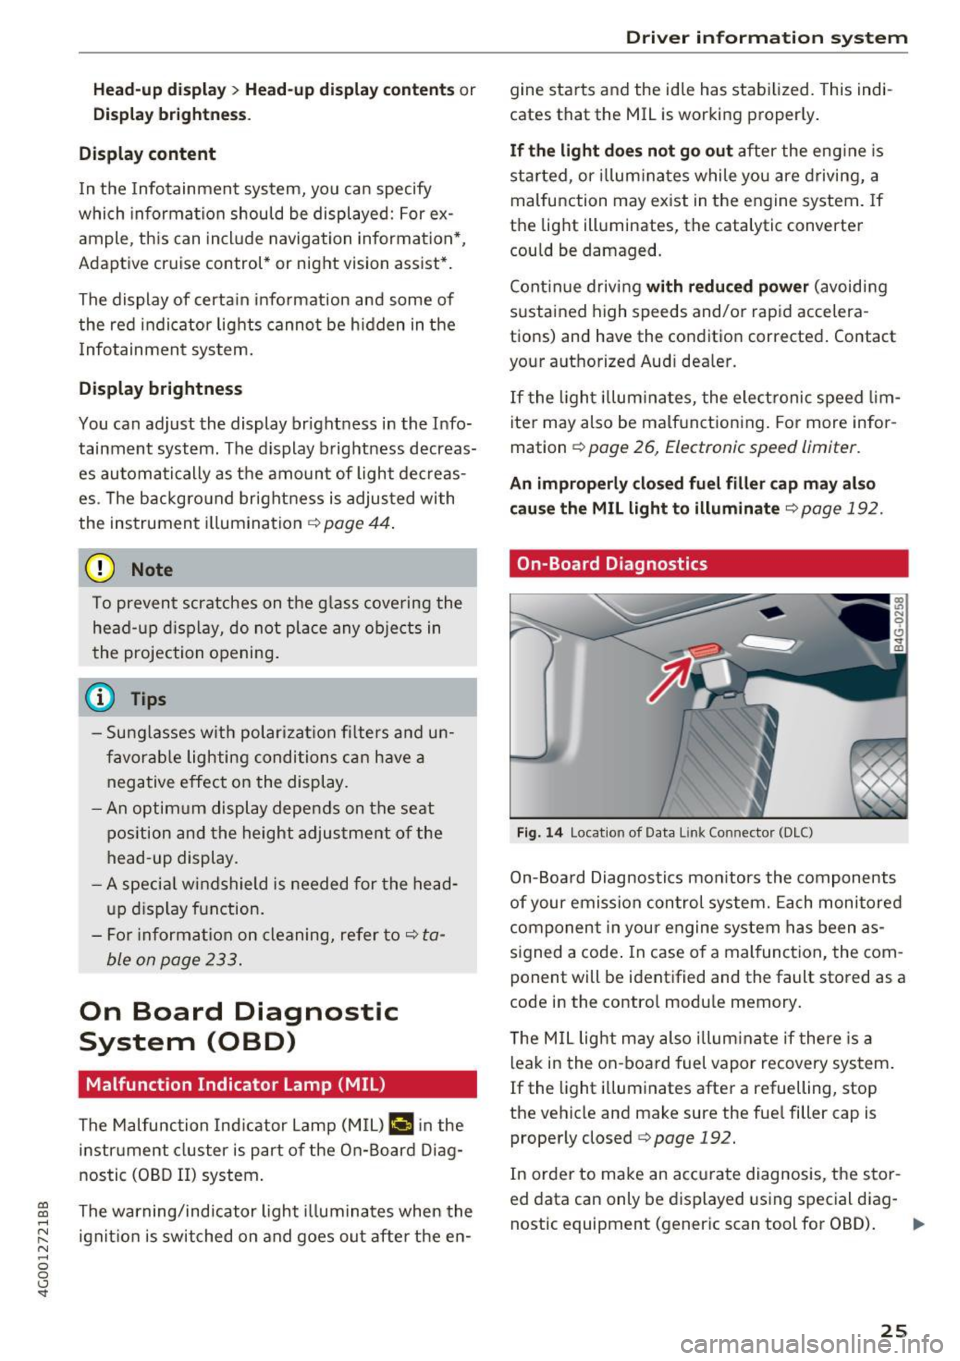
Fig. 14 Locat ion of Data L ink Connector (DLC)
On-Board Diagnostics monitors the components
of your emission control system. Each monitored
component in your engine system has been as
s igned a code . In case of a malfunction, the com
ponent will be identified and the fault stored as a
code in the contro l module memory.
T he M IL light may also illum inate if there is a
leak in the on-board fuel vapor recovery system.
If the light i lluminates after a refuelling, stop
the vehicle and make sure the fue l filler cap is
properly closed
c::> page 192.
In order to make an accurate diagnosis, the stor
ed data can only be displayed using special diag-
nostic equipment (generic scan tool for OBD).
IJI,-
25
Page 41 of 280
Valet Parking function
Applies to: veh icles wit h Valet Parking function
The valet parking function protects the luggage
comportment from unauthorized access .
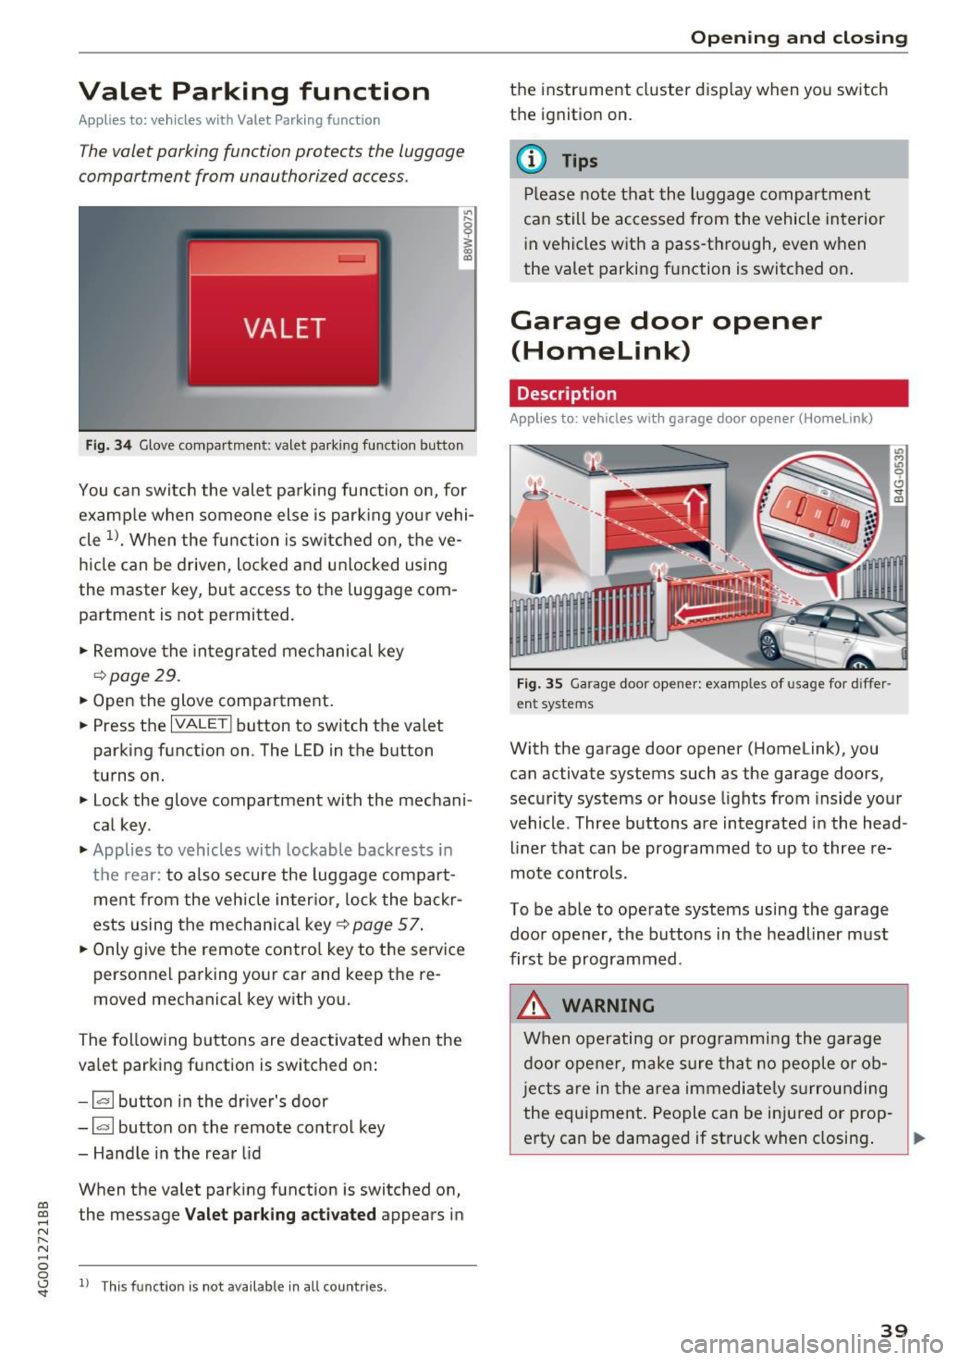
Fig. 34 Glove compartment: valet park ing function button
You can switch the valet parking function on, for
example when someone else is parking your vehi
cle
l)_ When the function is switched on, the ve
hicle can be driven, locked and unlocked using
the master key, but access to the luggage com
partment is not permitted .
.,. Remove the integrated mechanical key
r::!:>poge 29.
.,. Open the glove compartment.
.,. Press the
IVALET I button to switch the valet
parking function on. The LED in the button
turns on.
.,. Lock the glove compartment with the mechani
cal key .
.,. Applies to vehicles with lockable backrests in
t h e rear: to also secure the luggage compart
ment from the vehicle inter ior, lock the backr
ests using the mechanica l key ¢
page 57.
.,. Only giv e the remote control key to the service
personnel parking your car and keep the re
moved mechanical key with you.
The following buttons are deactivated when the
va let parking function is switched on:
- 1""' 1 button in the driver's door
-la l button on the remote control key
- Handle in the rear lid
When the valet parking function is switched on,
co ~ the message Valet parking activated appears in
N
" N .... 0 0
~ ll This func tion is not available in all co untries .
Open ing and closing
the instrument cluster display when you switch
the ignition on.
(D Tips
Please note that the luggage compartment
can still be accessed from the vehicle interior
in vehicles with a pass-through, even when
the valet parking function is switched on .
Garage door opener
(Homelink)
Description
Applies to: veh icles with garage door opener (Home link)
Fig . 35 Garage door opene r: examples of usage for diffe r
ent systems
With the garage door opener (Homelink), you
can activate systems such as the garage doors ,
security systems or house lights from inside your
vehicle. Three buttons a re integrated in the head
liner that can be programmed to up to three re
mote controls.
To be able to operate systems using the garage
door opener, the buttons in the headliner must
first be programmed .
_&. WARNING
When operating or programming the garage
door opener, make sure that no people or ob
j ects are in the area immediate ly surrounding
the equipment. People can be injured or prop-
erty can be damaged if struck when closing. .,.
39
Page 42 of 280
Opening and closing
@ Tips
-For security reasons, we recommend that
you clear the programmed buttons before
selling the vehicle.
- For additional information about Homelin k,
vis it www.homelink.com.
- For an explanation on conformity with the
FCC regulations in the United States and the
Industry Canada regulations, see
¢page 262.
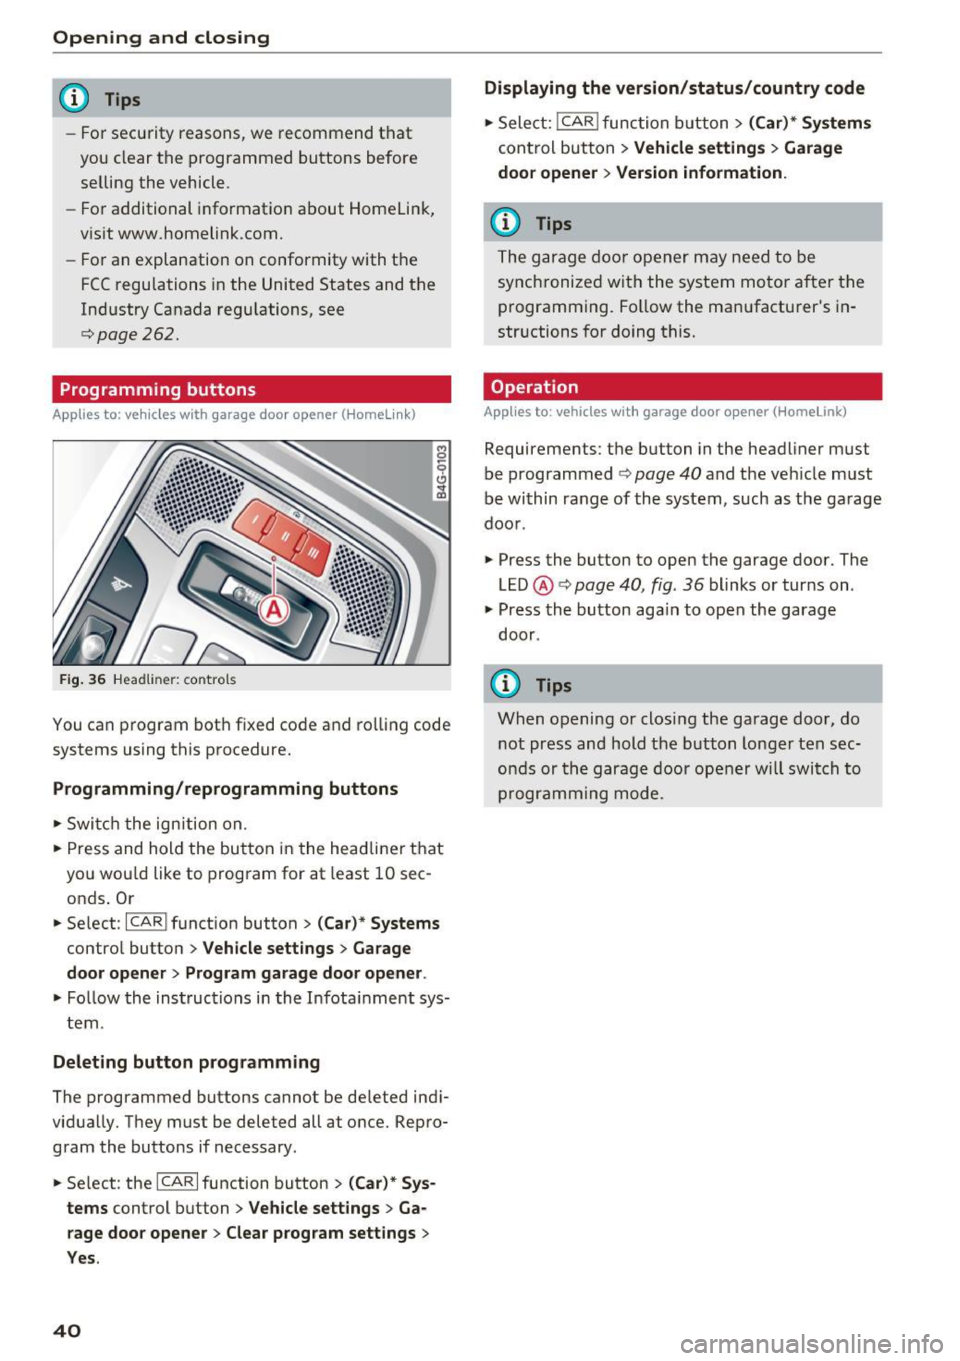
Programming buttons
App lies to : vehicles with garage door opener (Homelin k)
Fig. 36 Headli ner: co ntrols
You can program both fixed code and rolling code
systems using this procedure.
Programming/reprogramming buttons
,.. Switch the ignition on.
,.. Press and hold the button in the headliner that
you wou ld like to program for at least 10 sec
onds . Or
,.. Select:
-I C_A _R_I function button > (Car)* Systems
control button > Vehicle settings > Garage
door opener > Program garage door opener .
,.. Fo llow the instructions in the Infota inment sys
tem .
Deleting button programming
The programmed buttons cannot be de leted indi
vidually. They must be deleted all at once. Repro
gram the buttons if necessary.
,.. Se lect : the
ICARI function button > (Car)* Sys
tems
control button > Vehicle settings > Ga
rage door opener
> Clear program settings >
Yes.
40
Displaying the version/status/country code
,.. Select: !CAR I func tion button > (Car)* Systems
control button > Vehicle settings > Garage
door opener > Version information.
(D Tips
The garage door opener may need to be
synchronized with the system motor after the
programming. Follow the manufacturer's in
str uctions for doing this.
Operation
Applies to : vehicles with garage door opener (Homelink)
Requirements: the button in the headliner must
be programmed
¢ page 40 and the veh icle must
be within range of the system, such as the ga rage
door .
.,. Press the button to open the garage door. The
LED @¢
page 40, fig. 36 blinks or turns on .
.,. Press the button aga in to open the garage
door .
(D Tips
When opening or closing the garage door, do
not press and hold the button longer ten sec
onds or the garage door opener will switch to
programming mode.
Page 44 of 280
Lights and Vi sion
- If you turn off the ignition whi le the exterior
lights are on and open the door, a warning
tone sounds.
- In cool or damp weather, the inside of the
headlights, turn signals and tail lights can
fog over due to the temperature d ifference
between the inside and outside. They will
clear shortly after sw itch ing them on. This
does not affect the serv ice life of the light
ing .
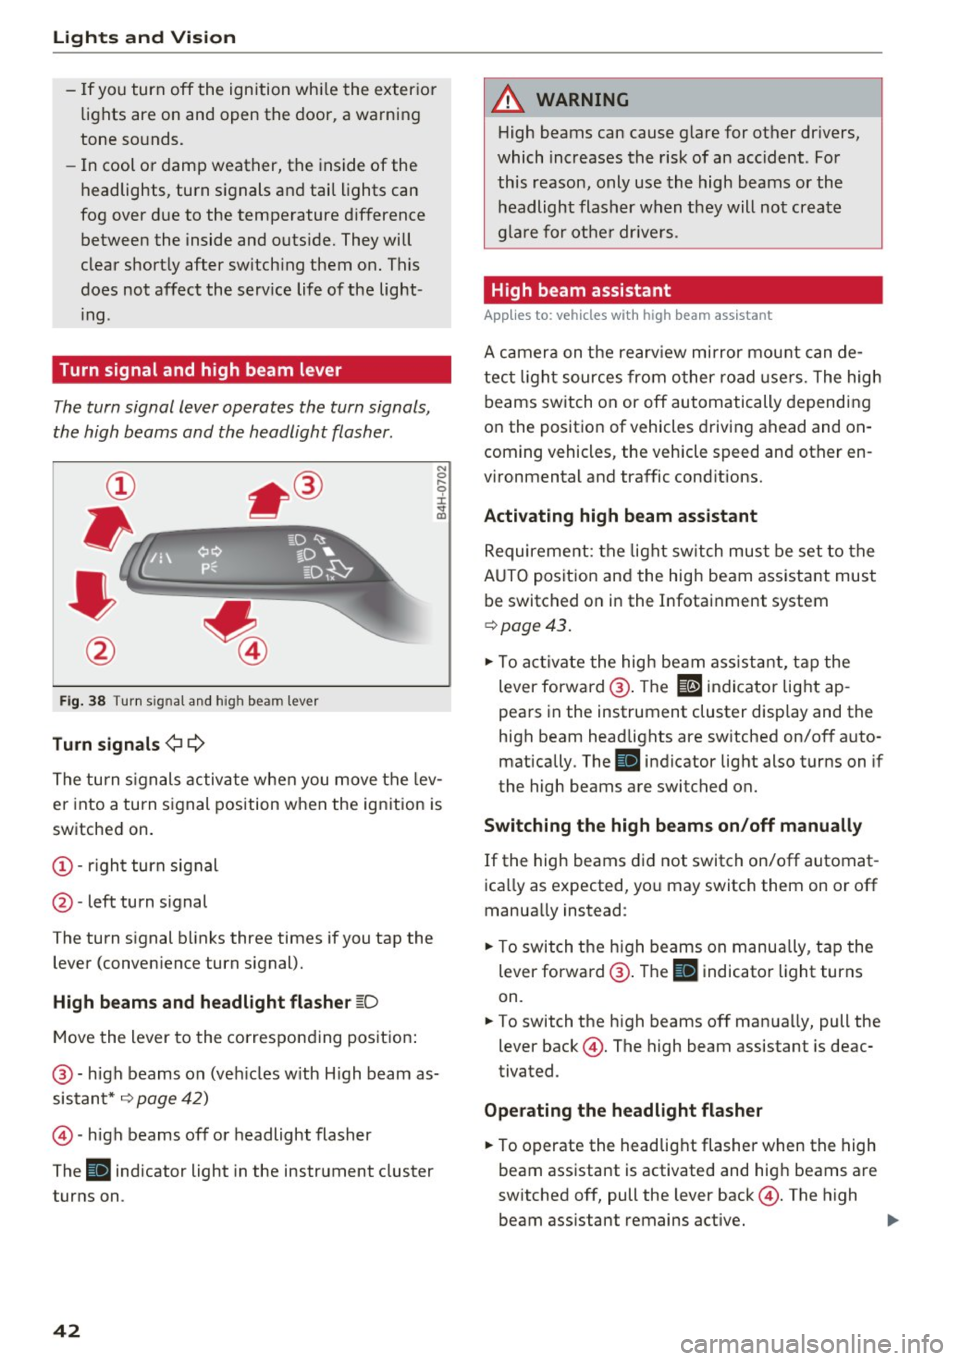
Turn signal and h igh beam lever
The turn signal lever operates the turn signals,
the high beams and the headlight flasher.
F ig . 38 Turn sig nal and high beam lever
Tu rn signals ¢ Q
N
0 ,.._
9 J:
;;!;
The turn s ignals activate when you move the lev
er into a turn signal position when the ignition is
switched on.
@ -right turn signal
@ -left turn s ignal
The turn signal blinks three times if you tap the lever (conven ience turn signal).
High b eams and h eadlight flasher ~D
Move the lever to the corresponding position :
@ -high beams on (veh icles w ith H igh beam as
sistant*
¢ page 42)
© -high beams off or headlight flasher
The
II indicator light in the instrument cluster
turns on.
42
A WARNING , _
H igh beams can cause glare for other drivers,
which increases the risk of an accident . For
this reason, only use the high beams or the headlight flasher when they will not create
g la re fo r othe r drive rs .
High beam assistant
App lies to: vehicles wi th high beam ass istan t
A camera on the rearv iew mirror mou nt can de
tect light sources from other road use rs. The high
beams switch on or off automatically depending
on the position of vehicles driving ahead and on
coming vehicles, the vehicle speed and other en
vironmental and traffic cond itions.
Activating high beam ass istant
Requirement: the light sw itch must be set to the
A UTO posit ion and the hig h beam ass istant must
be switched on in the Infotai nment system
¢ page 43 .
.,. To act ivate the high beam ass istant, tap the
lever forward @. The
El indicator light ap
pears in the instrument cluster display and the
high beam headlights are sw itched on/off auto
matically . The
II indicator light also turns on if
the high beams are switched on.
Switching the high b eam s on /off manually
If the high beams did not switch on/off automat
ica lly as expected, yo u may switch them on or off
manually instead:
.,. To switch t he h igh beams on manually, tap the
lever forward @. The
II indicator light turns
on.
.,. To switch the h igh beams off manua lly, pull the
lever back@. The high beam assistant is deac
tivated .
Operating the headlight flasher
.,. To operate the headlig ht flasher when the high
beam assistant is activated and hig h beams are
sw itched off, pull the lever back@. The high
beam ass istant remains active.
Page 45 of 280
Messages in the instrument cluster display
Headlight a ssist: System fault !
Drive to an authorized Aud i dealer or a uthorized
Aud i Service Facility immediately to have the
malfunct ion cor rected. You can still switc h the
hi gh beams on or off manually.
Headlight as sis t: Unavailable No camera view
The camera view is blocked, for example by a
sticker or debris.
The sensor is located between the interior rear
v iew mirror and the windshield . Do not p lace any
stickers in this area on the windshield.
A WARNING
H igh beam assistant is only intended to assist
the drive r. The dr iver is still responsible for
con troll ing the headlights a nd sw itch ing
them manually depend ing on light and v is ibil
i t y cond itions .
It may be neces sary to operate
t hem manually in situ at ions such as:
- In adverse weathe r co nd itions s uch as fog,
heavy r ain, b low ing snow o r sp raying wate r.
- On roads whe re oncoming traffic may be
partia lly obs cured, su ch as exp ressways .
- Whe n there are road users that do not have
s ufficient lighting, s uch as bi cycler s or
vehicles wi th dirty ta il lamps .
- In tight cu rv es and on steep hills.
- In poor ly l it areas.
- With strong reflectors, such as s igns.
- If the area of the windsh ield near the sensor
is fogged over, dirty, icy or covered w ith a
st icker.
Adjusting the exterior lighting
The functions ore adjusted in the Infotainment
system.
.,. Se lect : I CARI fu nction button> (Car )* Systems
contro l button > Vehicle setting s> Exterior
lighting .
co Automatic headlights co ....
~ You can adjust the fo llowing settings in the Au-N
8 tomatic headlight s menu: 0 <.,;) 'SI"
Lights and Vision
A cti vation sensitivity -you can adjust if the
headlights switch on
Early , Medium or Late ac
cording to the sensitivity of the light sensor .
Auto-dimming high beams* -yo u can sw itch the
high beam assistant*
On and Off .
Daytime running lights*
USA mode ls:
the daytime running lights can be
swit ched on/off. Select
On or Off .
Canada models:
this function cannot be switched
off . They act ivate automatically each time the ig
ni tion is switched on.
Coming home , Leaving home
The coming home function illuminates the area
outside the vehicle when you turn the ignit ion off
and open the driver 's doo r. To turn the function
o n, select
Light s when leaving car > On .
The leaving home illum inates the area outside
the vehicle when you unlock the vehicle . To turn
the function on, se lect
Li ghts when unlocking
car > On .
The coming home and leav ing home functions
only operate when it is dark and the light switc h
is in the
AUTO pos ition .
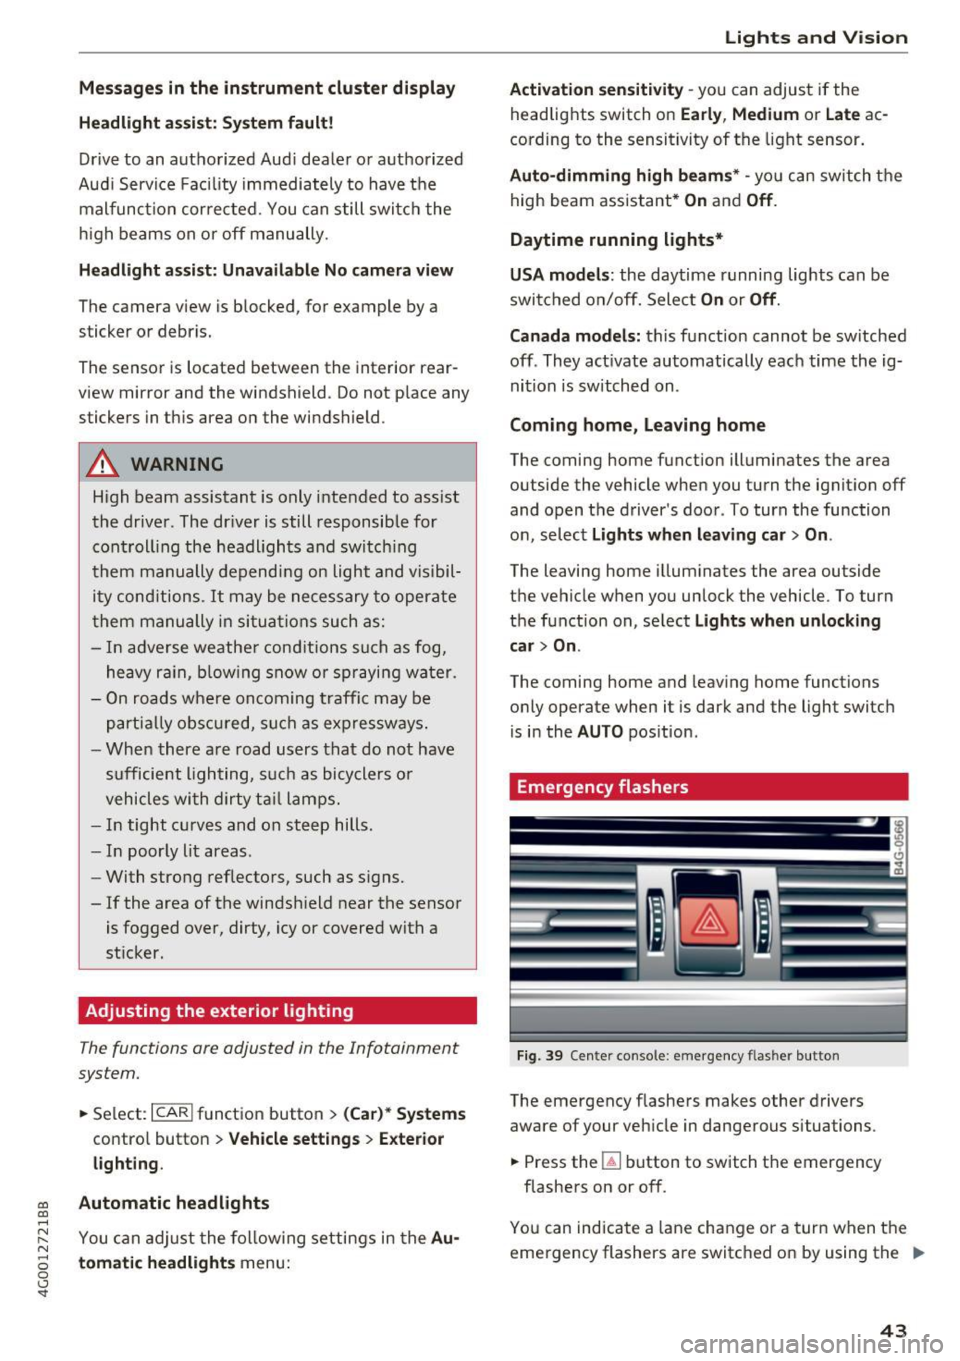
Emergency flashers
Fi9. 39 Cente r console : emergency f las her button
The emergency flashe rs makes other drivers
aware of your vehicle in dangerous situations .
.,. Press the~ button to switch the emergency
flashe rs on or off.
You can indicate a lane change or a turn w hen the
eme rgency flashers are switched on by using the .,.
43
Page 46 of 280
Lights and Vision
turn signal lever . The emergency flashers stop
temporarily .
The emergency flashers also wo rk when the igni
tion is turned off.
Interior lighting
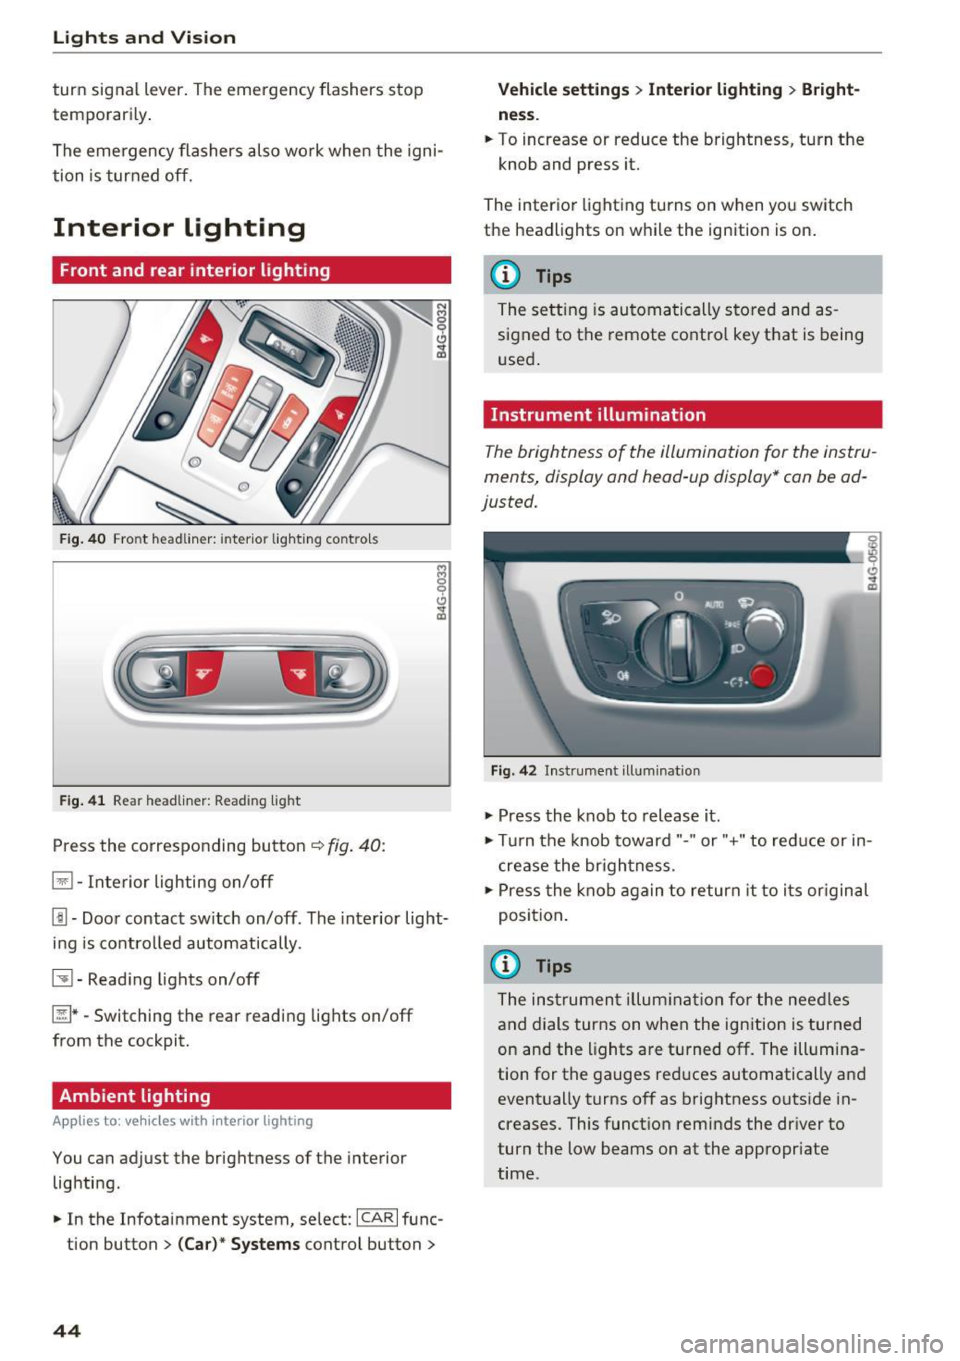
Front and rear interior lighting
Fig . 4 0 Fro nt headli ner: inter io r lig hting co ntro ls
F ig . 4 1 Rea r headliner: Read ing light
Press the corresponding button ~ fig. 40:
El -Interior lighting on/off
Jjj -Door contact sw itch on/off. The interior light
ing is contro lled automatically.
~ - Read ing lights on/off
~ *·Switching the rear reading lights on/off
from the cockpit.
Ambient lighting
Ap plies to: vehicl es w ith i nterio r lighting
You can adjust the brightness of the interior
lighting .
.. In the Infotainment system , select:
ICAR I func
tion button
> ( Ca r)* Sy stems control button >
44
Vehicle setting s> Interior lighting > Bright
ne ss .
.. To increase or reduce the brightness, turn the
knob and press it.
The inter ior lighting turns on when yo u switch
the headlights on w hile the ignition is on .
(D Tips
The setting is automa tically stored and as
s igned to the remote contro l key that is being
u sed .
Instrument illumination
The brightness of the illumination for the instru
ments, display and head -up display* can be ad
justed.
F ig. 42 In strument illuminat ion
.,. Press the knob to release it .
.,. Tur n the knob toward"." or"+" to reduce or in
c rease the br ightness.
.,. Press the knob again to return it to i ts or iginal
position .
(i} Tips
The ins trumen t illum ina tion for the nee dles
and dials turns on when the ign ition is turned
on and the lights are turned off. The illum ina
tion for the gauges red uces automatically and
event ually turns off as brightness outside in
creases. This funct ion reminds the dr iver to
turn the low beams on at the appropriate
time.
Page 65 of 280
co
co
.... N
" N .... 0 0 <.:l '
re ar con tro ls
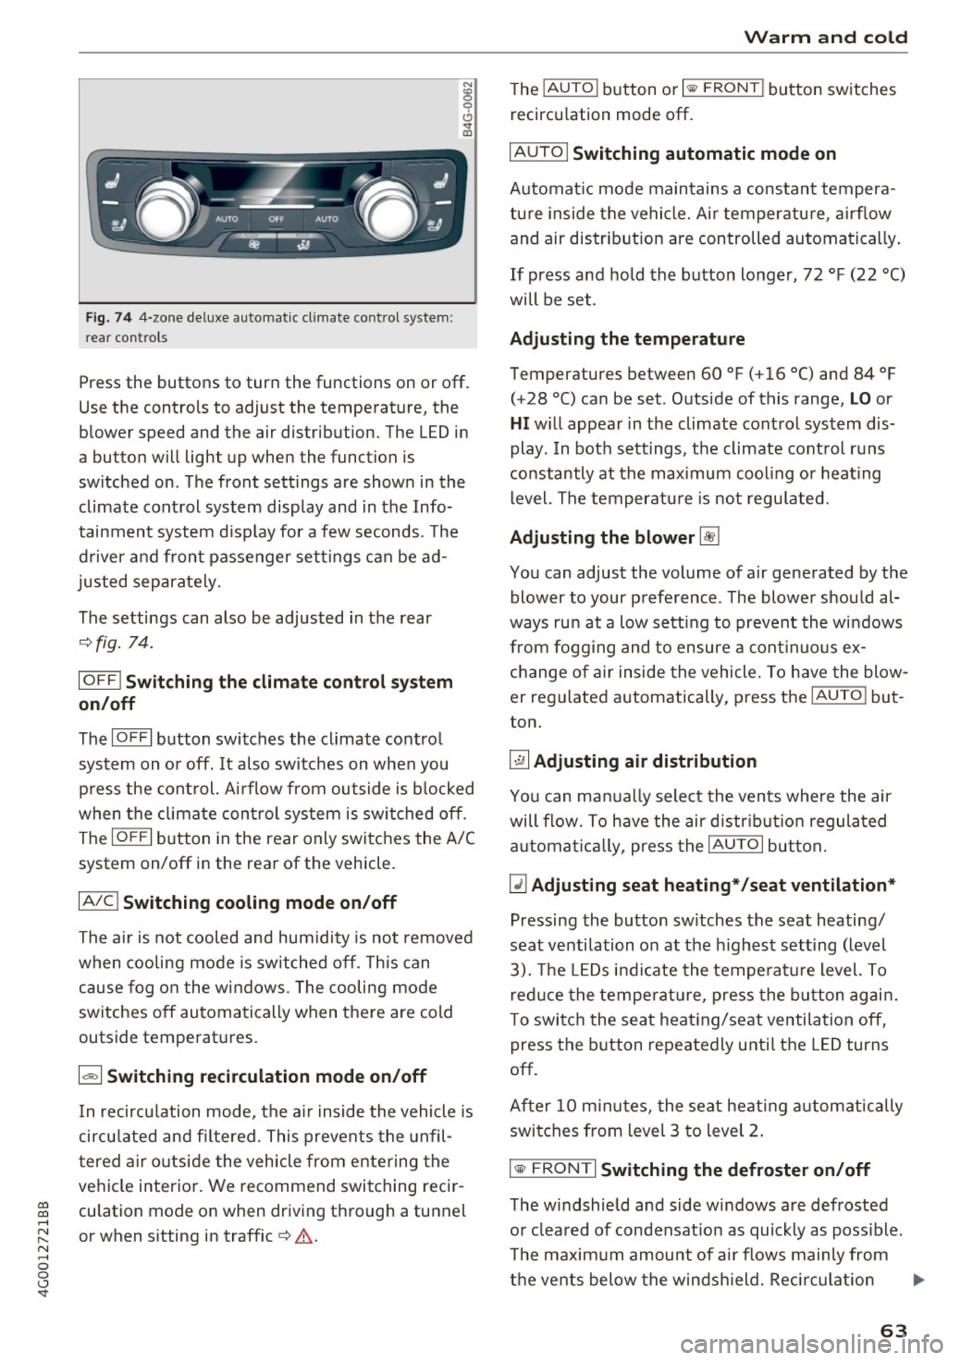
Press the buttons to turn the functions on or off .
Use the controls to adjust the temperature, the
blower speed and the air distribution. The LED in
a button will light up when the function is
sw itched on . T he front settings are shown in the
climate control system display and in the Info
tainment system d isp lay for a few seconds. The
d river and front passenger settings can be ad
justed separately.
The settings can also be adjusted in the rear
~ fig. 74.
IO FF I Sw itchin g the clim ate cont rol s ystem
on /off
The IO FFI button switches the climate control
system on or off.
It also sw itches on when you
press the control. Ai rflow from outside is b locked
when the climate control system is switched off .
The
IO FF I button in the rear only switc hes the A/C
system on/off in the rear of the vehicle .
IA/Cl Switching cooling mod e on /off
The air is not cooled and humidity is not removed
when cooling mode is switched off. This can
cause fog o n the windows . The cooling mode
switches off automatically when there are cold
outside temperatures.
1 6<) 1 Sw itching recirculation m ode on /off
In recircu lation mode, the a ir inside the vehicle is
circu lated and fi ltered. This prevents the unfil
tered a ir o utside the vehicle from entering the
vehicle interior. We recommend switching recir
culation mode on when driving through a tunnel
or when sitting in traffic~&. .
Warm and c old
The !AU TO I button or lllill F RON TI button switches
recircu lation mode off.
I AUTO I Switching automatic mode on
Automat ic mode main tains a cons tant tempera
ture inside the vehicle. Air temperatu re , airf low
and air distr ib ution are controlled automatically.
If press and hold the button longer, 72 °F (22 °C)
will be set .
Adju stin g the temperature
Temperatures between 60 °F ( +16 °() and 84 °F
(+28 °() ca n be set . Outside of this range,
LO or
HI w ill appear in the climate control system dis
play . In both settings, the climate control runs
constantly at the max imum cool ing or heat ing
level. The temperature is not regu lated.
Ad ju sting the blower~
You can adjust the volume of a ir generated by the
blower to your preference . The blower shou ld al
ways run at a low sett ing to prevent the windows
from fogging and to ensure a cont inuo us ex
change of air inside the vehicle , To have the blow
er regu lated automatically , press the
IAU TO ! but
ton .
~ Adju sting air distribution
You can ma nually select the vents where the air
will flow. To h ave the air d istr ibut ion regulated
a utomat ica lly, press the
IAUTOI but ton.
~ Adjusting seat he ating* /seat v entilation *
Pressing the button sw itches the seat heating/
seat ventilation on at the h ighest setting (level
3). The LEDs indicate the tempe rature level. To
reduce the temperat ure, press the b utton again.
To switc h the seat heat ing/seat ventilation off,
press the button repeatedly until the LED turns
off.
After 10 m inutes, the seat heat ing a utomatically
swi tches from level 3 to level 2.
l
The w indshield and side windows a re defrosted
or clea red of condensat ion as quickly as poss ible.
T he maxim um amount of air flows mainly from
the vents below the windsh ield. Reci rc u lat ion
Ill>-
63
Page 67 of 280
co
co
.... N
" N .... 0 0 <..:l 'SI'
quickly. The auxiliary heating activates automati
cally when the when the automatic auxiliary
heater funct ion is act ivated .
Steering wheel heating
App lies to: ve hicles with steering w heel heating
The steering wheel rim can be heated.
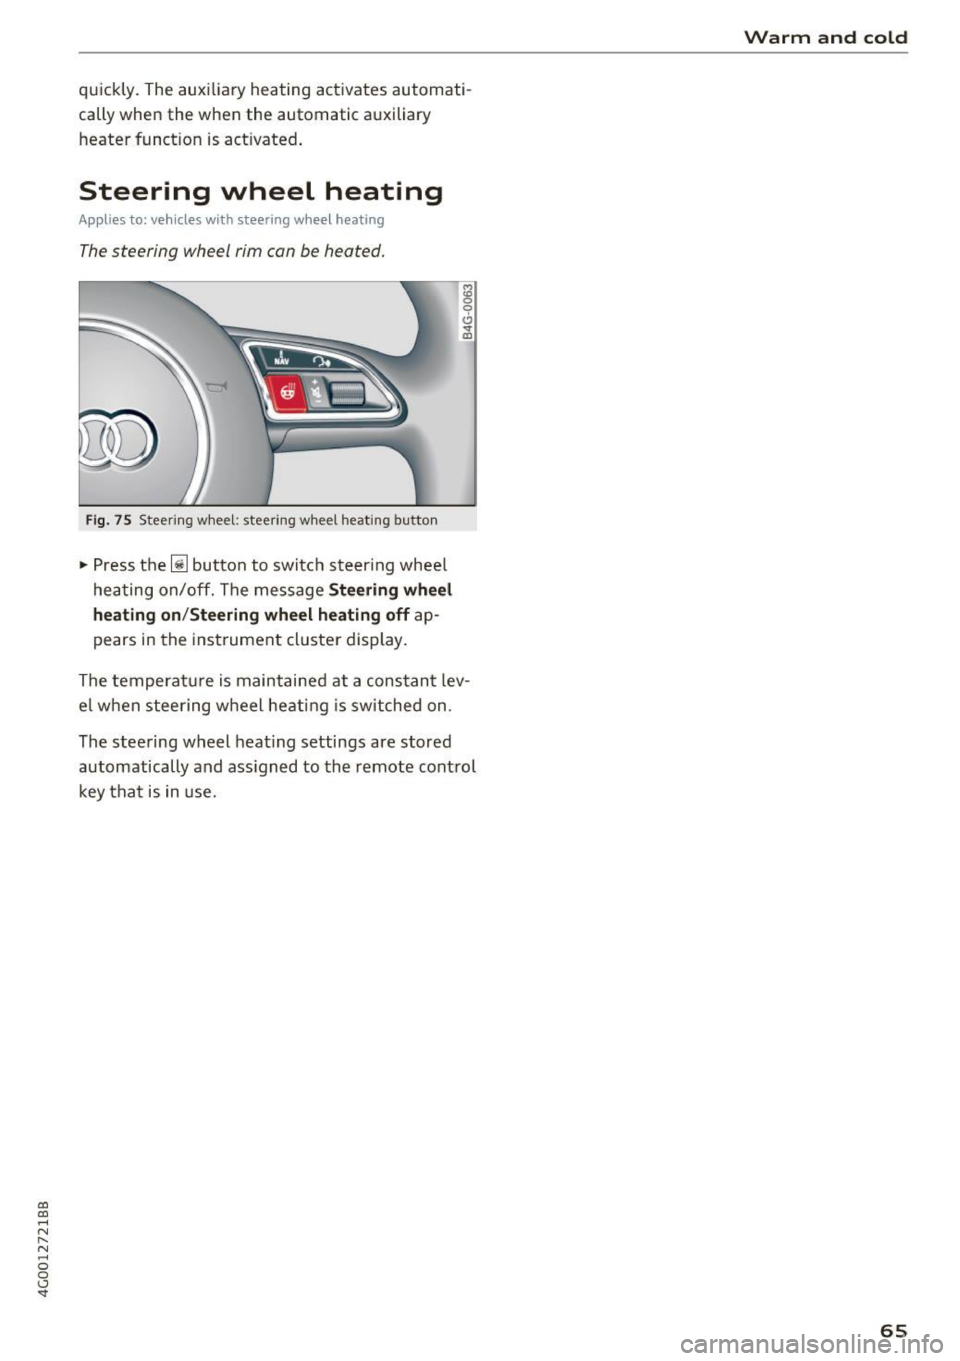
Fig. 75 Steeri ng wheel: steering w heel heating button
"' Press the ljJ button to switc h steering whee l
hea ting on/off. The message
Stee ring wheel
heating on /Steering wheel heating off
ap
pears in the inst rument cluster display.
The temperat ure is maintained at a constant lev
e l w hen steering w heel heat ing is switched on .
The steering wheel heat ing settings are stored
automatically and ass igned to the remote control
key tha t is in use.
Warm and cold
65