airbag AUDI A6 2017 Owners Manual
[x] Cancel search | Manufacturer: AUDI, Model Year: 2017, Model line: A6, Model: AUDI A6 2017Pages: 280, PDF Size: 70.24 MB
Page 5 of 280
co
co
.... N
" N .... 0 0 <..:l '
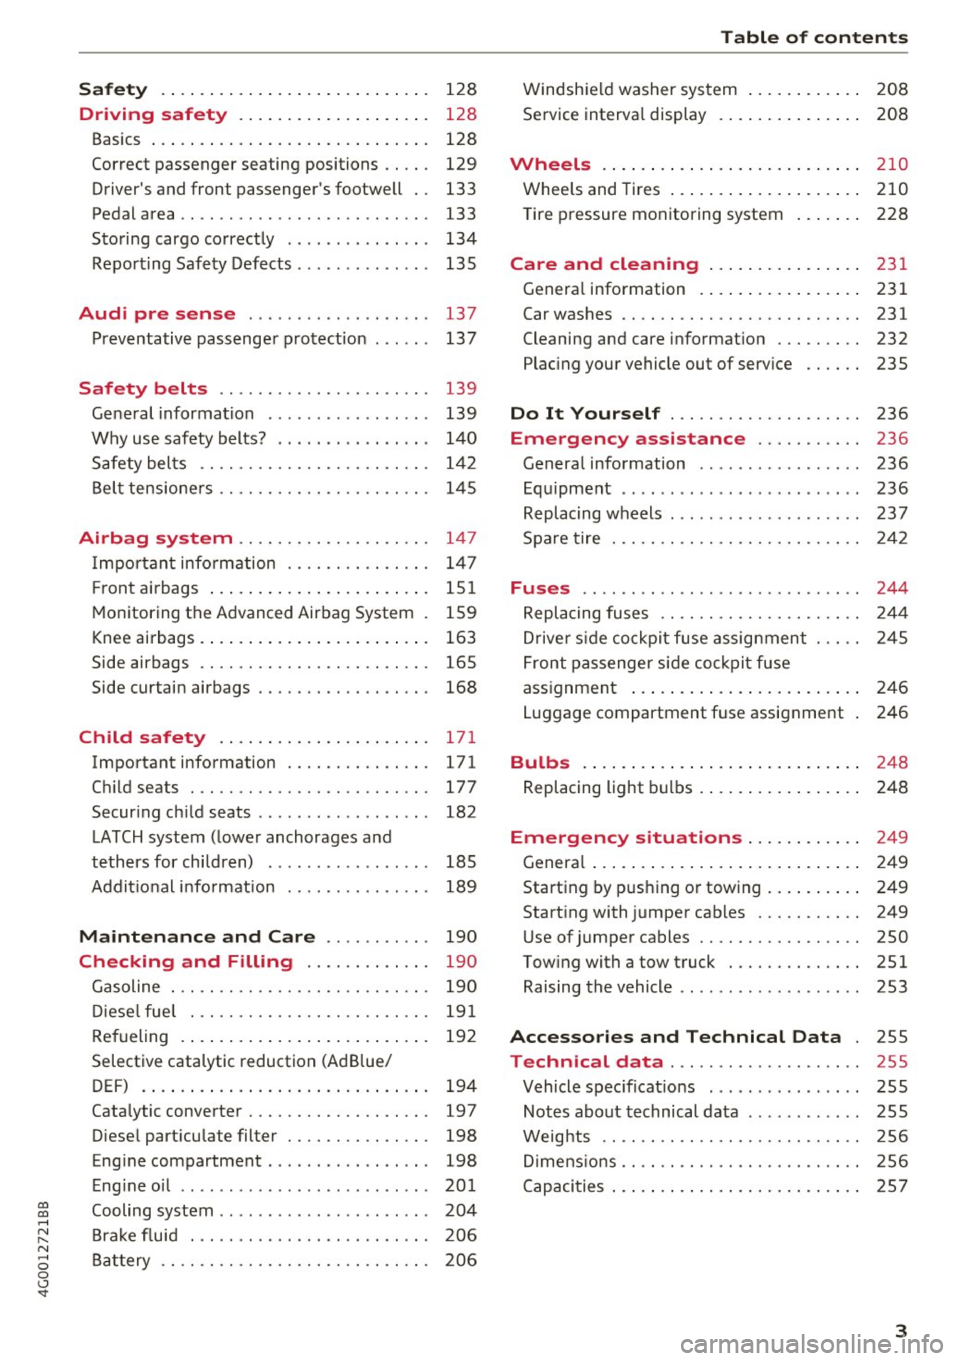
Driving safety . . . . . . . . . . . . . . . . . . . . 128
Basics . . . . . . . . . . . . . . . . . . . . . . . . . . . . . 128
Correct passenger seating positions . . . . . 129
Driver 's and front passenger's footwell . . 133
Pedal area . . . . . . . . . . . . . . . . . . . . . . . . . . 133
Sto ring cargo correctly . . . . . . . . . . . . . . . 134
Repo rting Safe ty Defects . . . . . . . . . . . . . . 13 5
Audi pre sense . . . . . . . . . . . . . . . . . . . 137
P reventative passenge r protect ion . . . . . . 137
Safety b elts . . . . . . . . . . . . . . . . . . . . . . 139
Ge ne ral informa tion . . . . . . . . . . . . . . . . . 139
Why use safety belts? . . . . . . . . . . . . . . . . 14 0
S afety belts . . . . . . . . . . . . . . . . . . . . . . . . 142
B el t tensione rs . . . . . . . . . . . . . . . . . . . . . . 14 5
Airbag system . . . . . . . . . . . . . . . . . . . . 147
I m portan t info rm ation . . . . . . . . . . . . . . . 147
F ront airbags ... .. .. .... .. . .. .. .. .. . 151
M on itor ing the Advanced Airbag System . 159
Knee airbags . . . . . . . . . . . . . . . . . . . . . . . . 163
Side airbags . . . . . . . . . . . . . . . . . . . . . . . . 165
Side curtain airbags . . . . . . . . . . . . . . . . . . 168
Ch ild safety . . . . . . . . . . . . . . . . . . . . . . 171
Important information . . . . . . . . . . . . . . . 171
Ch ild seats . .. ............... .. .. .. . 177
Secur ing ch ild seats . . . . . . . . . . . . . . . . . . 182
L ATCH system ( lower anchorages and
tethers for chi ldren) . . . . . . . . . . . . . . . . . 185
Addit io nal info rmat ion . . . . . . . . . . . . . . . 189
Maintenance and Care . . . . . . . . . . . 190
Checking and Filling . . . . . . . . . . . . . 190
Gasoline . . . . . . . . . . . . . . . . . . . . . . . . . . . 190
Di ese l fue l . . . . . . . . . . . . . . . . . . . . . . . . . 19 1
Refueling . . . . . . . . . . . . . . . . . . . . . . . . . . 192
Selective catalytic reduction (Ad Blue/
DEF) . . . . . . . . . . . . . . . . . . . . . . . . . . . . . . 194
Catalytic converter . . . . . . . . . . . . . . . . . . . 197
Diese l particulate filter . . . . . . . . . . . . . . . 198
E ng ine compartment . . . . . . . . . . . . . . . . . 198
E ng ine oil . . . . . . . . . . . . . . . . . . . . . . . . . . 20 1
Cooling system . . . . . . . . . . . . . . . . . . . . . . 204
B ra ke flu id . . . . . . . . . . . . . . . . . . . . . . . . . 206
Ba ttery . . . . . . . . . . . . . . . . . . . . . . . . . . . . 206
Table of contents
Windsh ield washer sys tem . . . . . . . . . . . . 2 08
Service interva l display . . . . . . . . . . . . . . . 208
Wheels .. .. .. .. .. .... . ..... ... .. .. 210
Wheels and Tires .... .. .. ..... ... .. .. 210
Tire pressure monitoring system . . . . . . . 228
Care and cleaning . . . . . . . . . . . . . . . . 231
Genera l information . . . . . . . . . . . . . . . . . 231
Ca r washes . . . . . . . . . . . . . . . . . . . . . . . . . 231
Cleaning and care information . . . . . . . . . 232
Plac ing your vehicle out of serv ice . . . . . . 235
Do It Yourself . . . . . . . . . . . . . . . . . . . . 236
Emergency assistance . . . . . . . . . . . 236
General information . . . . . . . . . . . . . . . . . 236
E q uipment . . . . . . . . . . . . . . . . . . . . . . . . . 236
Replacing wheels . . . . . . . . . . . . . . . . . . . . 237
Spa re tire 242
Fuses . . . . . . . . . . . . . . . . . . . . . . . . . . . . . 244
Repla cing fuses . . . . . . . . . . . . . . . . . . . . . 24 4
Dr ive r sid e co ckpit fuse assignment . . . . . 245
F ront passenger si de co ckpit fuse
ass ignment . . . . . . . . . . . . . . . . . . . . . . . . 2 46
Luggage compartment fuse assignment 246
Bulbs . . . . . . . . . . . . . . . . . . . . . . . . . . . . . 248
Replacing light b ulbs . . . . . . . . . . . . . . . . . 248
Emergency situations . . . . . . . . . . . . 249
Genera l . . . . . . . . . . . . . . . . . . . . . . . . . . . . 249
Starting by p ush ing o r towing . . . . . . . . . . 249
Start ing with jumper cab les . . . . . . . . . . . 249
U se of jumpe r cables . . . . . . . . . . . . . . . . . 250
Tow ing with a tow truck . . . . . . . . . . . . . . 251
Raising the vehicle . . . . . . . . . . . . . . . . . . . 253
Accessories and Technical Data . 255
Technical data . . . . . . . . . . . . . . . . . . . . 255
Vehicle spec ificat io ns . . . . . . . . . . . . . . . . 255
Notes about technical data . . . . . . . . . . . . 255
Weig hts . . . . . . . . . . . . . . . . . . . . . . . . . . . 256
Di mens ions . . . . . . . . . . . . . . . . . . . . . . . . . 256
C apaci ties . . . . . . . . . . . . . . . . . . . . . . . . . . 2 57
3
Page 9 of 280
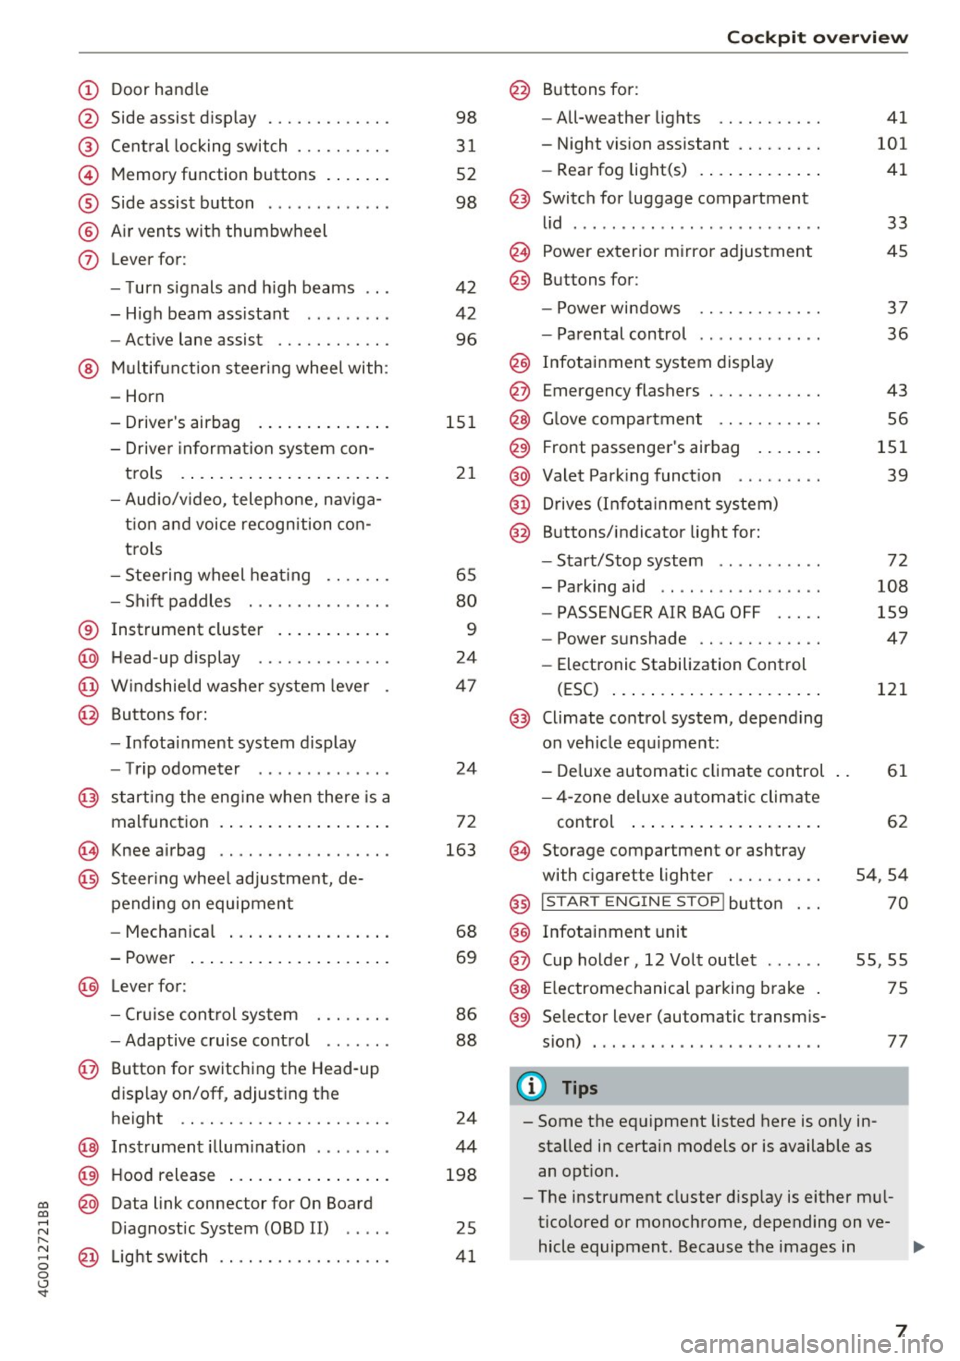
(!) Door handle
@
®
©
®
®
(j)
Side assist display
Cent ral locking switch ....... .. .
Memory function buttons . ... .. .
Side assist button ... ..... ... . .
A ir ven ts wit h thumbwheel
Lever for:
- T urn s ignals and h igh beams
- H igh beam assistant .. .. ... . .
- Active lane assist ......... .. .
@ M ultifunction steer ing wheel with:
- Horn
- Drive r's airbag . ..... ... .. .. .
- Drive r informa tion sys tem con-
t rols . ... ... .. ..... ... .. .. .
- Audio/v ideo, telephone, nav iga
t ion an d voice recognition con
trols
- Stee ring wheel heat ing .... .. .
- Sh ift paddles ............ .. .
® Instrument cluster .... ... .. .. .
@ H ead-up display ............. .
@ W indshield w ashe r system leve r
@ Buttons for:
- Infota inment system display
- Trip odometer ............. .
@ starting the eng ine when there is a
malfunc tion . ... .. .... ... .. .. .
~ Knee airbag .. ............. .. .
@ Steer ing whee l adjustment, de
pending on equipment
- Mechan ica l . ... ..... ... .. .. .
- Power ... .. .. .. .... ... .. .. .
@ Lever for:
- Cruise cont rol system ... .. .. .
- Adaptive c ruise cont rol ...... .
@ Button for switching the Head-up
d isplay on/off , adjust ing the
height .. .. ............... .. .
@ Instrument illum ination ....... .
@ Hood release .. .. ..... ... .. .. .
~ @ Data link connector for On Board
;:::: Diagnostic System (OBD II) .....
,..._
8 @ Light switch ............. .. .. .
0 <..:l -
3 1
52
98
42
42 96
15 1
21
65
80
9
24
47
24
72
163
68
69
86
88
24
44
198
25
4 1
Coc kpit o ve rv iew
@ Buttons for :
- All-weather lights
- Night vision assistant ........ .
- Rea r fog light(s) . ... . ..... .. .
@ Switch for luggage compartment
li d ...... ... .. .. ... ......... .
@ Power exterior m irro r adjustment
@ Buttons for :
- P owe r wi ndows
- Parental control
@ Infotai nment system display
@ Emergency flashers ........... .
@ G love compartment .......... .
@) Front passenger's airbag .... .. .
@ Valet Park ing funct ion .. ..... . .
@ Drives (Infot ainment system)
@ Buttons/ indicator light for:
- Start/Stop system .......... .
- Parking aid .. .. .... .. ... .. . .
- PASSENGER AIR BAG OFF .... .
- Power s unshade ............ .
- Elect ronic Stabilization Control
(ESC) ... .. .. .. .... . ..... .. .
@) Climate control system, depending
on vehicle equ ipment:
- De luxe automatic climate control
- 4-zone del uxe au tomatic climate
con trol ... .. ... .. .. ..... .. .
@ Storage compartment or ashtray
with c igarette lighter ... ...... .
@ I S TAR T EN GINE ST OP I butto n
@ Infotainment unit
@ Cup holder, 12 Vo lt outlet
41
101 41
33
45
3 7
36
43
56
151 39
72
108
159
47
121
61
62
54,54
70
55,55
@ E lectromechanical parking b rake 75
@ Se lector lever (automatic transm is-
sion) . . . . . . . . . . . . . . . . . . . . . . . .
77
(!) Tips
- Some the eq uipment listed here is on ly in
sta lled in certain models or is available as
an opt io n.
- The instr ument cluster d isp lay is either m ul
ticolored or monochrome, depending on ve-
hicle equipment. Because t he images in .,..
7
Page 19 of 280
co
co
.... N
" N .... 0 0 <..:l '
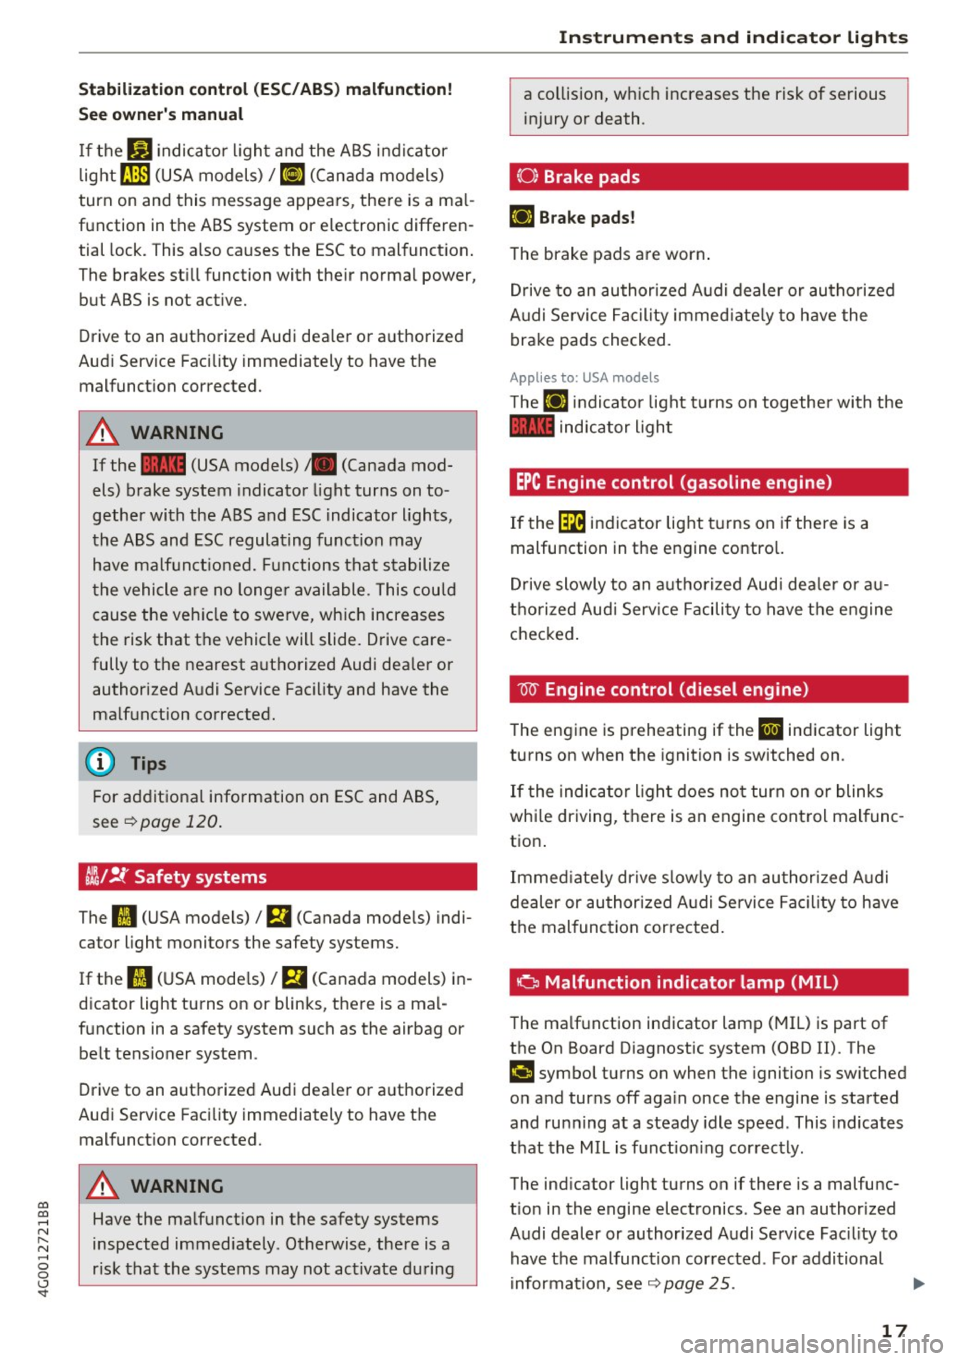
See owne r's manual
I f the
G1 indicato r light and the ABS indicator
l ight ~ (USA models)
I (c a (C anada models)
turn on and this message appears, the re is a ma l
function in the ABS system or electronic differen
tial lock. This also causes the ESC to malfunct ion .
The brakes st ill function with their normal power,
but ABS is not act ive.
Drive to an authorized Audi dea ler or authorized
Aud i Service Facility immediately to have the
malfunction corrected.
_&. WARNING
If the 1111 (USA models)/ . (Canada mod
els) brake system indicator light turns on to
gether with the ABS and ESC indicator lights,
the ABS and ESC regulating function may
have malf uncti oned. Functions that stabilize
the vehicle are no longer available . This could
cause the vehicle to swerve, which increases
the risk that the vehicle will slide. Drive care
fully to the nearest authorized Audi dealer or
authorized Audi Service Facility and have the
ma lfunction corrected.
@ Tips
For additional information on ESC and ABS,
see
~page 120.
~/ !f Safety systems
The
II (USA models) / m (Canada mode ls) indi
cator light monitors the safety systems.
If the
II (USA mode ls)/ m (Canada models) in
dicator light turns on or blinks, there is a mal
function in a safety system such as the airbag or be lt tensioner system .
Drive to an authorized Audi dea ler or authorized
Audi Service Facility immediately to have the
malfunction corrected.
_&. WARNING
Have the malfunction in the safety systems
inspected immediately . Otherwise, there is a
r isk that the systems may not activate during
-
Instruments and indicator lights
a collision, which increases the risk of serious
injury or death.
(0) Brake pads
EiJ Brake pads!
The brake pads are worn .
Drive to an authorized Audi dealer or authorized
A udi Service Facility immediate ly to have the
brake pads checked.
Applies to: USA models
T he EiJ ind icator light turns on together with the
1111 indicator light
EPC Engine control (gasoline engine)
If the~ indicator light turns on if there is a
malfunction in the engine contro l.
Drive slowly to an authorized Audi dealer or au
thorized Aud i Serv ice Facility to have the engine
checked.
W Engine control (die sel engine )
T he engine is preheating if the
II indicator light
turns on when the ignition is switched on .
If the indicator light does not turn on or blinks
whi le driving, there is an engine control malfunc
tion .
Immediately drive slow ly to an authorized Audi
dealer or authorized Audi Service Facility to have
the malfunction cor rected.
a Malfunction indicato r lamp (MIL)
The malfunction indicator lamp (MIL) is part of
the On Board Diagnostic system (080 II) . The
('4 c;ymbol turns on when the ignition is switched
on and turns off aga in once the engine is started
and running at a steady idle speed . This indicates
that the MIL is function ing correctly.
The ind icator light turns on if there is a malfunc
t ion in the engine electronics . See an authorized
Audi dealer or authorized Audi Service Fac ility to
have the malfunction corrected. For additional
information, see~
page 25.
17
Page 29 of 280
Opening and closing
Central locking
Description
You can lock and unlock the veh icle centrally . You
have the following options:
- Remote control key¢
page 30,
-Sensors in the door handles* ¢ page 30,
-Lock cylinder on the driver's door c::> page 32,
or
- Interior central locking switch
c::> page 31.
Turn signals
The turn s ignals flash twice when you unlock the
veh icle and flash once when you lock the veh icle.
If the blinking continues, one of the doors or the
luggage compartment lid/hood is not closed or
the ignition is still switched on.
Auto Lock
The Auto Lock function locks all doors and the
l uggage compartment lid once the speed has ex
ceeded approximately 9 mph (15 km/h).
The vehicle can be unlocked if the opening func
tion in the central locking system sw itch is used
or one of the door handles is pulled.
I n the event of a crash with airbag deployment,
the doors will also automatically unlock to allow
access to the vehicle.
Selective door unlocking
The doors and luggage compartment lid will lock
when they close . You can set in the Infotainment
system whether
only the driver's door or the en
tire vehicle should be unlocked when unlocking
c::> page 32.
Unintentionally locking yourself out
The follow ing cond it ions prevent you from lock
ing your remote control key in the vehicle :
-If the driver's door is open, the vehicle cannot
be locked by pressing the
lil button on the re-
~ mote control key or touching the locking sen-,...,
~ sor* on a door. N .... 0 0 <..:l '
-When locking using the lil button in the central
locking switch, the vehicle will not lock if a door
is open
¢ page 31.
-On vehicles with a convenience key*, the lug
gage compartment lid unlocks again after clos
ing if the most recent ly used key is in the lug
gage compartment. The emergency flashers
blink four times.
Do not lock your vehicle with the remote control
key or convenience key* until all doors and the
luggage compartment lid are closed. This helps
to prevent you from locking yourself out acciden
tally .
Closing aid on the doors*
The vehicle doors are equipped with closing aids.
When closing a door, you only have to let it fall
lightly into the latch. It then closes automatically
c::> &..
A WARNING "----When you lock your vehicle from outs ide,
nobody -especially children -should rema in
inside the vehicle. Remember, when you
lock the vehicle from the outside the win
dows cannot be opened from the inside.
- When you leave the vehicle, always take the
ignit ion key with yo u. This will prevent pas
sengers (children, for examp le) from acci
dentally being locked in the vehicle should
they accidentally press the power locking
switch in the doors.
- Do not leave children inside the vehicle un
supervised. In an emergency it would be im
possible to open the doors from the outside
without the key.
- Applies to vehicles with power side door
closer*:
- When closing a door, make sure nothing
can interfere with the door. Th is could
cause serious personal inj ury.
- You can stop the door from closing at any
time by pulling on the inside or outside
doo r handle.
27
Page 52 of 280
Sea ts and stor age
Seats and storage
General information
A WARNING
Refer to c::> page 128, Driving safety for im
portant information, tips, suggestions and
warnings that you should read and follow for
your own safety and the safety of you r pas
sengers.
Front seats
Power seat adjustment
App lies to veh icles with power adjustable seats
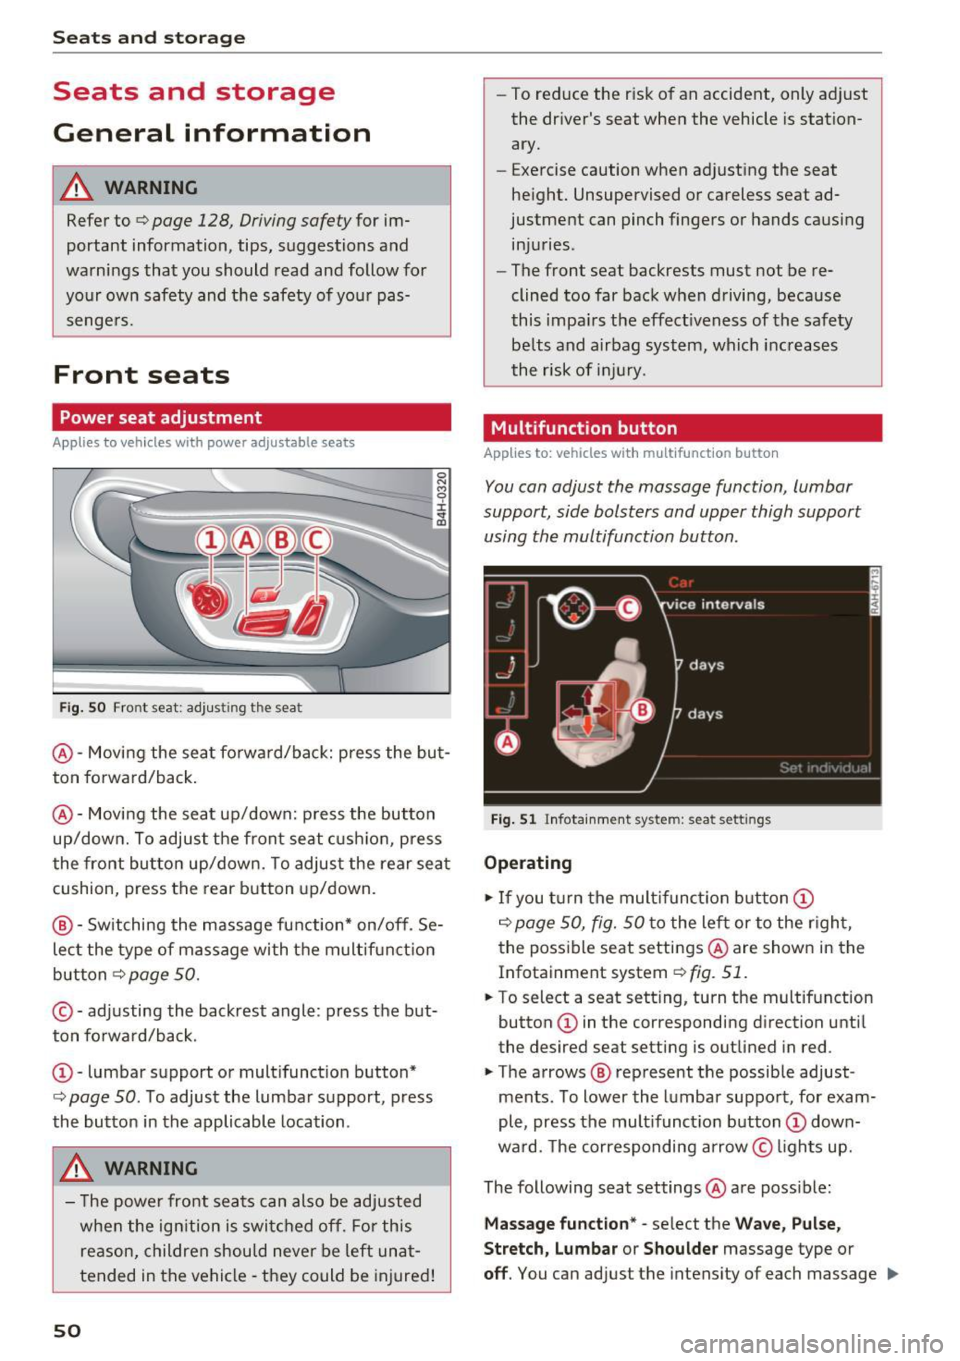
F ig. SO Front seat: adj usting the seat
@ -Movi ng the seat fo rwa rd/back: p ress the but
ton forwa rd/back .
@ -Moving the seat up/down: press the button
up/dow n. To adjust the front seat cush ion, press
the front button up/dow n. T o adjus t the rear sea t
cushion, press the rear button up/down.
@ - Switching the massage function * on/off. Se
lec t the type of massage with the multif unct ion
button
c::> page 50.
© - adjusting the backrest angle: press the but
ton fo rwa rd/back.
CD -lumbar support or multifunct ion button*
c::> page 50 . To adjust the lumbar support, press
the button in the applicable location .
A WARNING
- The power fro nt seats can also be adjusted
when the ign ition is swi tc h ed off. For this
reason, children should never be left una t
tended in the vehicle -they could be injured!
50
- To reduce the r isk of an accident, only adjust
the driver's seat when the vehicle is station ary.
- Exercise caution when adjusting the seat
height. Unsupervised or careless seat ad
justment can pinch fingers or hands causing
injuries.
- The front seat backrests must not be re
clined too far back when driving, because
this impa irs the effect iveness of the safety
be lts and airbag system, which increases
the risk of i nju ry.
Multifunction button
App lies to: vehicles wit h mult ifunct ion b utto n
You can adjust the massage function, lumbar
support, side bolsters and upper thigh support using the multifunction button.
Fig . 51 Infotainme nt system: seat settings
Operating
.,. If you t urn the mult ifunct ion b utton CD
c::> page 50, fig. 50 to the lef t or to the r igh t,
the poss ible seat settings @are shown in the
Infotainment system
c::> fig. 51.
.,. To select a seat sett ing, turn the multifunction
button
CD in the corresponding direction until
the desired seat setting is outlined in red .
.,. The arrows @ represent the possible adjust
ments . To lower the lumbar support, for exam
ple, press the mult ifunct ion button
CD down
ward. The corresponding arrow © lights up.
The following seat settings @are poss ible:
Ma ssa ge fun ctio n* -select the W ave, Pulse ,
Stretch, Lumbar or Shoulder
massage type or
off. You can adjust the intensity of each massage IIJ,,
Page 58 of 280
Seats and storage
_& WARNING
-Do not put any hot beverages in the cup
holder while the vehicle is moving. Hot bev
erages could spill, which can cause injury.
- Do not use any breakable beverage contain
ers (for example, made out of glass or por
celain) . You could be injured by them in the
event of an accident.
0 Note
Beverage containers in the cup holders should
always have a lid . If not, beverages could spill
and cause damage to vehicle equipment, such
electronics or seat covers .
Cooled glove compartment
Applies to: veh icles with cooled glove compartment
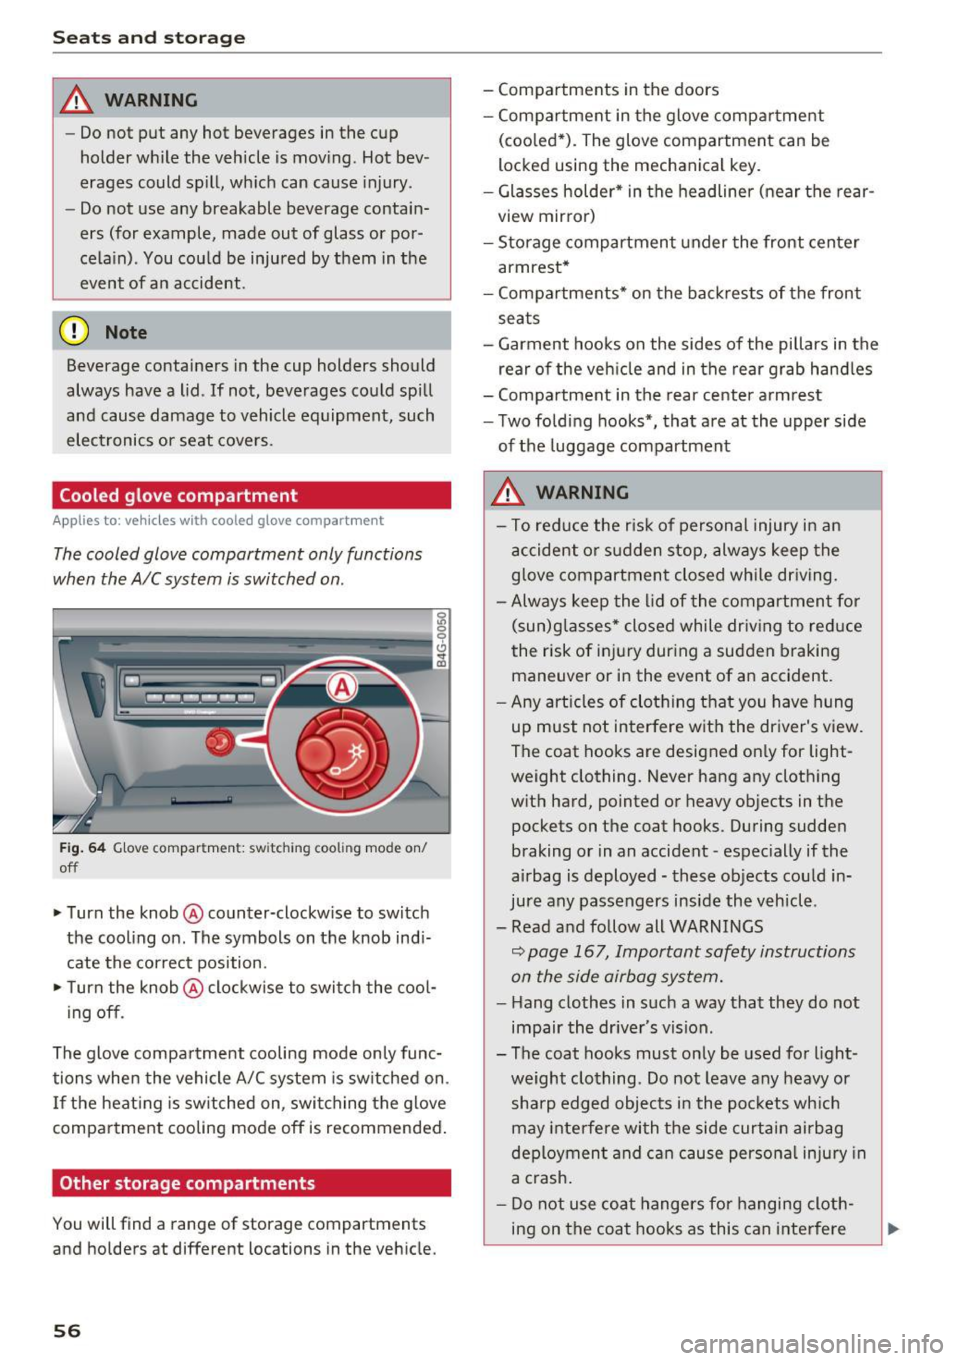
The cooled glove compartment only functions
when the
AIC system is switched on.
Fig. 64 Glove compar tm ent: s witch in g coo ling mode on/
off
~ Turn the knob@ counter-clockwise to switch
the cooling on . The symbols on the knob indi
cate the correct position.
~ Turn the knob @ clockwise to switch the cool-
ing off .
The glove compartment cooling mode only func
tions when the vehicle A/C system is switched on .
If the heating is switched on, switching the glove
compartment cooling mode off is recommended.
Other storage compartments
You will find a range of storage compartments
and holders at different locations in the vehicle.
56
- Compartments in the doors
-Compartment in the glove compartment
(cooled*) . The glove compartment can be
locked using the mechanical key.
- Glasses holder* in the headliner (near the rear
view mirror)
- Storage compartment under the front center
armrest*
- Compartments* on the backrests of the front
seats
- Garment hooks on the sides of the pillars in the
rear of the vehicle and in the rear grab handles
- Compartment in the rear center armrest
- Two folding hooks*, that are at the upper side
of the luggage compartment
_& WARNING
- To reduce the risk of personal injury in an
accident or sudden stop, always keep the
glove compartment closed while driving.
- Always keep the lid of the compartment for
(sun)glasses* closed while driving to reduce
the risk of injury during a sudden braking
maneuver or in the event of an accident .
- Any articles of clothing that you have hung
up must not interfere with the driver's view.
The coat hooks are designed only for light
weight clothing. Never hang any clothing
with hard, pointed or heavy objects in the pockets on the coat hooks. During sudden
braking or in an accident -especially if the
airbag is deployed - these objects could in
jure any passengers inside the vehicle .
- Read and follow all WARNINGS
c::> page 167, Important safety instructions
on the side airbag system.
- Hang clothes in such a way that they do not
impair the driver 's vision .
-
- The coat hooks must only be used for light
weight clothing . Do not leave any heavy or
sharp edged objects in the pockets which
may interfere with the side curtain airbag
deployment and can cause personal injury in
a crash.
- Do not use coat hangers for hanging cloth
ing on the coat hooks as this can interfere
Page 59 of 280
co
co
.... N
" N .... 0 0 <..:l 'SI"
with proper deployment of the side curtain
airbags in an accident.
- Do not hang heavy objects on the coat
hooks, as they could cause personal injury in
a sudden stop.
CD Note
Objects on the rear shelf that rub against the
rear window can damage the rear window
heating wires.
Roof rack
App lies to: ve hicles with roof rac k
~
------~~ ~
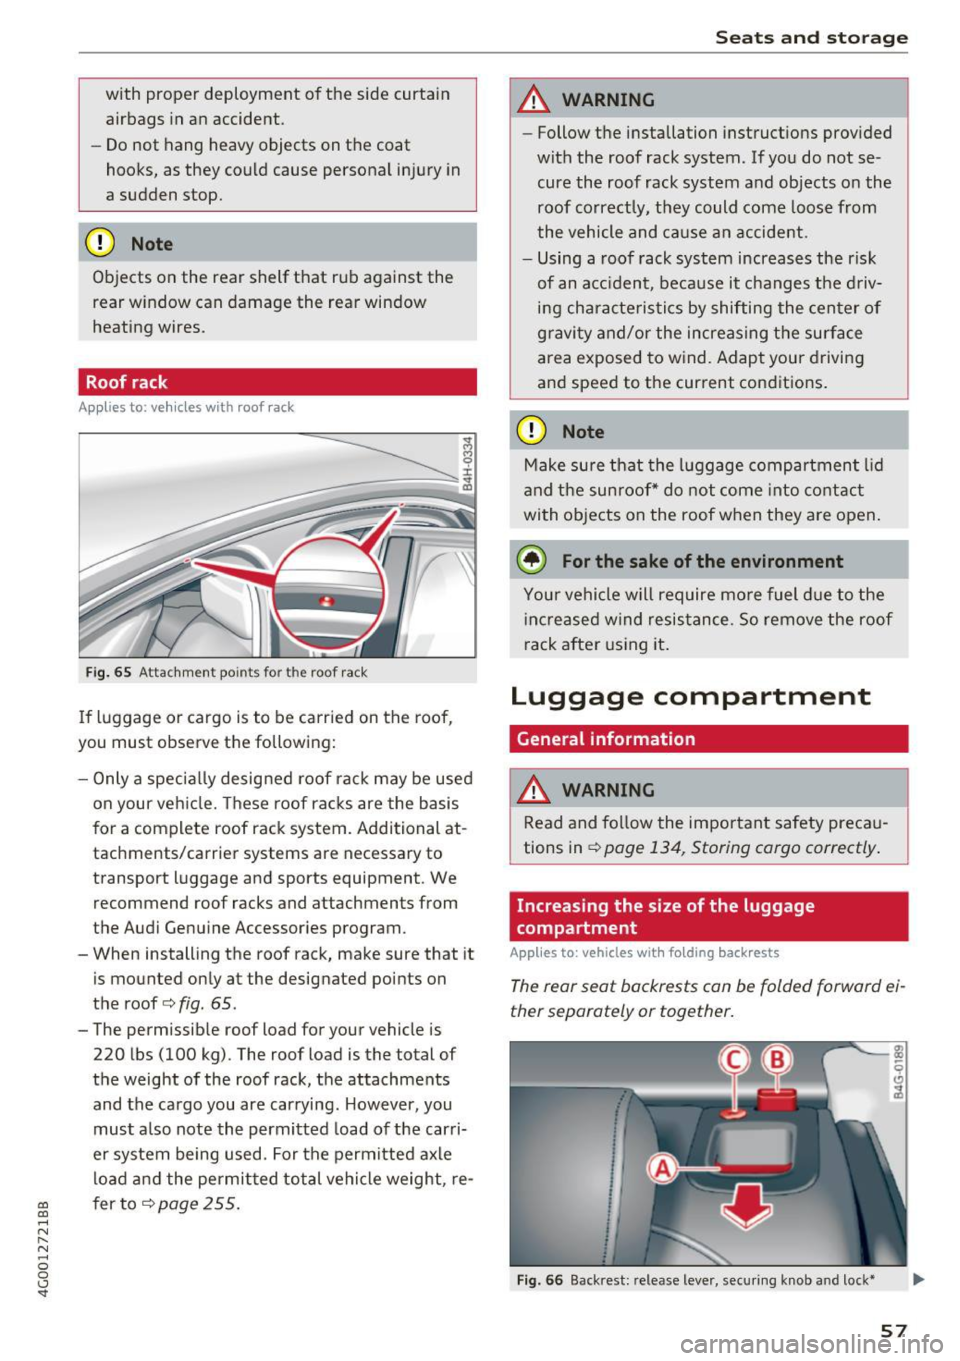
Fig. 65 Attachm ent points for the roof rack
If luggage or cargo is to be carried on the roof,
you must observe the following:
- Only a specially designed roof rack may be used
on your vehicle. These roof racks are the basis
for a complete roof rack system. Additional at
tachments/carrier systems are necessary to
transport luggage and sports equipment . We
recommend roof racks and attachments from
the Audi Genuine Accessories program.
- When installing the roof rack, make sure that it
is mounted only at the designated points on
the roof
c> fig . 65 .
- The permissible roof load for your vehicle is
220 lbs (100 kg). The roof load is the total of
the weight of the roof rack, the attachments
and the cargo you are carrying . However, you
must also note the permitted load of the carri
er system being used. For the permitted axle
load and the permitted total vehicle weight, re
fer to
c> page 255.
Seats and storage
A WARNING
--Follow the installation instructions provided
with the roof rack system. If you do not se cure the roof rack system and objects on the
roof correctly, they could come loose from
the vehicle and cause an accident.
- Using a roof rack system increases the r isk
of an accident, because it changes the driv
ing characteristics by shifting the center of
gravity and/or the increasing the surface
area exposed to wind. Adapt your driving
and speed to the current cond itions.
CD Note
Make sure that the luggage compartment lid
and the sunroof* do not come into contact
with objects on the roof when they are open.
(,® For the sake of the environment
Your vehicle will require more fuel due to the
increased wind resistance. So remove the roof
rack after using it.
Luggage compartment
General information
A WARNING ~
Read and follow the important safety precau-
tions in
c> page 134, Storing cargo correctly .
Increasing the size of the luggage
compartment
Applies to : vehicles wit h folding back rests
The rear seat backrests can be folded forward ei
ther separately or together.
Fig. 66 Backrest: re lease lever, securing knob a nd lock*
57
Page 71 of 280
co
co
...,
N
" N ...,
0 0 <.,;) 'SI'
~ page 129, fig. 140. If you cannot main
tain this minimum distance, the airbag sys
tem cannot protect you properly.
- If physical limitations prevent you from sit
ting 10 in (25 cm) or more from the steer ing wheel, check with your authorized Audi
dealer to see if adaptive equipment is avail
able.
- If the steering wheel is aligned with your
face, the supplemental driver's airbag can
not provide as much protection in an acci
dent. Always make sure that the steering
wheel is aligned with your chest.
-Always hold the steering wheel with your
hands at the 9 o'clock and 3 o'clock posi
tions to reduce the risk of personal injury if
the driver's airbag deploys.
- Never hold the steer ing wheel at the 12
o'clock position or with your hands inside
the steering wheel rim or on the steering
wheel hub . Holding the steering wheel the
wrong way can cause serious injuries to the
hands, arms and head if the driver's airbag
deploys.
Power steering wheel position adjustment
App lies to: ve hicles with power steering whee l adjustment
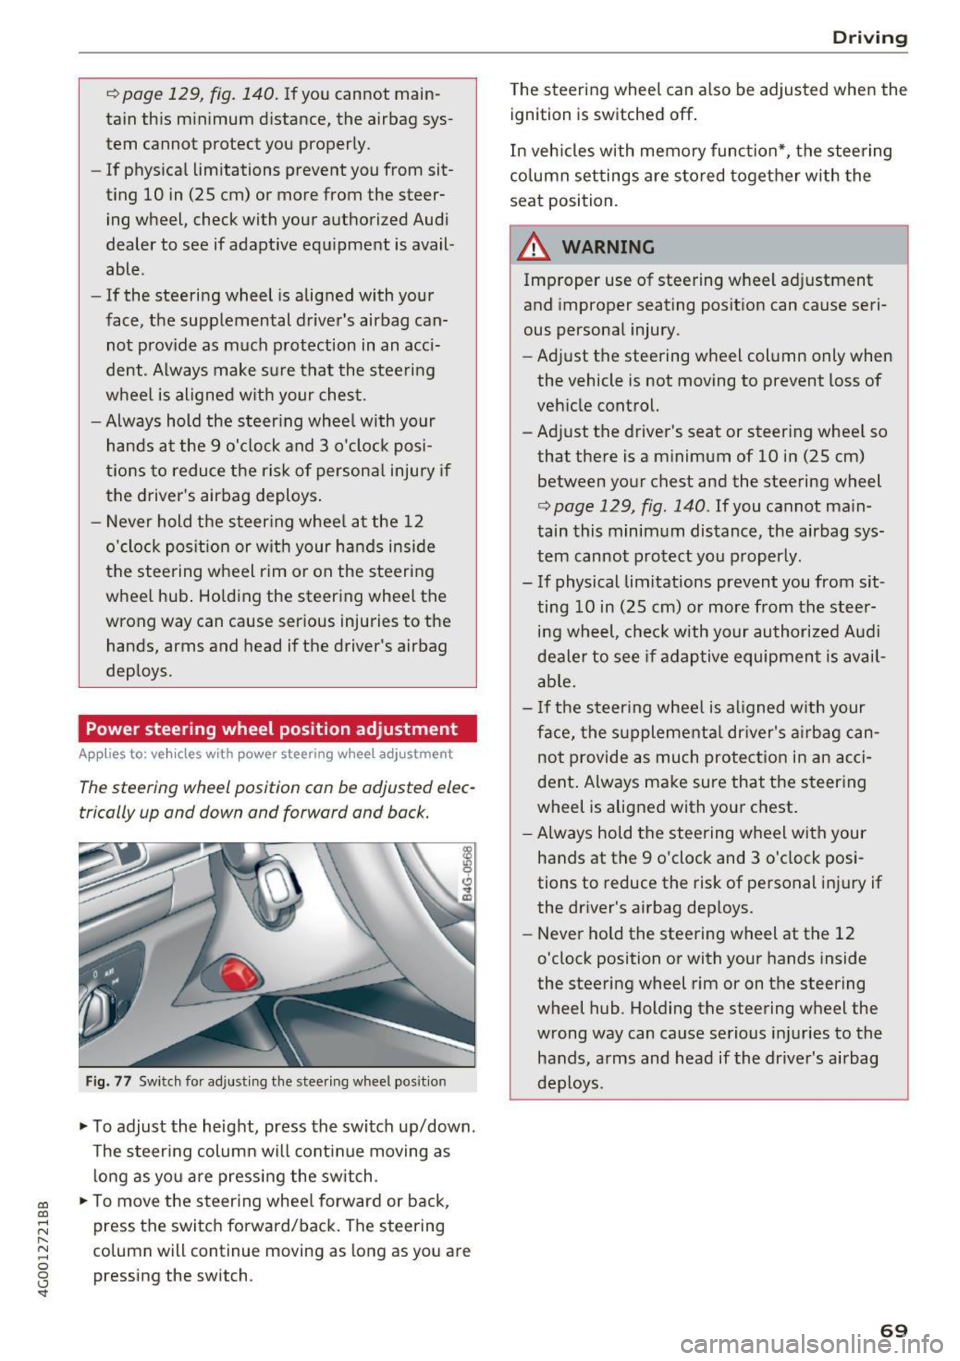
The steering wheel position can be adjusted elec
trically up and down and forward and back.
Fig. 77 Switch for adjust ing the steer ing whee l pos ition
~ To adjust the height, press the switch up/down.
The steering column will cont inue moving as
long as you are pressing the switch .
~ To move the steering wheel forward or back,
press the switch forward/back. The steering
column will continue moving as long as you are
pressing the switch.
Driving
The steering wheel can a lso be adjusted when the
ignition is switched off .
In vehicles with memory function*, the steering
column settings are sto red together with the
seat position.
A WARNING
Improper use of steering wheel adjustment
and improper seating position can cause seri
ous personal injury.
- Adjust the steering wheel column only when
the vehicle is not moving to prevent loss of
vehicle control.
- Adjust the driver's seat or steering whee l so
that there is a minimum of 10 in (25 cm)
between your chest and the steering wheel
r:=;, page 129, fig . 140 . If you cannot main
tain this minimum distance, the airbag sys
tem cannot protect you properly.
- If physical limitations prevent you from sit ting 10 in (25 cm) or more from the steer
ing wheel, check with your authorized Audi
dealer to see if adaptive equipment is avail
able.
- If the steering wheel is aligned with your
face, the supplemental dr iver's airbag can
not provide as much protection in an acci
dent. Always make sure that the steering
wheel is aligned with your chest.
- Always hold the steering wheel with your
hands at the 9 o'clock and 3 o'clock posi
tions to reduce the risk of personal injury if
the driver's airbag deploys.
- Never hold the steering wheel at the 12
o'clock position or with your hands inside
the steering wheel rim or on the steering
wheel hub . Holding the steering wheel the
wrong way can cause serious injuries to the
hands, arms and head if the driver's airbag
deploys.
-
69
Page 128 of 280
Intelligent Technology
I n addition, you may notice that the idle speed
has slightly increased . That is norma l and no
cause for conce rn. By increasing the idling speed,
the additional req uired energy will be generated
and the vehicle battery will be charged.
Notice about data
recorded by the Event
Data Recorder and
vehicle control modules
E v ent Dat a Reco rd er
This vehicle is equipped with an Event Data Re
corder (EDR). The main purpose of an EDR is to
record, in certain crash or near crash-like situa
tions, such as an a irbag deployment or h itting a
road obstacle, data that will assist in understand
i n g how a veh icle's sys tems performed . The EDR
is designed to record data re lated to veh icle dy
namics and s afety systems for a sho rt pe riod of
t ime, typically 30 seconds or less. The EDR in th is
vehicle is designed to record s uch data as :
- How various systems in you r vehicle were oper
at ing ;
- Whether or not the driver and passenger safety
belts we re buck led/fastened ;
- How far ( if at all) the drive r was depressing t he
acce le ra to r and/o r brake peda l; and,
- How fast the veh icle was trave ling .
These data can help prov ide a better understand
ing of the circumstances in which crashes and in
juries occur . NOTE : EDR data are recorded by your
veh icle only if a non-trivial crash situat ion occurs;
no data are recorded by the EDR under norma l
d riving conditions and no pe rsonal data (e .g.,
name, gende r, age , and crash location) are re
corded . Howeve r, other pa rties , such as law en
forcement, cou ld combine the EDR data w ith the
type of personally identifying data routine ly ac
qu ired dur ing a crash invest igat ion.
To read data recorded by an EDR, specia l equip
ment is required, and access to the veh icle or the
EDR is needed. In addit ion to the vehicle manu
facturer, other parties, suc h as law enforcement,
that have the specia l equipment, can read the in-
126
format ion if they have a ccess to the vehicle or the
EDR .
Some sta te la ws rest ric t the retrieval or down
l oad ing of data s tored by E D Rs ins talled in a veh i
cle for the exp ress p urpose of retrieving data af
ter an accident or crash event without the own er 's consent.
Audi will not access the E DR and/or simi la r data
or give it to others -
- unless the ve hicle owne r (o r lessee if the vehi
cle has been le ased) ag rees; o r
- upon the offic ial request by the police; or
- upon the order of a court of law or a govern- ment agency; or
- for the defense of a lawsuit through the jud icia l
discovery process .
- Aud i may also use the data for research about
veh icle operation and safety performance or
prov ide the data to a th ird party for research
purposes w itho ut identify ing the specific vehi
cle or info rmation about the ident ity of its own
er or lessee and only afte r the reco rded vehicle
data has been accessed .
Vehicle control modules
Your vehicle is also equ ipped w ith a number of
electronic cont rol modules for va rious vehicle
systems, such as engine management, em iss ion
con tro l, airbags, and safety be lts.
These elect ronic contro l modules record data
duri ng norma l vehicle operation t hat may be
needed by tra ined techn ic ians for d iagnost ic and
r epa ir purposes. The recording cap ab ili ty o f these
modules is lim ited to data (no sound is record
ed). Only a sma ll amount of data is actually re
corded over a very limited period of time, or stor
ed when a system fault is detected by a contro l
module . Some of the data stored may relate to
vehicle speed, d irection, or braking, as well as re
straint system use and performance in the eve nt
of a crash . Stored data can also on ly be read and
downloaded w it h specia l equipment t hat is di
r ectly connec ted to the vehicle.
Page 130 of 280
Driving sa fe ty
Driving safety
Basics
Safe driving habits
Please remember -safety first!
This chapter contains important information,
tips, instruct ions and warn ings that you need to
read and observe for your own safety, the safety
of your passengers and others. We have summar ized here what you need to know about safety
be lts, a irbags, child restra ints as well as child
safety. Your safety is for us
priority number 1 . Al
ways observe the i nfo rmation and wa rn ings in
this section - for your own safety as well as that
of your passengers.
The information i n this section applies to all
model versions of yo ur vehicle . Some of the fea
tures descr ibed in t his sections may be s tanda rd
equipment on some models, or may be optional
equipment on others . If you are not sure, ask
your authorized Audi dealer.
A WARNING
- Always make sure that you follow the in
structions and heed the WARNINGS in th is
Manual.
It is in your interest and in the in
te rest of your passengers.
- Always keep the comp lete Owner's Litera
ture in your A udi when you lend or sell your
vehicle so that this important information
will always be available to the d river and
passenge rs.
- Always keep the Owner 's literature handy so
that you can find it easily if you have ques
t ions.
Safety equipment
The safety features are part of the occupant re
straint system and work together to help reduce
the risk of injury in a wide variety of occident si t
uations.
Your safety and the safety of your passenge rs
should not be left to chance. Advan ces i n tech
nology have made a var iety of features avai lab le
to help reduce t he risk of injury in an accident .
128
The following is a list of just a few of the sa fety
features in your Audi :
- sophis tica ted safety be lts fo r dr ive r and all pas-
senge r seat ing pos itions,
- safety belt p retensioners,
- safety belt force lim ite rs fo r th e front seats,
- safety belt he ight adjustment systems for the
front seats,
- front airbags,
- knee airbags for the front seats*
- side airbags in the front seats and outer rear
seats*,
- side curtain airbags with ejection mitigation
features,
- special LATCH anchorages for child restraints,
- head rest raints fo r ea ch seating position,
- adj ustab le steering col umn.
These ind iv idual safety features, can work to
ge ther as a system to help protect you and your
passengers in a wide range of acc idents. These
features canno t wo rk as a sys tem if they are not
alw ays cor rec tly adj usted and cor rect ly used.
Safety is everybody' s re sponsibility!
Important things to do before driving
Safety is everybody's job! Vehicle and occupant
safety always depends on the informed and care
ful driver .
For your safety and the safety of your passen
gers,
before driving alway s:
.. Make sure that a ll lights and signals are operat
ing correctly.
.. Make sure that the tire pressure is correct.
.,. Make sure that all windows are clean and afford
good visibility to the outs ide .
.. Sec ure all luggage and othe r items carefully
~page 57, ~page 56 .
.. Ma ke sure that noth ing ca n interfere wi th the
peda ls .
.. Adjust front seat, head restraint and mirrors
correctly for yo ur height .
.. Instruct passengers to adjust the head re
straints according to their he ight.