stop start AUDI A7 2015 Owners Manual
[x] Cancel search | Manufacturer: AUDI, Model Year: 2015, Model line: A7, Model: AUDI A7 2015Pages: 316, PDF Size: 78.09 MB
Page 4 of 316
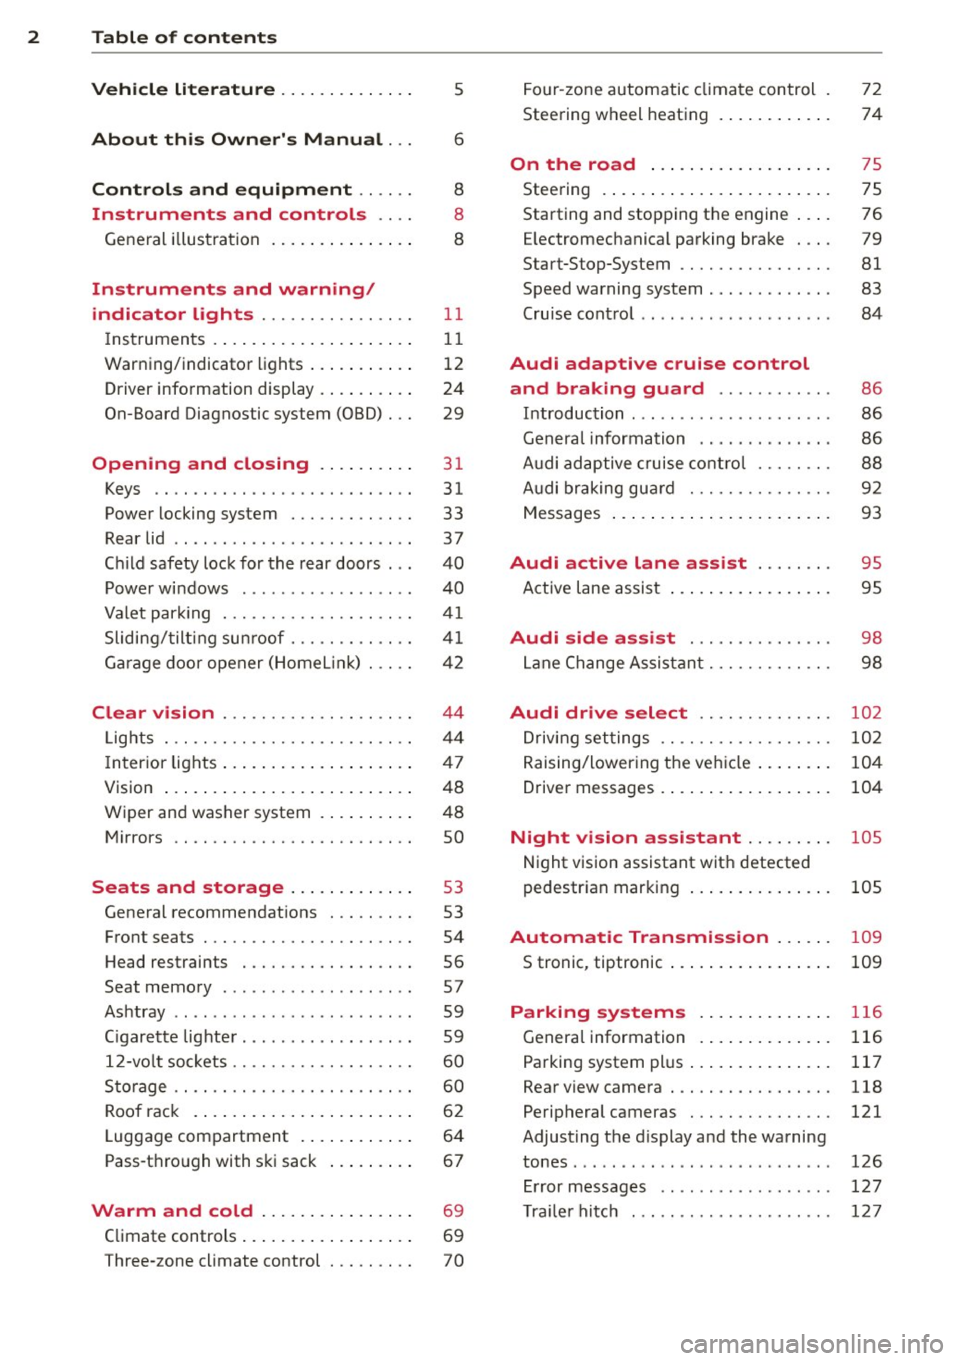
2 Table of content s
Vehicle lite ratu re .. .. .. .. .. ... .
5
About thi s Owner' s Manual . . . 6
C ontr ols and equi pm ent .. ... .
Ins truments and controls .. . .
General illustration ...... ... .. ... .
Instruments and warning /
indicator lights ........ .. .. .. . .
Instruments ............ ... .. ... .
Warning/indicator lights .. ... ... .. .
Driver information display .... .. ... .
On-Board Diagnostic system (OBD) . . .
Opening and closing .. .. .... . .
Keys .. ...... ........... .. .. ... .
Power locking system ..... .. .. .. . .
Rear lid .. .. ........ ........ .... .
Child safety lock for the rear doors .. .
Power windows ............... .. .
Valet park ing . ........... .. .. ... .
Sliding/tilting sun roof ... .. .. .. .. . .
Garage door opener (HomeL in k) . ... .
Clear vision .. ........ .. .. .. .. . .
Lights . .. .. ............. .. .. .. . .
I nterior lights .... ....... ... .. ... .
V1s1on ..... ... . ........ .... .... .
Wiper and washer system . ... .. .. . .
Mirrors ................. .. .. ... .
Seat s and storage ... .. .. .... . .
General recommendations . .. .. .. . .
Front seats .................. ... .
H ead restraints .......... .... ... .
Seat memory .. .... ........ .. .. . .
Ashtray .. .. ................ ... . .
C igarette lighter ................. .
12-vo lt sockets ........... .. .. ... .
Sto rage .. ............... .. .. .. . .
Roof rack . .... . ...... ... ... .... .
Luggage compartment . ... .. .. ... .
Pass-through with ski sack ... .... . .
Warm and cold ..... ... .. .. ... .
Climate controls .. ..... ... .. .. ... . 8
8
8
11
1 1
1 2
24
29
31
31
33
37
40
40
4 1
41
42
44
44
4 7
48
48
so
53
53
54
56 57
59
59
60
60
62
64
67
69
69
Three-zone climate control . . . . . . . . . 70 Four
-zone automatic climate control .
Steering wheel heating . ..... ... .. . 72
74
On the road
. . . . . . . . . . . . . . . . . . . 75
Steering . . . . . . . . . . . . . . . . . . . . . . . . 75
Starting and stopping the engine . . . . 76
E lectromechanical parking brake . . . . 79
Start-Stop-System . . . . . . . . . . . . . . . . 81
Speed warning system . . . . . . . . . . . . . 83
Cruise control . . . . . . . . . . . . . . . . . . . . 84
Audi adaptive cruise control
and braking guard . . . . . . . . . . . .
86
Introduction . . . . . . . . . . . . . . . . . . . . . 86
Genera l information . . . . . . . . . . . . . . 86
Audi adaptive cruise cont rol . . . . . . . . 88
Audi braking gua rd . . . . . . . . . . . . . . . 92
Messages . . . . . . . . . . . . . . . . . . . . . . . 93
Audi active lane assist . . . . . . . . 95
Active lane assist . . . . . . . . . . . . . . . . . 95
Audi side assist . . . . . . . . . . . . . . . 98
Lane Change Assistant. . . . . . . . . . . . . 98
Audi drive select . . . . . . . . . . . . . . 102
Driv ing settings . . . . . . . . . . . . . . . . . . 102
Raising/lowering the vehicle . . . . . . . . 104
Driver messages . . . . . . . . . . . . . . . . . . 104
Night vision assistant . . . . . . . . . 105
Night vision assistant with detected
pedestr ian marking . . . . . . . . . . . . . . . 105
Automatic Transmission . . . . . . 109
S tronic, tiptronic . . . . . . . . . . . . . . . . . 109
Parking systems . . . . . . . . . . . . . . 116
General information . . . . . . . . . . . . . . 116
Parking system plus . . . . . . . . . . . . . . . 117
Rear view camera . . . . . . . . . . . . . . . . . 118
Peripheral cameras . . . . . . . . . . . . . . . 121
Adjusting the d isplay a nd the warning
tones. . . . . . . . . . . . . . . . . . . . . . . . . . . 126
Error messages . . . . . . . . . . . . . . . . . . 12 7
T ra ile r hitch . . . . . . . . . . . . . . . . . . . . . 127
Page 11 of 316
M N <( (.J
'SI: ,...., \!) 1.1'1 ,...., 1.1'1 ,....,
CD
@
®
©
®
®
(j)
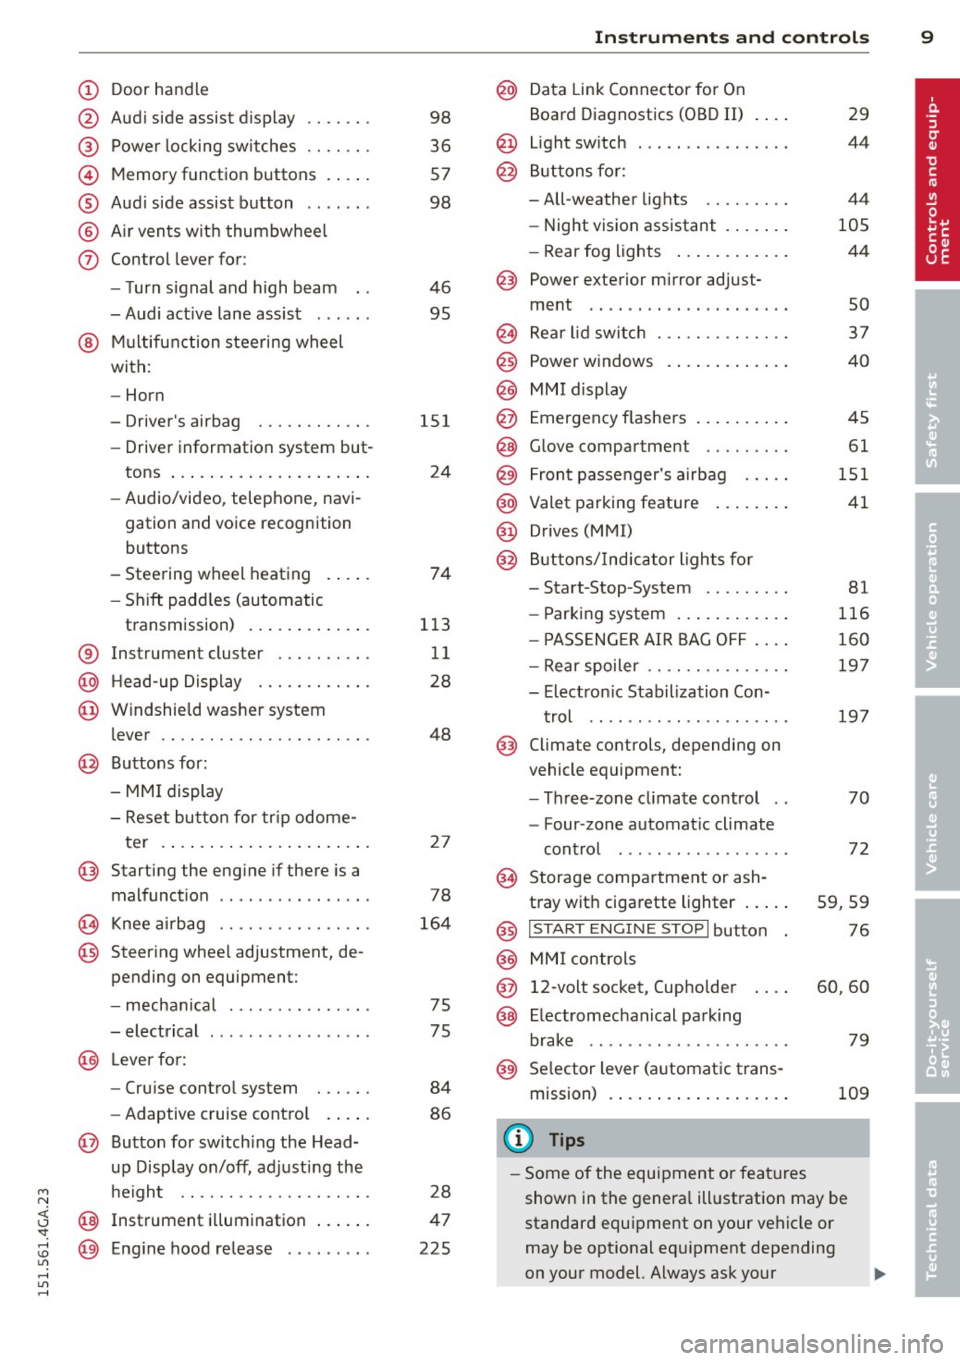
Door handle
Audi side assist display
Power locking sw itches
Memory function buttons .. .. .
Aud i side assist button ...... .
A ir vents with thumbwheel
Control lever for:
- T urn signal and high beam
- Audi act ive lane assist . .. .. .
@ Mu ltifunction steering wheel
with:
- Horn
- Driver's airbag
- Driver information system but-
tons ... ..... ....... ... .. .
- Audio/video , telephone, navi
gation and voice recognition
buttons
- Steering wheel heating . ... .
- Shift padd les (automatic
transmission) ..... ... ... . .
® Instrument cluster ......... .
@ Head-up Display ........... .
@ Windshield washer system
lever .. .. ........ ..... .... .
@ Buttons for :
- MMI display
- Reset bu tton for tr ip odome-
te r .. .. ... .. ..... ... .. .. .
@ Starting the engine if there is a
malfunction ............... .
~ Knee airbag ........... .. .. .
@ Steer ing whee l adjustment, de
pending on equipment:
- mechan ical .......... .. .. .
- electrical .... ....... ... .. .
@ Leve r for:
- Cru ise control system ... .. .
- Adaptive cruise contro l .. .. .
@ Button for sw itch ing the Head
up Disp lay on/off, adjusting the
h eight .. ............. .. .. .
@ Instrument illumination ... .. .
@ Eng ine hood release ........ . 98
36
57
98
46 95
151 24
74
113 11
28
48
2 7
78
164
75
75
84
86
28
47
225
In strument s and control s 9
@ Data Link Connector for On
Board Diagnostics (OBD II)
@ Light switch ... .. . .. ... .... .
@ Buttons for :
- All-weather lights
- Night v ision assistant .... .. .
- Rear fog lights .. .. .. ..... .
@ Power exterior m irror adjust-
ment ...... .. .. ..... ..... . 29
44
44
105 44
so
@ Rea r lid switch . . . . . . . . . . . . . . 37
@ Power w indows . . . . . . . . . . . . . 40
@ MMI display
@ Emergency flashe rs . . . . . . . . . . 45
@ Glove compartment . . . . . . . . . 61
@) Front passenger's airbag . . . . . 151
@ Valet parking feature . . . . . . . . 41
@ Drives (MMI)
@ Buttons/Indicator lights fo r
- Start-Stop-System . . . . . . . . . 81
- Parking system . . . . . . . . . . . . 116
- PASSENG ER AIR BAG OF F . . . . 160
- Rear spoiler . . . . . . . . . . . . . . . 197
- Electron ic Stabilization Con-
t rol . . . . . . . . . . . . . . . . . . . . . 19 7
@ Climate controls, depending on
vehicle equipment:
- Three-zone cl imate control . . 70
- F our-zone automatic climate
cont rol . . . . . . . . . . . . . . . . . . 72
@ Storage compartment or ash-
t ray wit h cigarette lighter . . . . . 59, 59
@ I S T ART ENGINE STOPI button 76
@ MM I controls
@ 12-volt socket, (upho lder 60, 60
@ E lectromechanical parking
brake . . . . . . . . . . . . . . . . . . . . . 79
@ Selector lever (a utomatic trans-
mission) 109
(D Tips
-Some of the equipment or fea tures
show n in the genera l ill ustration may be
standard equipment on your vehicle or
may be opt ional equ ipment depending
on your model. Always ask your
Page 15 of 316
M N <( (.J
'SI: ,...., \!) ..,.,
,...., ..,., ,....,
Instrument s and warnin g/indic ator ligh ts 13
compartment, stop the engine and let it
cool down. Always exercise extreme cau
t ion when working under the hood
<=> page 225.
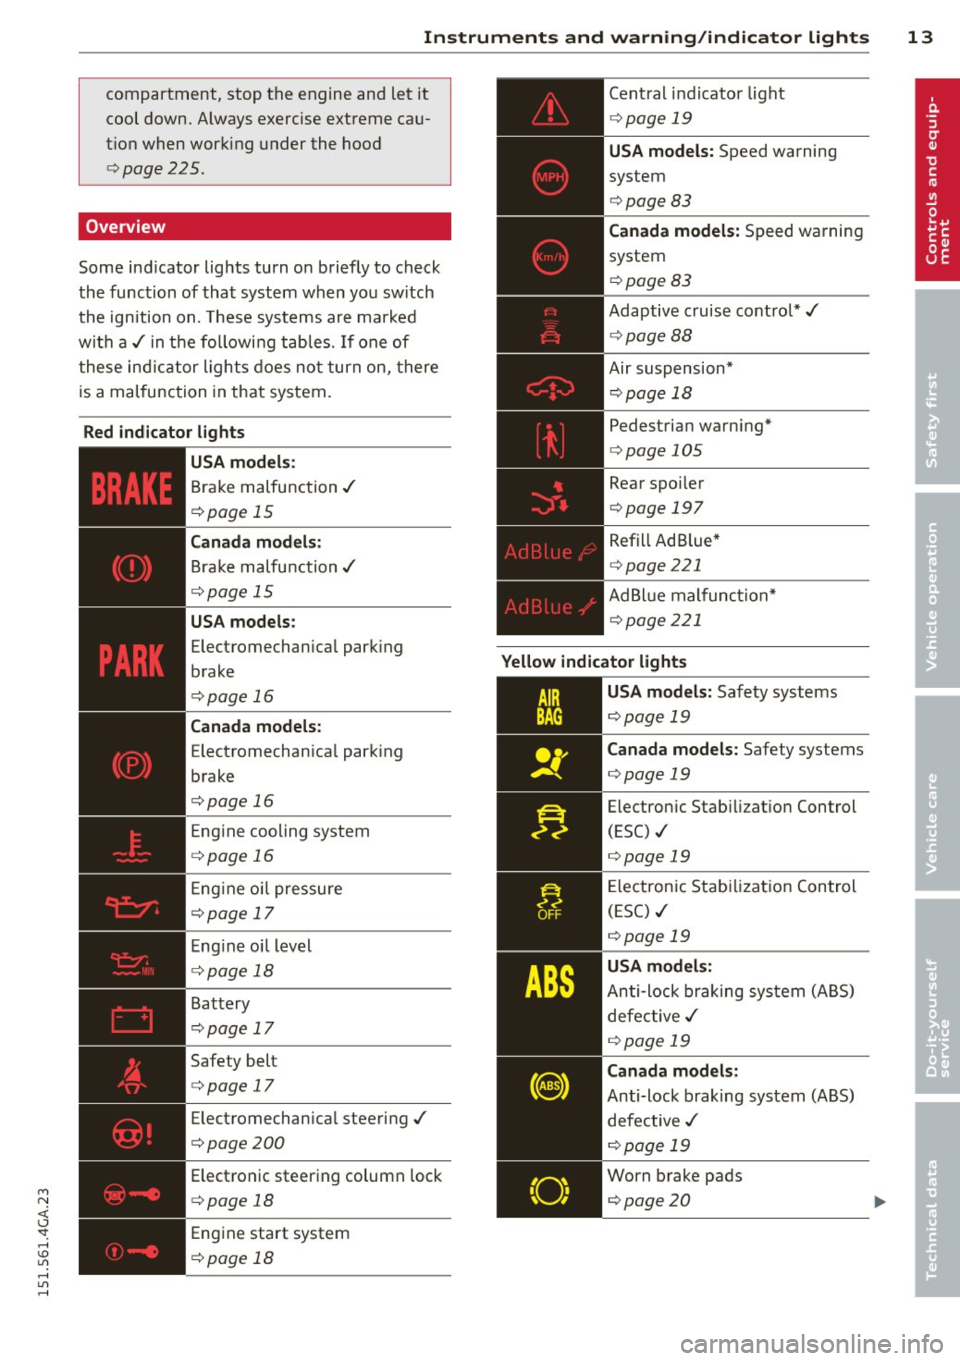
Overview
Some ind icator lights turn on briefly to check
the function of that system when you switch
the ignition on. These systems are marked
w ith a,/ in the followi ng tables.
If one of
these ind icator lights does no t turn on, there
is a malfunction in that system.
Red ind ic ator l ights
------------
U S A m od els :
Brake malfunction ,/
c:> page 15
Canada mod els:
Brake malfunction,/
c:> page 15
USA models :
Electromechanical park ing
brake
c:> page 16
Can ada models :
Electromechan ica l park ing
brake
c:> page 16
E ng ine cooling system
c:> page 16
E ng ine o il pressure
c:> page 17
Eng ine oi l level
c:> page 18
Battery
c:> page 17
Safety bel t
c:> page 17
Electromechan ica l steering,/
c:>page200
Elect ronic steering column lock
c::> page 18
Engine start system
c:> page 18 Cent
ral indicator light
<=> page 19
USA model s: Speed warning
system
<=> page 83
Ca nada model s: Speed warning
system
<=> page 83
Adaptive cruise contro l*,/
<=> page 88
Air suspension* <=> page 18
Pedestrian warn ing*
c::> page 105
Rear spo iler
<=> page 197
Refill Ad Blue *
<=> page 221
AdBl ue malfunction*
c:>page 2 21
Yellow indicato r light s
-------------
USA mod els : Safety systems
c::> page 19
Canada models: Safety systems
c::> page 19
Electronic Stab ili z ation Control
(ESC) ./
<=> page 19
Electron ic Stab ilizat ion Control
(ESC) ,/
c::> page 19
USA models:
Anti-lock braking system (ABS)
defective ,/
c::> page 19
Canada models :
Anti-lock braking system (ABS)
defective ,/
c::> page 19
Worn brake pads
c::> page 20
Page 17 of 316
M N <( (.J
'SI: ,...., \!) 1.1'1 ,...., 1.1'1 ,....,
Instruments and warning/indicator lights 15
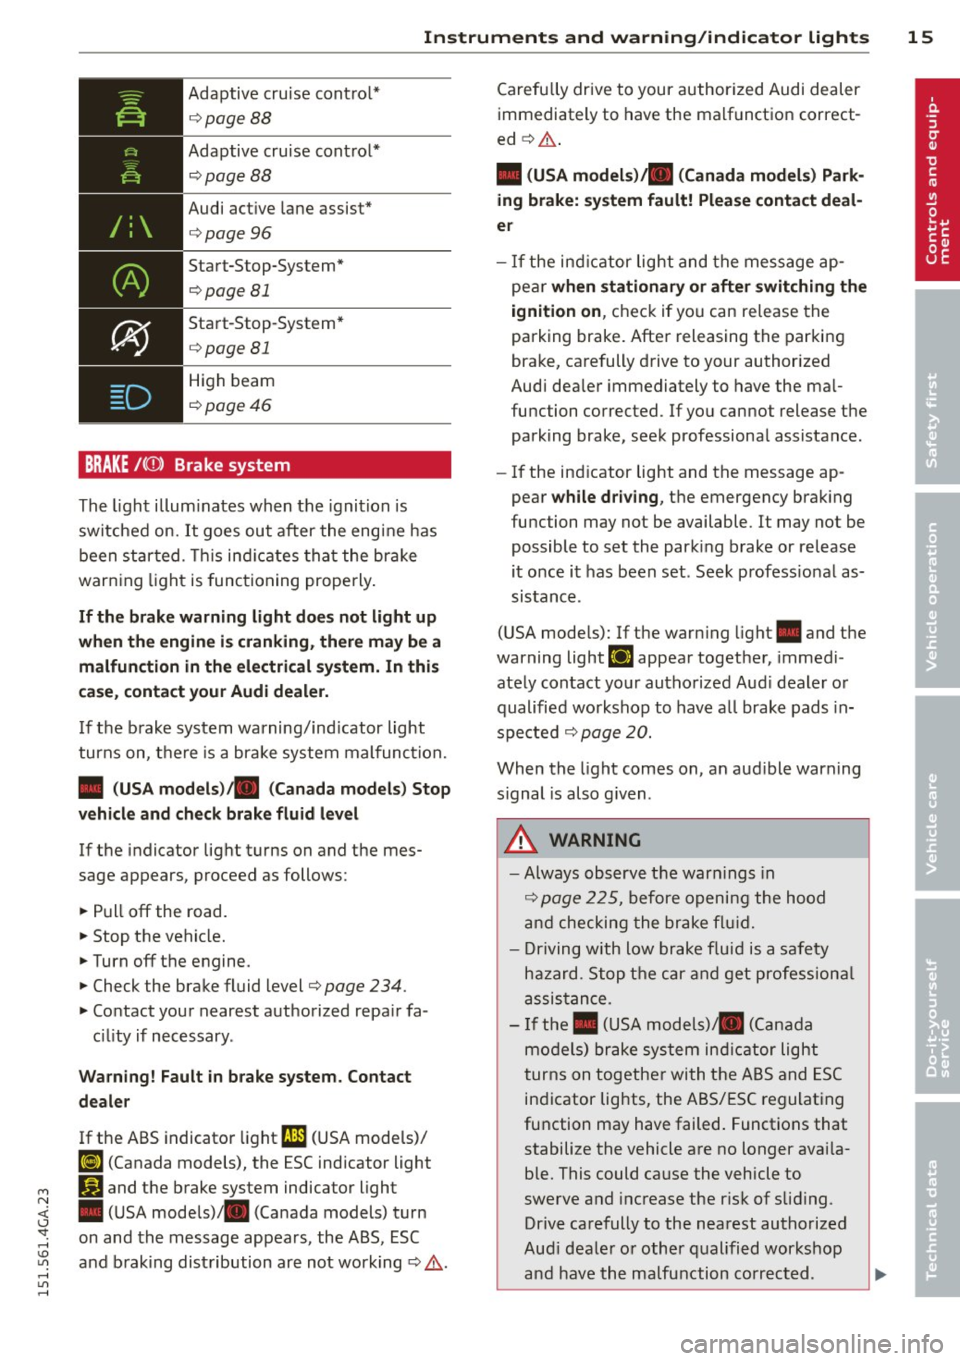
Adaptive cruise control*
9page88
Adaptive cru ise control*
¢ page 88
Audi act ive lane assist*
¢page96
Sta rt-Stop-System*
¢page 81
Sta rt-Stop-System*
¢page 81
High beam
¢page46
BRAKE/((!)) Brake system
The light illum inates when the ignition is
sw itched on.
It goes out after the engine has
been started. This ind icates that the brake
warning light is functioning properly .
If the brake warning light doe s not light up
when the engine is cranking, there may be a
malfun ction in the electrical system. In this
case , contact your Audi dealer.
If the brake system warning/ind icator light
turns on, there is a brake system malfunction.
• (USA models) . (Canada models) Stop
vehicle and check brake fluid level
If the indicator light turns on and the mes
sage appears, proceed as follows :
.,. Pull
off the road.
.,. Stop the vehicle.
.,. Turn
off the engine.
.,. Check the brake fluid level¢
page 234.
.,. Contact your nearest authorized repa ir fa-
c ili ty if necessary .
Warning! Fault in brake system . Contact
dealer
If the ABS indicator light rJl1 (USA mode ls)/
ii] (Canada models), the ESC indicator light
G1 and the brake system indicator light
• (USA models)/ . (Canada models) turn
on and the message appears , the ABS, ESC
and brak ing distribution are not work ing ¢ .&. . Carefully
drive to your authorized Audi dealer
immediately to have the malfunction correct
ed ¢.&. .
• (USA models) . (Canada models) Park
ing brake: system fault! Please contact deal
er
- If the ind icator light and the message ap
pear
when stationary or after switching the
ignition on,
check if you can release the
parking brake. After releasing the parking
brake, carefully drive to your authorized
Audi dea ler immediately to have the ma l
function corrected. If you cannot release the
parking brake, seek professional assistance.
- If the ind icator light and the message ap
pear
while driving , the emergency brak ing
function may not be available. It may not be
possible to set the park ing b rake or release
it once it has been set . Seek profess ional as
sistance .
(USA models): If the warn ing light . and the
warning light
llJ appea r togethe r, immedi
ately contact your authorized Aud i dealer or
qualified workshop to have all brake pads in
spe cted
¢ page 20.
When the light comes on, an aud ible warning
s ignal is also g iven .
A WARNING
-Always observe the warn ings in
¢ page 225, before opening the hood
and checking the brake fluid .
- Driving with low brake fluid is a safety
ha zard . Stop the car and get professional
assistance .
- If the. (USA models). (Canada
models) brake system indicat or light
turns on together with the ABS and ESC
indicator lights, the ABS/ESC regulating
function may have failed. Functions that
stabilize the vehicle are no longer avai la
ble. This could cause the vehicle to
swerve and increase the risk of slid ing .
Drive carefully to the nearest authorized
Aud i dealer or other qualified workshop
and have the malfunction corrected. ..,.
Page 18 of 316
16 Instrum ent s and w arn ing /indic ato r light s
-If the brake warning/indicator light does
not go out after a few seconds and the
park ing brake is released, or lights up
wh ile you are driving, the fluid level in
the brake fluid reservoir is too low .
If you
believe that it is safe to do so, proceed
immediately at low speed to the nearest
authori zed Aud i dealer o r qualified repa ir
f acili ty and have the brake system in
spected.
- Always keep in m ind that after several
brake applicat ions, yo u will need greater
pressure on the brake peda l to stop your
vehicle. Do not re ly on strained brakes to
respond with maxim um stopp ing power
in critical situations. You must allow for
increased brak ing distances . The extra
distance used up by fad ing brakes could
lead to an acc ident.
PARK/( ®) Electromechanical parking brake
The warning/indicator light monitors the
electromechanical parking brake.
If the indicator light . (USA models)/ .
(Canada models) turns on, the park ing brake
was set .
• (U SA models) • (Canada models ) Cau
tion: Vehicle pa rked too steep
If the indicator light blinks and the message
appears, there is not eno ugh braking power to
keep the vehicle from ro lling . The brakes have
overheated. The vehicle could ro ll away even
on a small incline.
P res s brake pedal to relea se parking brake
To release the parking bra ke, press t he b ra ke
pedal and press the button~ or start d riving
with start ing assist at the same time
c::> pageBO .
Please release parking brake
To release the parking brake ma nually, press
the brake pedal and press the button~ at the
same time . T he parking brake on ly re leases
automatically if the dr iver's safety be lt is fas
tened.
Ill Parking brak e!
If the Ill ind icator light tu rns o n and this
message appears , the re is a parking b rake
malfunction . Drive to your au thorized A udi
dealer or qualif ied workshop immediately to
have the malfunction corrected .
-L Engine cooling system malfunction
A malfunction in th e engine cooling system
must be repaired as soon as possible.
• Swit ch off engin e and check coolant level
If the indicator light turns on and the mes
sage appea rs, the coolant temperature is too
high o r the coolant leve l is too low.
.. Pull
off the road .
.. Stop the vehicle .
.. Tu rn
off the engi ne .
.,. Check coolant level
c::> page 231.
.. Add coo lant if necessary c::> page 232 .
.,. Con tinue dr iv ing on ly afte r the engine coo l
ant warning/indicator light goes out .
.. Contact your authorized A udi dealer for as-
sistance if necessary.
If the engine coo lant level is correct, then the
radiator fan may be the ca use of the malfunc
tion .
• Coolant temperature too high! Plea se let
engin e run with vehicl e st ationary
If the indicator light turns on and the mes
sage appea rs, let the engine run at id le for a
f ew m inutes to cool down.
A WARNING
- If your vehicle should break down for
mechanical or other reaso ns, park at a
safe distance from mov ing traffic, turn
off the eng ine and turn on the hazard
warn ing lights
c::> page 45, Emergency
flasher .
-
-Never open the hood if you see or hear
steam or coo lant escaping from the en
g in e compartment -you r isk being scald
ed. Wait unt il you can no lo nger see or
hear steam o r coolant escap ing .
~
Page 19 of 316
M N <( (.J
'SI: ,...., \!) 1.1"1 ,...., 1.1"1 ,....,
Instruments and warning/indicator lights 17
-The engine compartment of any vehicle
is a dangerous area. Before you perform
any work in the engine compartment,
turn of the eng ine and allow it to cool.
Follow the warning stickers
c::;, page 225.
(D Note
Do not continue driving if the. symbo l
illuminates. There is a malfunct ion in the
eng ine cooling system -you could damage
your eng ine.
0 Battery
This warning/indicator light detects a mal
function in the generator or in the vehicle's
electrical system.
The. warning/ind icator light illuminates
when you switch on the ignit ion and must go
out after the engine has started.
• Alternator fault: Battery is not being
charged
If the indicator light turns on and the mes
sage appears, there is a malfunction in the
generator or vehicle e lectr ica l system .
Dr ive to your au thorized Audi dealer or quali
fied workshop immediately . Because the vehi
cle battery is discharging, turn
off all unnec
essary electrical equipment such as the radio.
Seek professional ass istance if the battery
charge level is too low .
(•) Low battery: battery will be charged
while driving
If the indicator light turns on and the mes
sage appears , there may be limited starting
abi lity .
If this message turns off after a litt le wh ile,
the battery charged enough wh ile driving.
If the message does not turn off, have your
authorized Audi dealer or qua lified workshop
correct the mal func tion.
~ Safet y belts
This warning/indicator light reminds you to
put on your safety belt.
The . warning/ indicator light illum inates
when the ignition is switched on to remind
the driver and any front passenger to put on
the safety belt. Add it ionally, an acoustic warn
ing (gong) wi ll also sound.
For more Information
c::;, page 138, i Safety
belt warning light .
~ Engine oil pressure malfunction
The red engine oil pressure warning symbol
requires immediate service or repair . Driving
with a low-oil-pressure indication is likely to
inflict severe damage to the engine.
• Switch off engine and check oil level
If the indicator light turns on and the mes
sage appears, the oi l pressure is too low.
.,. Pull
off the road.
.,. Stop the vehicle.
.,. Turn
off the engine .
.,. Check the engine oil level c> page 229 .
.,. If the eng ine o il level is too low, add eng ine
oil
c::;, page 229. Make sure that the oil pres
sure warning symbol. appears no longer
in the display before you start dr iv ing again .
.,. If the eng ine o il level is correct and the indi
cator light still turns on, turn the engine
off
and do not continue driving. Seek professio
na l assistance .
(D Tips
- The engine oil pressure symbol. is
not an indicator for a low engine oil lev
el. Do not rely on it. Instead, check the
oil level in your engine at regular inter
vals, preferably each time you refuel ,
and always before going on a long trip.
- The yellow oil level warning indication
II requires oil refill or workshop serv
ice without delay. Do not wait until the
red oil pressure warning. starts to
flash before you respond to the low oil
Page 38 of 316
36 Opening and clo sing
@ Tips
If your vehicle has been standing for an ex
tended period, please note the following:
- The proximity sensors are deactivated af-
ter a few days to save power. You then
have to pull on the door handle once to
unlock the vehicle and a second time to
open the vehicle.
- To prevent the battery from being dis
charged and to preserve your vehicle's
ability to start for as long as possible,
the ene rgy management system gradu
ally switches off unnecessary conven i ence functions.
It i s possible that you
will not be able to unlock your vehicle us
i ng these conven ience f unctions .
- For Declaration of Compliance to United
States FCC and Industry Canada regula
tions
¢ page 297.
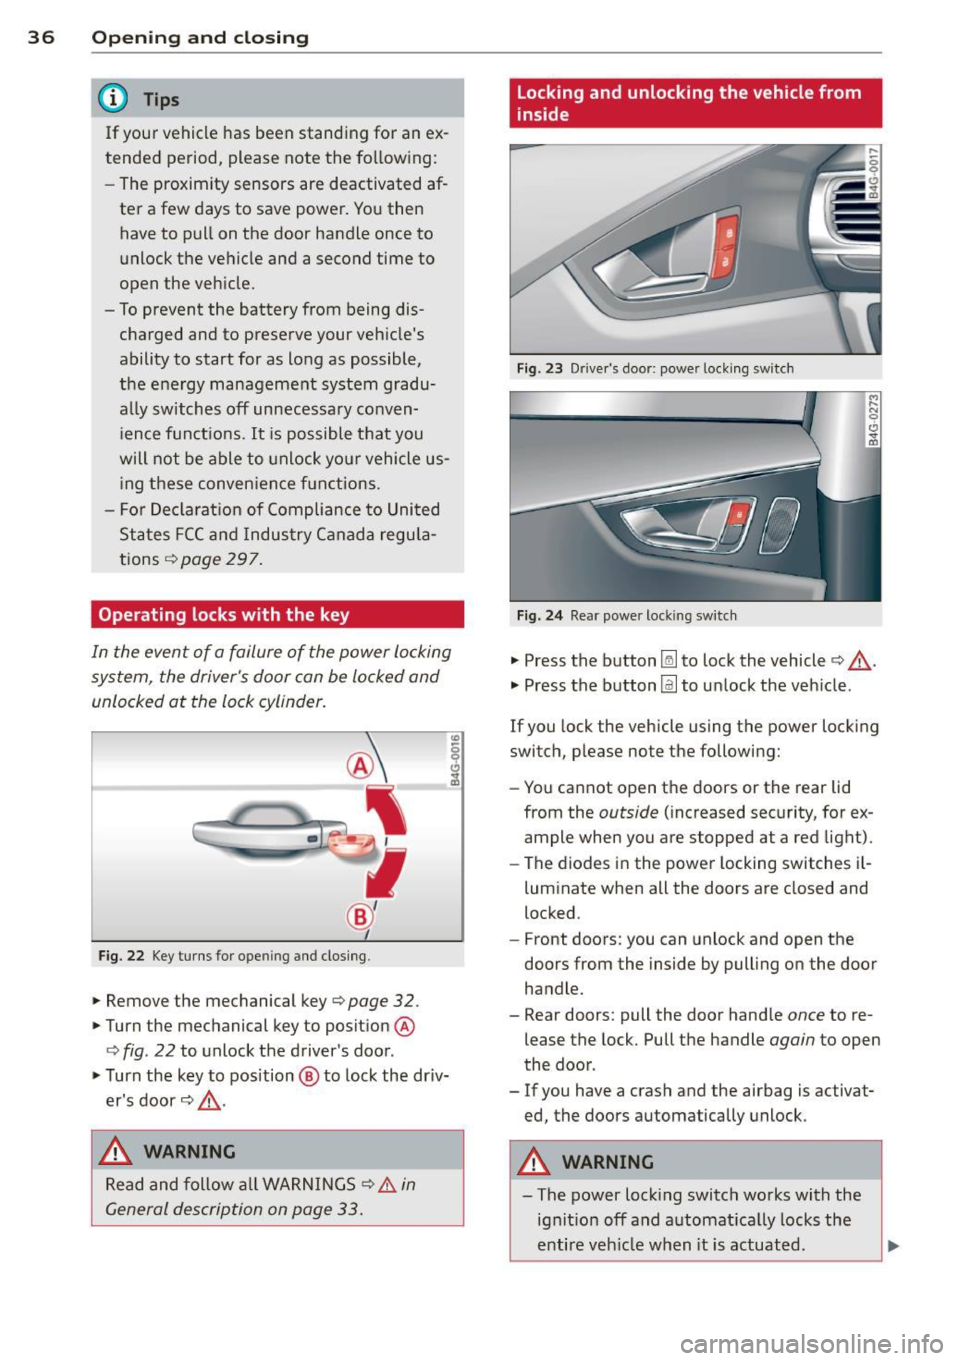
Operating locks with the key
In the event of a failure of the power locking
system, the driver 's door can be locked and
unlocked at the lock cylinder.
Fig. 22 Key turns for ope ning and closing .
.. Remove the mechanical key¢ page 32 .
.. Turn the mechanical key to position @
¢
fig . 22 to unlock the driver's door .
.. Turn the key to position @ to lock the driv
er's door ¢.&, .
_& WARNING
Read and follow all WARNINGS¢ & in
General description on page 33.
Locking and unlocking the vehicle from
inside
Fig. 23 Drive r's door; power locking sw itch
Fig. 24 Rear powe r lock ing switch
.. Press the button~ to lock the vehicle¢.&, .
.. Press the button@] to unlock the veh icle .
If you lock the vehicle using the power locking
switch, please note the following:
- You cannot open the doors or the rear lid
from the
outside (increased security, for ex
ample when you are stopped at a red light).
- The diodes in the power locking switches i l-
luminate when all the doors are closed and
locked .
- Front doors: you can unlock and open the
doors from the inside by pulling on the door
handle .
- Rear doors: pull the door handle
once to re
lease the lock. Pull the handle
again to open
the door .
- If you have a crash and the airbag is activat
ed, the doors automatically unlock.
A WARNING
-==
-The power lock ing switch works with the
ignition off and automatica lly locks the
entire veh icle when it is actuated .
Page 42 of 316
40 Opening and clo sing
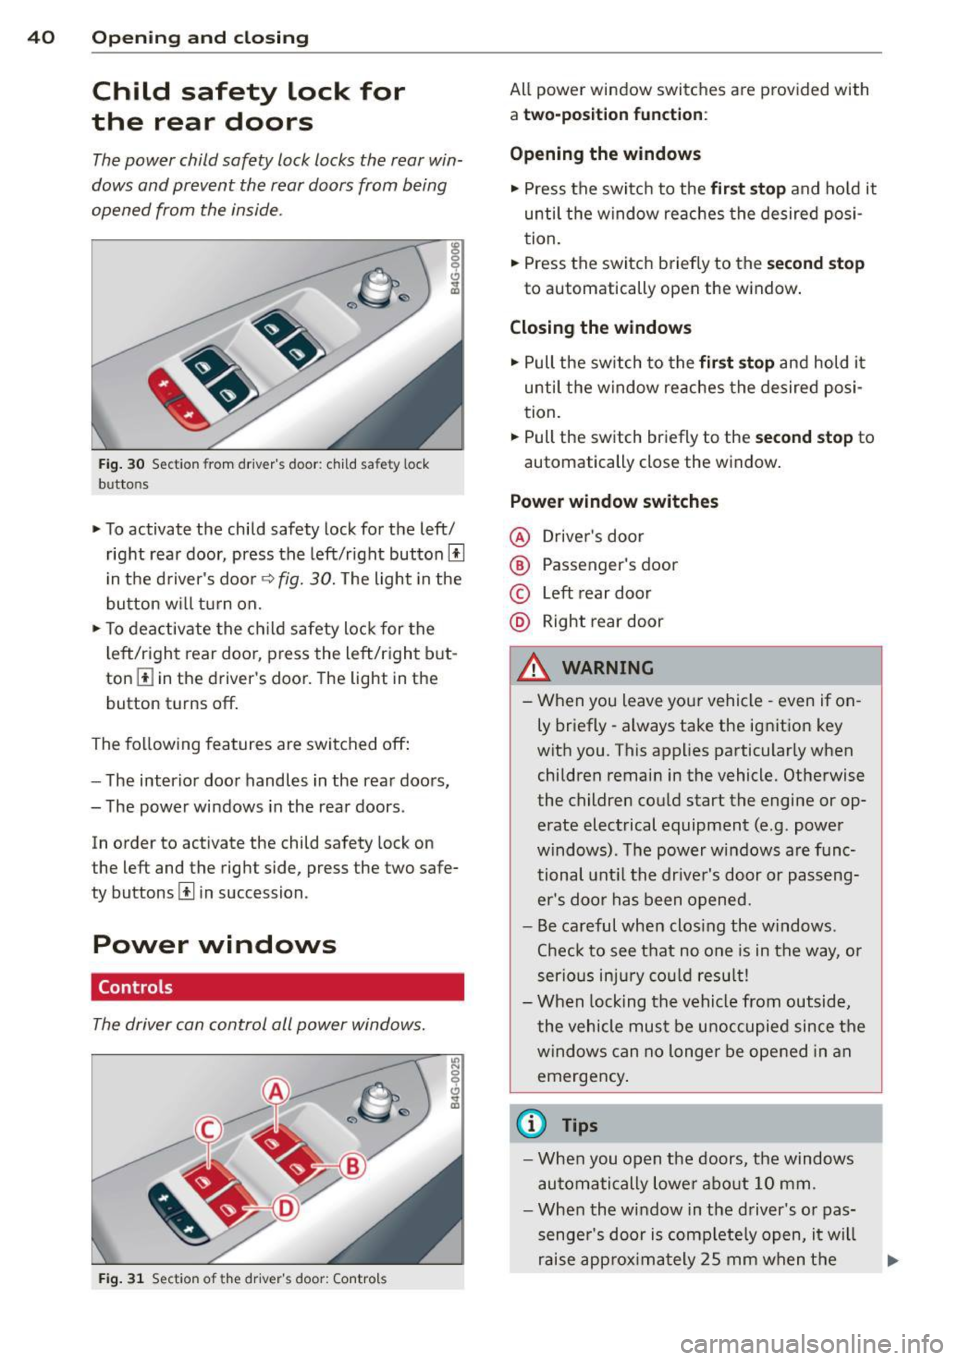
Child safety lock for
the rear doors
The power child safety lock locks the rear win
dows and prevent the rear doors from being
opened from the inside.
Fig. 30 Section from driver's door: child safety lock
buttons
• To activate the child safety lock for the left/
right rear door, press the left/right button[!]
i n the d river's door
q fig. 30. The light in the
button w ill turn on.
• To deactivate the ch ild safety lock for the
l eft/right rear door, press the left/right b ut
ton
III in the driver's door. The light in the
button turns off.
The following features are switched off:
- The interior door handles in the rear doors,
- The power windows in the rear doors .
In order to activate the child safety lock on
the left and the right side, press the two safe
ty buttons[!] in succession.
Power windows
Controls
The driver can control all power windows.
Fig . 31 Section of the driver's door: Controls
All power window switches are provided with
a two-po sition function :
Opening the windows
• Press the switc h to the fir st sto p and hold it
until the window re aches the desired posi
tion.
• Press the switch briefly to the
second stop
to automatically open the window .
Closing the windows
• Pull the sw itch to the fir st stop and hold it
until the window reaches the desired posi
tion .
.. Pull the switch br iefly to the
s e cond stop to
automatically close the window.
Power window switches
@ Drive r's door
® Passenger's door
© Left rear door
@ Right rear door
& WARNING
- When you leave you r vehicle -even if on
ly briefly -always take the ignition key
wit h you . This applies particularly when
children remain in the vehicle. Otherwise
the children could start the engine or op
erate electrical equipment (e.g. power
windows). The power windows are func
tional unt il the drive r's door or passeng
er 's doo r ha s been opened.
- Be careful when clos ing the w indows .
Chec k to see that no o ne is in the way, or
serio us inju ry co uld resu lt!
- When lock ing the vehicle from outside,
the vehicle mu st be u noccupied since the
windows can no longer be opened in an
emergency .
{1) Tips
-When you open the doors, the windows
au tomati cally lower abo ut 10 mm .
- When the window in the driver's or pas
senge r's door is complete ly open, it will
raise app rox ima tely 25 mm when t he
Page 78 of 316
76 On the road
column will continue moving as long as you
are pressing the switch.
There must be at least 10 inc hes (25 cm) be
tween you r chest and the center of the steer
ing whee l.
If you cannot sit more than 10 in
ches (25 cm) from the steering whee l, see if
adapt ive equipment is available to help you
reach the pedals and increase the distance
from the steer ing wheel.
F or detai led information on how to adjust the
driver's seat, see
<::> page 54 .
In vehicles with the memory f unction* , the
steering column settings are stored together
with the seat position.
A WARNING
Improper use of steering wheel adjust
ment and improper seating position can
cause se rious personal injury.
- Adjust the steer ing whee l column on ly
when the vehicle is not moving to pre
vent loss of veh icle cont rol.
-
- Adjust the driver's seat or steering wheel
so that the re is a min imum of 10 inches
(25 cm) between your chest and the
steering wheel ¢
page 129, fig. 148. If
you can not maintain this min imum dis
tan ce, the airbag system cannot protect
yo u properly.
- If p hys ica l limi tations prevent y ou from
sitting 10 in ches (25 cm) o r more from
the steering wheel, check with yo ur au
tho rized Aud i dealer to see if adaptive
equipment is availab le .
- If the steerin g wheel is aligned wi th you r
face, the supp lemental drive r's airbag
cannot prov ide as much protect ion in an
acc ident. A lways make sure that the
steering wheel is aligned with your
chest.
- Always hold the steering wheel with your
hands at the 9 o'clock and 3 o'clock posi
t ions to reduce the risk of pe rsonal injury
if the d river 's airbag deploys.
- Never hold the steer ing whee l at the 12
o'clock posit ion or w it h your hands i nside the steering wheel rim or on the steering
wheel hub. Hold
ing the steer ing wheel
the wrong way can cause serious injuries
to the hands, arms and head if the driv
er 's airbag deploys.
Easy entry feature
Applies to vehicles: with electrically adjustable steering
wheel
The easy entry feature makes it easier to en
ter and exit the vehicle by automatically ad
justing the steering wheel.
.. Select in the MM I: ICAR I fu nction button>
(Car )* sys tem s control b utton > V ehicle set
ting s
> Seat s > Driver 's seat > Easy entry >
On .
When the easy ent ry feature is turned on, the
steering wheel moves up to the park position
when you switch
off the ignition. After you en
ter the veh icle, the steering wheel moves to
the stored position as soon as you sw itch on
the ignit ion.
Starting and stopping
the engine
Starting the engine
This button switches on the ignition and
starts the engine.
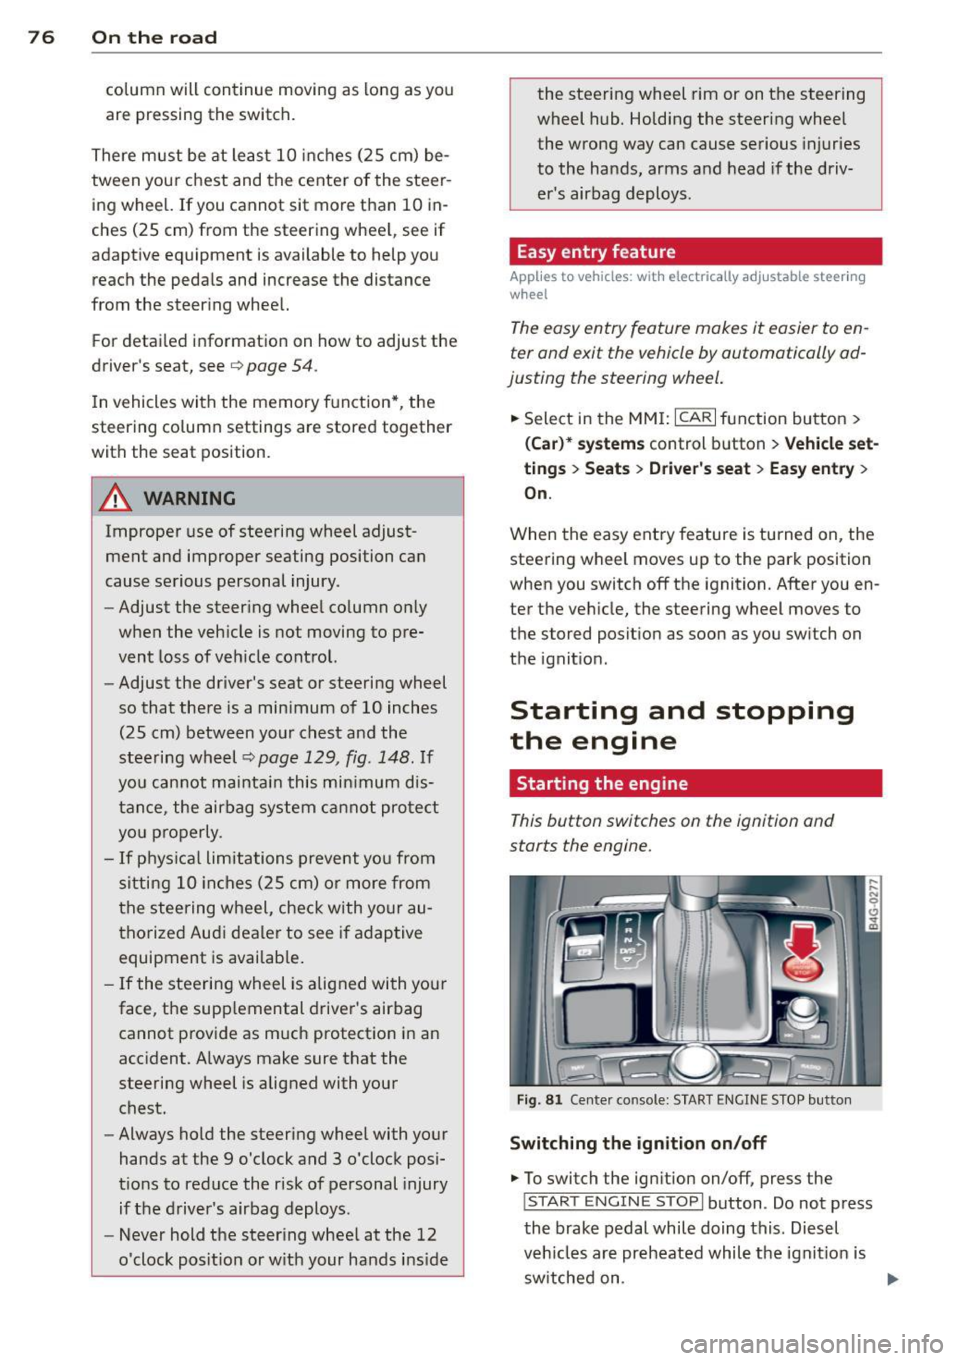
Fig . 81 Ce nter console: S TART ENGINE S TOP b utto n
Switching the ign ition on /off
• To switch the ign ition on/off, press the
I STAR T ENGINE ST OPI button . Do not p ress
the brake pedal while doing this . Diesel
veh icles are preheated while the ignit ion is
sw itched on . ..,.
Page 79 of 316
M N <( (.J
'SI: ,...., \!) ..,.,
,...., ..,., ,....,
Starting th e engin e
"'Pre ss the brake peda l c::> _&..
"'Press the !START ENGINE STOP I button
c::> fig. 81. The engi ne will start .
"' It is possible that the re wi ll be a slight de lay
when starting the engine for diesel vehicles
in colder temperatures. Therefore, you must
hold the brake pedal down until the eng ine
starts. The indicator lamp
Ii illuminates
when the eng ine is preheated.
If the engine should not start immediately,
the starting process is automatically stopped
after a short time . Repeat starting procedure .
Start-Stop-Sy stem *:
Note the information on c::> page 81, Start
Stop-Sys tem.
A WARNING
- Never allow the engine to run in confined
spaces -danger of asphyxiation .
- Never turn off the eng ine unti l the vehi
cle has come to a complete stop .
- The brake booster and power steer ing
only work when the engine is running .
If
the engine is off, you have to use more
force when steering or braking. Because
you cannot stee r and brake as you usua l
ly wou ld, this could lead to crashes and
ser ious injur ies.
- Avoid high engine rpm, fu ll throttle and
heavy engine loads unti l the engine has
reached operating temperat ure - ot her
wise yo u risk eng ine dam age.
- The eng ine ca nnot be started by pushing
or tow ing the veh icle.
(D Tips
- After a cold engine is sta rted, there may
be a brief period of increased noise be
ca use oil p ress ure mus t fi rs t bu ild up in
the hyd raulic valve adjus ters. This is nor
mal and not a ca use for concern .
-If yo u leave the vehicle with t he ignit ion
switched on, the ignition will switch off
On th e ro ad 77
after a cer tain per iod of t ime. Please
note that electrical eq uipment such as
exterior lights will sw itch off as well
when that happens.
Stopping the engine
"' Bring your vehicle to a complete stop.
"' Move the selector lever to the P or N posi
tion .
"' Press the
I STA RT E NGINE ST OP I button
c::> page 76, fig. 81.
Steering lock
The steer ing locks when you tur n the engine
off using the
I STAR T ENGINE ST OP I button
and open the d river's door . The locked steer
ing helps prevent vehicle theft.
Eme rgency off
If necessa ry, the engine can be switched off
with the selector lever in the R or D/S posi
t ion . The engine stops if you press the
I S TART ENG INE STOPI button at speeds below
6 mph (10 km/h) .
A WARNING
-Never tur n off the engine unti l the vehi
cle has come to a complete stop .
- T he b rake booster and powe r stee ring
only work w he n the eng ine is r unning. If
the engine is off, you have to use more
force when steering or braking. Because
you cannot steer and brake as you usual
ly would, th is co uld lead to crashes and
serio us injuries.
- For safety reasons, you sho uld a lways
park your vehicle w ith the selector lever
in P. Otherwise, the vehicle could inad
vertently roll away .
- After the eng ine has been switched off,
the radiator fa n can cont inue to run for
up to 10 minutes - even with the ignition
sw itche d off .
It can also sw itch on again
after some t ime if the coolant tempera
ture r ises as the resu lt of a hea t buildup
.
or if the engine is hot and the engine .,..