display AUDI A7 2016 User Guide
[x] Cancel search | Manufacturer: AUDI, Model Year: 2016, Model line: A7, Model: AUDI A7 2016Pages: 294, PDF Size: 73.82 MB
Page 28 of 294
Instruments and indicato r Lights
Economy tips
In certain situat ions, economy tips appear auto
matica lly for a short time in the efficiency pro
gram ~
fig. 10. If yo u follow these economy tips,
you can reduce your vehicle's fuel consumption.
To turn an economy tip off immediately after it
appears, press any button on the multifunction
steering whee l.
(D Tips
-If you e rase the data in the efficiency pro
gram, the values in the on-board computer
will a lso be reset.
- Once you have turned an economy tip off, it
will on ly appear again after you turn the ig
nition on again.
- The economy tips are not displayed in every
instance, but rather in intervals over a peri
od of t ime .
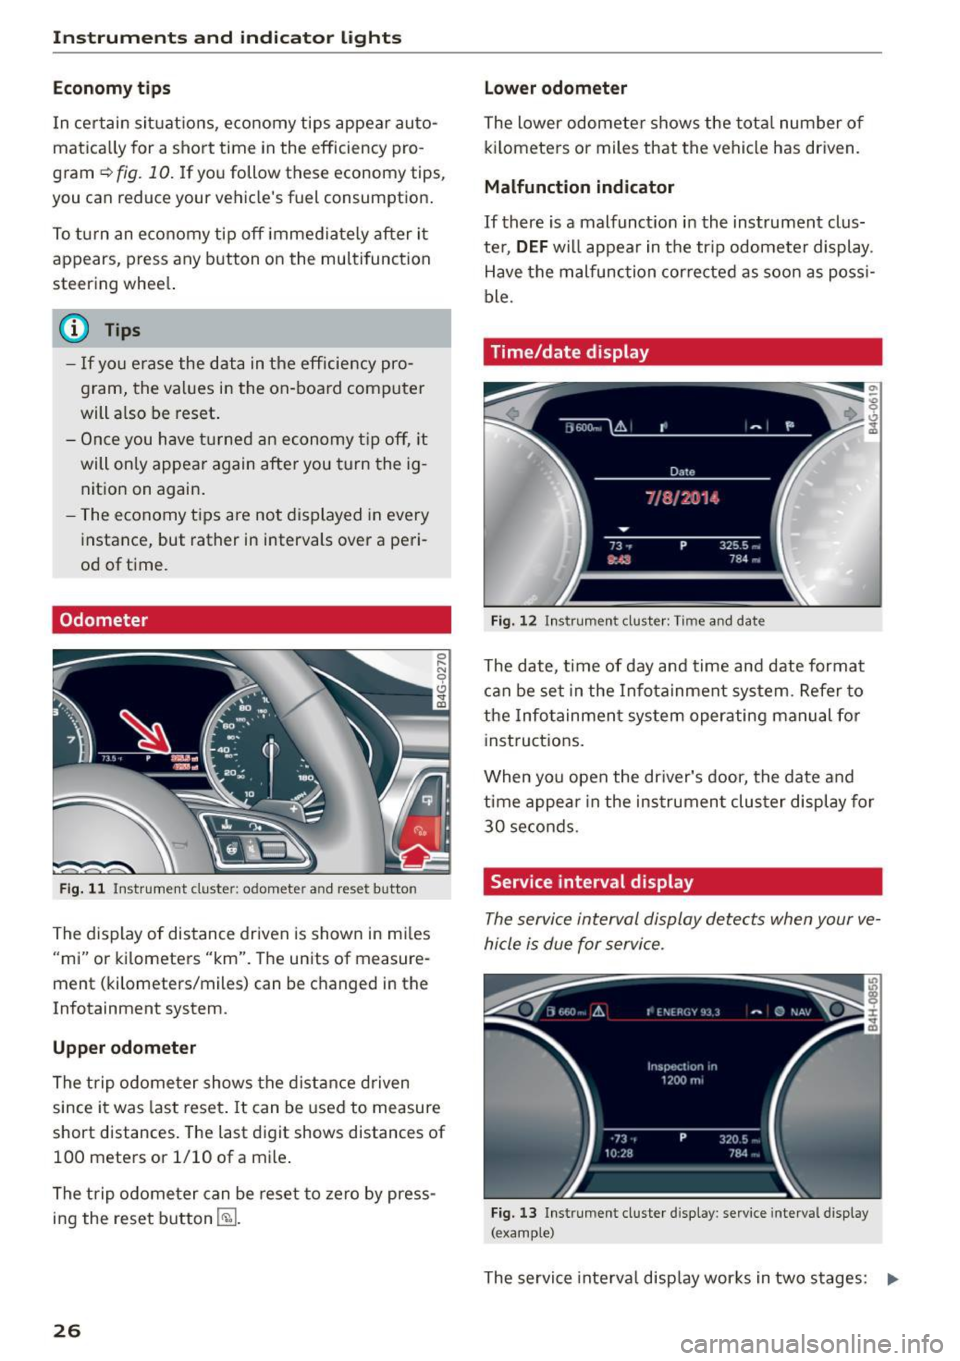
Odometer
Fig . 11 Instrum ent cluste r: o dom eter an d res et butto n
The display of distance driven is shown in m iles
"mi" or kilometers "km". The units of measure
ment (kilometers/miles) can be changed in the
Infotainment system.
Upper odometer
The trip odometer shows the distance driven
since it was last reset . It can be used to measure
short distances. The last digit shows distances of
100 meters or 1/10 of a mile .
The trip odometer can be reset to zero by press
ing the reset button~-
26
Lower odometer
The lower odometer shows the total number o f
kilometers or miles that the vehicle has driven.
Malfunction indicator
If there is a malfunction in the instrument clus
ter ,
DEF will appear in the tr ip odometer display .
Have the malfunction corrected as soon as poss i
ble.
Time/date display
Fig. 12 Ins trumen t cl uster : T im e and dat e
The date, time of day and time and date format
can be set in the Infotainment system. Refer to
the Infotainment system operating manual fo r
instructions.
When you open the dr iver's door, the date and
time appear in the instrument cluster display for
30 seconds .
Service interval display
The service interval display detects when your ve
hicle is due for service .
Fig. 13 Instrume nt cluster d ispl ay: service interv al displ ay
(example)
The service interval display works in two stages: ..,.
Page 29 of 294
M N <( I.J "". rl I.O
"' N I.O rl
-Inspection or oil change reminder: After a cer
tain distance driven, a message appears in the
instrument cluster display each time the igni
tion is switched on or off
c> fig. 13. The remain
ing distance or time is displayed briefly .
-Inspection or oil change due : If your vehicle is
due for an inspection or oil change or both, a
message appears br iefly in the instrument clus
ter display when switching the ignition on or
off:
Inspection due! or Oil change due! or Oil
change and inspection due! .
Checking service intervals
You can check the remaining distance or time un
til the next oil change or next inspection n the
Car menu. To do th is, select: the ICAR !function
button
> (Car) * Systems control button > Service
& control
> Servi ce intervals .
Resetting the indicator
Your authorized Audi dealer or authorized Audi
Service Facility will reset the service interval dis
play after performing service .
If you have changed the oil yourself, you must re
set the oil change interval.
To reset the indicator, select: the ICARI fu nct ion
button
> (Car)* System control button > Service
& control > Service intervals. Turn the control
knob downward to
Reset oil change interval and
press the control knob.
(D Note
- Only reset the oil change indicator if the o il
was changed.
- Fo llowing the service intervals is critical to
maintain ing the service life and value of
your vehicle, especially the engine. Even if
the mileage on the vehicle is low, do not ex
ceed the time for the next service.
- Calculating the time to the next oil change
i s interrupted when the vehicle battery is
disconnected. If the vehicle is not driven for
a long period of time, check the mainte
nance schedule so that you can follow the
maintenance interva ls.
Instruments and indicator lights
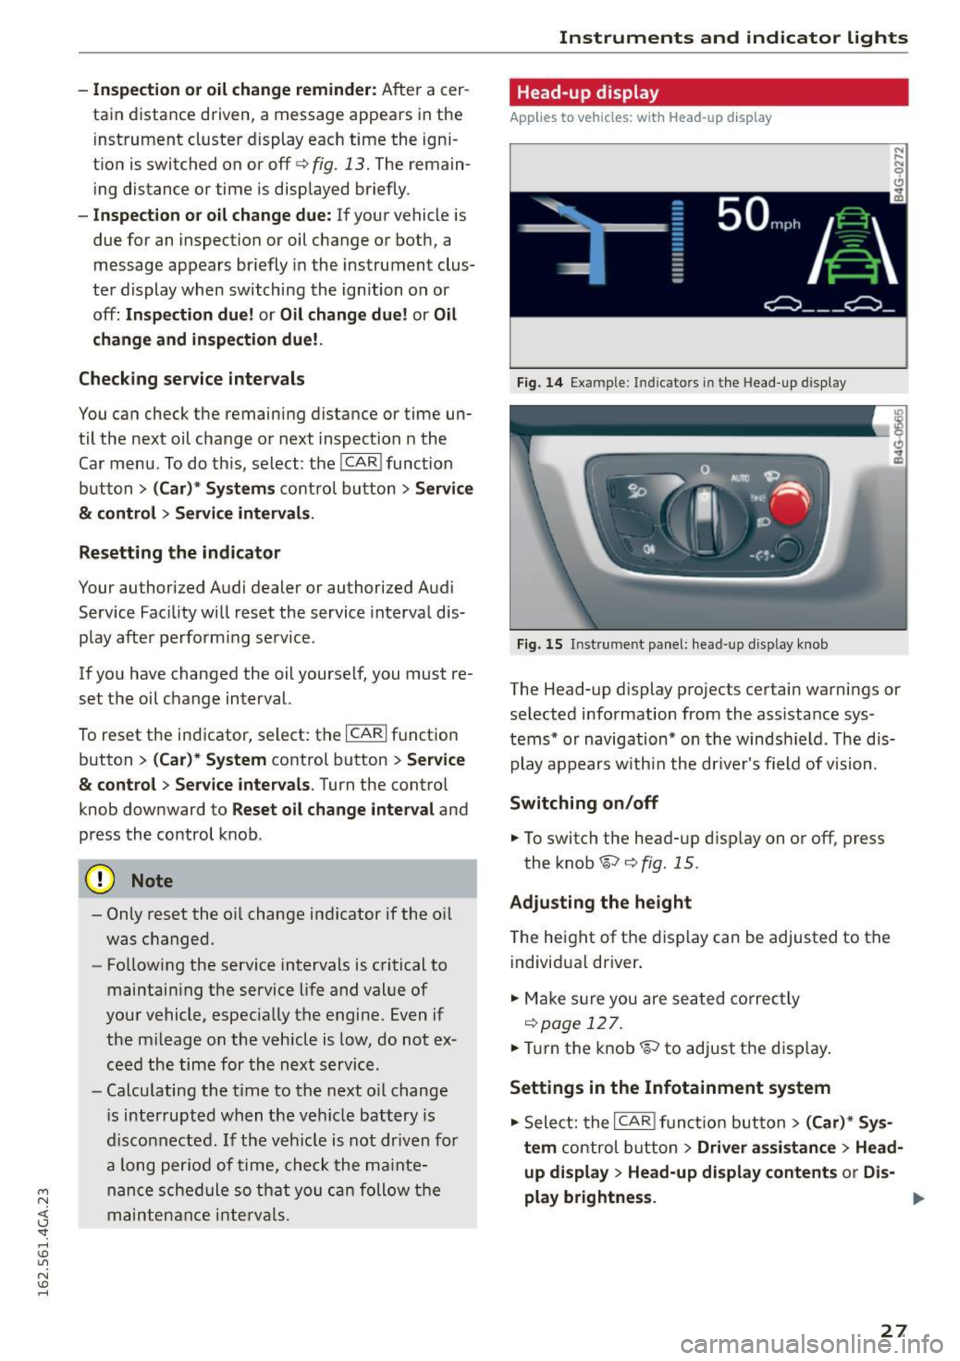
Head-up display
Applies to vehicles: wit h Head-up disp lay
Fig. 14 Examp le : Indicato rs i n th e Head -up dis play
Fig . 15 Instrument panel: head-up display knob
The Head-up display projects certain warnings or
selected information from the assistance sys
tems* or navigation* on the windsh ield . T he dis
play appears w ith in the dr iver's field of vision.
Switching on/off
... To switch the head-up d isplay on or off, press
the knob~
c> fig. 15.
Adjusting the height
The height of the display can be adjusted to the
individual driver.
... Make sur e you are seated correctly
r=!)page 127 .
... Tur n the knob~ to adjust the disp lay .
Settings in the Infotainment system
... Sele ct: the I CARI function button > (Car)* Sys
tem
control button > Driver assistance > Head
up display > Head-up display contents or Dis-
play brightness. ..,
27
Page 30 of 294
Instruments and indicato r Lights
Display content
In the Infotainment system, yo u can specify
which information should be displayed : For ex
ample , this can include navigation information*,
Adapt ive cruise control * or night vision assist *.
The display of certain information and some of
the red indicator lights cannot be hidden in the
Infotainment system.
Display brightness
You can adjust the display brightness in the Info
tainment system. The display brightness decreas
es automatically as th e amount of light decreas
es. The basic level of brightness is adjusted with
the instrument illum ination ¢
page 47.
(D Note
To prevent scratches on the gla ss covering the
Head-up display, do not place any objects in
the projection opening.
@ Tips
-Sunglasses with polar izat ion filters and un
favorable lighting conditions can affect the
display.
- An optimum display depends on the seat
position and the height adjustment of the
head-up display.
- A specia l windshield is needed for the head
up display function.
- For informat ion on cleaning, refer to
Q ta
ble on page
207.
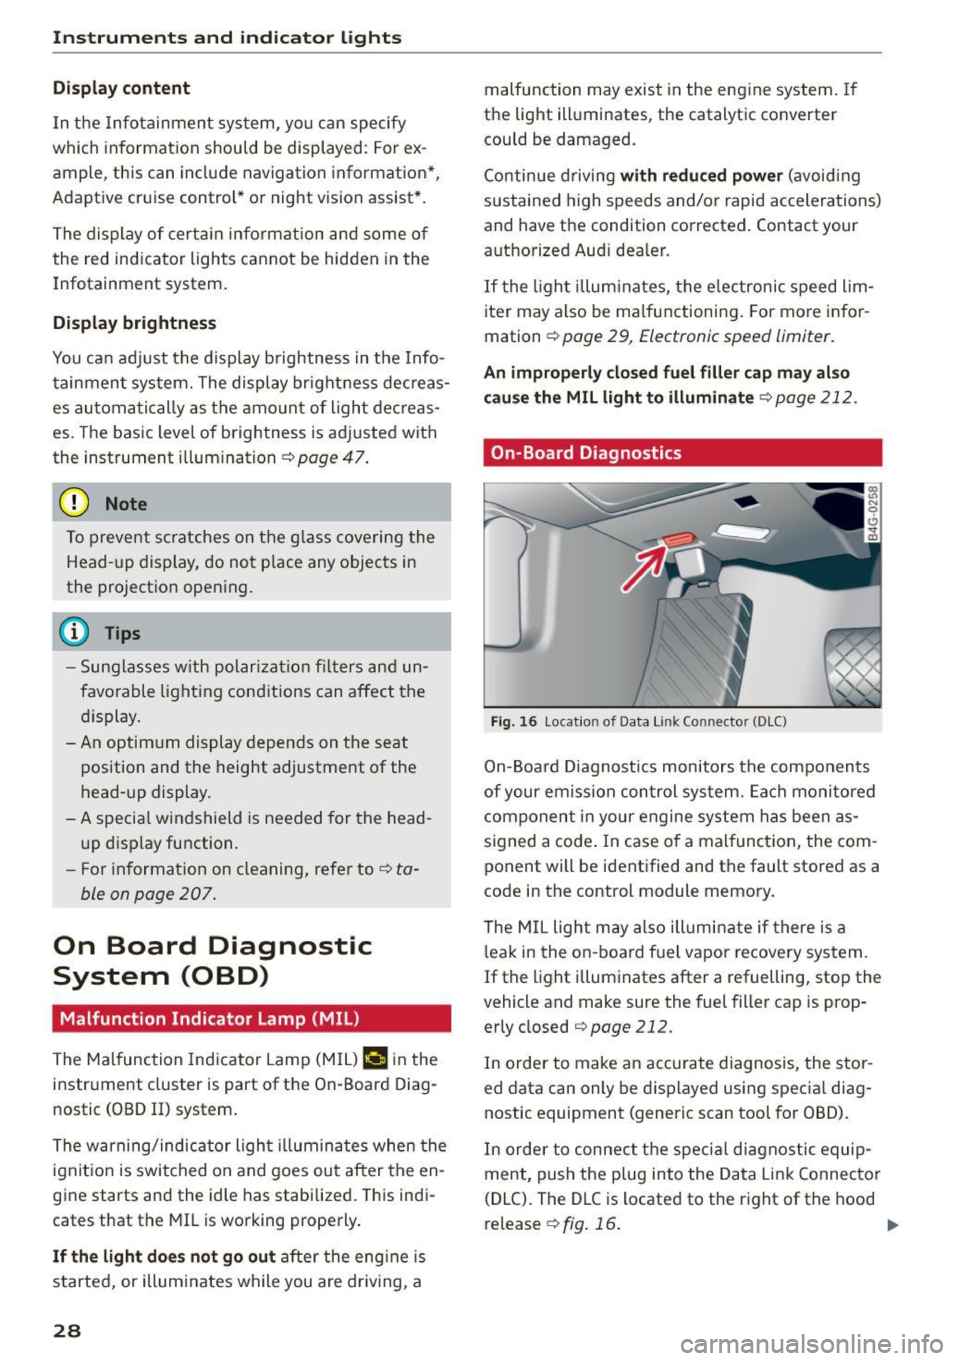
On Board Diagnostic
System (OBD}
Malfunction Indicator Lamp (MIL)
The Malfunction Indicator Lamp (MIL) ¢..ifl in the
instrument cluster is part of the On-Board Diag
nostic (OBD II) system.
The warning/indicator light illuminates when the
ignit ion is switched on and goes out after the en
gine starts and the idle has stabilized. This indi
cates that the MIL is working properly.
If the light does not go out after the engine is
started, or illuminates while you are dr iving, a
28
malfunction may exist in the engine system. If
the light illum inates , the catalytic converter
could be damaged.
Continue driving
with reduced power (avoiding
sustained high speeds and/or rapid accelerations)
and have the condition corrected. Contact your
authorized Aud i dea ler.
If the ligh t illuminates, the electronic speed lim
iter may also be ma lfunctioning . For more infor
mation ¢
page 29, Electronic speed limiter.
An improperly closed fuel filler cap may also
cause the MIL light to illuminate
Q page 212.
On-Board Diagnostics
Fig. 16 Locat io n of Data Link Co nnector (DLC)
On-Board Diagnostics monitors the components
of your emission control system. Each monitored
component in your engine system has been as
signed a code . In case o f a malfunct ion, the com
ponent will be identified and the fault stored as a
code in the control module memory .
The MIL light may also ill uminate if there is a
leak in the on-board f uel vapor recove ry system.
If the light illuminates after a refuelling, stop the
vehicle and make sure the fuel filler cap is prop
erly closed
c:> page 212.
In order to make an accurate diagnosis, the stor
ed data can only be displayed using special diag
nostic equipment (generic scan tool for 080).
In order to connect the specia l diagnostic equip
ment, push the plug into the Data Link Connector
(DLC). The DLC is located to the right of the hood
release ¢
fig. 16. ..,.
Page 44 of 294

Opening and closing
Programming buttons
Applies to vehicles: with garage door opener (Homelink)
Fig . 34 Hea dlin er: Control panel
You can program both fixed code and rolling code
systems us ing this procedu re .
P rogramming /rep rogramming butt ons
• Switc h the ignition on.
• Press and ho ld the button in the headliner that
you wou ld like to program for at least 10 sec
onds. Or
• Select :
~ IC~A~ R~ I funct io n button> (Car )* systems
control button > Vehicle setting s> garage door
opener > Program garage door op ener .
• Fo llow the in struc tions in the Infota inment sys-
t em.
Deleting button programming
The programmed buttons cannot be deleted indi
vidua lly, they must be de leted all at once . Rep ro
g ram the b uttons if necessa ry .
• Se lect : the
ICA RI function button > (Car }* sys
tems
control button > Vehicle sett ings > Ga
rage door op ener > Clear program s etting s>
Yes .
Displaying the version /status /country code
• Se lect : ICAR I funct ion button> (Car )* systems
control butt on > Vehicle sett ings > Garage
door opener > Ver sion information .
(D Tips
The ga rage doo r opener may need to be
synchronized with the system motor aft er the
programm ing . Fo llow th e manufacture rs in
struc tio ns for do in g th is.
42
Operation
Applies to vehicles: with garage door opener (Homelink)
Req uirements The bu tton in the roof hea dliner
mu st be p rog rammed
~page 42 a nd t he ve hicle
mus t be w ithin range of the sys tem, such as the
garage door .
• Press the b utton to open the g arage doo r. T he
L E D @ ¢
page 4 2, fig. 3 4 blinks or tur ns on .
• Press t he b utton ag ain to open the garage door.
(1) Tips
T o open or close the gar age door, do not p ress
the bu tton l onge r ten seconds o r th e g arage
d oor opener wi ll swi tch to programming
mode.
Page 47 of 294
M N <( (.J
'SI: ,...., \!) ..,.,
N \!) ,....,
~ To activate the h igh beam assist, tap the lever
forward
(D . The ID indicator light appears in
the instrument cluster disp lay and the high
beam assist is switched on/off automatically.
The
El indicator ligh t also turns on if the high
beams are switched on .
Switching the high beam s on/off manually
If the high beams did not switch on/off automat
ically as expected, you may switch them on or off
manually instead:
~ T o switch the high beams on man ually, tap the
lever forward
(D. The El indica tor light turns
on.
~ To switch the high beams off manua lly, pull the
lever back@. The high beam assist is deacti
vated.
Operating the headlight flasher
~ To operate the headlight flasher when the high
beam assist is activated and high beams are
switched off, pull the lever back@. The high
beam assist remains act ive.
Messages in the instrument cluster display
r!IJ Audi adaptive light: system fault!
High beam assist: System fault
Drive to an authorized Aud i dealer or authorized
Aud i Service Fac ility immediately to have the
malfunct ion corrected. You can still switch the
hi gh beams on or off manually.
High beam assist : Unavailable No camera view
The camera view is blocked, for example by a
sticker or debr is.
The sensor is located between the interior rear
view mirror and the windshie ld. Therefore, do not
p lace any st ickers in this area on the windshield.
A WARNING
-
High beam assist is only intended to assist
the driver. The driver is still responsible for
controlling the headlights and switching
them manually depending on light and visibil
i t y cond itions. It may be necessary to operate
them manually in situations such as:
Lights and Vision
-In adverse weather conditions such as fog,
heavy ra in, blow ing snow or spray ing water.
- On roads where oncoming traffic may be
partially obscured, such as expressways.
- When there a re road users that do not have
sufficient lighting, such as bicyclers or
veh icles with dirty tail lamps.
- In tight curves and on steep slopes.
- I n poorly lit areas.
- With strong reflectors, such as signs.
-If the area of the windsh ield near the sensor
is fogged over, dirty, icy or covered with a
sticker.
Adjusting the exterior lighting
The settings are adjusted in the MMI.
~ Select: !CARI function button> (Car)* systems
control button > Vehicle settings > Exterior
lighting .
Automatic headlights
You can adjust the following sett ings in the Auto
matic headlights
menu:
Headlights activation time -You can adjust if the
headlights switch on
Early , Med. or Late accord
ing to the sensit ivity of the light sensor.
Audi adaptive light* -You can switch adaptive
light
On and Off.
Automatic high beams*
You can switch the high beam assist on and off.
Daytime running lights
USA models:
You can switch the daytime running
lights
on and off .
Canada models:
The function cannot be turned
off. It is activated automat ica lly each t ime the ig
nition is switched on. Th is menu item is show n
"greyed out".
Coming home, Leaving home
The coming home function illuminates the area
outside the vehicle when you switch the ignition off and open the driver's door. To turn the func-
t ion on, select
Lights when leaving car > On . ..,.
45
Page 49 of 294

M N <( I.J "". rl I.O
"' N I.O rl
.. To increase or reduce the brightness, turn the
knob and press it .
The inte rior lighting turns on when you switch
the headlights on whi le the ignition is on .
(D Tips
The setting is automat ically stored and as
signed to the remote control key that is in
use.
Instrument illumination
The brightness of the illumination for the instru
ments, display and head-up display* can be ad
justed.
Fig. 41 Instrument illumination
.. Press the knob to release it.
.. Turn the knob toward" -" or"+" to reduce or in
crease the brightness.
.. Press the knob again to return it to its original
pos ition.
@ Tips
The instrument illumination for the needles
and dia ls turns on when the ignition is turned
on and the lights are turned off. The illumina
tion for the dials reduces automatically and
eventually turns off as brightness outside in
creases. This function reminds the driver to
turn the headlights on at the appropriate
time.
Lights and Vision
Vision
Adjusting the exterior mirrors
Fig. 42 Driver 's doo r: knob fo r the exterior mirrors
Turn the knob to the desired position:
Q/P -Adjusting the left/right exterior mirror.
Move the knob in the des ired direction.
4iil -Heating the mirror glass depending on the
outside temperature.
8 -Folding exterior mirrors*. In the Infotain
ment system , you can select if the mirrors fold in
a utomat ically when you lock the vehicle
~page 33.
Front passenger's exterior mirror tilt
function*
To help you see the curb when backing into a
parking space, the surface of the mirror tilts
slight ly . For this to happen, the knob must be in
the position for the front passenger's outside
mirror.
You can adjust the tilted mirror surface by turn
ing the knob in the desired direction. When you
move out of reverse and into another gear, the
new mirror position is stored and assigned to the
key you are using.
T he m irror goes back into its orig inal position
once you drive forward faster than 9 mph (15
km/h) or switch the ign ition off.
A WARNING
-Curved (i . e. convex) mirror surfaces increase
your f ield of view . Remember that veh icles or
other objects will appear smaller and farther
away than when seen in a fla t mirror . If you
47
Page 56 of 294
Seats and storag e
Multifunction button
Applies to vehicles: with memory function
You con adjust the massage function, lumbar
support, side bolsters and seating surface using
the multifunction button .
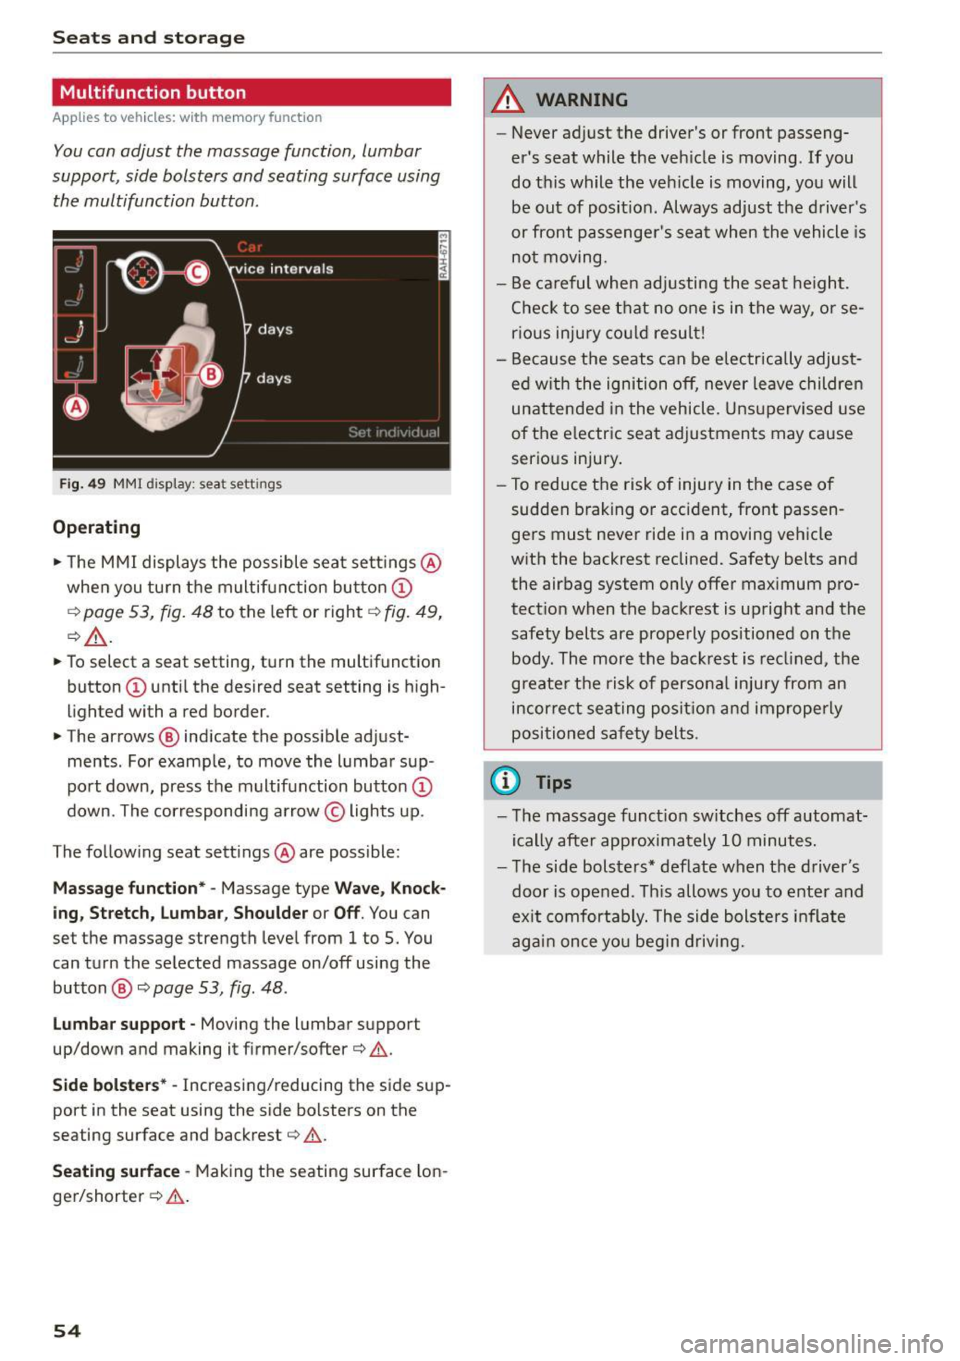
Fig . 4 9 MMI display: seat settings
Operating
.. The MMI displays the possible seat sett ings @
when you tu rn the m ultif unction button @
¢
page 53, fig. 48 to the left or right¢ fig. 49,
¢£ .
.. To select a seat setting, turn the multifunction
button
(D unti l the desired seat setting is h igh
lighted with a red border .
.. The arrows @ indicate the possib le adjust
ments . For example, to move the lumbar sup
po rt down, press the multifunction button
(D
down. The corresponding arrow © lights up .
The following seat sett ings @are possible:
Mas sag e function* -Massage type Wave, K nock
ing, Stret ch , Lumbar , Shoulder or Off .
You can
set the massage strength level from 1 to 5. You
can turn the selected massage on/off using the
button @¢
page 53, fig . 48.
L u mbar support -Moving the lumbar support
up/down and making it firmer/softer¢ &,.
Side bolst ers* -Increasing/reducing the side sup
port in the seat using the side bolsters on the
seating surface and backrest¢&, .
Se ating surfac e -Making the seating surface lon
ge r/shorter ¢ &, .
54
A WARNING
-Never adjust the driver's or front passeng
er's seat while the veh icle is moving. If you
do this while the veh icle is moving, you will
be out of posit ion . Always adjust the d river's
or front passenger's seat when the vehicle is
no t moving.
- Be careful when adjusting the seat he ight.
Check to see that no one is in the way, or se
r io us inju ry co uld resul t!
- Because the seat s can be elec trically adjust
ed w ith the ignition off, never leave children
unattended in the vehicle. Unsupervised use
of the e lectric seat adjustments may cause
serious injury .
- To reduce the risk of injury in the case of
sudden b raking or accident, front passen
gers must never ride in a moving veh icle
with the backrest reclined. Safety belts and
the airbag system only offer max imum pro
tect ion when the backrest is upright and the
safety belts are properly positioned on the
body . The more the backrest is recl ined, t he
greater the ris k of persona l inju ry from an
incor rect seating posit ion and imprope rly
positioned sa fety belts .
(D Tips
- The massage funct ion sw itches off automat
ically after approximately 10 minutes.
- The side bolsters* deflate when the d river's
door is ope ned . Th is allows you to enter and
ex it comfortably. The side bolsters i nflate
ag ain once you begin drivi ng.
Page 73 of 294

M N <( I.J "". rl I.O
"' N I.O rl
Warm and cold
Four-zone automatic climate control
Operating
Applies to vehicles: with four-zone a utomat ic climate control
Fi g. 76 Four -zone a utomat ic climate con trol: controls
N :g 0
Cl .,. m
Fig . 77 Four -zone automat ic climate con trol: rear contro ls
Press the buttons to t urn the funct ions on or off.
Use the con trols to ad just the temperature, the
b lower speed and the air distribution . The LED in
a button will light up when the function is
switched on. The front settings are shown in the
climate control system display and in the Info
tainment system d isplay for a few seconds. The
d river and front passenger settings can be adjust
ed sepa rately .
The settings can also be adjusted in the rear
¢ fig. 77.
IOFF ! Switching the climate control system
on /off
The IO FFI button switches the climate control
system on or off.
It a lso switches on when you
p ress the control. Airflow from outside is blocked
when the climate control system is switched off . The
I
OF F! button in the rear only switches the A/C
system on/off in the rear of the vehicle.
IA/Cl Switching cooling mod e on /off
T he air is not coo led an d humidity is not remove d
when coo ling mode is switc hed off. This can
ca use fog on the windows . The cooling mode
switches off automatica lly when there are cold
outside temperatures.
l ""'I Switching recirculation mode on /off
In recirc ulation mode, the air inside the vehicle is
c irculated and filtered. Th is prevents the unfil
tered air outside the vehicle from entering the
vehicle interior. We recommend switch ing recir
cu lation mode on when driving through a tunnel
or when sitt ing in traffic
c:> & .
The IAUTO I button orl ~ FRON T I button switches
recirculation mode off .
I AUTO I Switching automatic mode on
Automatic mode main tains a cons tan t tempera
tu re ins ide the veh icle. Air tem perature, airf low
and air distr ib ution are cont ro ll ed automatically.
Adjusting the temperature
Tempera tures betwee n 60 °F (+ 16 °() and 8 4 °F
(+ 28 °() can be set . Ou tside of this range, lo or hi
will appear in the climate control system disp lay .
lliJJ,
71
Page 75 of 294
M N <( I.J "". rl I.O
"' N I.O rl
Basic settings
Applies to vehicles: with four-zone automat ic climate control
The climate control syst em basic s ettings are ac
cessed in th e Infotainment system.
... Se lect : th e ICARI function button > (Car )* Sys-
tems
contro l button > AC.
Rear seat settings
W hen t his funct ion is se lected, a ll sett ings for
the rear can be adjusted through the climate con
trol system in the cockpit. The climate contro l
system sett ings cannot be adjusted in the rea r
seat at the same time. This funct io n sw itches off
after a certain period of time or w hen o ne of the
con trols in the cockpit is pressed.
Recirculation mode
The sensit ivity level of the automatic recircula
tion mode can be set at various leve ls from
Off to
Sensitive . Recirculat io n mode is contro lled auto
mat ica lly. If the w indows fog up, press the
I@ F RON T I button.
Footwell temperature
You can adjust the footwe ll temperat ure so that
it is coole r or warmer.
Au xiliary heater*
In vehicles with d iesel en gines*, the auxiliary
heate r helps to warm t he vehicle interior more
qu ickly . The auxiliary heater is controlled auto
mat ica lly in the
A uto setting.
Steering wheel heating
Applies to vehicles: with heated steering w heel
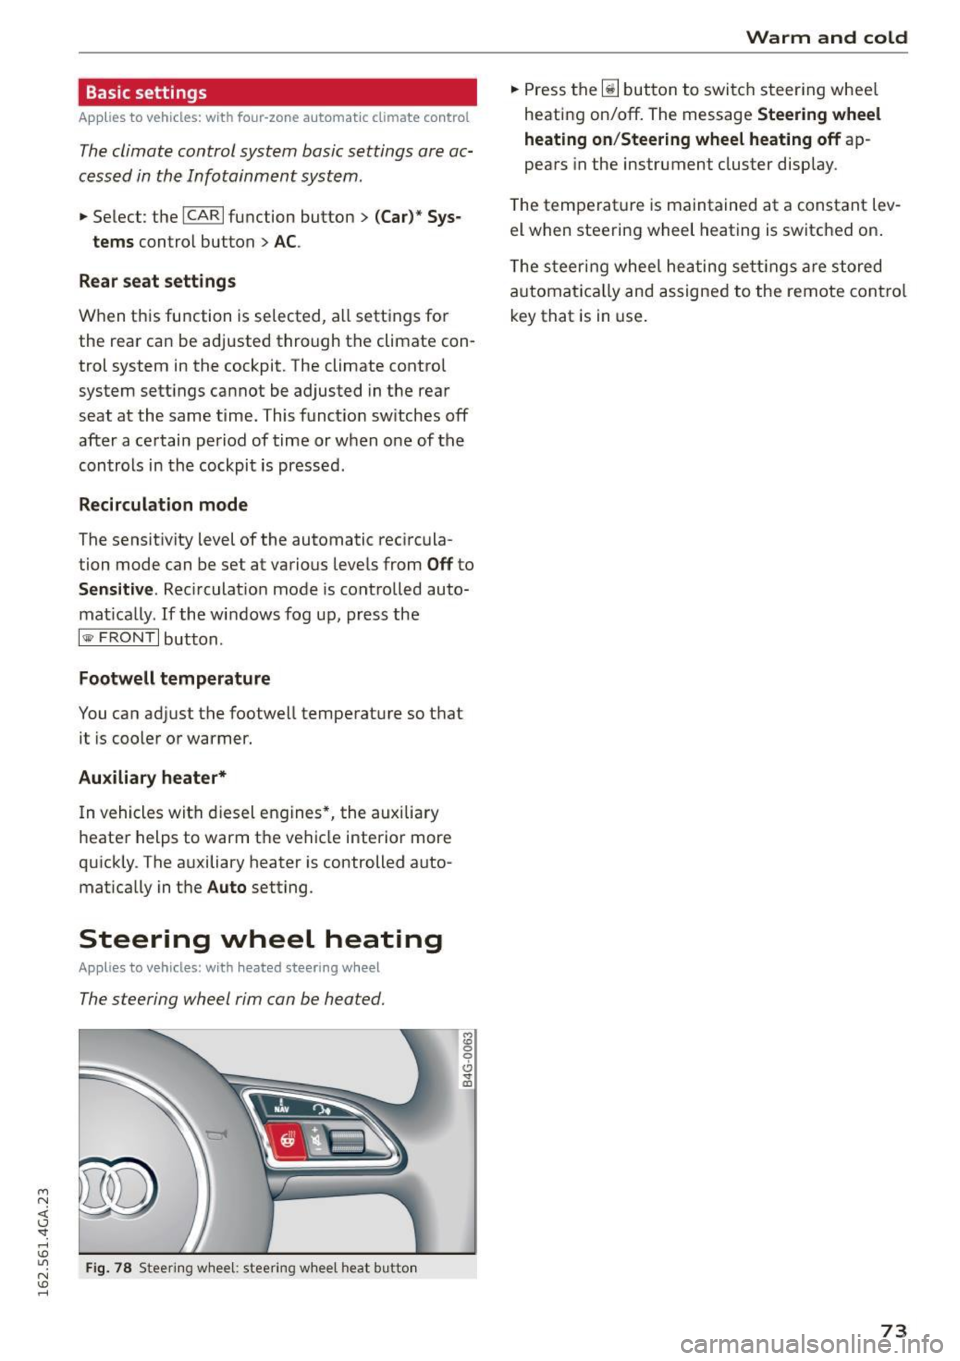
The steering wheel rim can be heated.
F ig . 7 8 Steering w heel : steering w hee l heat butto n
M :g 0
0 .,. ID
Warm and cold
... Press the~ button to switc h steer ing whee l
heati ng on/off. The message
Steering wheel
heating on/Steering wheel heating off
ap
pears in the instrument cluster display.
T he temperat ure is maintained at a constant lev
el when steering wheel heating is switched on .
T he s teer ing wheel hea ting se tt ings a re stored
a utoma tica lly and assigne d to the remote con trol
key that is in use .
73
Page 79 of 294

M N <( I.J "". rl I.O
"' N I.O rl
-After the engine has been switched off , the
radiator fan can cont in ue to run for up to 10
minutes - even with the ign ition sw itched
off . It can a lso switch on again after some
t i me if t he coolant tern pera ture rises as the
result of a heat bu ildup or if the engine is
ho t and the engi ne compa rtmen t is addi
ti onal ly he ate d by the su n's ra ys.
(D Note
Do not stop the engine imme diate ly afte r
ha rd or extend ed dr iving . K eep the engi ne
r u nning for app roximately two m inutes to
p reven t exces sive heat build-up.
Messages
Turn off ignition before leaving car
This message appea rs and a war ning tone sounds
if you open the d river's doo r whe n the ignition is
switche d on .
Press brake ped al to start engine
This message appears if you do not press the
brake peda l when starting the engine.
Ill Is key in the vehicle?
This indi ca tor light tur ns on and t his message ap
pears i f the ignit ion key was removed from the
ve hicl e when the e ngine was ru nning . If the igni
tion key is no longer in the vehicle, you cannot
switch on the ignit ion or start the engine once
you stop it. You also cannot lock the veh icle from
the outside.
Shift to P , otherwise vehicle can roll away.
Doors do not lock if lev er is not in P.
This message appears for sa fe ty reasons if the
tra nsmission is not i n the P position when you
switch the ignition off . Move the selector lever to
the P pos ition . Otherwise the vehicle is not pro
tected from roll ing and it cannot be locked.
DJ Key is not recognized . Hold back of key
again st ma rked a rea. See owner's manual
If the i ndic ator lig ht turns on and th is mess age
appears, there is a malfunction ~
page 77.
Driv ing
Turn off ignition before leaving car. Battery is
di scha rging
T his dr iver message appears if the drive r's door is
o pened wh ile the ign ition is switched on. Always
switch off the ignition if you are leav ing t he veh i
cle . Refer to
¢ page 81.
Shift to P and turn off ignition b efore leaving
car , otherwise vehicle can roll away
This message appears if the drive r's door is
opened wh ile the ign ition is switched on and the
sele ctor lever is not in the P position . Move the
se lector lever in to the P posi tion a nd switch the
i gnition off when you exit the vehicle . Otherwise
t h e vehicle co uld ro ll. Refer to ¢
page 81.
Starting the engine when there is a
malfunction
It may not be possible to start the engine under
certain circumstances, for example if the battery
in the vehicle key is drained , if interference is af
fected the key or if there
is a system malfunc
tion .
Fig . 8 2 Ce nte r c onsol e/master key : s tar ting t he e ngin e
w hen t here is a ma lf un ctio n
Requirement: The message Key is not recog
nized. Hold back of key against marked are a.
Se e owner 's manual
is displayed and the DJ indi
c ator lig ht tu rns on.
.. Hold the master key i n the location indicated as
shown in the illustration
f>l) ¢ fig . 82 .
.. Press the brake pedal ¢ A. in Starting the en
gine on page
76.
.. Press the
~ IS_ T_A_ R_T _E_N_G-IN_E_S_ T_O_P ~I bu tton. The
eng ine will start .
77