ECU AUDI A8 2020 Service Manual
[x] Cancel search | Manufacturer: AUDI, Model Year: 2020, Model line: A8, Model: AUDI A8 2020Pages: 360, PDF Size: 95.38 MB
Page 127 of 360
4N0012721BD
Driving
“P” gear or pressing the brake pedal. Make sure
the indicator light is off before you start driving.
Automatically releasing the parking brake
when starting to drive
Requirement: the driver's door must be closed
and the driver’s safety belt must be fastened.
> Press the accelerator pedal to start to drive.
ZA\ WARNING
—To reduce the risk of an accident, always
make sure the vehicle is situated safely
while stationary.
— If the parking brake is set, it can release au-
tomatically when the accelerator pedal is
pressed. To reduce the risk of an accident,
do not inadvertently press the accelerator
pedal and always shift into “P” when the ve-
hicle is stopped.
— If the power supply fails, you cannot set the
parking brake once it is released, or release
it if it is set. In this case, park the vehicle on
level ground and secure it by engaging the
"P” gear. Contact an authorized Audi dealer
or authorized Audi Service Facility for assis-
tance.
@) Tips
— On steep inclines, especially when in trailer
mode, the vehicle may roll backwards unin-
tentionally when starting to drive. To re-
duces the risk of this happening, pull and
hold the ©) switch while pressing the accel-
erator pedal. If enough drive power has
built up at the wheels and the vehicle does
not roll backwards, then release the switch
to start to drive.
— If you leave the vehicle when “D” or “R” are
engaged, the parking brake will be set auto-
matically.
— Noises when the parking brake is set and re-
leased are normal and are not a cause for
concern.
— The parking brake goes through a self-test
cycle at regular intervals when the vehicle is
stopped. Any noises associated with this are
normal.
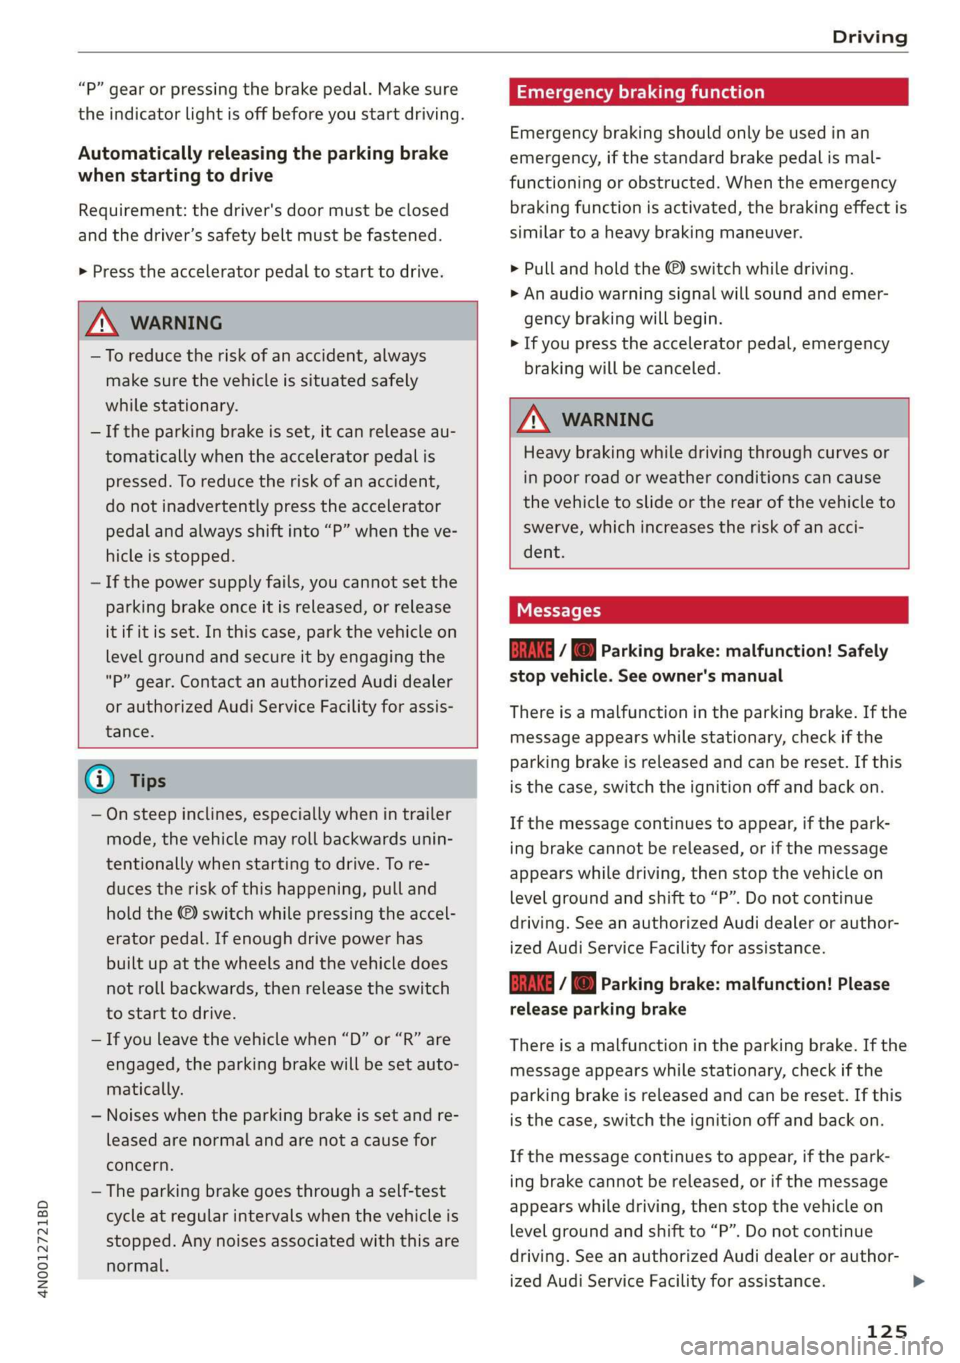
Emergency braking function
Emergency braking should only be used in an
emergency, if the standard brake pedal is mal-
functioning or obstructed. When the emergency
braking function is activated, the braking effect is
similar to a heavy braking maneuver.
> Pull and hold the ©) switch while driving.
> An audio warning signal will sound and emer-
gency
braking will begin.
> If you press the accelerator pedal, emergency
braking will be canceled.
ZA WARNING
Heavy
braking while driving through curves or
in poor road or weather conditions can cause
the vehicle to slide or the rear of the vehicle to
swerve, which increases the risk of an acci-
dent.
Messages
EG / @ Parking brake: malfunction! Safely
stop vehicle. See owner's manual
There is a malfunction in the parking brake. If the
message appears while stationary, check if the
parking brake is released and can be reset. If this
is the case, switch the ignition off and back on.
If the message continues to appear, if the park-
ing brake cannot be released, or if the message
appears while driving, then stop the vehicle on
level
ground and shift to “P”. Do not continue
driving. See an authorized Audi dealer or author-
ized Audi Service Facility for assistance.
GG / @ Parking brake: malfunction! Please
release parking brake
There
is a malfunction in the parking brake. If the
message appears while stationary, check if the
parking brake is released and can be reset. If this
is the case, switch the ignition off and back on.
If the message continues to appear, if the park-
ing brake cannot be released, or if the message
appears while driving, then stop the vehicle on
level
ground and shift to “P”. Do not continue
driving. See an authorized Audi dealer or author-
ized Audi Service Facility for assistance.
125
>
Page 128 of 360
![AUDI A8 2020 Service Manual Driving
25] Parking brake: malfunction! Please contact
Service
There is a malfunction in the parking brake. Drive
to an authorized Audi dealer or authorized Audi
Service Facility immediately t AUDI A8 2020 Service Manual Driving
25] Parking brake: malfunction! Please contact
Service
There is a malfunction in the parking brake. Drive
to an authorized Audi dealer or authorized Audi
Service Facility immediately t](/img/6/57606/w960_57606-127.png)
Driving
25] Parking brake: malfunction! Please contact
Service
There is a malfunction in the parking brake. Drive
to an authorized Audi dealer or authorized Audi
Service Facility immediately to have the malfunc-
tion corrected. Do not park the vehicle on inclines
and shift to “P”.
a / {Q)] Parking brake: warning! Vehicle parked
too steep
The braking force may not be enough to secure
the vehicle from rolling away. Park the vehicle in
a place with less of an incline.
fa / Parking brake: applied
The parking brake is set. Press and hold the brake
pedal to release the parking brake.
Special driving situations
Driving uphill and downhill
When driving uphill, downhill, or at high alti-
tudes, note the following information:
— Drive slowly and carefully.
— Do not try to turn around if you cannot safely
drive on an incline or hill. Instead, drive in re-
verse.
— When driving down hills, you can activate the
hill descent control if you press the brake pedal
while driving in “D” gear. The automatic trans-
mission will select a gear suitable for driving
down the hill and will attempt to maintain the
speed at which the vehicle was traveling at the
time the brake pedal was pressed. Press the
brake pedal if necessary. The hill descent con-
trol will switch off once the hill levels out or
you press the accelerator pedal.
— Utilize the engine braking effect when driving
downhill by selecting the “S” driving program
=> page 114. This especially applies when tow-
ing a trailer. This reduces the load on the
brakes.
— Brake in intervals and do not press the brake
pedal continuously.
126
Z\ WARNING
— Only drive on inclines that your vehicle is de-
signed to handle. Do not exceed the hill
climbing ability of your vehicle. Your vehicle
could tip or slide.
— Do not drive at an angle on steep inclines
and hills. If your vehicle is about to tip, you
must immediately start steering in the di-
rection of the downward slope to reduce the
risk of an accident.
— Always be ready to brake when using the hill
descent control function.
Driving through water
If you must drive through water, follow these in-
structions:
— Check the stability of the ground, the current,
and the water depth. If the ground is unstable,
there is a strong current, or there are waves,
the water must only reach up to the lower edge
of the body at the most.
— Deactivate the Start/Stop system.
— Drive carefully and no faster than at walking
speeds to prevent the front of the vehicle from
creating waves, because they could splash
above the lower edge of the body. Oncoming
vehicles could also create waves.
— Do not stop the vehicle while in the water.
— Drive in reverse.
— Do not turn the engine off.
ZX WARNING
After driving through water, press the brake
pedal carefully to dry the brakes so that the
full braking effect will be restored.
@) Note
Vehicle components such as the engine, drive
system, suspension, or electrical system, can
be severely damaged by driving through wa-
ter?
@ Tips
If possible, avoid driving through salt water
because it increases the risk of corrosion. Use >
Page 131 of 360
4N0012721BD
Driving dynamic
Based on the selected setting, the air suspen-
sion* will adjust the ground clearance and the ac-
tive suspension* will provide various degrees of
compensation for vehicle movements.
Engine sound
The engine sound adapts and can be subtle to
sporty.
Suspension
Air suspension
Applies to: vehicles with air suspension
The air suspension is an electronically-controlled
suspension and leveling system. The firmness of
the suspension will adapt to the driving condi-
tions and the driving situation. The system balan-
ces out changes in load. The vehicle level will also
adapt gradually to the vehicle speed in order to
reduce the wind resistance at high speeds and in-
crease the ground clearance at low speeds. The
settings depend on the selected Audi drive se-
lect* mode.
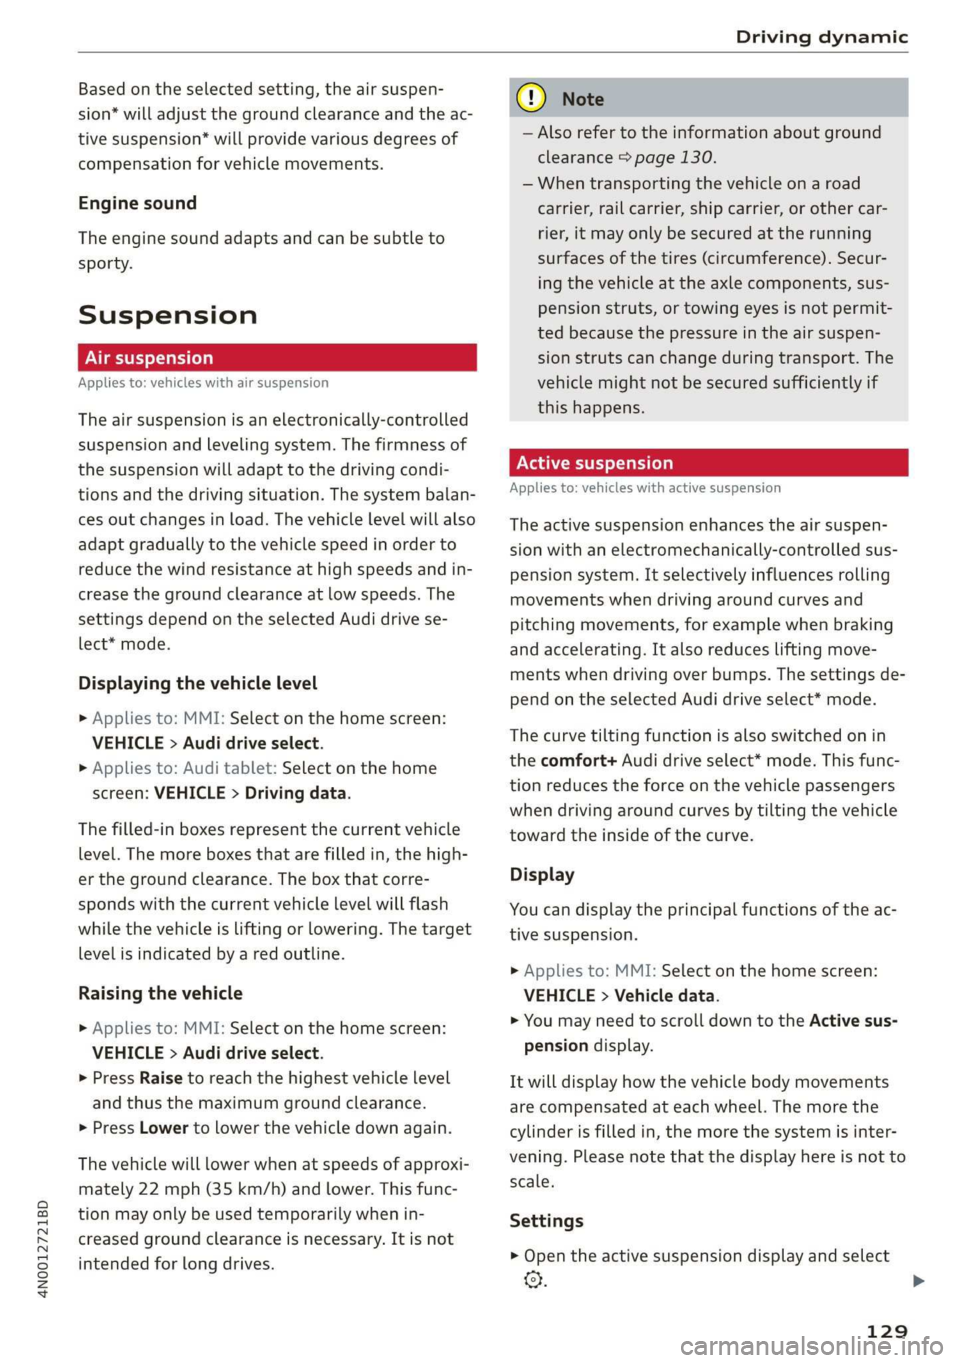
Displaying the vehicle level
> Applies to: MMI: Select on the home screen:
VEHICLE > Audi drive select.
» Applies to: Audi tablet: Select on the home
screen: VEHICLE > Driving data.
The filled-in boxes represent the current vehicle
level. The more boxes that are filled in, the high-
er the ground clearance. The box that corre-
sponds with the current vehicle level will flash
while the vehicle is lifting or lowering. The target
level is indicated by a red outline.
Raising the vehicle
>» Applies to: MMI: Select on the home screen:
VEHICLE > Audi drive select.
> Press Raise to reach the highest vehicle level
and thus the maximum ground clearance.
> Press Lower to lower the vehicle down again.
The vehicle will lower when at speeds of approxi-
mately 22 mph (35 km/h) and lower. This func-
tion may only be used temporarily when in-
creased ground clearance is necessary. It is not
intended for long drives.
CG) Note
— Also refer to the information about ground
clearance > page 130.
— When transporting the vehicle on a road
carrier, rail carrier, ship carrier, or other car-
rier, it may only be secured at the running
surfaces of the tires (circumference). Secur-
ing the vehicle at the axle components, sus-
pension struts, or towing eyes is not permit-
ted because the pressure in the air suspen-
sion struts can change during transport. The
vehicle might not be secured sufficiently if
this happens.
Active suspension
Applies to: vehicles with active suspension
The active suspension enhances the air suspen-
sion with an electromechanically-controlled sus-
pension system. It selectively influences rolling
movements when driving around curves and
pitching movements, for example when braking
and accelerating. It also reduces lifting move-
ments when driving over bumps. The settings de-
pend on the selected Audi drive select* mode.
The curve tilting function is also switched on in
the comfort+ Audi drive select* mode. This func-
tion reduces the force on the vehicle passengers
when driving around curves by tilting the vehicle
toward the inside of the curve.
Display
You can display the principal functions of the ac-
tive suspension.
> Applies to: MMI: Select on the home screen:
VEHICLE > Vehicle data.
> You may need to scroll down to the Active sus-
pension display.
It will display how the vehicle body movements
are compensated at each wheel. The more the
cylinder is filled in, the more the system is inter-
vening. Please note that the display here is not to
scale.
Settings
> Open the active suspension display and select
. >
129
Page 141 of 360

4N0012721BD
High-voltage system
— IEC 61851 and IEC 62196 (Europe)
— SAE J1772 (North America, Japan)
— You can use your Audi charging system if
there is a household or industrial connec-
tion available at the charging station.
@ Tips
Applies to: Audi charging systems
— For an uninterrupted charging process, we
recommend only charging using sockets
that are connected to a separately protected
circuit.
— It is recommended to use Audi charging sys-
tems in the wall mount clip* during opera-
tion. If this is not possible, always position
Audi charging systems ona secure surface
during the charging process > A.
—To reduce the risk of overheating during op-
eration, do not place Audi charging systems
in direct sunlight for long periods of time. If
the control unit is overheated, the charging
process is automatically paused until the
temperature has lowered back within the
normal range.
Cee Tact)
Applies to: vehicles with plug-in hybrid drive
Fig. 106 Left rear side of the vehicle: opening the high-
voltage charging port door
RAZ-0835
Fig. 107 Charging unit: charging port and buttons/LED
Connecting the charging cable
If you charge your vehicle at a charging station,
the following sequence of steps may vary. Follow
the manufacturer guidelines and operating in-
structions for the charging station.
Requirement: the “P” gear must be selected, the
parking brake must be set, and drive ready mode
must have ended.
— If necessary, remove the charging cable from
the vehicle > page 144, Transport.
— Remove the cap from the charging cable if nec-
essary.
— First connect the charging cable to the power
supply, or remove it from the charging station.
— Unwind the charging cable completely.
— Unlock the vehicle.
— To open the charging port door, press on the
right
side of the door > fig. 106.
— Remove the cap from the vehicle charging port
and place it on the holder on the charging port
door.
— Plug the charging connector into the vehicle
charging port.
Starting to charge automatically (immediate
charging)
If charging is not delayed with a timer, the charg-
ing process will begin immediately. If necessary,
the charging station may need to be activated.
Follow the manufacturer guidelines and operat-
ing instructions for the charging station.
While charging
The charging display on the charging unit @) will
flash green while charging. It will pulse |} in the
instrument cluster. You can find the meaning of >
139
Page 142 of 360
High-voltage system
the possible charging display colors under
=> page 140.
The charging connector is locked while charging
and cannot be removed.
If the driver's door is opened while the ignition is
switched off, the current battery charge level and
the high-voltage battery range will be displayed
in the instrument cluster. If charging is in prog-
ress, the remaining charging time will also be
displayed.
Immediate charging and timer charging
You can switch between the immediate charging
@ and charging timer @ options during the
charging process if a charging timer is set
= page 141. Press the desired button to do this.
Ending the charging process
You can interrupt the charging process at any
time.
— Unlock the vehicle or press the @/(@) button
when the vehicle is unlocked, and the LED will
turn on.
— Remove the charging connector. If the charging
connector is not removed within 30 seconds, it
will automatically relock and the charging proc-
ess may continue.
— Put the cap back on the charging port.
— Close the charging port door.
— Disconnect the charging cable from the power
supply if necessary or return it securely to the
charging station.
— Install the protective caps on the charging ca-
ble again.
— If you are transporting the charging cable in
the vehicle, store it securely > page 144.
If the charging connector cannot be removed,
you must unlock it manually > page 142.
ZA\ WARNING
— Do not disconnect the charging cable from
the socket or the vehicle charging port while
the vehicle is charging. End the charging
process before removing the charging cable
from the socket in order to reduce the risk of
damaging the connector contacts from
sparks.
—If the charging unit is damaged, do not
charge using the charging port to reduce the
risk of injury.
— If the charging unit is damaged or the
charging port door cannot close or is miss-
ing, drive immediately to an authorized Audi
dealer or authorized Audi Service Facility
and have the malfunction corrected to re-
duce the risk of injury.
() Note
If you drive with the charging unit open, both
the charging port door and the electronics in-
stalled behind it could be damaged. Check
each time after charging if the port door is
locked before you start driving the vehicle.
@) Tips
— If the parking brake is set, it could create
noises when the charging connector is con-
nected.
— Remove ice and snow in the charging unit
using a hand brush and solvent-free deicing
spray.
— The vehicle radio and TV systems may have
limited reception when charging the vehicle.
Charging display
Applies to: vehicles with plug-in hybrid drive
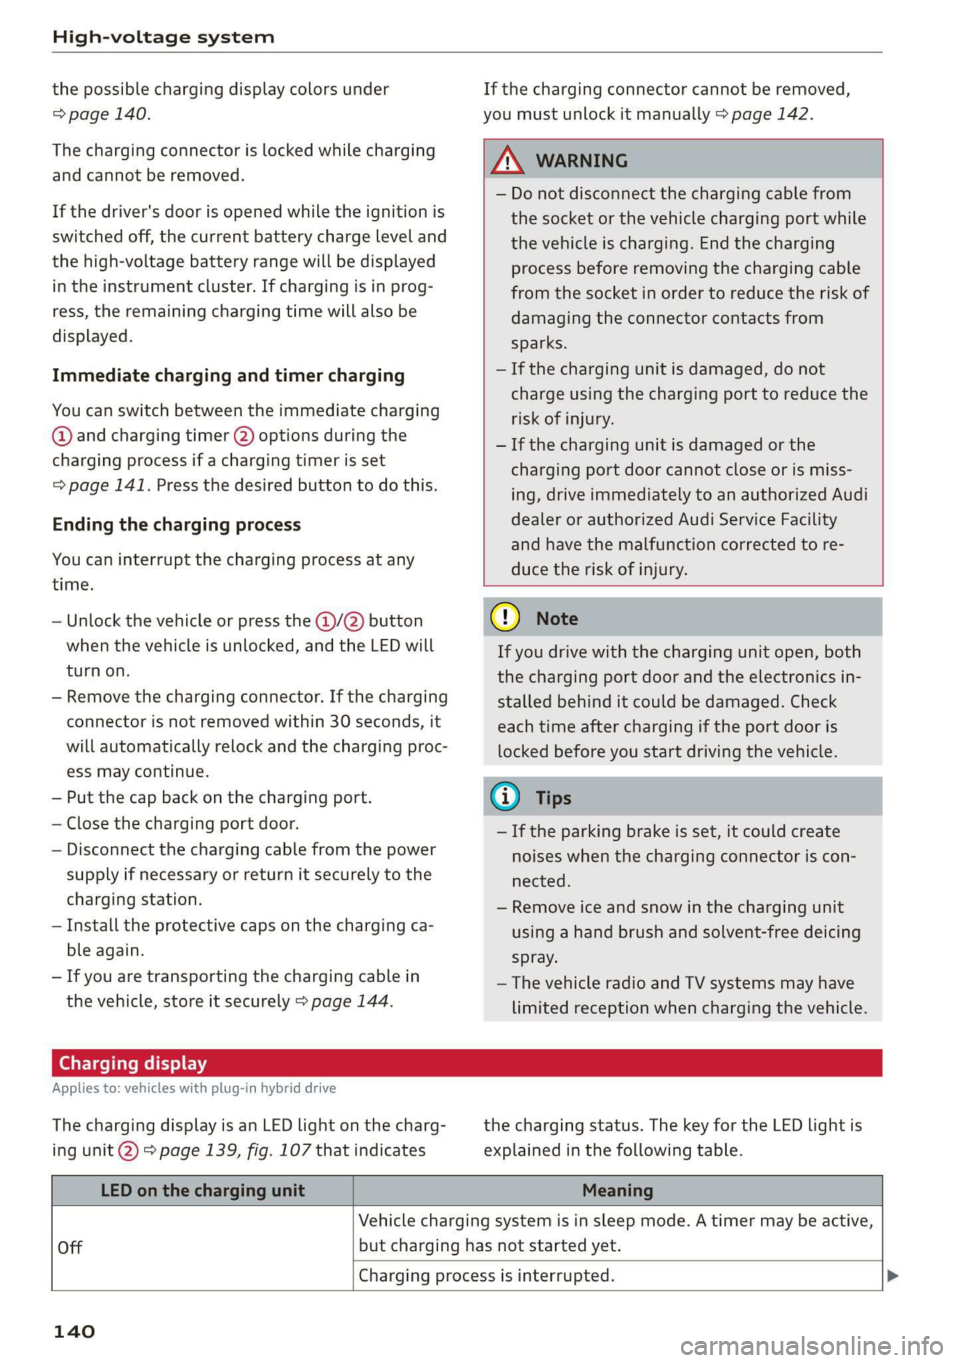
The charging display is an LED light on the charg-
ing unit @) > page 139, fig. 107 that indicates
the charging status. The key for the LED light is
explained in the following table.
LED on the charging unit Meaning
Vehicle charging system is in sleep mode. A timer may be active,
Off but charging has not started yet.
Charging process is interrupted. >
140
Page 143 of 360

4N0012721BD
High-voltage system
LED on the charging unit Meaning
Pulsing The high-voltage battery is charging.
Green Flashing A timer is active, but charging has not started yet.
On High-voltage battery charging process is completed.
When using the Audi charging system, make sure the power
plug is inserted in the power socket > page 144. No power sup-
ply was recognized even though the charging cable is plugged
On in. Have the power supply or power supply system inspected.
When using the Audi charging system, check the status displays
Yellow on the unit > table on page 145. See an authorized Audi dealer
or authorized Audi Service Facility for assistance if necessary.
The vehicle is not secured from rolling away. Check if “P” is se-
lected and the parking brake is set. If the LED continues to
flash, see an authorized Audi dealer or authorized Audi Service
Facility for assistance.
Flashing
The charging connector may not be able to lock correctly in the
vehicle charging port. Check if the charging connector is insert-
ed correctly. Remove the charging connector and plug it in the
charging port again, or use a different charging station. If the
Red On LED stays turned on, there is a malfunction either in the vehicle
charging system or at the power source. See an authorized Audi
dealer or authorized Audi Service Facility for assistance if neces-
sary.
The outside temperature is too low or too high.
@ Tips > If the timer should be set one time, select Indi-
: vidual timer. If the timer should be set to re-
peat, select Repeat timer.
> Set a preferred charging time if desired, for ex-
ample to use off-peak power rates.
> To also activate the climate control with a tim-
Yad tare mans er, select CD.
Applies to: vehicles with plug-in hybrid drive > Select Next and follow the instructions in the
The operation status indicated by the LED on
the charging unit are is displayed in the in-
strument cluster Es.
menu.
> To turn ona timer, select CD.
> To activate an enabled timer, select s— until the
Timer charging mode is displayed.
Use a timer to set at what departure time your
vehicle should be fully charged. A timer can ei-
ther be set one time or to repeat at the selected
times. You can also specify if your vehicle should
be heated or cooled to the temperature set in the If the set departure time on the timer is too
climate control system. You can turn on multiple close, it may not be possible to charge the vehicle
timers at the same time. fully.
> Applies to: MMI: Select on the home screen: @ :
VEHICLE > Charging & Efficiency > Charging. Tips
It is not possible to charge using the timer at
Multiple timers are displayed that you can set peer
separately.
> To set a timer, select > in the line for the de-
sired timer.
141
Page 144 of 360

High-voltage system
Emergency release
In case of malfunction, you can manually release
the charging port door or the charging connec-
tor.
Fig. 108 Left side of luggage compartment: emergency re-
lease cover
Fig. 109 Left side of the luggage compartment: emergen-
cy release
Manually releasing the charging port door
> Open the luggage compartment lid.
> Remove the screwdriver from the vehicle tool
kit > page 316 and pry off the cover > fig. 108.
> Loosen the red loop @) > fig. 109 from the re-
tainer and then pull on the loop carefully >@.
> To open the charging port door, press on the
right side of the door.
>» After releasing manually, secure the loop on
the retainer and close the cover.
> Drive to an authorized Audi dealer or author-
ized Audi Service Facility immediately to have
the malfunction corrected.
Manually releasing the charging connector
If you are not able to pull the charging connector
out of the vehicle charging port, there may bea
malfunction. You must use the emergency re-
lease to release the vehicle charging connector.
142
Requirement: the “P” gear must be selected and
the vehicle must be unlocked.
> End the charging process > page 140.
> Open the luggage compartment lid.
> Remove the screwdriver from the vehicle tool
kit > page 316 and pry off the cover > fig. 108.
> Carefully pull on the red loop @) > fig. 109
>©.
> Remove the charging connector.
> Close the emergency release cover.
> Drive to an authorized Audi dealer or author-
ized Audi Service Facility immediately to have
the malfunction corrected.
If the charging connector still cannot be removed
after using the emergency release, see an author-
ized Audi dealer or authorized Audi Service Facili-
ty for assistance.
® Note
Only pull on the loop until you feel resistance.
You
will not hear it release. If you continue to
pull, you could damage the emergency re-
lease mechanism.
IY tre (1
Applies to: vehicles with plug-in hybrid drive
If the or =] indicator light turns on, then the
range is low or very low. Charge the high-voltage
battery.
B AC charging system: malfunction! Please
contact Service
This message appears if there is a malfunction in
the charging system. Drive to an authorized Audi
dealer or authorized Audi Service Facility immedi-
ately.
Incompatible charging system. Please check
charging system
This message appears when the charging system
is incompatible. Only charge using the Audi
charging system that is designed for your vehicle.
|< Charging system: malfunction
This message appears if there is a malfunction in
the vehicle charging infrastructure or the charg-
ing station. Use a different charging station. If >
Page 145 of 360
4N0012721BD
High-voltage system
this message does not turn off, contact an au-
thorized Audi dealer or authorized Audi Service
Facility.
Charging equipment
Introduction
Applies to: vehicles with plug-in hybrid drive
Depending on the vehicle equipment, the Audi e-
tron compact charging system may be available.
Using the charging equipment
Pay attention to the following information for
safe handling of the charging equipment:
— Secure the charging equipment against any
strain, such as being run over, falling, pulling,
bending, and crushing.
— Do not submerge the charging equipment in
water and do not cover it with snow or ice.
— When you remove the charging cable from the
vehicle and from the power supply, only pull at
the connectors and not at the cable.
— Put the cap on after using the charging cable.
— Only operate the Audi charging system ina
power supply system with a frequency of
50 Hz/60 Hz.
— Only operate or store the Audi charging system
at a humidity level between 5% and 95% (no
condensation).
— The Audi charging system is protected against
dust and splashing water (IP55 (USA: Enclosure
3).
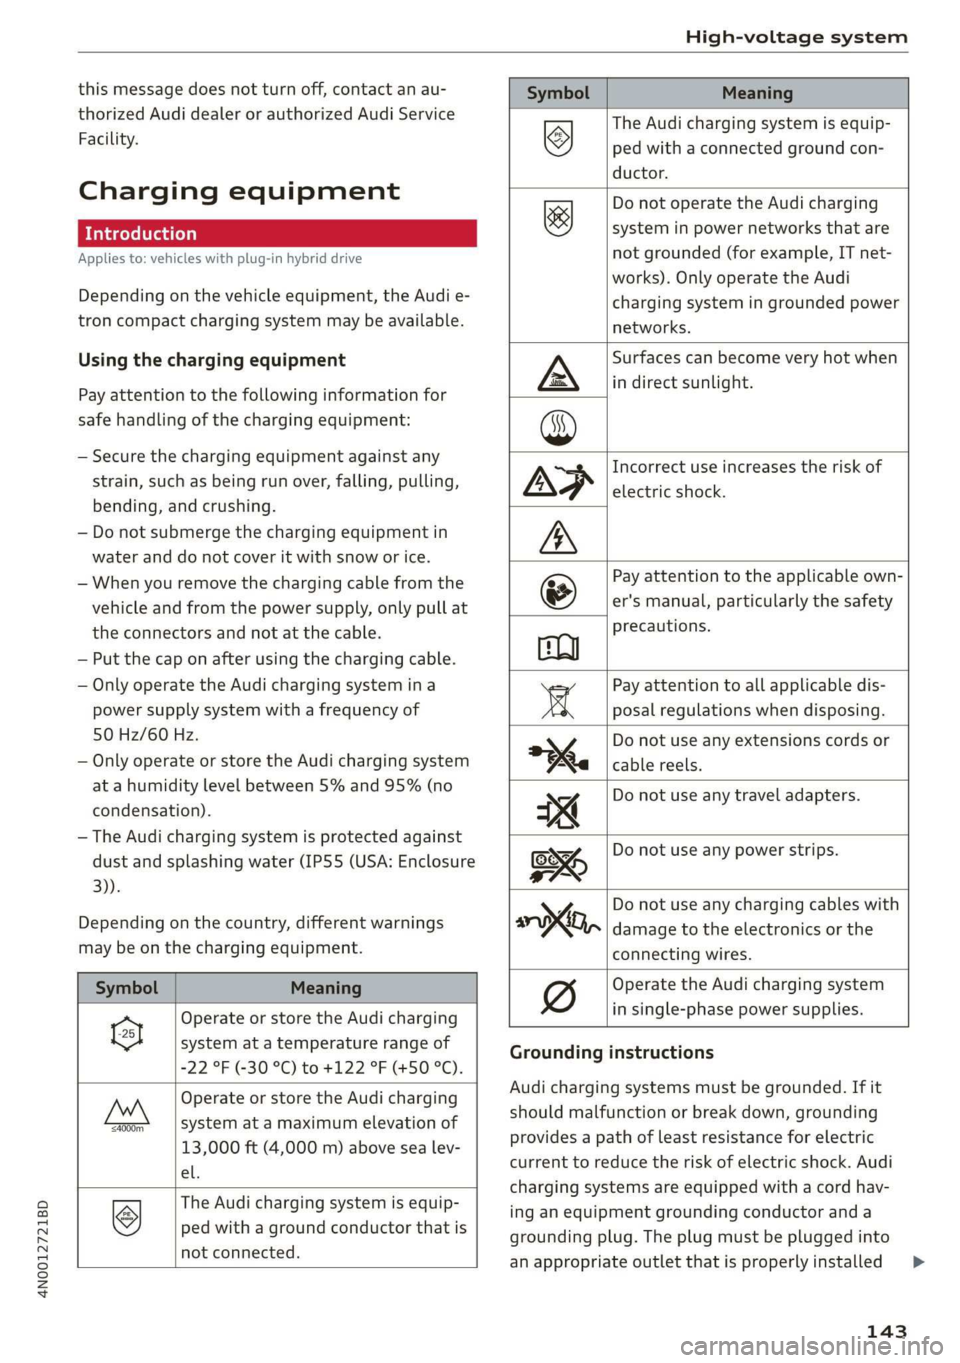
Depending on the country, different warnings
may be on the charging equipment.
Symbol Meaning
Operate or store the Audi charging
system at a temperature range of
-22 °F (-30 °C) to +122 °F (+50 °C).
a
Operate or store the Audi charging
system at a maximum elevation of
13,000 ft (4,000 m) above sea lev-
el.
‘=4000m
The Audi charging system is equip-
ped with a ground conductor that is
not connected.
Symbol Meaning
> The Audi charging system is equip-
WZ ped with a connected ground con-
ductor.
Do not operate the Audi charging
system in power networks that are
not grounded (for example, IT net-
works). Only operate the Audi
charging system in grounded power
networks.
&
Surfaces can become very hot when
in direct sunlight.
Incorrect use increases the risk of
electric shock.
Pay attention to the applicable own-
er's manual, particularly the safety
precautions.
Pay attention to all applicable dis-
posal regulations when disposing.
Do not use any extensions cords or
cable reels.
Do not use any travel adapters.
Do not use any power strips.
y Do not use any charging cables with
oo, damage to the electronics or the
Operate the Audi charging system
connecting wires.
in single-phase power supplies.
Grounding instructions
Audi charging systems must be grounded. If it
should malfunction or break down, grounding
provides a path of least resistance for electric
current to reduce the risk of electric shock. Audi
charging systems are equipped with a cord hav-
ing an equipment grounding conductor and a
grounding plug. The plug must be plugged into
an appropriate outlet thatis properly installed >
143
Page 146 of 360
High-voltage system
and grounded in accordance with all local codes
and ordinances.
Z\ WARNING
Improper connection of the equipment-
grounding conductor is able to result in a risk
of electric shock. Check with a qualified elec-
trician or serviceman if you are in doubt as to
whether the product is properly grounded. Do
not modify the plug provided with the product
- if it will not fit the outlet, have a proper out-
let installed by a qualified electrician.
Applies to: vehicles with plug-in hybrid drive
Fig. 110 Luggage compartment: storage compartment
Always store the charging equipment securely
before transporting.
> Open the luggage compartment lid > page 50.
> Open the storage compartment in the luggage
compartment > fig. 110.
> Stow the charging equipment in the storage
compartment.
> Close the storage compartment and the lug-
gage compartment lid.
ZA WARNING
If the charging equipment is not secured or
positioned correctly, it can slide out of place
and endanger vehicle occupants when brak-
ing, when changing directions, or in a colli-
sion.
— Only transport charging equipment in the
transport bag in the luggage compartment
and never unsecured or in the passenger
compartment.
@ Note
Always lift or carry the Audi charging system
as one unit and never by the cables.
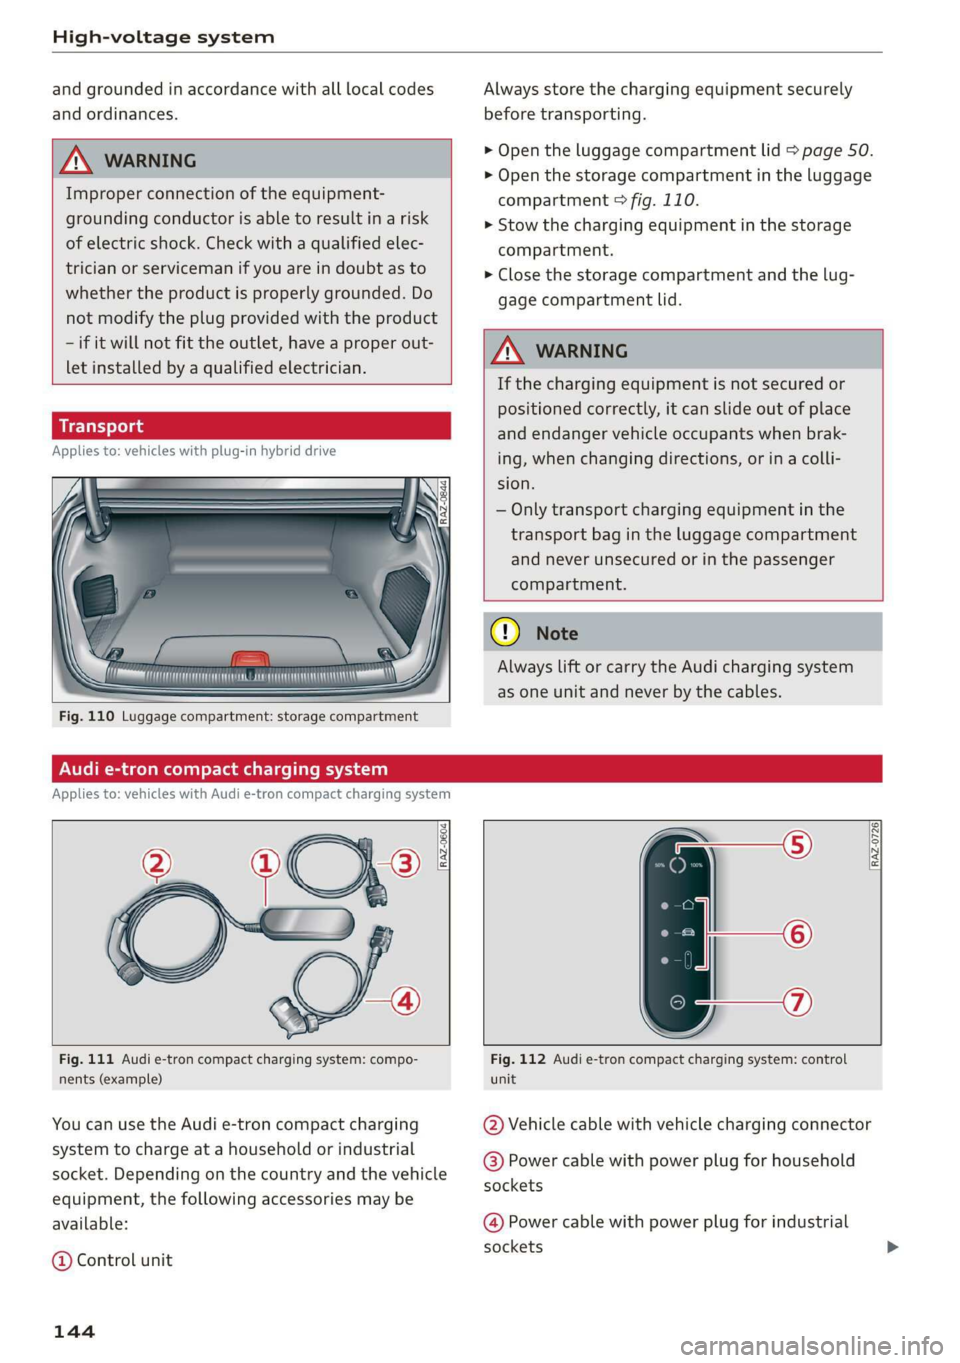
Audi e-tron compact charging system
Applies to: vehicles with Audi e-tron compact charging system
a~ |
[RAZ-0726|
Fig. 111 Audi e-tron compact charging system: compo-
nents (example)
You can use the Audi e-tron compact charging
system to charge at a household or industrial
socket. Depending on the country and the vehicle
equipment, the following accessories may be
available:
@ Control unit
144
Fig. 112 Audi e-tron compact charging system: control
unit
@ Vehicle cable with vehicle charging connector
@ Power cable with power plug for household
sockets
@ Power cable with power plug for industrial
sockets
Page 147 of 360

4N0012721BD
High-voltage system
The vehicle cable is securely connected to the can set whether you would like to charge with full
control unit. The power cable is plugged into the or reduced charging power. The last setting that
upper end of the control unit and can be switched was selected will be saved and used again the
> page 149. next time the vehicle is charged. If multiple
items are connected to the power circuit, the
charging current may be reduced when charging
© | On/Off button ®, charging power lev- at a power outlet. This can help to prevent the
Control unit overview
el and LED electrical equipment from overheating.
© _ |Status LED: Before charging, always check if the charging
a Power supply/household power setting that was selected last is still suita-
connection ble.
& | Vehicle —To set the charging power level, press the ()
6 Control panel button G) > fig. 112 for at least two seconds.
@ © Reset After the charging power level is set, the status
LEDs ©, and (will flash green one time. The
Adjusting the charging power level selected value (50% or 100%) is displayed on the
The control unit automatically recognizes the left or right side of the ®) button.
voltage and the available current strength. You
Control unit: status and malfunction indicators
Indicator lights Meaning Solution
© Green The charger is ready to charge, | Starting the charging process
O O off but is not charging. => page 139.
O & off
O 0 off
9 Off
© Flashing green _| The vehicle is being charged
O 0 Off with the ground conductor
O & of monitor activated.
O 0 of
9 Off
O Flashing green _| The power cable has overheat- | After the cable cools down, the malfunc-
© Q Yellow ed. Possible cause of the mal- | tion will be automatically cleared. Until it
O Bor function: a multi-phase socket | cools down, charging performance will be
O 6 of is being used in single-phase | reduced. If the malfunction continues,
mode. The charging perform- | have the power supply/household con- de. The chargi fe h h ly/h hold
© Off ance will be reduced. nection checked by a qualified electrician.
145