warning AUDI A8 2020 Repair Manual
[x] Cancel search | Manufacturer: AUDI, Model Year: 2020, Model line: A8, Model: AUDI A8 2020Pages: 360, PDF Size: 95.38 MB
Page 99 of 360
4N0012721BD
Stowing and using
Stowing and using
Power sources
When the ignition is switched on, you may be
able to use multiple power sources for external
devices, depending on the vehicle equipment.
12 volt sockets
You can connect electrical accessories to the 12
volt sockets. The power usage must not exceed
120 watts.
The 12 volt sockets are labeled with the 12V
symbol. They are located in the front center con-
sole, in the rear* and on the side trim panel in the
luggage compartment*.
USB ports
Applies to: vehicles with USB port
You can charge mobile devices using the USB
ports. The USB ports are labeled with the «<> or
(4 symbol or CHARGE ONLY.
115 volt socket
Applies to: vehicles with 115 volt socket
The socket is located in the center console in the
rear and can be used for electrical devices > A\.
The power usage must not exceed 150 watts.
When you push the device connector all the way
into the socket, the child safety mechanism re-
leases and there is electric current.
—If the LED on the socket is green or flashes
slowly, then the socket is ready for use.
—If the LED is red and flashes quickly, there is a
malfunction in the connected device or the
socket is too hot. The socket will switch off for
safety reasons. To reactivate the socket, remove
the device connector. Connect the device after
correcting the malfunction or reconnect after a
brief cool-down period.
— Incorrect usage can lead to serious injuries
or burns. To reduce the risk of injuries, never
leave children unattended in the vehicle
with the key.
Z\ WARNING
Applies to: vehicles with 115 volt socket
—To reduce the risk of fatal injury, do not in-
sert any conductive objects, such as knitting
needles, into the contacts on the socket.
—To reduce the risk of fatal injury, do not spill
any fluids on the socket. Should any mois-
ture enter the socket, make sure that it has
dried out completely before using the socket
again.
— If devices or connectors that are heavy (such
as a power supply unit) are attached directly
to the socket, the holder can become dam-
aged, which increases the risk of injury.
— Using adapters and extension cables in-
creases the risk of injury because they over-
ride the safety devices for the socket.
—To reduce the risk of injury, remove the con-
nector of the connected device if the socket
has switched off due to a malfunction.
Z\ WARNING
—To reduce the risk of fatal injury, store all
connected devices securely when driving so
that they do not move around inside the ve-
hicle when braking or in the event of an acci-
dent.
@) Note
— Read the operating manuals for the con-
nected devices.
—To reduce the risk of damage to the vehicle
electrical system, never attempt to charge
the vehicle battery by connecting accesso-
ries that provide power to the power sour-
ces.
— Do not connect any device whose network
class (voltage) does not match the network
class designed for the socket.
— Disconnect the connectors from the power
sources carefully to reduce the risk of dam-
aging them.
(i) Tips
Applies to: vehicles with 115 volt socket
— Devices that are not shielded or devices near
the rear window antenna can cause mal-
functions in the radio, TV, or vehicle electri-
cal system.
97
Page 100 of 360

Stowing and using
— The functions on some devices may be limit-
ed due to the low power output.
— With some power supply units, the integrat-
ed overcurrent protection may prevent it
from switching on. In this case, disconnect
the power supply unit from the electrical
equipment and reconnect after approxi-
mately 10 seconds.
Cup holders
Applies to: vehicles with cup holders
AN WARNING
— Do not put any hot beverages in the cup
holder while the vehicle is moving. Hot bev-
erages could spill, which increases the risk
of injury.
— Do not use any breakable beverage contain-
ers (for example, made out of glass or por-
celain). You could be injured by them in the
RAZ-0745
Fig. 85 Center armrest and rear center console: cup holder
Front center console cup holders
> The cup holder (2) may be under a cover. To
open the cup holder, tap on the strip on the
cover.
Rear center armrest* cup holders
> Fold the center armrest* downward.
> To open the cup holder, tap on front of the cov-
er Q).
> To close the cup holder, push the cup holder all
the way back into the slot.
Rear center console cup holders
> To open the cup holders in the center console,
tap on the cover @).
98
event of an accident.
@) Note
Beverage containers in the cup holders should
always
have a lid. Otherwise, the liquid inside
could spill and cause damage to vehicle
equipment.
Storage and
compartments
Cooled glove compartment
Applies to: vehicles with cooled glove compartment
Sf
RAZ-0036|
Fig. 86 Glove compartment: cooling mode knob
> To switch the refrigeration function on, turn the
knob counterclockwise until the symbols indi-
cate that refrigeration is switched on @).
> To switch the refrigeration function off, turn
the knob clockwise until the symbols indicate
that refrigeration is switched off @).
@ Tips
The glove compartment cooling mode only
functions when the vehicle A/C system is
switched on.
Page 101 of 360
4N0012721BD
Stowing and using
Folding tray tables
Applies to: vehicles with folding tray tables
Fig. 88 Rear center console: extending and adjusting the
folding tray table
Folding up and down
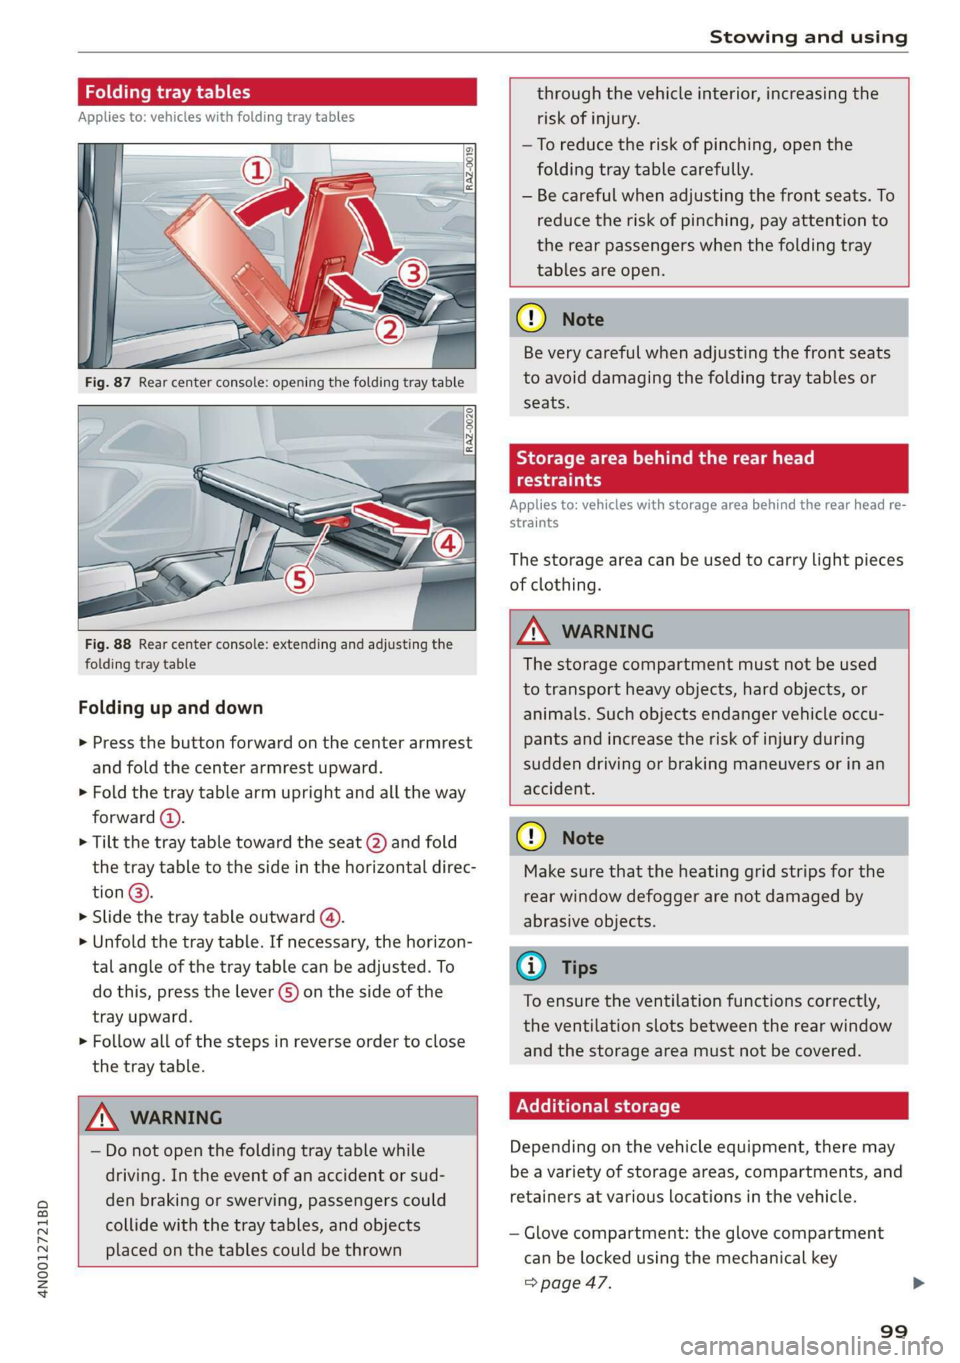
> Press the button forward on the center armrest
and fold the center armrest upward.
> Fold the tray table arm upright and all the way
forward (4).
> Tilt the tray table toward the seat (2) and fold
the tray table to the side in the horizontal direc-
tion @).
> Slide the tray table outward (4).
>» Unfold the tray table. If necessary, the horizon-
tal angle of the tray table can be adjusted. To
do this, press the lever G) on the side of the
tray upward.
> Follow all of the steps in reverse order to close
the tray table.
ZA WARNING
— Do not open the folding tray table while
driving. In the event of an accident or sud-
den braking or swerving, passengers could
collide with the tray tables, and objects
placed on the tables could be thrown
through the vehicle interior, increasing the
risk of injury.
—To reduce the risk of pinching, open the
folding tray table carefully.
— Be careful when adjusting the front seats. To
reduce the risk of pinching, pay attention to
the rear passengers when the folding tray
tables are open.
() Note
Be very careful when adjusting the front seats
to avoid damaging the folding tray tables or
seats.
Storage area behind the rear head
oe)
Applies to: vehicles with storage area behind the rear head re-
straints
The storage area can be used to carry light pieces
of clothing.
ZA WARNING
The storage compartment must not be used
to transport heavy objects, hard objects, or
animals. Such objects endanger vehicle occu-
pants and increase the risk of injury during
sudden driving or braking maneuvers or in an
accident.
@) Note
Make sure that the heating grid strips for the
rear window defogger are not damaged by
abrasive objects.
@ Tips
To ensure the ventilation functions correctly,
the ventilation slots between the rear window
and the storage area must not be covered.
Nellie etl lel
Depending on the vehicle equipment, there may
be a variety of storage areas, compartments, and
retainers at various locations in the vehicle.
— Glove compartment: the glove compartment
can be locked using the mechanical key
=> page 47.
99
Page 102 of 360
Stowing and using
— Holders for a notepad and a pen in the glove
compartment
— Storage compartments in the door trim panel
— Net in the front passenger's footwell
— Storage compartments under the center arm-
rest
— Compartments on the backrests of the front
seats
— Garment hooks in the rear
— Cell phone holder in the right rear door
— Bag hooks in the luggage compartment
— Net in luggage compartment
— Umbrella holder
> Stow heavy luggage as far forward in the lug-
gage compartment as possible.
> Use non-elastic cords attached to the tie-downs
to secure objects.
ZA WARNING
— To reduce the risk of injury, make sure all
storage compartments are always closed
while driving.
— Loose objects can be thrown around the ve-
hicle interior during sudden driving or brak-
ing maneuvers, which increases the risk of
an accident. Store objects securely while
driving.
— Only use the storage compartments in the
door trim panels to store small objects that
will not stick out of the compartment and
impair the function of the side airbags.
— Only lightweight clothing should be hung
from the garment hooks in the vehicle. Do
not use clothes hangers to hang clothing.
The pockets of the clothing must not con-
tain any heavy, breakable, or sharp-edged
objects. This could impair the effectiveness
of the side curtain airbags.
— Make sure your view toward the rear is not
blocked, for example by hanging clothing or
objects in the vehicle.
Luggage compartment
General information
All pieces of luggage or objects must be securely
fastened in the luggage compartment. Note the
following to maintain good vehicle handling:
> Distribute the load evenly in the luggage com-
partment.
100
ZX WARNING
— Loose objects can be thrown around the ve-
hicle interior during sudden driving or brak-
ing maneuvers, which increases the risk of
an accident. Always stow objects securely in
the luggage compartment and secure them
at the tie-downs. Use straps suitable for
heavy objects.
— If pieces of luggage or objects are secured
to the tie-downs with unsuitable or dam-
aged straps, this can increase the risk of in-
jury during braking maneuvers or accidents.
— When transporting heavy objects, the vehi-
cle characteristics will change due to the
shift in the center of gravity, which increases
the risk of an accident. You may need to
adapt your driving style and speed to the
current conditions.
— The cargo net is only strong enough to se-
cure light objects. Heavy objects are not ade-
quately secured. Attempting to secure heavy
objects increases the risk of injury.
— Never exceed the permitted axle and load
and vehicle weight > page 342.
— Never secure a child safety seat to the tie-
downs.
— Never leave your vehicle unattended, espe-
cially if the luggage compartment lid is
open. Children could enter the luggage com-
partment and close the luggage compart-
ment lid from the inside. This creates the
risk of fatal injury, since the children would
be locked in and may not be able to escape
by themselves.
— Do not allow children to play in or on the ve-
hicle. Close and lock the luggage compart-
ment lid as well as all other doors when you
leave the vehicle.
— Never transport passengers in the luggage
compartment. Every passenger must be cor-
rectly secured with the safety belts in the
vehicle > page 82.
Page 104 of 360
Stowing and using
Depending on the equipment, the refrigerator
may be located in the rear behind the center arm-
rest or the sunshade. It refrigerates or freezes
only when the ignition is switched on.
The maximum load capacity is 5.5 lbs (2.5 kg).
Opening and closing
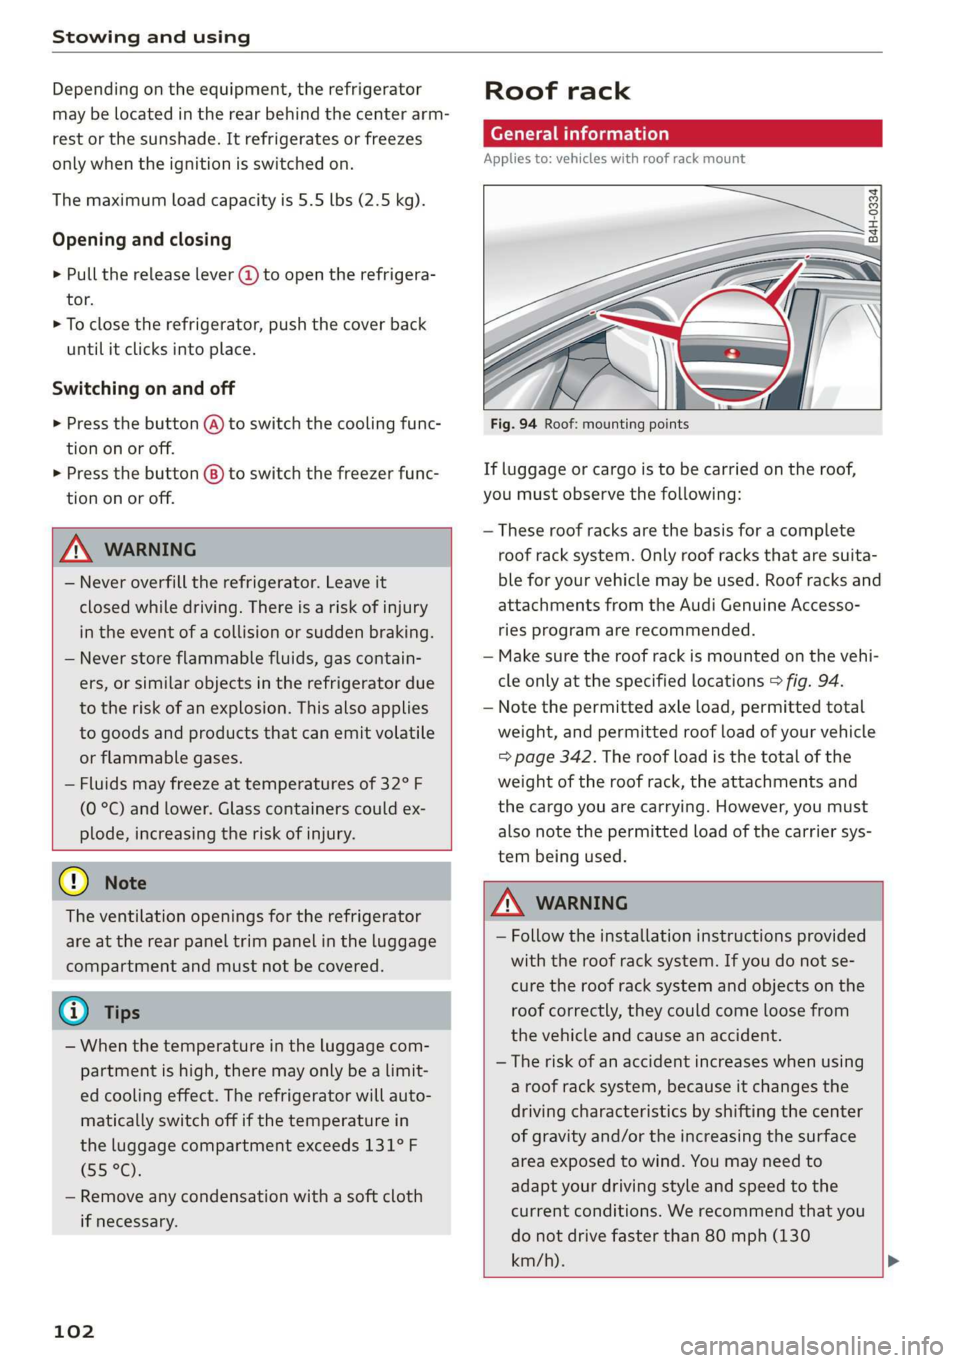
> Pull the release lever (2) to open the refrigera-
tor.
> To close the refrigerator, push the cover back
until it clicks into place.
Switching on and off
> Press the button (@) to switch the cooling func-
tion on or off.
>» Press the button (8) to switch the freezer func-
tion on or off.
Z\ WARNING
— Never overfill the refrigerator. Leave it
closed while driving. There is a risk of injury
in the event of a collision or sudden braking.
— Never store flammable fluids, gas contain-
ers, or similar objects in the refrigerator due
to the risk of an explosion. This also applies
to goods and products that can emit volatile
or flammable gases.
— Fluids may freeze at temperatures of 32° F
(0 °C) and lower. Glass containers could ex-
plode, increasing the risk of injury.
@) Note
The ventilation openings for the refrigerator
are at the rear panel trim panel in the luggage
compartment and must not be covered.
@ Tips
— When the temperature in the luggage com-
partment is high, there may only be a limit-
ed cooling effect. The refrigerator will auto-
matically switch off if the temperature in
the luggage compartment exceeds 131° F
G5°0)
— Remove any condensation with a soft cloth
if necessary.
102
Roof rack
General information
Applies to: vehicles with roof rack mount
(/_
B4H-0334
Fig. 94 Roof: mounting points
If luggage or cargo is to be carried on the roof,
you must observe the following:
— These roof racks are the basis for a complete
roof rack system. Only roof racks that are suita-
ble for your vehicle may be used. Roof racks and
attachments from the Audi Genuine Accesso-
ries program are recommended.
— Make sure the roof rack is mounted on the vehi-
cle only at the specified locations > fig. 94.
— Note the permitted axle load, permitted total
weight, and permitted roof load of your vehicle
=> page 342. The roof load is the total of the
weight of the roof rack, the attachments and
the cargo you are carrying. However, you must
also note the permitted load of the carrier sys-
tem being used.
ZA WARNING
— Follow the installation instructions provided
with the roof rack system. If you do not se-
cure the roof rack system and objects on the
roof correctly, they could come loose from
the vehicle and cause an accident.
— The risk of an accident increases when using
a roof rack system, because it changes the
driving characteristics by shifting the center
of gravity and/or the increasing the surface
area exposed to wind. You may need to
adapt your driving style and speed to the
current conditions. We recommend that you
do not drive faster than 80 mph (130
km/h).
Page 109 of 360
4N0012721BD
Warm and cold
at low or high temperatures. You can adjust the
fragrance function > page 107.
Residual heat
The residual heat from the coolant is used to
heat the vehicle interior. To use this function,
press and hold $8 for more than two seconds
while the ignition is switched off. The function
switches off automatically after about 15 mi-
nutes.
Z\ WARNING
— You should not use the recirculation mode
for an extended period of time, because no
fresh air is drawn in and the windows can
fog when cooling mode is switched off. This
increases the risk of an accident.
— Individuals with reduced sensitivity to pain
or temperature could develop burns when
using the seat heating* function. To reduce
the risk of injury, these individuals should
not use seat heating”.
G) Note
To reduce the risk of damage to the seat heat-
ing* elements, do not kneel on the seats or
place heavy pressure on one area of the seat.
@ Tips
— If the front passenger's seat heating” is
turned on, it will not turn on again automat-
ically if more than 10 minutes have passed
between switching the ignition off and on
again.
— Only use the fragrance function* in modera-
tion and take any other passengers and ani-
mals into consideration when using the
function. An overlap of different scents or
odors could cause discomfort. If there is
discomfort, reduce the intensity or switch
the fragrance function* off. Only use fra-
grances that are approved by Audi.
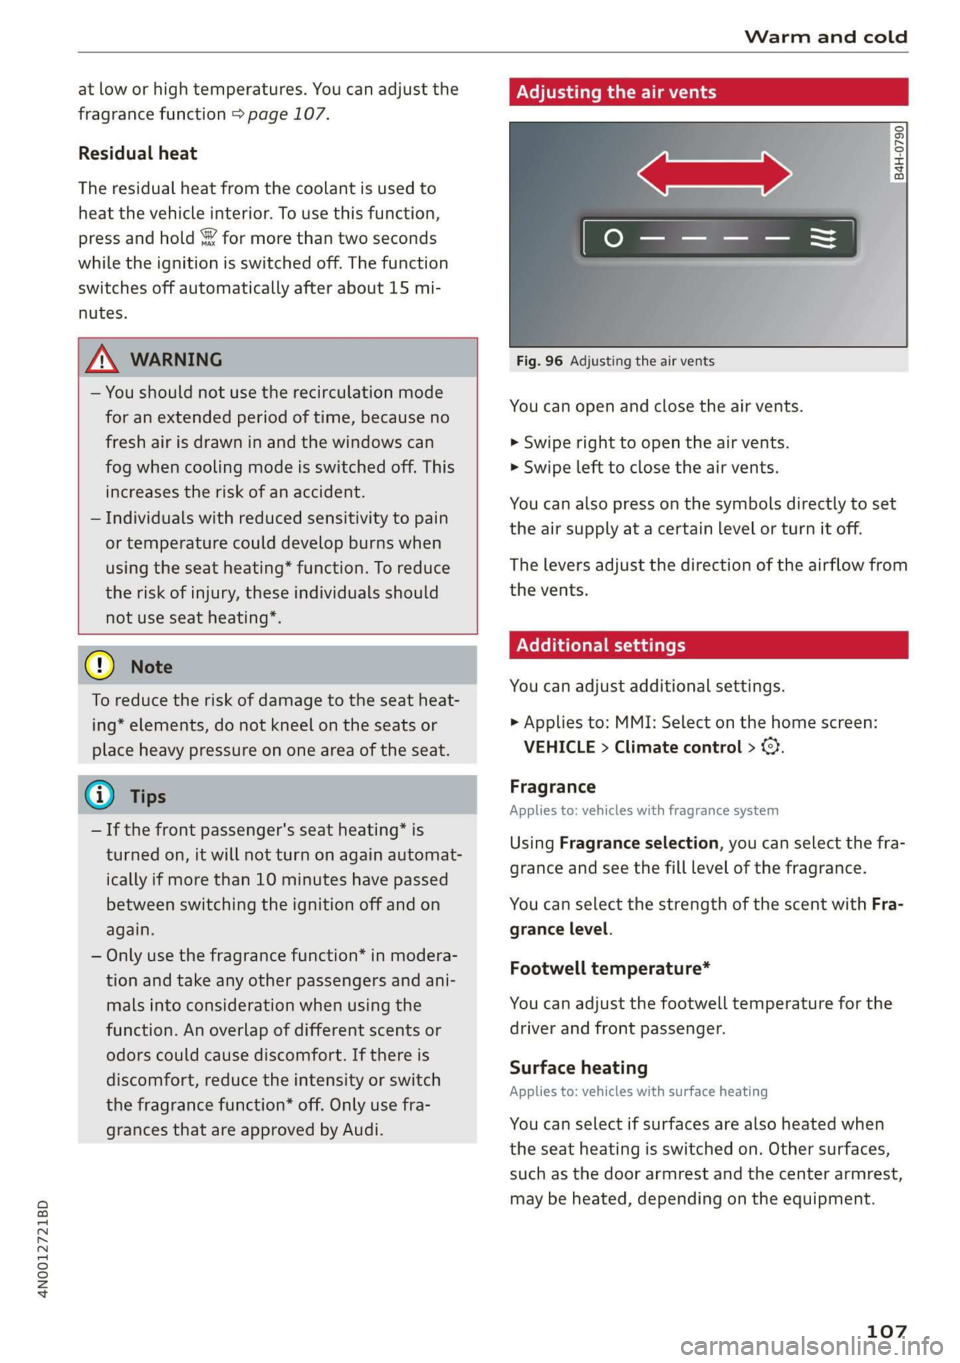
Adjusting the air vents
S| a g
S| = + a
Fig. 96 Adjusting the air vents
You can open and close the air vents.
> Swipe right to open the air vents.
> Swipe left to close the air vents.
You can also press on the symbols directly to set
the air supply at a certain level or turn it off.
The levers adjust the direction of the airflow from
the vents.
Additional settings
You can adjust additional settings.
> Applies to: MMI: Select on the home screen:
VEHICLE > Climate control > ©.
Fragrance
Applies to: vehicles with fragrance system
Using Fragrance selection, you can select the fra-
grance and see the fill level of the fragrance.
You can select the strength of the scent with Fra-
grance level.
Footwell temperature*
You can adjust the footwell temperature for the
driver and front passenger.
Surface heating
Applies to: vehicles with surface heating
You can select if surfaces are also heated when
the seat heating is switched on. Other surfaces,
such as the door armrest and the center armrest,
may be heated, depending on the equipment.
107
Page 112 of 360
Warm and cold
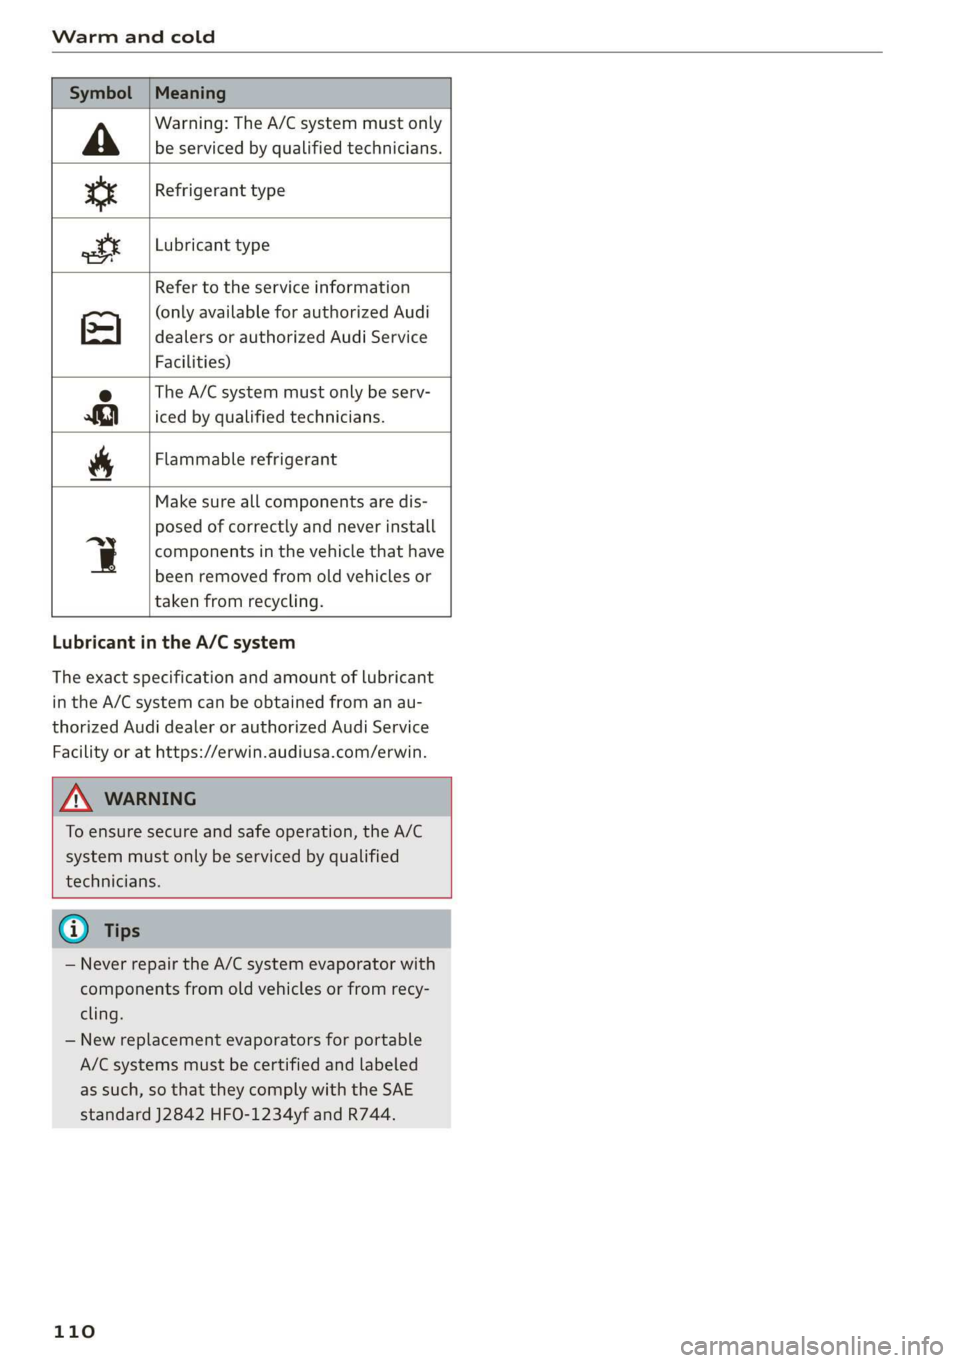
Symbol | Meaning
Warning: The A/C system must only
A be serviced by qualified technicians.
tt Refrigerant type
tt
Lubricant type
Refer to the service information
(only available for authorized Audi
dealers or authorized Audi Service
Facilities)
The A/C system must only be serv-
iced by qualified technicians.
Flammable refrigerant
Se
Be
Make sure all components are dis-
posed of correctly and never install
q components in the vehicle that have
been removed from old vehicles or
taken from recycling.
Lubricant in the A/C system
The exact specification and amount of lubricant
in the A/C system can be obtained from an au-
thorized Audi dealer or authorized Audi Service
Facility or at https://erwin.audiusa.com/erwin.
ZA\ WARNING
To ensure secure and safe operation, the A/C
system must only be serviced by qualified
technicians.
G) Tips
— Never repair the A/C system evaporator with
components from old vehicles or from recy-
cling.
— New replacement evaporators for portable
A/C systems must be certified and labeled
as such, so that they comply with the SAE
standard J2842 HFO-1234yf and R744.
110
Page 113 of 360
4N0012721BD
Driving
Driving
Starting the vehicle
Dye Tod f ola (ela)
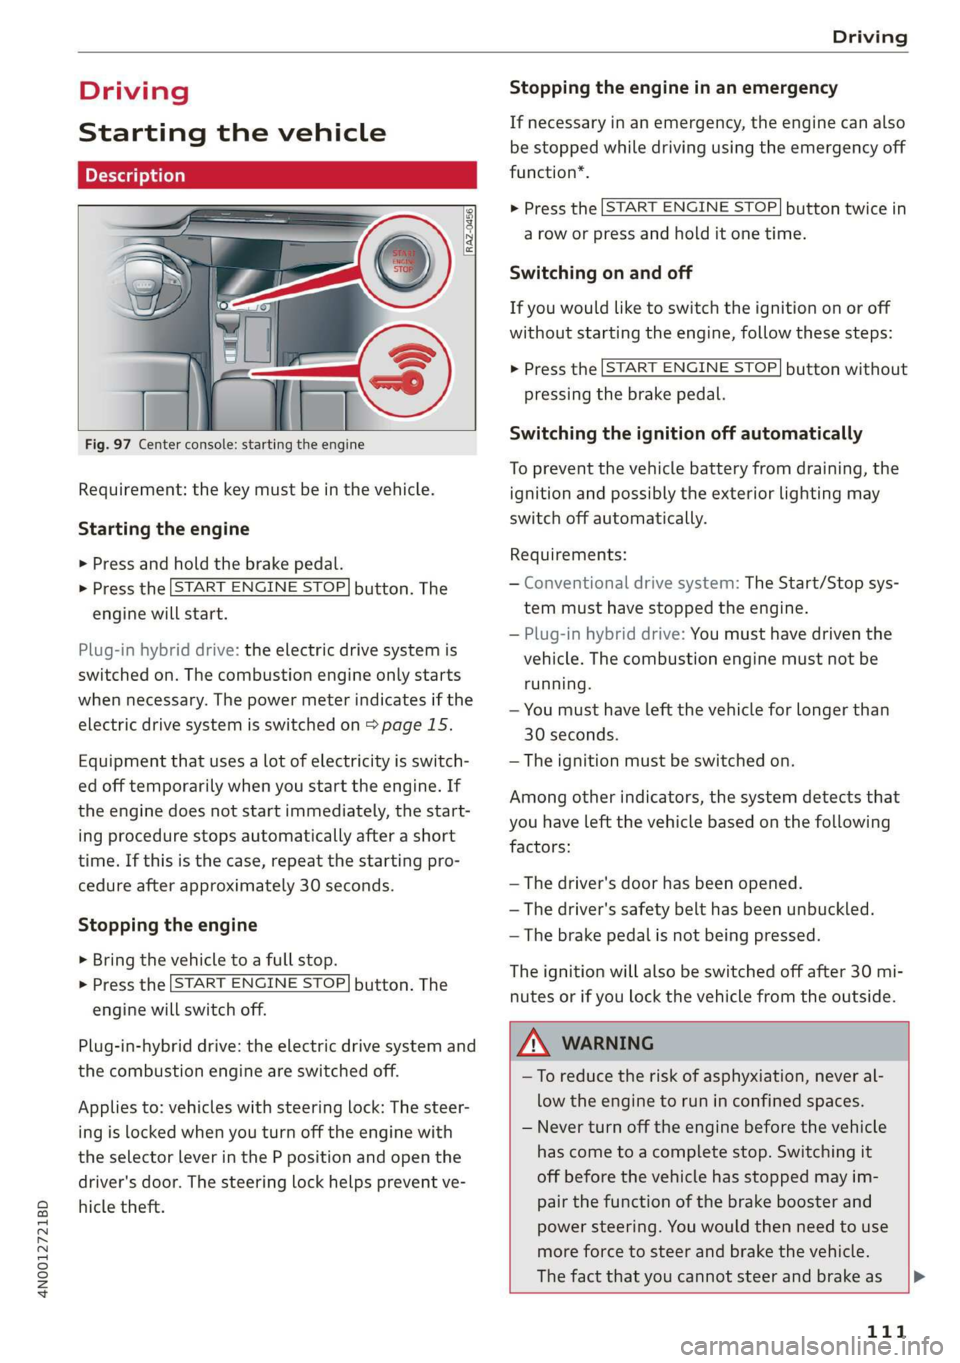
Fig. 97 Center console: starting the engine
Requirement: the key must be in the vehicle.
Starting the engine
> Press and hold the brake pedal.
> Press the [START ENGINE STOP] button. The
engine will start.
Plug-in hybrid drive: the electric drive system is
switched on. The combustion engine only starts
when necessary. The power meter indicates if the
electric drive system is switched on > page 15.
Equipment that uses a lot of electricity is switch-
ed off temporarily when you start the engine. If
the engine does not start immediately, the start-
ing procedure stops automatically after a short
time. If this is the case, repeat the starting pro-
cedure after approximately 30 seconds.
Stopping the engine
> Bring the vehicle to a full stop.
> Press the [START ENGINE STOP] button. The
engine will switch off.
Plug-in-hybrid drive: the electric drive system and
the combustion engine are switched off.
Applies to: vehicles with steering lock: The steer-
ing is locked when you turn off the engine with
the selector lever in the P position and open the
driver's door. The steering lock helps prevent ve-
hicle theft.
Stopping the engine in an emergency
If necessary in an emergency, the engine can also
be stopped while driving using the emergency off
function*.
> Press the [START ENGINE STOP] button twice in
a row or press and hold it one time.
Switching on and off
If you would like to switch the ignition on or off
without starting the engine, follow these steps:
> Press the [START ENGINE STOP] button without
pressing the brake pedal.
Switching the ignition off automatically
To prevent the vehicle battery from draining, the
ignition and possibly the exterior lighting may
switch off automatically.
Requirements:
— Conventional drive system: The Start/Stop sys-
tem must have stopped the engine.
— Plug-in hybrid drive: You must have driven the
vehicle. The combustion engine must not be
running.
— You must have left the vehicle for longer than
30 seconds.
— The ignition must be switched on.
Among other indicators, the system detects that
you have left the vehicle based on the following
factors:
— The driver's door has been opened.
— The driver's safety belt has been unbuckled.
— The brake pedal is not being pressed.
The ignition will also be switched off after 30 mi-
nutes or if you lock the vehicle from the outside.
ZA WARNING
—To reduce the risk of asphyxiation, never al-
low the engine to run in confined spaces.
— Never turn off the engine before the vehicle
has come to a complete stop. Switching it
off before the vehicle has stopped may im-
pair the function of the brake booster and
power steering. You would then need to use
more force to steer and brake the vehicle.
The fact that you cannot steer and brake as |P>
111
Page 115 of 360

4N0012721BD
Driving
prevents too much stress from being placed on
the locking mechanism.
ZA\ WARNING
— Always set the parking brake when leaving
your vehicle, even if for a short period of
time. If the parking brake is not set, the ve-
hicle could roll away, increasing the risk of
an accident.
— Do not leave your vehicle unattended while
the engine is running, because this increases
the risk of an accident.
— If the parking brake is set, it can release au-
tomatically when the accelerator pedal is
pressed. To reduce the risk of an accident,
do not inadvertently press the accelerator
pedal and always shift into “P” when the ve-
hicle is stopped.
— If you leave the vehicle, switch the ignition
off and take the key with you. This is espe-
cially important when leaving persons or an-
imals in the vehicle. Otherwise, the vehicle
could start unintentionally, the parking
brake could release, or electronic equipment
could activate, which increases the risk of an
accident.
— No persons or animals should be left in a
locked vehicle. Locked doors make it more
difficult for emergency workers to enter the
vehicle, which puts lives at risk.
— If you do not begin driving immediately af-
ter releasing the brake pedal, your vehicle
may begin to roll backward. Press the brake
pedal or set the parking brake immediately.
@) Note
If you have to stop on an incline, always press
the brake pedal to hold the vehicle in place to
reduce the risk of the vehicle rolling back-
ward. Do not try to hold the vehicle in place
by pressing and holding the accelerator pedal.
The transmission can overheat, which increas-
es the risk of damage.
Hill hold assist
If you take your foot off of the brake pedal when
driving on hills, the braking force will be held for
several seconds. At that time, you can start driv-
ing without the vehicle rolling backward.
Requirement: the driver's door must be closed,
the engine must be on, and the vehicle must be
traveling uphill.
> To activate hill hold assist, press and hold the
brake pedal for several seconds while the vehi-
cle is stationary.
Z\ WARNING
— If you do not begin driving immediately af-
ter releasing the brake pedal, your vehicle
may begin to roll backward. Press the brake
pedal or set the parking brake immediately.
— The hill hold assist cannot hold the vehicle
on inclines in every scenario (for example,
on slippery or icy ground).
Messages
Take over!
The vehicle cannot be held in place automatically.
Press the brake pedal to secure the vehicle from
rolling away unintentionally.
Gears and driving programs
Oo
@—*
RAZ-0410:
R
N
tt
D/S
7 NEI
Fig. 98 Center console: selector lever
The automatic transmission shifts automatically
depending on the selected gear and the current
driving style. When driving with a moderate driv-
ing style, upshifting early and downshifting late
will help to improve fuel economy. When driving
with a sporty driving style, the transmission per-
mits higher RPMs.
The gears are displayed next to the selector lever. >
113
Page 116 of 360
Driving
—P (Park)
— R (Reverse)
—N (Neutral)
—D (Drive)
Selecting a gear
Requirement: the ignition must be switched on.
— Bring the vehicle to a full stop and press the
brake pedal.
— Press the release button (@ on the selector lev-
er.
—To select the nearest gear, move the selector
lever forward or back until you feel the first
pressure point.
—To skip a gear (for example, move from “D” to
“R”), move the selector lever past the pressure
point in the desired direction.
— The label next to the selector lever for the se-
lected gear will light up.
“N” (Neutral) gear
In the “N” gear, power is not transmitted to the
driving wheels. Use the “N” gear in a car wash
(with conveyor belts), for example.
If you unintentionally select “N” while driving
(faster than 1 mph (2 km/h)), you can also shift
back to “D” without pressing the brake pedal.
For safety reasons, the vehicle cannot be locked
when the transmission is in the "N” gear.
“p” (Park) gear
Requirement: the ignition must be switched on.
The vehicle is secured from rolling away by the
parking lock when in the “P” gear.
— Bring the vehicle to a full stop and press the
brake pedal.
— Press the “P” button @) on the selector lever.
— The “P” next to the selector lever will light up.
“P” engages automatically if you switch the en-
gine off while the “D” or “R” gear is selected. If
you switch the engine off in “N”, “P” will engage
automatically after approximately 30 minutes.
If you want to switch to another gear from “P”,
the engine must be running.
114
If you cannot shift out of “P”, for example be-
cause the vehicle has no power, you may need to
use the emergency release for the parking lock
=> page 116.
Selecting the driving program
Various driving programs can be selected when in
the “D” gear. The programs influence when the
transmission shifts and how the accelerator ped-
al responds.
The selected driving program is displayed in the
instrument cluster.
— D (Drive): normal driving mode
— S (Sport): sporty driving mode
If you select the Dynamic mode in Audi drive se-
lect*, the “S” driving program will be activated.
When the ignition is switched off, the driving pro-
gram may be reset to “D”.
To switch between the current driving program
and “S”, push the selector lever toward the rear.
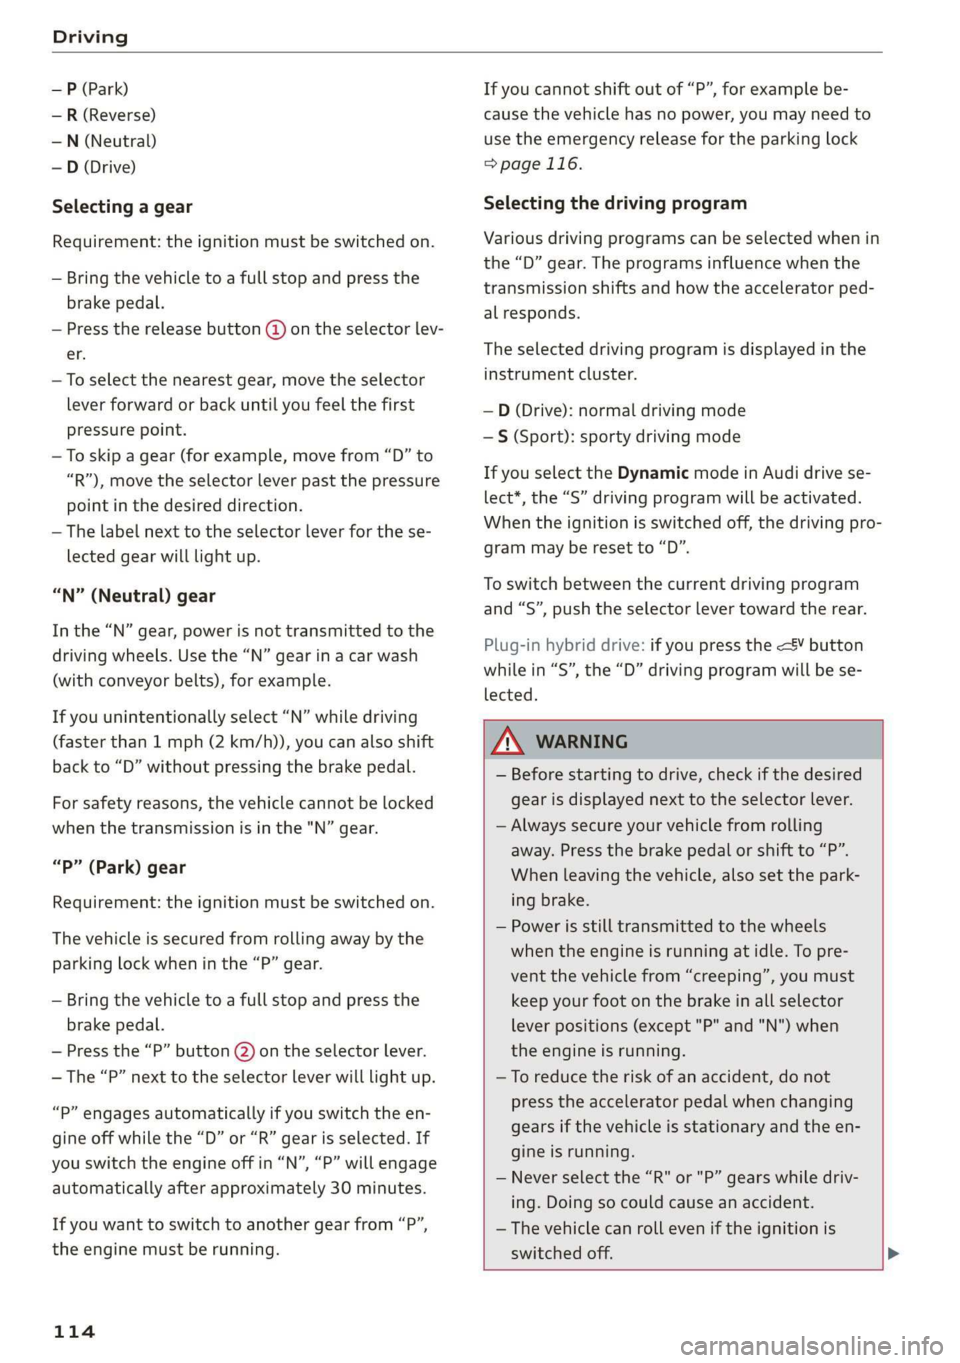
Plug-in hybrid drive: if you press the
lected.
A WARNING
— Before starting to drive, check if the desired
gear is displayed next to the selector lever.
— Always secure your vehicle from rolling
away. Press the brake pedal or shift to “P”.
When leaving the vehicle, also set the park-
ing brake.
— Power is still transmitted to the wheels
when the engine is running at idle. To pre-
vent the vehicle from “creeping”, you must
keep your foot on the brake in all selector
lever positions (except "P" and "N") when
the engine is running.
— To reduce the risk of an accident, do not
press the accelerator pedal when changing
gears if the vehicle is stationary and the en-
gine is running.
— Never select the “R" or "P” gears while driv-
ing. Doing so could cause an accident.
— The vehicle can roll even if the ignition is
switched off.