bluetooth AUDI A8 2020 Owners Manual
[x] Cancel search | Manufacturer: AUDI, Model Year: 2020, Model line: A8, Model: AUDI A8 2020Pages: 360, PDF Size: 95.38 MB
Page 5 of 360
4N0012721BD
Table of contents
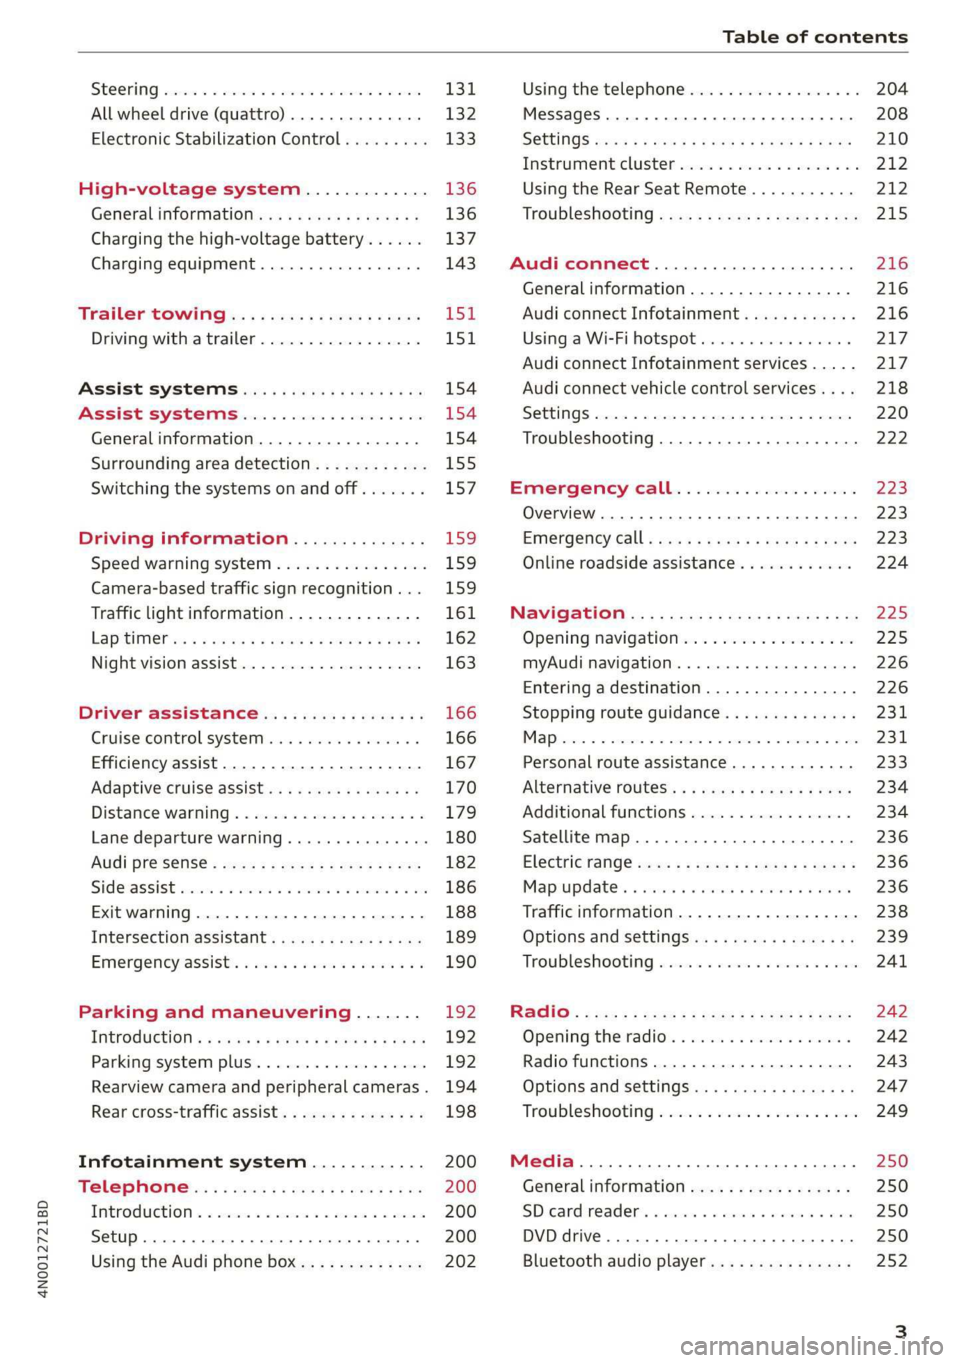
SEOOKING assess © & secwens + + anes ww ceawien Hewes 131
All wheel drive (quattro).............. 132
Electronic Stabilization Control......... 133
High-voltage system............. 136
General information...........0..5.5 136
Charging the high-voltage battery...... 137
Charging equipment................. 143
TANS COWINIG ss 5 & cews 4c ous ce ewe LSL
Driving with atrailer................. 151
Assist systems.................0. 154
Assist systems................... 154
Generalinformation................. 154
Surrounding area detection............ 155
Switching the systems on and off....... 157
Driving information.............. 159
Speed warning system................ 159
Camera-based traffic sign recognition... 159
Traffic light information.............. 161
LAP Mer as « 2 eons x = nevos ¢ 6 aus ¢ 8 em 162
Night vision assist..............-.04. 163
Driver assistance................. 166
Cruise control system.............0-5 166
Efficiency assist.............02--004. 167
Adaptive cruise assist............00-. 170
Distance Warning « « wse« 6 3 sone se eee oa LID:
Lane departure warning.............4. 180
Audi presense............-.22+--05- 182
Side@rassist esses: sv vows © v ememe © 2 suman 2 eae 186
Exit warning ...........-.....2.0000. 188
Intersection assistant................ 189
Emergeneyassists. «ican & wacen 3 3 woes ¥ 5 190
Parking and maneuvering....... 192
INEFODUCKION « » sey: x « caus 4 2 wasn 4 & Rees 192
Parking system plus...............00. 192
Rearview camera and peripheral cameras. 194
Rear cross-traffic assist... 2.2.2.0... 198
Infotainment system............ 200
TELEBNOMEs: 5 «ees & Cees 4 e oeew eee 200
IMtrOdUGEION « 2 asaces < a asomee x a wma Sewanee 200
Setup... eee eee ee eee 200
Using the Audi phone box............. 202
Using the telephone.................. 204
MessageS ... 0... cece cece eee eee 208
SOCtinGS eva 3 x espa o Kae 5s BER Bo ee 210
Instrument:cluster css vo evn ee ween eae 212
Using the Rear Seat Remote........... 212
Troubleshooting «<< <= eccn ss yews sp es 215
Audi connect..................0.. 216
Generalinformation................. 216
Audi connect Infotainment............ 216
Using a Wi-Fi hotspot................ 217
Audi connect Infotainment services..... 217
Audi connect vehicle control services.... 218
SCttINGS come
EMe@ngency CALL. « «ccc 6 i cs 6 vee « 223
Overview... ... 0. eee eee eee 223
Emergency Call « cas « wean s + gee os pee 223
Online roadside assistance............ 224
Navigation....................005- 225
Opening navigation.................. 225
myAudi navigation...............000% 226
Entering adestination................ 226
Stopping route guidance.............. 231
MapPinceins i + cxanees i ¥ scree © sammee @ =m ommeae #0 oe 2231.
Personal route assistance............. 233
Alternative routes...............000- 234
Additional functions................. 234
Satellite map......... 0... eee eee eee 236
Eleetric'rangeé acc sv sees 5 ¢ eee se Hews: 236
Mapiupdater, « sss + a cssmee + & nen «5 enaens 236
Traffic information................00- 238
Options aNd 'SEtNGS is « x see s x sews 4 vs 239
Troubleshooting wees «= wer = o wees ov eee 241
Ragios: sce ¢ = nae ¢ ¢ seuss 2 2 eeu 2 2 eee 242
Opening the radio...............000. 242
Radio functions.................0-4. 243
Options and settings...............0. 247
Troubleshooting esc 2 2 wee ts wie oo wee 249
Media............ cc eee eee 250
Generalinformation................. 250
SD card reader... ..... cc eee eee eee 250
DVD drive... 2... eee eee eee 250
Bluetooth audio player............... 252
Page 24 of 360
Touch displays
> To adjust the placement of the buttons in the
quick access bar, pull them to the desired posi-
tion in the bar.
> Press Done to complete the configuration.
@ Tips
The position of © cannot be adjusted.
Display area
You can freely change the location of the buttons
on the home screen display area.
Configuring the display area
> Press and hold a button on the home screen
display area.
> To adjust the placement of the buttons, pull
them to the desired locations.
> Press Done to complete the configuration.
Switching between menu pages
If a menu contains multiple menu pages, fabatm |S
displayed in the display area. The white bar
shows the location of the current menu page.
> To switch between menu pages, swipe your fin-
ger to the right or left.
Off Of o8
O88 of af
C8 Oo of
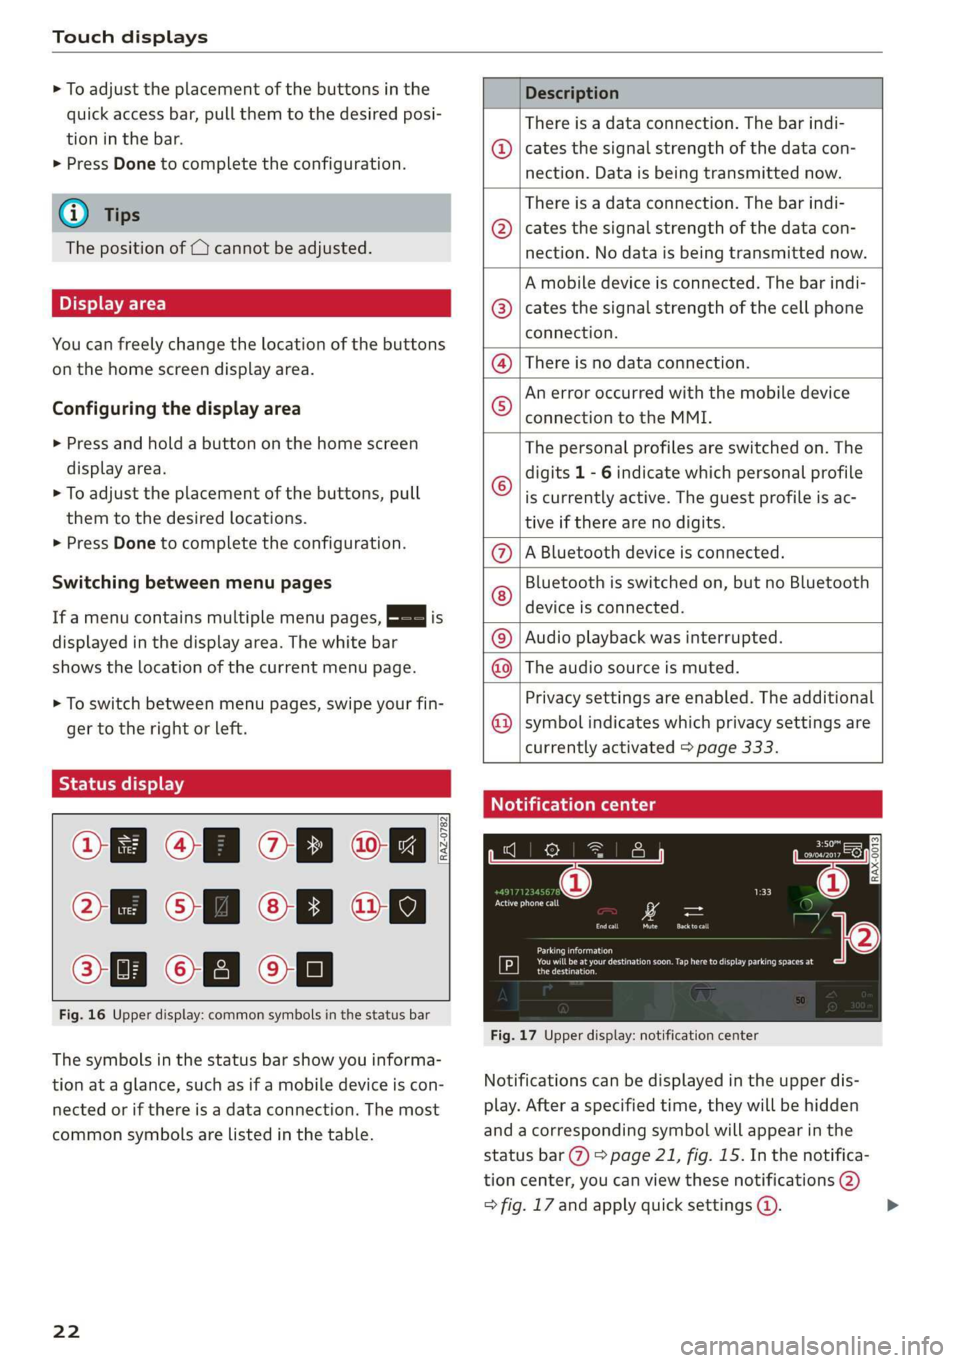
Fig. 16 Upper display: common symbols in the status bar
[RAZ-0782
The symbols in the status bar show you informa-
tion at a glance, such as if a mobile device is con-
nected or if there is a data connection. The most
common symbols are listed in the table.
22
Description
There is a data connection. The bar indi-
cates the signal strength of the data con-
nection. Data is being transmitted now.
There is a data connection. The bar indi-
cates the signal strength of the data con-
nection. No data is being transmitted now.
A mobile device is connected. The bar indi-
cates the signal strength of the cell phone
connection.
® There is no data connection.
An error occurred with the mobile device
connection to the MMI. @
The personal profiles are switched on. The
digits 1 - 6 indicate which personal profile
is currently active. The guest profile is ac-
tive if there are no digits.
A Bluetooth device is connected.
Bluetooth is switched on, but no Bluetooth
device is connected. ©®e
©
Audio playback was interrupted.
The audio source is muted. @|©
Privacy settings are enabled. The additional
symbol indicates which privacy settings are ©
currently activated > page 333.
Notification center
ll
RAX-0013
reuse
Sear)
You will be at your destination soon. Tap here to display parking spaces at
[P] eesti
Fig. 17 Upper display: notification center
Notifications can be displayed in the upper dis-
play. After a specified time, they will be hidden
and a corresponding symbol will appear in the
status bar (2) > page 21, fig. 15. In the notifica-
tion center, you can view these notifications @)
> fig. 17 and apply quick settings @. >
Page 27 of 360
4N0012721BD
Touch displays
Accepting suggested words or selecting
entries from the results list
> To accept a suggested word (2) or select an en-
try from the results list @), press on it.
> To display more content in the results list, drag
your finger upward or downward on the screen.
Setting the input language or keyboard
layout
> Applies to MMI: Select on the home screen:
SETTINGS > Language & keyboard > Keyboard.
> To define additional input languages, press the
© button.
> To change the keyboard layout for an input lan-
guage, press >. For example, you can select be-
tween QWERTZ and QWERTY.
Rear Seat Remote
Applies to: vehicles with Rear Seat Remote
With Rear Seat Remote, you can control conven-
ience and Infotainment system functions in the
rear of the vehicle, such as the climate control
system or the media playback in the vehicle.
ZA WARNING
— As the driver, do not allow usage of the Rear
Seat Remote to distract you from driving, as
this could increase the risk of an accident.
For example, do not reach behind you while
driving to operate the Rear Seat Remote.
— The Rear Seat Remote can only be operated
when the vehicle is stationary or when the
remote is securely positioned in the desig-
nated holder in the vehicle. Like all loose ob-
jects, it could be thrown through the vehicle
and
cause serious injuries in a collision. If
the Rear Seat Remote is not in the designat-
ed holder, it must always be securely stowed
while driving.
— Do not use any wireless devices on the front
seats within range of the airbags while driv-
ing. Also read the warnings in the chapter
> page 86.
— The Rear Seat Remote can become hot while
charging. Pay attention to the housing and
display temperature, and be careful when
removing the Rear Seat Remote from the
holder.
— There are magnets located on the back of
the Rear Seat Remote and in the designated
holder. For people with pacemakers, the
electromagnetic radiation may impair pace-
maker function. Always maintain a mini-
mum distance of approximately 6 in (15 cm)
from the magnets.
CG) Note
— Always follow the information found in 9®
in General information on page 216.
— Protect the Rear Seat Remote against pro-
longed exposure to direct sunlight.
— Extremely high or low temperatures that
can occur inside vehicles can damage the
Rear Seat Remote and/or impair the device
performance. Never leave your Rear Seat
Remote in the vehicle in extremely high or
low temperatures.
— Protect the Rear Seat Remote from coming
into contact with any fluids.
G) Tips
— Please note that the Rear Seat Remote can
be used only when the ignition is switched
on and within range of your vehicle's active
Wi-Fi hotspot.
— Please note that a Wi-Fi connection does
not automatically make it possible to use
the
Internet. For additional information,
see the chapter > page 216.
— When playing online media sources, there
may be longer loading times or restrictions
on media playback, depending on the Inter-
net connection or the Wi-Fi usage (for ex-
ample, if there is intensive usage by multi-
ple devices on the hotspot).
— Signals from Bluetooth devices and Wi-Fi
hotspots within range of the vehicle may
impair the vehicle Wi-Fi services. If multiple
Bluetooth devices and Wi-Fi hotspots are
within range of the vehicle, it may cause re-
duced data transfer rates, connection inter-
ruptions, or limitations when streaming me-
dia.
25
Page 32 of 360
Touch displays
MMI by securing it in the holder
=> page 30.
— When streaming media, the following situa-
tions may cause reduced data transfer rates,
interrupted connections, or restrictions:
—If there are multiple Wi-Fi hotspots or de-
vices connected to Wi-Fi and Bluetooth
within range of the vehicle
— If multiple devices are connected to the
vehicle Wi-Fi hotspot and in use at the
same time
— The Audi tablet has been tested with many
of the products available on the market.
However, there may be cases where individ-
ual devices are not recognized, or where us-
age may be restricted or impossible.
Lea TN]
Applies to: vehicles with Audi tablet
[RAZ-0110
|
a
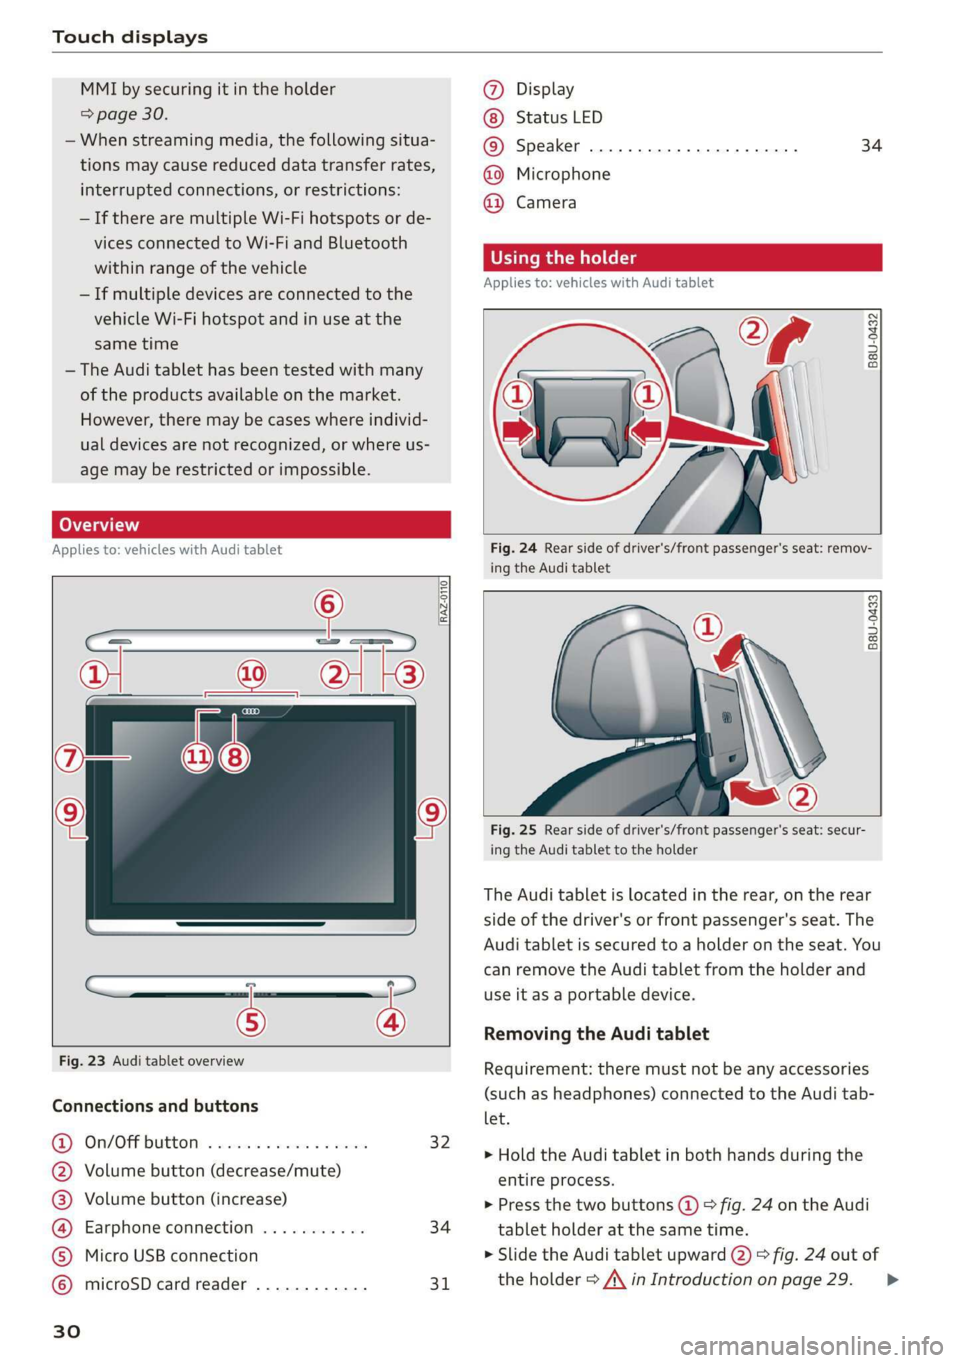
Fig. 23 Audi tablet overview
Connections and buttons
@) On/OFPbuttOM: » cso ee css ov eeceeee 32
@ Volume button (decrease/mute)
@® Volume button (increase)
@ Earphone connection ........... 34
© Micro USB connection
© microSD card reader ............ 31
Ww °o
@ Display
Status LED
© Speaker
@ Microphone
@ Camera
34
Using the holder
Applies to: vehicles with Audi tablet
B8U-0432
VA
Fig. 24 Rear side of driver's/front passenger's seat: remov-
ing the Audi tablet
B8U-0433
Fig. 25 Rear side of driver's/front passenger's seat: secur-
ing the Audi tablet to the holder
The Audi tablet is located in the rear, on the rear
side of the driver's or front passenger's seat. The
Audi tablet is secured to a holder on the seat. You
can remove the Audi tablet from the holder and
use it as a portable device.
Removing the Audi tablet
Requirement: there must not be any accessories
(such as headphones) connected to the Audi tab-
let.
> Hold the Audi tablet in both hands during the
entire process.
> Press the two buttons (@) > fig. 24 on the Audi
tablet holder at the same time.
> Slide the Audi tablet upward @) > fig. 24 out of
the holder > A\ in Introduction on page 29. >
Page 35 of 360
4N0012721BD
Touch displays
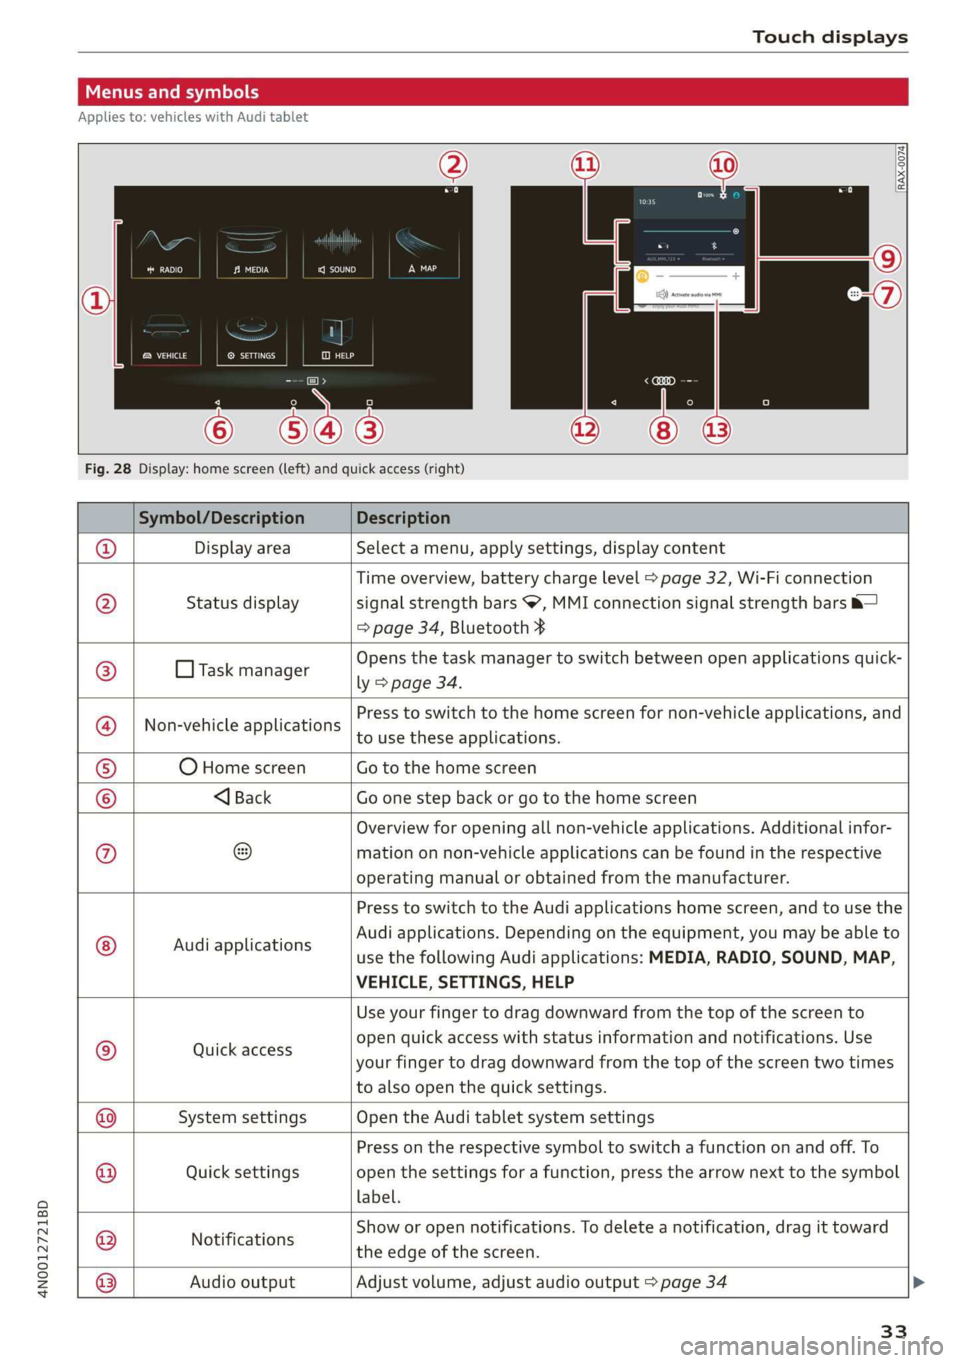
Menus and symbols
Applies to: vehicles with Audi tablet
emsa || | cea
Rats ® SETTINGS
Cy
Fig. 28 Display: home screen (left) and quick access (right)
Symbol/Description Description
Display area Select a menu, apply settings, display content
Status display
Time overview, battery charge level > page 32, Wi-Fi connection
signal strength bars , MMI connection signal strength bars &—
=> page 34, Bluetooth ¥
O Task manager
Opens the task manager to switch between open applications quick-
ly > page 34.
Non-vehicle applications
Press to switch to the home screen for non-vehicle applications, and
to use these applications.
O Home screen Go to the home screen
®@
Ef
©|e|
©
|}
<1 Back Go one step back or go to the home screen
Overview for opening all non-vehicle applications. Additional infor-
mation on non-vehicle applications can be found in the respective
operating manual or obtained from the manufacturer.
© Audi applications
Press to switch to the Audi applications home screen, and to use the
Audi applications. Depending on the equipment, you may be able to
use the following Audi applications: MEDIA, RADIO, SOUND, MAP,
VEHICLE, SETTINGS, HELP
Quick access
Use your finger to drag downward from the top of the screen to
open quick access with status information and notifications. Use
your finger to drag downward from the top of the screen two times
to also open the quick settings.
@|
©
System settings Open the Audi tablet system settings
Quick settings
Press on the respective symbol to switch a function on and off. To
open the settings for a function, press the arrow next to the symbol
label.
Notifications
Show or open notifications. To delete a notification, drag it toward
the edge of the screen.
@|O|]
©
Audio output
Adjust volume, adjust audio output > page 34
33
Page 37 of 360
4N0012721BD
Touch displays
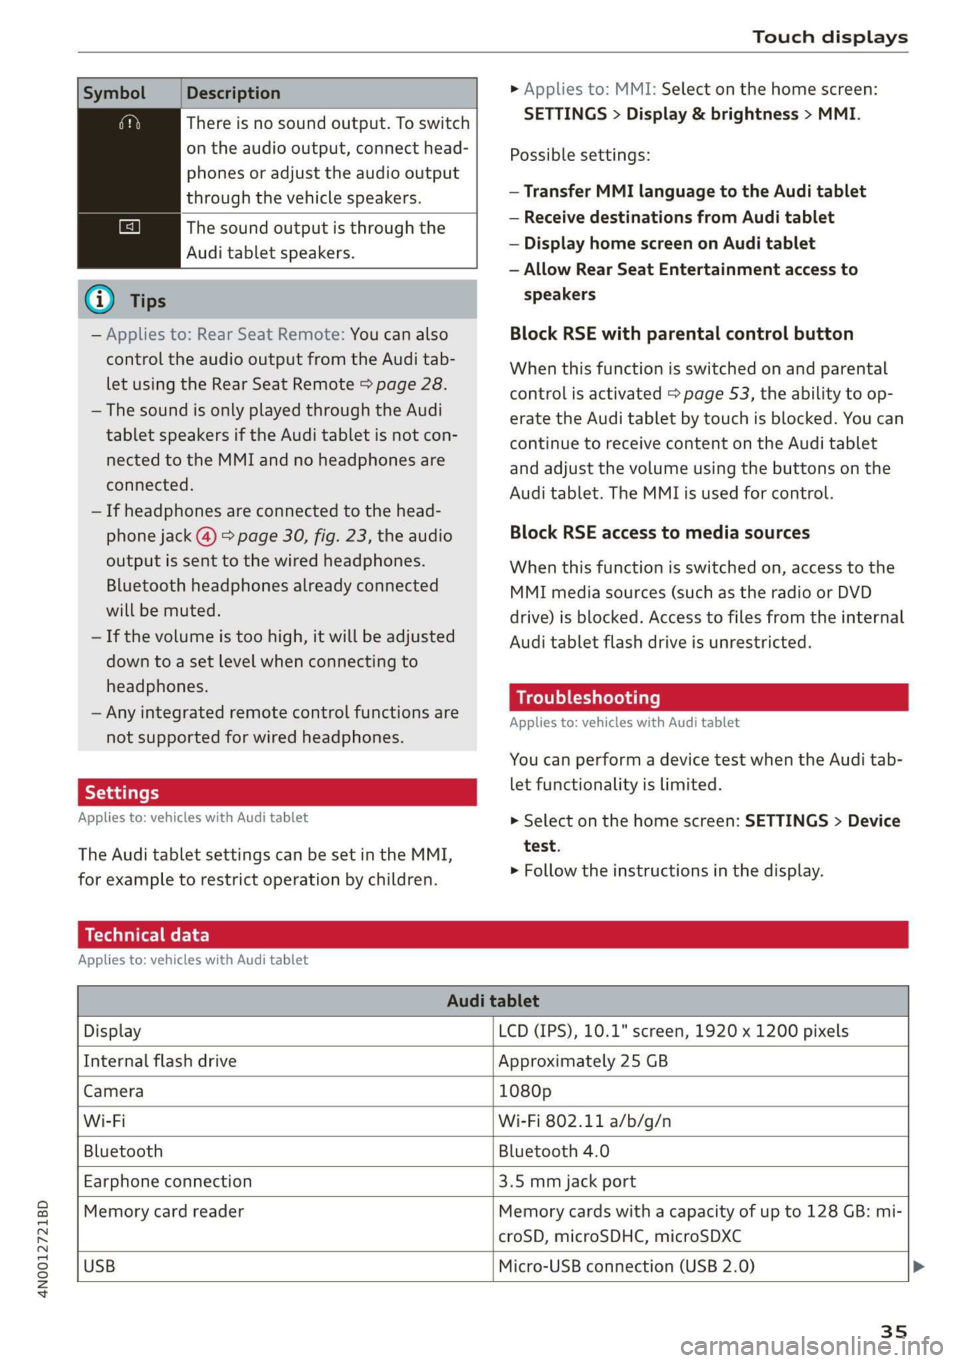
Symbol Description
There is no sound output. To switch
on the audio output, connect head-
phones or adjust the audio output
through the vehicle speakers.
The sound output is through the
Audi tablet speakers.
G) Tips
— Applies to: Rear Seat Remote: You can also
control the audio output from the Audi tab-
let using the Rear Seat Remote > page 28.
— The sound is only played through the Audi
tablet speakers if the Audi tablet is not con-
nected to the MMI and no headphones are
connected.
— If headphones are connected to the head-
phone jack (@) > page 30, fig. 23, the audio
output is sent to the wired headphones.
Bluetooth headphones already connected
will be muted.
— If the volume is too high, it will be adjusted
down to a set level when connecting to
headphones.
— Any integrated remote control functions are
not supported for wired headphones.
Applies to: vehicles with Audi tablet
The Audi tablet settings can be set in the MMI,
for example to restrict operation by children.
> Applies to: MMI: Select on the home screen:
SETTINGS > Display & brightness > MMI.
Possible settings:
— Transfer MMI language to the Audi tablet
— Receive destinations from Audi tablet
— Display home screen on Audi tablet
— Allow Rear Seat Entertainment access to
speakers
Block RSE with parental control button
When this function is switched on and parental
control is activated > page 53, the ability to op-
erate the Audi tablet by touch is blocked. You can
continue to receive content on the Audi tablet
and adjust the volume using the buttons on the
Audi tablet. The MMI is used for control.
Block RSE access to media sources
When this function is switched on, access to the
MMI media sources (such as the radio or DVD
drive) is blocked. Access to files from the internal
Audi tablet flash drive is unrestricted.
Troubleshooting
Applies to: vehicles with Audi tablet
You can perform a device test when the Audi tab-
let functionality is limited.
> Select on the home screen: SETTINGS > Device
test.
> Follow the instructions in the display.
Technical data
Applies to: vehicles with Audi tablet
Audi tablet
Display LCD (IPS), 10.1" screen, 1920 x 1200 pixels
Internal flash drive Approximately 25 GB
Camera 1080p
Wi-Fi Wi-Fi 802.11 a/b/g/n
Bluetooth Bluetooth 4.0
Earphone connection 3.5 mm jack port
Memory card reader Memory cards with a capacity of up to 128 GB: mi-
croSD, microSDHC, microSDXC
USB
Micro-USB connection (USB 2.0) >
35
Page 43 of 360
4N0012721BD
Personalization
Personalization
User
Personal profiles
Applies to: vehicles with personal profiles
You can store your customized settings in a per-
sonal profile. Specific settings are stored auto-
matically in the personal profile that is currently
active.
Depending on the equipment, the profile being
used is assigned to the vehicle key currently in
use. The profile that was last active with the key
is loaded when the vehicle is unlocked.
> Applies to: MMI: Press USER on the home
screen.
Use various profiles to link them to specific vehi-
cle settings.
— Create your customized profile. This is helpful
in some situations, for example if multiple peo-
ple share the vehicle and each person would
like to use his or her individual vehicle settings.
— Guest: the guest profile can be used to adjust
settings in the vehicle without changing the
other profiles.
Active profile
— Rename: you can rename your profile so that
you can recognize by name which settings are
stored.
— Copy: you can copy your profile. Select the loca-
tion where the profile will be copied or which
profile should be overwritten. The settings will
be applied.
— Reset: you can reset your active profile to the
factory default settings.
— Reload*: Requirement: the vehicle must be sta-
tionary and the ignition must be switched on.
You can reload your profile, for example if the
seat, mirror, and steering wheel settings could
not be applied when changing profiles.
Profile selection
If you would like to change the profile, select an-
other profile from the list.
Switching personal profiles off
— Applies to: MMI: Select on the home screen:
USER > © > Personal profiles.
The personal profiles are switched on at the fac-
tory. If you do not wish to use the personal pro-
files, you can switch the function off.
@) Tips
— Certain Infotainment and vehicle settings
(such as mirrors) may be stored, depending
on vehicle equipment. You can find addi-
tional information in the MMI. Select on the
home screen: SETTINGS > General > Legal
notes > About Audi connect.
—The guest profile cannot be renamed.
— When changing profiles, the new profile
settings are loaded in the vehicle.
— You can reset all personal profiles to the
factory default settings.
Applies to: vehicles with myAudi login
Requirement: you must have successfully regis-
tered at my.audi.com.
Logging in from the vehicle
Applies to: MMI
> Select on the home screen: USER > myAudi
login.
> Log in to myAudi in the vehicle using your e-
mail address and password.
You can select if and when an automatic login to
myAudi in the vehicle should occur.
— Personal profile: Requirement: the personal
profile must be turned on and you must not be
logged in with the guest profile. Log in to
myAudi in the vehicle. Follow the system in-
structions and save your desired personal pro-
file. You will then always be logged in automat-
ically when your personal profile is active.
— Bluetooth device 1/Bluetooth device 2*: Re-
quirement: after a Bluetooth device has been
paired with the MMI, you must be logged in to
myAudi in the vehicle. Follow the system in-
structions and save the desired Bluetooth de-
vice. You will be automatically logged in when
41
>
Page 44 of 360
Personalization
your Bluetooth device is connected to the MMI,
and automatically logged out when the Blue-
tooth connection to your mobile device is dis-
connected.
To transfer existing destinations from the MMI to
your myAudi account one time, confirm the sys-
tem prompts with Yes.
G) Tips
— For some Audi connect Infotainment serv-
ices, you may also have to enter your myAu-
di access information when accessing serv-
ices in the MMI.
— Regardless of the key user and additional
users, you can only connect one myAudi ac-
count to your vehicle.
Oe
Applies to: vehicles with user management
The vehicle owner must be set up as the key user
for some Audi connect vehicle control services,
which depend on the vehicle equipment.
Setting the key user
Requirement: a key user must not be set yet.
> To set a key user for the vehicle, you will need a
myAudi account. Register at my.audi.com.
> Add your vehicle at my.audi.com and then veri-
fy your myAudi account using the verification
process that is provided.
> Applies to MMI: Select on the home screen:
USER > User management > (Key user) > Set
key user.
> Applies to: MMI: Follow the system instructions
and enter the 10-digit vehicle code > page 47.
The key user is set. You have the rights to use
the Audi connect vehicle control services
=> page 218 that depend on vehicle equipment
as well as the ability to manage other vehicle
functions and any other users.
Managing additional users
Depending on the vehicle equipment, you can
grant authorization for additional users to use
Audi connect vehicle control services at my.audi.
com.
42
Removing the key user
If you remove the key user, all other users and
their authorizations will be deleted. It will no
longer be possible to use the Audi connect vehi-
cle control services, depending on the vehicle
equipment.
Requirement: a key user must be set.
> Applies to: MMI: Select on the home screen:
USER > User management > (Key user) > Re-
move key user.
@ Tips
— Depending on the country, you may be able
to use the myAudi app or my.audi.com.
— Depending on the vehicle equipment, you
may be able to reset specific functions to
the factory default settings.
— Depending on the vehicle equipment, log-
ging into myAudi in the vehicle may not be
required to use Audi connect vehicle control
services.
— If you sell your vehicle, remove the key user
and reset all settings to the factory set-
tings.
— Store the vehicle code in a secure place. It
may be necessary to re-enter the vehicle
code.
— Pay attention to upper- and lower-case let-
ters when entering the vehicle code.
— If you do not have the 10-digit vehicle code,
contact an authorized Audi dealer or author-
ized Audi Service Facility.
Page 202 of 360
Telephone
Telephone
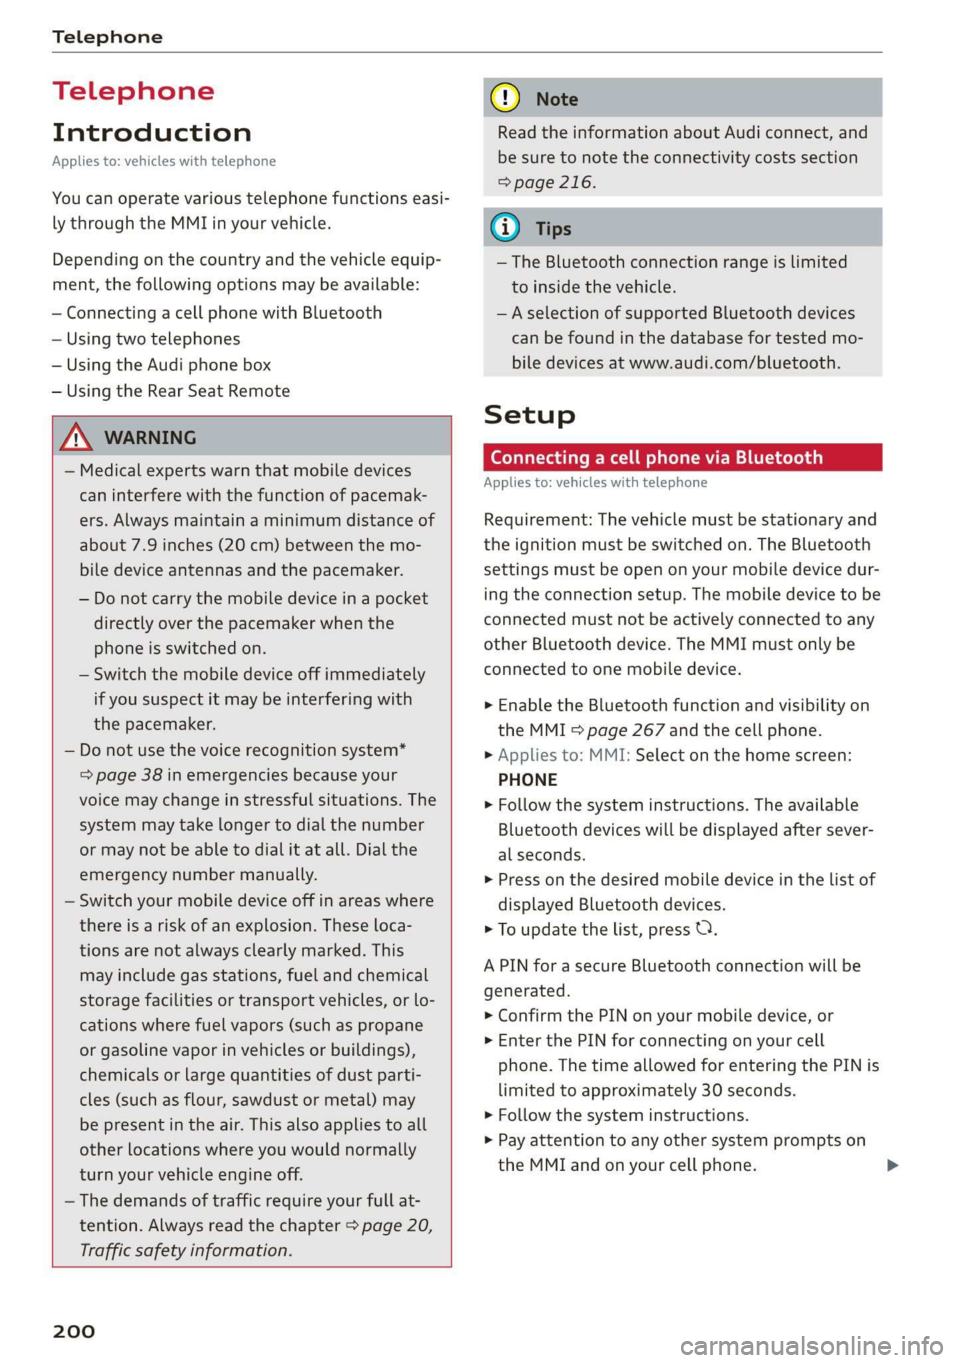
Introduction
Applies to: vehicles with telephone
You can operate various telephone functions easi-
ly through the MMI in your vehicle.
Depending on the country and the vehicle equip-
ment, the following options may be available:
— Connecting a cell phone with Bluetooth
— Using two telephones
— Using the Audi phone box
— Using the Rear Seat Remote
Z\ WARNING
— Medical experts warn that mobile devices
can interfere with the function of pacemak-
ers. Always maintain a minimum distance of
about 7.9 inches (20 cm) between the mo-
bile device antennas and the pacemaker.
— Do not carry the mobile device in a pocket
directly over the pacemaker when the
phone is switched on.
— Switch the mobile device off immediately
if you suspect it may be interfering with
the pacemaker.
— Do not use the voice recognition system*
= page 38 in emergencies because your
voice may change in stressful situations. The
system may take longer to dial the number
or may not be able to dial it at all. Dial the
emergency number manually.
— Switch your mobile device off in areas where
there is a risk of an explosion. These loca-
tions are not always clearly marked. This
may include gas stations, fuel and chemical
storage facilities or transport vehicles, or lo-
cations where fuel vapors (such as propane
or gasoline vapor in vehicles or buildings),
chemicals or large quantities of dust parti-
cles (such as flour, sawdust or metal) may
be present in the air. This also applies to all
other locations where you would normally
turn your vehicle engine off.
— The demands of traffic require your full at-
tention. Always read the chapter > page 20,
Traffic safety information.
200
@) Note
Read the information about Audi connect, and
be sure to note the connectivity costs section
=> page 216.
@) Tips
— The Bluetooth connection range is limited
to inside the vehicle.
—Aselection of supported Bluetooth devices
can be found in the database for tested mo-
bile devices at www.audi.com/bluetooth.
Setup
Connecting a cell phone via Bluetooth
Applies to: vehicles with telephone
Requirement: The vehicle must be stationary and
the ignition must be switched on. The Bluetooth
settings must be open on your mobile device dur-
ing the connection setup. The mobile device to be
connected must not be actively connected to any
other Bluetooth device. The MMI must only be
connected to one mobile device.
> Enable the Bluetooth function and visibility on
the MMI => page 267 and the cell phone.
> Applies to: MMI: Select on the home screen:
PHONE
> Follow the system instructions. The available
Bluetooth devices will be displayed after sever-
al seconds.
> Press on the desired mobile device in the list of
displayed Bluetooth devices.
> To update the list, press OQ.
A PIN for a secure Bluetooth connection will be
generated.
> Confirm the PIN on your mobile device, or
> Enter the PIN for connecting on your cell
phone. The time allowed for entering the PIN is
limited to approximately 30 seconds.
> Follow the system instructions.
> Pay attention to any other system prompts on
the MMI and on your cell phone.
Page 203 of 360
4N0012721BD
Telephone
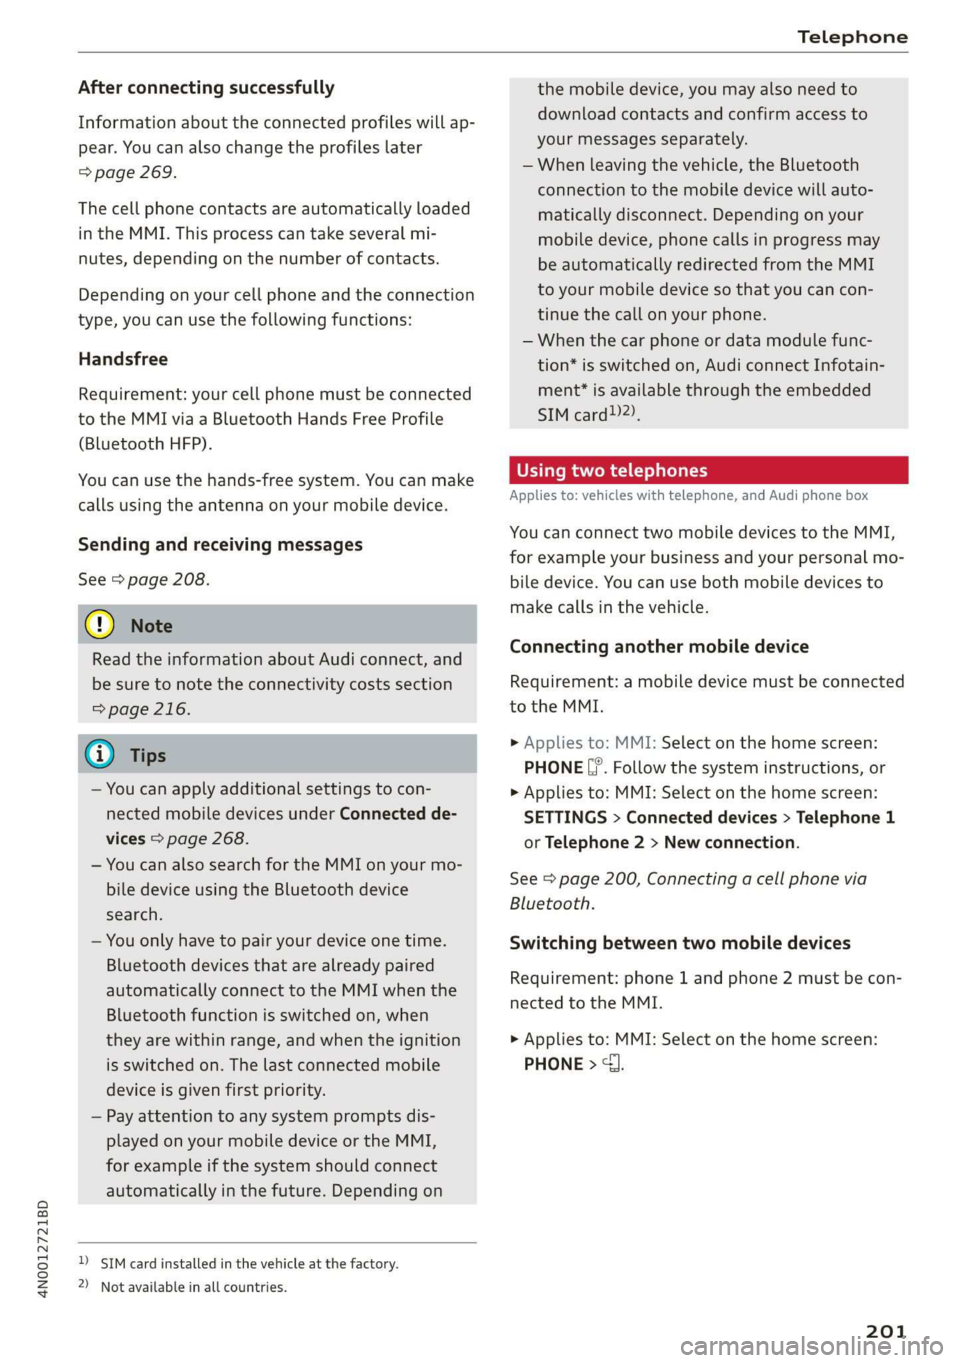
After connecting successfully
Information about the connected profiles will ap-
pear. You can also change the profiles later
=> page 269.
The cell phone contacts are automatically loaded
in the MMI. This process can take several mi-
nutes, depending on the number of contacts.
Depending on your cell phone and the connection
type, you can use the following functions:
Handsfree
Requirement: your cell phone must be connected
to the MMI via a Bluetooth Hands Free Profile
(Bluetooth HFP).
You can use the hands-free system. You can make
calls using the antenna on your mobile device.
Sending and receiving messages
See > page 208.
() Note
Read the information about Audi connect, and
be sure to note the connectivity costs section
=> page 216.
@) Tips
— You can apply additional settings to con-
nected mobile devices under Connected de-
vices > page 268.
— You can also search for the MMI on your mo-
bile device using the Bluetooth device
search.
— You only have to pair your device one time.
Bluetooth devices that are already paired
automatically connect to the MMI when the
Bluetooth function is switched on, when
they are within range, and when the ignition
is switched on. The last connected mobile
device is given first priority.
— Pay attention to any system prompts dis-
played on your mobile device or the MMI,
for example if the system should connect
automatically in the future. Depending on
D_ SIM card installed in the vehicle at the factory.
2) Not available in all countries.
the mobile device, you may also need to
download contacts and confirm access to
your messages separately.
— When leaving the vehicle, the Bluetooth
connection to the mobile device will auto-
matically disconnect. Depending on your
mobile device, phone calls in progress may
be automatically redirected from the MMI
to your mobile device so that you can con-
tinue the call on your phone.
— When the car phone or data module func-
tion* is switched on, Audi connect Infotain-
ment* is available through the embedded
SIM card})2).
Using two telephones
Applies to: vehicles with telephone, and Audi phone box
You can connect two mobile devices to the MMI,
for example your business and your personal mo-
bile device. You can use both mobile devices to
make calls in the vehicle.
Connecting another mobile device
Requirement: a mobile device must be connected
to the MMI.
> Applies to: MMI: Select on the home screen:
PHONE [?. Follow the system instructions, or
> Applies to: MMI: Select on the home screen:
SETTINGS > Connected devices > Telephone 1
or Telephone 2 > New connection.
See > page 200, Connecting a cell phone via
Bluetooth.
Switching between two mobile devices
Requirement: phone 1 and phone 2 must be con-
nected to the MMI.
> Applies to: MMI: Select on the home screen:
PHONE > J.
201