reset AUDI A8 2021 User Guide
[x] Cancel search | Manufacturer: AUDI, Model Year: 2021, Model line: A8, Model: AUDI A8 2021Pages: 362, PDF Size: 99.29 MB
Page 142 of 362
High-voltage system
Audi e-tron compact charging system
Applies to: vehicles with Audi e-tron compact charging system
a oho
RAZ-0726}
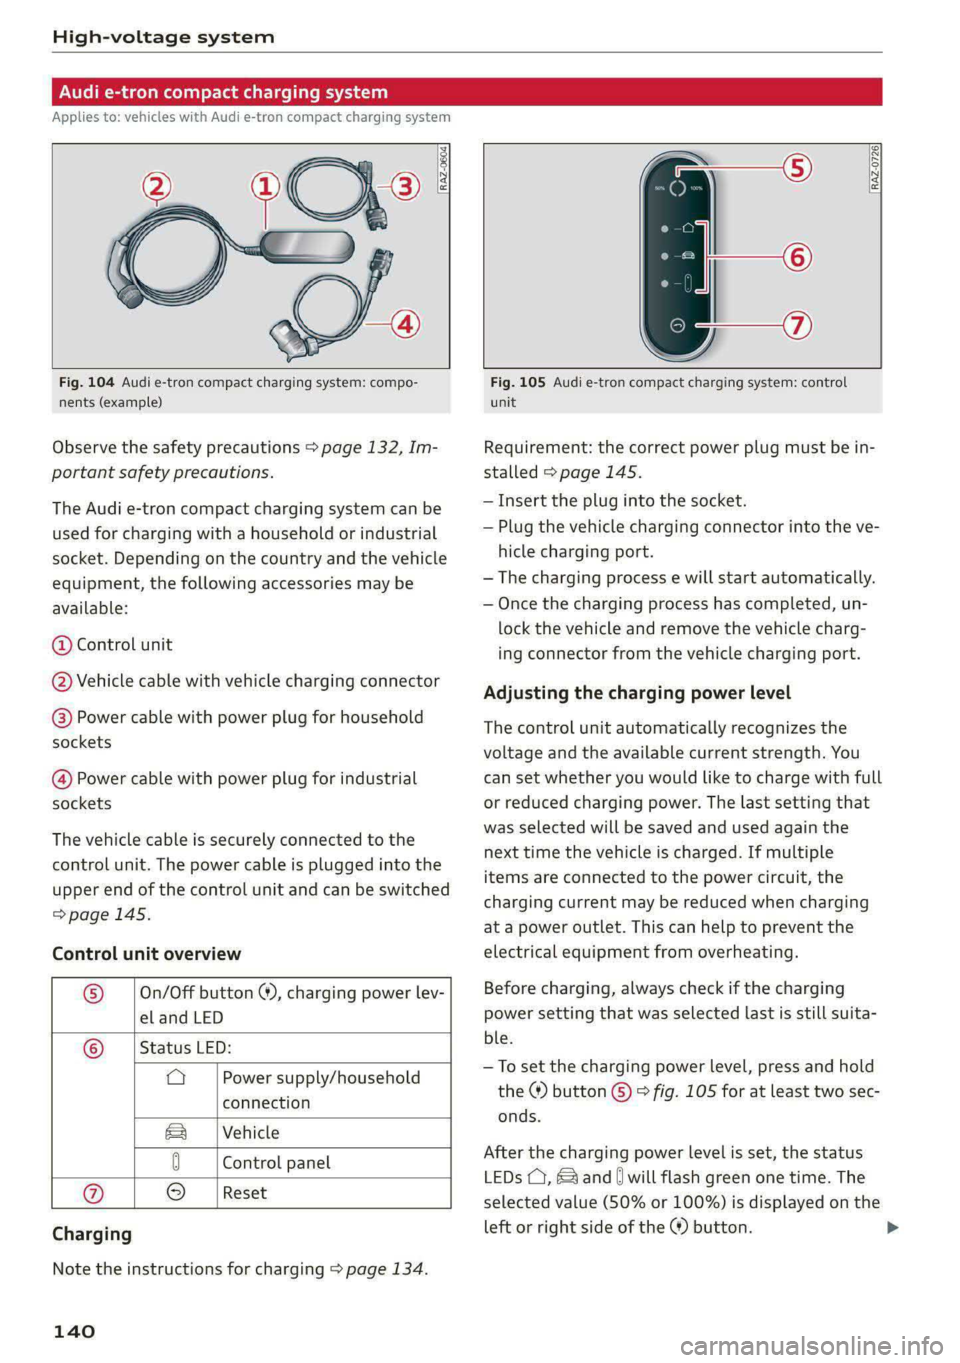
Fig. 104 Audi e-tron compact charging system: compo-
nents (example)
Observe the safety precautions > page 132, Im-
portant safety precautions.
The Audi e-tron compact charging system can be
used for charging with a household or industrial
socket. Depending on the country and the vehicle
equipment, the following accessories may be
available:
@ Control unit
@ Vehicle cable with vehicle charging connector
@) Power cable with power plug for household
sockets
@ Power cable with power plug for industrial
sockets
The vehicle cable is securely connected to the
control unit. The power cable is plugged into the
upper end of the control unit and can be switched
=>page 145.
Control unit overview
© | On/Off button @, charging power lev-
el and LED
© _ |Status LED:
a Power supply/household
connection
& | Vehicle
0 Control panel
@ 9
Charging
Reset
Note the instructions for charging > page 134.
140
Fig. 105 Audi e-tron compact charging system: control
unit
Requirement: the correct power plug must be in-
stalled > page 145.
— Insert the plug into the socket.
— Plug the vehicle charging connector into the ve-
hicle charging port.
— The charging process e will start automatically.
— Once the charging process has completed, un-
lock the vehicle and remove the vehicle charg-
ing connector from the vehicle charging port.
Adjusting the charging power level
The control unit automatically recognizes the
voltage and the available current strength. You
can set whether you would like to charge with full
or reduced charging power. The last setting that
was selected will be saved and used again the
next time the vehicle is charged. If multiple
items are connected to the power circuit, the
charging current may be reduced when charging
at a power outlet. This can help to prevent the
electrical equipment from overheating.
Before charging, always check if the charging
power setting that was selected last is still suita-
ble.
—To set the charging power level, press and hold
the ® button © © fig. 105 for at least two sec-
onds.
After the charging power level is set, the status
LEDs (, and [) will flash green one time. The
selected value (50% or 100%) is displayed on the
left or right side of the ® button.
Page 145 of 362

4N0012721BF
High-voltage system
Indicator lights Meaning Solution
© Red The control unit has atechni- | Disconnect the charger from the power
O A Off cal malfunction. The charging | supply and reconnect it after 60 seconds.
O @B oft process has been interrupted. |If the malfunction continues, have the
@ 30 Red control unit checked by an authorized
Audi dealer or authorized Audi Service Fa-
© Off cility.
© Red The control unit has a techni- | Disconnect the charger from the power
O QO Off cal malfunction (self-test supply and reconnect it after 60 seconds.
O B oft failed). The charging process | If the malfunction continues, have the
. has been interrupted. control unit checked by an authorized
@ 0 Flashing red Audi dealer or authorized Audi Service Fa-
9 Off cility.
© Red The charging infrastructure of | Have the control unit checked by an au-
@ QC Red the power supply/household | thorized Audi dealer or authorized Audi
@ Bre connection is insufficient: the | Service Facility, and have the power sup-
O 0 of ground conductor is interrupt- | ply/household connection checked by a
ed or not present. The ground | qualified electrician. Do not use the pow-
© Off conductor monitor has inter- | er supply/household connector until the
rupted the charging process. | malfunction is corrected.
© Red The indicator light in the reset | Have the control unit replaced by an au-
@ X Red button on the control unit is | thorized Audi dealer or authorized Audi
@ & Red faulty. The charging process _| Service Facility.
@ 6 Red has been interrupted.
9 Off
O Red The control unit has detected | Press and hold the © button for at least
@ X Red residual current. The charging | two seconds. If the malfunction contin-
@ 2 Red process has been interrupted. | ues, have the control unit checked by an
@ 6 Red authorized Audi dealer or authorized Audi
Service Facility, and have the power sup-
9 Flashing red ply/household connection checked by a
qualified electrician.
O Red The charging infrastructure is | Disconnect the charger from the power
© 1 Flashing red wired incorrectly. The charging | supply. Have the power supply/household
© @ Flashing red process has been interrupted. | connection checked by a qualified electri-
© {) Flashing red can.
9 Off
O Red The control unit has atechni- | Disconnect the charger from the power
@ A Red cal malfunction. Possible supply and reconnect it after 60 seconds.
@ Bred cause of the malfunction: soft- | If the malfunction continues, have the
@ & Red ware error or the load relay control unit checked by an authorized
© Red has been switched incorrectly. | Audi dealer or authorized Audi Service Fa-
The charging process has been
interrupted.
cility, and have the power supply/house-
hold connection checked by a qualified
electrician.
143
Page 161 of 362
4N0012721BF
Driving information
After completing a lap, the difference between
the last lap and the previous best lap time will be
indicated with a “~” or “+”.
Pausing timing and displaying a split time
> To insert a pause @ select Pause in the menu.
> To resume timing, select Resume in the menu.
> To display a split time, select Split time in the
menu. The split time appears for approxi-
mately ten seconds in the instrument cluster.
The current lap timing will continue running.
Canceling lap timing
The timing of the current lap will stop. The lap
time will be erased and will not be included in the
statistics.
>» Select Cancel lap in the menu.
Resetting the time
> Select Reset lap times in the menu.
@ Tips
—A maximum of 99 lap times can be meas-
ured.
— If timing is paused, you can continue it later
even if you switch the ignition off.
— Saved lap times cannot be individually de-
leted from the total results.
— The saved lap timer values will remain after
switching the ignition off.
Lap stati
Applies to: vehicles with lap timer
Displaying lap statistics
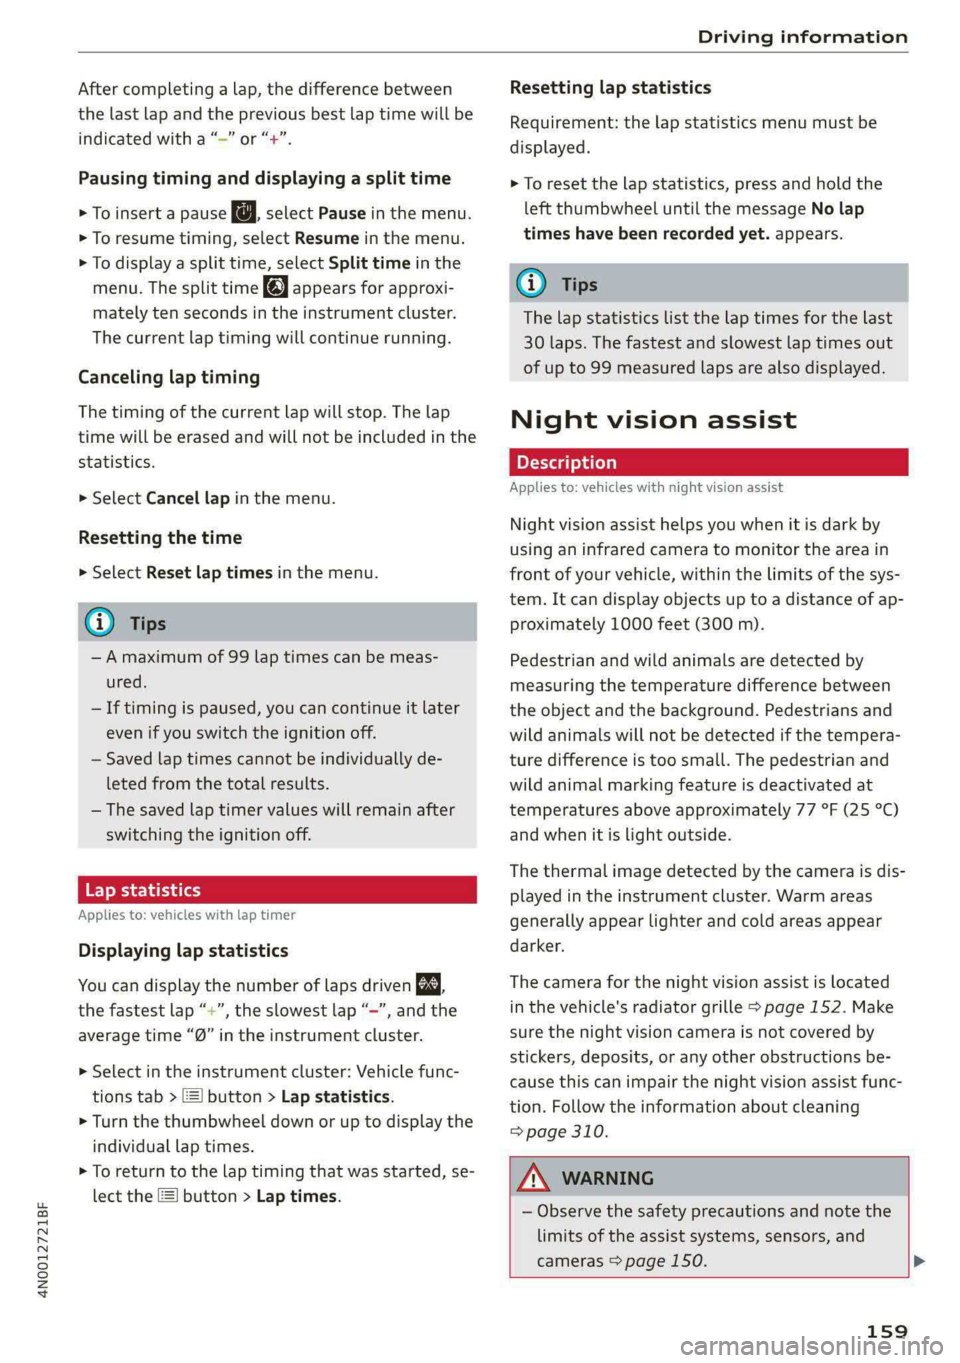
You can display the number of laps driven ES
the fastest lap “+”, the slowest lap “~”, and the
average time “®” in the instrument cluster.
> Select in the instrument cluster: Vehicle func-
tions tab > I button > Lap statistics.
> Turn the thumbwheel down or up to display the
individual lap times.
> To return to the lap timing that was started, se-
lect the [J button > Lap times.
Resetting lap statistics
Requirement: the lap statistics menu must be
displayed.
> To reset the lap statistics, press and hold the
left thumbwheel until the message No lap
times have been recorded yet. appears.
@) Tips
The lap statistics list the lap times for the last
30 laps. The fastest and slowest lap times out
of up to 99 measured laps are also displayed.
Night vision assist
Applies to: vehicles with night vision assist
Night vision assist helps you when it is dark by
using an infrared camera to monitor the area in
front of your vehicle, within the limits of the sys-
tem. It can display objects up to a distance of ap-
proximately 1000 feet (300 m).
Pedestrian and wild animals are detected by
measuring the temperature difference between
the object and the background. Pedestrians and
wild animals will not be detected if the tempera-
ture difference is too small. The pedestrian and
wild animal marking feature is deactivated at
temperatures above approximately 77 °F (25 °C)
and when it is light outside.
The thermal image detected by the camera is dis-
played in the instrument cluster. Warm areas
generally appear lighter and cold areas appear
darker.
The camera for the night vision assist is located
in the vehicle's radiator grille > page 152. Make
sure the night vision camera is not covered by
stickers, deposits, or any other obstructions be-
cause this can impair the night vision assist func-
tion. Follow the information about cleaning
=> page 310.
ZX WARNING
— Observe the safety precautions and note the
limits of the assist systems, sensors, and
cameras > page 150. >
159
Page 172 of 362

Driver assistance
Overview of displays and lane guidance
limitations
The availability of lane guidance is shown with in-
dicator lights and with arrows @) > page 167,
fig. 119 in the Driver assistance display.
> 4] - Lane guidance is active.
Bl - this indicator light turns on if the limits of
the system have been reached (for example, the
system’s steering force is not sufficient to handle
tight curves). Take over steering.
ri turns white, lane guidance is switched on
but is not active. This may occur due to the fol-
lowing system limits or situations:
— The necessary lane marker lines have not been
detected (for example, in a construction zone
or because the lines are obstructed by snow,
dirt, water, or lighting)
— The lane is too narrow or too wide
— The curve is too narrow
— Visibility is obstructed by a rise or dip.
— The driver's hands are not on the steering
wheel
— The turn signal was activated.
Steering intervention request
If no steering activity is detected or the limits of
the system are reached, the driver steering inter-
vention request will alert the driver using audio
and visual signals, such as B or B. Take over
the steering and keep your hands on the steering
wheel so that you will be ready to steer at any
time. The system will become inactive after a
short time and will only be active again later.
If the driver does not take over steering, adaptive
cruise assist will be canceled. If the vehicle is
equipped with emergency assist and it is ready to
function, it will be activated if possible
=> page 186.
Z\ WARNING
Observe the safety precautions and note the
limits of the assist systems, sensors, and
cameras > page 150.
170
G) Tips
— Always keep your hands on the steering
wheel so you can be ready to steer at any
time. The driver is always responsible for
adhering to the regulations applicable in
the country where the vehicle is being oper-
ated.
— Audi recommends only switching on lane
guidance on well-constructed roads.
—The > fig. 122 button switches lane guid-
ance availability and the lane departure
warning on or off simultaneously, if lane
guidance is preset in the adaptive cruise as-
sist settings.
Predictive control
Applies to: vehicles with adaptive cruise assist and efficiency
assist
Fig. 123 Instrument cluster: speedometer: predictive con-
trol display
With predictive control, efficiency assist adapts
the set speed in adaptive cruise control @) based
on detected speed limits and the upcoming
route. Once the system no longer detects any in-
cidents, adaptive cruise control will accelerate
back up to the last speed that the driver set. Af-
ter switching on the ignition, the availability of
predictive control is indicated by a message when
the adaptive cruise assist is first activated.
Incident symbols indicate the situation to which
predictive control is reacting > page 165, Situa-
tion symbols.
Requirements
— Predictive control is switched on in the MMI
> page 174.
— The adaptive cruise assist must be actively reg-
ulating > page 168.
Page 177 of 362

4N0012721BF
Driver assistance
handling will be adjusted from Sport to Moder-
ate and the lane guidance haptic feedback will be
adjusted.
Store last distance - The last distance that was
set will be stored after the ignition is switched
off. If the distance is not stored, distance
(time distance of approximately 1.8 seconds) is
automatically preset every time the ignition is
switched on.
Predictive control > Set speed limit - adaptation
to speed limits can be switched On or Off. Regu-
lation With tolerance can also be selected, if de-
sired.
In this scenario, you may fall below or ex-
ceed the set speed in favor of increased efficien-
cy.
Predictive control > Adjustment to curves along
route - regulation based on the road ahead can
be switched Off or set individually from Slow to
Fast. The setting influences vehicle handling with
predictive control, for example the speed for
driving through curves.
Werle lt
Applies to: vehicles with adaptive cruise assist
if or fal is displayed when there is a malfunc-
tion, the adaptive cruise assist functions may be
unavailable or limited.
A message that indicates the cause and possible
solution may appear with some displays. The
weather conditions may be too poor or a sensor
may be covered. Clean the area in front of the
sensors > page 152 and try to turn on the sys-
tems again later.
If the malfunction remains, drive to an author-
ized Audi dealer or authorized Audi Service Facili-
ty immediately to have the malfunction correct-
ed.
Applies to: vehicles with narrowed road assist
Narrow area
Depending on vehicle equipment, this message
appears in the Driver assistance display if the
adaptive cruise assist is adjusting the speed ina
narrow area, for example a construction zone.
Adaptive cruise assist: Please take over!
Adaptive cruise assist was ended, for example be-
cause the vehicle rolled backwards when starting
on a slight incline even though the system was
active. You must take over further control of the
vehicle.
Adaptive cruise assist: limited availability.
See owner's manual
This message appears when the sensor view is
limited, for example, when weather conditions
are too poor or a sensor is covered. You can
switch on the adaptive cruise assist, but certain
functions such as assistance in narrow areas will
not be available. Under certain circumstances,
some objects may be detected late or may not be
detected at all. Be especially careful. Cleaning
the area in front of the sensors > page 152 may
correct the malfunction.
Distance warning
Applies to: vehicles with distance warning
RAZ-0401
Applies to: vehicles with adaptive cruise assist
Fig. 128 Instrument cluster: display of the current dis-
tance
[RAZ-0400}
Applies to: vehicles with adaptive cruise assist:
Fig. 129 Instrument cluster: distance warning
General information
At speeds above approximately 40 mph (65
km/h), this function measures the distance to the >
175
Page 246 of 362
Radio
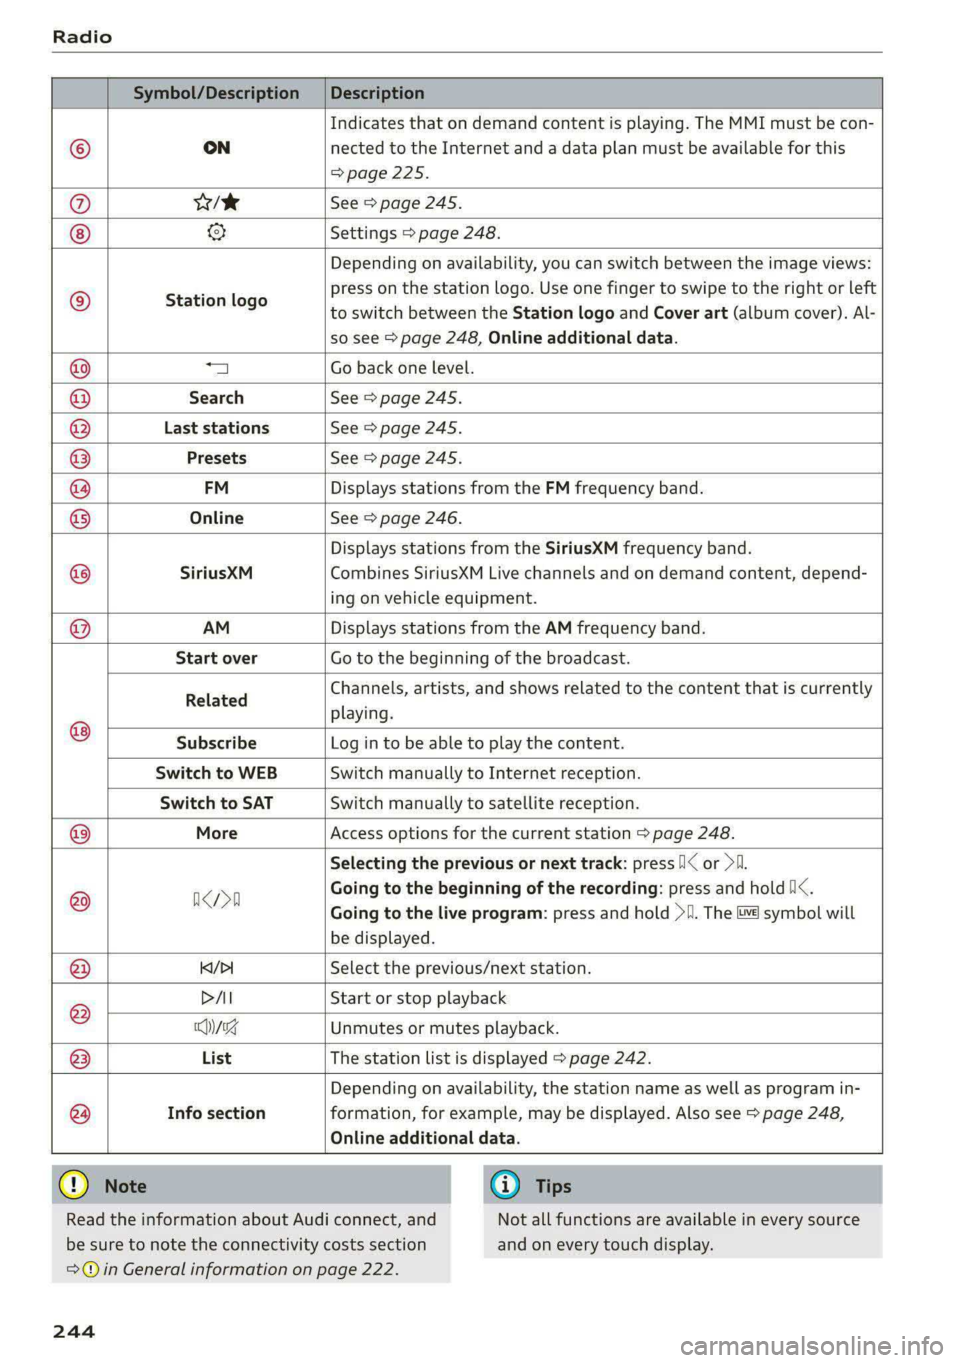
Symbol/Description | Description
Indicates that on demand content is playing. The MMI must be con-
© ON nected to the Internet and a data plan must be available for this
=> page 225.
@ es See > page 245.
& Settings > page 248.
Station logo
Depending on availability, you can switch between the image views:
press on the station logo. Use one finger to swipe to the right or left
to switch between the Station logo and Cover art (album cover). Al-
so see > page 248, Online additional data.
1 Go back one level.
Search See > page 245.
Last stations See > page 245.
Q|
©
O|O|O|O\O\O,
©
Info section
Depending on availability, the station name as well as program in-
formation, for example, may be displayed. Also see > page 248,
Presets See > page 245.
FM Displays stations from the FM frequency band.
Online See > page 246.
Displays stations from the SiriusXM frequency band.
SiriusXM Combines SiriusXM Live channels and on demand content, depend-
ing on vehicle equipment.
AM Displays stations from the AM frequency band.
Start over Go to the beginning of the broadcast.
Related Channels, artists, and shows related to the content that is currently
playing.
Subscribe Log in to be able to play the content.
Switch to WEB Switch manually to Internet reception.
Switch to SAT Switch manually to satellite reception.
@® More Access options for the current station > page 248.
Selecting the previous or next track: press /I< or >I.
@ arn Going to the beginning of the recording: press and hold /i<.
Going to the live program: press and hold >I. The &¥ symbol will
be displayed.
@ K/>| Select the previous/next station.
DAI Start or stop playback
® Chyssg Unmutes or mutes playback.
@ List The station list is displayed > page 242.
@
Online additional data.
Read the information about Audi connect, and
be sure to note the connectivity costs section
G) Tips
Not all functions are available in every source
and on every touch display.
= in General information on page 222.
244
Page 247 of 362
4N0012721BF
Radio
a \-ny dees laaa)
Using intelligent search, you can search for sta-
tion names, frequencies, program types (such as
News), podcasts*, or online radio stations*.
Opening free text search
> Applies to: MMI: Select on the home screen:
RADIO > Source > Search.
Entering search terms
You can enter multiple search terms at once in
any order.
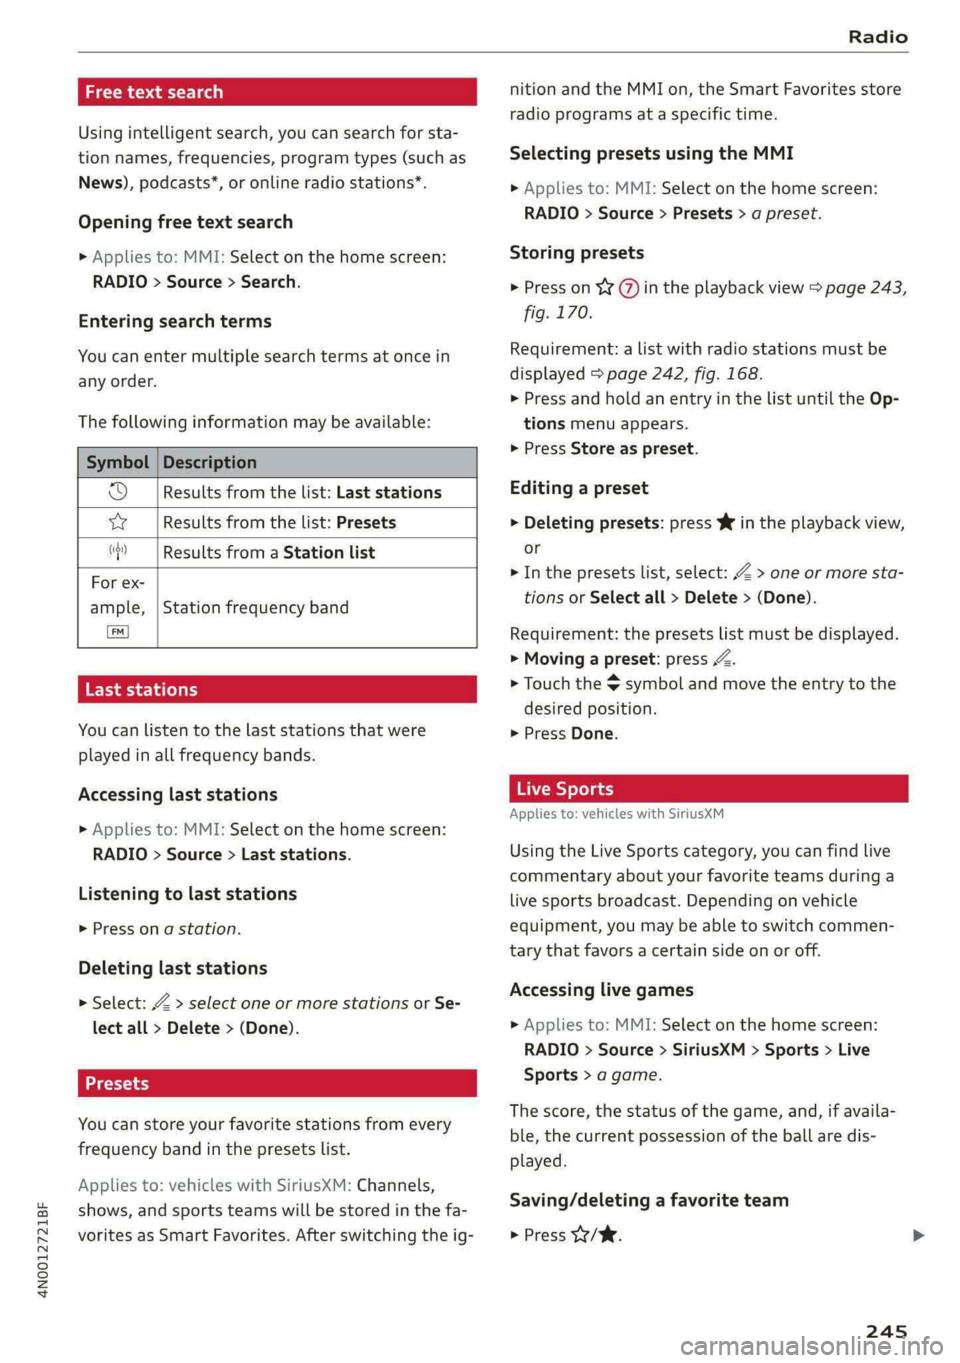
The following information may be available:
Symbol | Description
od Results from the list: Last stations
w Results from the list: Presets
“?) | Results from a Station list
For ex-
ample,
[ew]
Last stations
You can listen to the last stations that were
played in all frequency bands.
Station frequency band
Accessing last stations
> Applies to: MMI: Select on the home screen:
RADIO > Source > Last stations.
Listening to last stations
> Press ona station.
Deleting last stations
> Select: Z > select one or more stations or Se-
lect all > Delete > (Done).
You can store your favorite stations from every
frequency band in the presets list.
Applies to: vehicles with SiriusXM: Channels,
shows, and sports teams will be stored in the fa-
vorites as Smart Favorites. After switching the ig-
nition and the MMI on, the Smart Favorites store
radio programs at a specific time.
Selecting presets using the MMI
> Applies to: MMI: Select on the home screen:
RADIO > Source > Presets > a preset.
Storing presets
> Press on ¥¥ @ in the playback view > page 243,
fig. 170.
Requirement: a list with radio stations must be
displayed > page 242, fig. 168.
> Press and hold an entry in the list until the Op-
tions menu appears.
> Press Store as preset.
Editing a preset
> Deleting presets: press W in the playback view,
or
> In the presets list, select: Z > one or more sta-
tions or Select all > Delete > (Done).
Requirement: the presets list must be displayed.
> Moving a preset: press Z.
> Touch the $ symbol and move the entry to the
desired position.
> Press Done.
Live Sports
Applies to: vehicles with SiriusXM
Using the Live Sports category, you can find live
commentary about your favorite teams during a
live sports broadcast. Depending on vehicle
equipment, you may be able to switch commen-
tary that favors a certain side on or off.
Accessing live games
> Applies to: MMI: Select on the home screen:
RADIO > Source > SiriusXM > Sports > Live
Sports > a game.
The score, the status of the game, and, if availa-
ble, the current possession of the ball are dis-
played.
Saving/deleting a favorite team
> Press W/W.
245
Page 251 of 362
4N0012721BF
Radio
Troubleshooting
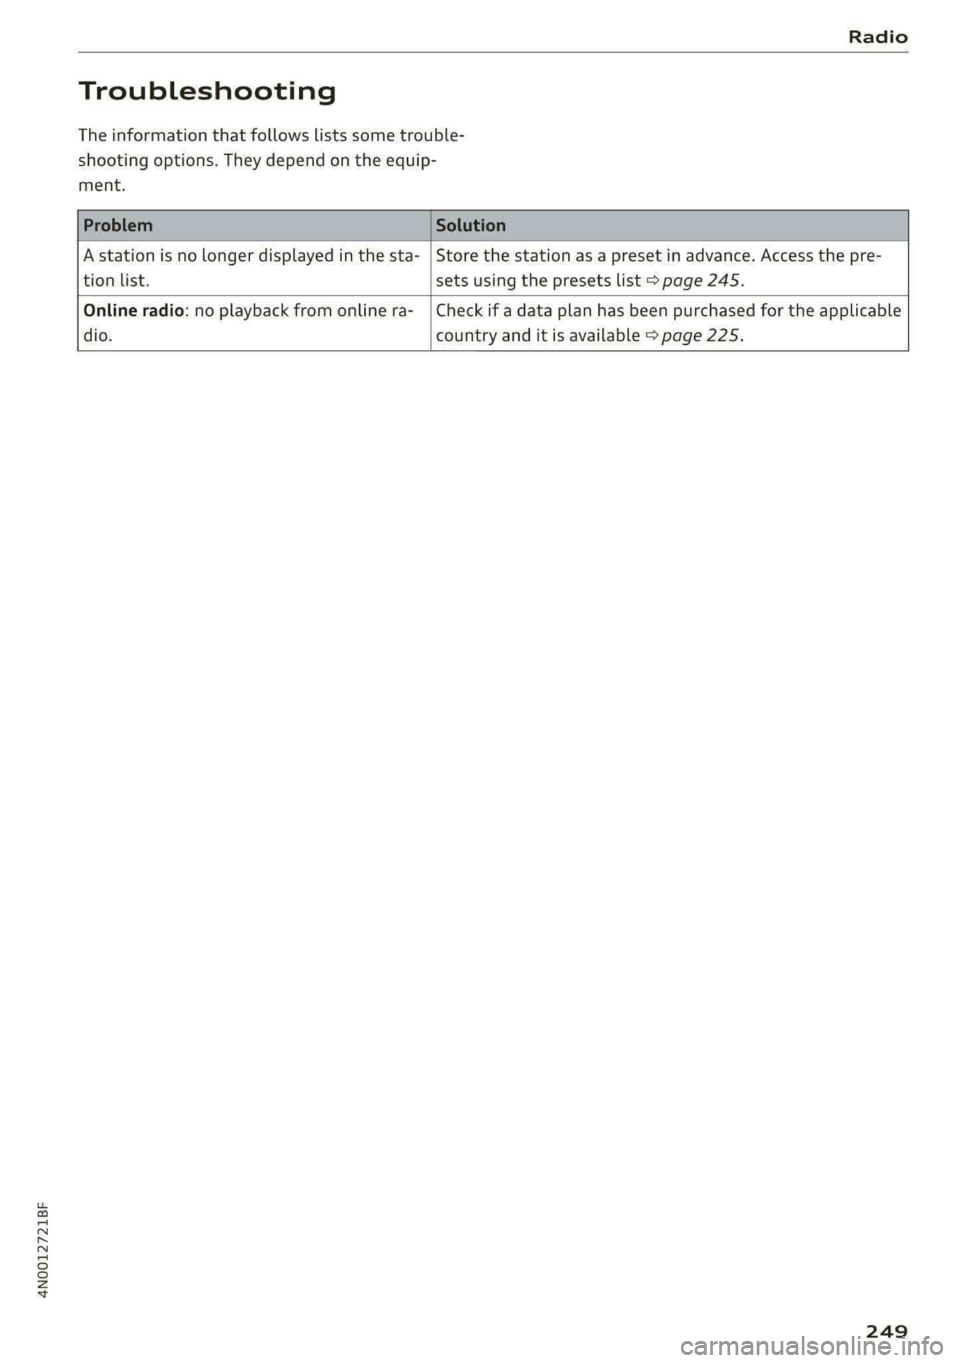
The information that follows lists some trouble-
shooting options. They depend on the equip-
ment.
A station is no longer displayed in the sta- | Store the station as a preset in advance. Access the pre-
tion list. sets using the presets list > page 245.
Online radio: no playback from online ra-_ | Check if a data plan has been purchased for the applicable
dio. country and it is available > page 225.
249
Page 252 of 362

Media
Media
General information
There may be different media sources and con-
nections available depending on the vehicle
equipment. For example, you can play media files
using a connected USB drive or connect your mo-
bile devices to the Audi music interface and oper-
ate them through the MMI.
Media and format restrictions: the MMI (includ-
ing the USB storage device connection) was test-
ed with a variety of products and media on the
market. However, there may be cases where indi-
vidual devices or media and audio/video files may
not be recognized, may play only with restric-
tions, or may not play at all.
Restricted functionality: reset the MMI to the
factory default settings if functionality is restrict-
ed > page 264.
Digital Rights Management: please note that
the
audio/video files are subject to copyright pro-
tection.
Files that are protected by DRM and are identi-
fied with the symbol f@ will not play.
Data security: never store important data on
CDs/DVDs or mobile devices. Audi is not responsi-
ble for damaged or lost files and media.
Loading times: the more files/folders/playlists
there are on a storage medium, the longer it will
take to load. To reduce the amount of time it
takes the audio/video files to load, use a storage
medium that only contains audio/video files, and
create subfolders (for example, for each artist or
album).
Additional information: when playing, audio
files are automatically displayed with any addi-
tional information that is stored (such as the ar-
tist, track and album cover). If this information is
not available on the medium, the MMI will revert
to the local Gracenote metadata database or
search online if necessary. See > page 258, On-
line additional data. However, in some cases, the
additional information may not be displayed.
250
@) Note
Read the information about Audi connect, and
be sure to note the connectivity costs section
=@ in General information on page 222.
DVD drive
General information
Applies to: vehicles with a DVD drive
The functionality of individual storage mediums
may be limited due to the variety of blank CDs/
DVDs available and the various capacities. Audio
CDs or video DVDs with copy protection, CDs/
DVDs that do not conform to the standard, and
multisession CDs may have limited playback or
may not play at all. Audi recommends finalizing
the recording process when creating multisession
CDs. Multisession DVDs are not supported.
(1) Note
To reduce the risk of damaging the drive and
data carriers:
— Always store data carriers in a protective
sleeve and do not expose them to direct
sunlight
— Do not use damaged, dirty, or laminated da-
ta carriers
— Do not use single CDs/-DVDs with a 3.1 inch
(8 cm) diameter, non-circular CDs/DVDs
(shaped CDs), cleaning CDs, and protective
rings
— Never force CDs/DVDs into the drive. Discs
are pulled in automatically.
G) Tips
The thermal protection switch stops playback
temporarily when outside temperatures are
too high.
Page 255 of 362
4N0012721BF
Media
Never leave mobile devices in the vehicle in
extremely high or low temperatures.
@ Tips
— Always follow the information found in
=> page 94.
— When you switch the ignition off, the USB
ports are still supplied with power until the
energy management intervenes.
— Do not use an additional adapter cable or
USB extension cable to connect mobile devi-
ces to the Audi music interface that already
have a cable or that must be connected with
a USB adapter cable (> page 252, fig. 172).
Using an additional adapter or US extension
cable may impair functionality.
— Functionality is not guaranteed for mobile
devices that do not conform to the USB 2.0
specification.
— USB hubs are not supported.
— Video playback through the Audi music in-
terface is not supported on Apple devices
and MTP devices (such as smartphones).
— iPod touch or iPhone malfunctions also af-
fect the operation of the MMI. Reset your
mobile device in these situations.
— Audi recommends updating the iPod touch
or iPhone software to the latest version. Re-
fer to your mobile device owner's manual
for more information.
— The USB adapter on the Audi music inter-
face will support iPod touch or iPhone devi-
ces from the 5th generation or newer with
the lightning connector.
—Aselection of supported devices can be
found in the database for tested mobile de-
vices at www.audi.com/mp3.
Playing media
The following sources can be selected depending
on the vehicle equipment:
— Amazon Alexa > page 251.
— USB device > page 252.
— DVD © page 251.
— External device: you can connect external devi-
ces via Bluetooth and use the Bluetooth audio
player > page 251, or you can connect an exter-
nal device directly to the Audi music interface
=> page 252.
Accessing media
Playing media files using the MMI
> Applies to: MMI: Select on the home screen:
MEDIA > Source > a source. Depending on the
connected device, the symbol for a source may
change. The device name may be displayed (for
example: myPhone).
> Select a track from the categories in the media
center > page 254.
Playing media files using the multifunction
steering wheel
Requirement: a media source must contain me-
dia files > page 253.
> Select the radio/media tab in the instrument
cluster.
> Turn the left thumbwheel to display the play-
list.
> To switch to a different source, press the
button.
> To select a media file or a source, turn and
press the left thumbwheel.
> To switch between radio and media, select in
the instrument cluster: the LE] button > Switch
to radio/Switch to media.
Playing media files using the Rear Seat
Remote
Applies to: vehicles with Rear Seat Remote
Requirement: the Rear Seat Remote must be con-
nected to the MMI > page 28.
> Applies to: Rear Seat Remote: Press MEDIA on
the home screen.
Operation of the available media functions with
the Rear Seat Remote is very similar to operation
in the MMI > page 255.
Z\ WARNING
Observe the safety precautions > page 26,
Rear Seat Remote. >
253