AUDI ALLROAD 2000 Owners Manual
Manufacturer: AUDI, Model Year: 2000, Model line: ALLROAD, Model: AUDI ALLROAD 2000Pages: 306, PDF Size: 9.95 MB
Page 141 of 306
CONT
ROLS AND
EQUIPMENT--------------------
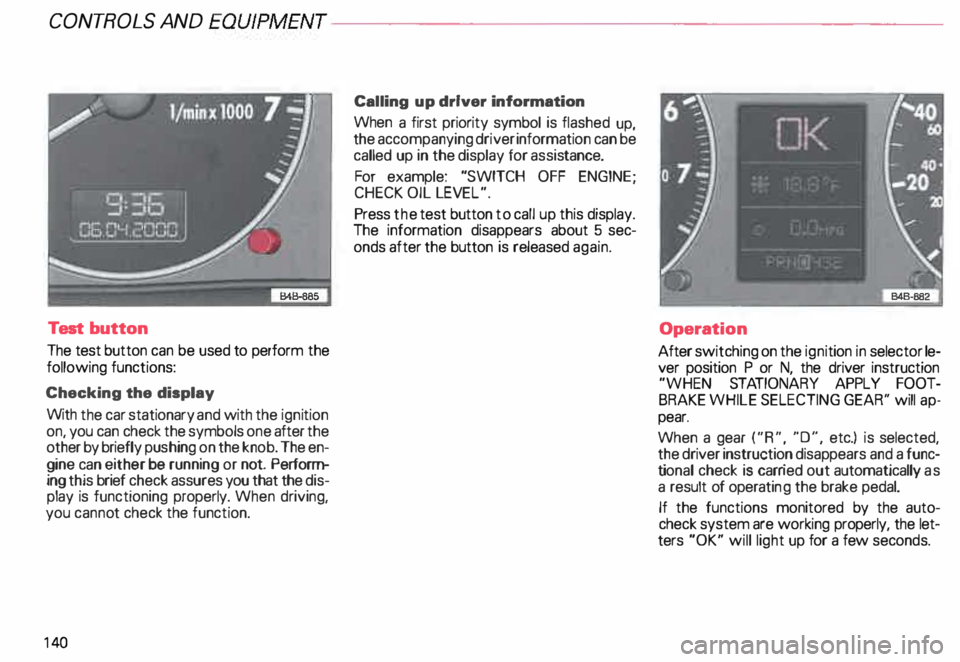
Test button
The test button can be used to perform the
following functions:
Checking the display
With the car stationary and with the ignition
on, you can check the symbols one after the
other by briefly push ing on the knob. The en
gine can either be running or not. Perform
ing this brief check assures you that the dis
play is functioning properly. When driving,
you canno t check the function.
14 0 Calling
up driver information
When a first priority symbol is flashed up,
the accompanying driver information can be
called up in the display for assis tance.
For example: "SWITCH OFF ENGINE ;
CHECK OIL LEVEL".
Press the test button to call up this display.
The information disappears about 5 sec
onds after the button is released again.
Operation
After switching on the ignition in selector le
ver position P or N, the driver instruction
"WHEN STATIONARY APPLY FOOT
BRAKE WHILE SELECTING GEAR'' will ap
pear.
When a gear ("R", "0", etc.) is selected,
the driver instruction disappears and a func
ti onal check is carr ied out automatically as
a result of operati ng the brake pedal.
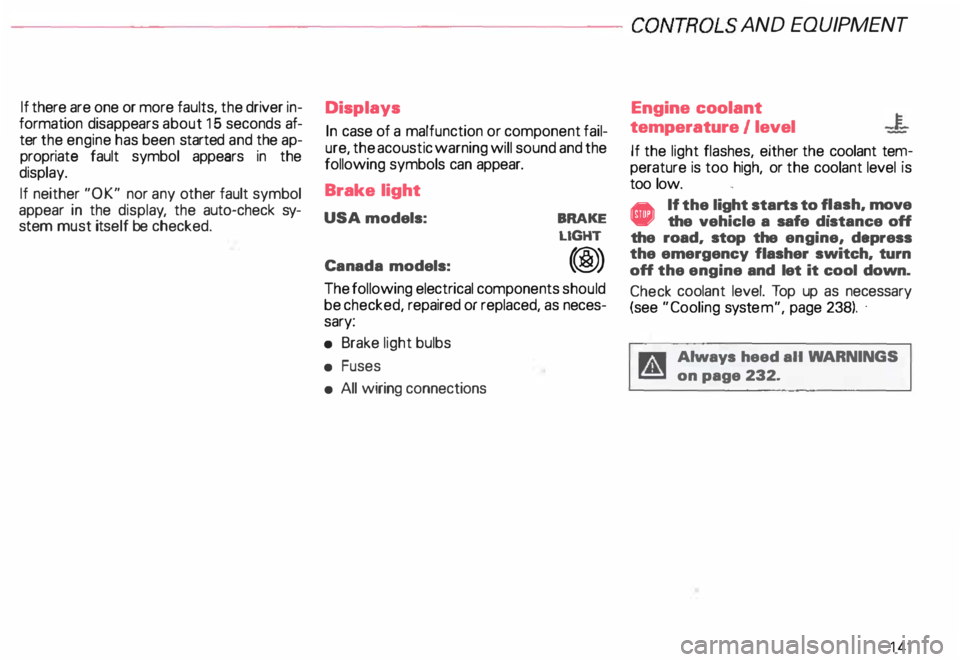
If the functions monitored by the auto
check system are working properly, the let
ters "OK" will light up for a few seconds.
Page 142 of 306
--------------------CONTROLS AND
EQUIPMEN T
If there are one or more faults, the driver in
formation disappears about 15 seconds af
ter the engine has been started and the ap
propriate fault symbol appears in the
display.
If neither "OK" nor any other fault symbol
appear in the displa y, the auto-check sy
stem must itself be checked. Displays
In case of a malfunction or component fail
ure, the acoustic warning will sound and the
following symbols can appear.
Brake light
USA models:
Canada models: BRAKE
LIGHT
(@)
The following electrical components should
be checked, repaired or replaced, as neces
sary:
• Brake light bulbs
• Fuses
• All wiring connections Engine
coolant
temperature /level
If the light flashes, either the coolant ten:
perature is too high, or the coolant level1s
too low.
• If the light starts to f_lash, move
the vehicle a safe d1stance off
the road, stop the engine, depress
the emergency flasher switch, turn
off the engine and let it cool down.
Check coolant level. Top up as necessary
(see "Cooling system", page 238). ·
g Always heed all WA RNINGS
� on page 232.
141
Page 143 of 306
CONT
ROLS AND EQUIPMENT---------------------
�W ARNING
• The engine compartment of any
motor vehicle is a potentially haz
ardous area. Before you check any
thing in the engine compartment,
stop the engine and let it cool
down. Always exercise extreme
caution when working under the
engine hood. Heed all of the
WA RNINGS on page 232.
• To reduce the risk of being
burned, never open the hood if you
see or hear steam or coolant es
caping from the engine compart
ment. Wait until no steam or cool
ant can be seen or heard before
carefully opening the hood.
• Never touch the radiator fan.
The auxiliary fan is temperature
controlled and can switch on sud
denly.
14 2 �
WARNING continued
• Reduce the risk of scalding from
hot coolant by following these
steps:
If the coolant reservoir cap must
be removed. wait until the en
gine has cooled down.
- Protect face, hands. and arms
from escaping fluid and steam
by cov ering the cap with a large.
thick rag.
Tu rn the cap slowly and very
carefully in a counter-clockwise
direction while applying light.
downward pressure on the top
of the cap.
- To help avoid being burned. do
not spill antifreeze or coolant on
the exhaust system or hot en
gine parts. Under some condi·
tions. the ethylene glycol in en·
gine coolant can catch fire. •
If a visual check shows the coolant level
and the V-belt normal, and the warning light
still does not go out, do not continue
driving. See your authorized Audi Dealer.
• If the coolant level and the V-belt are nor
mal, the malfunc tion may be in the auxiliary
radiator fan. You can continue driving to the
nearest authorized Audi Dealer. The wind
from the moving vehicle and the main radia
tor fan driven by the V-belt will be enough to
keep the angine cool. However, avoid idling
for a long time or driving very slowly.
If the V-belt is torn, the main radiator fan, the
power steering and the gener ator will also
not work.
Obtain expert assistance.
Refer to "Coolant temperature gauge" on
page 118 for detai ls.
Page 144 of 306
---------------------CONTROLS AND EQUIPMENT
Engine oil pressure
If this warning light comes on, 1t Indi cates
that the engine oil pressure is too low.
• Stop the engine immediately,
check the engine oil level and
add oil if necessary.
If engine oil level is normal but the
light comes on again, do not con
tinua to operate the vehicle. This
could damage the engine.
Tu rn the engine off and contact the nearest
Audi Dealer for assistance.
The oil pressure warning light is not
an indicator for low engine oil level.
To check the oil level, always use
dipstick (sea page 235).
Make it a habit to have the engine oil
level checked with every fuel filling.
A Always heed all WA RNINGS
� on page 232. Brake
pads worn
0
See your Audi Dealer promptly to have front
and rear brake pads checked and replaced
as necessary.
Headlights I tail lights
�
Check, repair or replace:
• Light bulbs
• Fuses
• Electrical connections.
Washer fluid
Replenish the windshield washer
fluid in the container (see page 250).
Fuel Pull into the next filling station and
fill up. Battery
voltage too high
t::::1
or too low
See your Audi Dealer promptly to locate and
correct the problem. The battery may be run
down, the generator may be overcharging,
or the V-belt tension may need adjustment.
The voltage in the electrical system is dis
played on the voltmeter. See page 120 for
additional details.
143
Page 145 of 306

CONTROLS AND EQUIPMENT---------------------
Check
engine oil level �N
Check the engine oil level as soon as pos
sible by using the dip stick. Add engine oil
accordingly. See page 236.
Engine oil sensor
defective �ENOOR
Contact an authorized Audi dealer and have
the engine oil sensor inspected.
Speed warning 8 or 8
The stored speed h·as been exceeded. Slow
down or set new speed.
Dynamic headlight dimmer �(D
control• not functioning =1.
•
Have your authorized Audi dealer repair the
headlight dimmer control.
Refer to "Xenon lights" on page 157 for de
tails.
14 4 Speed
warning
You can store a road speed which is not to
be exceeded. As soon as you exceed that
speed by approximately 6 miles (1 0 kilome
ters), a warning tone sounds and "MPH"
("k m/h ") appears in the disp lay.
Nota Always monitor the vehicle speed by
means of the speedometer. The speed
warning device may only be used as a re
minder not to exceed the posted speed
limit. The
following describes how to store or de
lete speed warnings 1 and 2.
Speed warning 1
The ''MPH" ("km/h ") disappears when you
reduce the speed below the stored speed.
Also, the ''MPH" goes out when the driving
speed increases approximately 25 mph
(40 km/h) over the set speed for at least
1 0 seconds. The stored speed is not de
leted.
Selec ting speed limit
Press the test button for the Auto-Check
control briefly when the desired speed is in
dicated on the speedometer. The speed
warning symbol lights up when the button
is released to confirm that the selected
speed has been stored.
The set speed limit remains stored until
another speed is selected by pressing the
button again or until the memory is cleared.
Page 146 of 306
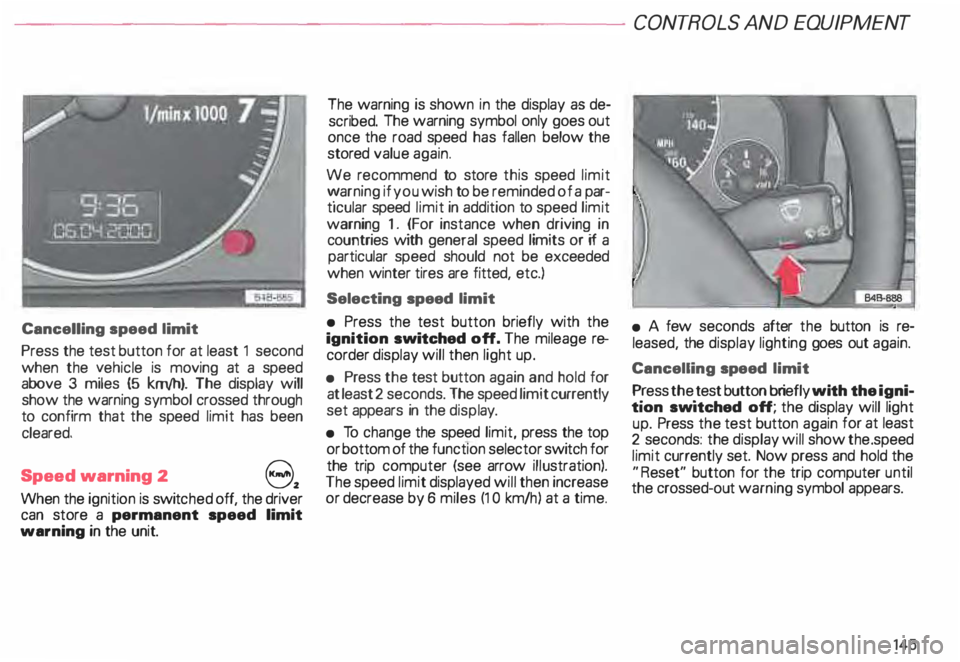
Cancelling speed limit
Press the test button for at least 1 second
when the yehicle is moving at a speed
above 3 miles (5 km/h). The display will
show the warning symbol crossed through
to confirm that the speed limit has been
cleared.
Speed warning 2
82
When the ignition is switc hed off, the driver
can store a permanent speed limit
warning in the unit. The
warning is shown in the display as de
scribed. The warning symbol only goes out
once the road speed has fallen below the
stored value again.
We recommend to store this speed limit
v:' arning if you wish to be reminded of a par
ticular speed limit in addition to speed limit
warning 1. (For instance when driving in
countries with general speed limits or if a
particular speed should not be exceeded
when winter tires are fitted, etc.)
Selecting speed limit
• Press the test button briefly with the
ignition switched off. The mileage re
corder display will then light up.
• Press the test button again and hold for
at least 2 seconds. The speed limit currently
set appears in the disp lay.
• To change the speed limit, press the top
or bottom of the function selector switch for
the trip computer (see arrow illustration).
The speed limit displayed will then increase
or decrease by 6 miles (1 0 km/h ) at a time. CONT
ROLS AND EQUIPMENT
• A few seconds after the button is re
leased, the display lighting goes out again.
Cancelling speed limit
P _ress the .test button briefly with the igni
tion sw1tched off; the display will light
up. Press the test button again for at least
2 seconds: the display will show the .speed
limit currently set. Now press and hold the
"R eset" button for the trip computer until
the crossed-out warning symbol appears.
145
Page 147 of 306
CONT
ROLS AND EQUIPMENT---------------------
Trip computer
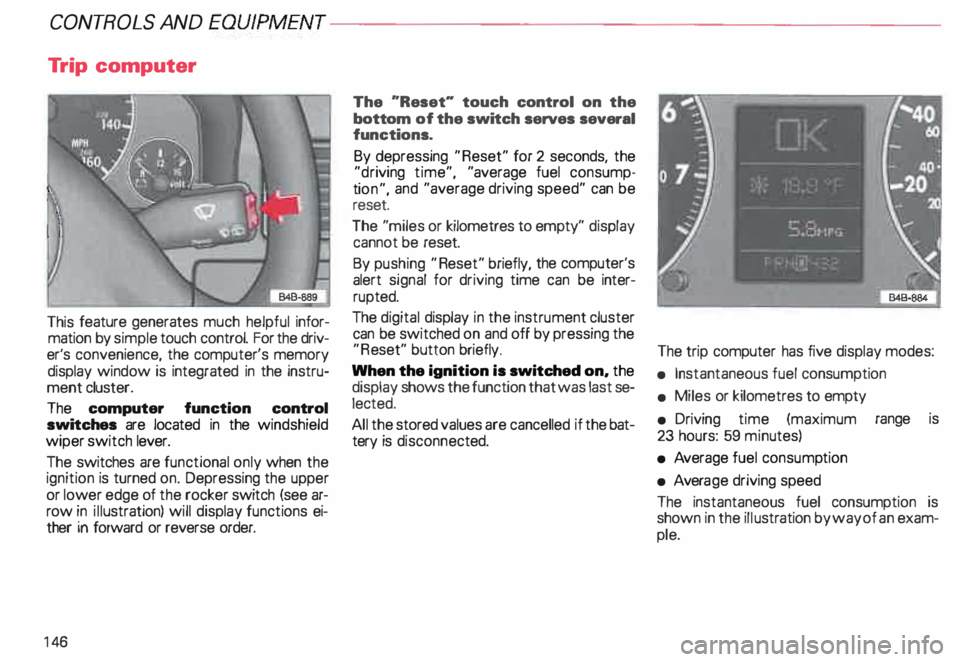
This feature generates much helpful infor
mation by simple touch control. For the driv
er's convenience, the computer's memory
display window is integrated in the instru
ment cluster.
The computer function control
switches are located in the windshield
wiper switch lever.
The switches are functional only when the
ignition is turned on. Depressing the upper
or lower edge of the rocker switch (see ar
row in illustration) will display functions ei
ther in forward or reverse order.
14 6 The
"Reset" touch control on the
bottom of the switch serves several
functions.
By depressing "Reset" for 2 seconds, the
"d riving time", "average fuel consump
ti on", and "average driving speed" can be
reset.
The "miles or kilometres to empty" display
cannot be reset.
By pushing "Reset" briefly, the computer's
alert signal for driving time can be inter
rupted.
The digital display in the instrument cluster
can be switched on and off by pressing the
"R eset" button briefly.
When the ignition is switched on, the
display shows the function that was last se
lected.
All the stored values are cancelled if the bat
tery is disconne cted. The
trip computer has five display modes:
• Instantaneous fuel consumption
• Miles or kilometres to empty
• Driving time (maximum range is
23 hours: 59 minutes)
• Average fuel consump tion
• Avera ge driving speed
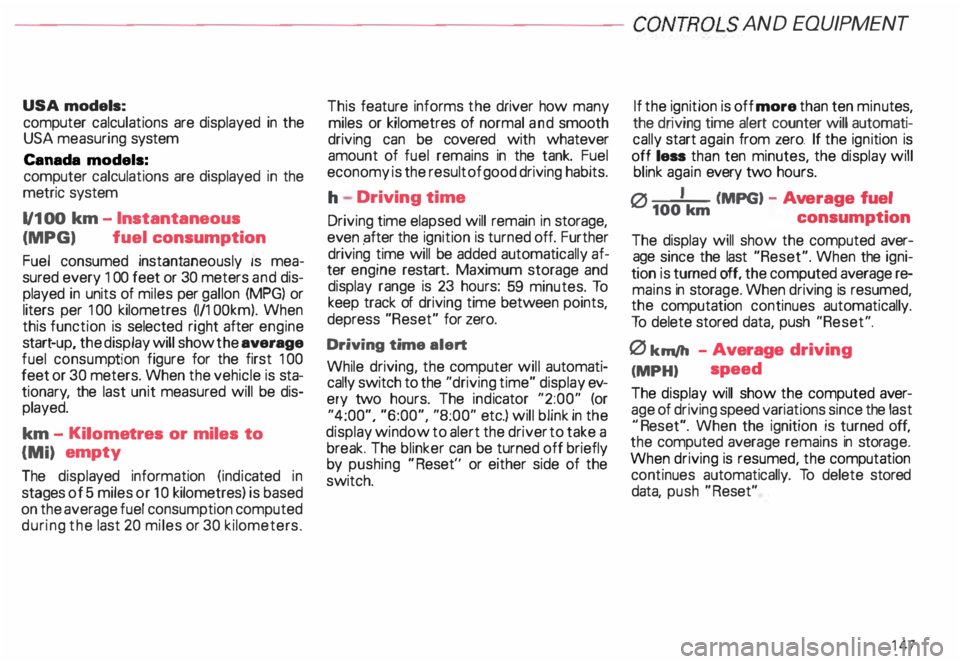
The instantaneous fuel consumption is
shown in the illustration by way of an exam
ple.
Page 148 of 306
---------------------CONTROLS AND
EQUIPMEN T
USA models:
computer calculations are displayed in the
USA measuring system
Canada models:
computer calculations are displayed in the
metric system
1/1 00 km -Instantaneous
(MPG) fuel
consumption
Fuel consumed instantaneously IS mea
sured every 1 00 feet or 30 meters and dis
played in units of miles per gallon (MPG) or
liters per 100 kilometres (1/1 OOkm). When
this function is selected right after engine
start -up, the display will show the average
fuel consump tion figure for the first 100
feet or 30 meters. When the vehicle is sta
tionar y, the last unit measured will be dis
played.
km -Kilome tres or miles to
{Mi) empty
The displa yed information (indicated in
stages of 5 miles or 1 0 kilometres) is based
on the average fuel consumption computed
during the last 20 miles or 30 kilometers. This
feature informs the driver how many
miles or kilometres of normal and smooth
driving can be covered with whatever
amount of fuel remains in the tank. Fuel
economy is the result of good driving habits.
h Driving time
Driving time elapsed will remain in storage,
even pfter the ignition is turned off. Further
driving time will be added automat ically af
ter engine restart. Maximum storage and
display range is 23 hours: 59 minutes. To
keep track of driving time between points,
depress "Reset" for zero.
Driving time alert
While driving, the computer will automati
cally switch to the "driving time" display ev
ery two hours. The indicator "2:00" (or
"4:00", "6:00", "8:00" etc.) will blink in the
display window to alert the driver to take a
break. The blinker can be turned off briefly
by pushing "Reset'' or either side of the
switch. If the
ignition is off more than ten minu tes,
the driving time alert counter will automati
cally start again from zero. If the ignition is
off less than ten minutes, the display will
blink again every two hours.
0 I (MPG) -Ave rage fuel
100 km
consumption
The display will show the computed aver
age since the last "Reset". When the igni
tion is turned off, the computed average re
mains in storage. When driving is resumed,
the computation continues automatically.
To delete stored data, push "Reset".
0 km/h -Average driving
(MPH) speed
The display will show the computed aver
age of driving speed variations since the last
"R eset". When the ignition is turned off,
the computed average remains in stora ge.
When driving is resumed, the computation
continues automatically. To delete stored
data, push "Reset"
147
Page 149 of 306
CONTROLS ANDEO�PMENT-----------------------------------------
Switches
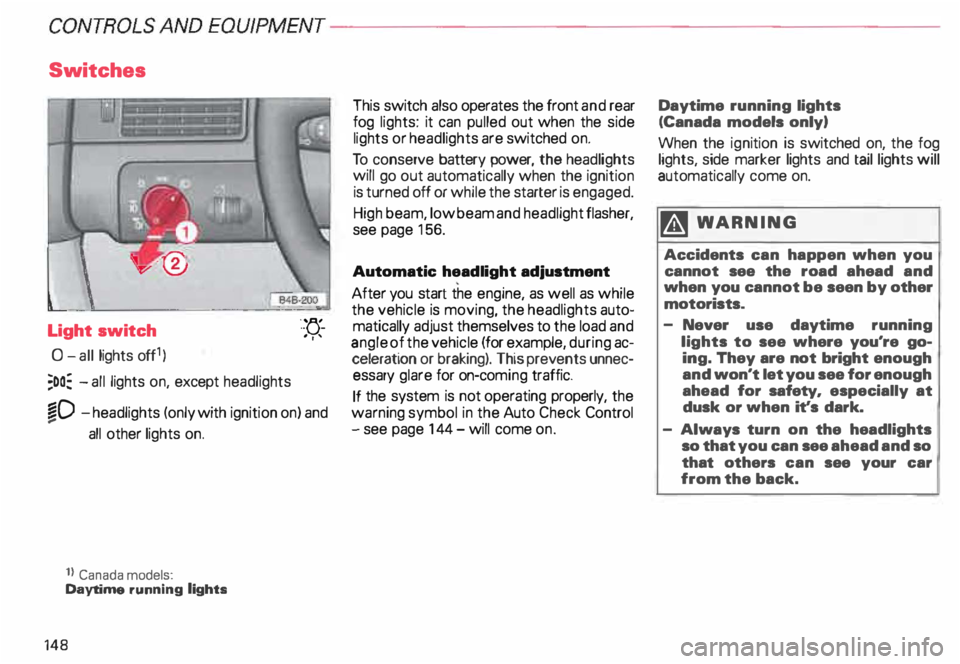
Light switch
0- all lights off1)
;oo: -all lights on, except headlights "-
YJ.-
. ''
�D -headlights (only with ignition on) and
...
all other lights on.
1} Canada models:
Daytime running lights
148 This
switch also operates the front and rear
fog lights: it can pulled out when the side
lights or headlights are switched on.
To conserve battery power, the headlights
will go out automatically when the ignition
is turned off or while the starter is engaged.
High beam, low beam and headlight flasher,
see page 156.
Automatic headlight adjustment
After you start the engine, as well as while
the vehicle is moving, the headlights auto
matically adjust themselves to the load and
angle of the vehicle (for example, during ac
celeration or braking). This prevents unnec
essary glare for on-com ing traffic.
If the system is not operating properly, the
warning symbol in the Auto Check Control
- see page 144- will come on. Daytime
running lights
(Canada models only)
When the ignition is switched on, the fog
lights, side marker lights and taillights will
automatically come on.
�W ARNING
Accidents can happen when you
cannot see the road ahead and
when you cannot be seen by other
motorists.
- Never use daytime running
lights to see where you're go
ing. They are not bright enough
and won't let you see for enough
ahead for safety, especially at
dusk or when it's dark.
- Always turn on the headlights
so that you can see ahead and so
that others can see your car
from the back.
Page 150 of 306
Front
fog lights
�D
Do not try to turn the light switch toward the
front fog light symbol.
With ignition on, the fog lights can be
switched on in combination with low
beams.
Tu rn the light switch to the headlight posi
tion and pull the switch out to the fint
stop.
The front fog light symbol next to the switch
will light up.
Please observe local regulations when us
ing the fog lights.
Rear fog light
0$
Do not try to turn the light switch toward tlie
rear fog light symbol.
With ignition on. the rear fog light can be
switc hed on in combination with low
beams.
Tu rn the light switch to the headlight posi
tion and pull the switch out to the second
stop. The front
and rear fog light symbols next to
the switch will light up.
The vehicle is equipped with one rear fog
light, located on the left side in the rear lid
of the vehicle. The front fog lights will come
on automatically when the rear fog light is
switched on.
The rear fog light can distract drivers behind
you, so it must only be switched on in condi
tions of very poor visibil ity. Please observe
local regulations when using the rear fog
light.
General note
If the lights are left on after the key has been
taken out of the ignition lock, a buzzer
sounds when the driver's door is opened.
This is your reminder to switch off the ligHts
before leaving the vehicle. CONT
ROLS AND EQUIPMEN T
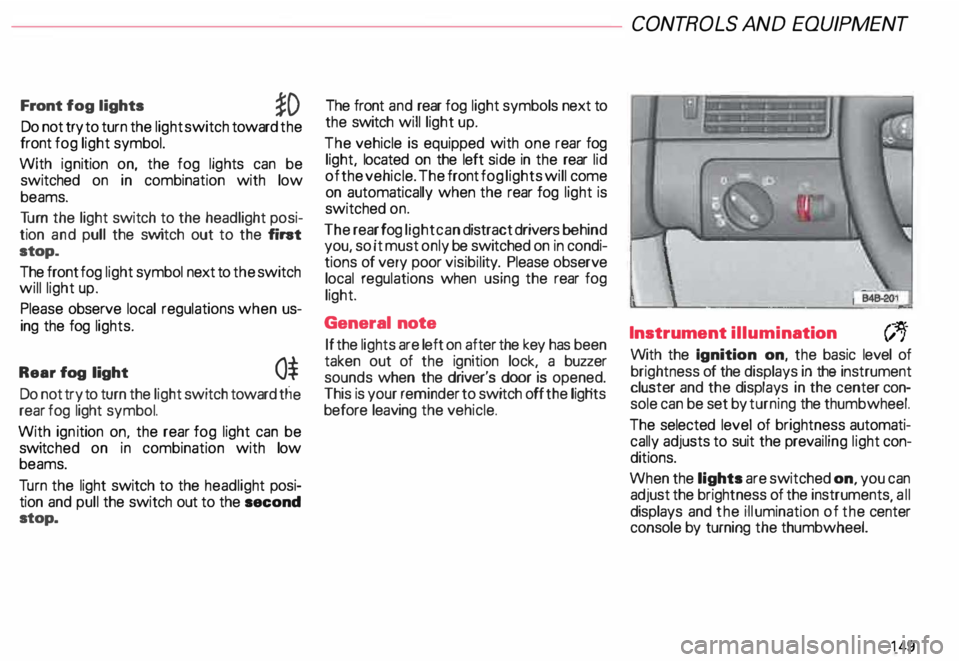
Instrument illumination
(;,.
With the Ignition on, the basic level of
brightness of the displays in the instrument
cluster and the displays in the center con
sole can be set by turning the thumbwheel.
The selected level of brightness automati
cally adjusts to suit the prevailing light con
ditions.
When the lights are switched on, you can
adjust the brightness of the instruments all
displays and the illumination of the ce�ter
console by turning the thumbwheel.
149