AUDI ALLROAD 2000 Manual PDF
Manufacturer: AUDI, Model Year: 2000, Model line: ALLROAD, Model: AUDI ALLROAD 2000Pages: 306, PDF Size: 9.95 MB
Page 71 of 306
CONTROLS ANDEQWPMENT-----------------------------------------
Opening and closing
Front door windows
• To open the driver's or the front passen
ger's door window push down the front of
switch A orB briefly. The windows will open
automatically (one-touch down fea
ture).
If yo u push or pu ll the front of switch A re
spectively B while the window is opening,
the window will stop where it is.
To close, pull up the front of switch A re
spectively B briefly. The windows will close
automatically (one-touch up feat ure).
If you push or pull the front of switch A re
spectively 8 while the window is opening,
the window will stop where it is.
The automatic open I close feature for the
front door windows is only available when
the ignition is switched on.
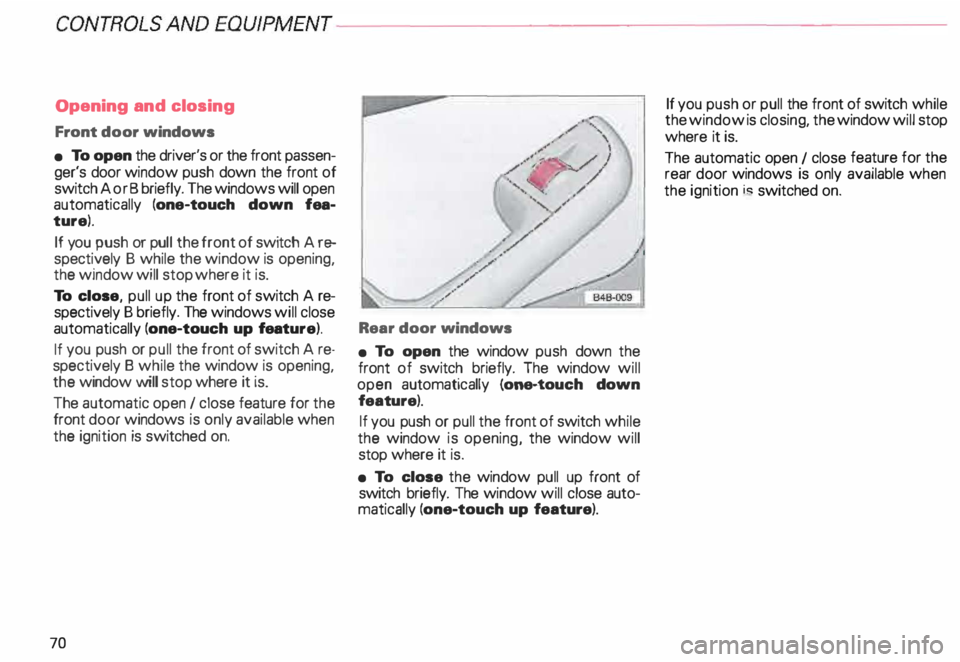
70 Rear door
windows
• To open the window push down the
front of switch briefly. The window will
open automatically (one-touch down
feature).
If you push or pull the front of switch while
the window is opening, the window will
stop where it is.
• To close the window pull up front of
switch briefly. The window will close auto
matically (one-touch up feature). If
you push or pull the front of switch while
the window is closing, the window will stop
where it is.
The automatic open 1 close feature for the
rear door windows is only available when
the ignition i� switched on.
Page 72 of 306
---------------------CONTROLS AND EQUIPMEN T
Convenience close I open
feature
For the convenience of the driver all win
dows can be closed I opened centrally with
the ignition key while locking I unlocking the
vehicle:
Closing windows
In sert key into the lock of driver's door,
turn and hold in the locking position until all
windows are closed. The automatic close
func tion will stop imme diately if the key is
released.
�W ARNING
• Be careful when closing the win
dows.
• Check to see that no one is in
the way, or serious injury could re
sult. Opening
windows
Inse rt key into the lock of driver's door,
turn the key and hold in the unlocking posi
tion until all windows are opened.
This feature enables the driver, to let the
heat escape from the interior of the car, af
ter having parked in direct sunlight.
The convenience close I open feature is not
available when locking the vehicle using the
remote control. Note
If you disconnect and then reconnect the
battery, the convenience open and close
feature will not work.
The follow ing steps describe how to reacti
vate the convenience open I close feature
after reconnecting the battery:
• Close the window completely by lifting
the power window switch and holding.
• Release the switch and then lift it again
for a second.
• The convenience feature is now acti
vated.
71
Page 73 of 306
CONT
ROLS AND EQUIPMENT
Mir rors
Adjust the outside and inside mi rrors before
driving and after adjusting your seat to prop
er driving position. It is im porta nt for safe
driving that you have good vision to the rear.
Inside dey-night mirror
Manual anti-glare adjustment
Yo u can adjust the day -night mirror from
clear daylight visibility to non-glare visibility
at night by moving the lever at the bottom
of the mirror.
To ensure the best possible antiillare ef
fect, the lever on the lower edge of the mir
ror should be pointing forwards when the
basic setting is made.
Daylight driving -lever to front
Night driving -lever to rear.
72 Automatic
anti-glare adjustment•
When the ignition is switc hed on the interior
mirror will darken automatically depending
on the amount of light shinin g into the car
from the rear (e. g. headlights).
When you move the selector lever I gear
shift lever into Reverse R or when you
switch the interior lights on, the inside mir
ror will return to its original position (dim
ming effect off).
The mirror will return to the original position
(i. e. not anti-dazzle) when the selector lever
I gearshift lever is moved to position R. Outside
mirrors
Adjust the outside mirrors so that the side
of your own vehicle can just be seen. This
setting ensures the best possible field of
view, and in addition it serves as an instant
check on the mirror setti ng.
Self-d imming day I night outside
mirrors
The dimming of the outside mirrors is con
trolled by the inside day I night mirror.
The dimming of the outside mirrors works
only properly and without any interference,
if the rear window shade* is rolled up and I
or the light shining on the inside mirror is not
blocked by other objects.
Page 74 of 306
---------------------CONTROLS AND
EQUIPMENT
�W ARNING
• The right hand outside mirror
has a convex (curved) surface. Re
member that vehicles or other ob
jects seen in a convex mirror will
appear smaller and farther away
than when seen in a flat mirror. If
you use this mirror to estimate dis
tances of following vehicles when
changing lanes, you could esti
mate incorrectly and cause an ac
cident.
• Whenever possible, use the in
side mirror to determine the actual
distance and size of vehicles or
other objects seen in the convex
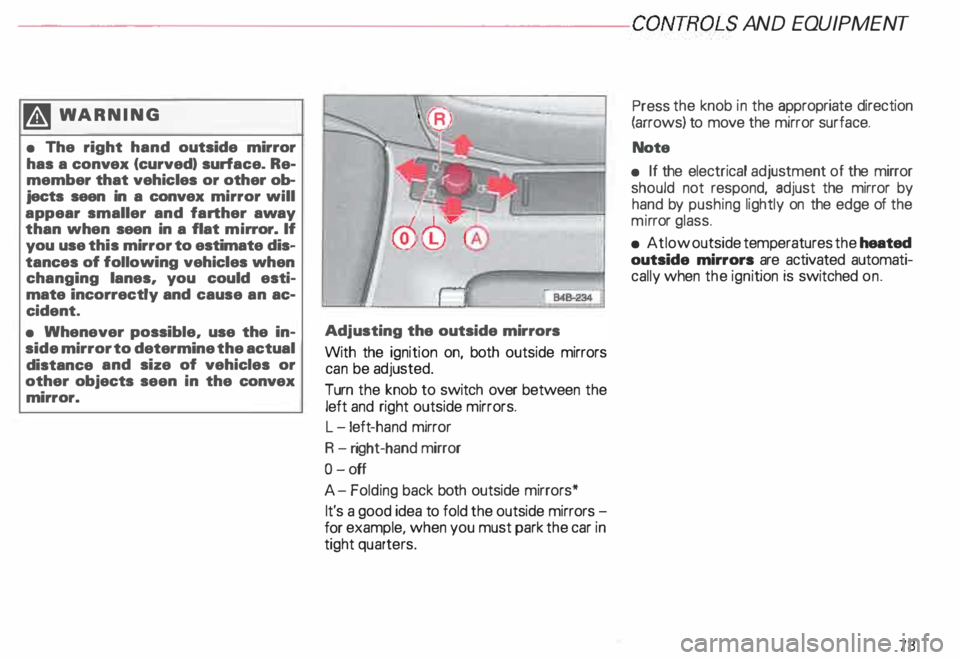
mirror. Adj
usting the outside mirrors
With the ignition on, both outside mirrors
can be adjusted.
Turn the knob to switch over between the
left and right outside mirrors.
L -l eft -hand mirror
R -right-hand mirror
0- off
A- Folding back both outside mirrors*
It's a good idea to fold the outside mirrors
for example, when you must park the car in
tight quarters. Press
the knob in the appropriate direction
(arrows) to move the mirror surface.
Note
• If the electrical adjustment of the mirror
should not respond, adjust the mirror by
hand by pushing lightly on the edge of the
mi rror glass.
• At low outside temperatures the heated
outside mirrors are activated automati
cally when the ignition is switched on.
73
Page 75 of 306
CONTROLS AND EQUIPMENT---------------------
Folding down of the outside
mirror passenger•s side1l
When you move the selector lever I gear
shift lever into R (Reverse), the outside mir
ror on the passenger's side will tilt slightly
downwards, provided you have switched to
the right-hand outside mirror.
This makes it possible to see the edge of
the curb when parking your vehicle. The
mirror will return to its original position as
soon as you move the selector lever I gear
shift lever out of R (Reverse), or if you
switch the remote control back to the driv
er's outside mirror.
1 l Only on
vehicles with memory for driver's seat.
74 Memory*
The setting of the outside mirrors is auto
matically stored in the memory for the driv
er's seat adjustment together with the seat
position.
Memory function for driver's seat and out
side mirrors see page 81.
Adjust the mirrors os described and then
store this setting together with your seating
position memory.
Page 76 of 306
Head
restra ints
Position the head restra ints accor ding to the
occupant's height. Properly positioned head
restra ints, together with the use of safety
belts offer effective protection in most acci
dent situations.
g WARNING
Head restraints are designed to
help reduce injuries in an accident.
Do not drive the vehicle without
the head restraints in place and
properly adjusted.
For maximum protection, the upper edge of
the head restra ints should be at least at
eye level, or high er. ' 848·181
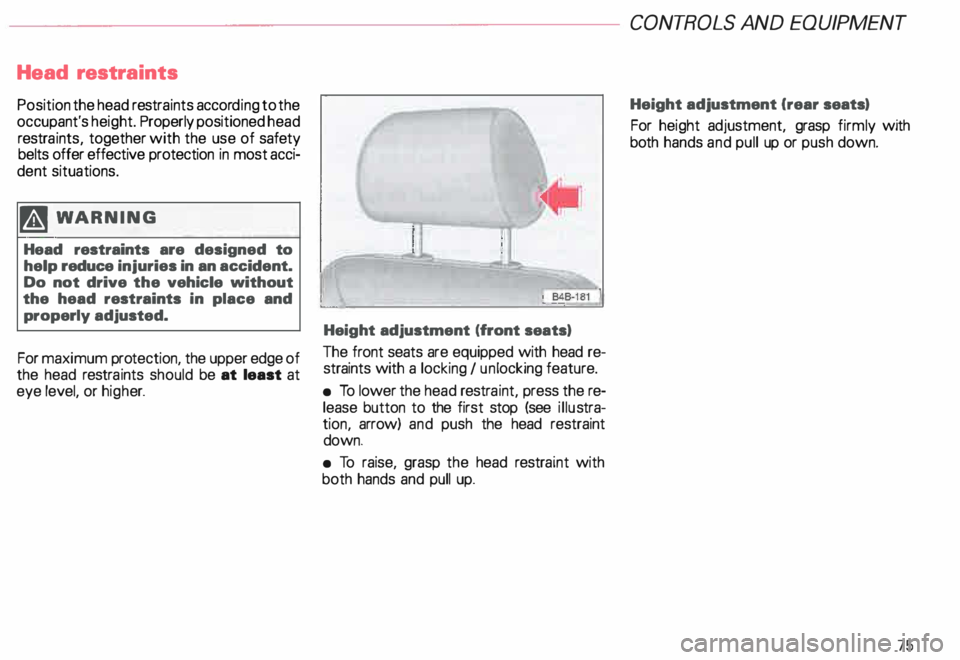
Height adjustment (front seats)
The front seats are equipped with head re
straints with a locking I un locking feature.
• To lower the head restra int, press the re
lease button to the first stop (see illustra
tion, arrow) and push the head restraint
down.
• To raise, grasp the head restraint with
both hands and pull up. CONT
ROLS AND EQUIPMEN T
Height adjustment Crear seats)
For height adjustment, grasp firmly with
both hands and pull up or push down.
75
Page 77 of 306
CONTROLS ANDEOUWMENT-----------------------------------------
Front seats
The correct positioning of the seats is im
porta nt:
so that you can reach all the controls on
the vehicle quickly and safely;
so that you can drive or ride relaxed and
help reduce fatigue;
and for maximum protection of
fered by the safety belts and air
bag system.
Therefore, always adjust the position of the
seat as described on the following pages.
Remember to adjust the seats before fas
tening the safety belts and before driving
off. Always be sure to follow these general
guidelines:
76 m
WARNING
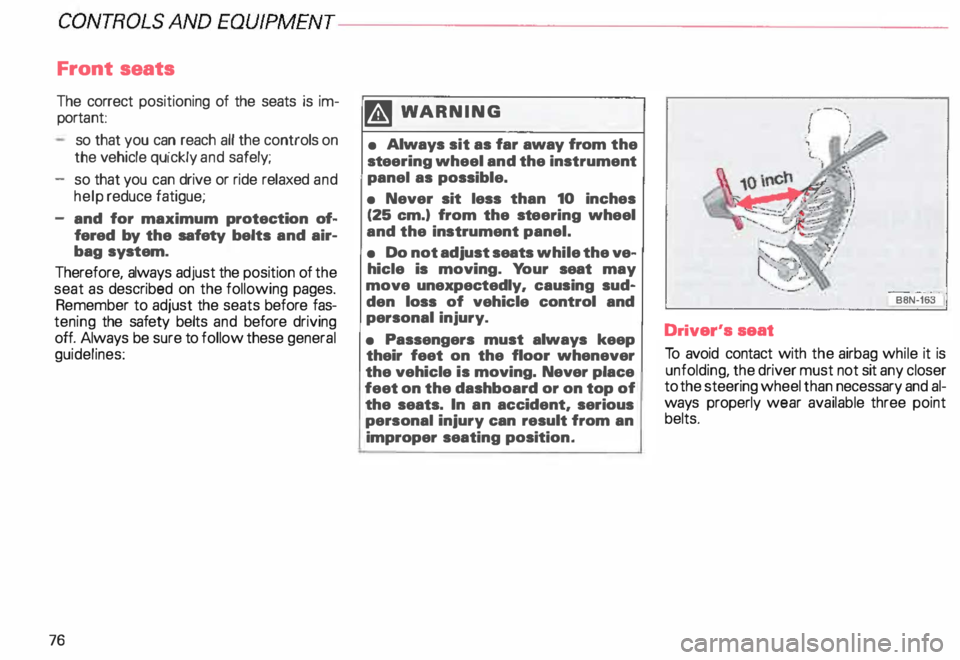
• Always sit as far away from the
stee ring wheel and the instrument
panel as possible.
• Never sit less than 10 inches
(25 em.) from the steering wheel
and the instrument panel.
• Do not adjust seats while the ve
hicle is moving. Your seat may
move unexpectedly, causing sud·
den loss of vehicle control and
personal injury.
• Passengers must always keep
their feet on the floor whenever
the vehicle is moving. Never place
feet on the dashboard or on top of
the seats. In an accident, serious
personal injury can result from an
improper seating position. BSN-163
Driver's seat
To avoid contact with the airbag while it is
unfolding, the driver must not sit any closer
to the steering wheel than necessary and al
ways properly wear available three point
belts.
Page 78 of 306
·---------------------CONTROLS AND
EQUIPMENT
We recommend that you adjust the driver's
seat as follows:
adjust the seat in fore and aft direction so
that you can easily push the pedals all the
way while keeping your knee slightly
bent.
adjust the seatback so that when you sit
with your back against the seatback, you
can still grasp the top of the steeri ng
wheel.
adjust the steeri ng wheel so that the dis
tance from the center of your breastb one
to the center of the airbag cover on the
steering wheel must be at least
10 inches (25 em) or more.
See illustration on previous page. �W
ARNING
• Navar sit closer than 10 inches
(25 em) to the steering wheal.
• If you cannot sit more than
10 inches (25 em) from the steer
ing wheel, we recommend that
you investigate whether adaptive
equipment may be available to
help you reach the pedals and in
crease your seating distance from
the steering wheal. Front
passenger's seat
To avoid contact with the airbag while it is
unfolding, the adult front seat passenger
must not sit any closer to the instrument
panel than necessary and always properly
wear availaple three point belts.
We recommend that you adjust the passen
ger's seat as follows:
backrest upright (never reclined)
place your feet on the
floor _in front
of the
passenger's seat
adjust the passenger's seat as far as pos
sible to the rear of the fore and aft adjust
ment range.
77
Page 79 of 306
CONT
ROLS AND
EQUIPMENT---------------------
�W ARNING
• Always keep both feet on the
floor in front of the seat.
• Never place your feet on the in
strument panel or on the seat. If
the airbag inflates and your feet
are on the instrument panel or on
the seat, you could receive serious
personal injuries to the legs, hips
and even the head if the airbag in
flates.
For safety information on transporti ng chil
dren on the front passenger seat be sure to
read all the information on"ln fant seats,
Convertible seats and Booster seats", see
page 44.
78 �W
ARNING
• To reduce the risk of personal in
jury in an accident, front seat pas
sengers must never ride in a mov
ing vehicle with the seatback re
clined. Safety belts offer protec
tion only when the seatback is up
right and belts are properly posi
tioned on the body. The more the
seatback is reclined, the greater
the risk of perso nal injury from an
out-of -position safety belt.
• Never store items under the
seats. Loose objects can interfere
with the seat latching mechanism
and can also cause personal injury
in an accident. Seat
adjustment
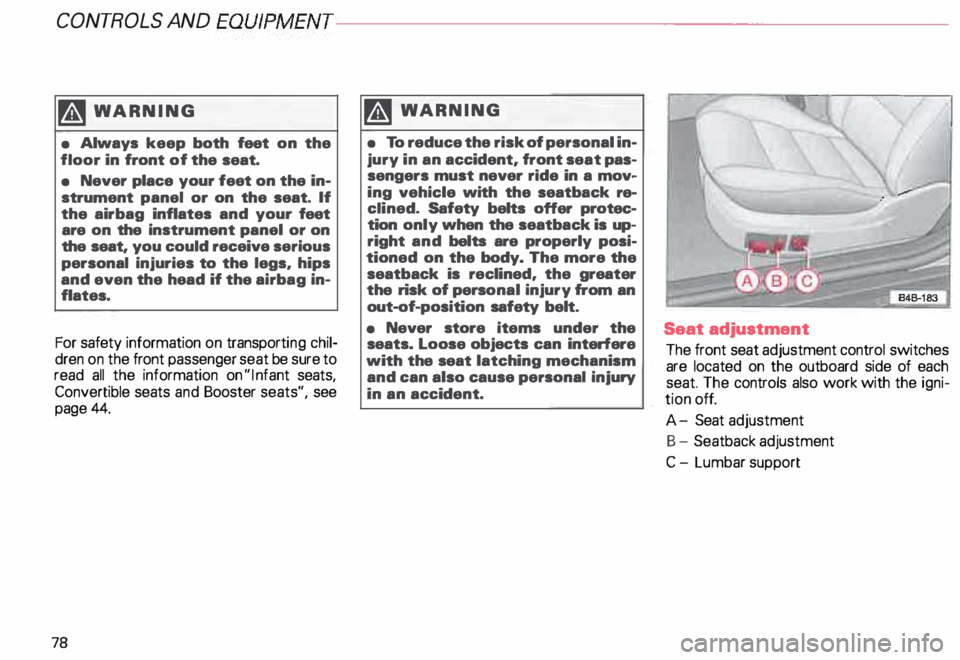
The front seat adjustment control switches
are located on the outboard side of each
seat. The controls also work with the igni
tion off.
A- Seat adjustment
B- Seatback adjustment
C - Lumbar support
Page 80 of 306
Before
adjusting your seat there are some
important considerations to keep in mind.
• To prevent interference with the seat ad
justment, never store anything under the
seats.
• The front seats should be adjusted be
fore fastening the safety belts.
• The position of the driver's seat you find
most comforta ble can be stored in the me
IT]Ory. See page 81 for details.
�W ARNING
Because the seats can be electri
cally adjusted with the ignition
key removed, never leave children
unattended in the vehicle. Unsu
pervised use of the electric seat
adjustments may cause serious in
iury. Seat
adjustment
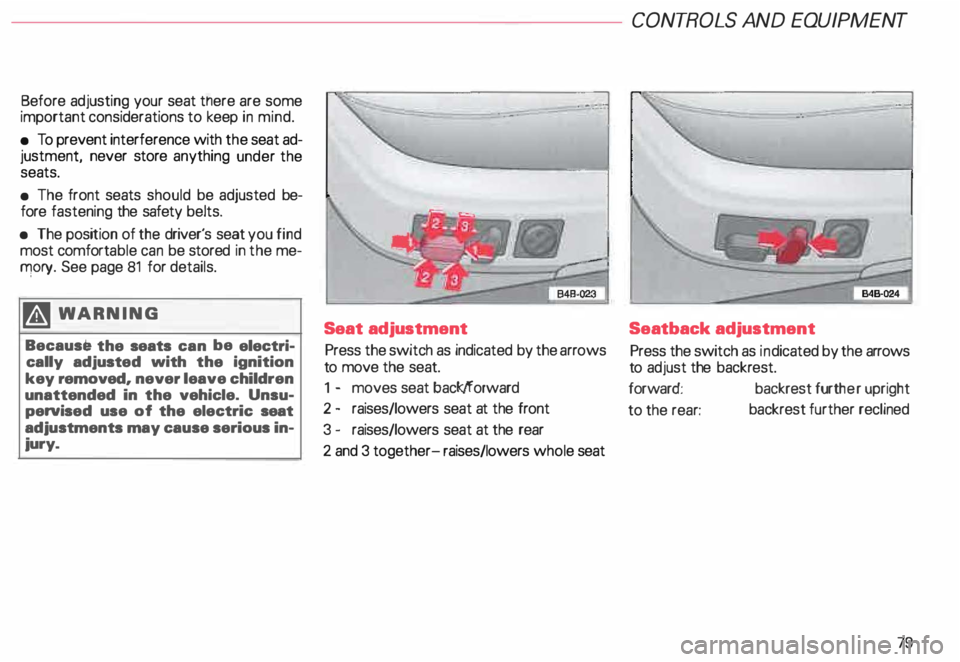
Press the switch as indicated by the arrows
to move the seat.
1 - moves seat back/forward
2 - raises/lowers seat at the front
3 - raises/lowers seat at the rear
2 and 3 together- raises/lowers whole seat CONT
ROLS AND EQUIPMENT
Seatback adjustment
Press the switch as indicated by the arrows
to adjust the backrest.
forward: backrest further upright
to the rear: backrest
further reclined
79