wheel bolts AUDI Q2 2021 Owner´s Manual
[x] Cancel search | Manufacturer: AUDI, Model Year: 2021, Model line: Q2, Model: AUDI Q2 2021Pages: 364, PDF Size: 87.77 MB
Page 310 of 364
Wheels
DOT ...2216...
means, for example, that the tyre was produced
in the 22nd week of 2016.
Audi Genuine Tyres
Audi Genuine Tyres with the marking "AO" are
specially matched to your Audi. When used prop
erly, these tyres meet the highest standards in
safety and handling. Your specialist retailer will
be glad to provide more information.
Tyre wear / damage
A
WARNING
- Use only tyre/rim combinations and match
ing wheel bolts approved by Audi. Otherwise
damage to the vehicLe and an accident could
result.
- For technical reasons, it is not possible to
use wheels from other vehicles. In certain
cases, it is not even possible to use wheels
from another vehicle of the same model.
- It is very important to ensure that the tyres
you have chosen have adequate clearance.
When selecting replacement tyres, do not
rely entirely on the nominal tyre size
marked on the tyre; with some makes of
tyre the effective tyre size can differ signifi
cantly from the nominal dimensions, even
though the tyres have the same size desig
nation.
Inadequate tyre clearance can result
in damage to the tyres or the vehicle, caus
ing a serious safety risk.
- Avoid running the car on tyres that are more
than 6 years old. If
you
have no alternative,
you should drive slowly and with extra care
at all times.
- The use of run-flat tyres on your vehicle is
NOT authorised! Unauthorised use can cause
an accident or damage your vehicLe.
- If wheel trims are fitted after the car is pur
chased,
ensure that there is an adequate
flow of air for cooling the brakes - risk of ac
cident!
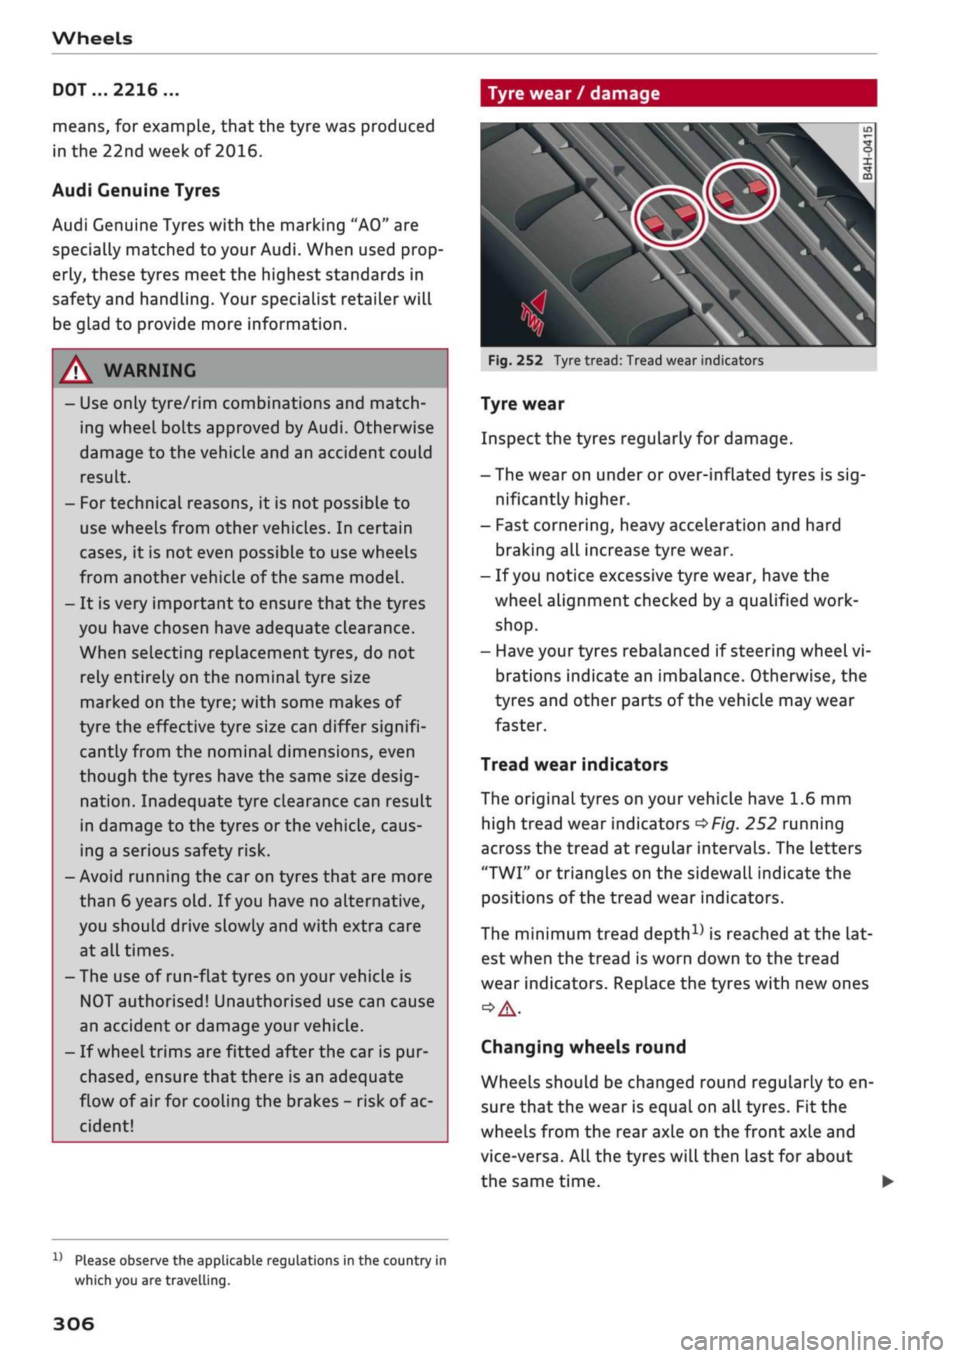
Fig.
252 Tyre tread: Tread wear indicators
Tyre wear
Inspect the tyres regularly for damage.
- The wear on under or over-inflated tyres is
sig
nificantly higher.
- Fast cornering, heavy acceleration and hard
braking all increase tyre wear.
- If
you
notice excessive tyre wear, have the
wheel alignment checked by a qualified work
shop.
- Have your tyres rebalanced if steering wheel vi
brations indicate an imbalance. Otherwise, the
tyres and other parts of the vehicLe may wear
faster.
Tread wear indicators
The original tyres on your vehicle have 1.6 mm
high tread wear indicators
^>Fig.
252 running
across the tread at regular intervals. The letters
"TWI"
or triangles on the sidewall indicate the
positions of the tread wear indicators.
The minimum tread
depth1)
is reached
at
the lat
est when the tread is worn down to the tread
wear indicators. Replace the tyres with new ones
Changing wheels round
Wheels should be changed round regularly to en
sure that the wear is equal on all tyres. Fit the
wheels from the rear axle on the front axle and
vice-versa. All the tyres will then last for about
the same time.
x)
Please observe the applicable regulations in the country in
which you are travelling.
306
Page 312 of 364
Wheels
- Incorrect tyre pressures increase tyre wear
and adversely affect vehicle braking and
handling - risk of accident!
(7) CAUTION
Replace any lost valve caps to prevent dam
age to the tyre valves.
(#) For
the sake of the environment
- Under-inflated tyres will increase the fuel
consumption.
- Driving with the tyre pressures adjusted to
the comfort setting* may also result in in
creased fuel consumption.
©
We recommend always using the tyre pres
sure setting
(T)
for partial loads and the set
ting
(?) for
full loads.
Wheel bolts and rims
Wheel bolts
The wheel bolts should be clean and turn easily.
A special adapter is required to turn the
anti-
theft wheel bolts*
^
page 321.
Rims
Rims with a bolted rim flange* or bolted trim
parts*
consist of several components. A special
technique is applied to bolt these components
together. Never attempt to repair or dismantle
them
o
A-
A,
WARNING
If the wheel bolts have not been tightened or
serviced correctly, they can come loose, and
you could lose control of the vehicLe - risk of
accident! For the correct tightening torque,
refer to
^page
324, After changing a wheel.
- Make sure that the wheel bolts and threads
in the wheel hubs are always clean and free
from grease.
- Only use wheel bolts that are designed to
match the rims on your car.
- Always have damaged rims repaired by a
qualified workshop. Never attempt to repair
or dismantle rims yourself - risk of accident!
Winter tyres
In winter road conditions winter tyres will consid
erably improve the car's handling. Due to their
type of construction (width, rubber compound,
tread pattern), summer tyres give less grip on ice
and snow.
•
Winter tyres must be fitted on all four wheels.
•
Only use winter tyres of the correct type ap
proved for your vehicle.
•
Please note that the maximum permissible
speed for winter tyres may be lower than for
summer tyres
•=> A-
Your specialist retailer can
advise you of the maximum speed
for
your
tyres.
•
After fitting the wheels you must always check
the tyre pressures
^>page
307.
Winter tyres Lose their effectiveness when the
tread is worn down to a depth of 4 mm. The per
formance of winter tyres is also severely impaired
by ageing, even if the tread is still much deeper
than 4 mm.
A WARNING
- Never exceed the maximum approved speed
for your tyres. This causes the tyres to over
heat and can even result in a blow-out - risk
of accident!
- Always adapt your driving style to the pre
vailing road and traffic conditions. Drive
carefully and reduce your speed on icy or
slippery roads. Even winter tyres lose their
grip on black ice.
(^)
For the sake of the environment
Summer tyres should be fitted again as soon
as possible; they give better handling on
roads which are free of snow and ice. They are
quieter, do not wear so quickly and reduce
fuel consumption. •
308
Page 325 of 364
Mobility
CO
rN
IV
rN
•-i
00
- Do not drive faster than 80 km/h.
- Avoid heavy acceleration, hard braking and
fast cornering.
-Vehicle handling could be impaired.
- If the tyre is too badly damaged, you should
seek professional assistance.
Removing the hubcap/wheel bolt caps
(#) For
the sake of the environment
A used can of sealing compound can be re
turned to your qualified workshop for dispos
al.
Note ©
After repairing a tyre, remember to buy
a
new
tyre sealant can at
a
qualified workshop.
Changing a wheel
Preparations
Certain preparations must be made before you
change the wheel.
• Please refer to the important safety notes on
^page
318.
• Apply the parking brake.
• Manual gearbox: Engage first gear.
• Automatic gearbox: Move the selector Lever to
position P.
• If
you
are towing a trailer, unhitch
it
from your
vehicle.
• Take out the tools
^>page
319 and spare
wheel*
^>page
324.
A WARNING
If
you
have to use the jack* on a gradient or
off-road track, block the wheel diagonally op
posite the wheel being changed by placing
suitable objects underneath both the front
and rear of the wheel to prevent the vehicle
from rolling away.
0
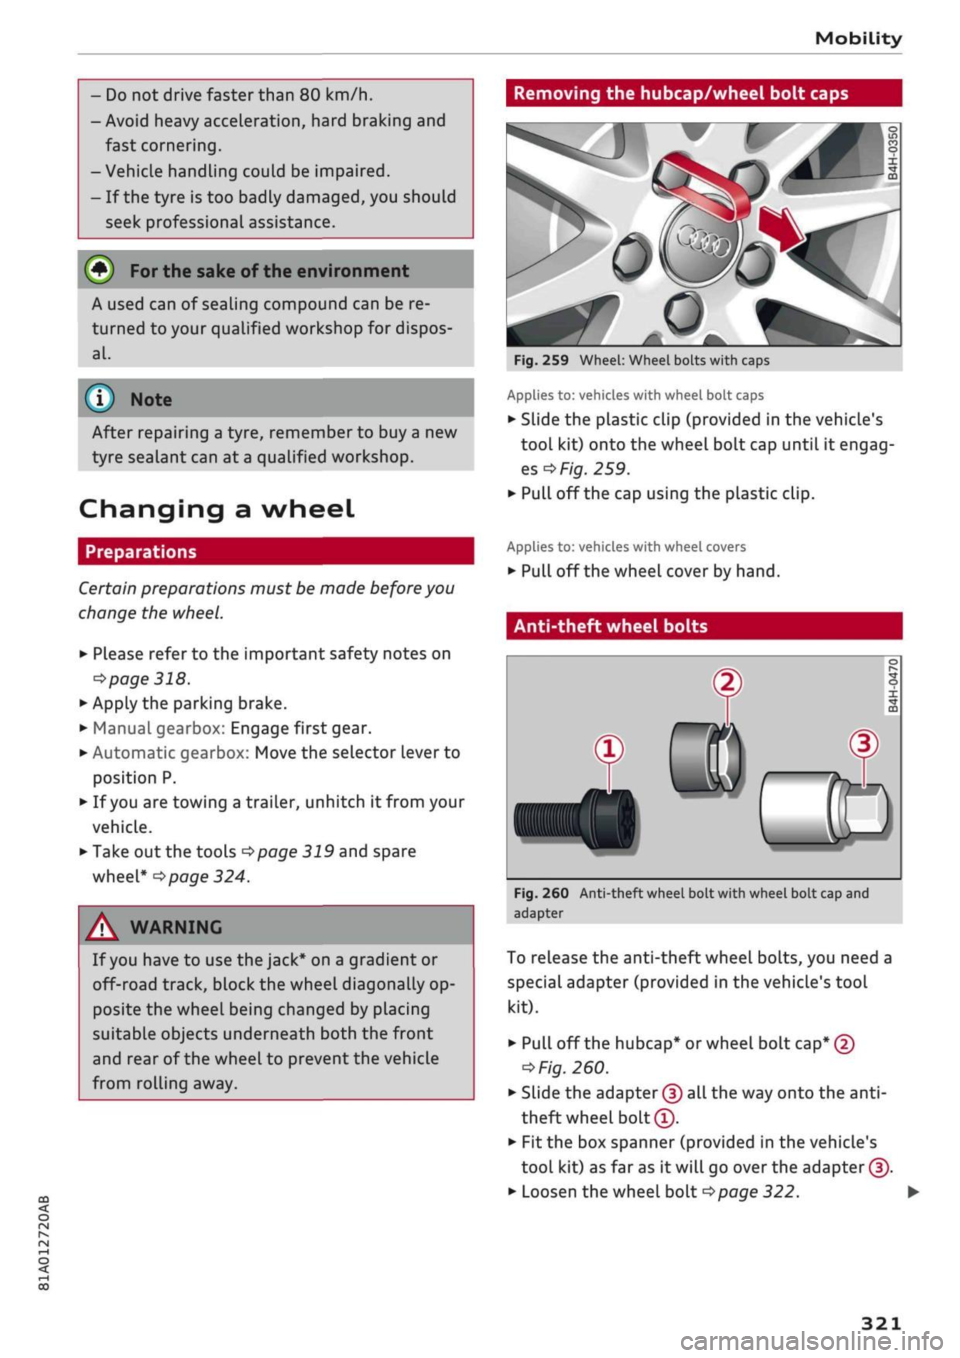
Fig.
259 Wheel: Wheel bolts with caps
Applies to: vehicles with wheel bolt caps
• Slide the plastic clip (provided in the vehicle's
tool kit) onto the wheel bolt cap until it engag
es
^F/'g.
259.
• Pull off the cap using the plastic clip.
Applies to: vehicles with wheel covers
• Pull off the wheel cover by hand.
Anti-theft wheel bolts
T
0)
®
Fig.
260 Anti-theft wheel bolt with wheel bolt cap and
adapter
To release the anti-theft wheel bolts, you need a
special adapter (provided in the vehicle's tool
kit).
• Pull off the hubcap* or wheel bolt
cap*
@
^>
Fig.
260.
• Slide the adapter
©
all the way onto the
anti-
theft wheel bolt®.
• Fit the box spanner (provided in the vehicle's
tool kit) as far as it will go over the adapter ©.
• Loosen the wheel bolt
^>page
322.
321
Page 326 of 364

Mobility
\J Note
Note the code number of the anti-theft wheel
bolt and keep it in a safe place - not in your
vehicle. If
you
need a replacement adapter,
give the code number to your Audi dealer.
Loosening the wheel bolts
Raising the vehicle
Fig.
261 Wheel: Loosening the wheel bolts
•
Fit
the box spanner (provided in the vehicle's
tool kit) as far as it will go over the wheeL
bolt1'.
• Turn the wheel bolt approx. one turn
anti
clockwise -arrow-. To apply the necessary tor
que,
hold the box spanner
near
the end. If the
wheel bolt is very tight, you may be able to
loosen it by pushing down the end of the span
ner carefully with your foot. Hold on to the car
for support and take care not to slip.
WARNING
To avoid accidents, the wheel bolts should on
ly be loosened slightly (one turn) before rais
ing the vehicle with the jack*.
:v<
:
Fig.
262 Sills: markings (example)
Fig.
263 Door
sill:
Applying the jack under the door sill
• Always provide a firm base for the jack* on the
ground.
(The jack can be found in the vehicle's
tool kit). If necessary use a large, strong board
or similar support. On a
hard,
slippery surface
(such as tiles) use a rubber mat or similar to
prevent
the
jack from slipping
^> /\.
• Locate the marking (recess or rib) on the door
sill closest to the wheel being changed
^>Fig.
262. The jacking point is located behind
the marking under the door
sill.
• Wind up
the
jack* under
the
jacking point until
the claw
(A)
•=>
Fig.
263 of the jack is directly
be
low the jacking point.
• Align
the
jack* so
that
the
claw
(A)
grips the
jacking point under the door sill and the mova
ble base plate of the jack
(B)
is flat on the
ground.
The base plate
(B)
must be positioned
vertically underneath
the
jacking point®.
• Raise the vehicle until the defective wheel is
clear of the ground.
11
An adapter is required to unscrew or tighten the anti-theft
wheel bolts
opage
321.
322
Page 327 of 364

Mobility
A WARNING
CO
rN
IV
rN
•-i
00
- Make sure the jack* is stable. If the ground
underneath the jack* is slippery or soft, the
jack can slip or sink in - risk of injury!
- Use only the jack* supplied with your vehicle
to raise the vehicle. If
you
use
a
jack from a
different vehicle, your vehicle may slip off
the
jack - risk of injury!
- Apply the jack* only at the jacking points lo
cated behind the markings on the door sill
and align it properly. Otherwise there is a
risk of injury since
the
jack* can slip off
sud
denly if it is not properly engaged.
-The height of the parked vehicle can change
as a result of variations in loading.
- Never start the engine when the vehicle is
on the jack - risk of accident!
- If work has to be done under the vehicle, en
sure that it is
safely
supported on suitable
stands - risk of injury!
© CAUTION
The vehicle must not be lifted up on its sills.
Only apply the jack*
at
the jacking points loca
ted behind the markings on the door
sill.
Oth
erwise your vehicle could be damaged.
Taking off / putting on the wheel
Fig.
264 Wheel: Hexagonal socket for turning wheel bolts
Fig.
265 Wheel: Mounting pin in wheel bolt hole nearest
to the top
Taking off the wheel
• Using the hexagonal socket in the screwdriver
handle (provided in the vehicle's tool kit), un
screw the top wheel bolt and place it on a clean
surface
<=>Fig.
264.
• Screw in the mounting pin (provided in the ve
hicle's tool kit) by hand in place of the wheel
boit*Fig.
265.
• Then unscrew the other wheel bolts.
• Take off the wheel
*(£).
The mounting pin
stays where it is.
Putting on the wheel
When putting on a tyre with directional tread
pattern,
refer to
*page
324.
• Put on the wheel, using the mounting pin to
guide it into place
<=>([).
• Screw in the wheel bolts and tighten them
lightly using the hexagonal socket.
• Then unscrew the mounting pin and tighten the
remaining wheel bolt lightly.
• Carefully lower the car with the jack*.
• Tighten the wheel bolts in diagonal sequence
with the box spanner.
The wheel bolts should be clean and turn easily.
Before putting on the wheel, inspect the condi
tion of the wheel and hub mounting surfaces.
These surfaces must be clean before mounting
the wheel.
A WARNING
Do not use the hexagonal socket in the screw
driver handle to tighten the wheel bolts. It is
323
Page 328 of 364

Mobility
not possible to tighten the bolts to the re
quired torque using the hexagonal socket
risk
of accident!
© CAUTION
When removing/fitting the wheel the rim
may hit and damage the brake disc. For this
reason,
please take care and get
a
second per
son to assist you.
(T) Note
The wheel bolts are easier to remove from the
wheel rim if
you
use the hexagonal socket in
the screwdriver handle. The reversible screw
driver blade should be removed as a precau
tionary measure when the tool is used for this
purpose.
Tyres with directional tread pattern
A directional tread pattern can be identified by
arrows on the sidewall that point in the direction
of rotation. Always note the direction of rotation
indicated when mounting the wheel. This is im
portant so that these tyres can give maximum
grip and avoid excessive noise, tread wear and
aquaplaning.
If
you
ever have a puncture and need to fit the
spare wheel* in the wrong direction, please drive
with extra care because the tyre will not give op
timum performance in this situation. Bear this in
mind particularly when driving on wet roads.
To benefit from the advantages of tyres with this
type of tread pattern, the defective tyre should
be replaced and refitted as soon as possible so
that all tyres again rotate in the correct direction.
After changing a wheel
• Fit the hubcap or wheel bolt caps back on, as
required.
• Put the tools and jack back in the luggage com
partment.
• If the replaced wheel will not fit into the spare
wheel
well,
stow it safely in the luggage com
partment
*page
272.
• Check the tyre pressure of the fitted wheel as
soon as possible.
• On vehicles with tyre pressure loss indicator,
adjust the tyre pressures and store them via the
infotainment system
opage
311.
• The wheel bolts should be tightened to 140
Nm.
Have this checked as soon as possibLe with
a torque wrench. Until
then,
drive with caution.
• Have the flat tyre replaced as quickly as possi
ble.
Spare wheel
General notes
Applies to: vehicles with compact temporary spare wheel
Fig.
266 Luggage compartment: Floor panel folded up
Fig.
267 Compact temporary spare wheel (example)
The compact temporary spare wheel
*Fig.
267 is
only intended for temporary use over short dis
tances. Have the damaged wheel checked as soon
as possible by
a
qualified workshop and, if neces
sary, replaced.
PLease note the following restrictions when using
the compact temporary spare wheel. The com
pact temporary spare wheel is designed specifi
cally for this model. For this reason, do not use a
spare wheel from a different type of
vehicle.
•
324
Page 349 of 364
Index
A
A/C (automatic air conditioner) 69
A/C (manual air conditioner) 67
ABS
see Anti-lock brake system (ABS) 145
Accelerator pedal 272
Accessories 60
Active Lane assist
see Audi active lane assist 123
Adaptive cruise control
see Audi adaptive cruise control
Ill
Adaptive light
see Audi adaptive light 49
AdBlue 292
Driver messages 292
Refilling 293
Remaining range 292
Additional phone 175, 257
Advanced key
see Convenience key 76
Airbag
Deactivating front passenger's airbag ... 288
Air conditioner (automatic) 66
Adjusting air outlets 71
AUTO (automatic mode) 69
Controls 69
Default settings 66
Description 66
Drive select 131
Key-coded settings 66
Supplementary heater 66
Synchronisation 69
Air conditioner (manual) 66
Adjusting air outlets 71
Controls 67
Default settings 66
Description 66
Key-coded settings 66
Supplementary heater 66
Air distribution, adjusting
Automatic air conditioner 70
Heating/ventilation system and manual air
conditioner 67
CO
rN
IV
rN
i-H
00
Air outlets, adjusting 71
Automatic air conditioner 70
Heating/ventilation system and manual air
conditioner 67
Air recirculation mode
Automatic air conditioner 70
Heating/ventilation system and manual air
conditioner 68
Alarm system
see Anti-theft alarm system 42
All-season tyres
see All-weather tyres 308
All-weather Lights 49
All-weather tyres 308
Alterations to the vehicle 340
AMI
see Audi music interface 240, 241
Android Auto
see Audi smartphone interface 253
Announcements (traffic programme)
Volume 261
Anti-dazzle interior mirror 54
Anti-freeze
Coolant 299
Windscreen washer system 303
Anti-lock brake system (ABS) 145
Anti-theft alarm system 42
Anti-theft wheel bolts 321
Apple CarPlay
see Audi smartphone interface 253
Armrest (front centre) 58
Ashtray 59
ASR
see Traction control system (ASR) 145
Audi active lane assist 123
Cleaning area around camera 313
Driver messages 125
Audi adaptive cruise control
Ill
Cleaning sensor 313
Distance indicator, distance warning .... 118
Driver messages 119
Traffic
jam assist 117
Audi adaptive light 49, 131
Audi connect (infotainment) 191,203
Data protection 205
Overview of services 197
345
Page 351 of 364

Index
CO
< o rN
iv
rN
t-H
o <
•H
00
Emergency braking function 82
New brake pads 147
Browser
see Media centre 244
Bulb failure
Changing bulbs 334
Bulbs,
changing 334
Buttons
Assigning functions (multi-function steering
wheel) 17
Multi-function steering wheel 15, 18
Operating unit (MMI) 152
C
Cables (USB adapter/AUX adapter) 240
Calling up media 243
Call
list 179
CalL
options 187
Capacities
AdBlue 292
Fuel
tank 343
Washer fluid reservoir 343
Caps for wheel bolts, removing 321
Car care
Washing/cleaning 312
Care
see Cleaning 312
Car phone
172,188
Catalytic converter 295
CD drive 236
Central locking system 37
Cetane number (diesel) 289
Changing settings for additional dispLay .... 19
Charging
see Power sources 60
Charging battery 242
Charging battery (mobile devices) 241
Chassis number 342
Child lock 46
DVD 246
Child seats 267
Fitting 270
Cigarette Lighter 60
Classic view 17
Cleaning 312
Cleaning/de-icing windows 314
Cleaning/treating leather 315
Cleaning Alcantara 315
Cleaning carbon parts 314, 315
Cleaning controls and displays 314
Cleaning fabrics 315
Cleaning leatherette 315
Cleaning plastic parts 314
Closing
Panorama sun roof 48
Windows 46
see also Unlocking/locking 39, 40
Closing/opening
see Unlocking/locking 39, 40
Coasting mode 91
Coat hooks 61
Colour code 342
Coming home/leaving home
see Entry/exit lights 51
Commands (speech dialogue system) 164
Compact temporary spare wheel 324
Compartments 61
Conference calls 180
Connection manager 257
Connections
see Media 234, 243
Consumption (fuel) 19, 20, 342
Contacts 185
From another directory 258
Importing/exporting 187
Memory capacity 189
Storing as a destination
216
Control buttons (MMI operation) 154
Controls and displays (overview) 10
Control units 150
Convenience key
Manual operation 79
Starting/stopping the engine 76
Unlocking/locking 39
Convenience open/close 47
Cooling mode
Automatic air conditioner 69
Manual air conditioner 67
Cooling system
Anti-freeze 299
Checking coolant level 300
347
Page 360 of 364

Index
Technical data 342
Telephone 172
Audi phone box 177
Connecting 173
Dialling a number 179
Options during a call 180
Playing music 237
Settings 187
SIM card 176
Telephone mode 188
Temperature display
Coolant 12
Outside temperature 15
Temperature selection
Automatic air conditioner 69
Heating/ventilation system and manual air
conditioner 67
Tethering 195
Text messages 182
Tightening torque (wheel bolts) 324
Time 255
tiptronic (automatic gearbox) 85,90
TMC/TMCpro
see Traffic information 225
Tools 319
Top tether and ISOFIX (securing child seats) 271
Torque
Engine 344
Wheel bolts 324
Touch pad
see MMI touch 155
Tourist guide
see Travel guide 200
Tow-starting 328
Towing 96
Parking aids 144
Trailer weights 96, 343
Towing away 328
Tow-away protection 42
Towline anchorage 330, 331
TPMS
see Tyres 309
Traction control system (ASR) 145
Traffic announcements
see Traffic programme (TP) 229
Traffic avoidance 217
Traffic information 225, 226
Traffic jam assist 117
Traffic programme (TP) 229
Traffic sign recognition 108
Trailer mode (navigation) 217
Trailer stabilisation 97
Travel guide 200
Treble (sound) 260
Trip recorder, resetting 14
Turning light 49
Turn signals 50
Type plate 342
Tyre Mobility System (tyre repair kit) 319
Tyres 305
Changing 321
Directional tread 324
Inflation pressure 307
Low-profile tyres 309
quattro (four-wheel drive) 148
Repair kit 319
Service life 306
Tyre pressure loss indicator 309
Tyre pressure (towing a trailer) 96
Wear indicator 306
U
Unlocking/locking
By remote control 39
Using the central locking switch 40
With key 41
With the convenience key 39
Updating station List (radio) 231
USB charging socket 60, 242
USB stick
see Audi music interface 240, 241
V
Vehicle
Raising 322
Taking out of service 317
Vehicle data
Identification data 342
Version information 259
VIEW button 15
356
Page 361 of 364
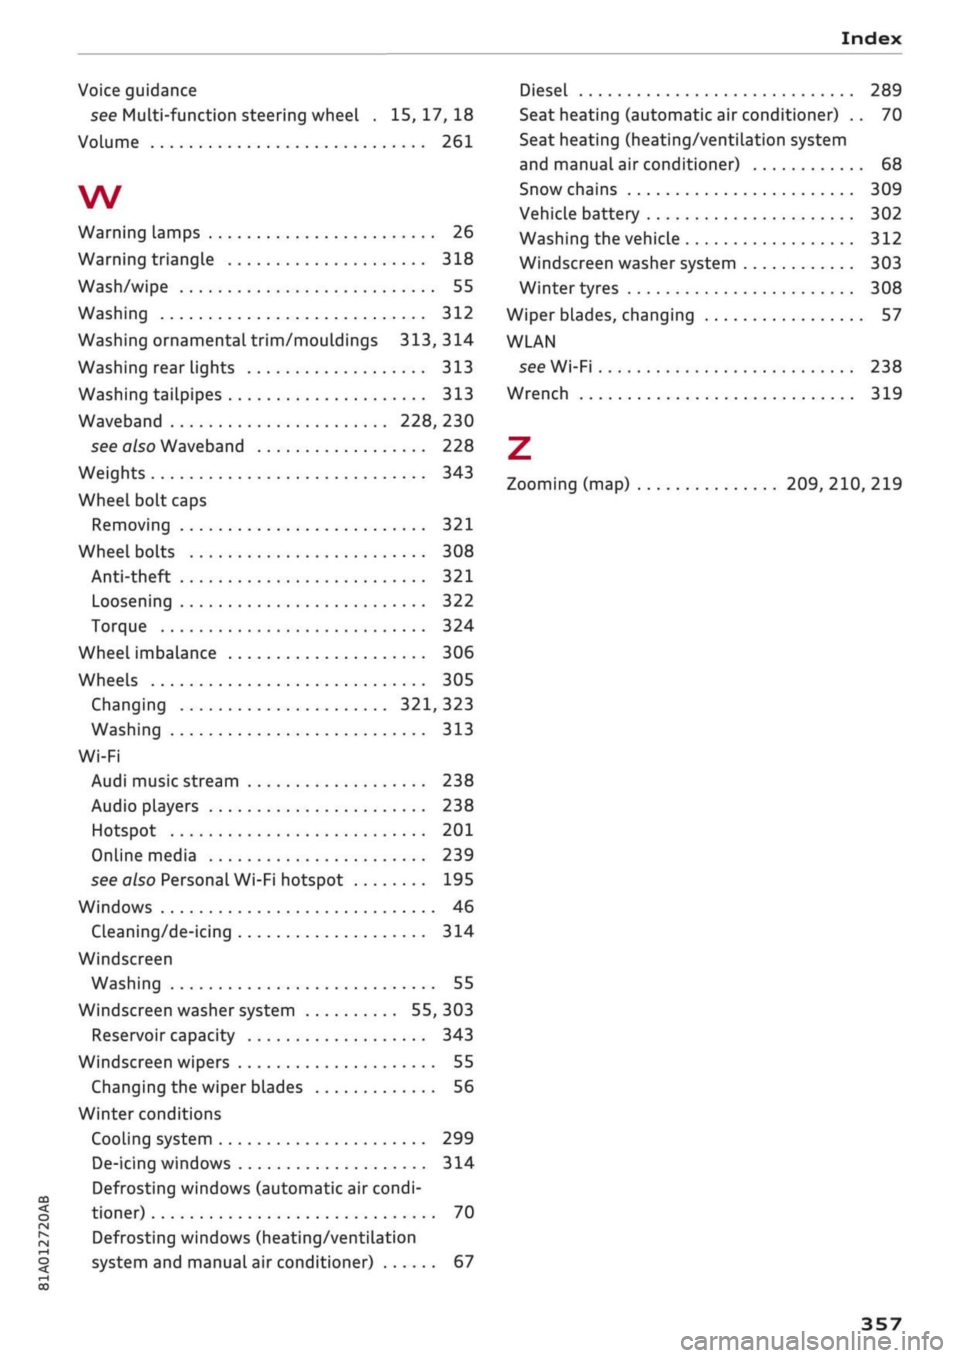
Index
CO
< o rN
iv
rN
i—i
o <
•H
00
Voice guidance
see Multi-function steering wheel .
15,17,18
Volume 261
W
Warning lamps 26
Warning triangle 318
Wash/wipe 55
Washing 312
Washing ornamental trim/mouldings 313, 314
Washing rear lights 313
Washing tailpipes 313
Waveband 228, 230
see also Waveband 228
Weights 343
Wheel bolt caps
Removing 321
Wheel bolts 308
Anti-theft 321
Loosening 322
Torque 324
Wheel imbalance 306
Wheels 305
Changing 321, 323
Washing 313
Wi-Fi
Audi music stream 238
Audio players 238
Hotspot 201
Online media 239
see also Personal Wi-Fi hotspot 195
Windows 46
Cleaning/de-icing 314
Windscreen
Washing 55
Windscreen washer system 55, 303
Reservoir capacity 343
Windscreen wipers 55
Changing the wiper blades 56
Winter conditions
Cooling system 299
De-icing windows 314
Defrosting windows (automatic air condi
tioner) 70
Defrosting windows (heating/ventilation
system and manual air conditioner) 67
Diesel 289
Seat heating (automatic air conditioner) .. 70
Seat heating (heating/ventilation system
and manual air conditioner) 68
Snow chains 309
VehicLe battery 302
Washing the vehicle 312
Windscreen washer system 303
Winter tyres 308
Wiper blades, changing
57
WLAN
see Wi-Fi 238
Wrench 319
Z
Zooming (map) 209, 210, 219
357