Mmi AUDI Q3 2015 Owners Manual
[x] Cancel search | Manufacturer: AUDI, Model Year: 2015, Model line: Q3, Model: AUDI Q3 2015Pages: 258, PDF Size: 64.9 MB
Page 7 of 258
M N
M N
0 ::i co ,...., \!) 1.1'1 ,...., 1.1'1 ,....,
In addition to t his Owner's Ma nual, your A udi
comes w ith t he
- MMI Oper ating In st ru cti ons
- Warranty
& Ma intenance boo klet.
If you are m iss ing one of these publicat ions,
or if you believ e that the information is not
comp lete, contact you r auth orized Audi dea le r
for assistanc e.
MMI Operating Instructions
contain detailed desc ription of the Aud i M ulti
Media Interface (MMI) including t he nav iga
tion system, the so und system and the ha nd
h e ld pho ne.
The Warranty & Maintenance booklet
explains how yo u can keep your A udi in top
driving condition by hav ing it serviced regular
l y and conta ins detai led info rmat ion about
the wa rra nties covering your Aud i. Always
h ave the boo klet with yo u when yo u take your
ve hicl e to a n author ized Audi dealer for serv
i ce. Y our Audi Servi ce A dvis or will re cord each
sche duled service and can an swe r any ques
tions you may have rega rding how to ma in tain
your ve hicle.
In Canada,
the veh icle lite rat ure is also avai lab le in
Fr ench . T o ob tain a cop y, contact your dea le r
or wri te to:
Au Canada, on peut se p rocure r un exemp la ire
e n fr an<;ais de ce do cument aupres du conces
sio nnair e ou de:
Aud i Canada .
C lient Assistance
Assis tance a la Clientele
7 77 Bayly S tree t, Wes t,
A jax, On tario LlS 7G 7
If you sell your Audi
all lite ratu re should be left in the ve hicle to
make th e Warranty terms as we ll as a ll oper
ating, safety and m aintenan ce inform ation
a vaila ble to the nex t owne r.
Vehicle literature 5
If you change your address or if you
bought this Audi used
be s ure to send in a "Notice of Add ress
Change"/ " Notice of Used Car Purchase" post
card. T his card can be fo und in the Warranty
&
Maintenance booklet or obtained from your
autho rized Aud i dea ler .
It is in your own interest that we are able to
contact you should the need arise .
•
•
Page 11 of 258
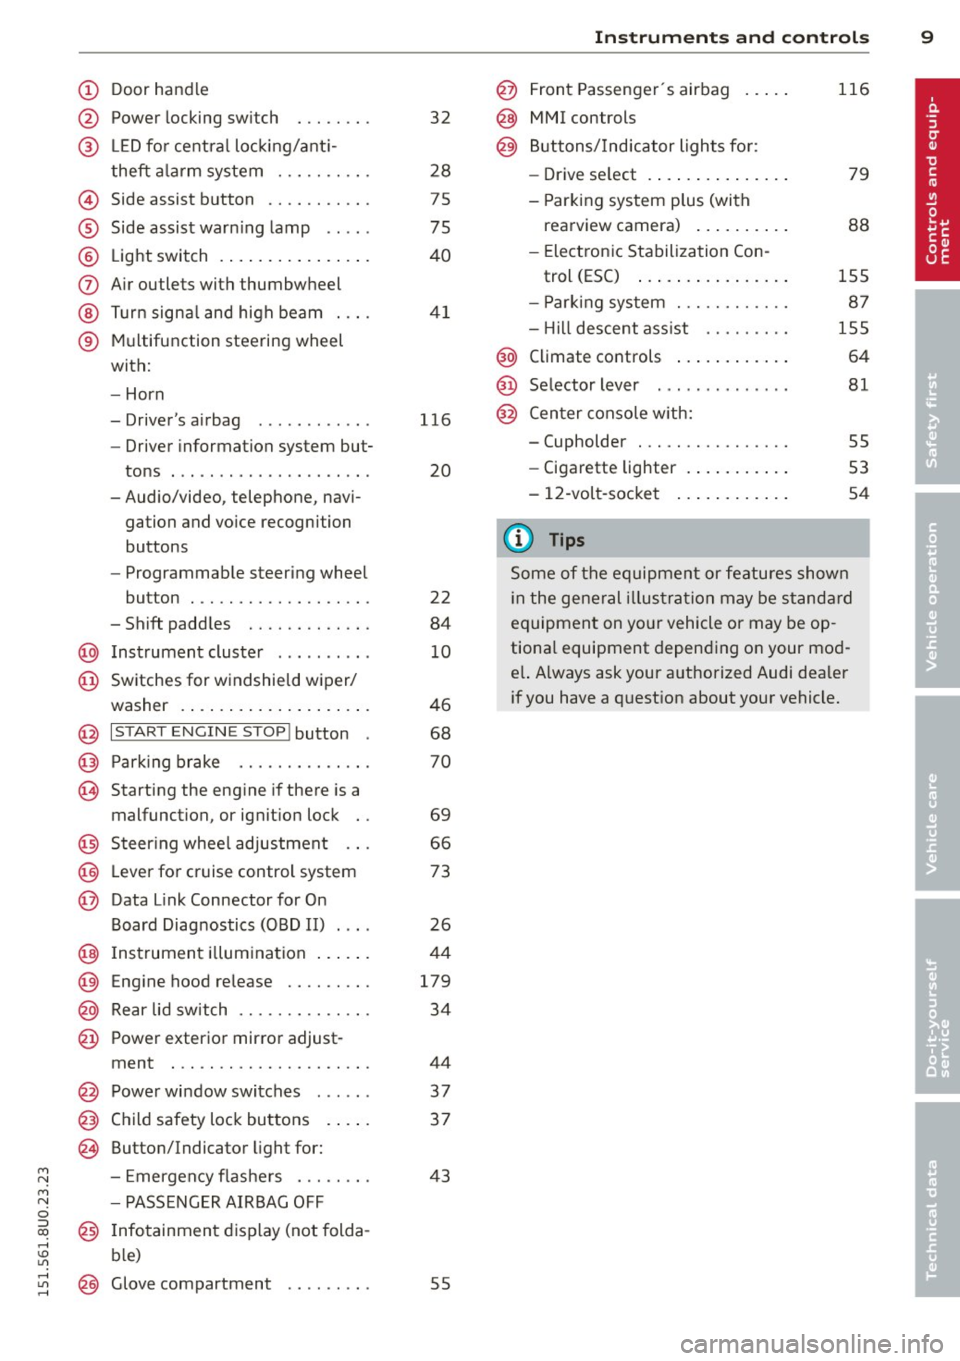
(!) Door handle
@ Power locking sw it ch . .. .. .. .
@ LED fo r centra l loc king/a nti-
theft a larm system . .... .. .. .
@ Side assist button .. .... .. .. .
® Side assist warn ing lamp .. .. .
@ Light switch . ... .... ... .. .. .
(J) A ir outlets with thumbwheel
@ Turn signa l and high beam . .. .
® M ultifunction steering wheel
with:
- Horn
- Driver's airbag
- Driver information system but-
tons . .. ... ....... ... .. .. .
- Audio/video, telephone, navi gation and vo ice recognition
buttons
- Programmable steering wheel
button . .. ........... .. .. .
- Shift padd les ........ .. .. .
@ Instrument cluste r ...... ... .
@ Switches for windshie ld wiper/
washer . ..... ...... ... .. .. .
@ I STAR T ENGINE STOP ! button
@ Parking brake ......... .... .
~ Starting the eng ine if there is a
malfunction, or ignit ion lock . . 32
28
75
75
40
41
1 16
20
22
84
10
46
68
70
69
@ Steer ing whee l adjustment . . . 66
@ Lever for cruise control system 73
@ Data L ink Connector for On
Board Diagnostics (OBD II) . . . . 26
@ Ins trument i llum ination . . . . . . 44
@ Eng ine hood release . . . . . . . . . 179
@ Rear lid sw itch . . . . . . . . . . . . . . 34
@ Power exterior mir ro r adjust-
ment . . . . . . . . . . . . . . . . . . . . . 44
@ Power wi ndow switches . . . . . . 37
@ Child safety lock bu ttons . . . . . 3 7
@ Button/Indicator light for:
~ - E mergency flas he rs . . . . . . . . 43
~ -PASSENGER AIRBAG OFF 0
~ @ Info tainmen t disp lay (not folda -,....,
~ ble)
5 @ Glove compartment . . . . . . . . . S5
Instrument s and control s 9
@ Front Passenger's airbag .. ...
@ MMI controls
@) Buttons/Indicator lights fo r:
- Drive se lect ..... .. .. ..... .
- Parking system p lus (with
rearview camera) ... .... .. .
- Elect ron ic Stabilization Con-
trol (ESC) ..... . .. .. ..... .
- P arking system ........... .
- Hi ll descent ass ist ........ .
@ Climate controls .. ... ...... .
@ Selector lever ........ ..... .
@ Cen ter console w ith:
- (upholder . .. ............ .
- Cigarette lighter . ... .... .. .
- 12 -volt -socket
(D Tips 116
79
88
155
87
155 64
81
S5
53
54
Some of the equipment or features show n
i n the general i llus tration may be standa rd
equipment on yo ur vehicle or may be op
tiona l equipment depend ing on your mod
e l. Always ask your authorized Audi dea ler
if you have a quest ion about your vehicle.
Page 25 of 258
M N M N
0 ;::::, co
rl I.O
"' rl
"' rl
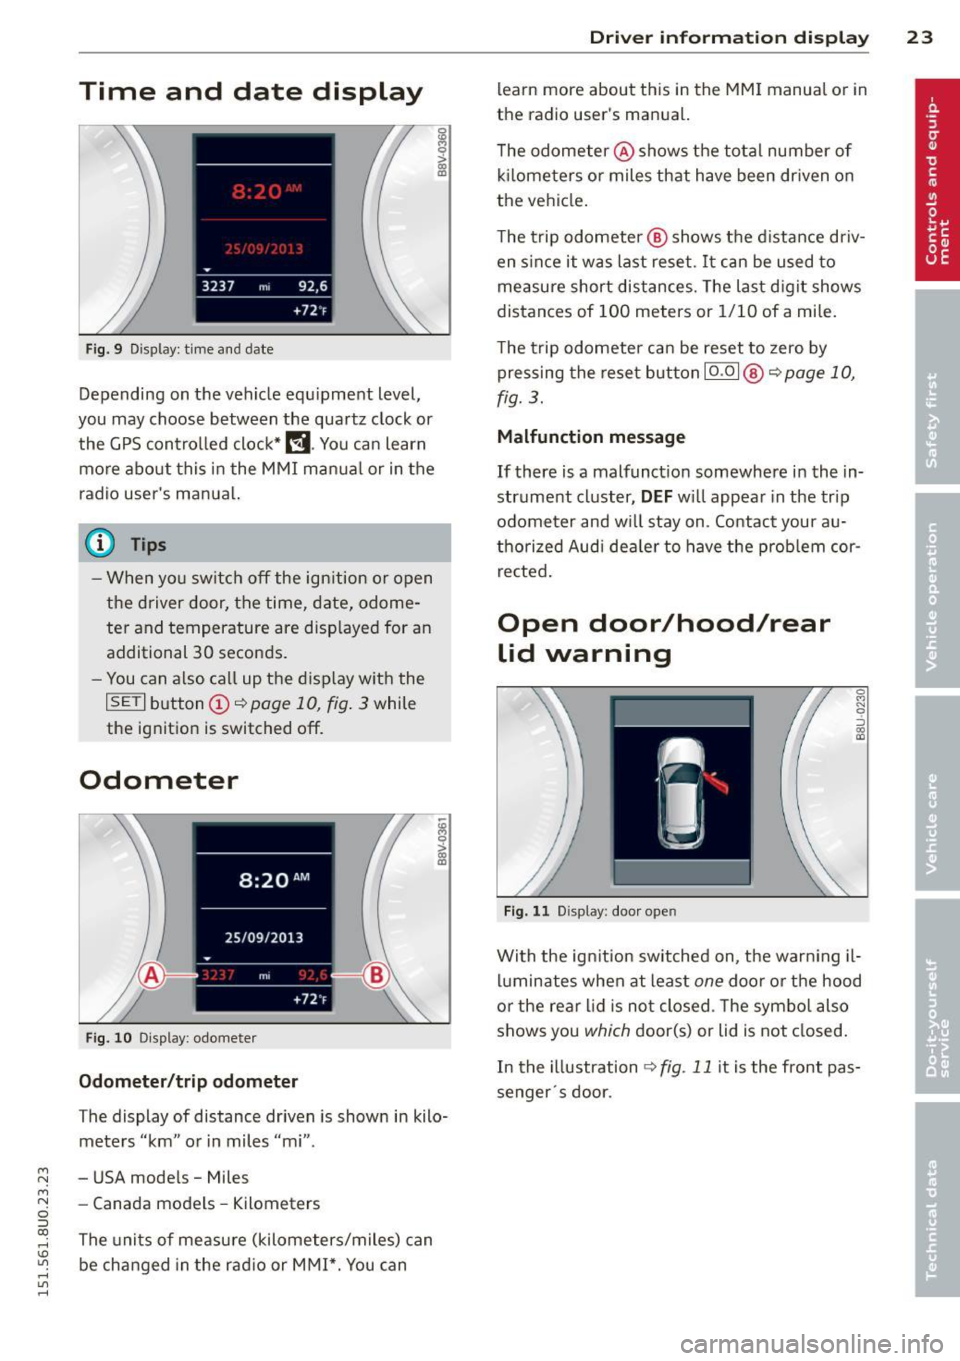
Time and date display
Fig. 9 Dis pl ay: time an d date
Depending on the veh icle equ ipment leve l,
you may choose between the quartz clock or
the GPS control led clock*
l!j . You can learn
more about this in the MMI manual or in the
radio user's ma nua l.
(D Tips
- When you switch off the ign ition or open
the driver door, the time, date, odome
ter and temperature are disp layed for an
additional 30 seconds.
- You can also call up the display w ith the
I SET I b utton (D ~ page 10, fig . 3 while
the ignition is switched off.
Odometer
F ig. 10 Dis play : odomete r
Odometer /trip odometer
The display of distance driven is shown in kilo
meters "km" or in miles "mi" .
- USA mode ls - Miles
- Canada models -Kilometers
The uni ts of me asure (kilometers/miles) can
be changed in the rad io or MMI*. You can
Dri ver inform ation di spl ay 23
learn more about this in the MM I manual o r in
the radio use r's manual.
T he odometer @shows the total number of
k il ometers o r miles that have been dr iven on
the vehicle.
The trip odometer @ shows the d istance driv
en since it was last reset . It can be used to
measure short distances. The last d igit shows
distances of 100 meters or 1/10 of a mi le.
The trip odometer can be reset to zero by pressing the reset button I
0.0 I @ ~ page 10,
fig. 3.
Malfunction message
If there is a malfunct ion somewhere in the in
strument cluster,
DEF w ill appear in the trip
odometer and w ill stay on . Contact your au
thorized Aud i dea le r to have the prob lem cor
r ected .
Open door/hood/rear
lid warning
F ig. 1 1 Dis play : door o pen
0
"' N 9 ::::, 0:, a,
With the ign ition sw itched on, the warn ing il
luminates when at least
one door o r the hood
or the rear l id is not closed . T he symbo l also
shows you
which door(s) or lid is not closed.
In the illustration
~ fig . 11 it is the front pas
senger · s door.
Page 27 of 258
M N M N
0 ::i co
rl I.O
"' rl
"' rl
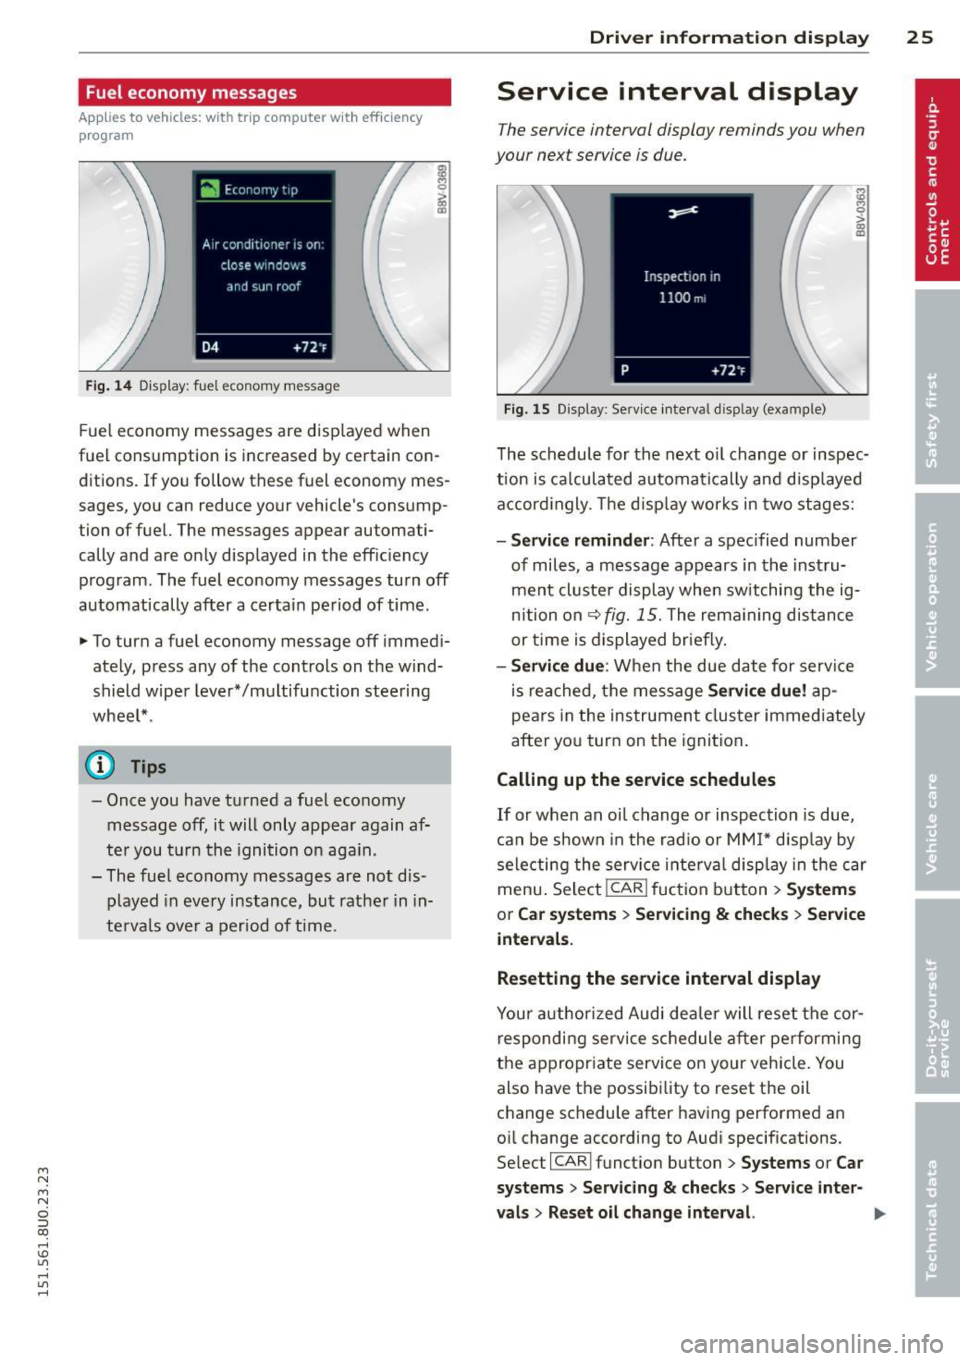
Fuel economy messages
App lies to vehicles: with trip computer w it h eff ic iency
p rogram
Fig . 14 Display: fuel economy message
Fue l economy messages are disp layed when
fuel consumption is increased by certain con
ditions. If you follow these fuel economy mes
sages, you can reduce your vehicle's consump
tion of fuel. The messages appear automati
cally and are only displayed in the effic iency
program. The fuel economy messages turn off
automatically after a certain period of time.
• To turn a fuel economy message off immedi
ately, press any of the controls on the wind
shield wiper lever*/multifunction steering
whee l* .
(D} Tips
- Once you have turned a fuel economy
message off, it will only appear again af
ter you t urn the ignition on aga in.
- The fuel economy messages are not dis
played in every instance, but rather in in
te rva ls over a period of time.
Dri ver inform ation di spl ay 25
Service interval display
The service interval display reminds you when
your next service is due.
Fig. 15 Display: Service interval display (example)
The schedule for the next o il change or inspec
t ion is ca lculated automatica lly and disp layed
accord ingly. The d isp lay works in two stages:
-Serv ice rem inder: After a spec ified number
of miles, a message appears in the instru
ment cluster display when switching the ig
nition on
¢fig. 15. The rema ining dis tance
or time is displayed br iefly.
- Se rvi ce due : When the due date for serv ice
is reached, the message
Se rvic e due! ap
pears in the instrument cluster immediate ly
after you turn on the ignition .
Calling up the service schedules
If or when an oil change or inspection is due,
can be shown in the rad io or MMI* disp lay by
selecting the service i nte rva l display in the car
menu . Selec t!CAR ! fuction button>
Sy ste m s
or C ar s ystem s > Ser vicing & check s > Service
intervals.
Resetting the service interval displa y
Your author ized Audi dealer will reset the cor
respondi ng service schedule after pe rforming
the appropr iate service on your veh icle. You
also have the possibi lity to reset the oil
change schedule after having performed an
oil change according to Audi specifications.
Se lect !CARI function button>
Sy stem s or Ca r
sy ste ms
> Servicing & checks > Service int er-
val s
> Reset oil cha nge int erval. ""
Page 30 of 258
28 Opening and closing
Opening and closing
Power locking system
General description
The power locking system locks or unlocks all
doors and the rear lid simultaneously.
You can lock and unlock the vehicle centrally.
You have the following choices:
- Remote master key~
page 30,
-Sensors in the front door handle on vehicles
with convenience key* ¢
page 31,
-Power locking switch ins ide¢ page 32,
oder
- Lock cylinder at the driver's door
~page 33.
Automatic locking
The automat ic locking feature locks all the ve
hicle doors and the rear lid when you drive
faster than 9 mph (15 km/h).
The car is unlocked again once the ignition key
is removed. In addition, the veh icle can be un
locked if the opening function in the power
locki ng system switch or at one of the door
levers is actuated.
Addit ionally, in the event of a crash with air
bag deployment the doors are automatically
un locked to all ow access to the vehicle.
Selective unlocking
When you lock the vehicle, the power locking
system w ill lock the doors and the rear lid.
When unlocking, you can set in the rad io or
MMI* whether only the driver's door or the
enti re vehicle should be unlocked
¢page 32.
Anti-theft alarm warning system
If the anti -theft alarm warning system de
tects a break- in into the vehicle, acoust ic and
visua l warning signals are triggered.
The anti-theft alarm system turns on auto matically when you lock the vehicle. It deacti
vates when unlocking using the remote con- trol key or by touching the sensor on the door
handle (convenience key) .
T o switch the alarm off, press the@ button on
the remote control key or conven ience key or
switch the ignition on. The a larm also stops
automatica lly after a certain amount of time .
You can also trigger the alarm by pressing the
PANIC button on your remote-control key.
This will alert other people in case of emer
gency. Press the
PANIC button again to turn
off the a larm .
Turn signals
When you unlock the vehicle, the turn sig nals
flash twice, when you lock it once. If they do
not flash, one of the doors or the luggage
compartment lid is not locked, the ignition is
sti ll switched on or the selector lever is not in
pos ition P.
Unintentionally locking yourself out
In the following cases there are safeguards to
prevent you from locking your remote master
key in the vehicle :
- The vehicle does not lock w ith the central
locking switch if the driver's door is open
~ page 32.
-On veh icles with convenience key*, if the
most recently used master key is in the lug
gage compartment, the rear lid is automati
cally un locked again after it is closed.
Do not lock your veh icle w ith the remote mas
ter key or convenience key* until all doors and
the rear lid are closed. In this way you avoid l ocking yourself out accidentally.
A WARNING
- When you leave the vehicle, always re
move the ignition key and take it with
you . This will prevent passengers (chil -
dren, for example) from accidentally be-
-
ing locked in the vehicle should they acci
denta lly press the power locking switch
in the front doors.
~
Page 33 of 258
M N M N
0 ::i co
rl I.O
"' rl
"' rl
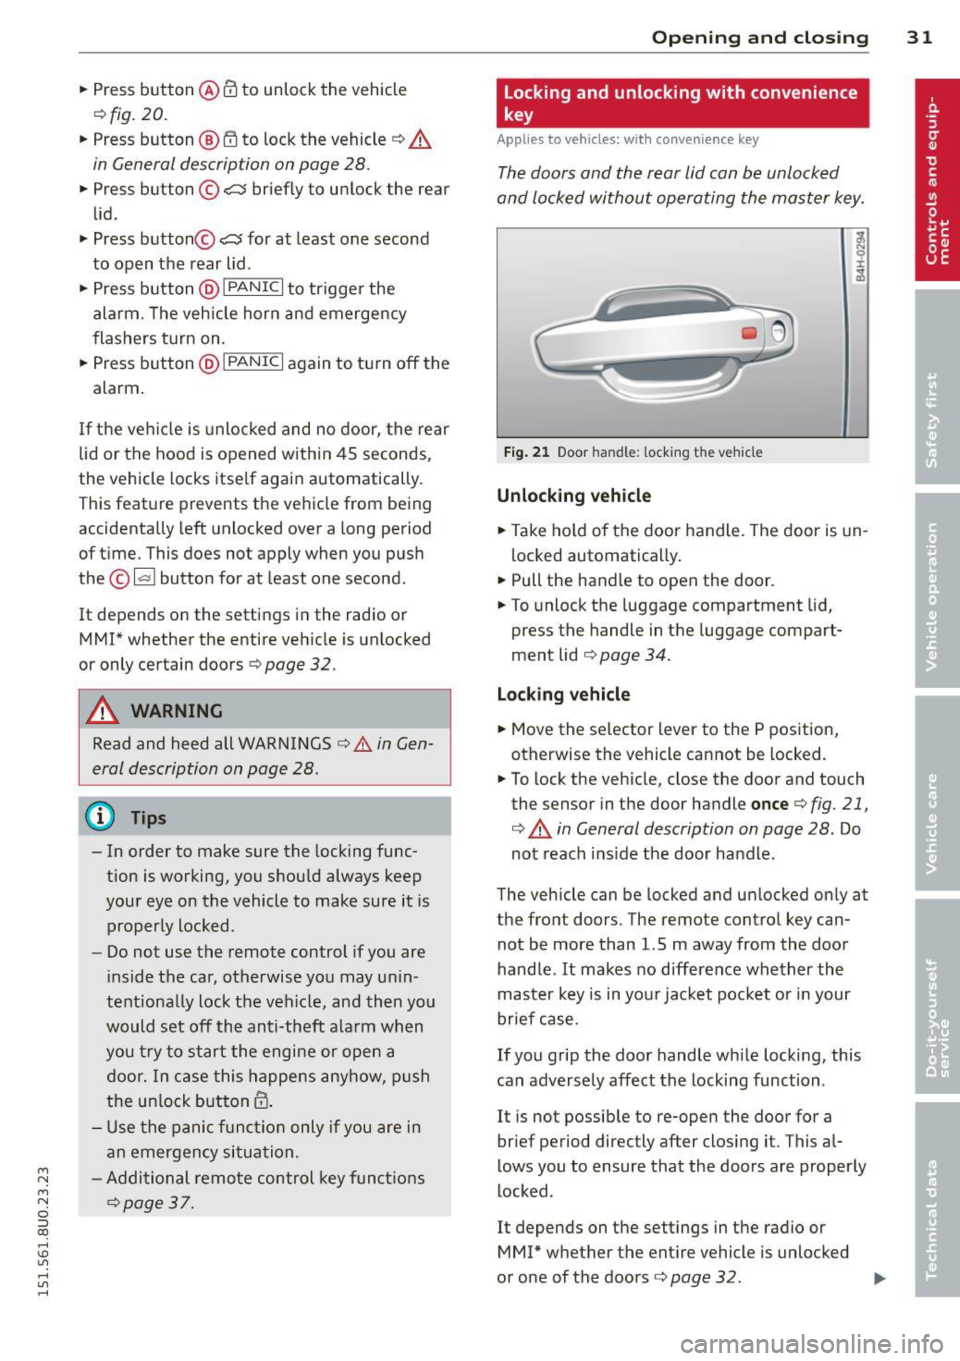
.. Press button @ III to unlock the vehicle
r=>fig. 20 .
.. Press button @ ffi to lock the vehicle r=> A
in General description on page 28.
.. Press button ©~ briefly to unlock the rear
l id .
.. Press button @~ for at least one second
to open the rear lid .
.,. Press button @ ~I P-A-N-IC~I to trigger the
alarm. The vehicle horn and emergency
flashers turn on .
.. Press button @IPANICI again to turn off the
alarm.
If the vehi cle is unlocked and no door, the rear
lid or the hood is opened within 45 seconds,
the vehicle locks itself agai n automatically.
This feature prevents the vehicle from being
accidentally left unlocked over a long period
of time. This does not apply when you pus h
the ©~button for at least one second .
It depends on the settings in the radio or
MMI* whether the entire vehicle is unlocked
or only certain doors
r=> page 32 .
A WARNING
Read and heed all WARNINGS c:> _.&. in Gen
eral description on page 28 .
@ Tips
-In order to make sure the locking func
tion is working, you should always keep
your eye on the vehicle to make sure it is
properly locked.
- Do not use the remote control if you are
inside the car, otherwise you may unin
tentiona lly lock the vehicle, and then you
would set off the anti-theft alarm when
you try to start the engine or open a
door. In case this happens anyhow, push
the un lock button
m .
- Use the panic f unc tion only if you are in
an emergency si tua tion.
- Additional remo te control key funct ions
r=>page37.
Op enin g an d clos ing 31
Locking and unlocking with convenience
key
Appl ies to veh icles: w ith conven ience key
The doors and the rear lid can be unlocked
and locked without operating the master key.
Fi g. 21 Door handle: l ocking t he veh icle
Unlocking vehicle
.. Take ho ld of the door handle. The door is un
locked automatically .
.. Pull the handle to open the door .
.. To unlock the luggage compartment lid,
press the handle in the luggage compart
ment lid
r=> page 34 .
Locking vehicle
.. Move the selector lever to the P position ,
otherwise the vehicle cannot be locked.
.. To lock the vehicle, close the door and touch
the sensor in the door handle
once c:> fig. 21,
c:> A in General description on page 28. Do
not reach ins ide the door handle .
The vehicle can be locked and unlocked only at
the front doors. The remote control key can
not be more than 1.5 m away from the door
handle .
It makes no difference whether the
master key is in you r jacket pocket or in your
brief case.
If you grip the door handle wh ile locking, this
can adversely affect the locking function .
It is not possible to re-open the door for a
brief period directly after closing it. This al
lows you to ensure that the doo rs are properly
locked .
It depends on the settings in the radio or
MM!* whether the entire vehicle is unlocked
or one of the doors
c:> page 32 . IJJ,
Page 34 of 258
32 Opening and clo sing
A WARNING
Read and heed all WARNINGS¢.&. in Gen
eral description on page 28.
(D Tips
If your vehicle has been standing for an ex
tended period, please note the following :
- The proximity sensors are deactivated af-
ter a few days to save power. You then
have to pull on the door handle once to
unlock the vehicle and a second time to
open the veh icle .
- To prevent the battery from being dis
charged and to preserve your veh icle's
ability to start for as long as possible,
the ene rgy management system gradu
ally switches off unnecessary conven
i ence funct ions .
It is possible that you
will not be able to unlock your vehicle us
ing these convenience functions.
- For Declarat ion of Compliance to Uni ted
States FCC and Industry Canada regu la
tions ¢
page 240.
Locking and unlocking the vehicle from
inside
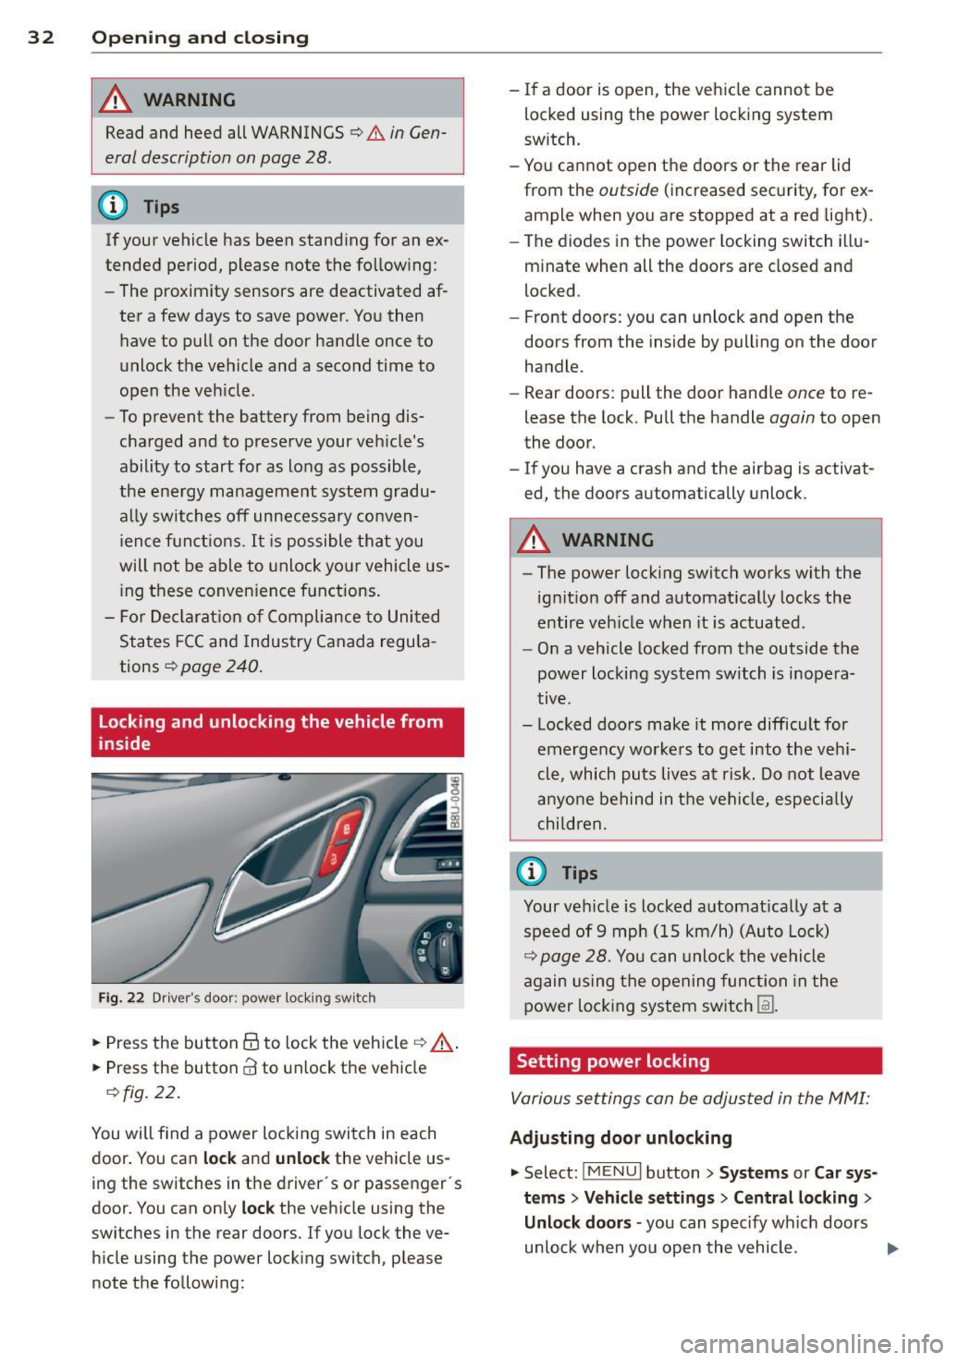
Fig. 22 Drive r's door ; p ow er lo ckin g sw it c h
.. Press the button @to lock the vehicle¢ A
.. Press the button CI! to unlock the vehicle
¢fig. 22.
You will f ind a power locking switch in each
door. You can
lock and unlock the vehicle us
ing the switches in the driver's or passenger 's
doo r. You can only
lock the vehicle using the
switches in the rear doors. If you lock the ve h icle using the power locking switch, please
note the following: -
If a door is open, the vehicle cannot be
locked using the power locking system
sw itch.
- You cannot open the doors or the rear lid
from the
outside ( increased security, for ex
ample when you are stopped at a red light).
- The diodes in the power locking switch illu
minate when all the doors are closed and
locked .
- Front doors: you can unlock and open the
doors from the inside by pulling on the door
handle.
- Rear doors: pull the door handle
once to re
lease the lock. Pull the handle
again to open
the door.
- If you have a crash and the ai rbag is activat
ed, the doors automatically unlock.
A WARNING
-
-The power locking switch works with the
ignition off and automatically locks the
entire veh icle when it is actuated .
- On a vehicle locked from the outside the
power locking system switch is inopera
tive .
- Locked doors make it more difficult for
emergency workers to get into the veh i
cle, which puts lives at risk. Do not leave
anyone behind in the vehicle, especia lly
children,
0) Tips
Your vehicle is locked automat ically at a
speed of 9 mph (15 km/h) (Auto Lock)
¢ page 28. You can unlock the vehicle
again using the opening function in the
power locking system sw itch
[fil .
Setting power locking
Various settings can be adjusted in the MMI:
Adjusting door unlocking
.. Select: iM ENUI button> Systems or Car sys
tems > Vehicle settings> Central locking>
Unlo ck doors -
you can spec ify which doors
un lock when yo u open the vehicle . ...
Page 42 of 258
40 Clear vision
Clear vision
Lights
Switching the lights on and off
Fig . 34 Instrument panel: headlight control switch
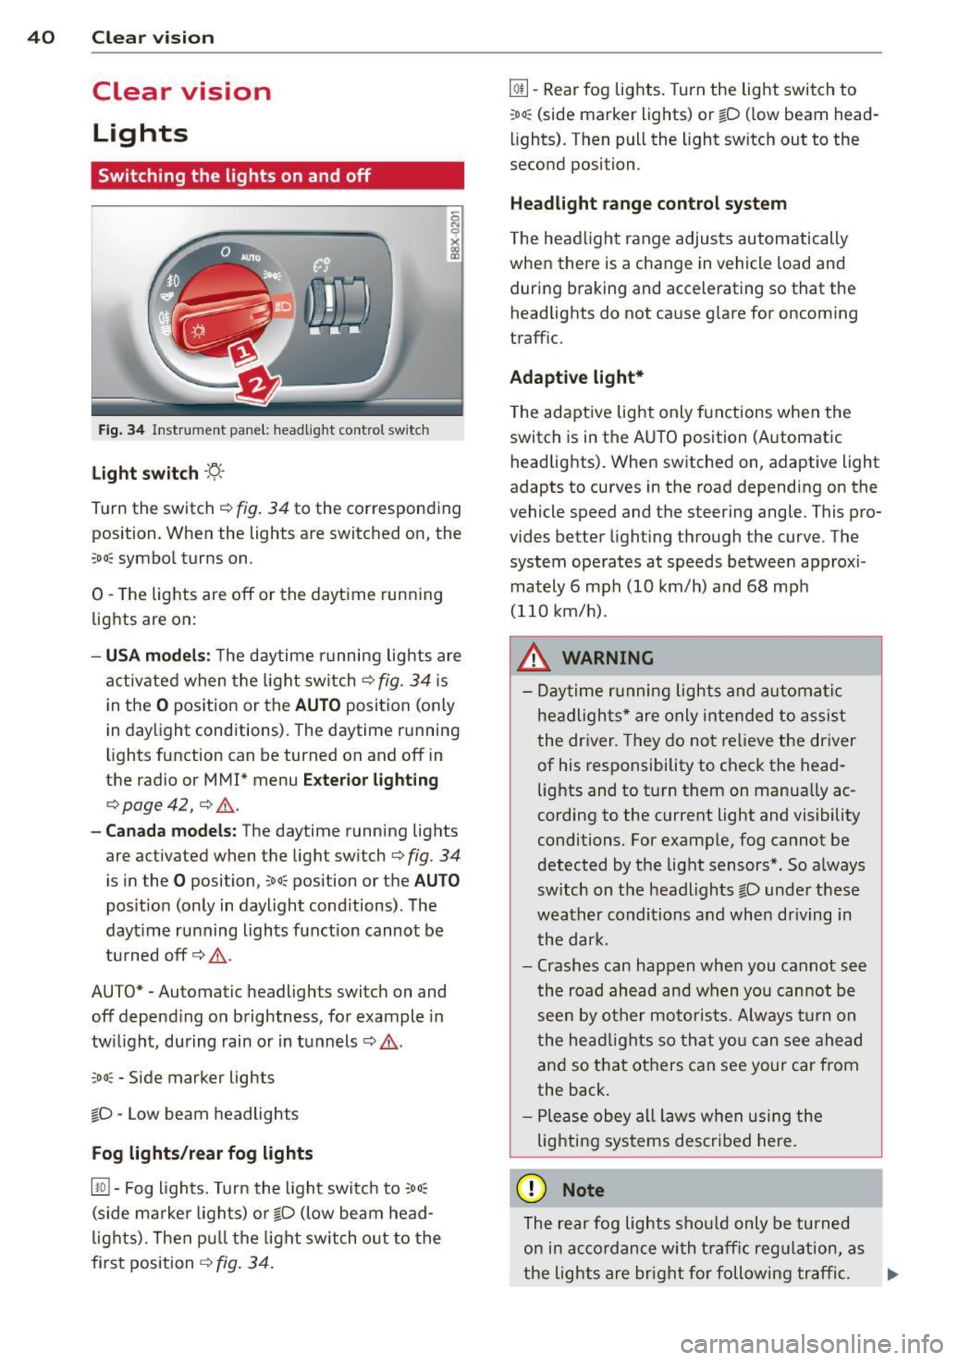
Light switch -'t;. -
Tu rn the switch ¢ fig. 34 to the corresponding
position. When the lights are switched on, the
:oo : symbol turns on.
0 -The lights are off or the daytime running
lights are on:
- USA models: The daytime running lights are
activated when the light switch¢
fig. 34 is
in the
O position or the AUTO position (only
in daylight conditions). The daytime running
lights function can be turned on and off in
the radio or
MMI* menu Exterior lighting
¢ page 42, ¢ ,& .
-Canada models : The daytime running lights
are activated when the light switch¢
fig. 34
is in the O posi tion, co o: position or the AUTO
position (only in daylight conditions). The
dayt ime running lights function cannot be
turned off¢,& .
AUTO* -Automatic headligh ts swi tch on and
off depending on brightness, for example in
twilight, during rain or in tunnels¢,& .
:oo: -Side marker lights
io -Low beam headlights
Fog lights /rear fog lights
[!Q] -Fog lights. Turn the light switch to :oo:
(side marker lights) or io (low beam head
lights). Then pull the light switch out to the
first position ¢
fig. 34.
@I] -Rear fog lights. Turn the light switch to
:oo : (side marker lights) or io (low beam head
lights). Then pull the light switch out to the
second position .
Headlight range control system
The headlight range adjusts automatically
when there is a change in veh icle load and
during braking and accelerating so that the
headlights do not cause glare for oncoming
traffic.
Adaptive light*
The adaptive light only functions when the
switch is in the AUTO position (Automatic
headlights). When switched on, adapt ive light
adapts to curves in the road depending on the
vehicle speed and the steering angle. This pro
vides better lighting through the curve . The
system operates at speeds between approxi
mately 6 mph (10 km/h) and 68 mph
(110 km/h) .
_&. WARNING
- Daytime running lights and automatic
headlights* are only intended to assist
the driver. They do not relieve the driver
of his responsibility to check the head
lights and to turn them on manually ac
cording to the current light and visibility
conditions. For example, fog cannot be
detected by the light sensors*. So always
sw itch on the headlights
io under these
weather conditions and when driving in
the dark.
- Crashes can happen when you cannot see
the road ahead and when you cannot be
seen by other motorists. Always turn on
the headlights so that you can see ahead
and so that others can see your car from
the back.
- Please obey all laws when using the
lighting systems described here.
(D Note
The rear fog lights should only be turned
on in accordance with traffic regulation, as
-
the lights are bright for following traffic. .,._
Page 47 of 258
M N M N
0 ::i co
rl I.O
"' rl
"' rl
to estimate distances of following vehicles
when changing lanes, you could estimate incorrectly and cause an accident.
(D Note
- If the mirror housing is moved uninten
tionally (for example, while parking your
vehicle), then you must first fold the mir ror electrically. Do not readjust the mir
ror housing manually. You could damage
the motor which controls the mirror .
- If you wash the vehicle in an automatic
car wash, you must fold the exterior mir
rors in to reduce the risk of damage to
the mirrors. Never fold power folding ex
terior mirrors* by hand. Only fold them
in and out using the power controls.
@ Tips
If there should be a malfunction in the
electrical system, you can still adjust the
exterior mirrors by pressing the edge of
the mirror ..
Dimming the mirrors
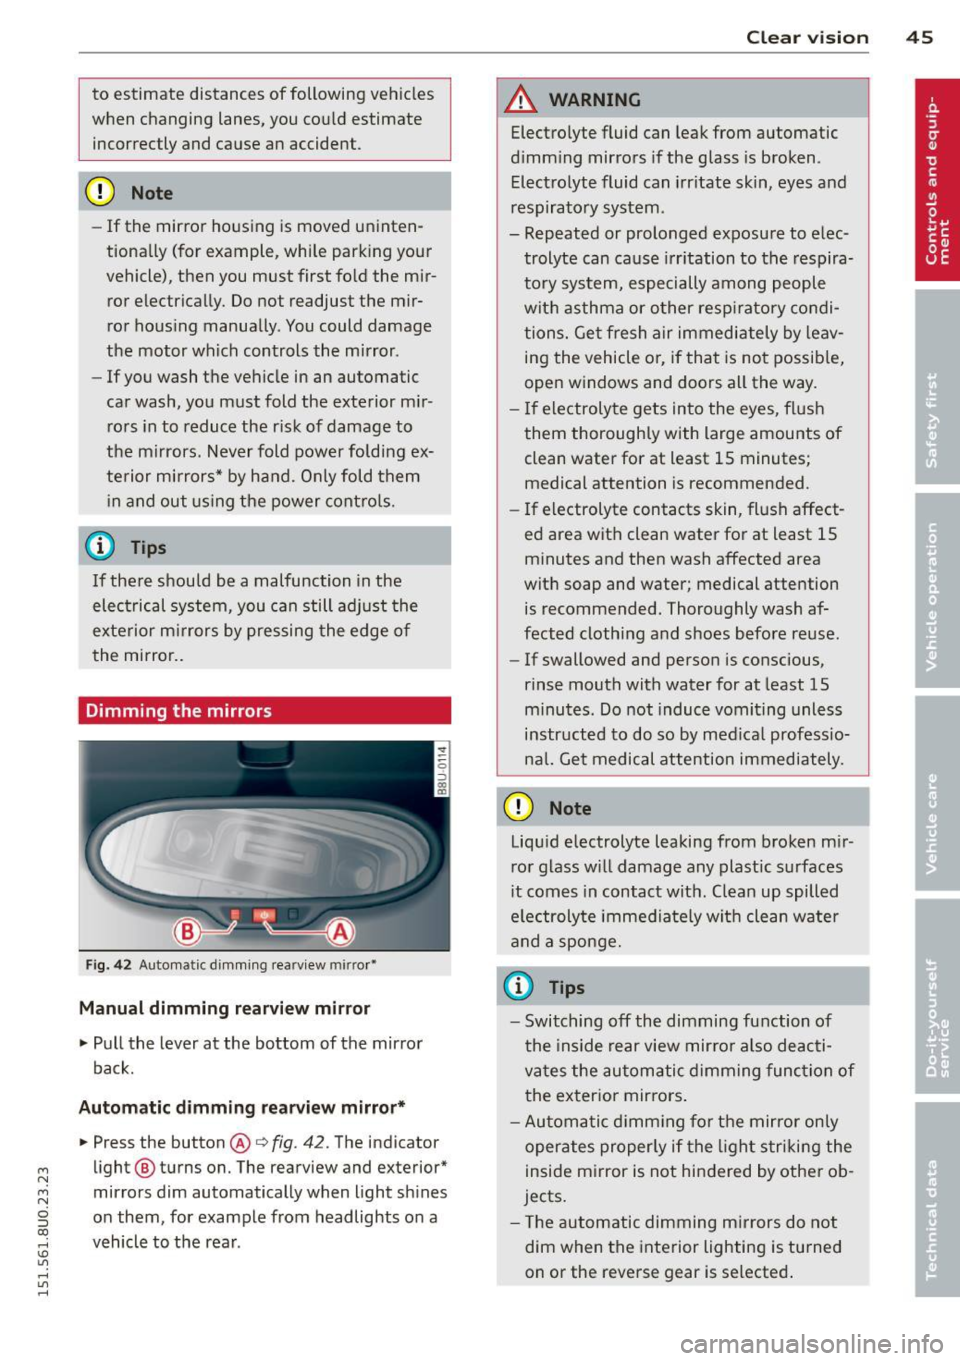
Fig. 42 Automatic dimming rearview mirror•
Manual dimming rearview mirror
.,. Pull the lever at the bottom of the mirror
back.
Automatic dimming rearview mirror* .,. Press the button
@r::;, fig. 42. The indicator
light @ turns on. The rearview and exterior*
mirrors dim automatically when light shines
on them, for example from headlights on a
vehicle to the rear .
Clear vision 45
A WARNING
Electrolyte fluid can leak from automatic
dimming mirrors if the glass is broken.
Electrolyte fluid can irritate skin, eyes and
respiratory system.
- Repeated or prolonged exposure to elec trolyte can cause irritation to the respira
tory system, especially among people
with asthma or other respiratory condi
tions. Get fresh air immediately by leav
ing the vehicle or, if that is not possible,
open windows and doors all the way.
- If electrolyte gets into the eyes, flush
them thoroughly with large amounts of clean water for at least 15 minutes; medical attention is recommended.
- If electrolyte contacts skin, flush affect
ed area with clean water for at least 15
minutes and then wash affected area
with soap and water; medical attention is recommended. Thoroughly wash af
fected clothing and shoes before reuse.
- If swallowed and person is conscious,
rinse mouth with water for at least 15
minutes. Do not induce vomiting unless
instructed to do so by medical professio
ncil. Get medical attention immediately.
(D Note
Liquid electrolyte leaking from broken mir
ror glass will damage any plastic surfaces
it comes in contact with. Clean up spilled
electrolyte immediately with clean water
and a sponge.
(D Tips
-Switching off the dimming function of
the inside rear view mirror also deacti
vates the automatic dimming function of
the exterior mirrors.
- Automatic dimming for the mirror only
operates properly if the light striking the
inside mirror is not hindered by other ob
jects.
- The automatic dimming mirrors do not
dim when the interior lighting is turned
on or the reverse gear is selected.
.
Page 75 of 258
M N
M N
0 ::i co ,...., \!) ..,.,
,...., ..,., ,....,
vehicle to skid or the rear end to break away -risk ing an accident.
Speed warning system
Overview
T he speed warning system helps you to keep
your driving speed below a set speed limit.
The speed warning system warns if the driver
exceeds a prev iously stored maximum speed .
A warning tone will sound as soon as the vehi
cle speed exceeds the set speed by about
3 mph (3 km/h). At the same time , an indica
tor lamp
(mj (USA models) / ISJ (Canada mod
e ls) will light up in the instrument cluster dis
p lay and the driver message
Spe ed limit
wa rning exceeded.
wi ll appear. The indicator
l amp
1mj / i•j will go out when the speed
drops below the set speed lim it aga in.
Setting a thresho ld is recommended if you
wou ld like to be reminded when you reach a
certain maximum speed . Situations where yo u
may want to do so include driving in a country
with a general speed limit or if the re is a
specified max imum speed for winter tires .
(D Tips
Even though your vehicle is equipped with
a speed warning system, you should st ill
watch the speedometer to make sure you are not driving faster than the speed lim it.
Setting speed limit
You can set , change and delete the threshold
in the MMI.
.,. Se lect :
I CAR I funct ion button > S ystem s or
Car System s control button > Vehicle set
tings > Speed warning .
You can set any thresho ld between 20 mph
(30 km/h) and 150 mph (240 km/h). Settings
can each be adjusted in increments of 6 mph
(10 km/h) .
On the ro ad 73
Cruise control
Description
The cruise cont ro l system makes it poss ible to
drive at a constant speed start ing at 15 mph
(20 km/h).
The speed is kept constant by modifying en
gine powe r or th rough an active brake inte r
vention.
A WARNING
- Always pay attention to the traffic
around you when the cruise control is in
operation. You are always responsible for
your speed and the distance between
your vehicle and other vehicles.
- For reasons of safety, cr uise control
should not be used in the city, in stop
and-go traffic, on winding roads and
when road cond it ions are poor (such as
ice, fog, gravel, heavy rain and hydro
plan ing) -you could have an accident .
- Sw itch the cruise control off temporar ily
when dr iv ing in turning lanes, h ighway
exits or in constr uction zones.
- Please note that unconsc iously "resting"
your foot on the accelerator pedal pre
vents the cruise control from braking .
This is due to the control system be ing
overridden by the dr iver's acceleration .
- If a b rake system malfunction s uc h as
overheating occurs when the cruise con
trol system is swi tched on, the braking
function in the system may be switched off . The other cruise control functions re
main active as long as the indicator light
II (US models) !l'I (Canada mode ls) is
on .
(D Tips
-The cruise control system is ideal for
stretches w ith speed limits. The driver is
responsib le for adhering to the correct
speed.
- The cru ise control remains act ive when
shift ing gears .