wheel bolt torque AUDI Q3 2015 Owners Manual
[x] Cancel search | Manufacturer: AUDI, Model Year: 2015, Model line: Q3, Model: AUDI Q3 2015Pages: 258, PDF Size: 64.9 MB
Page 214 of 258
212 Tire s and wheel s
driving a few yards and correct if neces
sary. Follow the instructions from the
snow cha in manufacturer when doing so.
(D Tips
Where snow chains are mandatory oncer
tain roads, this normally also applies to
veh icles with all wheel drive .
Wheel bolts
Wheel bolts must always be tightened to the
correct torque.
The design o f whee l bolts is matched to the
factory insta lled rims . If different rims are fit
ted, the correct wheel bolts with the right l ength and correctly shaped bolt heads must
be used. This ensures that wheels are f itted
securely and that the brake system functions
correctly .
In certain circumstances, you may not use
wheel bolts from a different vehicle -even if it
is the same model¢
page 239.
.&_ WARNING
Improperly tig htened or maintained wheel
bolts can become loose ca using loss of
cont ro l, a co llision and serious p ersona l in
Jury.
- Always keep the wheel bolts and the
threads in t he wheel hubs clea n so the
wheel bolts can tu rn easily and be prop
erly tigh tened.
- N ever grease or oil the wheel bo lts and
the threads in the wheel h ubs. They can
become loose w hile d riving if greased or
oiled, even if tightened to the specified
torq ue.
- O nly use wheel bo lts that be long to the
rim being installed.
- N ever use different whee ls bolts on your
vehicle.
- Alw ays mai nta in the co rrec t tighte ning
tor que fo r the wheel bo lts to reduce the
risk of a wheel loss . If the tightening tor
que of the wheel bo lts is too low, they
can loosen and come out when the veh i- cle is moving.
If the tig
hte ning torq ue is
too high, the wheel bolts and threads
can be damaged and the wheel can be
come loose.
(D Note
The specified torque for the whee l bolts is
105 ft lbs. (140 Nm) with a tolerance of
± 7,4 ft lbs. (± 10 Nm). Torque whee l bolts
diagonally . After changing a wheel, the
torque must be checked as soon as poss i
ble with a to rque wrenc h - preferab ly by an
a uthorized Aud i dea le r or qualified wor k
shop.
Low aspect ratio tires
Your A udi is factory -eq uipped w it h low aspect
ratio tires. These tires have been thoroughly
tested and been se lected specifically for your
model for their superb performance, road fee l
and handling under a variety of driving condi
t ions . Ask your authorized Audi dealer for
more details .
The low aspect ratio of these tires is ind icated
by a numeral of
55 or less in the tire's s ize
designation . The numeral represents the ratio
of the tire's sidewall height in relation to its
t read width exp ressed in percentage. Conven
tiona l tires have a he ight/w idth rat io of 60 or
more.
The performanc e of low-a spect-ratio tire s is
pa rticularly sen sitive to improp er inflation
pre ssure. It i s therefor e important that low
a spe ct ratio tir es are inflated to the spe cified
pre ssure and that the inflation pre ssure i s
regula rly checked and mainta ined. Tire pre s
sure s should be checked at lea st once a
month and always befo re a long trip
¢ page 201, Checking tire pressure.
What you can do to avo id tire and rim
damage
Low aspect ratio tires can be damaged mo re
easily by impact w ith potholes, curbs, gul lies
or ridges on the road, particularly if the tire is
underinflated . ..,.
Page 221 of 258
M N
M N
0 ::i co ,...., \!) ..,.,
,...., ..,., ,....,
A WARNING 1=
You or your passengers could be injured
while changing a wheel if you do not fol
low these safety precautions:
- If you have a flat tire, move a safe dis
tance off the road. Turn off the engine,
turn the emergency flashers on and use
other warning devices to alert other mo
torists.
- Make sure that passengers wait in a safe
place away from the vehicle and well
away from the road and traffic.
- To help prevent the vehicle from moving
suddenly and possibly slipping off the
jack, always fully set the parking brake
and block the wheel diagonally opposite
the wheel being changed with the fold
ing chocks or other objects. When one
front wheel is lifted off the ground, plac ing the Automatic Transmission in "P"
(Park) will
not prevent the vehicle from
moving .
- Before you change a wheel, be sure the
ground is level and firm. If necessary,
use a sturdy board under the jack.
- Always store the vehicle tool kit, the jack
and the replaced tire in the luggage com
partment
¢ page 100.
(D Note
If you are changing the wheel on a steep
incline, use the folding chock¢
page 217
to block the opposite wheel to prevent the
vehicle from moving.
(!) Tips
Obey all laws.
Changing a wheel
When you change a wheel, follow the se
quence described below step-by-step and in
exactly that order .
-
1. Remove the decorative wheel cover* or
the
wheel bolt caps*. For more details see
also
¢ page 220.
2. Loosen the wheel bolts<=:> page 220 .
What do I do now? 219
3.
4.
5.
6.
7.
8.
Locate the proper mounting point for the
jack and align the jack below that point
¢ page 221.
Lift the car with the jack ¢ page 221.
Remove the wheel with the flat tire and
then install the
spare tire <=:>page 222.
Tighten all wheel bolts lightly.
Lower the vehicle with the jack .
Use the wheel bolt wrench and
firmly
tighten all wheel bolts in a crisscross pat
tern ¢
page 220.
9. Replace the decorative wheel cover* or
the
wheel bolt caps*.
A WARNING
Always read and follow all WARNINGS and information<=:>
A in Raising the vehicle on
page 221
and <=:> page 223.
After changing a wheel
A wheel change is not complete without the
doing the following.
.,. Always store the vehicle tool kit, the jack4
and the replaced tire in the luggage com
partment
¢ page 100.
.,. Check the tire pressure of the spare tire as
soon as possible .
.,. As soon as possible, have the
tightening
torques
on all wheel bolts checked with a
torque wrench. The correct tightening tor
que is 105 ft lbs. (140 Nm).
.,. Have the flat tire
replaced as soon as possi
ble.
(D Tips
- If you notice that the wheel bolts are
corroded and difficult to turn while
changing a tire, they should be replaced
before you check the tightening torque.
- Drive at reduced speed until you have the
tightening torques checked.
•
•
Page 224 of 258
222 What do I do now?
-If work has to be done under the vehi
cle , ensure that it is safely supported
on suitable stands -risk of injury!
- Never start the engine when the vehi
cle is on the jack -risk of accident!
CD Note
Do not lift the vehicle by the si ll. Position
the vehicle jack only at the designated lift
ing points on the sill. Otherwise, your vehi
cle will be damaged.
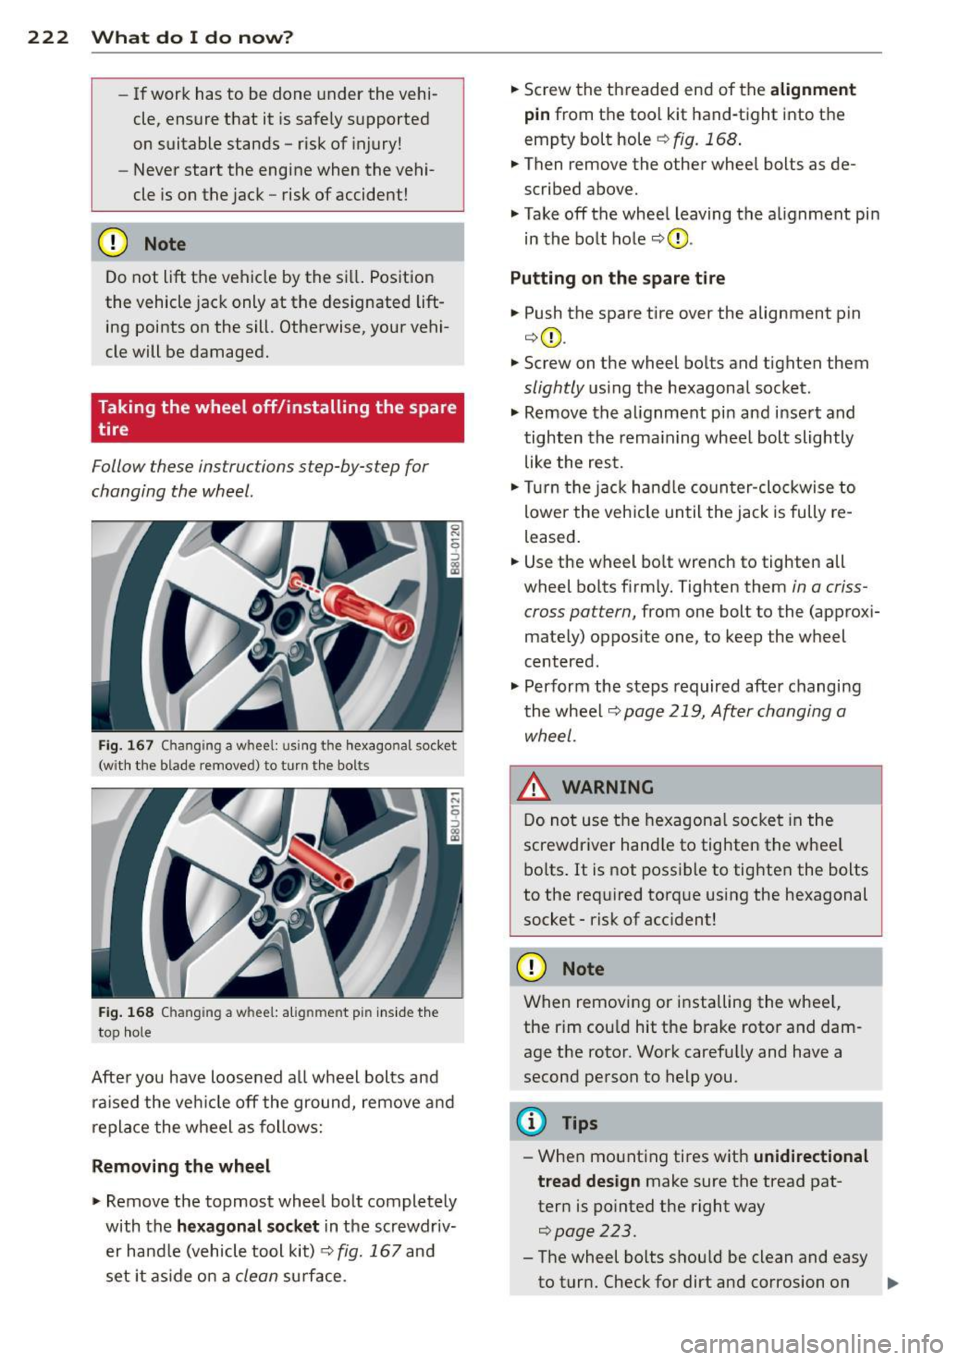
Taking the wheel off/installing the spare
tire
Follow these instructions step-by-step for
changing the wheel.
Fig. 167 Changing a whee l: u sing the hexago nal socket
(w ith the blade removed) to turn the bolts
Fig. 168 Changing a w hee l: a lignm en t pi n inside the
top hole
After you have loosened a ll wheel bolts and
ra ised the veh icle off the ground, remove and
replace the wheel as follows:
Removing the wheel
> Remove the topmost wheel bolt completely
with the
hexagonal socket in the screwdriv
er handle (vehicle tool kit)
r=;; fig. 167 and
set it as ide on a
clean su rface. >
Screw the threaded end of the
alignment
pin
from the tool kit hand-tight into the
empty bolt hole
¢ fig. 168 .
... Then remove the other whee l bolts as de
scribed above.
> Takeoff the whee l leaving the alignment pin
in the bolt hole
r=;; (D.
Putting on the spare tire
... Push the spare tire over the alignment pin
¢ CD.
... Screw on the wheel bolts and tighten them
slightly using the hexagonal socket .
> Remove the alignment pin and insert and
tighten the remaining wheel bolt slightly
like the rest.
... Turn the jack handle counter -clockwise to
lower the veh icle until the jack is fully re
leased .
... Use the wheel bolt wrench to tighten all
wheel bo lts firm ly. Tighten them
in a criss
cross pattern,
from one bolt to the (approx i
mately) oppos ite one, to keep the wheel
centered.
> Perform the steps required after changing
the wheel
¢ page 219, After changing a
wheel.
A WARNING
-
Do not use the hexagonal socket in the
screwdriver hand le to tighten the whee l
bolts. It is not possible to tighten the bolts
to the required torque using the hexagonal
socket - risk of accident!
CD Note
When removing or installing the whee l,
the rim cou ld hit the brake rotor and dam
age the rotor. Work carefu lly and have a
second person to help you.
(D Tips
-When mount ing tires with unidirectional
tread design
make sure the tread pat
tern is po inted the right way
r=;;page223.
- The wheel bolts shou ld be clean and easy
to turn. Check for dirt and corrosion on
Page 225 of 258
M N
M N
0 ::i co ,...., \!) 1.1'1 ,...., 1.1'1 ,....,
th e mat ing s urfaces o f both the whee l
and t he hub . R emove a ll dirt f rom these
su rfaces before remo untin g t he wheel.
Tires with unidirectional tread design
Tires with uni directional tread design must be
mounted with their tread pattern pointed in the right direction.
Using a spare tire with a tread pattern
intended for use in a specific direction
W hen using a spa re tire w it h a t read patte rn
intended fo r use in a specific direction, p lease
note t he followi ng:
- The di rection of rotation is ma rked by an
ar
row on the side of the t ire.
- If the s pare tire has to be inst alled in the in
correct di rection, use the spare tire only
temporarily since the t ire wi ll not be a ble to
achieve its optimum pe rformance character
ist ics with regard t o aquaplani ng, noise and
wea r.
- We recommend that you pay particular at
tent io n to this fact during wet weather and
t h at y ou adjust y our speed to matc h road
co ndi tions .
- Rep lace the flat tire w ith a new one and
have it installed on your ve hicle as soon as
poss ible to restore the handling a dvan tages
of a uni direct io na l ti re.
Notes on wheel changing
Please re ad the inform ation ~ p age 206 , New
tires and repl acing tires and wheels
if you are
goi ng to use a s pare t ire which is different
from the tires on your ve hicle .
A ft er you ch ange a tire:
- Check the tire pressure on the spare imme
diately after installation .
- Have the wheel bolt tightening torque
checked with a torque wrench as soon as possible by your authorized Audi dealer or
qualified workshop. What do I do now? 223
- With steel and alloy wheel r ims, the wheel
bolts are correctly tightened at a torque of
90 ft lbs. (120 Nm).
- If you notice that the wheel bolts are cor
roded and difficult to turn while changing
a tire, they should be replaced before you
check the tightening torque.
- Replace the flat tire with a new one and
have it installed on your vehicle as soon as
possible. Remount the wheel cover .
Until then , drive with extra care and at re
duced speeds.
_& WARNING
- If you are goin g to e quip your ve hicle
wit h tires o r rims which differ from th ose
which were facto ry installed, then be
sure to r ead th e information
~ pag e 206,
N ew tir es and replacing tir es and
w heels.
- Always make sur e the d amag ed wh eel o r
ev en a fl at ti re a nd the j ack and t ool kit
a re pr operly se c u red in the lugg age co m
partment and are not loose in the pas
sen ger c omp artment.
- In an accide nt or su dde n maneuver they
co uld fly forw ard, in ju ring anyone in the
ve hicl e.
- Always s tore dama ged wheel, j ack and
to ols se curely in the lugg age comp art
ment . Othe rwise, in an accident o r su d
den maneuver the y co uld fly forwa rd,
causing inju ry to passengers in the ve hi
cle.
([) Note
Do not use comme rcially ava ila bl e tire
sea lants. Ot herwise , th e e lectr ica l compo
nents of the tire pressu re monitoring sys
tem* wi ll no l onge r wor k properly an d the
se nsor fo r th e tire pressur e mo nitor ing
syste m* will have to be replaced by quali
fied wor kshop. •
•
Page 255 of 258
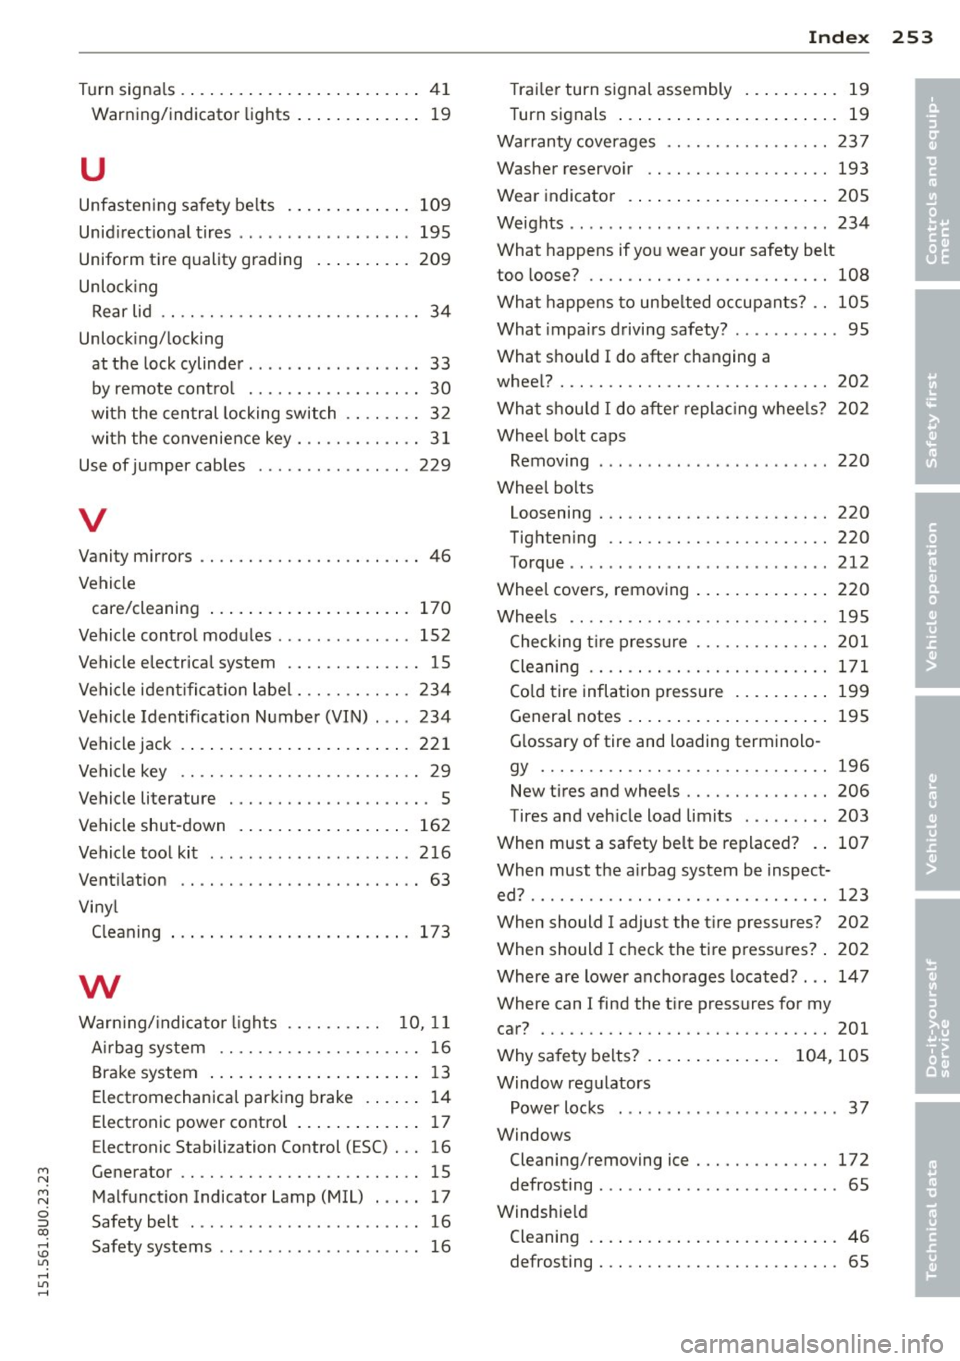
M N
M N
0 ::i co ,...., \!) 1.1"1 ,...., 1.1"1 ,....,
_______________________________ I~ n~ d:::: e~x 253
Turn signa ls . ... .... .... ... .. .. .. .... 41
Warning/indicator lights ... .. .. .. .. .. 1 9
u
Unfasten ing sa fety be lts
Unid irect ional tires ... ... ... .. .. .. .. .
Uniform tire quality grading ... .. .. .. .
Unlo ck ing 109
195
209
Rear lid . . . . . . . . . . . . . . . . . . . . . . . . . . . 34
Unlock ing/ locking
at t he lock cylinder ............ ... ... 33
by remote cont ro l . . . . . . . . . . . . . . . . . . 30
with the cen tral locking switch . . . . . . . . 3 2
with the convenience key . . . . . . . . . . . . . 3 1
Use of jumper cab les ................ 229
V
Vanity mirrors ............. .... .. .. .. 46
Vehicle care/cleaning . . . . . . . . . . . . . . . . . . . . . 170
Vehicle cont rol mod ules .............. 152
Vehicle e lectrical system .............. 15
Vehicle iden tifica tion labe l ... .. .. .. .. . 234
Vehicle Identification Number (VIN) ... . 234
Vehicle jack . ... .... .. .... ... .. .. ... 221
Vehicle key . . . . . . . . . . . . . . . . . . . . . . . . . 29
Vehicle literature . . . . . . . . . . . . . . . . . . . . . 5
Vehicle shut -down . ..... ... .. .. .. .. . 162
Vehicle tool kit . . . . . . . . . . . . . . . . . . . . . 216
Vent ilation
Vi ny l
C leaning
w
. . .... ......... .... .. .. .. 63
173
Warn ing/ indica to r li ghts . . . . . . . . . . 10, 11
A irbag system ........... .. .. .. .... 16
B rake system .... ..... ... .. .. .. .... 1 3
Electromechanica l parking brake .. .. .. 14
Electronic power control . . . . . . . . . . . . . 17
E lectronic Stabilization Control (ESC) . .. 16
Generator .. ............. .... .. .. .. 15
Malfunct ion Indicator Lamp (MIL) . .. .. 17
Safety belt ............... ...... ... 16
Safety systems ............ ...... ... 16 T
rai ler turn s ignal assembly .. ... .. .. . 19
Turn signals ... .. .. . ... ...... ... .. . 19
Wa rranty cove rages
Washer reservo ir 2
37
193
Wear indicato r .. .. .. . ... ...... ... .. 20S
We ights ....... .... ................ 234
What happens if you wear your safety belt
too loose? ......................... 108
Wha t happens to unbe lted occupan ts? .. l0S
What impairs driving safety? ......... .. 95
What s hou ld I do after changing a
whee l? ..... .. .. .. .... ............. 202
Wha t shou ld I do after replac ing whee ls?
Wheel bo lt caps
Remov ing
Whee l bolts 2
02
220
Loosening . .. .. .. .... ........... .. 220
Tighte ning .. .. .. ................. 220
Torque ........................... 212
Whee l cove rs, removing .. ..... ... .. .. 220
Whee ls ........................... 195
Checking tire pressu re .......... .. .. 201
Cleaning .. .. .. .. ................. 171
Co ld tire infla tion pressure ... ... .. .. 199
General notes ...... . .. .. ..... ... .. 195
G lossary of tire and loading terminolo-
gy .............................. 196
New tires and wheels ........... .... 206
Tires and vehicle load limits ... ..... . 203
When must a safety be lt be re placed? .. 107
When must the a irbag system be inspect-
ed? ............................... 123
When should I adjust the t ire pressures? 202
When should I check the ti re press ures? . 202
Where are lower ancho rages located? ... 147
Whe re can I find the t ire pressures for my
car? .............................. 201
Why sa fety belts? . . . . . . . . . . . . . . 104, 105
Window reg ulators
Power locks ...... ................. 37
Windows Cleaning/removing ice .......... .... 172
defrosting . . . . . . . . . . . . . . . . . . . . . . . . . 65
Windshie ld
Cleaning . ... .. .. .. .. .. .. .... ... .. . 46
defrosting . . . . . . . . . . . . . . . . . . . . . . . . . 65
•
•