service AUDI Q3 2015 Owners Manual
[x] Cancel search | Manufacturer: AUDI, Model Year: 2015, Model line: Q3, Model: AUDI Q3 2015Pages: 258, PDF Size: 64.9 MB
Page 5 of 258
M N
M N
0 ::i co ,...., \!) 1.1'1 ,...., 1.1'1 ,....,
Airbag system ............ ... .. 112
Important things to know . . . . . . . . . . 112
Front airbags .................... 116
Monitoring the Advanced Airbag
System . . . . . . . . . . . . . . . . . . . . . . . . . 123
Side airbags . . . . . . . . . . . . . . . . . . . . . 127
Side curtain a irbags . . . . . . . . . . . . . . . 130
Child Safety . . . . . . . . . . . . . . . . . . . 133
Important things to know . . . . . . . . . . 133
Child safety seats . . . . . . . . . . . . . . . . . 139
Installing a child safety seat . . . . . . . . 143
LATCH Lower anchorages and tethers
for child ren . . . . . . . . . . . . . . . . . . . . . . 146
Additional Information
lSl
Vehicle operation . . . . . . . . . . . . . 1S2
Intelligent technology . . . . . . . . 152
Notice about data recorded by the
Event Data Recorder and vehicle
control modules . . . . . . . . . . . . . . . . . . 152
Electronic Stabili zation Control (ESC) . 153
Braking . . . . . . . . . . . . . . . . . . . . . . . . . 156
Electromechanical steering . . . . . . . . . 158
Driving with your quattro . . . . . . . . . . 158
Energy management . . . . . . . . . . . . . . 159
Driving and environment . . . . . 161
The first 1,000 miles (1,500 km) and
afterwards . . . . . . . . . . . . . . . . . . . . . . 161
Avoid damaging the vehicle. . . . . . . . . 161
Catalytic converter . . . . . . . . . . . . . . . . 161
Shutting down vehicle . . . . . . . . . . . . . 162
Operate your vehicle economically and minimize pollution. . . . . . . . . . . . . . . . 162
Driving offroad . . . . . . . . . . . . . . . . . . . 164
Trailer towing . . . . . . . . . . . . . . . . . 166
Driving with a trailer . . . . . . . . . . . . . . 166
Trailer towing tips . . . . . . . . . . . . . . . . 168
Vehicle care . . . . . . . . . . . . . . . . . . . 170
Vehicle care and cleaning . . . . . 170
General information . . . . . . . . . . . . . . 170
Car washes . . . . . . . . . . . . . . . . . . . . . . 170
Cleaning and care information . . . . . . 171
Table of contents 3
Fuel supply and filling your
fuel tank ..... .... ..............
175
Gasoline .. .. .. .. .. .. .. .. .. .. .. .. 175
Fuel tank. . . . . . . . . . . . . . . . . . . . . . . . 176
Checking and filling . . . . . . . . . . . 179
Engine hood . . . . . . . . . . . . . . . . . . . . . 179
Engine compartment ............. .
Engine oil . .. .. .... ... .. ..... ... .
Engine cooling system .......... .. .
Brake fluid ....... .............. .
Battery ........................ .
Windshield washer container
Tires and wheels ... ..... ... .. .
181
181
186
189
190
193
195
Tires . . . . . . . . . . . . . . . . . . . . . . . . . . . 195
Tire pressure monitoring system 213
Do-it-yourself service . . . . . . . . . 216
What do I do now? ............ 216
General information . . . . . . . . . . . . . . 216
Vehicle tool kit with lifting jack . . . . . . 216
Folding chocks . . . . . . . . . . . . . . . . . . . 217
Removing bass box . . . . . . . . . . . . . . . 217
Space-saving spare tire (compact
spare tire) . . . . . . . . . . . . . . . . . . . . . . . 217
Changing a wheel . . . . . . . . . . . . . . . . . 218
Fuses and bulbs . . . . . . . . . . . . . . . 224
Fuses. ....... ... .. .............. 224
Bulbs. . . . . . . . . . . . . . . . . . . . . . . . . . . 226
Emergency situations . . . . . . . . . 228
General . . . . . . . . . . . . . . . . . . . . . . . . . 228
Starting by pushing or towing . . . . . . . 228
Starting with jumper cables . . . . . . . . 228
Use of jumper cables . . . . . . . . . . . . . . 229
Emergency towing with commercial
tow truck . . . . . . . . . . . . . . . . . . . . . . . 230
Lifting vehicle . . . . . . . . . . . . . . . . . . . . 232
Technical data . . . . . . . . . . . . . . . . . 234
Technical Data . . . . . . . . . . . . . . . . . 234
Vehicle identification . . . . . . . . . . . . . . 234
Weights . . . . . . . . . . . . . . . . . . . . . . . . 234
Dimensions . . . . . . . . . . . . . . . . . . . . . . 235
•
•
Page 6 of 258
4 Table of contents
Capacities . . . . . . . . . . . . . . . . . . . . . . . 235
Gasoline engines . . . . . . . . . . . . . . . . . 236
Consumer Information . . . . . . . 237
Warranty coverages . . . . . . . . . . . . . . . 237
Operating your vehicle o utside the
U.S.A. or Canada . . . . . . . . . . . . . . . . . 237
Audi Service Repair Manuals and
Literature . . . . . . . . . . . . . . . . . . . . . . . 237
Maintenance . . . . . . . . . . . . . . . . . . . . . 237
Additional accessories, modifications
and parts replacement . . . . . . . . . . . . 239
D eclaration of Compliance,
T e lecommun ications and Elec tro nic
Systems . . . . . . . . . . . . . . . . . . . . . . . . 240
Index . . . . . . . . . . . . . . . . . . . . . . . . . . 242
Page 7 of 258
M N
M N
0 ::i co ,...., \!) 1.1'1 ,...., 1.1'1 ,....,
In addition to t his Owner's Ma nual, your A udi
comes w ith t he
- MMI Oper ating In st ru cti ons
- Warranty
& Ma intenance boo klet.
If you are m iss ing one of these publicat ions,
or if you believ e that the information is not
comp lete, contact you r auth orized Audi dea le r
for assistanc e.
MMI Operating Instructions
contain detailed desc ription of the Aud i M ulti
Media Interface (MMI) including t he nav iga
tion system, the so und system and the ha nd
h e ld pho ne.
The Warranty & Maintenance booklet
explains how yo u can keep your A udi in top
driving condition by hav ing it serviced regular
l y and conta ins detai led info rmat ion about
the wa rra nties covering your Aud i. Always
h ave the boo klet with yo u when yo u take your
ve hicl e to a n author ized Audi dealer for serv
i ce. Y our Audi Servi ce A dvis or will re cord each
sche duled service and can an swe r any ques
tions you may have rega rding how to ma in tain
your ve hicle.
In Canada,
the veh icle lite rat ure is also avai lab le in
Fr ench . T o ob tain a cop y, contact your dea le r
or wri te to:
Au Canada, on peut se p rocure r un exemp la ire
e n fr an<;ais de ce do cument aupres du conces
sio nnair e ou de:
Aud i Canada .
C lient Assistance
Assis tance a la Clientele
7 77 Bayly S tree t, Wes t,
A jax, On tario LlS 7G 7
If you sell your Audi
all lite ratu re should be left in the ve hicle to
make th e Warranty terms as we ll as a ll oper
ating, safety and m aintenan ce inform ation
a vaila ble to the nex t owne r.
Vehicle literature 5
If you change your address or if you
bought this Audi used
be s ure to send in a "Notice of Add ress
Change"/ " Notice of Used Car Purchase" post
card. T his card can be fo und in the Warranty
&
Maintenance booklet or obtained from your
autho rized Aud i dea ler .
It is in your own interest that we are able to
contact you should the need arise .
•
•
Page 17 of 258
M N
M N
0 ::i co ,...., \!) 1.1'1 ,...., 1.1'1 ,....,
Instrument s and warnin g/indic ator ligh ts 15
If the indicator light turns on and the mes
sage appears , let the engine run at idle for a
few minutes to cool down .
A WARNING
-If your veh icle should break down for
mechanical or other reasons, park at a
safe distance from moving traffic, turn
off the engine and turn on the hazard
warning lights¢
page 43, Emergency
flashers.
-
- Never open the hood if you see or hea r
steam o r coolant escap ing from the en
gine compartment - you risk being s cald
ed . Wa it until you can no longe r see or
hear s team or coo lant escaping .
- T he e ngine compartment of any veh icle
is a dangerous a rea. Before you perform
any work in the engine compartment,
tu rn of the engine and allow it to cool.
Follow the warning stickers¢
page 179.
(D Note
Do not contin ue driving if the . symbo l
illuminates. There is a ma lf u nct ion in the
engine cooling system -you co uld damage
your eng ine.
requires immediate service or repair . Driving
with a low-oil -pressure indication is likely to
inflict severe damage to the engine.
• Turn off engine! Oil pressu re i s too low.
Tu rn off the eng ine and do no t continue dr iv
ing . Chec k the engine oil leve l¢
page 184.
- If the engine oil level is too low, add engine
o il ¢
page 184 . Only continue dr iv ing if the
indica tor l igh t turns off.
- If the engine oil leve l is correct and the indi
c ator lig ht st ill turns on, tur n the eng ine off
and do not contin ue d riving. See yo ur a u
tho rized Aud i dea le r or q uali fied repa ir fa
c ili ty.
(D Tips
- The engine oil pressure symbol. is
not an indicator for a low engine o il lev
el. Do not rely on it . Instead, check the
o il level in yo ur engine at regular inter
vals, preferably each time you refuel ,
and alway s before going on a long trip .
- The yellow oil lev el warn ing indication
l!I requires oil refill or workshop serv
ice without delay . Do not wait until th e
red oil pressure warning. start s to
fla sh before you respond to the low oil
level warning
m. By then, your engine
may alread y have suffered serious dam
age.
D Battery
The .warn ing/ indicator light i llum inates
when you switch on the ignition and must go
out after the eng ine has started.
• Alternator fault : Battery is not being
charged.
If the indicator light turns on and the mes
sage appears, there is a malfunction in the generator or vehicle electrical system .
Drive to your authori zed A udi dealer or quali
fied wor kshop immed iate ly . Because the ve hi
cle battery is discharging, turn off all unnec
essary e lectrical equipment such as the radio.
Seek professiona l assistance if the battery
charge level is too low.
(•) low battery cha rge: B atter y will be
charged while driving .
If the indica to r ligh t turns on and the mes
sage appears, there may be limited sta rting
ability .
If this message turns off afte r a little while,
the battery c ha rged enough while drivi ng.
If the message does not turn off, have you r
autho rized Aud i dea le r or qualified wor kshop
cor re ct t he malfu nction.
Page 20 of 258
18 Instruments and warning/indicator lights
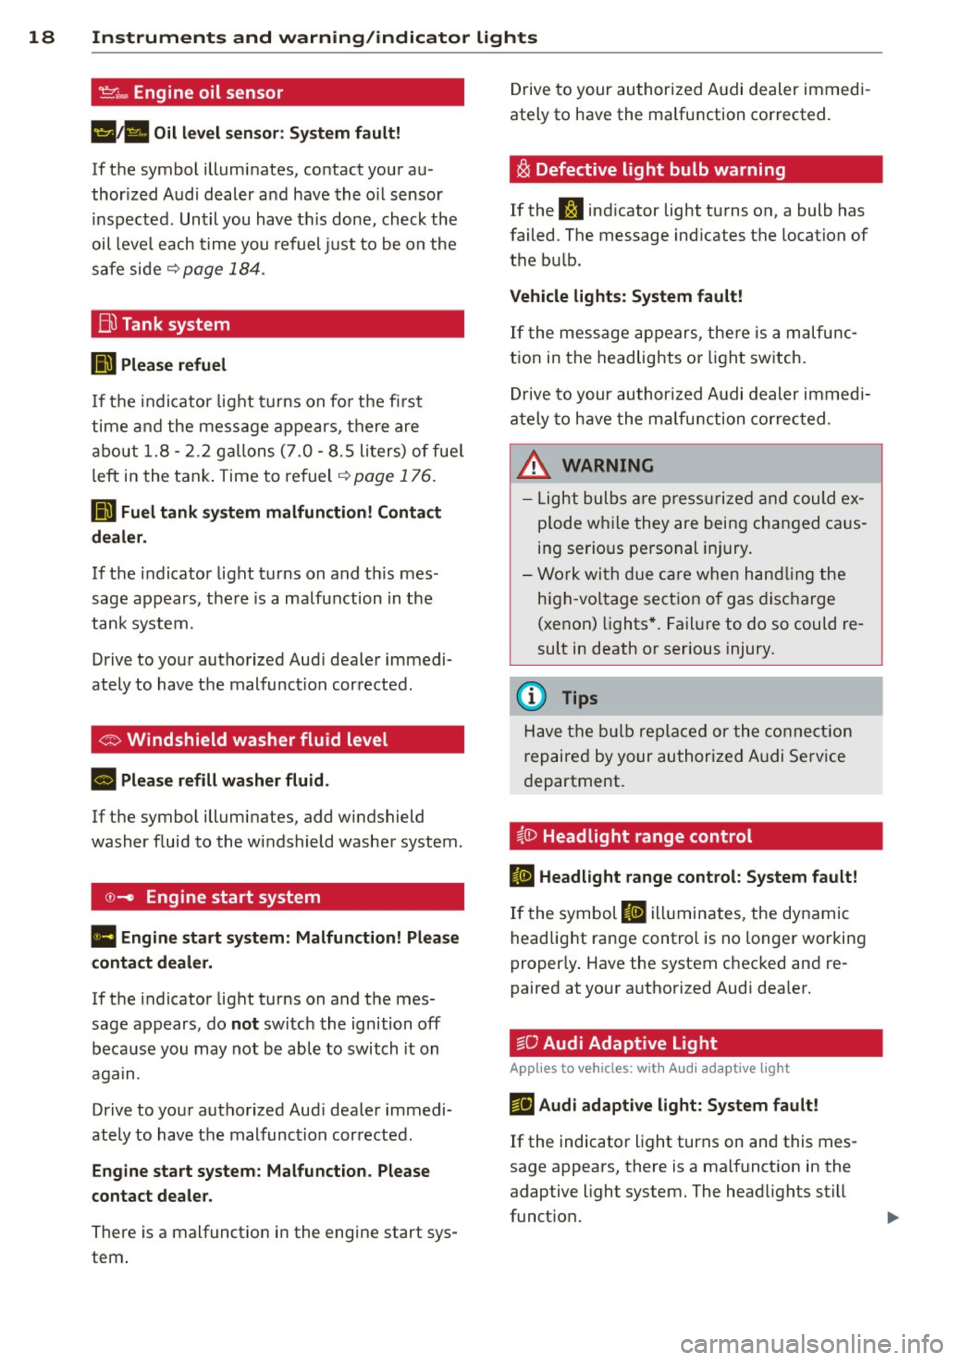
't':r.,. Engine oil sensor
1!11a Oil level sensor: System fault!
If the symbol illuminates, contact your au
thor ized Audi dealer a nd have the oil sensor
inspected. Until you have th is done, check the
oil level each time you refuel just to be on the
safe side~
page 184.
Bil Tank system
DD Please refuel
If the indicator light turns on for the first
time and the message appears, there are
about 1.8- 2.2 gallons (7.0 -8.5 li ters) of fue l
l eft in the tank . Time to refuel
~page 176.
ID'J Fuel tank system malfunction! Contact
dealer.
If the indicator light turns on and th is mes
sage appears, there is a malfunction in the
tank system.
Drive to your authorized Aud i dealer immedi
ately to have the malfunction corrected .
If the symbol illuminates, add windshield
washer fluid to the windshield washer system .
©-Engine start system
Ill Engine start system: Malfunction! Please
contact dealer.
If the indicator light turns on and the mes
sage appears, do
not sw itch the ignition off
because you may not be able to switch it on
again.
Drive to your authorized Aud i dealer immedi
ately to have the malfunction corrected .
Engine start system: Malfunction. Please
contact dealer.
There is a malfunction in the engine start sys
tem . Drive to
your authorized Audi dealer immedi
ately to have the ma lfunction corrected.
i§i Defective light bulb warning
If the J:I indicator light turns on, a bulb has
failed. The message ind icates the location of
the bu lb .
Vehicle lights: System fault!
If the message appears, there is a malfunc
tion in the headlights or lig ht switch.
Drive to your authorized Audi dealer immedi
ately to have the malfunction corrected .
&, WARNING
-Light bulbs are pressurized and could ex
p lode whi le they are being changed caus
ing serio us personal injury.
- Work with due care when handling the
high-vo ltage section of gas discharge
(xenon) lights*. Failure to do so could re
sult in death or serious injury.
{D Tips
Have the bulb replaced or the connect ion
r epaired by your authorized Audi Service
department.
~0 Headlight range control
II Headlight range control: System fault!
If the symbol II illuminates , the dynamic
headlight range control is no longer working
proper ly . Have the system checked and re
paired at your a uthorized Audi dea ler.
§0 Audi Adaptive Light
Appl ies to vehicles : wit h Audi adapt ive light
mfl Audi adaptive light: System fault!
If the indicator light turns on and this mes
sage appears, there is a malfunction in the
adaptive light system. The headlights still
funct ion.
Page 22 of 258
20 Driver in formation d ispl ay
Driver information
display
Overview
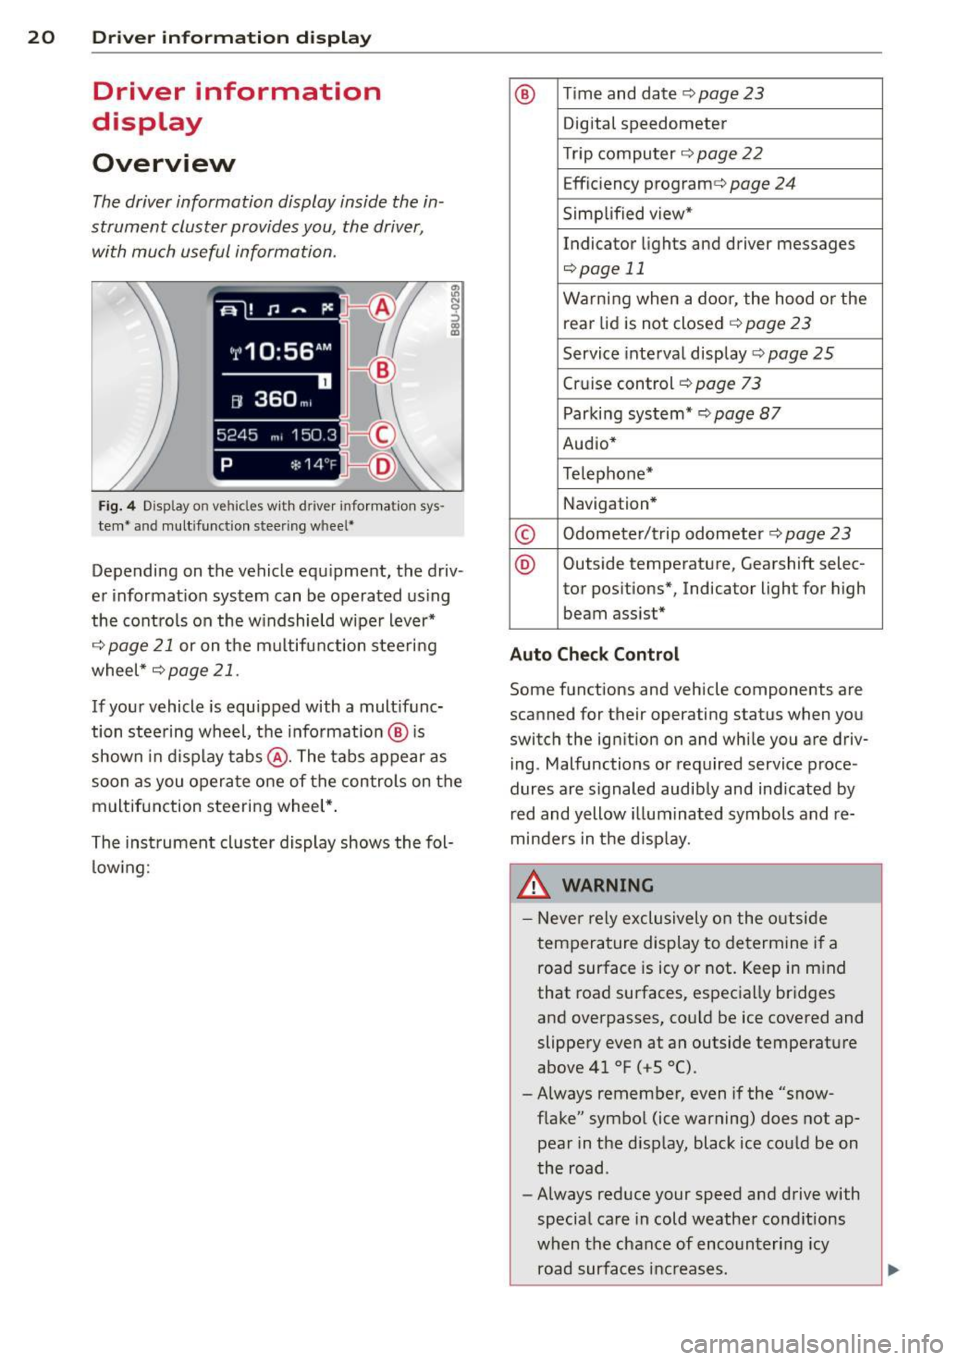
The driver information display inside the in
strument cluster provides you, the driver ,
with much useful information.
Fi g. 4 Dis play on vehicle s w it h dri ve r in fo rma tion sys
tem * and mult ifunc tion steering w hee l*
:ii N 9 ::> a, a,
Depending on the vehicle equ ipment, the driv
er informat ion system can be operated us ing
the cont rols on the w indshield wipe r lever*
¢
page 21 or on the m ultifunction steering
wheel *¢
page 21 .
If your vehicle is equ ipped with a mult ifunc
tion stee ring wheel, t he informat io n @ is
shown in d isplay tab s@ . The tabs appear as
soon as you opera te one of the controls on the
multif unction steering wheel* .
Th e inst rument cluster display shows the fol
l ow ing:
® T im e and date ¢ page23
Digital speedometer
Tr ip compu ter ¢
page 22
Effic iency program ¢ page 24
Simplified view*
Indicator lights and drive r me ssages
¢page 11
Warning when a door, the hood or the
rea r lid is not closed¢
page 23
Service inte rval display ¢ page 25
Cruise control ¢ page 73
Parking system* ¢page 87
Audio*
Telephone*
Navigation *
© Odometer/trip odometer ¢ page 23
® Outs ide temperature , Gearshift selec-
tor pos itions*, Indicator light for high
beam assist *
Auto Check Control
Some f unctions and vehicle components are
scanned for their operating status when yo u
switch the igni tion on and whi le you a re driv
i ng . Malfunctions or required service proce
dur es are s ignaled audib ly and ind icated by
red and yellow illuminated symbols and re
minders in the d isp lay.
8, WARNING -
- Never rely exclusively o n the o utside
t empera ture display to de termine i f a
road surface is icy or not. Keep in m ind
that road surfaces, espec ia lly bridges
and overpasses, co uld be ice
covered and
slippery
even at an outside tempe rature
above 41 °F ( +S 0
() .
-Always remember, even if the "snow
f lake" symbol (ice warning) does not ap
pear in the d isp lay, black ice cou ld be on
the road .
- Always reduce your speed a nd drive with
specia l care in cold weathe r cond itions
when the chance of encounter ing icy
road surfa ces inc reases .
Page 27 of 258
M N M N
0 ::i co
rl I.O
"' rl
"' rl
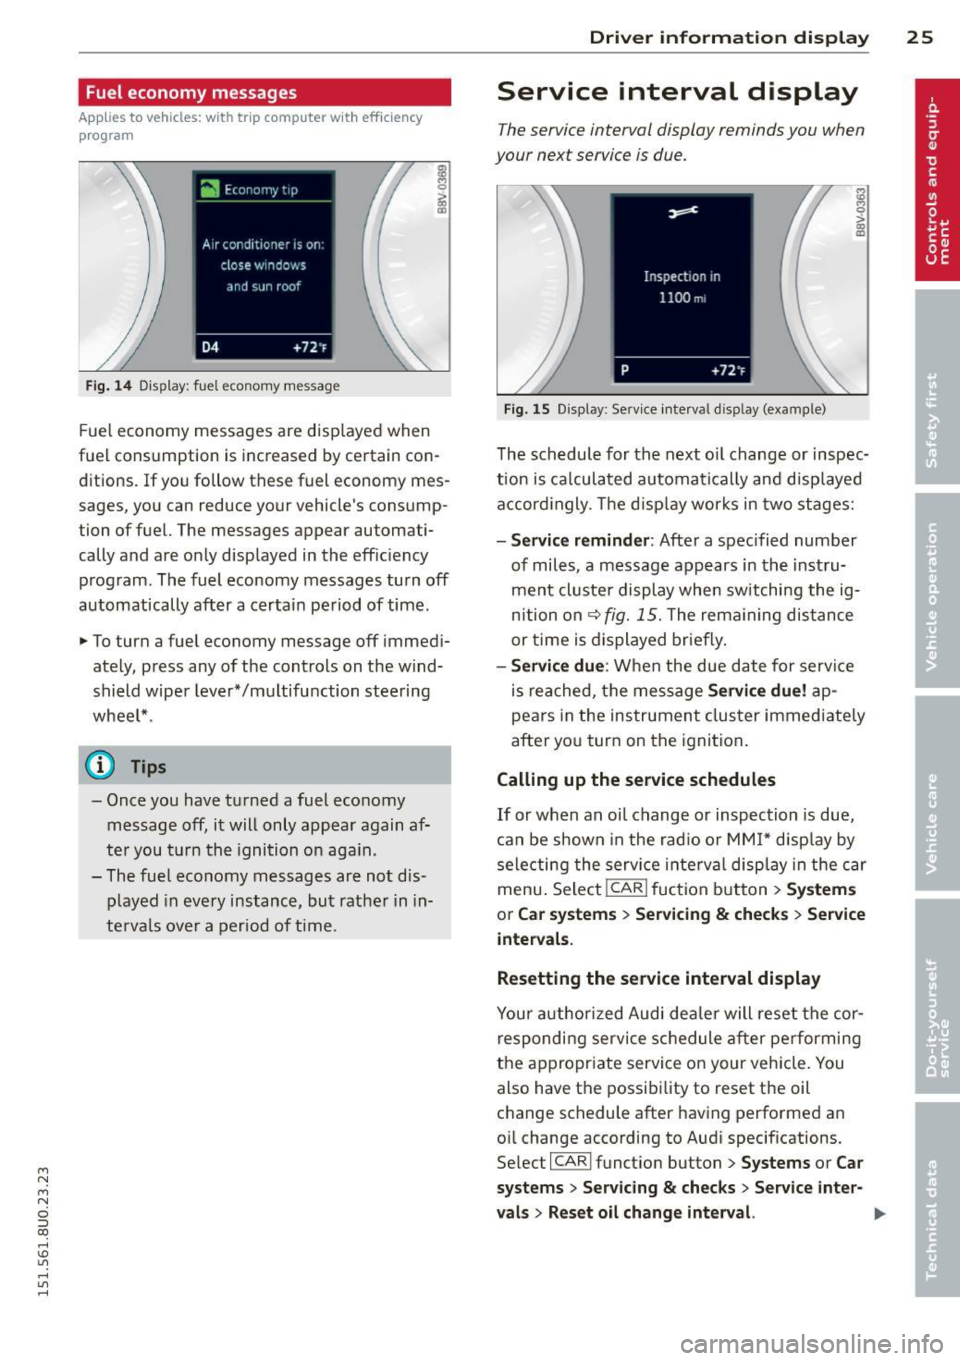
Fuel economy messages
App lies to vehicles: with trip computer w it h eff ic iency
p rogram
Fig . 14 Display: fuel economy message
Fue l economy messages are disp layed when
fuel consumption is increased by certain con
ditions. If you follow these fuel economy mes
sages, you can reduce your vehicle's consump
tion of fuel. The messages appear automati
cally and are only displayed in the effic iency
program. The fuel economy messages turn off
automatically after a certain period of time.
• To turn a fuel economy message off immedi
ately, press any of the controls on the wind
shield wiper lever*/multifunction steering
whee l* .
(D} Tips
- Once you have turned a fuel economy
message off, it will only appear again af
ter you t urn the ignition on aga in.
- The fuel economy messages are not dis
played in every instance, but rather in in
te rva ls over a period of time.
Dri ver inform ation di spl ay 25
Service interval display
The service interval display reminds you when
your next service is due.
Fig. 15 Display: Service interval display (example)
The schedule for the next o il change or inspec
t ion is ca lculated automatica lly and disp layed
accord ingly. The d isp lay works in two stages:
-Serv ice rem inder: After a spec ified number
of miles, a message appears in the instru
ment cluster display when switching the ig
nition on
¢fig. 15. The rema ining dis tance
or time is displayed br iefly.
- Se rvi ce due : When the due date for serv ice
is reached, the message
Se rvic e due! ap
pears in the instrument cluster immediate ly
after you turn on the ignition .
Calling up the service schedules
If or when an oil change or inspection is due,
can be shown in the rad io or MMI* disp lay by
selecting the service i nte rva l display in the car
menu . Selec t!CAR ! fuction button>
Sy ste m s
or C ar s ystem s > Ser vicing & check s > Service
intervals.
Resetting the service interval displa y
Your author ized Audi dealer will reset the cor
respondi ng service schedule after pe rforming
the appropr iate service on your veh icle. You
also have the possibi lity to reset the oil
change schedule after having performed an
oil change according to Audi specifications.
Se lect !CARI function button>
Sy stem s or Ca r
sy ste ms
> Servicing & checks > Service int er-
val s
> Reset oil cha nge int erval. ""
Page 28 of 258
26 Drive r in form ation d ispl ay
(D Note
-Only reset the oi l change display when
you have completed an o il change .
- If you d isconnect the battery term inals,
no calculatio ns can be made for the serv
ice interval display during this time and
no service rem inder will appear . Remem
ber that observing the proper service in
tervals is vitally important to extending
the life of you r vehicle, particularly the
engine, and maintaining its value. Even if
the mileage dr iven is low, the max imum
period of one year from one serv ice to
the next must not be exceeded.
On-Board Diagnostic
system (OBD)
Malfunction Indicator Lamp (MIL)
The Malfunction Ind icator Lamp (MIL) ¢'4 i n
the instrument cluster is part of the On-Board
Diagnostic (OBD II) system.
The warning/indicator light illuminates when
the ign ition is switched on and goes o ut after
the engine starts and the idle has stabilized.
Th is indicates that the MIL is working proper
l y.
If the light doe s not go out after the eng ine
is started, or illuminates wh ile you are driv
ing, a ma lfunction may exist in the engine sys
tem . If the light illuminates, the catalytic con
verter cou ld be damaged.
Continue driving
w ith reduced pow er (avoid
ing sustained high speeds and/or rapid accel
erations) and have the condition corrected.
Contact your authorized Audi dealer .
If the light ill uminates, the electronic speed
limiter may also be ma lfunctioning . For more
information
¢ page 2 7, Electronic speed
limiter.
An imp roperly clo sed fuel filler c ap m ay als o
c a u se th e M IL l ight to illuminate
¢ page 177.
On-Board Diagnostics
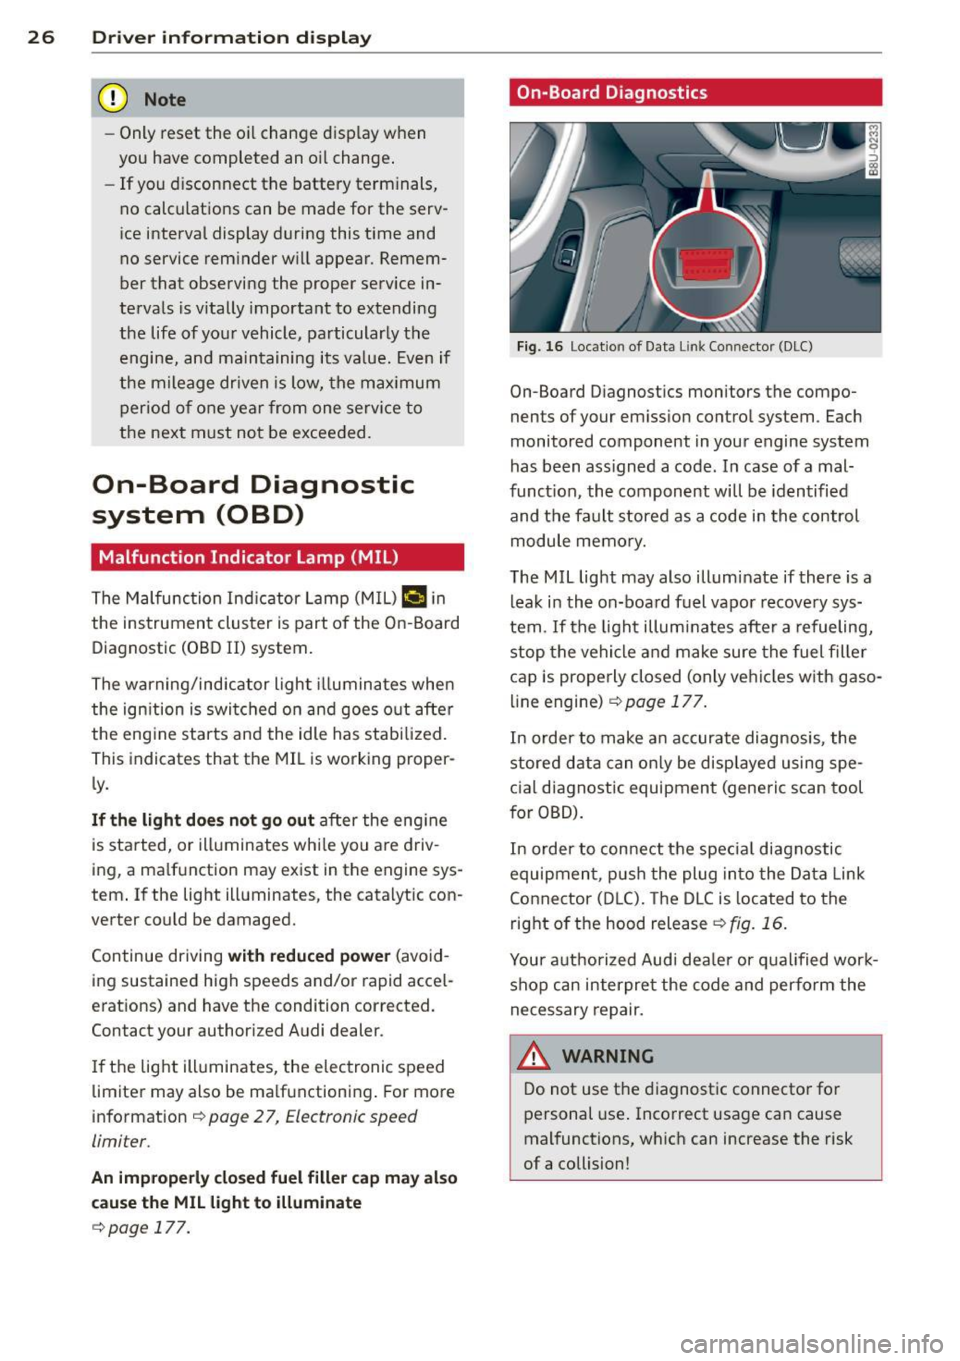
Fig. 16 Locat io n of Data Li nk Conn ector (DLC)
On-Board D iagnostics monitors the compo
nents of your em ission contro l system . Each
monitored component in your engine system
has been ass igned a code . In case of a mal
funct ion, the component will be identified
and the fault stored as a code in the control
module memo ry.
The MIL light may also illuminate if there is a lea k in the on-board fuel vapor recove ry sys
tem . If the ligh t illuminates after a refueling,
stop the vehicle and make sure the fuel fille r
cap is prope rly closed (only vehicles w ith gaso
line engine) ¢
page 177.
In order to make a n accurate diagnosis, the
stored data can on ly be displayed using spe
c ial d iagnostic equipment (generic scan tool
for OBD).
In order to con nect t he special diagnostic
equipment, push the plug in to the Data Link
Connector (D LC). The D LC is located to the
right o f the hood release
<::!;> fig. 16.
Your a uthorized Audi dea le r or qua lified wor k
shop can interpret the code and perform the
necessary repair.
,&_ WARNING ~ -
Do not use t he diagnost ic connecto r fo r
personal use . Incorrect usage can cause
mal functions, wh ich can increase the risk
of a collision!
Page 43 of 258
M N M N
0 ::i co
rl I.O
"' rl
"' rl
(D Tips
-The light sensor* for headlight control is
located in the rear view mirror mount.
You should therefore not apply any stick
ers to the windshield in this area in order
to prevent malfunctions or failures.
- Some exterior lighting functions can be
ad justed
¢ page 42.
- When you switch off the ignition while
the vehicle's lights are turned on, a buz
zer sounds as long as the driver's door is
open .
- In cool or damp weather, the inside of
the headlights, turn signals and tail
lights can fog over due to the tempera
ture difference between the inside and
outside. They will clear shortly after
switching them on. This does not affect
the service life of the lighting.
- In the event of a light sensor malfunc
tion, the driver is notified in the instru
ment cluster display~
page 19 .
Turn signals and high beam lever
The lever operates the turn signals , the high
b eams and th e headlight flash er.
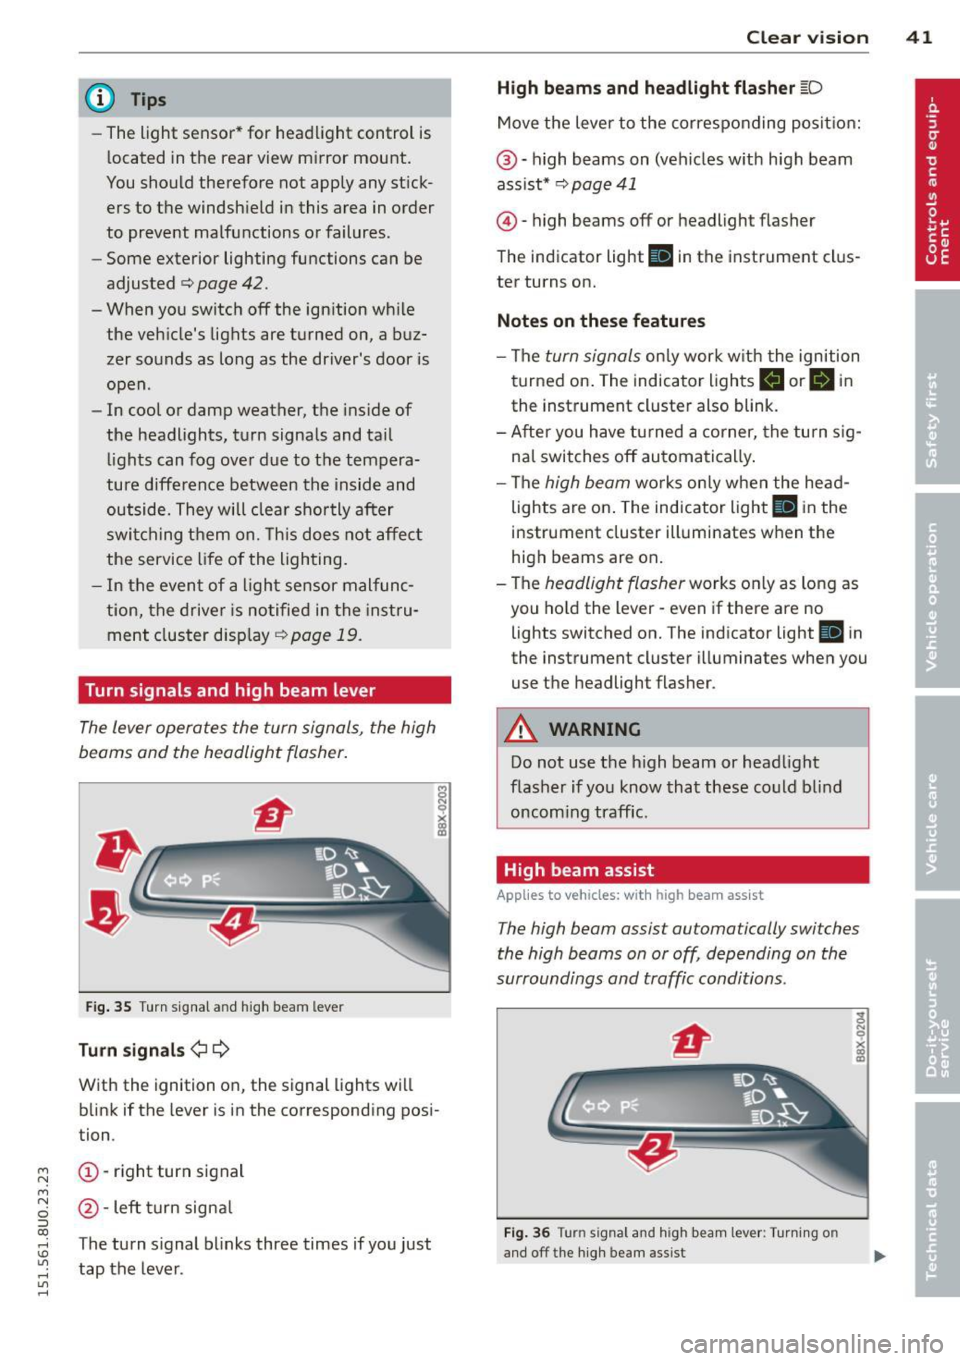
Fig. 35 Turn signal and high beam leve r
Turn signals ¢i ¢
With the ignition on, the signal lights will
blink if the lever is in the corresponding posi
tion .
(D-right turn signal
@-Left turn signal
T he turn signal blinks three times if you just
tap the lever. Clear
vision 41
High beams
and headlight flasher @:D
Move the lever to the corresponding position:
@-high beams on (vehicles with high beam
assist*
¢ page 41
@ -high be am s off or headligh t fla sher
The indicator light
Ill in the instrument clus
ter turns on.
Notes on these features
-The turn signals only work with the ignition
turned on. The indicator lights
II or Ill in
the instrument cluster also blink.
-After you have turned a corner, the turn sig
nal switches off automatically.
- The
high beam works only when the head
lights are on. The indicator light
El in the
instrument cluster illuminates when the
high beams are on.
- The
headlight flasher works only as long as
you hold the lever -even if there are no
lights switched on. The indicato r light
Iii in
the instrument cluster illuminates when you
use the headligh t flasher .
A WARNING
Do not use the high beam or headlight
flasher if you know that these could blind
oncoming traffic.
High beam assist
Applies to veh icles: w ith high beam assist
-
The high beam assist automatically switches
the high beams on or off, depending on the
surroundings and traffic conditions .
Fig. 36 Turn s ignal an d h igh beam lever : Turning o n
and off the high beam assist
Page 49 of 258
M N
M N
0 ::i co ,...., \!) 1.1"1 ,...., 1.1"1 ,....,
(D Note
-In the case of frost , check whether the
windsh ield wiper b lades are frozen to
the windshie ld. Switching on the wind
s hi eld wipers can damage the wiper
blades!
- Prior to using a car wash, the windshield
wiper system must be switched
off (lever
i n position @). This helps to prevent un
i ntent ional sw itch ing on and damage to
the windshie ld w iper system .
- The wi ndshield wipe rs are switched
off
whe n the ignition is turned off . Activate
t h e w indshie ld w ipers afte r the ig nit ion
i s sw itche d back on by mov ing the w ind
s hi eld wipe r lever to any pos ition.
- Worn or di rty windshie ld wiper b lades
r es ult in strea king. This can affe ct the
r ain senso r* func tion . C heck your wind
s h ield wiper blades r egularly.
- The w asher fluid nozzles of the wi nd
s hi eld washer system are heated a t low
temperatures w hen the ignit ion is on .
- W hen stopp ing tempor arily, (e.g. a t a
traff ic light) the se t speed of the w ind
s hi eld wipers is automatically red uced by
one speed .
Cleaning windshield wiper blades
Clean the windshield wiper blades whe n they
begin to leave streaks . Use a soft cloth and
g lass cleaner to clean the windsh ield wiper
b lades .
Windshield wiper s
.. Place the windshield wipe r arms in the serv
ice position . Refer to ¢ page
47 .
.,. Lift the w iper arm away from the front win
dow .
Rear window wiper
.. Lift the rear wiper arm away from the glass.
Clear vis ion 4 7
A WARNING
Dirty winds hield wiper b lades can impair
your v iew. This can lead to accidents .
Replacing windshield wiper blades
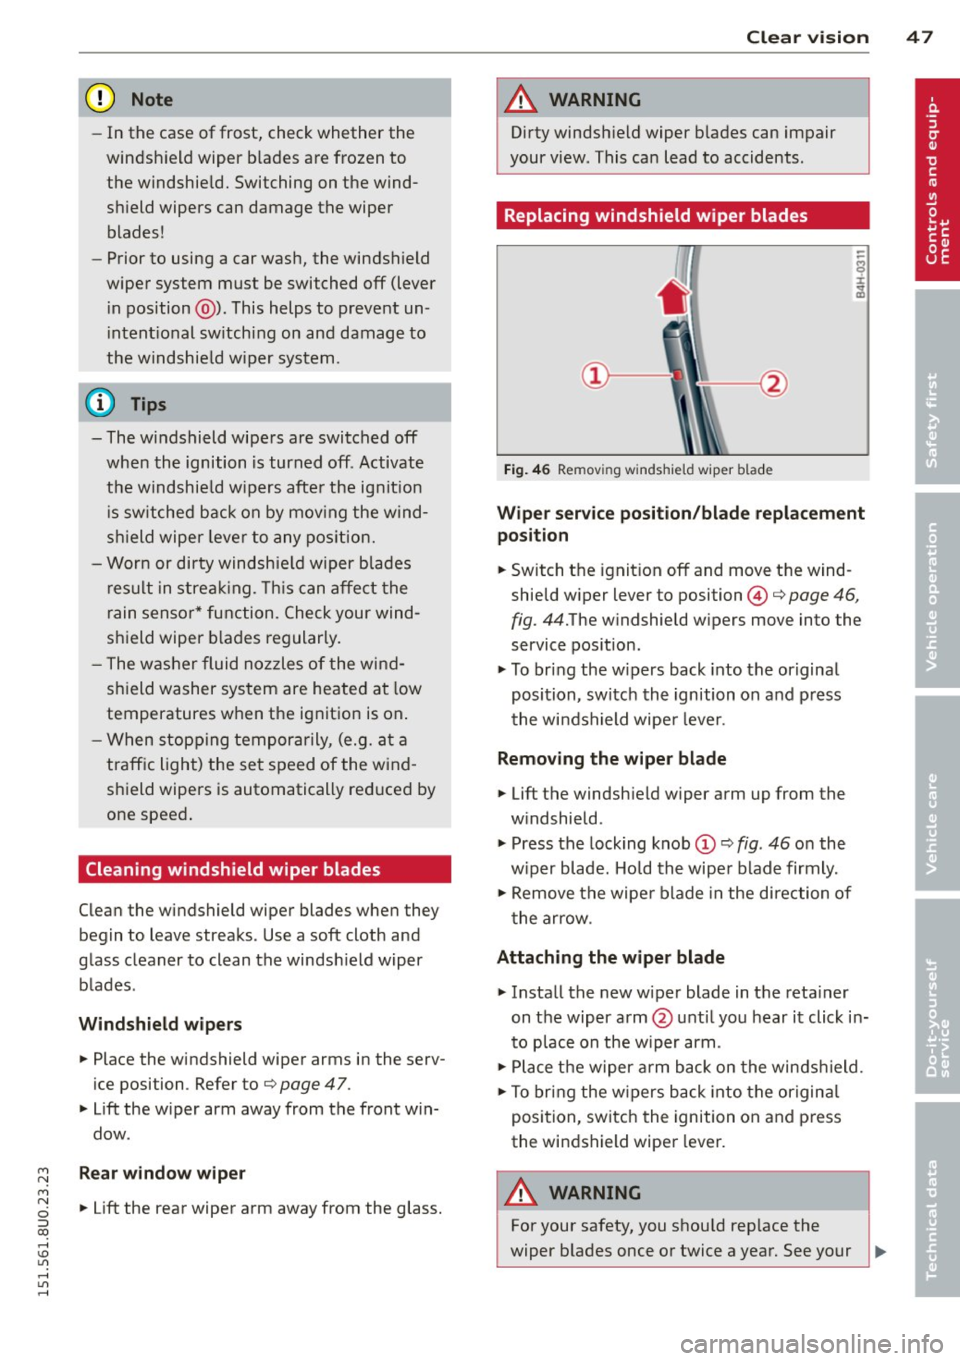
Fig. 46 Remov ing w indsh ield w iper blade
Wiper service position /blade replacement
position
.. Switch the ignit ion off and move the wind
shield w iper lever to position ©¢ page
46,
fig .
44.The w indshie ld w ipers move into the
service pos ition .
.. To br ing the w ipers back into the original
position, sw itc h th e ignition on and p ress
t he winds hield wipe r leve r.
Removing the wiper blade
.. Lift the windsh ield w iper arm up from the
w indshield .
.. Press the lock ing knob
.,. Remove the wipe r blade in the di rec tion of
t he ar row .
Attaching the wiper blade
.. Insta ll the new wiper blade in the reta iner
on t he wiper arm @until you hear i t click in
to p lace on the w iper arm .
.,. Place t he w iper arm back on the winds hield.
.. To bring the w ipers b ack into the or igin al
position, switch the ignition on and press
the windshield wipe r lever.
A WARNING
-
For your safety, y ou shou ld rep lace the
wiper b lades once or twice a year. See your