AUDI Q3 2016 Repair Manual
Manufacturer: AUDI, Model Year: 2016, Model line: Q3, Model: AUDI Q3 2016Pages: 252, PDF Size: 62.81 MB
Page 61 of 252
Installing
• Place both sides of the cover into the mounts
on the side trim.
• Push the cover downward until both sides click
into place.
Storing*
Depending on the vehicle equipment, you can
store the cover under the cargo floor
¢page 61.
A WARNING
-To reduce the risk of accidents, the luggage
compartment cover should never be unse
cured under any circumstances .
- The luggage compartment cover is not a
surface for storing objects. Objects placed
on the cover could endanger all vehicle oc
cupants during sudden braking maneuvers
or in a crash.
CD Note
To avoid damage, let the luggage compart
ment cover roll up slowly after removing.
Increasing the size of the luggage
compartment
The rear seat backrests can be folded forward ei
ther separately or together .
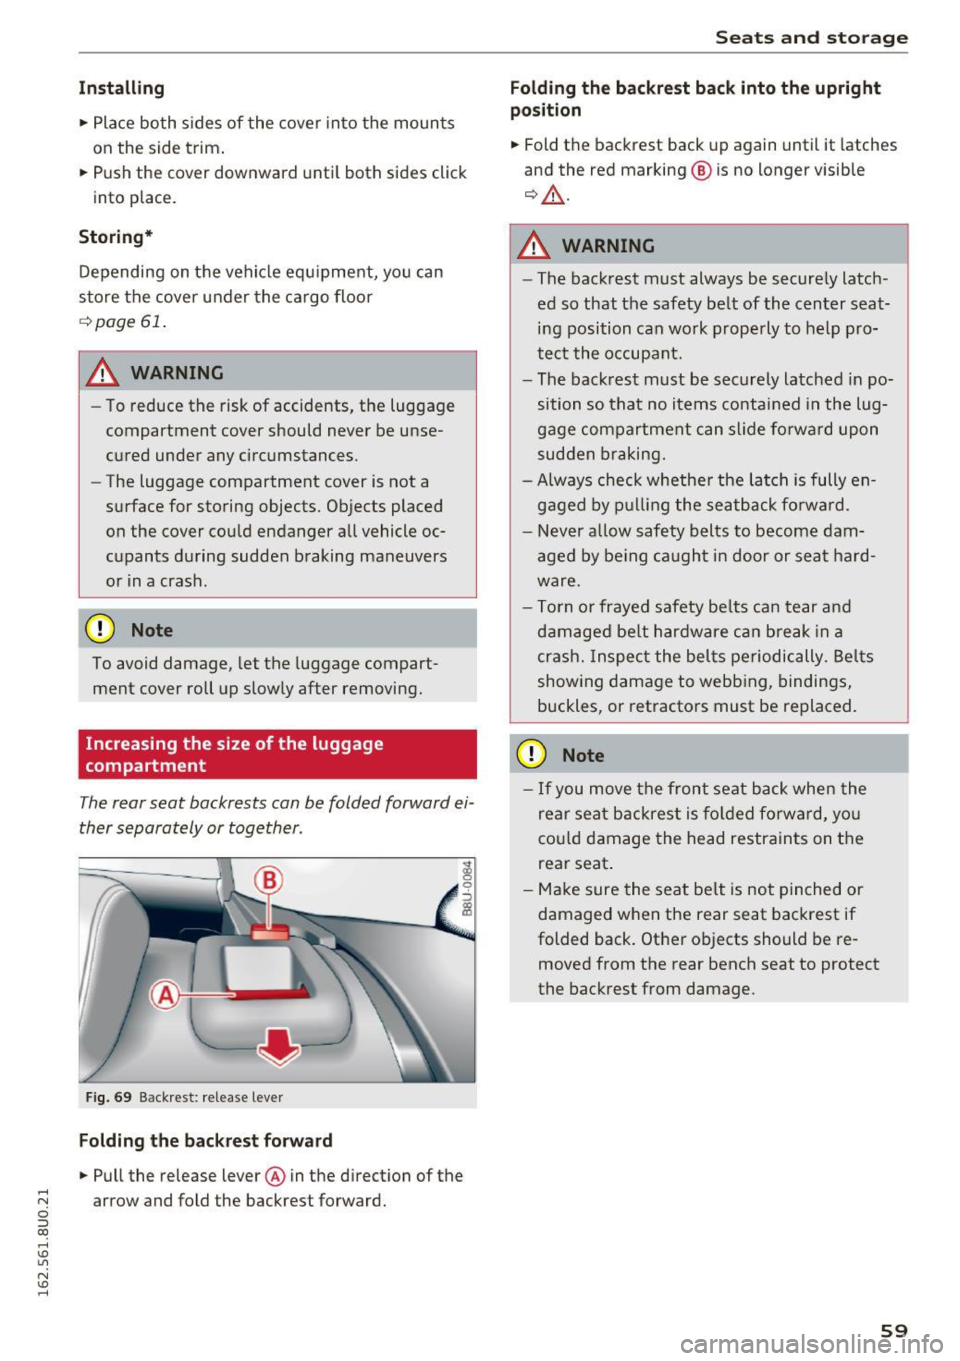
Fig. 69 Backrest: release lever
Folding the backrest forward
• Pull the release lever @in the direction of the .... N arrow and fold the backrest forward. c:i ::J CX)
.... I.Cl U"I
N I.Cl ......
Seats and storage
Folding the backrest back into the upright
position
• Fold the backrest back up again until it latches
and the red marking ® is no longer visible
¢ ,&..
A WARNING
--The backrest must always be securely latch-
ed so that the safety belt of the center seating position can work properly to help pro
tect the occupant.
- The backrest must be securely latched in po
sition so that no items contained in the lug
gage compartment can slide forward upon
sudden braking.
- Always check whether the latch is fully en
gaged by pulling the seatback forward.
- Never allow safety belts to become dam
aged by being caught in door or seat hard
ware.
- Torn or frayed safety belts can tear and
damaged belt hardware can break in a
crash. Inspect the belts periodically. Belts
showing damage to webbing, bindings,
buckles, or retractors must be replaced.
CD Note
- If you move the front seat back when the
rear seat backrest is folded forward, you
could damage the head restraints on the
rear seat.
- Make sure the seat belt is not pinched or
damaged when the rear seat backrest if
folded back. Other objects should be re
moved from the rear bench seat to protect
the backrest from damage.
59
Page 62 of 252
Sea ts and stor age
Tie-downs and cargo net
Applies to vehicles: with cargo net
The cargo net prevents small objects from slid
ing.
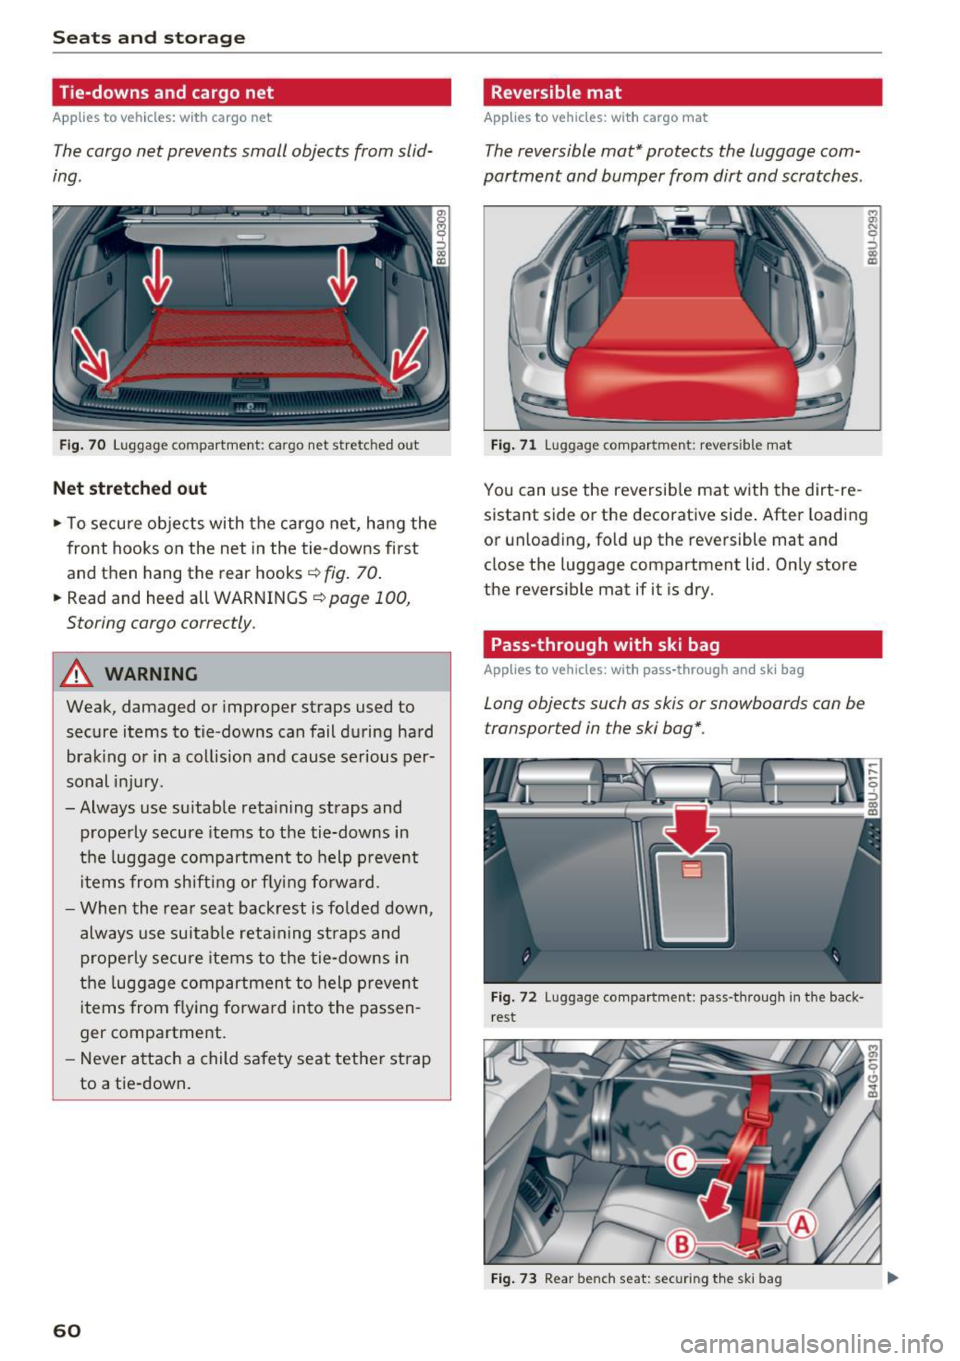
F ig. 70 Luggage compartment: cargo net stretched out
Net stret ched out
• To secu re objects with the ca rgo net, hang the
front hooks on the net in the tie -downs first
and then hang the rear hooks~
fig. 70.
• Read and heed all WARNINGS r:!) page 100,
Storing cargo correctly.
A WARNING
Weak, damaged or improper straps used to
secure items to tie-downs can fail during hard
bra king o r in a collision and cause serious per
sonal injury.
- Always use suitable reta in ing straps and
properly secure items to the tie-downs in
the luggage compartment to help p revent
items from sh ifting or f ly ing fo rwa rd.
- When the rear seat backrest is folded down,
always use suitab le reta ining st raps and
p rope rly secure items to the tie-downs in
the luggage comp artmen t to help preve nt
items from flying forwa rd into the passen
ger compartment.
- Never a ttach a child safety seat tet her strap
to a tie -down.
60
-
Reversible mat
Applies to vehicles: with cargo mat
The reversible mat* protects the luggage com
partment and bumper from dirt and scratches.
Fig . 71 Luggage compartment: revers ible mat
r, .,,
~ co C0
You can use the reversib le mat with the dirt -re
sistant side or the decorative side . After loading
or unloading, fold up the reversible mat and
close the luggage compartment lid. Only store
the reversible mat if it is dry.
Pass -through with ski bag
Applies to vehicles: with pass-through and ski bag
Long objects such as skis or snowboards can be
transported in the ski bag*.
Fig. 72 Luggage compartment: pass-through in the back·
rest
F ig . 73 Rear bench seat: securing the ski bag
Page 63 of 252
.... N
c:i :::J CX)
.... I.Cl U"I
N I.Cl ......
Loading
• Press the release button in the luggage com
partment
c:> fig. 72 and fold the pass-through
toward the front.
• Push the ski sack through the opening from the
luggage compartment . T he zipper must face
toward the rear
c:> ,& .
Securing
• Stick the strap @on th e bag in the center safe
ty belt @c:> fig. 73.
• Tighten and secure the strap©
A WARNING
-The ski sack is intended only for the trans
portation of skis and other light objects. To
reduce the risk of serious personal injury,
never transport heavy or pointed objects in
the ski sack.
- When braking rapidly or during an accident ,
the load could be displaced and cause injury
to occupants.
- Sharp edges on the load must be covered
for protection. Always fasten the belt tight
ly around the sack and its contents
c:>fig . 73.
- For safety reasons, do not transport more
than two pairs of skis in the ski sack .
- You must secure the ski sack with the strap
after loading.
- Make sure all objects that you are transport
ing in the pass-through are secured. Other
wise they could slide around during sudden
braking maneuvers and cause injury .
(D Tips
-Only fold the bag up if it is dry.
- When transporting skis or snowboards, tighten the securing strap between the
bindings.
- Lay skis in the bag with the points facing
forward and snowboards and ski pole points
facing the rear.
-
Seats and storage
Reversible cargo area floor
Applies to vehicles: with reversible cargo area floor
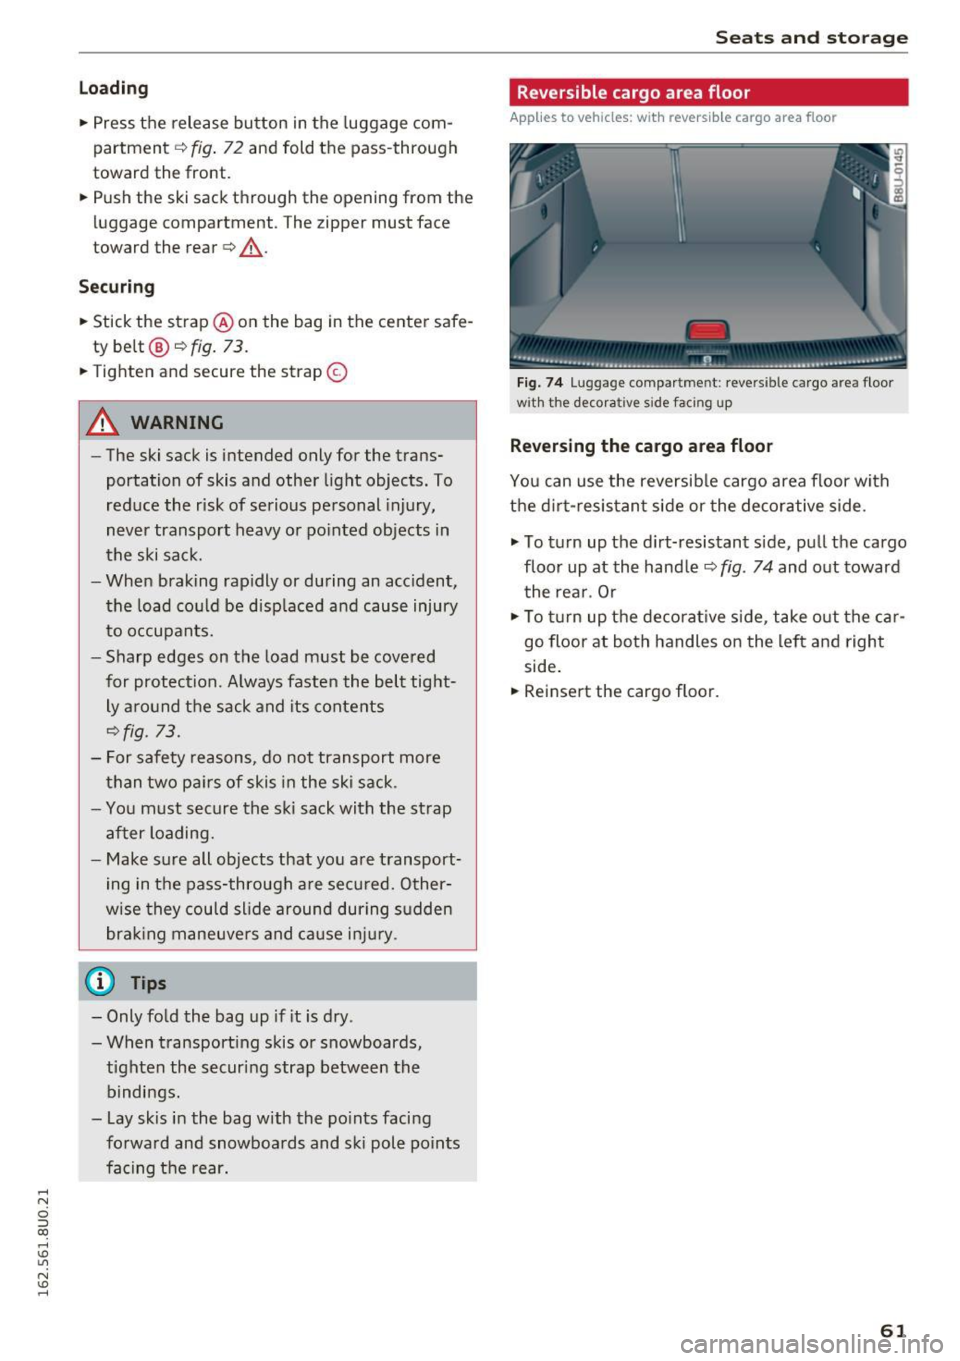
Fig. 74 Lug gag e compar tmen t: reve rs ibl e ca rgo area floor
w ith the decora tive s ide faci ng up
Reversing the cargo area floor
You can use the reversible cargo area floor with
the dirt-resistant side or the decorative side .
.,. To turn up the dirt-resistant side, pull the cargo
floor up at the handle c:>
fig. 74 and out toward
the rear . Or
.,. To turn up the decorative side , take out the car
go floor at both handles on the left and right
side.
• Reinsert the cargo floor.
61
Page 64 of 252
Warm and cold
Warm and cold
Climate control system
Description
Depending on the vehicle equ ipment, different
systems cou ld be installed:
- manual climate control system* or
- automatic climate control system*
The climate control system warms, coo ls and
adds humidity to the air in the vehicle interior. It
is the most effective when the windows and pan
orama roof are closed. If there is a build-up of
heat inside the vehicle, vent ilation can help to
speed up the cooling process.
Condensat ion from the cooling system can drip
and form a puddle of water under the vehicle.
This is normal and does not mean there is a leak.
Pollutant filt er
The po llutant filter removes pollutants such as
dust and po llen from the a ir .
The air pollutants filter must be changed at the intervals specified in your Warranty & Mainte
nance booklet, so that the air conditioner can
proper ly work.
I f you drive yo ur vehicle in an area wi th high air
pollut ion, the filter may need to be changed
more frequently than specified in your Audi War
ranty & Maintenance booklet. If in doubt, ask
your author iz ed Audi Service Advisor for advice.
K ey rec ognition *
The deluxe automati c climate control* settings
are stored and assigned to the remote contro l
key that is in use .
A WARNING
Reduced visibility is dangerous and can ca use
accidents.
62
- For safe driving it is very important that all
w indows be free of ice, snow and condensa
tion.
- Complete ly familiarize yourself with the
proper use and function of the heating and
ventilation system and espec ially how to de
fog and defrost the windows .
- Never use the windshield wiper/washer sys
tem in freezing weather until you have
warmed the windshield first, using the heat
ing and vent ilation system . The washe r so lu
tion may freeze o n the windshield and re
duce visibility.
(U;) Note
- If you suspect that the air conditioner has
been damaged, sw itch the system off to
avoid furthe r damage a nd have it inspected
by a q ualified deale rship .
- Repa irs to the Aud i ai r cond itione r requ ire
special techn ica l know ledge and spec ial
tools. Contact an authorized Audi dea le r fo r
assistance .
@ For the sake of the environment
By reducing t he amo unt of fuel you use, you
a lso red uce the amount of pollutan ts emitted
i nto the a ir.
(D Tips
- To prevent i nterference with the heating
and cooling ou tput and to prevent the win
dows from fogging over, the air intake in
front of the windshie ld must be free of ice,
snow or leaves.
- The energy management system may switch
t h e seat heating * or rear window defroster
o ff temporarily. These systems are available
again as soon as the energy supply has been
restored.
Page 65 of 252
.... N
c:i ::J CX)
.... I.Cl U"I
N I.Cl ......
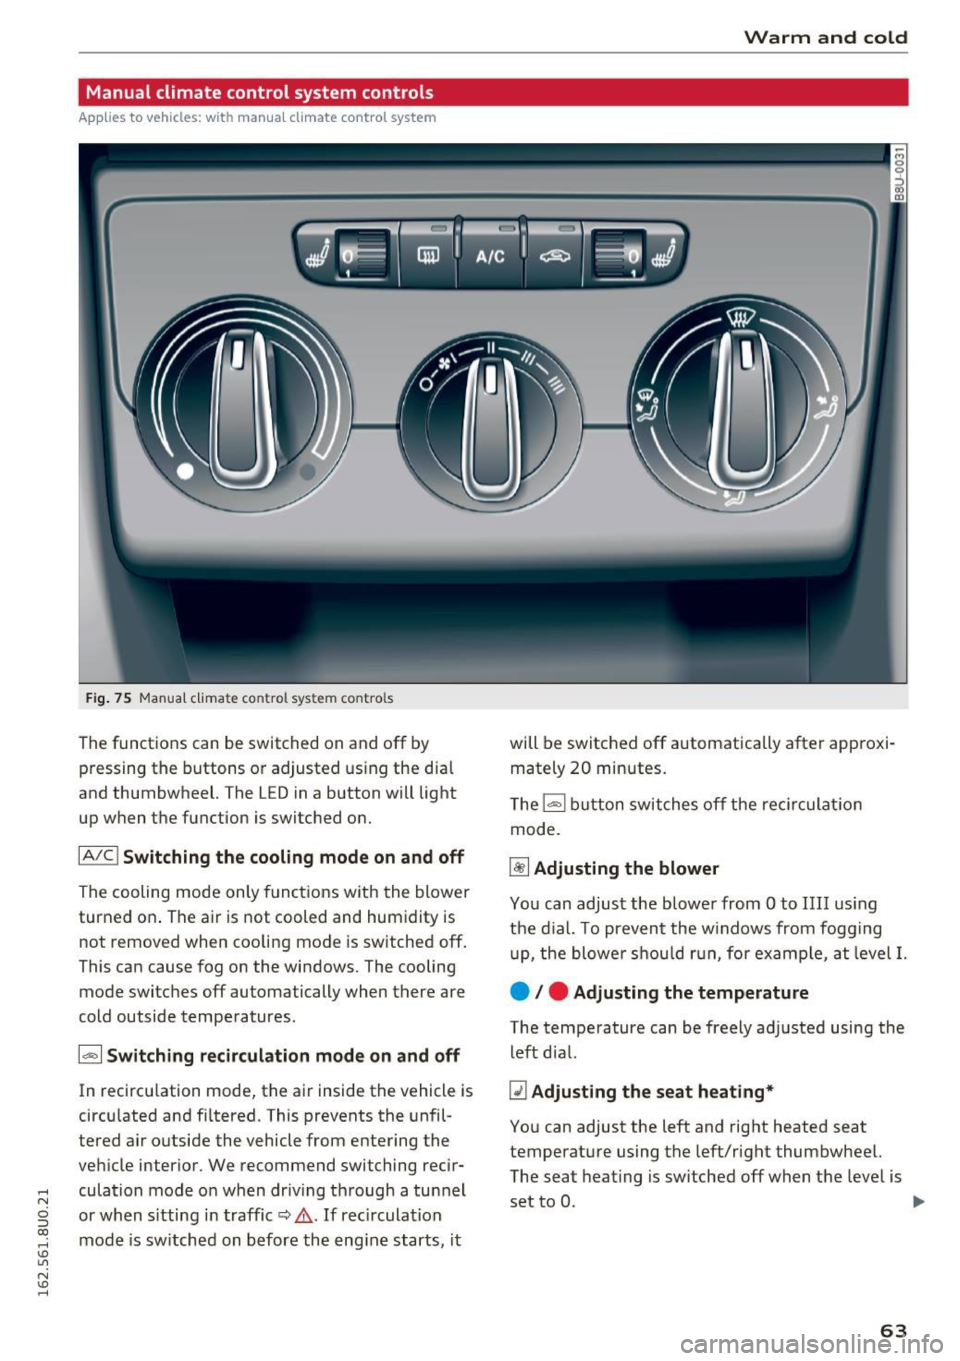
Manual climate control system controls
Applies to vehicles: with manual climate control system
Fig . 75 Manua l clima te co ntro l sys tem contro ls
The functions can be sw itched on and off by
pressing the buttons or adjusted us ing the dia l
and thumbwheel. The L ED in a button will light
up when the function is switched on.
IA/C l Switchin g the coolin g mod e on and off
The cooling mode only functions with the blower
turned on . The air is not cooled and humidity is
not removed when cooling mode is sw itched off.
This can cause fog on the windows. The cooling
mode switches off automatically when there are
cold outside temperatures .
1- 1 Sw itching recircul ation m ode on and off
In recircu lation mode, the air ins ide the vehicle is
circu lated and filtered. This prevents the unfil
tered air outside the vehicle from entering the
vehicle interior . We recommend switching recir
culation mode o n when driv ing through a tun nel
or when s itting in traffic
c::, .&. . If rec irculat ion
mode is sw itched on before the eng ine starts, it
Warm and cold
will be switched off automatically after approxi
mately 20 minutes.
T he
l= I button switches off the rec irculat ion
mode.
~ Adjusting the blower
You can adjust the blowe r from Oto IIII us ing
the d ia l. T o prevent the w indows from fogging
u p, the blowe r sh ou ld r un, for example, at level
I.
e / e Adjusting the temperature
The temperature can be freely adjusted using the
left dial.
Q1 Adju sting the seat heating *
You can adjust the left and right heated seat
temperature using the left/right thumbwheel.
The seat heat ing is switched off when the level is
set to 0.
ll-
63
Page 66 of 252
Warm and cold
~ Switching the rear window defogger on
and off
The rear window defogger only operates when
the engine is running .
It switches off automati
cally after approximate ly 10 to 20 minutes, de
pending on the outside temperature.
Adjusting air distribution and air vents
You can adjust the vents where the air will flow
out of. The air distribution is easi ly adjusted be
tween the two symbols positioned next to each
other
(®/;J/ •,,J/ ~).
In the ~ setting, the windshield and side win
dows are defrosted or cleared of condensation as
quickly as possible . The maximum amount of air
f lows mainly from the vents below the wind
sh ield. Recircu lation mode switches off .
You can open or close the center and rear vents in the cockpit and the vents in the rear center con- sole
using the ridged thumbwheels . The levers
adjust the direction of the airflow from the vents.
A WARNING
- You shou ld not use the recirculation mode
for an extended period since no fresh air is
drawn in. With the a ir-conditioning switch
ed off, the windows can fog up, which in
creases the risk of an accident!
- Individuals w ith reduced sensit iv ity to pain
or temperature could develop burns when
using the seat heating* function . To reduce
the ris k of injur y, these individua ls should
not use seat heating*.
(D Note
To avoid damaging the seat heating* ele
ments, do not kneel on the seats or place
heavy pressure on one area of the seat.
Deluxe automatic climate control system controls
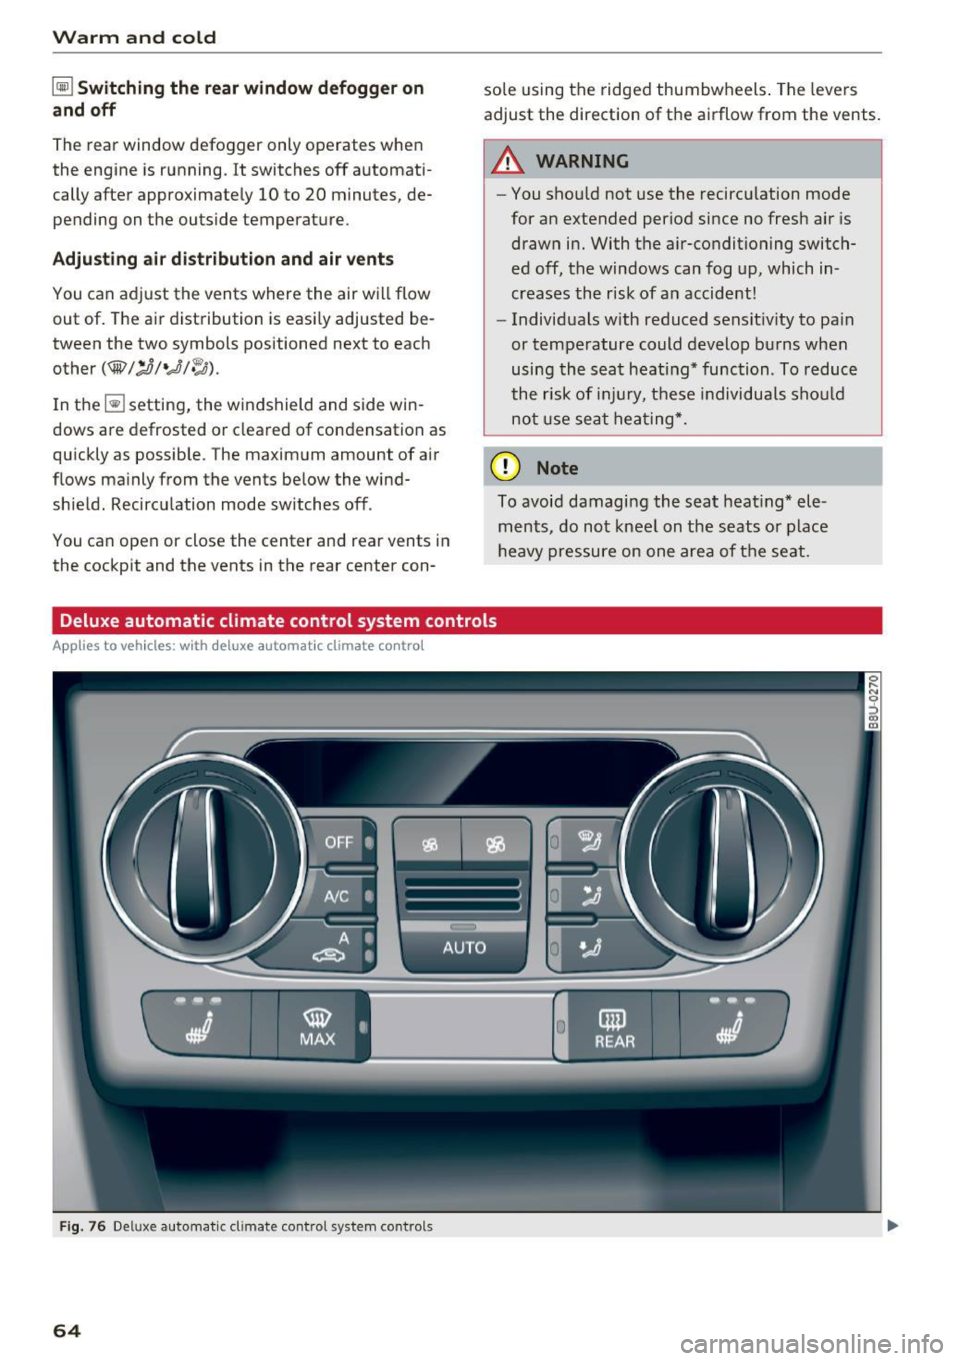
Applies to vehicles: w ith deluxe automatic climate control
Fig. 76 Deluxe automatic climate control system co ntrol s
64
Page 67 of 252
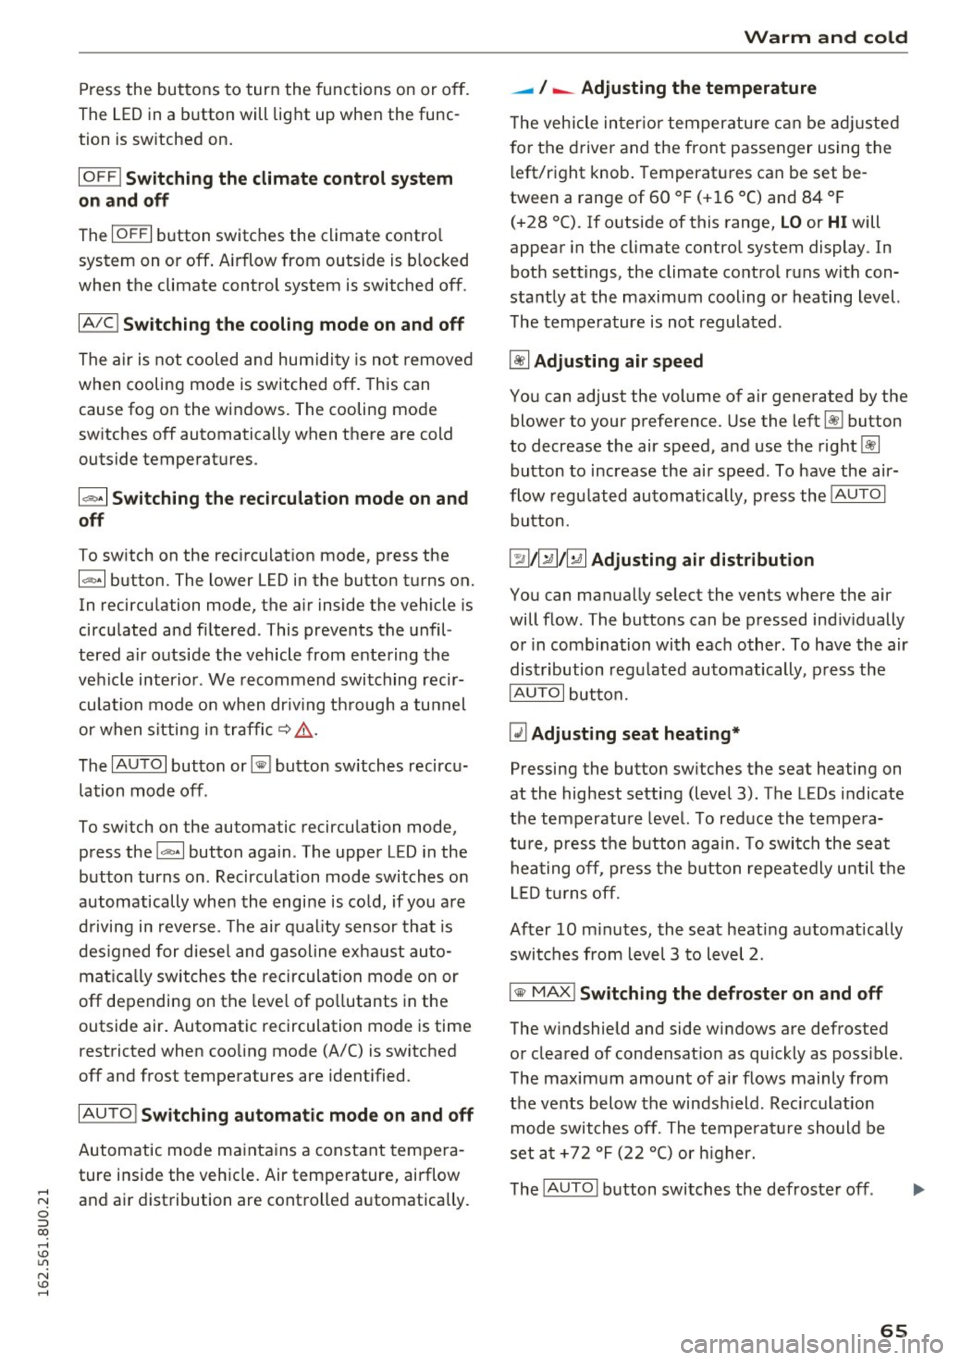
Press the buttons to turn the functions on or off.
The LED in a button will light up when the func
tion is sw itched on.
IOF FI Switching the climate control system
on and off
The
I O FF I button switches the climate contro l
system on or off. Airflow from outside is b locked
when the climate control system is switched off .
IAJC! Switching the cooling mode on and off
The air is not cooled and humidity is not removed
when cooling mode is switched off. This can
cause fog on the windows. The cooling mode
switches off automatically when there are cold
outside temperatures .
l= I Switching the recirculation mode on and
off
To switch on the recirculat ion mode, press the
1 ... ,.1 button. The lower LED in the button turns on.
In recirculation mode, the air inside the vehicle is
circulated and filtered . This prevents the unfil
tered air outside the vehicle from entering the
vehicle interior. We recommend switching recir
culation mode on when dr iv ing th rough a tunnel
or when sitting in traffic~ ,&.
The
IAUTOI button or~ button switches recircu
l ation mode off .
To switch on the automatic recirculation mode,
press the
l""> •I button again . The upper LED in the
button turns on . Recirculation mode switches on
automatically when the engine is co ld, if you are
driving in reverse. The ai r quality sensor that is
des igned for diese l and gasoline exha ust auto
matica lly switches the recirculation mode on or
off depending on the leve l of pollutants in the
outside air. Automatic recirculation mode is time
restricted when cooling mode (A/C) is switched
off and frost temperatures are identified.
IAUTO I Switching automatic mode on and off
Automatic mode maintains a constant tempera
ture inside the vehicle. Air temperature, airflow
,....,
"' and air distribution are controlled automatically. ci ::, co ,....,
-I -Adjusting the temperature
T he vehicle inter ior temperature can be adjusted
f or the driver and the front passenger using the
left/right knob. Temperatures can be set be
tween a range of 60 ° F (+ 16 °C) and 84 ° F
(+28 °C). If outside of this range,
LO or HI will
appear in the climate contro l system display . In
both settings, the climate control runs with con
stantly at the maximum cooling or heating level.
The temperature is not regulated.
~ Adjusting air speed
You can adjust the volume of air generated by the blower to your preference . Use the left~ button
to decrease the air speed, and use the right~
button to increase the air speed . To have the air
flow regulated automatically, press the
!AUTOI
button.
[!il l~/~ Adjusting air distribution
You can manually select the vents where the air
will flow. The buttons can be pressed individually
or in comb ination with each other. To have the air
distribution regulated automatically, press the
IAUTOI button.
~ Adjusting seat heating*
Pressing the button switches the seat heating on
at the highest setting (level 3) . T he LEDs indicate
the temperature level. To reduce the tempera
ture, press the button again . T o switch the seat
hea ting off, press the button repeatedly until the
LED tur ns off.
After 10 minutes, the seat heating automatically
switches from level 3 to level 2.
IIIW MAX ! Switching the defroster on and off
The windshield and side windows are defrosted or cleared of condensat ion as quickly as poss ible.
The maximum amount of air flows mainly from
the vents below the windsh ield. Recirculation
mode switches off. The temperatu re should be
set at +72 °F (22 °() or h igher.
The
! AUTOI button switches the defroster off .
65
Page 68 of 252
Warm and cold
IQiil REARI Switching the rear window defogger
on and off
The rear window defogger only operates when
the engine is running and will be automatically
switched off after approximately 10 minutes.
Synchronization
If you press the !AUTOI button longer, yo u can
transfer the driver temperat ure setting to the
front passenger. Synchronization is switched off
as soon as the temperature for the front pas
senger's side is changed.
Air vents
You can open or close the center and rear vents in
the cockpit and the vents in the rear center con
sole using the ridged thumbwheels. The levers
adjust the direction of the airflow from the vents.
Switching the temperature measurement
units
The temperature display can be switched be
tween°( and °F. Press and hold down the
j..., .1
button c:> fig. 76 and turn the knob on the dr iver's
side for 3 seconds -.
A WARNING
-You should not use the recirculation mode
for an extended period since no fresh air is
drawn in. With the air-conditioning switch
ed off, the windows can fog up, which in
creases the risk of an accident.
- Individuals with reduced sensitivity to pain
or temperature could develop burns when
using the seat heating* function. To reduce
the risk of injury, these indiv iduals should
not use seat heating*.
{tD Note
To avoid damaging the seat heating* ele
ments, do not kneel on the seats or place
heavy pressure on one area of the seat.
66
Page 69 of 252
..... N
c:i ::J CX)
..... I.Cl U"I
N I.Cl ......
Driving
Steering
Manually adjustable steering wheel
The steering wheel position is fully adjus table up
and down and forward and back .
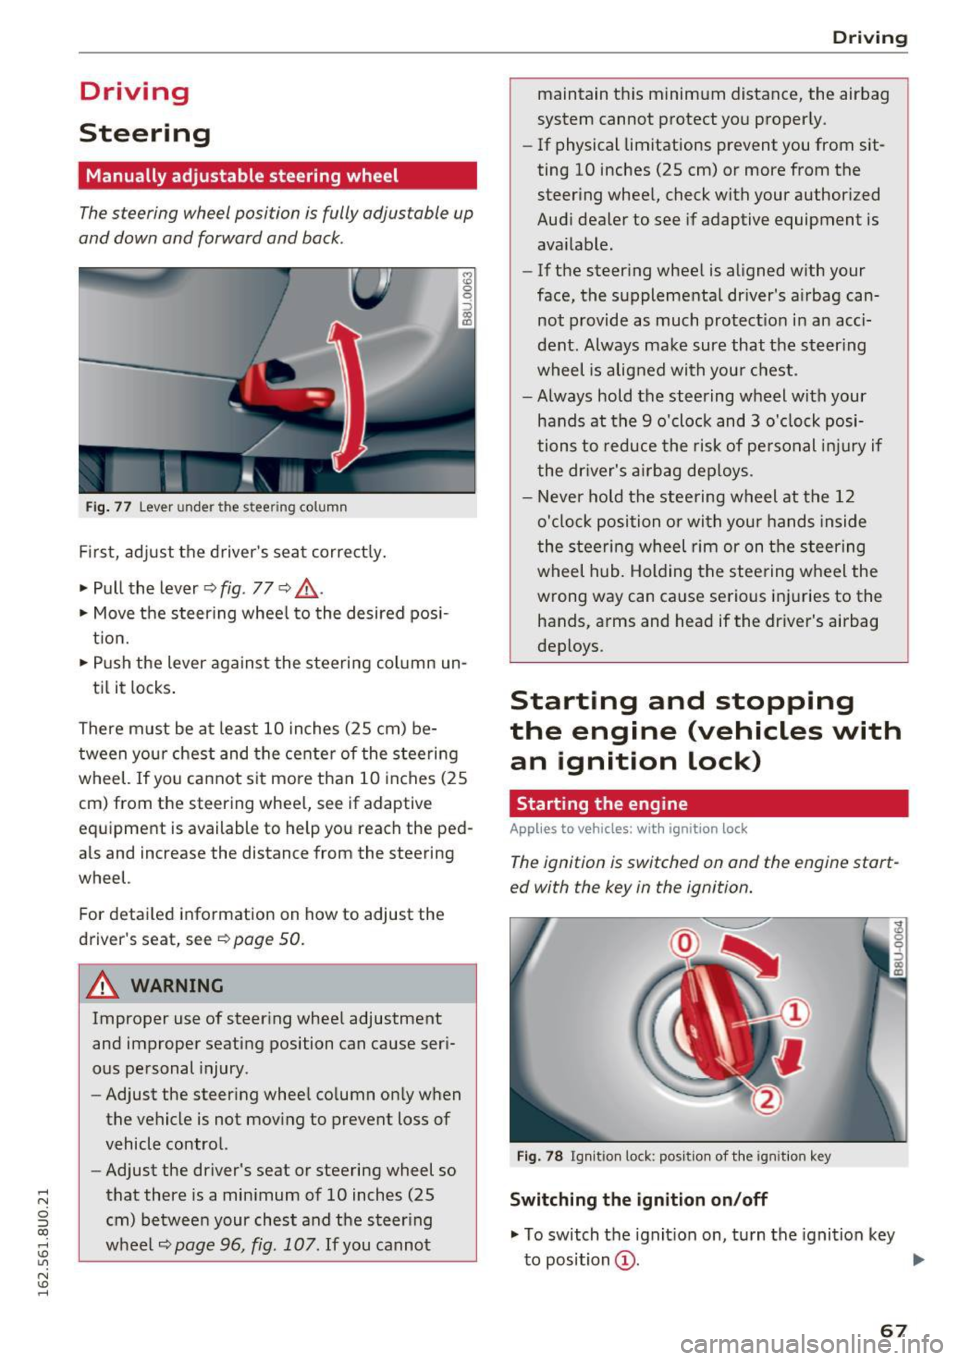
Fig. 77 Lever under the ste ering column
Fi rst, ad just t he driver 's sea t correct ly.
• Pull the lever ~
fig. 77 ~ .&,.
• Move the steer ing whee l to the desired posi
t ion.
• Push the lever against the steeri ng column un-
ti l it locks .
There must be a t least 10 inches (25 cm) be
tween your chest and the center of the stee rin g
wheel. If yo u cannot sit mo re than 10 inches (25
cm) from the steering whee l, see if adaptive
equipment is available to help you reach the ped
als and increase the distance from the steering
wheel.
F or detai led information on how to adjust the
driver's seat, see
~ page 50 .
.&_ WARNING
Improper use of steer ing whee l adjustment
and improper seating position can cause ser i
ous pe rsonal injury.
- Adjust the steer ing whee l co lumn on ly w hen
the vehicle is not mov ing to prevent loss of
vehicle control.
- Adjust the driver's seat or steering wheel so
that there is a min imum of 10 inches (25
cm) betwee n your chest and t he s teer ing
wheel
~page 96, fig. 107 . If you cannot
-
Drivi ng
maintain t his minim um distance, the airbag
system cannot p rotect yo u proper ly.
- If physical limitations prevent you from sit
ting 10 inches (25 cm) or more from the
steer ing whee l, check with your author ized
Audi dealer to see if adaptive equipment is
ava ilable.
- If the steer ing whee l is aligned w ith your
face, the supplementa l driver's a irbag can
not provide as much protect io n in an acc i
dent. Always make sure that the steer ing
wheel is aligned with you r chest.
- Always hold the steering wheel w ith your
hands at the 9 o'clock and 3 o' clock posi
tions to reduce the risk of pe rso nal injur y if
the dr iver's a irbag dep loys .
- Never ho ld the stee ring wheel at the 12
o'cl ock position or wi th you r hands inside
the stee rin g wheel rim or on the s teer ing
wheel h ub. Holding the stee ring w heel the
wrong way can cause serious inj uries to the
hands, arms and head if the driver's airbag
deploys .
Starting and stopping
the engine (vehicles with
an ignition lock)
Starting the engine
Applies to veh icles: w it h ign ition lock
The ignition is switched on and the engine start
ed with the key in the ignition.
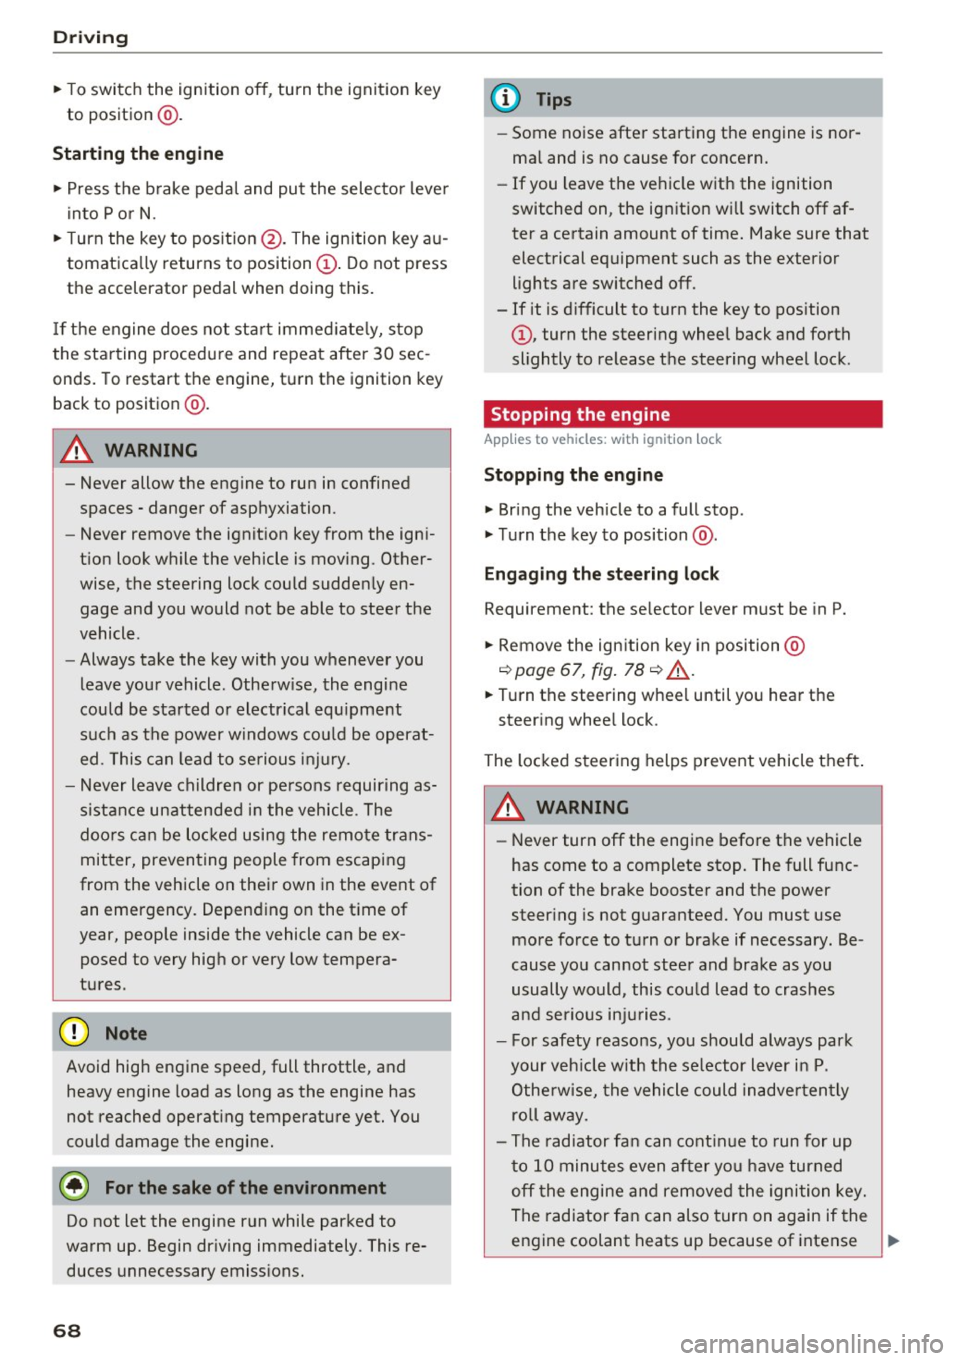
Fig. 78 Ignit io n lock: positio n of th e ig ni tion key
Switching the ignition on /off
• To switch t he ignit ion on, t urn the igni tion key
to position
(D . ..,.
67
Page 70 of 252
Driving
"'T o switch the ignition off, turn the ignition key
to position @.
Starting the engine
"' Press the b rake pedal and put the selector leve r
in to P or N.
"'T urn the key to pos it ion @. The ignition key au
tomatica lly returns to position
(I) . Do not press
the accelerator pedal when doing this.
If the engine does not sta rt immed iate ly, stop
the starting procedure and repeat after 30 sec
onds. To restart the engine, turn the ignition key
back to position @.
A WARNING
- Never allow the engine to run in confined
spaces -danger of asp hyxiation .
-
-Never remove the ignit ion key from the ign i
t ion look while the vehicle is moving . Other
wise , the steering lock cou ld sudden ly en
gage and you would not be able to stee r the
vehicle .
- Always take the key with you whenever you
leave your vehicle . Otherw ise, the engi ne
cou ld be sta rted o r electrical equ ipment
s uch as the power w indows co uld be operat
ed . This can lead to se rious i nju ry.
- Never leave children or pe rsons requiring as
sistance unattended i n the vehicle . The
doo rs c an be lo cked usi ng the remote trans
mit ter, preven ting people from escapin g
from the vehicle on thei r own in the event of
an emergency. Depending on the time of
year, people inside the vehicle can be ex
posed to very hig h or very low tempera
tures.
(D Note
Avoid high engine speed, full throttle, and heavy engine load as long as the engine has
not reached operat ing temperature yet. You
could damage the engi ne.
@ For the sake of the environment
Do not let the engine run while parked to
warm up. Begin dr iving immediately . This re
duces unnecessary emiss ions.
68
(D Tips
- Some noise after start ing the engine is nor
ma l and is no cause for concern.
- If you leave the ve hicle w ith the ignition
switched on, the ign ition wi ll switch off af
ter a certain amount of time. Make sure that
electrical equipment such as the exterior
lights are switched off.
- If it is d ifficult to turn the key to pos ition
(D , turn the steering wheel back and forth
slightly to release the steering wheel lock.
Stopping the engine
App lies to vehicles: with ignition lock
Stopping the engine
"' Bring the vehicle to a full stop .
"'T urn the key to posi tion @.
Engag ing the steering lock
Requi rement: the se lector lever must be in P.
"' Remove the ignition key in position @
c::> page 67, fig. 78 c::> &_ .
"'Tur n the steering whee l until you hear the
steer ing whee l lock .
The locke d steer ing helps prevent vehicle the ft.
A WARNING
-Never turn off the engine before the vehicle
has come to a complete stop. The full func
tion of the brake booster and the power
steer ing is not guaranteed. You must use
more force to turn or brake if necessary. Be
cause you cannot stee r and brake as you
usually would, this cou ld lead to crashes
a nd se rio us in juries.
- For safety reasons, yo u sh ould always park
your veh icle w ith the se lector lever i n P.
Othe rwise, the vehicle could inadve rten tly
roll aw ay.
- The rad iator fa n can cont in u e to run for up
t o 10 minutes even af ter yo u have turned
off the engine an d remove d the igni tion key.
The rad iator fan can also turn on again if the
eng ine coolant heats up because of intense .,._