AUDI Q3 2016 Owner's Manual
Manufacturer: AUDI, Model Year: 2016, Model line: Q3, Model: AUDI Q3 2016Pages: 252, PDF Size: 62.81 MB
Page 21 of 252
Drive to an authorized Audi dea ler or a uthorized
Audi Service Facility immediately to have the
malfunct ion corrected.
¢ Q Turn signals
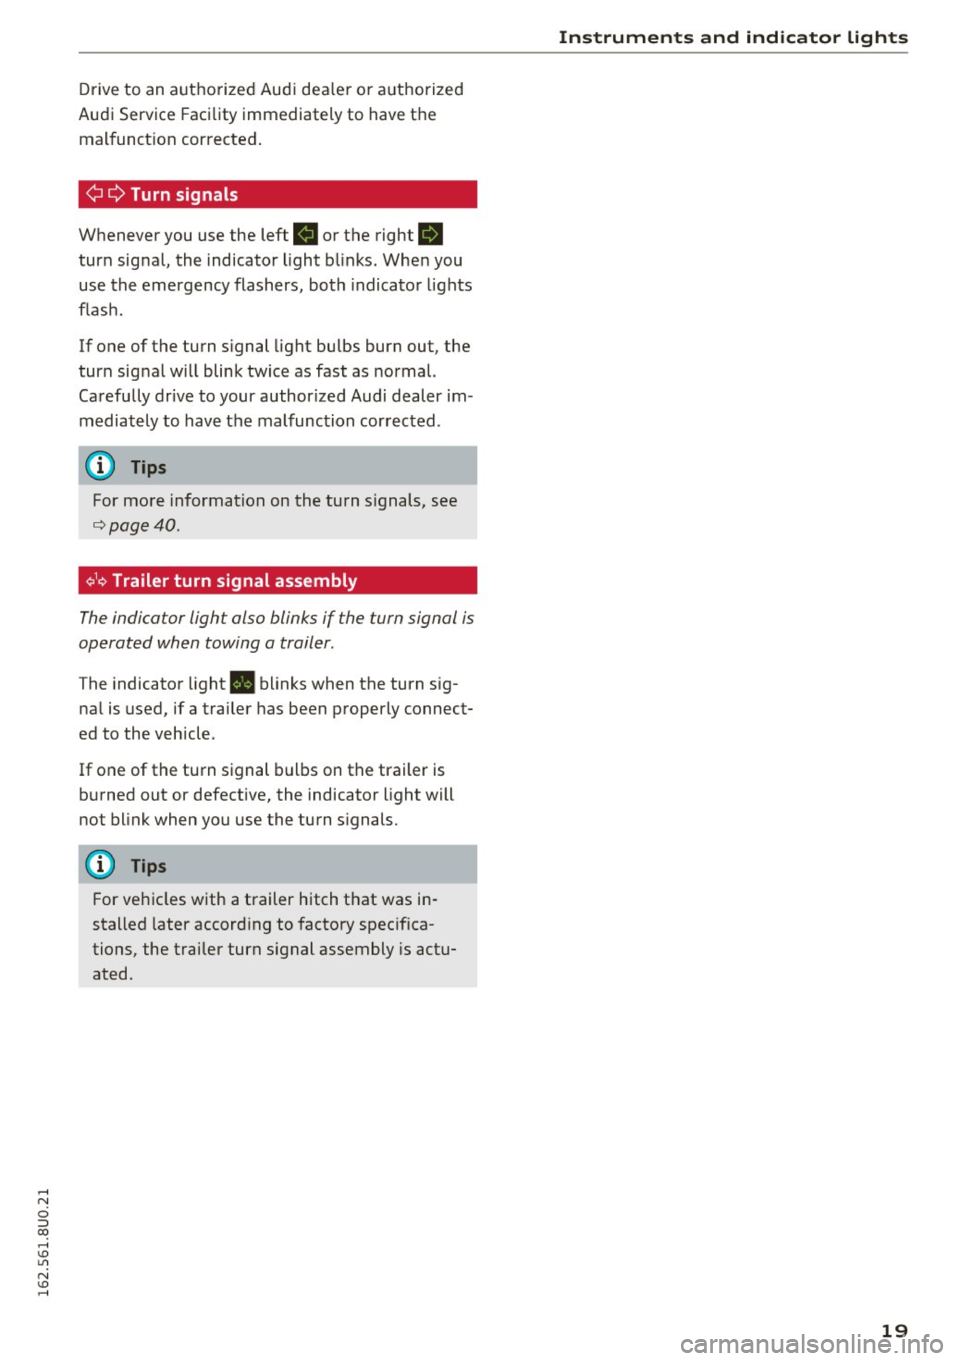
Whenever you use the left R or the right B
turn signal, the indicator light blinks. When you
use the emergency flashers, both indicator lights
flash.
If one of the turn signal light bulbs burn out, the
turn signal will blink twice as fast as normal.
Carefully drive to your author ized Audi dealer im
mediately to have the malfunction corrected .
(D Tips
For more information on the turn signals, see
¢page 40.
¢1¢ Trailer turn signal assembly
The indica tor light also blinks if the turn signal is
operated when towing a trailer .
The indicator light. blinks when the turn sig
nal is used, if a trailer has been properly connect
ed to the vehicle .
If one of the turn signal bulbs on the trailer is
burned out or defective, the indicator light will
not blink when you use the turn signals.
(D Tips
For vehicles with a trailer hitch that was in
stalled later according to factory specifica
tions, the trailer turn signal assembly is actu
ated.
Instruments and indicator lights
19
Page 22 of 252
Driver i nf orm ati on sy stem
Driver information
system
Overview
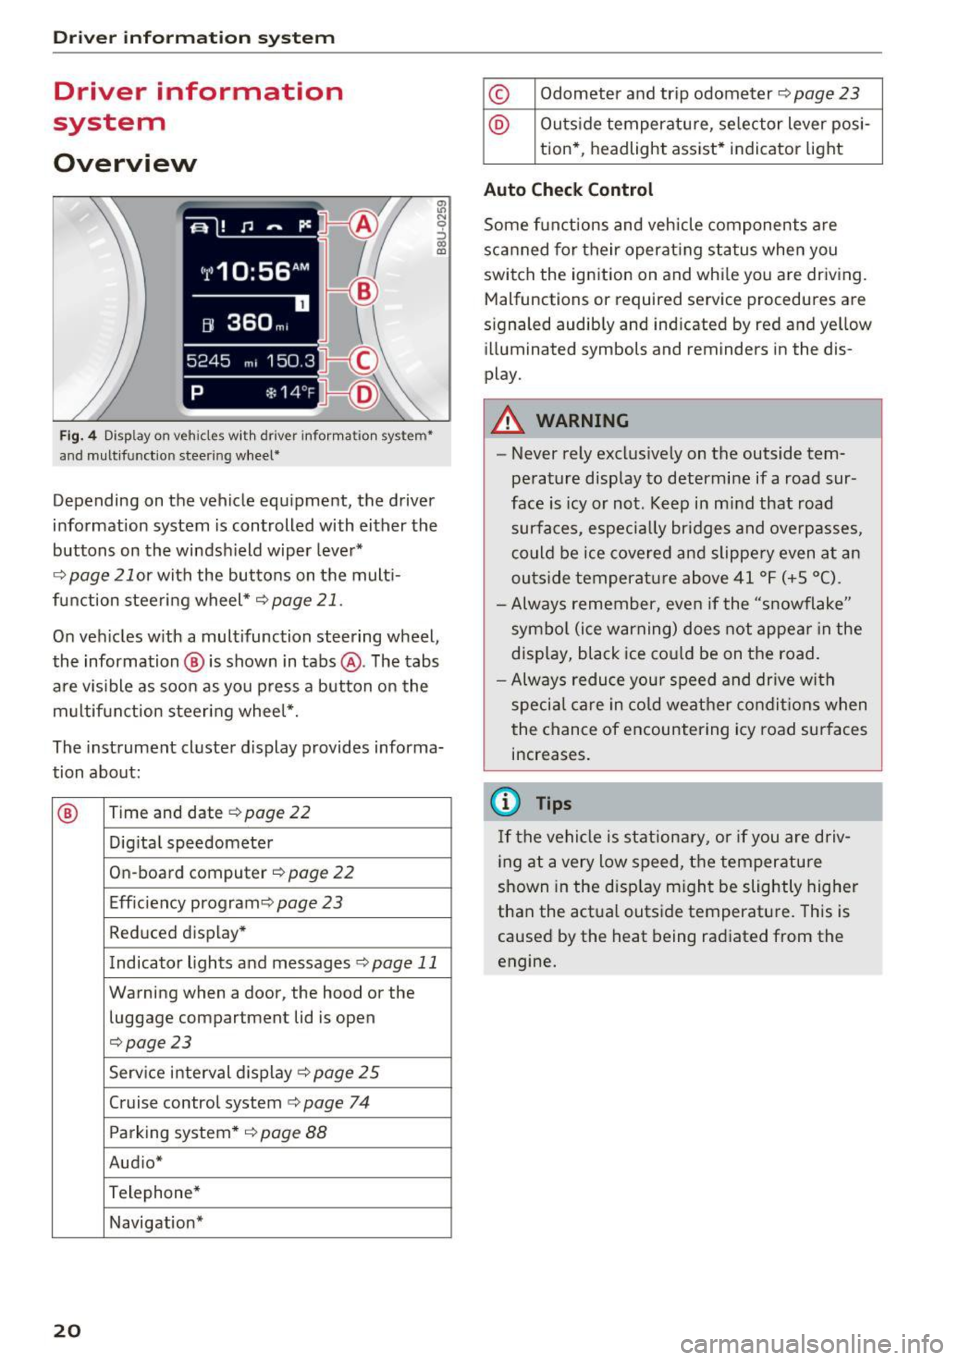
Fig. 4 Disp lay on vehicles with driver information system*
and multifunction steering wheel*
~ N 0 :::, 00 m
Depending on the vehicle equipment, the driver
information system is controlled with either the
buttons on the windshield wiper lever*
r='.> page 21 or wi th the buttons on the mult i
function steering wheel*
r='.> page 21 .
On vehicles w ith a multifunction steering wheel,
the information @ is shown in tabs @. The tabs
are v isible as soon as you press a button on the
multifunct ion steering wheel*.
The instrument cluster display provides informa
tion about:
® Time and date r='.> page 22
Digi tal speedometer
On-board computer
r='.> page 22
Eff iciency program ¢
page 23
Reduced display *
Indicator lights and messages
r='.>p age 11
Warning when a door, the hood or the
luggage compartment lid is open
r='.>page 23
Service interval display ¢ page 25
Cruise control system¢
page 74
Parking system* ¢
page 88
Aud io*
Telephone*
Navigation*
20
© Odometer and trip odometer r='.> page 23
@ Outside temperature, se lector lever posi -
tion* , headlight assist* indicator light
Auto Chec k Contro l
Some functions and vehicle components are
scanned for their operat ing status when you
switch the ignition on and while you are driving.
Malfunctions or requ ired service procedures are
s ignaled audibly and indicated by red and yellow
illuminated symbols and reminders in the dis
play.
A WARNING
-
- Never rely exclus ively on the outside tem
perature display to determine if a road sur
face is icy or not. Keep in m ind that road
surfaces, especially br idges and overpasses,
co uld be ice covered and slippe ry even at an
outs ide temperature above 41 °F (+ S °C).
- Always remember, even if the "snowflake"
symbol (ice warning) does not appear in the
display, black ice co uld be on the road.
- Always reduce you r speed and drive with
special care in cold weather condit ions when
the chance of encountering icy road surfaces
increases.
(D Tips
If the vehicle is stationary, or if you are driv
i ng at a very low speed, t he temperature
shown in the disp lay m ight be slightly higher
than the actual outside temperature. This is
caused by the heat being radiated from the
engine.
Page 23 of 252
...... N
c:i :::J CX)
...... I.Cl U"I
N I.Cl ......
Operation
Operating using the windshield wiper lever
Applies to vehicles: without multifunction steering wheel
--- ®
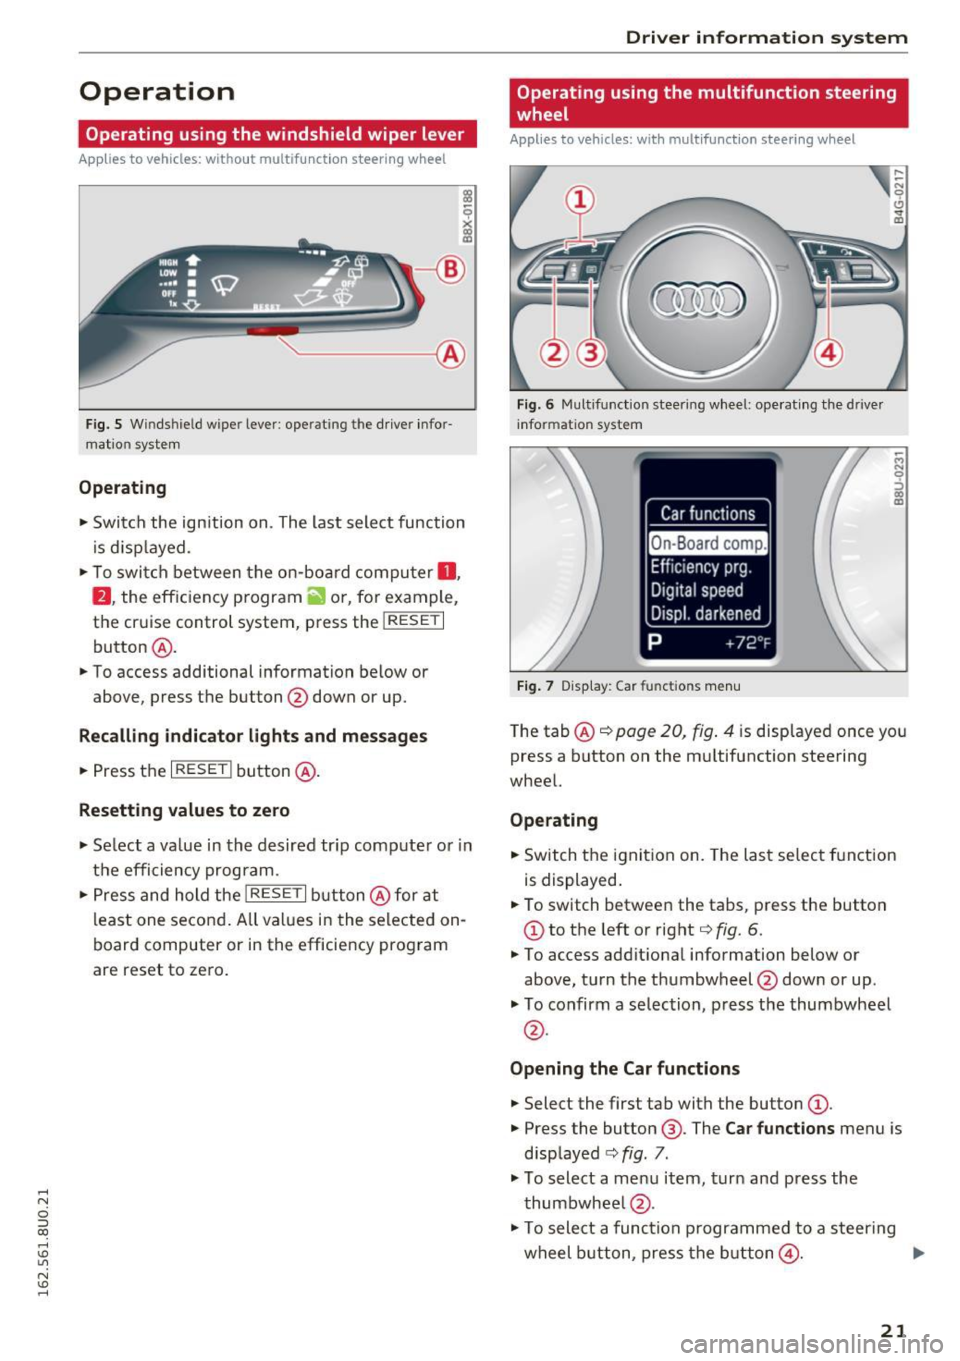
Fig . 5 Wi nds hield w iper lever : ope rating th e drive r info r
mat io n syste m
Operating
.. Swi tch the ign ition on . The last select function
is d is pl ayed.
,. To swi tch between the on-board compu ter
0 ,
fJ , the eff ic ien cy p rogram ii o r, fo r ex am ple,
the cr uise control system, p ress the
!RESE T I
button @ .
.. To access additional inf ormation below or
above, press the button @down or up.
Recalling indicator lights and messages
.. Press the I RESE TI button @.
Resetting values to zero
,. Se lect a va lue in the desired tr ip comp ute r o r i n
t h e efficiency prog ram .
.. Press and hold the
!RESE T I button @ for at
l east one secon d. All va lues i n the selected on
board computer or in the efficie ncy pro gram
are reset to ze ro .
Driver in forma tion system
Operating using the multifunction steering
wheel
Applies to vehicles: with multifunct ion steering wheel
Fig. 6 Multifu nct io n stee ring w heel: o perat ing th e d rive r
in fo rm atio n system
Fig. 7 D isplay : Car functio ns me nu
~ M N 9 ::> co m
The tab @~ page 20, fig . 4 is disp layed once yo u
press a button on the mu ltifunction steering
whee l.
Operating
.. Switch the ignit ion on. The las t selec t fu nction
is displayed .
.. To switch between the tabs, p ress the button
CD to t he left or right q fig. 6.
.,. To access addit ional information below o r
above, t urn the th umbwheel @down or up .
.,. To confirm a selection, p ress the thumbwheel
@ .
Opening the Car functions
.. Select the first tab with the button (D .
.,. Press the button @. The Car functions menu is
disp layed
q fig. 7 .
.,. To select a me nu item , tu rn and press the
thumbwhee l@ .
.,. To sele ct a func tion p rogra mmed to a steer ing
w heel button, press the but to n
@ . IJ,,
21
Page 24 of 252
Driver information system
Resetting values to zero
.. In the Ca r functions me nu, selec t On-board
computer or Efficiency program.
.. Se lect a va lue in the desired trip comp uter or in
the efficiency program.
.. To reset the values in a memory , press and ho ld
the thumbwheel @for one second.
Assigning a function to a programmable
steering wheel button
.. Se lect the ICAR I button> (Car ) systems *> Ve-
hicle sett ings
> Steering wheel button .
Recalling indicator lights and m essage s
.. Se lect the II ta b.
T he
II tab is only v is ible when there is a t lea st
one ind icator light o r message displaye d. Other
folders a re only visib le if the applicable system is
switched on.
On-board computer
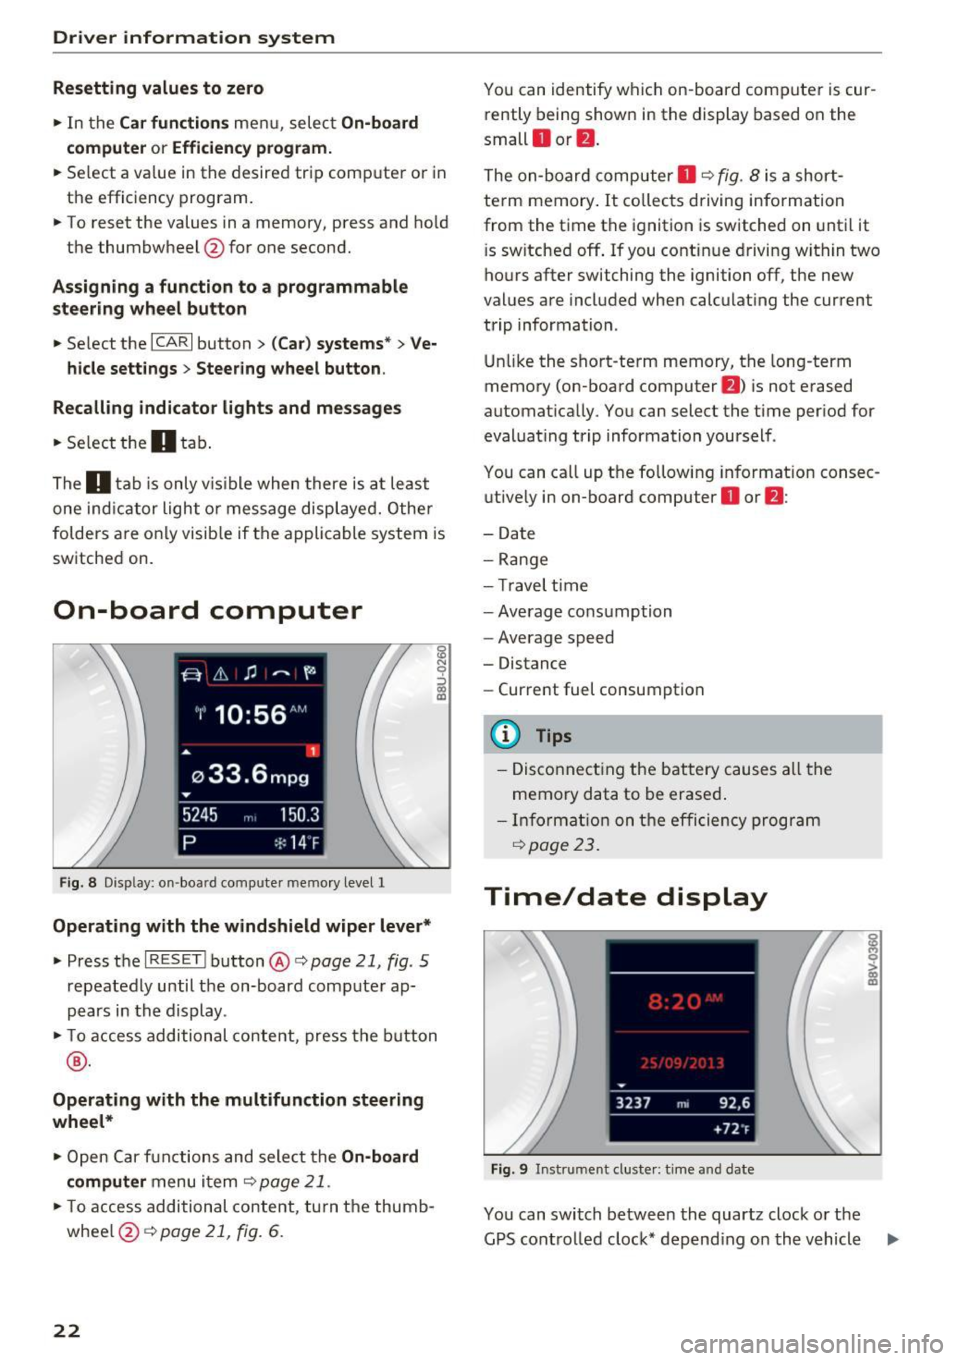
F ig . 8 Disp lay: on -boa rd comp uter mem ory level 1
Operating with the windshield wiper lever*
.. Press t he I R ES ET ! button @ c::, page 21, fig . 5
repeatedly until t he on-board co mputer ap
pears in the display .
.. To ac cess additional con tent, press the b utton
® ·
Operating with the multifunction steering
wheel*
.. Open Car f unct ions and sele ct the On -board
computer
menu i tem c::, page 21 .
.. To access addition al content, tu rn t he thumb
whee l@ c::>page
21, fig. 6 .
22
You can identify which on-board compute r is cur
rently being show n in the display based on the
small
O or fJ .
The on-board computer O c::, fig . 8 is a short
term memory . It co llects driving info rmation
from the time the ignition is switched on until it
i s sw itche d off . If you contin ue dr iving w ith in two
ho urs after switching the ignition off, the new
values are included when calculat ing the current
trip information .
Unlik e the sho rt-term memory, the long -term
memo ry (on-board computer
f) ) is not e rased
automat ica lly . You can select the time per iod for
evaluat ing trip information yoursel f .
You can ca ll up t he follow ing in fo rmat ion consec
u tive ly in on-board computer
O or f) :
-Date
- Ran g e
- Tr avel ti me
- Average cons umption
- Average speed
- Distance
- Current fuel consumption
@ Tips
-Disco nnect ing the bat tery c auses all the
memory data to be erased .
- Inf orma tion on the e ffic iency program
c::, page 2 3.
Time/date display
Fig . 9 In strum ent cluster: t ime a nd date
You can switch between the quartz clock o r the
G PS cont ro ll ed cloc k* depend ing on the vehicle ..,.
Page 25 of 252
,..,
N
c:i ::J CX) ,..,
I.Cl U"I
N I.Cl ......
equipment. For more informat ion, refer to your
MMI Operating Manual.
(D Tips
- When you switch off the ignition or open
the driver's door, the time, date*, odomete r
and temperature are displayed for an addi
tional 30 seconds.
- You can access the display with the
ISETI
button when the ign ition is switched off.
Odometer
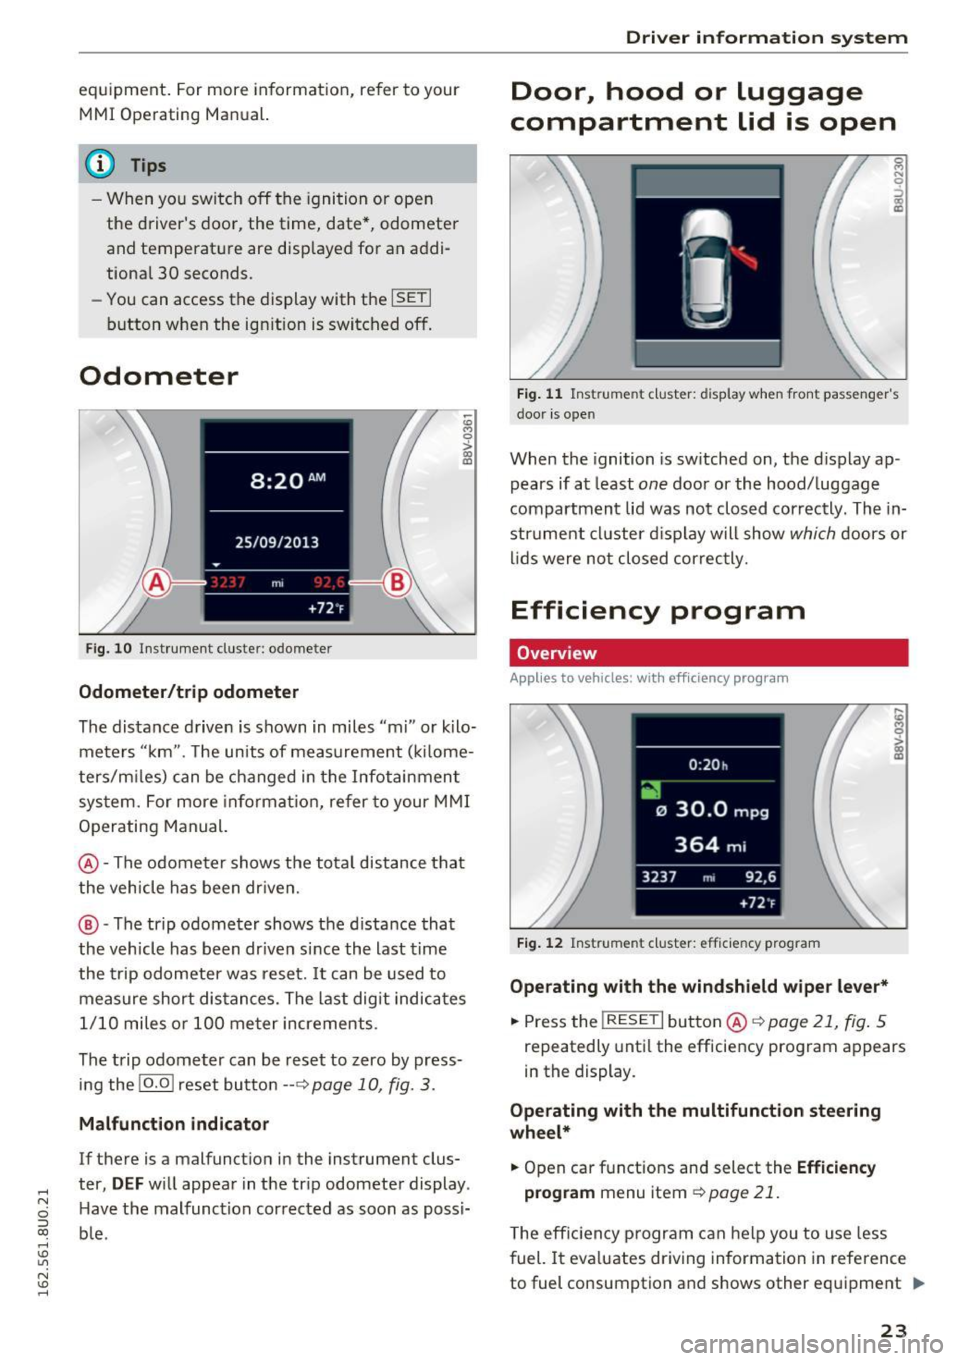
F ig. 10 In strument clu ste r: odomete r
Odometer/trip odometer
~
"' M 0 > a, m
The distance driven is shown in miles "mi" or kilo
meters "km". The units of measurement (ki lome
ters/m iles) can be changed in the Infotainment
system. For more informat ion, refer to your MMI
Operating Manual.
@-The odometer shows the total distance that
the vehicle has been driven.
® -The trip odometer shows the distance that
the vehicle has been dr iven since the last time
the trip odometer was reset.
It can be used to
measure short distances. The last digit indicates
1/10 miles o r 100 meter increments .
The trip odometer can be reset to zero by press
ing the
!O .O ! reset button --~ page 10, fig. 3.
Malfunction indicator
If there is a malfunction in the instrument clus
ter,
DEF will appear in the trip odometer display .
H ave the malfunction corrected as soon as possi
b le .
Driver in forma tion system
Door, hood or luggage
compartment lid is open
Fig. 11 Ins trume nt cluster: d isplay when front passenger's
door is open
When the ignition is switched on, the display ap
pears if at least
one door or the hood/ luggage
compartment lid was not closed correctly. The in
strument cluster display will show
which doors or
lids were not closed correctly.
Efficiency program
Overv iew
Applies to vehicles: with eff iciency program
Fig. 12 Instrumen t cluster: efficie ncy program
Operating with the windshield wiper lever*
.,. Press the I RESE T I button @ ~ page 21, fig. 5
repeatedly until the efficiency program appears
in the display.
Operating with the multifunction steering
wheel*
.,. Open car functions and select the Efficiency
program menu item ~ page 21.
T he efficiency program can help you to use less
fuel. It evaluates driving information in reference
to fuel consumption and shows other equipment
~
23
Page 26 of 252
Driver i nf orm ati on sy stem
influencing consumption c::> page 24. Fuel econ
omy messages
c::> page 24 provide tips for effi
cient dr iv ing.
The efficiency program receives data about the
distance and fue l consumption from the on
board computer
1. If the data in the efficiency
program is de leted
c::> page 21/c::>page 22, the
values in the on-board computer 1 are also reset.
Other equipment
App lies to veh icles: w ith efficie ncy program
F ig . 13 Instrument cluste r: other consumers
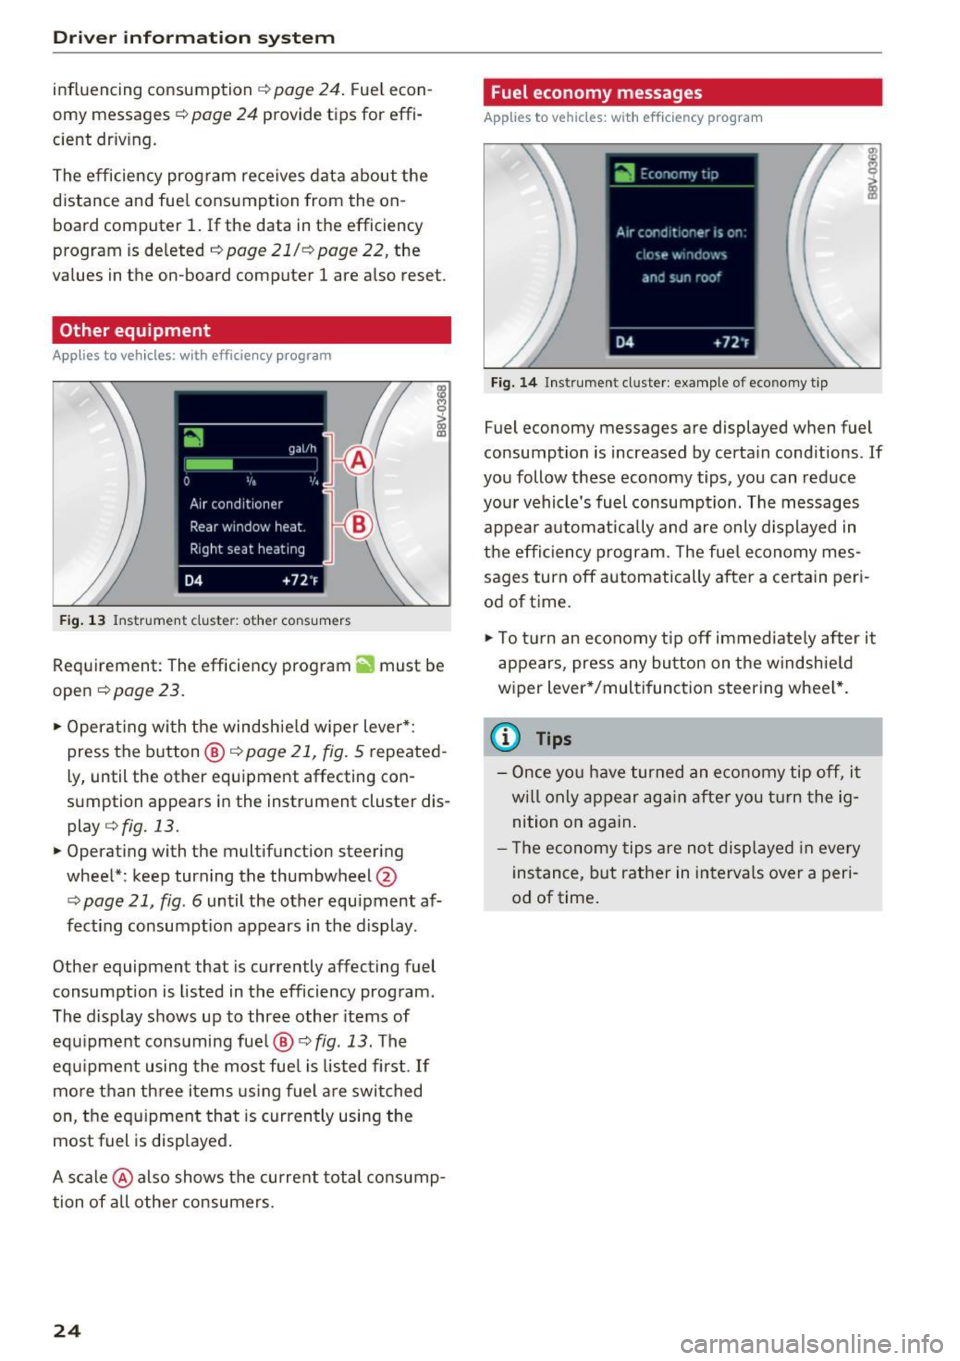
Requirement: The efficiency program ii1 must be
open
c::> page 23.
"' Operat ing with the windsh ie ld w iper lever *:
press the button @c::>
page 21, fig. 5 repeated
ly, until the other equipment affecting con
s u mption appears in the instrument cluster dis
play
c::> fig. 13.
"' Operating with the multifunction steering
wheel*: keep turn ing the thumbwheel @
c::> page 21, fig. 6 until the other equipment af
fecting consumption appears in the display .
Other equipment that is currently affecting fuel
consumption is listed in the efficiency program .
The display shows up to three other items of
equipment cons uming fue l®
c::> fig. 13. The
equipment using the most fue l is listed first.
If
more than three items us ing fuel a re switched
on, the equipment that is currently using the
most fuel is disp layed.
A scale @also shows the current tota l consump
tion of all other consumers .
24
Fuel economy messages
Applies to vehicles: with eff ic iency program
Fig. 14 Ins trument cl uster : example of eco nomy t ip
Fuel economy messages are displayed when fuel
consumption is increased by certa in cond itions . If
you follow these economy tips, you can reduce
you r vehicle's fuel consump tion. The messages
appea r automatically and are only d isplayed in
the efficiency program. The fue l economy mes
sages turn off automatically after a ce rtain peri
od of t ime .
"' To tu rn an economy t ip off immed iate ly after it
appears, press any bu tton on the windshie ld
wiper lever*/multifunction steering wheel*.
{l) Tips
- Once yo u have turned an economy tip off, it
wi ll only appear again after you turn the ig
nition on again.
- T he economy tips are not disp layed in every
instance, but rather in interva ls over a peri
od of time.
Page 27 of 252
Service interval display
The service interval display detects when your ve
hicle is due for service.
F ig. 15 I n st ru m ent cluster: example of a service interva l
d is p lay
i;i M 0
> CX) a,
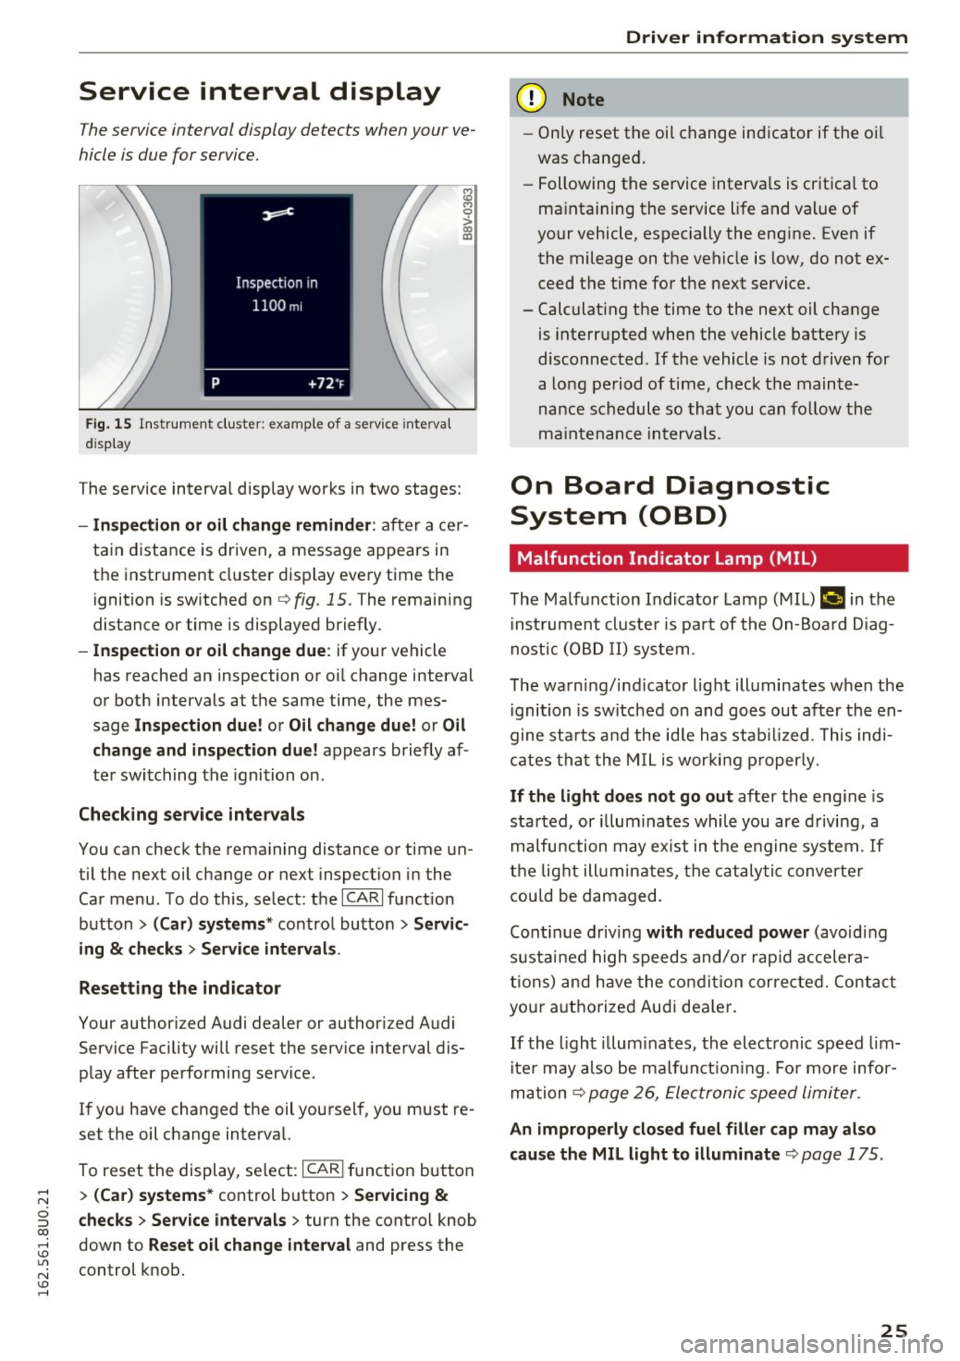
The service interva l display works in two stages:
- Inspection o r oil change reminder : after ace r
ta in distance is driven, a message a ppears in
t h e instr ument cluster d isp lay eve ry time the
ignition is sw itched on
q fig. 15 . The remain ing
distance or time is displayed briefly.
-Inspection or oil change due : if your vehicle
has reached an inspection or o il change interval
or both intervals at the same time, the mes
sage
Inspection due! or Oil change due! or Oil
change and in spection due!
appears brie fly af
te r swi tching the igni tion on.
Check ing service intervals
You can check the rema ining distance or time un
til the next oil change or next inspection in the
Car menu. To do this, select: the
I CA RI fu nction
button
> (Car) systems * contro l bu tton > Servic
ing
& checks > Service intervals .
Resetting the indicator
Your author ized Audi dealer or author ized Audi
Service Faci lity will reset the service interval dis
p lay after pe rforming service.
If yo u have changed the oil you rsel f, you must re
set the oil change interva l.
To reset the display, se lect:
I CARI fu nct ion but ton
> (Car) systems * control button > Servicing &
checks > Service intervals > turn the cont ro l knob
down to
Reset o il change interval and press the
control knob.
Driver information system
(D Note
- Only reset the oi l ch ange ind icator if the oi l
was changed.
- Following the se rvice interva ls is cr it ica l to
ma intaining the se rvice life and value of
yo ur vehicle, especially the eng ine. Even if
the mileage on t he ve hicle is low, do not e x
ceed the time fo r the next service.
- Calculat ing the time to the next oil change
is inte rru pted when the vehicle battery is
disconnected . If the vehicle is not d riven for
a lo ng pe riod of time, check t he main te
nance schedule so tha t you can fo llow the
maint enance in terva ls.
On Board Diagnostic
System (OBD)
Malfunction Indicator Lamp (MIL)
The M alfunction Indicator Lamp ( MIL) ¢'4 in the
i nst ru m en t cl uste r is p art o f the On-Boa rd Di ag
n os tic ( OBD I I) system .
T he wa rn ing/i nd icator lig ht ill uminates w hen the
ignition is sw itch ed on and goes out after th e en
gine sta rts and the id le h as stab ilized. This indi
ca tes tha t the M IL is wor kin g p roperly.
If the light does not go out after the eng ine is
sta rted, or illum inates while you are d riving, a
malfu nction may ex ist in the e ngine sys tem. If
t h e lig ht illumin ates, the c ata ly tic converte r
cou ld be d amaged.
Cont inue d riv in g
with reduced power (avoid ing
s u st ain ed high speeds and/o r rap id accelera
ti ons ) and have the co nditi on corre cte d. Cont act
yo ur aut ho rize d Aud i dea le r.
If th e li ght il lum inates, the ele ct ronic speed lim
i te r may also be ma lf u nct io ni ng. Fo r more inf or
m at ion
q page 26, Ele ct ronic speed limi ter.
An improperly closed fuel filler cap may also
cause the MIL light to illuminate
q page 175.
25
Page 28 of 252
Driver information system
On-Board Diagnostics
F ig. 16 Locat ion of Data Link Connector (DLC)
On-Board Diagnostics monitors the components
of your emission control system. Eac h monitored
component in your engine system has been as
signed a code. In case of a ma lfunction, the com
ponent w ill be identified and the fault stored as a
code in the control module memory.
The MIL light may also illuminate if there is a
leak in the on-board fuel vapor recovery system.
I f the light ill uminates after a refueling, stop the
veh icle and make sure the fuel filler cap is prop
erly closed (on ly vehicles with gasol ine engine)
r::!> page 17 5.
I n order to make an accurate diagnosis, the stor
ed data can only be displayed using special diag
nostic equipment (generic scan tool for OBD).
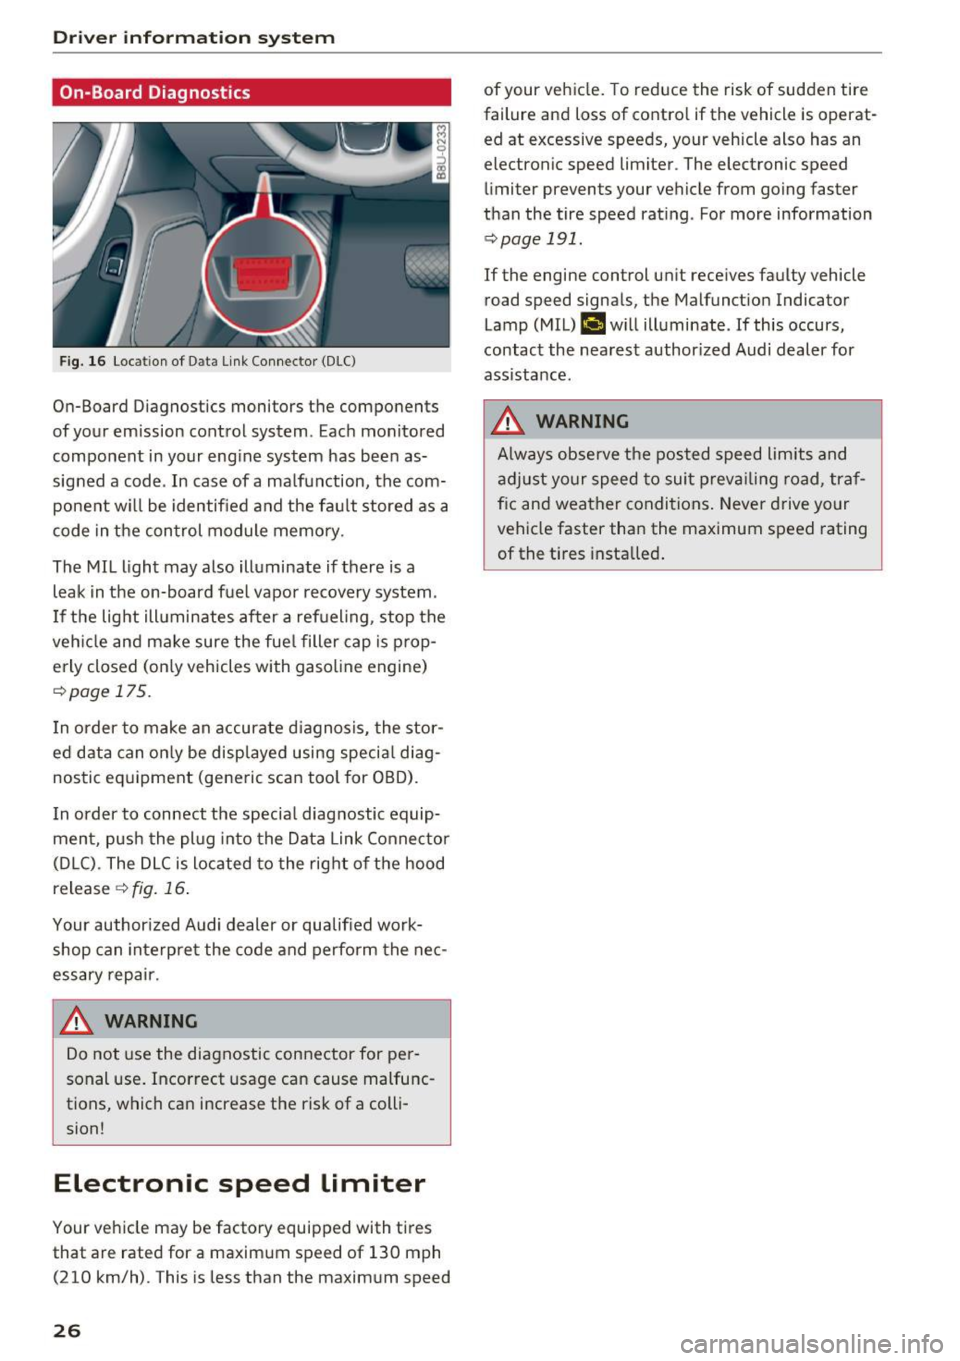
I n order to connect the specia l diagnostic equip
ment, push the plug into the Data Link Connector
(D LC). The DLC is located to the right of the hood
release
¢ fig. 16.
Your author ized Audi dealer or qualified work
shop can interpre t the code and perform the nec
essary repair .
.&_ WARNING
-
Do not use the diagnostic connector for pe r
sonal use. Incorrect usage can cause malfunc
tions, which can increase the risk of a colli
sion!
Electronic speed Limiter
Your vehicle may be factory equipped with tires
that are rated for a maximum speed of 130 mph (210 km/h). This is less than the maximum speed
26
of your veh icle. To reduce the risk of sudden tire
failure and loss of contro l if the vehicle is operat
ed at excessive speeds, your vehicle also has an
electronic speed limiter . The electronic speed
limiter prevents your vehicle from going faster
than the tire speed rating . For more information
r::!> page 191.
If the engine control un it receives faulty vehicle
road speed signals, the Malfunct ion Indicator
Lamp (MIL)
(,ij will illuminate. If this occurs,
contact the nearest author ized Audi dealer for
assistance.
.&_ WARNING
A lways observe the posted speed limits and
adjust your speed to suit prevailing road, traf
f ic and weather conditions. Never drive your
vehicle faster than the maximum speed rating
of the t i res installed .
-
Page 29 of 252
Opening and closing
Central locking
General description
The power locking system locks or unlocks all
doors and the rear lid simultaneously.
You can lock and unlock the vehicle centrally. You
have the following choices:
- Remote master key¢
page 29,
- Sensors in the front door handle on vehicles
with convenience key *
¢ page 30,
-Power locking switch insid e¢ page 31, oder
- Lock cylinder at the driver's door~
page 32.
Automatic locking
The automatic locking feature locks all the vehi cle doors and the rear lid when you drive faster
than
9 mph (15 km/h) .
The car is un locked again once the ignition key is
removed. In addition, the vehicle can be unlocked
if the opening function in the power locking sys
tem switch or at one of the door levers is actuat
ed.
Addit ionally, in the event of a crash with airbag
deployment the doors are automatically un
locked to allow access to the veh icle .
Selective unlocking
When you lock the vehicle, the power locking sys
tem will lock the doors and the rear lid. When
unlocking, you can set in the rad io or MMI*
whether
only the driver's door or the entire vehi
cle should be un locked ¢
page 31 .
Anti-theft alarm warning system
If the anti-theft alarm warn ing system detects a
break-in into the vehicle, acoustic and visua l
warn ing s ignals are triggered .
The anti-theft alarm system turns on automati
cally when you lock the vehicle. It deactivates
when unlocking using the remote control key or
~ by touc hing the sensor on the door handle (con-
ci ~ venience key).
Opening and closing
To switch the alarm off, p ress the@ button on
the remote contro l key or convenience key or
switch the ign ition on. The alarm also stops auto
matically after a certa in amount of t ime.
You can also trigger the alarm by pressing the
PANIC button on your remote-control key. This
will a lert other people in case of emergency .
Press the
PANIC button again to turn off the
alarm.
Turn signals
When you unlock the vehicle, the turn signals
flash twice, when you lock it once . If they do not
flash, one of the doors or the luggage compart
ment lid is not locked, the ign ition is still switch
ed on or the selector lever is not in position
P.
Unintentionally locking yourself out
In the following cases there are safeguards to
prevent you from locking your remote master key
in the veh icle:
- The vehicle does not lock with the central lock
ing switch if the driver's door is open
¢page 31.
-On vehicles with convenience key*, if the most
recent ly used master key is in the luggage com
partment, the rear lid is automatically unlocked
aga in after it is closed.
Do not lock your veh icle with the remote master
key or convenience key* until all doors and the
rear lid are closed. In this way yo u avoid locking
yourself out acc identally.
A WARNING
-- When you leave the vehicle, always remove
the ignition key and take it with you . This
will prevent passengers (children, for exam
p le ) from accidenta lly being locked in the
veh icle should they accidentally press the
power locking switch in the front doors.
- Do not leave children inside the vehicle un
supervised. In an emergency it would be im
possible to open the doors from the outside
without the key. .,.
27
Page 30 of 252
Opening and closin g
(D Tips
- In the event of a crash with airbag deploy
ment all locked doors will be automat ica lly
unlocked to give access to the vehicle occu
pants from the outside.
- If the power locking system should mal
funct ion, you can lock the driver's door us
ing the ignit ion key
¢ page 32.
- If the power lock ing system should fail, you
can still open the fuel tank flap in an emer
gency ¢
page 176.
-You are well adv ised not to keep valuables
i nside an unattended vehicle, vis ible or not.
Even a properly locked vehicle cannot pro
v ide the secur ity of a safe .
- If the LED in the upper edge of the driver's
door panel comes on for about 30 seconds
after the vehicle is locked, there is a mal
funct ion in the power lock ing o r the anti
theft warning system. Have the malfunct ion
correc ted by an authorized Audi dea lership
or q ualified repair facility .
Key set
Fig . 17 You r ve hicle key set
a, 0
~
x (X) Cll
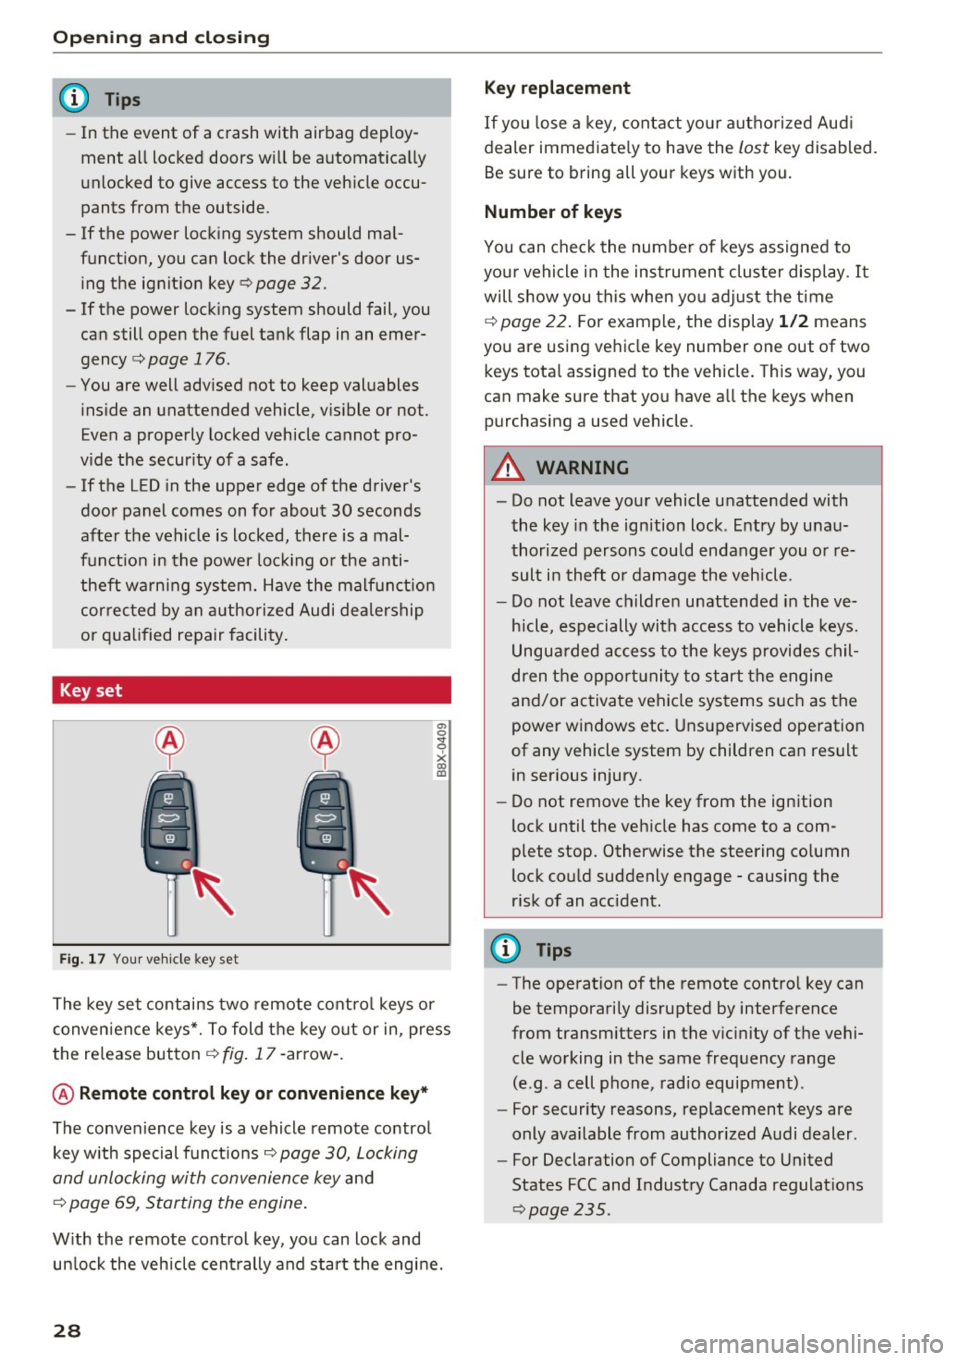
The key set contains two remote co ntro l keys or
conven ience keys*. To fold the key o ut or in, press
the re lease button
¢ fig . 17 -arrow -.
@ Remote control key or convenience key *
The convenience key is a vehicle remote contro l
key with special funct ions
Q page 30, Locking
and unlocking with convenience key
and
¢ page 69, Starting the engine .
With the remote control key, yo u can lock and
un lock the vehicle cent rally and start the engine.
28
Key replacement
If you lose a key, contact you r autho rized Aud i
dealer immed iate ly to have the
lost key disabled.
Be sure to bring all your keys w ith you.
Number of keys
You can chec k the numbe r of keys assigned to
you r vehicle in the ins trument cluster display .
It
will show you this when yo u adjust the t ime
¢
page 22. F or example, the display 1 /2 means
you are us ing vehicle key number one out of two
keys tota l assigned to the vehicle. This way, you
can make sure that you have a ll the keys when
purchasing a used vehicle .
.&, WARNING
-Do not leave your vehicle unatte nded with
the key in the ignition lock . E ntry by u nau
thori zed persons cou ld endanger you or re
sult in theft o r damage the vehicle.
- Do not leave childre n unattended i n the ve
h icle, especially with access to vehicle keys.
Ungua rded access to the keys provides chil
dren t he oppor tunity to start the engine
and/or activate vehicle systems s uch as the
power windows etc . Uns upervised ope ration
of any vehicle system by children can result in ser ious injury.
- Do not remove the key from the ign ition
lock until the veh icle has come to a com
plete stop. Otherwise the steering co lumn
lock cou ld suddenly engage -causing the
r isk of an accident.
(D Tips
- The operation of the remote contro l key can
be temporarily disrupted by interference
from transmitters in the v icinity of the vehi
cle working in the same frequency range
(e.g . a cell phone, radio equipment) .
- For security reasons, rep lacement keys are
only ava ilable from authorized Audi dealer .
- For Declaration of Compliance to United
States FCC and Industry Canada regulat ions
~ page 235.