program AUDI Q3 2018 Owners Manual
[x] Cancel search | Manufacturer: AUDI, Model Year: 2018, Model line: Q3, Model: AUDI Q3 2018Pages: 230, PDF Size: 57.03 MB
Page 4 of 230
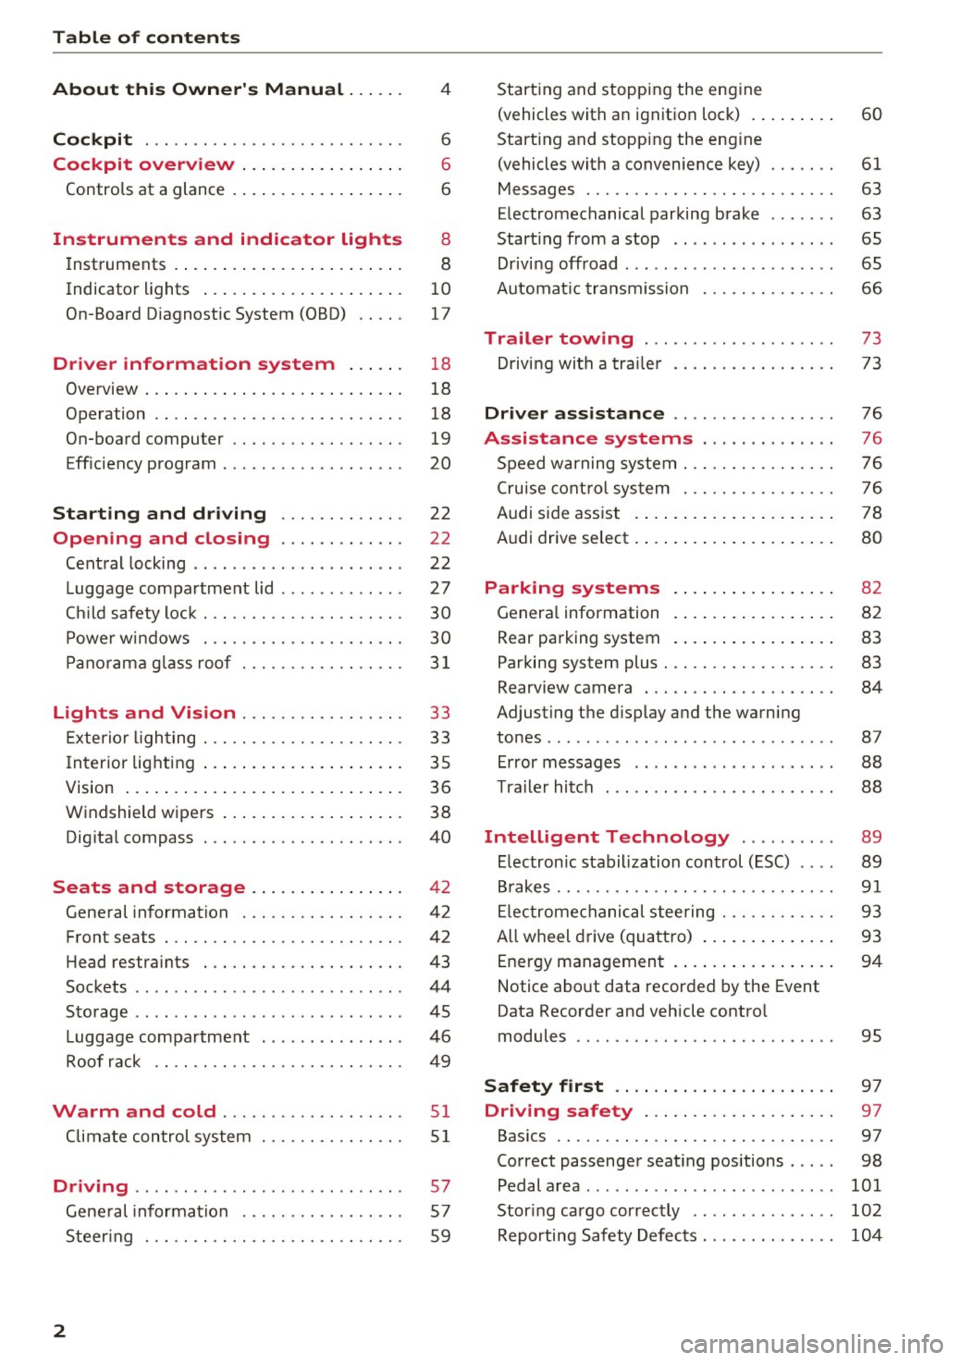
Table of contents
About this Owner's Manual ... .. .
Cockpit ... .. ............... .... .. .
Cockpit overview ................ .
Controls at a glance ... .......... .. .. .
Instruments and indicator lights
Instruments .... ... .......... .. .. .. .
Indicator lights .. .. .......... .. .. .. .
On-Board Diagnostic System (OBD) .. .. . 4
6
6
6
8
8
10
17
Drive r information system . . . . . . 18
Overview . . . . . . . . . . . . . . . . . . . . . . . . . . . 18
Operation . . . . . . . . . . . . . . . . . . . . . . . . . . 18
On-board computer . . . . . . . . . . . . . . . . . . 19
Efficiency program . . . . . . . . . . . . . . . . . . . 20
Starting and driving . . . . . . . . . . . . . 22
Op en ing and clo sing . . . . . . . . . . . . . 22
Central locking . . . . . . . . . . . . . . . . . . . . . . 22
Luggage compartment lid . . . . . . . . . . . . . 27
Ch ild safety lock . . . . . . . . . . . . . . . . . . . . . 30
Po wer wi ndows . . . . . . . . . . . . . . . . . . . . . 30
Panorama gla ss roof .......... .... ...
31
Lights and Vi sion . . . . . . . . . . . . . . . . . 33
E xterio r lighting . . . . . . . . . . . . . . . . . . . . . 33
I n terior lighting . . . . . . . . . . . . . . . . . . . . . 35
V1s1on . . . . . . . . . . . . . . . . . . . . . . . . . . . . . 36
Windshield wipers . . . . . . . . . . . . . . . . . . . 38
Dig ital compass . . . . . . . . . . . . . . . . . . . . .
40
Seats and storage . . . . . . . . . . . . . . . . 42
General information . . . . . . . . . . . . . . . . . 42
Front seats . . . . . . . . . . . . . . . . . . . . . . . . . 42
H ead restra ints . . . . . . . . . . . . . . . . . . . . . 43
Sockets . . . . . . . . . . . . . . . . . . . . . . . . . . . . 44
Storage . . . . . . . . . . . . . . . . . . . . . . . . . . . . 45
L uggage compartment . . . . . . . . . . . . . . . 46
Roof rack . . . . . . . . . . . . . . . . . . . . . . . . . . 49
Warm and cold .. .. .. ... ..... .. .. . 51
Climate control system . . . . . . . . . . . . . . . 51
Driving .. .. .. .. ... .. .. ..... ... .. .. . 57
General information . . . . . . . . . . . . . . . . . 57
Steering . . . . . . . . . . . . . . . . . . . . . . . . . . . 59
2
Starting and stopping the eng ine
(vehicles with an ignition lock) . . . . . . . . . 60
Starting and stopping the eng ine
(vehicles with a convenience key) ..... . .
Messages ..... .. .. .. ............. . .
E le ctromechanical parking brake ...... .
Start ing from a stop .. ........ ..... . .
D rivi ng offroad . .. ... ...... ....... .. .
Automatic transmission
61
63
63
65
65
66
Trailer towing . . . . . . . . . . . . . . . . . . . . 73
Driving with a trailer
Driver assistance .. ..... ......... .
A ss istance sy stem s .. .. ... ... .. . .
Speed warning system . .. ........... . .
Cruise control system .... .......... . .
Audi side assist .. .. .. .. . .......... . .
Audi drive select .... ... .. .......... . .
Park ing system s
General information
Rear parking system
Parking system plus ... ............. . .
Rearv iew camera ... .. .. ........... . .
Adjusting the display and the warning
tones ........ ... ... ...... ....... .. .
Error messages .. ... ...... ....... .. .
T ra ile r hitch . .. .. .. .. ... ... .... ... . .
Intelligent Technology ....... .. .
Electronic stabilization control (ESC) .. . .
Brakes ...... .. .. .. .. ... .......... . .
El ectrome chanical steering ........... .
A ll wheel drive (quattro) .. .......... . .
Energy management .. ... .......... . .
Notice about data recorded by the Event
Data Recorder and vehicle contro l
modules .. .... .. .. .. .. ........... . . 73
76
76
76
76
78
80
82
82
83
83
84
87
88
88
89
89
91
93
93
94
95
Safety first . . . . . . . . . . . . . . . . . . . . . . . 97
Driving safety . . . . . . . . . . . . . . . . . . . . 97
Bas ics . . . . . . . . . . . . . . . . . . . . . . . . . . . . . 97
Correct passenger seat ing positions . . . . . 98
Pedal area . . . . . . . . . . . . . . . . . . . . . . . . . .
101
Stor ing cargo correctly . . . . . . . . . . . . . . . 102
Reporting Safety Defects . . . . . . . . . . . . . . 104
Page 9 of 230
0 co ......
"' ,....
"' ...... 0 0 :::,
00
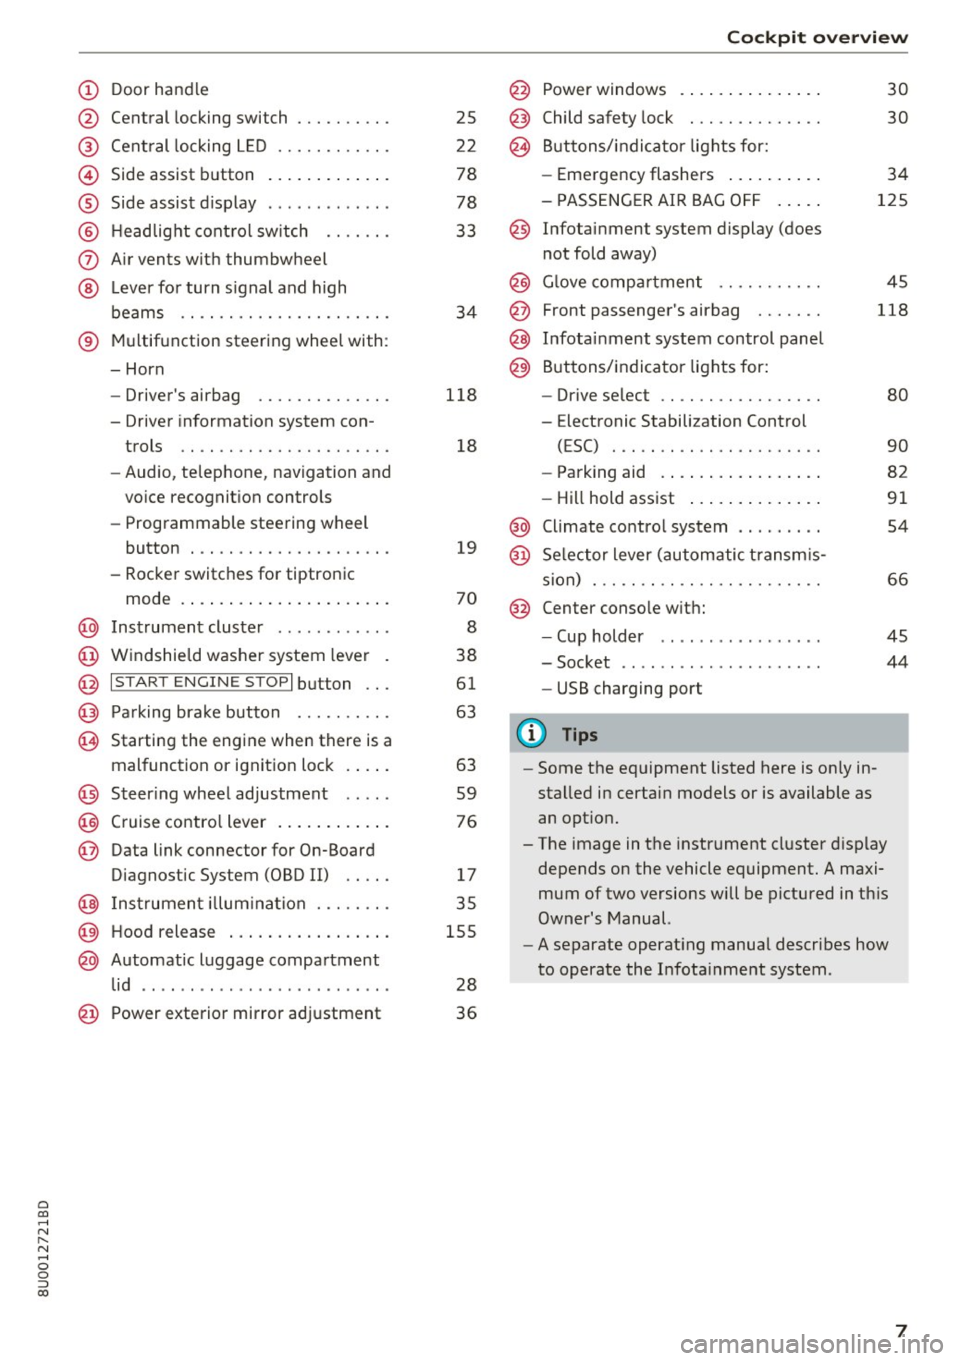
(!) Door handle
@
®
©
®
®
(J)
®
Central locking switch
Cent ral locking L ED ......... .. .
Side assist button
Side assist d isplay
H eadlight cont rol sw itch .... .. .
A ir vents with thumbwheel
L ever for turn s ignal and h igh
beams .. .. .... . .......... .. .
® Multifunction ste ering wheel with :
- Horn
- Driver's airbag ........... .. .
- Driver information system con-
trols .. .. ............... .. .
- Audio , te lephone, nav igation and
vo ice recognit ion controls
- Programmable steering wheel
button . .. .. ........... .. .. .
- Rocker switches for tiptronic
mode . ... .. ... ..... ... .. .. .
@ Instrument cluster ........... .
@ Windshield washer system lever
@ I S TART EN GIN E ST OPI button .. .
@ Pa rking brake button ....... .. .
~ Starting the engine when there is a
malfunction or ignition lock . ... .
@ Steer ing whee l adjustment .... .
@ Cruise contro l lever .... ... .. .. .
@ Data link connector for On-Board
Diagnostic System (OBD II) .. .. .
@ Inst rument illum ination ... .. .. .
@ Hood r ele as e .... ..... ... .. .. .
@ Automat ic luggage compartment
lid .. .. ... ............. ..... .
25
2 2
78
78
33
34
118
18
19
70
8
38
61
63
63
59
76
17
35
155
28
@ Power exterior mirror adjustment 3 6
Cockpit o ve rv iew
@ Power windows . .. .. .. ..... .. .
@ Child safety lock ............. .
@ Buttons/indi cator lights for:
- Eme rgency flashers .. ..... .. .
- PASSENG ER AIR BAG O FF .... .
@ Infotainment system display (does
not fold away)
@ G love compartment .......... .
@ Front passenger's airbag ...... .
@ Infota inment system control panel
@ Buttons/indicator lights for:
- Drive se lect .. .. ............ .
- E lectronic Stabilization Control
( E SC) . .. .. .. .. ....... ..... .
30
30
34
125
45
118
80
90
- Park ing aid . . . . . . . . . . . . . . . . . 82
- Hill hold ass ist . . . . . . . . . . . . . . 91
@ Climate contro l system . . . . . . . . . 54
@ Se lector lever (automatic transm is -
sion) . . . . . . . . . . . . . . . . . . . . . . . . 66
@ Center conso le w ith:
- Cup holder . . . . . . . . . . . . . . . . . 45
- Socket . . . . . . . . . . . . . . . . . . . . . 44
- USB charging port
(D Tips
-Some the eq uipment listed here is on ly in
sta lled in certain models or is available as
an opt ion.
- The image in the instrument cluster d isplay
depends on the vehicle equipment. A maxi
mum of two versions will be pictured in th is
Owner's Manual.
- A separate operat ing manua l describes how
to operate the Infota inment system .
7
Page 20 of 230
Driver information system
Driver information
system
Overview
A pp lies to: ve hicles w ith driver information system
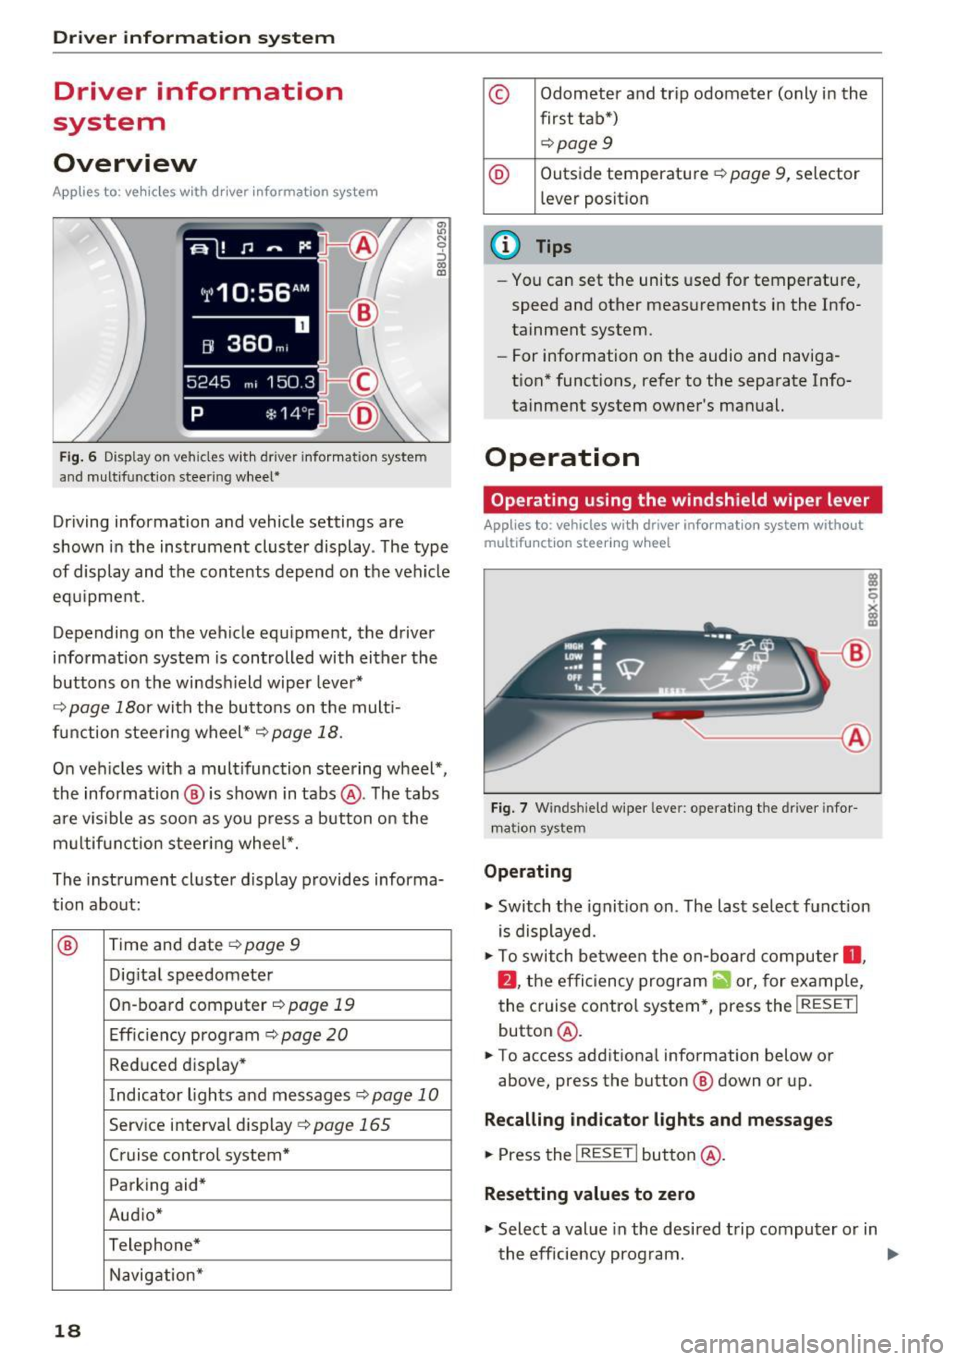
Fig. 6 Display on veh icles wit h driver informat ion system
and m ultifunc tion steering wheel*
:ll N 9 ::i a, ID
Driving information and vehicle settings are
shown in the instrument cluster display . T he type
of display and the contents depend on the vehicle
equipment.
Depending on the vehicle equ ipment, the driver
information system is controlled with either the
buttons on the windsh ield wiper lever*
¢ page 18or with the buttons on the mult i
function steering wheel*¢ page 18.
On vehicles with a multifunction steering wheel*,
the information ® is shown in tabs @. The tabs
are visible as soon as you press a button on the
multifunction steering wheel*.
The instrument cluster display provides informa
tion about:
® Time and date
¢ page 9
Dig ital speedometer
On -board computer¢ page 19
Efficiency program¢ page 20
Reduced display*
Indicator lights and messages¢ page 10
Serv ice interval display ¢page 165
Cruise control system* Parking aid*
Aud io*
Telephone* Navigation*
18
© Odometer and trip odometer (only in the
first tab*) ¢page
9
® Outside temperature~ page 9, selector
l ever posit ion
{!) Tips
- You can set the units used for temperature,
speed and other measurements in the Info
tainment system.
- For information on the audio and naviga
t ion* functions, refer to the separate Info
tainment system owner's manual.
Operation
Operating using the windshield wiper lever
Applies to : vehicles wit h dr iver infor mat ion system without
multif unct ion steer ing wheel
------ ®
Fig. 7 Windsh ie ld wipe r leve r: operating the drive r info r
ma tion system
Operating
~ Switch the ignit ion on . The last select function
is displayed.
~ To switch between the on -board computer 0 ,
fJ , the efficiency program a, or, for examp le,
the cruise contro l system*, press the
I RESET I
button@.
~ To access additiona l information below or
above, press the button ® down or up.
Recalling indicator lights and messages
~ Press the I RESET I button @.
Resetting values to zero
~ Select a value in the desired trip computer or in
the efficiency program. ..,.
Page 21 of 230
a
co
...... N r--. N .-< 0 0 ::, co
.. Press and hold the I RESET I button @for at
least one second . All val ues in the selected on
board computer or in the efficiency program
are reset to zero.
Operating using the multifunction steering
wheel
App lies to: veh icles with driver info rmation system and multi
funct ion steering w heel
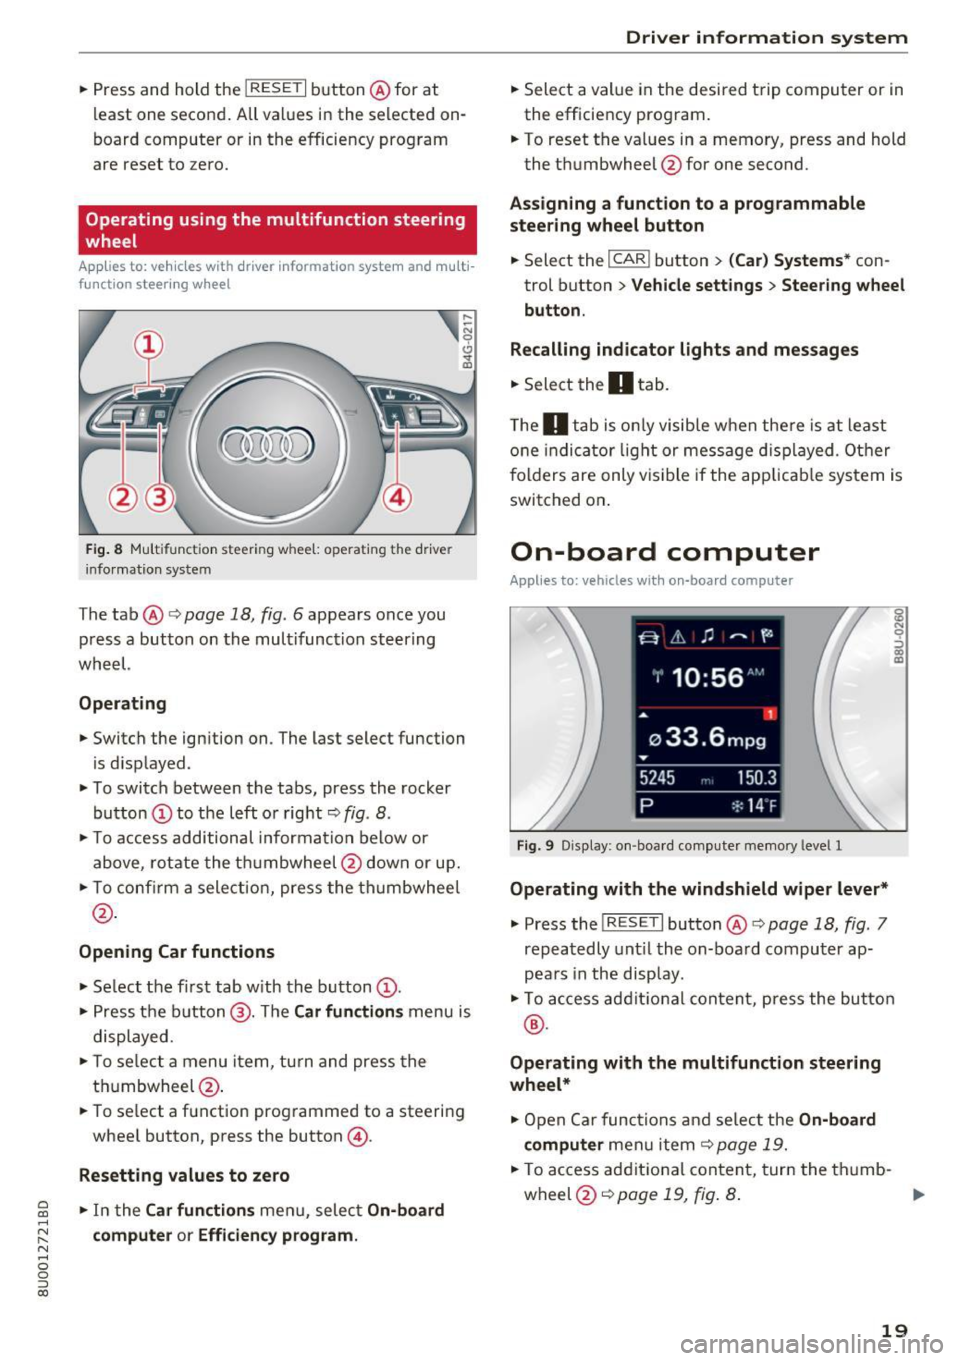
Fig. 8 Mu lt ifu nctio n ste ering w heel: o perat ing t he dr ive r
i nfo rmatio n syste m
The tab @<=> page 18, fig. 6 appears once you
p ress a button on the mult ifunction steer ing
wheel.
Operating
,.._ ~ N
0
Cl
is d isp layed .
.. To switch between the tabs, press the rocker
button
(D to t he left o r right ¢ fig . 8 .
.,. To access additional informa tion below or
above, rotate the t humbwheel @dow n or up .
.,. To con firm a select io n, press the th umbwhee l
@.
Opening Car functions
.. Se lect the fi rst tab w ith the button (D .
.,. Press t he bu tton @. The Car function s menu is
displayed .
.. To se lect a menu item, tu rn and press the
t hu mbwheel @.
.. To se lect a f unction prog rammed to a steeri ng
whee l button, press the button @.
Resetting values to zero
.,. In t he Car functions men u, selec t On-board
computer or Efficiency program.
Driver in forma tion system
.,. Sele ct a val ue in the desired t rip compu ter or in
the efficiency pro gram .
.. To reset t he val ues in a memo ry, press and hold
the t humbwheel @for one second.
Assigning a function to a programmable
steering wheel button
.. Select the I CAR ! button > (Car) Systems * con
trol button
> Vehicle settings > Steering wheel
button .
Recalling indicator lights and messages
.,. Sele ct the O tab .
T he
O tab is on ly visib le when the re is at least
o ne indi cator ligh t or mess age dis played . Other
f ol ders are only vis ible if the app licab le system is
switched on .
On-board computer
Applies to: vehicles with on-board computer
Fig. 9 D isp lay : o n-boa rd comp uter memory leve l l
Operating with the windshield wiper lever*
.,. Press the I RESET I button @ ¢ page 18, fig. 7
repea tedly unt il the on-boa rd computer ap
p ear s in the display .
g N 0
:::> (D a)
.,. To ac cess ad dit iona l content, press the button
®·
Operating with the multifunction steering
wheel*
.,. Open Ca r func tions and se lec t the On-board
computer
men u item ¢page 19 .
.,. To access addit io nal content, tur n the th umb-
wheel @¢
page 19, fig. 8. Iii>
19
Page 22 of 230
Driver information system
You can identify which on-board computer is cur
rently being shown in the disp lay based on the
small
O or fJ .
The on-board compu ter 0 ~ fig . 9 is a short-term
memory .
It collects driving information from the
time the ignition is switched on until it is switch
ed off. If you continue driving w ith in two hours
after switching the ignition off, the new values
are included when calculating the current trip in
formation .
Unlike the short-term memory, the long-term
memory (on-board computer
fJ ) is not erased
automatically. You can select the time period for
evaluating trip informat ion yourself .
You can call up the following information consec
utively in on-board computer
O or fJ :
-Date
-Range
- Travel time
- Average consumpt ion
- Average speed
- Distance
- Current fuel consumption
Inf ormation on the efficiency program
¢page 20.
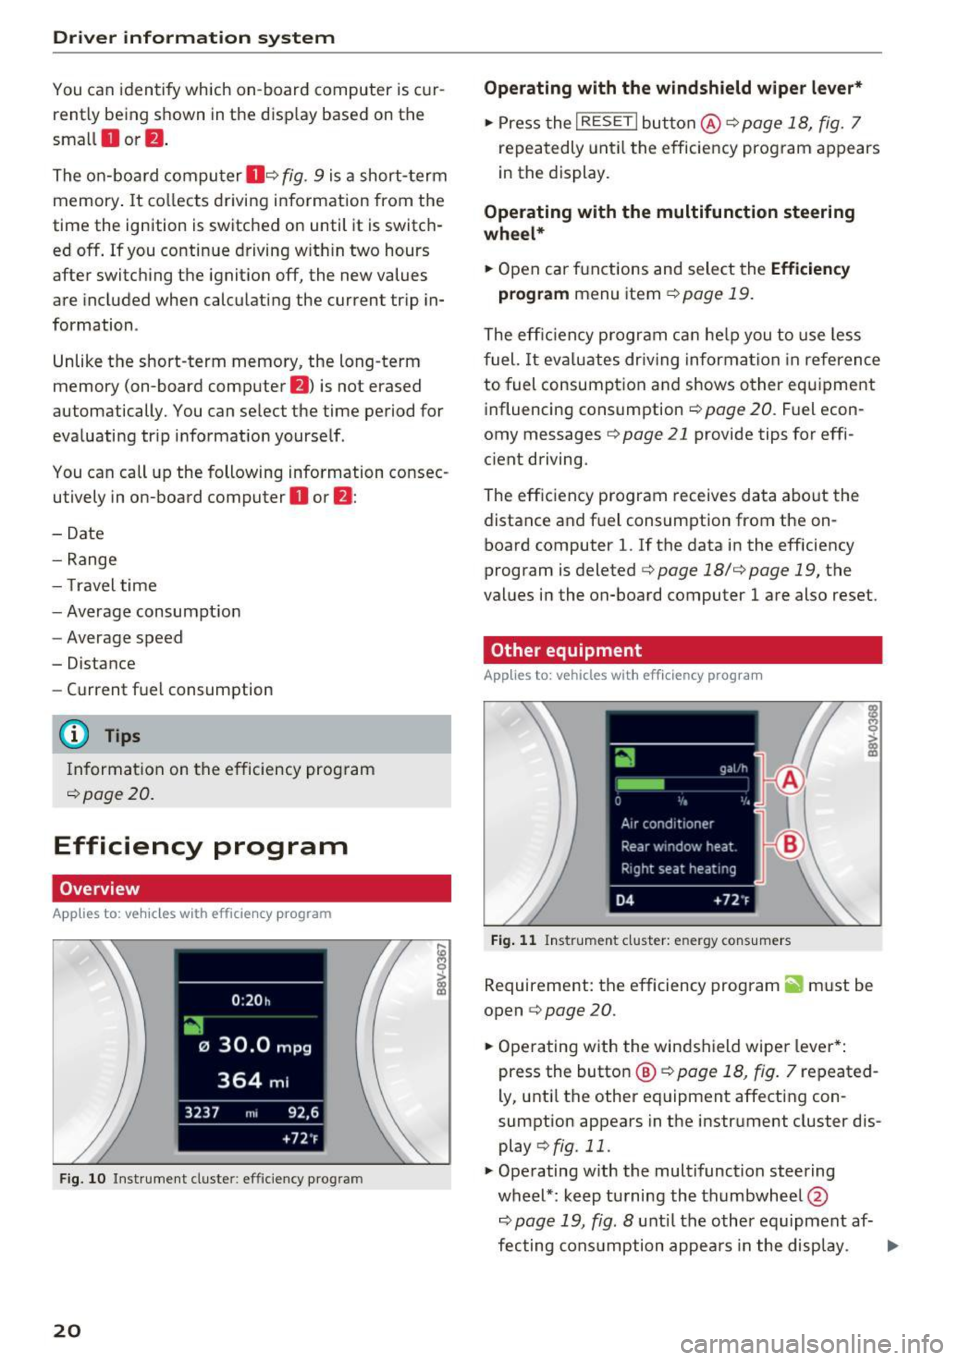
Efficiency program
Overview
App lies to: ve hicles w ith efficie ncy program
F ig. 10 Instrument cluster: efficiency program
20
Operating with the windshield wiper lever*
.,. Press the I RESET I button @¢ page 18, fig. 7
repeatedly until the efficiency program appears
in the display.
Operating with the multifunction steering
wheel*
.,. Open car functions and select the Efficiency
program
menu item ¢page 19.
The efficiency p rogram can help you to use less
fuel.
It evaluates dr iving information in reference
to fuel consumption and shows other equipment
influencing consumption
~ page 20. Fuel econ
omy messages ¢
page 21 provide tips for effi
c ient driving.
The effic iency program receives data about the
distance and fuel consumption from the on
board computer
1. If the data in the efficiency
program is deleted¢
page 18/¢ page 19, the
values in the on-board computer 1 are also reset.
Other equipment
App lies t o: vehicles wit h efficiency prog ra m
Fig. 11 Instrument cluster: energy cons umers
Requirement: the efficiency program ii must be
open ¢
page 20 .
.,. Operating with the windshield wipe r lever*:
press the button
@ ¢ page 18, fig. 7 repeated
ly, until the other equipment affecting con
sumption appears in the instrument cluster dis
play
~fig . 11 .
.,. Operating with the multifunction steering
wheel*: keep turning the thumbwheel @
~page 19, fig. 8 until the other equ ipment af-
fecting consumption appears in the display. .,..
Page 23 of 230
a
co
...... N r--. N .-< 0 0 ::, co
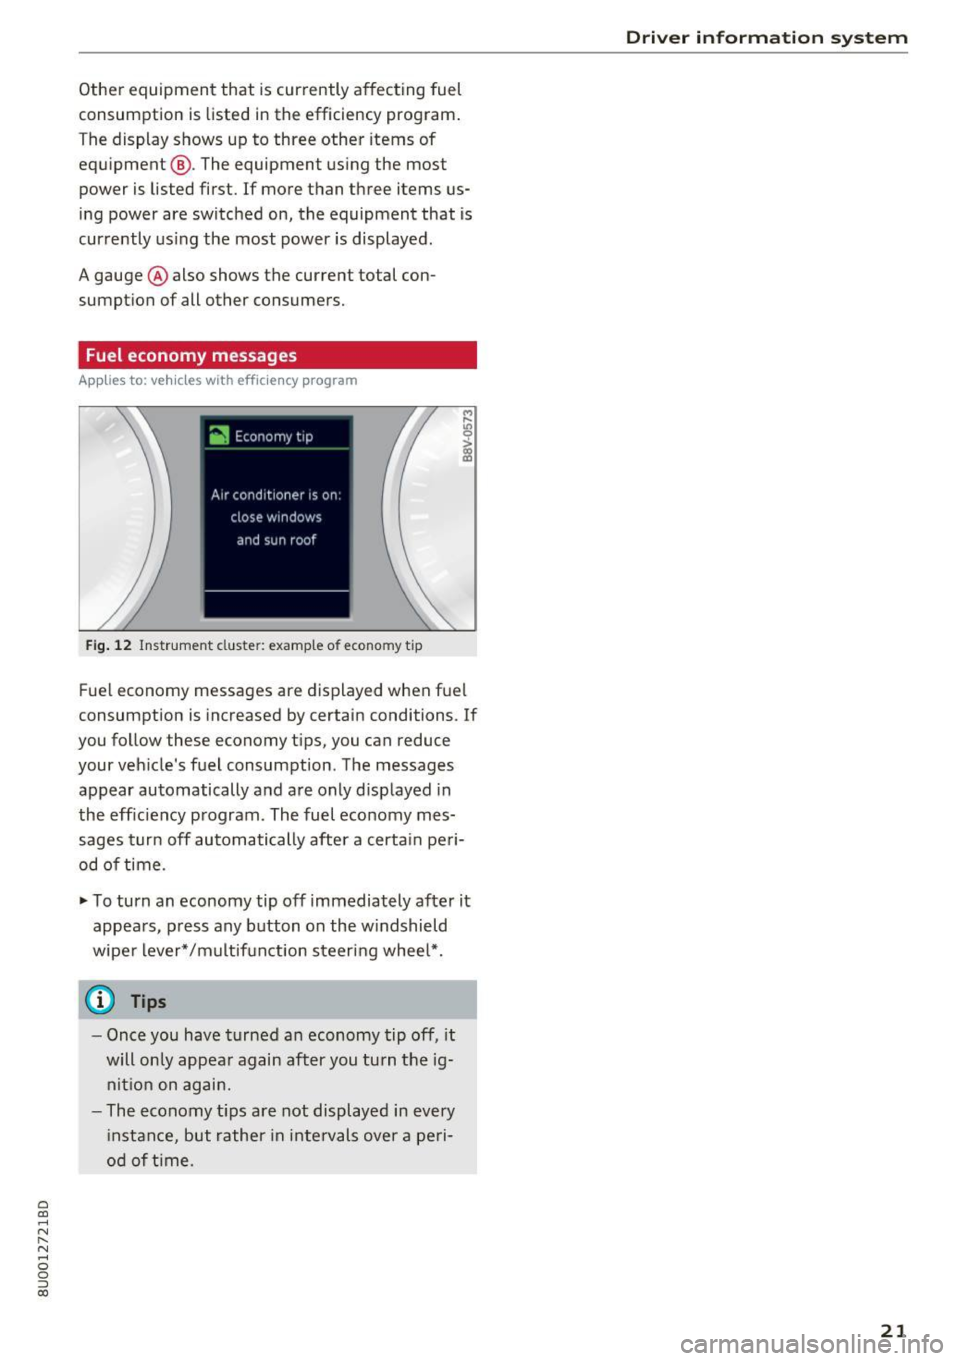
Other equipment that is currently affecting fuel
consumption is listed in the efficiency program .
The display shows up to three other items of
equipment @. The equipment using the most
power is listed first. If more than three items us
ing power are switched on, the equipment that is
currently using the most power is displayed .
A gauge @also shows the current total con
sumption of all other consumers.
Fuel economy messages
App lies to: vehicles with efficie ncy progra m
Fig. 12 Instrument cluste r: example of econo my tip
Fue l economy messages are displayed when fuel
consumption is increased by certain conditions. If
you follow these economy t ips, you can reduce
your vehicle's fuel consumption. The messages
appear automatically and are only displayed in
the efficiency program. The fuel economy mes
sages turn off automatically after a certa in peri
od of time .
.,. To turn an economy tip off immediately after it
appears, press any button on the w indshield
wiper lever*/multif unction steering wheel*.
@ Tips
- Once you have turned an economy tip off, it
will only appear again after you turn the ig
nition on again.
- The economy t ips are not displayed in every
in stance, but rather in intervals over a peri
od of time .
Driver in forma tion system
21
Page 26 of 230
Opening and clo sin g
@ Tips
The replacement battery must meet the same
specifications as the orig inal battery in the re
mote control key.
Remote control key synchronization
If the veh icle cannot be unlocked/locked by the
remote control, you can synchron ize the remote
control key .
• Press the remote control key button
III-
• Insert the key in the driver's door lock within 30
seconds.
• Press the
III button or cf'.I butto n.
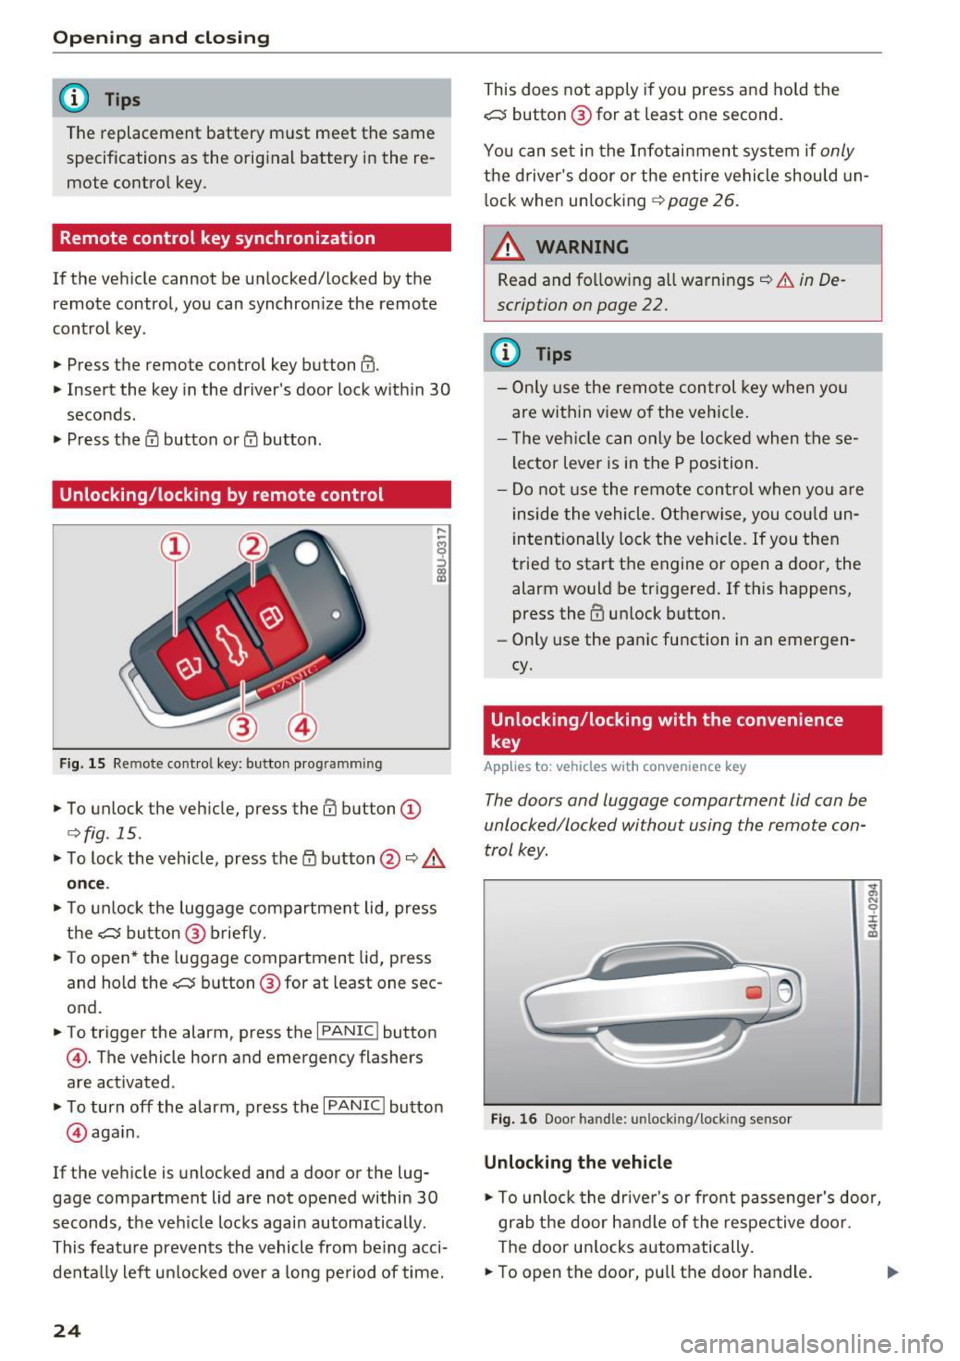
Unlocking /locking by remote control
F ig. 15 Remote control key: button programming
• To unlock the vehicle, press the III button (D
c>fig. 15.
• To lock the vehicle, press the /fl button @¢&.
on ce .
• To unlock the luggage compartment lid, press
the~ button@ brief ly.
• To open* the luggage compartment lid, press
and hold the~ button @ for at least one sec
ond.
• To trigger the alarm, press the
I PANIC I button
©-The vehicle horn and emergency flashers
are activated .
• To turn off the alarm, press the
I PANIC I button
@ aga in .
If the veh icle is unlocked and a door or the lug
gage compartment lid are not opened within
30
seconds, the ve hicle locks again automatically .
This feat ure prevents the vehicle from be ing acci
denta lly lef t un locked over a long pe riod of time.
24
This does not apply i f you press and hold the
~ button @for at least one second.
You can set in the Infot ain ment system if
only
the d river's door o r the entire vehicle should un
l ock whe n unlocking ¢
page 26.
~ WARNING
Read and fo llow ing all warnings¢ &. in De
scription on page
22.
(D Tips
- Only use the remo te control key when yo u
are within view of the veh icle.
- T he ve hicle can only be loc ke d when these
lector Lever is in the P position.
- Do not use the remote con trol when you a re
inside the vehicle. O therwise, you cou ld un
intentionally lock the vehicle . If you then
t ried to start the engine or open a door, the
alarm would be triggered. If this happens,
press the
III unlock button.
- Only use the panic function in an emergen
cy.
Unlocking/locking with the convenience
key
Applies to: vehicles with convenience key
The doors and luggage comportment lid con be
unlocked/locked without using the remote con
trol key .
Fig. 16 Door handle: unlocking/lock ing sensor
Unlocking the vehicle
-
;;, N 0 :i: ... m
• To unlock the drive r's or front passenge r's door,
grab the door ha ndle of the respective door .
The door u nlocks automatically.
• To open the door, pu ll the door handle. .,.
Page 52 of 230
Seat s and sto rage
recommend roof racks and attachments from
the Audi Genuine Accessories program .
- When installing the roof rack, make sure that it
is mounted on ly at the designated points on
the roof ¢
fig. 64.
-The permissib le roof load fo r your vehicle is
165 lb (7 5 kg). The roof load is the total of the
weight of the roof rack, the attachments and
the cargo you are carrying. However, you must
also note the permitted load of the carrier sys
tem being used . For the permitted axle load
and the permitted total vehicle weight, see
¢ page 209 .
A WARNING
-Fo llow the installation instructions p rovided
with the roof ra ck system. If you do not se
cure the roof rack system and objects on the
roo f correctly, they co uld come loose from
the vehicle and cause an accident .
- T he risk of an accident increases when using
a roof rack system, because it changes the
driving ch aracteristics by shift ing the center
of gravity and/or the increasing the surface
area exposed to wind. Adapt your driving
and speed to the current conditions.
Q;) Note
- If you use other roof luggage rack systems
or do not install the racks as intended, any
damage to the veh icle is not covered by the
warranty . Carefully follow the assembly and
i nsta llation instruct ions included w ith the
r oof rack car rier system.
- Make sure that the luggage compartment lid and the panorama glass roof* do not
come into contact with objects on the roof
when they are open.
@ For the sake of the environment
Your vehicle will requ ire more fuel due to the
increased wind resistance. So remove the roof
rac k after using it.
so
Page 53 of 230
0 co ......
"' ,-...
"' ...... 0 0 :::,
00
Warm and cold
Climate control system
Description
Depending on the vehicle equipment, different
systems could be installed:
- manual climate control system or
- automatic climate control system"
The climate control system circu lates, warms or
cools, and removes humidity from the air in the
vehicle interior. It is the most effective when the windows and panorama glass roof" are closed. If
there is a build-up of heat inside the vehicle, ven
tilation can help to speed up the cooling process .
Pollutant filt er
The pollutant filter removes pollutants such as
dust and pollen from the air.
Key rec ogn ition *
The automatic climate cont ro l system* settings
are stored and assigned to the remote control
key that is in use.
A WARNING
Poor visibility can lead to accidents.
- For safer driving, keep all windows free of
ice, snow and fog .
- Become familiar with the correct use and
function of the climate control system as
quickly as poss ible, espec ially with the de
frosting and defogging functions.
- When the temperature is below freezing,
only use the windshield washer system after
the windsh ield has been warmed by the cli
mate control system. The washer fluid could
Warm and c old
freeze on the windshield and impair visibili
ty.
@ Note
- If you suspect that the climate contro l sys
tem is damaged, switch the system off to
prevent further damage and have it checked
by an authorized Aud i dealer or authorized
Audi Service Facility.
- Repairs to the Audi climate control system
require special technical knowledge and
special tools. See an authorized Audi dea ler
or authorized Aud i Service Fac ility.
@) For the sake of the environment
- To save fuel, turn off the climate control
system cooling mode by pressing the A/C
button. This will also reduce emissions . The
cl imate control system is off when the LED
in the button turns off.
- In vehicles w ith the efficiency program*,
you can find other consumptio n information
and more economy tips
¢ page 20.
(D Tips
- To prevent interference with the heat ing
and cooling output and to prevent the win
dows from fogging over, the air intake in
fro nt of the windshie ld must be free of ice
,
snow or leaves.
- Condensation from the cooling system* can
dr ip and fo rm a pudd le of water under the
vehicle. This is norma l and does not mean
there is a leak .
- The energy management system may tem
porarily switch off certain functions, s uch as
the seat heating* or rear window defogger .
These systems are avai lable aga in as soon
as the energy supply has been restored.
5 1
Page 73 of 230
0 co ......
"' ,....
"' ...... 0 0 :::,
00
¢ page 67, fig. 72. For example, M4 means the
fourth gear is engaged.
~ To shift up a gear, tap the selector lever for
ward
0 ¢ fig. 74.
~ To shift down a gear, tap the selector lever to
back Q.
Shifting with the shift paddles*
You can operate the shift paddles in the D/S or M
(tiptronic shift gate) selector lever positions.
~ To shift up one gear, tap the shift paddle 0
¢fig. 75.
~ To shift down one gear, tap the shift paddle Q.
If the shift paddles are tapped while in the D/S
selector lever position, automatic mode switches
off briefly. To switch from manually shifting back
to automatic shifting immediately, tap the shift paddle
0 c:> fig. 75 for 1 second.
To keep shifting using the shift paddles, move
the selector lever to the right out of the D/S posi
tion into the tiptronic shift gate.
Description
The transmission automatically shifts up or down before critical engine speed is reached.
The transmission only allows manual shifting
when the engine speed is within the permitted
range.
Kick-down
Kick-down enables maximum acceleration .
When you press the accelerator pedal down be
yond the resistance point (called kick-down), the
automatic transmission downshifts into a lower
gear, depending on vehicle speed and engine
RPM.
It shifts up into the next higher gear once
the maximum specified engine RPM is reached .
A WARNING ,~
Please note that the wheels could spin on
slick or slippery roads when kick-down is ac
tive.
-
Driving
Emergency mode
Applies to: vehicles with automatic transmissions
In the event of a system malfunction, there is an
emergency program .
If all of the selector lever positions are highlight
ed with a light background in the instrument
cluster display, there is a system malfunction and
the S tronic transmission is running in the emer
gency program . The vehicle can still be driven in
emergency mode, but only with reduced speed
and not in all gears . In some cases, the vehicle
cannot drive in reverse.
([) Note
If the transmission runs in emergency mode,
drive to an authorized Audi dealer or author
ized Audi Service Facility immediately to have
the malfunction corrected.
Transmission malfunction
Applies to: vehicles with automatic transmissions
• Transmission overheating! Please stop vehi
cle!
The transmission is too hot and can become dam
aged. Stop and let the transmission cool with the
engine running (at idle) in the P selector lever po
sition. Then the indicator light and the message
turn off, drive to an authorized Audi dealer or au
thorized Audi Service Facility immediately to have
the malfunction corrected .
If the indicator light
and the driver message do not turn off, do not
continue driving. See an authorized Audi dealer
or authorized Audi Service Facility for assistance.
71