service AUDI Q5 2013 Owners Manual
[x] Cancel search | Manufacturer: AUDI, Model Year: 2013, Model line: Q5, Model: AUDI Q5 2013Pages: 316, PDF Size: 78.89 MB
Page 5 of 316
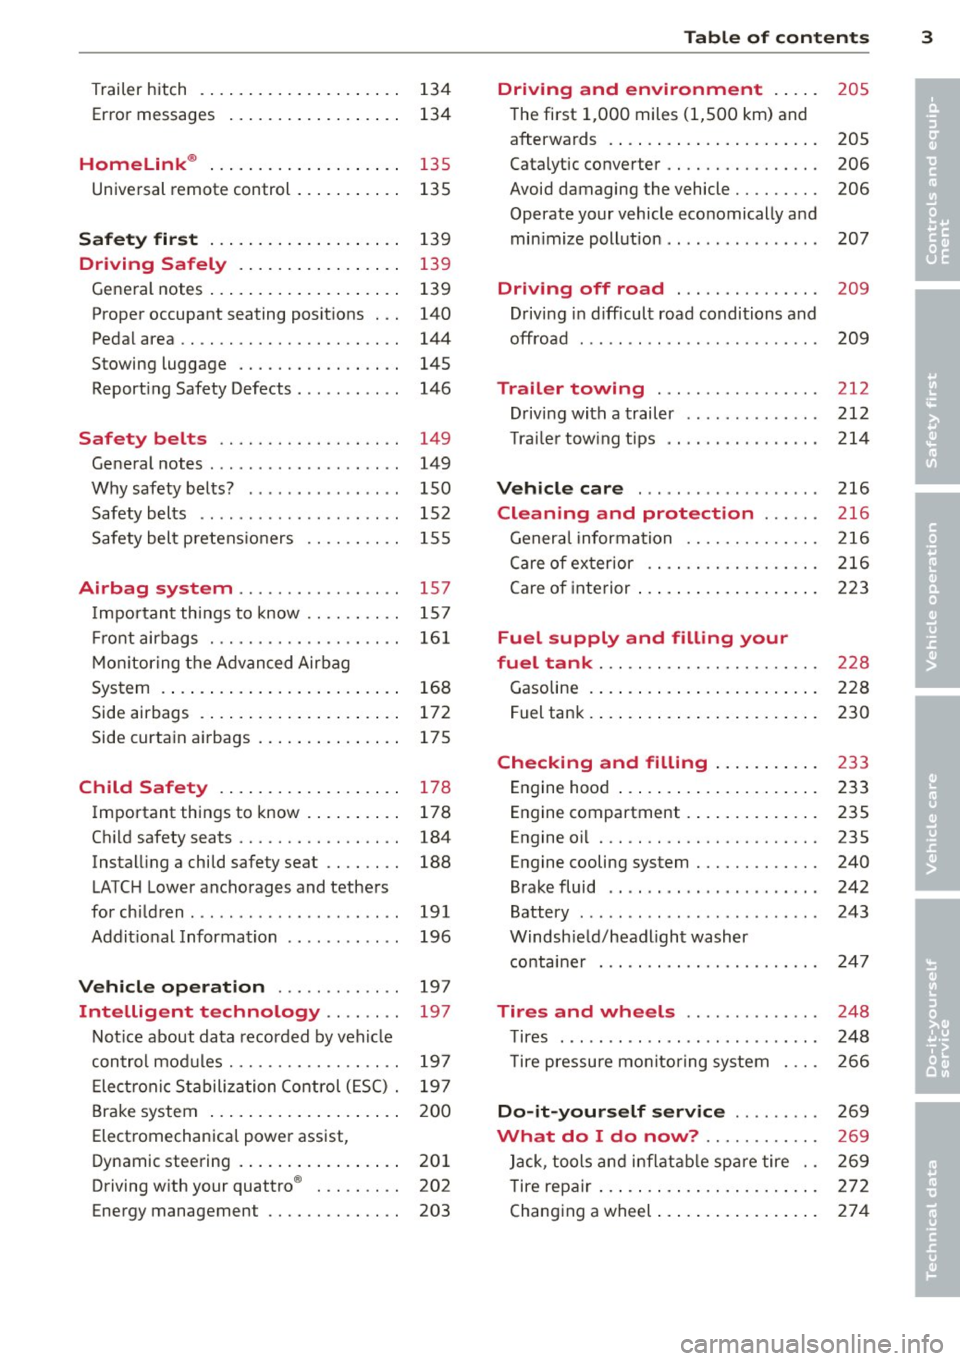
Trailer hitch . ..... .... ... .. .. .. . .
Error messages
Homelink ® ... .. .... ... .. .. .. . .
Universal remote control ... .. .. .. . . 134
134
135
135
S afet y fir st . . . . . . . . . . . . . . . . . . . . 139
Dri ving Safely . . . . . . . . . . . . . . . . . 139
Gene ral notes ..... .... ... .. .. .. . .
Proper occupant seating posit ions . . .
Pedal area .. .. ............. .. .. . .
Stowing luggage ................ .
Report ing Safety Defects .......... .
Safety belts .................. .
General notes ................... .
Why safety belts? ............... .
Safety belts ..... .. ... ... .. .. .. . .
Safety bel t pretens ioners ......... .
Airbag sy stem .......... ...... .
Important things to know ......... .
Fr ont airbags ............ .... .. . .
M on itoring the A dvanced Airbag
System .... .. ... .. ..... ... .. .. . .
Side airbags . ... ...... ... .. .. .. . .
Side curtain airbags .... ... .. .. .. . .
Child Safety .. .. .... ... .. .. .. . .
Important things to know . ... .. .. . .
Ch ild safety seats ................ .
Instal ling a child safety seat .. .. .. . .
LATC H Lower anchorages and tethers
for chi ldren .... .. .. ... ... .. .. .. . .
Addit ional Information 139
140
144
145
146
149 149
150
152
155
157
157
16 1
168
172
175
178
178
184
188
191
196
Vehicle operation . . . . . . . . . . . . . 197
Intelligent technology . . . . . . . . 197
Not ice about data recorded by vehi cle
con trol mod ules . . . . . . . . . . . . . . . . . . 197
E lect ronic S tabiliz ation Control ( ESC) . 19 7
Brake system . . . . . . . . . . . . . . . . . . . . 200
Elect romechanical power assist,
Dynamic stee ring . . . . . . . . . . . . . . . . . 201
Driving w ith your quattro ® . . . . . . . . . 202
Energy management . . . . . . . . . . . . . . 203
Table of contents 3
Driving and environment . . . . .
205
The first 1,000 miles (1,500 km) and
afterwa rds . . . . . . . . . . . . . . . . . . . . . . 205
Catalytic converter . . . . . . . . . . . . . . . . 206
Avoid damaging the vehicle . . . . . . . . . 206
Operate your vehicle economically and
min imize pollut ion . . . . . . . . . . . . . . . . 207
Driving off road . . . . . . . . . . . . . . . 209
Drivi ng in difficult road conditions and
offroad . . . . . . . . . . . . . . . . . . . . . . . . . 209
Trailer towing . . . . . . . . . . . . . . . . . 212
D riving with a trailer . . . . . . . . . . . . . . 212
T rai le rtow ingtips ... .. .. ..... .... 214
Vehicle care . . . . . . . . . . . . . . . . . . . 216
Cleaning and protection . . . . . . 216
General infor mation . . . . . . . . . . . . . . 216
Care of ex ter ior . . . . . . . . . . . . . . . . . . 216
Care of interior . . . . . . . . . . . . . . . . . . . 223
Fuel supply and filling your
fuel tank . . . . . . . . . . . . . . . . . . . . . . .
228
Gasoline . . . . . . . . . . . . . . . . . . . . . . . . 228
F uel tank. . . . . . . . . . . . . . . . . . . . . . . . 230
Checking and filling . . . . . . . . . . . 233
Engine hood . . . . . . . . . . . . . . . . . . . . . 233
Engine compartment . . . . . . . . . . . . . . 235
Engine oil . . . . . . . . . . . . . . . . . . . . . . . 235
Engine cooling system . . . . . . . . . . . . . 240
Brake fluid . . . . . . . . . . . . . . . . . . . . . . 242
Battery . . . . . . . . . . . . . . . . . . . . . . . . . 243
Windsh ield/headlight washer
containe r . . . . . . . . . . . . . . . . . . . . . . . 24 7
Tires and wheels . . . . . . . . . . . . . . 248
T ires . . . . . . . . . . . . . . . . . . . . . . . . . . . 248
T ire pressu re mo nitoring system 266
Do-it-your self service . . . . . . . . . 269
What do I do now? . . . . . . . . . . . . 269
Jack , tools and inflatab le sp are tire . . 269
T ire repa ir . . . . . . . . . . . . . . . . . . . . . . . 272
Changing a wheel ... . .. .. ..... ... . 274
•
•
Page 6 of 316
4 Table of contents
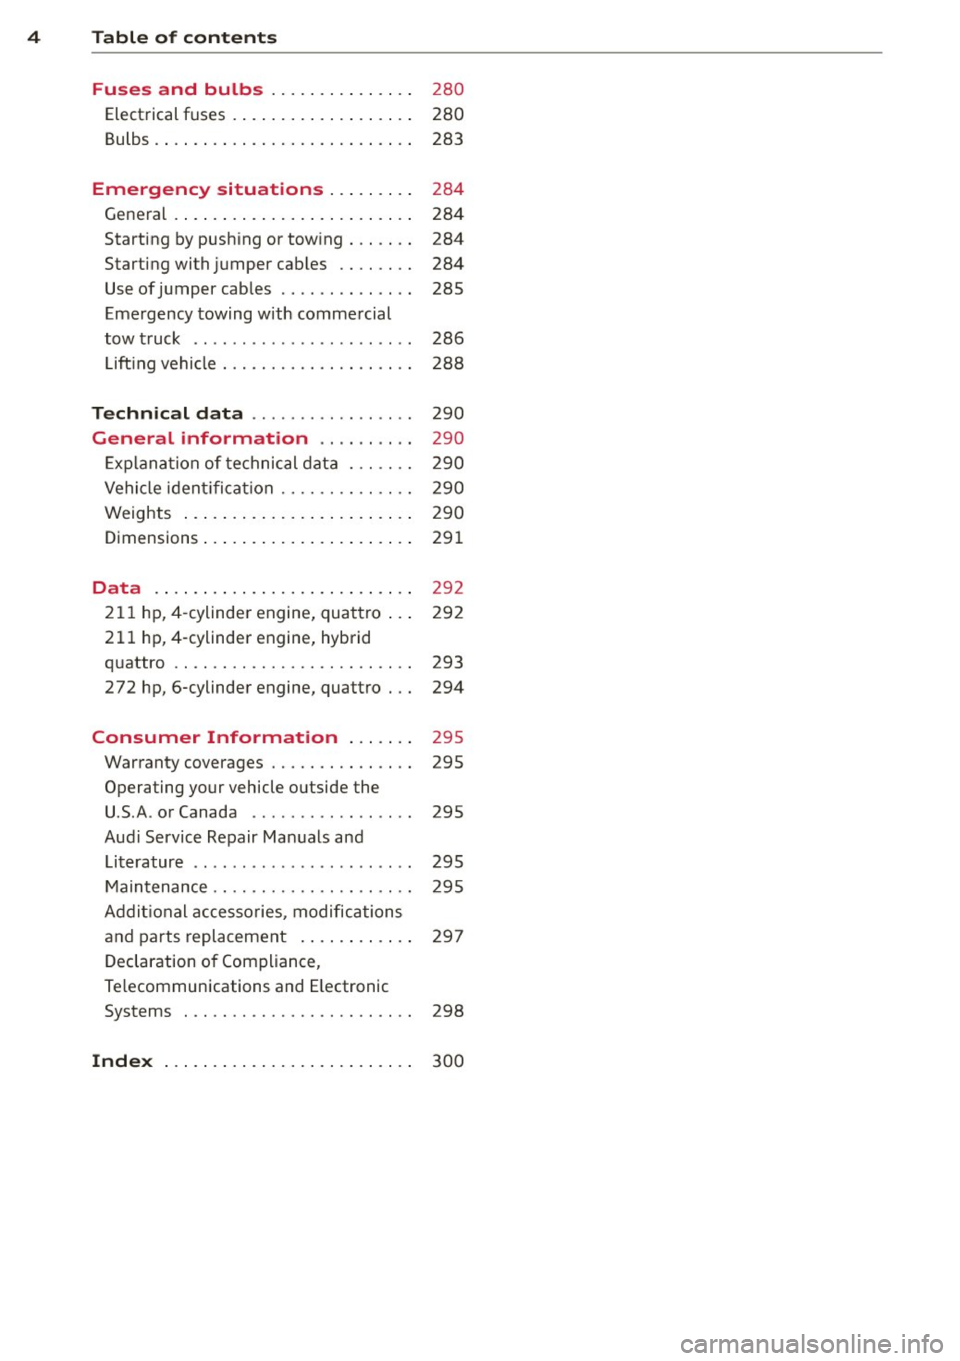
Fuses and bulbs ....... .. .. ... .
Elect rical fuses . ....... ... .. .. ... .
Bulbs .. .. .. ... ... .... ... .. .. ... .
Emergency situations ... .. ... .
General .... ... .. ..... ... .. .. ... .
Starting by push ing or tow ing . .. .. . .
Starting with jumper cables .. .. .. . .
Use of jumper cab les .. .. .. .. .. .. . .
Eme rgency towing with commercial
tow truck .. ................ ... . .
Lift ing vehicle . ........... .... ... .
Technical data ............. .. . .
General information .. .. .. .. . .
Explana tion of te chnical data . .. ... .
Vehicle iden tifica tion .... ...... .. . .
Weights ... ... .. ..... ... .. .. ... .
Dimensions .... .. ..... ... .. .. ... .
Data .. .. .. .. .. .. .... ... .. .. .. . .
2 11 hp, 4 -cylinder engine, quattro .. .
2 11 hp, 4-cylinder engine, hybrid
quattro ...... ............. ..... .
272 hp, 6-cylinder engine, quattro . . .
Consumer Information ..... . .
Warranty coverages ....... .. .. ... .
Operating your vehicle outside the
U .S .A . or Canada .......... ... .. . .
Aud i Service Repair Man uals and 280
280
283
284 284
284
284
285
286 288
290 290
290
290
290
29 1
292
2 92
293
294
295 295
295
Literature . . . . . . . . . . . . . . . . . . . . . . . 295
M ain tenance . . . . . . . . . . . . . . . . . . . . . 295
Addi tional accesso ries , modifications
and parts replacement . . . . . . . . . . . . 297
D eclaration o f Compliance,
Te lecommunications and E lectronic
Systems . . . . . . . . . . . . . . . . . . . . . . . . 298
Index . . . . . . . . . . . . . . . . . . . . . . . . . . 300
Page 7 of 316
In addition to t his Owner's Ma nual, your A udi
comes w ith a Warranty
& Maintena nce book
l et.
Mor eover , d ep en ding on the mode l and t he
e quip ment, there may be additiona l ins truc
tion boo klets delivered w ith your vehicle (for
e x amp le, Ope rat ing Instr uctions fo r yo ur
Sound System, Navigation System etc .).
If yo u are m iss ing one of these publicat ions,
or if you believe that the inf ormation is not
comp lete, contact you r auth orized Audi dea le r
for assistance.
The Warranty & Maintenance booklet
explains how yo u can kee p your A udi in top
d riving conditi on by hav ing it serviced regular
l y and conta ins deta iled in fo rmat ion about
the wa rranties covering your Aud i. Always
h ave the book let with yo u when yo u take your
ve hicle to an auth orized Audi dealer for serv
i ce . Y our Aud i Service Adviser w ill reco rd each
sche duled service and can answer any ques
tions you may have r ega rding how to ma intain
your ve hicle.
In Canada,
the vehicle lite ratu re is also avai lab le in
Fr ench . T o obtai n a co py, c ontact your dea ler
or w rit e to :
Au Canada, on peut se procure r un e xempla ire
e n fran~ais de ce doc ument aupres du conces
sionna ire ou de :
Vo lkswagen Canada, Inc.
Client Assistance
Assistance a la Clientele
77 7 Bayly Street, West,
A jax, On tario LIS 7G 7
If you sell your Audi
all literatu re should be left in the veh icle to
make the Warranty terms as we ll as a ll oper
ating, safety and ma intenance information
ava ilab le to the ne xt owne r.
Vehicle literature 5
If you change your address or if you
bought this Audi used
b e s ure to send in a "Notice of A ddress
Change"
I " N otice of Used Car Purchase" post
ca rd. T his card can be fo und in the War ranty
&
M aint enance booklet or obtained from your
a utho rized Aud i dea le r.
It is in your own interest that we are able to
contact you should the need arise .
•
•
Page 22 of 316
20 Driver information display
Driver information
display
Introduction
General notes
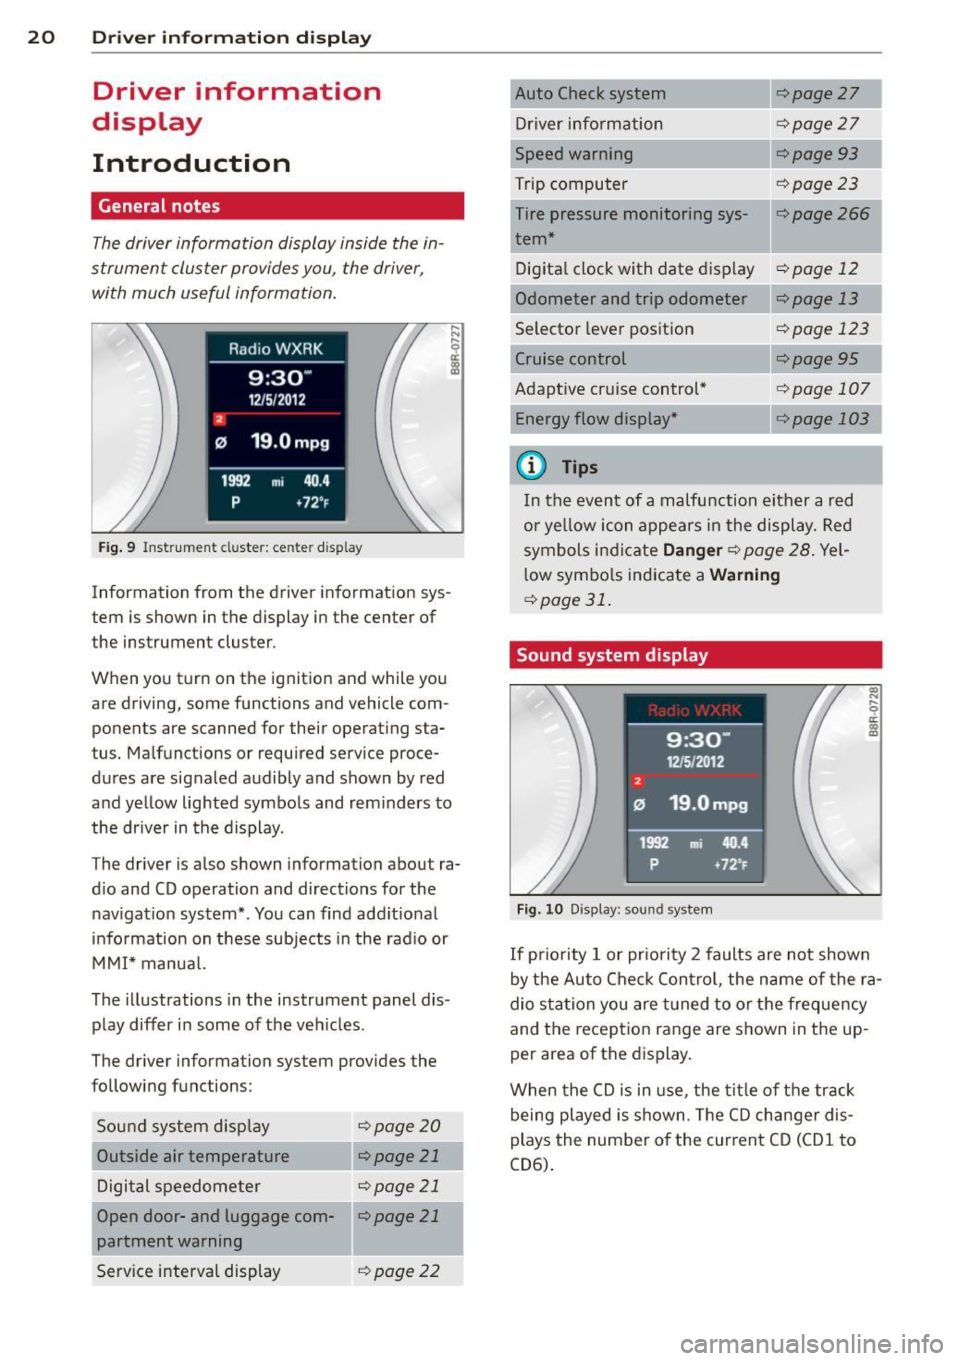
The driver information display inside the in
strument cluster provides you, the driver,
with much useful information.
Fig. 9 Instrument cluster: center display
Information from the driver information sys
tem is shown in the display in the center of
the instrument cluster.
When you turn on the ignition and while you
are driving, some functions and vehicle com
ponents are scanned for their operat ing sta
tus. Malfunctions or required service proce
dures are signaled audibly and shown by red
and yellow lighted symbols and reminders to
the driver in the display.
The driver is also shown information about ra
dio and CD operation and directions for the
navigation system*. You can find additional
information on these subjects in the radio or
MMI* manual.
The illustr ations in the instrument panel dis
play differ in some of the vehicles .
The driver information system provides the
following functions:
Sound system display
¢page20
Outside air temperature r:::;, page 21
Digital speedometer r:::;, page 21
Open door- and luggage com-llr:::;, page 21
partment warning
Service interval display
¢page 22 r:::;,page
27
Driver information r:::;,page 27
Speed warning r:::;,page93
Trip computer r:::;, page 23
Tire pressure monitoring sys-r:::;, page 266 1
tern*
Digital clock with date dis play
r:::;, page 12
Odometer and trip odometer ¢page 13
Selector lever position r:::;, page 123
¢page95
Adaptive cruise control* Energy flow display* ¢page 107
---,.--
r:=;,page 103
¢j) Tips
In the event of a malfunction either a red
or yellow icon appears in the display. Red
symbols indicate
Danger r:::;, page 28. Yel
low symbols indicate a
Warning
¢page 31.
Sound system display
Fig. 10 Display: sound system
(0
"' .... 9 a:
~
If priority 1 or priority 2 faults are not shown
by the Auto Check Control, the name of the ra
dio station you are tuned to or the frequency
and the reception range are shown in the up
per area of the displ ay.
When the CD is in use , the title of the track
being played is shown. The CD changer dis
plays the number of the current CD (CD
1 to
CD6).
Page 24 of 316
22 Driver information display
Service interval display
The service interval display reminds you when
your next service is due .
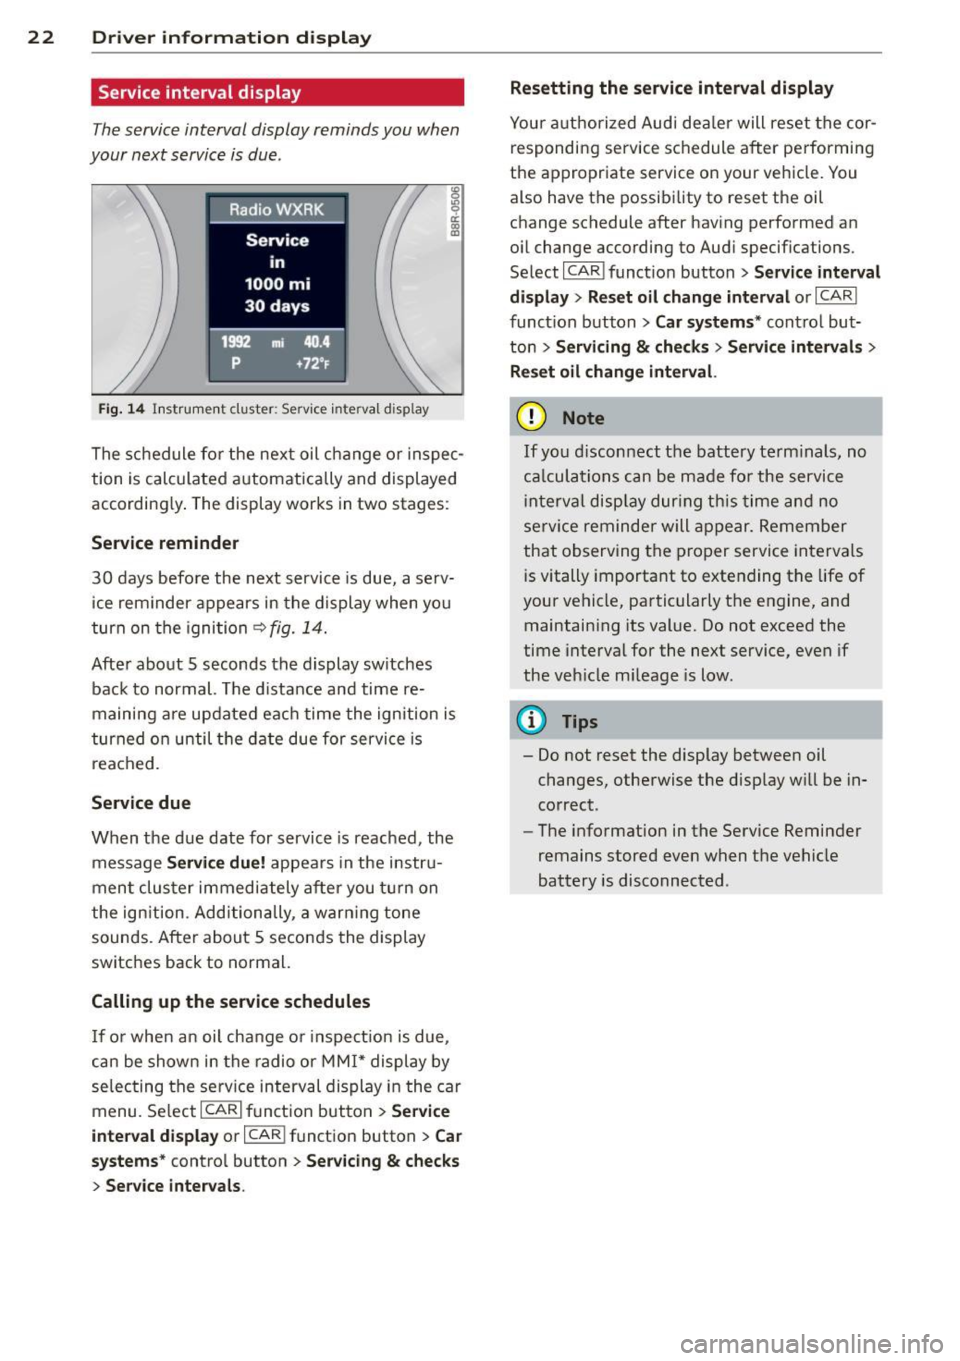
Fig. 14 Instrument cluster: Service interva l d isplay
The schedule for the next oil change or inspec
tion is calculated automatically and displayed
according ly . The display works in two stages:
Service reminder
30 days before the next service is due, a serv
i ce reminder appears in the display when you
turn on the ignition
C? fig. 14.
Afte r about 5 seconds the display sw itches
back to normal. The distance and time re
maining are updated each time the ignition is
turned on until the date due for service is
reached.
Service due
When the due date for service is reached, the
message
Service due! appears in the instru
ment cluster immediately after you turn on
the ignition. Additionally, a warn ing tone
sounds. After about 5 seconds the display
switches back to normal.
Calling up the service schedules
If or when an oil change or inspect ion is due,
can be shown in the radio or MMI* display by
selecting the serv ice interval display in the car
menu. Select
ICARI function button > Service
interval display
or I CARI function button > Car
systems*
contro l button > Servicing & checks
> Service intervals . Resetting the service interval display
Your a
uthorized Audi dea ler will reset the cor
responding se rvice schedule after performing
the appropriate service on your vehicle. You
also have the possibility to reset the oil
c h ange schedule after having performed an
o il change according to Audi specifications.
Select
I CAR ! funct ion button > Service interval
display
> Reset oil change interval or I CAR I
function button > Car systems* cont rol but
ton
> Servicing & checks > Service intervals >
Reset oil change interval.
(D Note
If you disconnect the battery terminals, no
calculations can be made for the service
int erva l display during this time and no
serv ice reminder will appear. Remember
that observing the proper serv ice intervals
is vitally important to extending the life of
your vehicle, particularly the engine, and
maintaining its value. Do not exceed the
time interval for the next service, even if
the veh icle m ileage is low.
(D Tips
- Do not reset the display between oil
changes, otherwise the display will be in
correct .
- The information in the Service Reminder
remains stored even when the vehicle
battery is disconnected .
Page 32 of 316
30 Driver in formation d isplay
...L Engine cooling system malfunction
A malfunction in the engine cooling system
must be repaired as soon as possible .
If the . symbol flashes in the display, either
t he eng ine cool ant
temperature is too h igh or
the eng ine coolant
level is too low . A dr iver
message appears as well to explain the mal
function in more detail. The d rive r warning
goes out afte r about 5 seconds, but it ca n be
b rought up a t any time by p ress ing the
!SE TI
button again.
Turn off engine and ch eck coolant l evel
• Pull off the road .
• Stop the vehicle .
• Turn off the engine.
• Check coo lant level¢
page 240.
• Add coolant if ne cessa ry ¢ page 241 .
• Co ntin ue d riving only after the eng ine cool
ant warn ing/ indicato r light goes o ut.
• Contact your a uthorized Audi dea ler for as-
sistance if necessary.
If the engine coolant level is co rrec t, then the
radia tor fan may be the cause o f the malf unc
tion .
A WARNING
-If your veh icle should break down for
mechanical or other reasons, park at a
safe distance from moving traffic, turn off the engi ne and turn on the hazard
wa rning lights ¢
page 52, Emergency
flash ers.
-
- Never open the hood if you see or hea r
steam o r coolant esca ping from the en
gine compa rtme nt - you risk being s cald
ed. Wait until you can no longe r see or
hear steam or coo lant es caping.
- T he e ngine compartmen t of a ny veh icle
is a dan gerous area. Before you perform
any wor k in the engine compartment,
t ur n of the engine and allow it to coo l.
Follow the wa rning stickers ¢
page 226,
Engine compartment.
(D Note
Do not continue driv ing if the . symbo l
ill um inates . There is a mal function in the
engine cooling system -you could damage
your engine.
"l:::r. Engine oil pressure malfunction
T he red engine oil pressure warning symbol
requires immediate service or repair. Driving with a low
oil pressure indication is likely to
cause severe engine damage .
If the . symbo l on the disp lay flashes, the
engine oil pressure is too low. A driver mes
sage appears as we ll to exp la in the malfunc
t io n in more detail. The dr iver warning goes
o ut afte r abo ut 5 seconds , but it can be
brought up at any t ime by p ressing the
~ 1s =ET= I
button ag ain.
Turn off engin e! O il pressure too low
• Stop the vehicle.
• Turn the engine off.
• Chec k the engine o il level ¢
page 238 .
• Contact yo ur au thorized Aud i deale r for as-
sistance if necessa ry.
Eng ine oil level too low
If the engine oil level is too low, add engine
o il
¢page 238.
Engine oil leve l correct
If the symbol . flashes even tho ugh the en
gine oil leve l is correct, please contact your
nearest authori zed Aud i Dea ler for assistance.
Do not continue dr iving . Do not leave the en
gine running
idle, either .
(D Tips
- The engine oil pressure symbol. is
not an indicator for a low eng ine oil lev
e l. Do not rely on it. Instead, check the
oil level in your engine at regular inter
vals, preferably each time you refuel, and always before going on a long trip .
Page 35 of 316
not to continue the journey without the mas
ter key.
If the master key is no longer in the vehicle,
you cannot sw itch off the ignition after stop
ping the engine and you a lso cannot start the
engine again . You also cannot lock the vehicle
from the outs ide.
~ o Light/rain sensor defective
ral A utom atic he adlight s/ autom atic wi pers
d efect ive
If the symbol illuminates, the light sensor has
fa iled. For safety reasons the low beams are
turned on permanently with the switch in
A U
TO . However, you can continue to turn the
lights on and off us ing the light switch . In the
case of a defect in the rain sensor, the w ind
sh ie ld wiper lever functions are st ill available .
H ave the light/rain sensor checked as soon as
possible by an autho rized Aud i dea ler.
(0) Worn brake pad s
[IJ Brake pad s!
If the warn ing l ight illum inates, immediately
contact your authorized A udi dealer or quali
fied workshop to have all brake pads inspect
ed . On USA models the warning light
[IJ
comes on together with the warning light
1111 . Both sets of brake pads on an axle
must always be replaced at the same time.
A WARNING
Dr iv ing with bad brakes can cause a coll i
sion and serious personal injury.
- If the warning light
[IJ and the warning
light
11111> w ith the message B rak e
pads!
comes on in the instr ument cluster
display, immediately contact your au
tho rized Aud i deale r or qualified work
shop to have a ll brake pads checked or
replaced if necessary.
1) - : USA mod els only
-
Dri ver information di spla y 33
~!}010 $ Defective light bulb warning
I -If the ind icator light tu rns on, a bulb has
failed . The message ind icates the location of
the bu lb.
II -If a front fog lamp has fa iled, the ind ica
tor light tu rns on to indica te the location on
the vehi cle.
ml -If a rear fog lamp has fa iled, the indica
tor light turns on to indicate the location on
the ve hicl e.
Veh icl e light s: Sys te m fault!
If the message appears, there is a malfunc
tion in the headlights or light sw itch.
Drive to your authorized A udi dealer immedi
ate ly to have the malfunction corrected.
A WARNING
- Light bulbs are pressurized and could ex
plode wh ile they are being changed caus
ing serious personal injury.
- Work with due care when handling the high-voltage section of gas discharge
(xenon) lights* . Failure to do so could re
sult in death or serious injury .
(D Tips
Have the bulb replaced or the connection
repaired by your authorized Audi Service
department .
o:> Windshield washer fluid level too
low
- Please re fill w asher fluid
If the symbol il lum inates, add w indshield
washer flu id to the washer system and also to
the headlight washe r system
c::> page 247.
Eli) Fuel supply too low
When the Ii'] symbo l ill uminates, this means
there a re abo ut 2.6 gallons (10 liters) o f fuel ..,.
Page 52 of 316
50 Clear vis ion
stickers to the windshield in this area in
or der to prevent malfunctions or fai l
u res .
- Some exte rior lig hti ng f unctions can be
adjusted
c> page 50 .
-When yo u remove yo ur key from the igni
tion while the vehicle's lights are turned
on, a buzze r sounds as long as the driv
er's door is open .
- In coo l or damp weather , the ins ide of
the headlights, t urn signa ls and tail
li ghts can fog over due to the tempera
ture difference between the inside and
outside. They will clea r sho rtly after
switching them on . T his does not affect
the service life of the lighting .
- In the even t of a light sensor malfunc
t ion, the d river is no tified in th e inst ru
ment cluster disp lay
c> page 33.
Fog lights
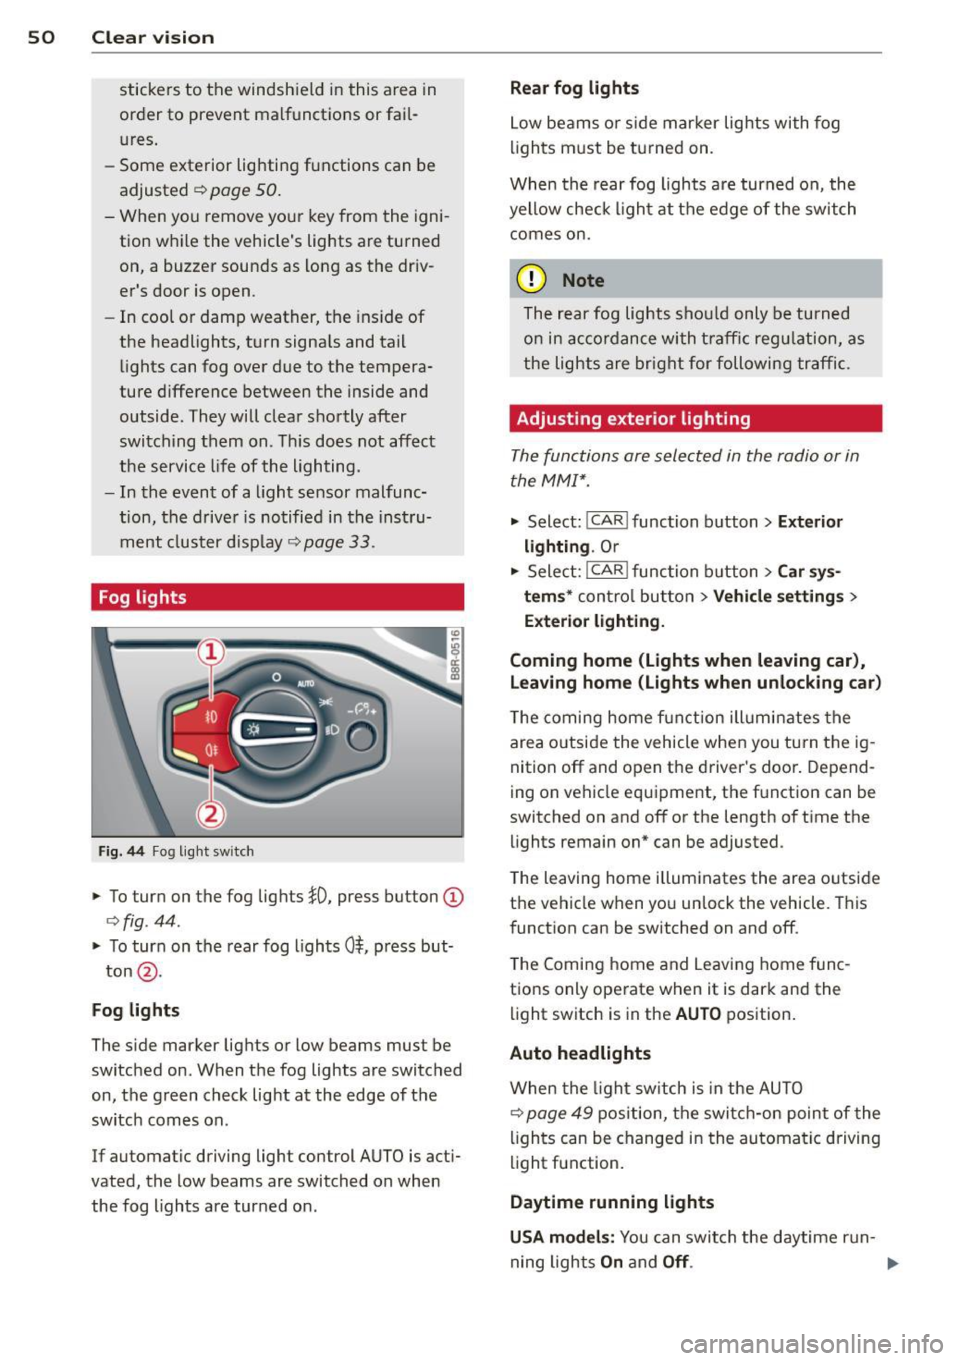
Fig . 44 Fog light sw it c h
.,. To tur n on the fog ligh ts iO, press button ©
c>fig . 44 .
.,. To tur n on the rear fog l ights Ot p ress but-
ton @.
Fog lights
The s ide marker lig hts or low beams must be
switched on . When the fog lights a re switched
on, the green check light at the edge of the
sw itch comes on.
If automatic driving light control AUTO is act i
vated, the low beams are switched on when
the fog lights are tur ned on .
Rear fog lights
Low be ams o r sid e mar ker lights wi th fog
li gh ts m ust be t urned on .
When the rear fog lights a re turned on, the
yellow check ligh t a t the edge of the switch
comes on.
(D Note
The rear fog lights s houl d only b e turned
o n in acc ord ance wi th t raff ic reg ulation, a s
the lights are brig ht for following tra ffic.
Adjusting exterior lighting
The functions are sele cted in the radio or in
the MM I*.
.,. Select: !CAR ! function b utton> Ext erior
lighting .
Or
.,. Sele ct:
!CAR ! func tion b utton> Car sys
tem s*
contro l bu tton > Vehicle setting s >
Exterior lighting.
Coming home (Lights when leaving car ),
Leaving home (Lights when unlocking car)
T he coming home f unct ion ill umi nates the
are a outside the vehicle whe n you tu rn the i g
nit ion off and open the d river 's door . Depend
ing on vehicle equ ipment, the f unction can be
switched on and off or the length of t i me the
lights remain on* can be adjusted .
T he leaving home illum inates the area outside
t h e vehicle when you unlock the vehicle . This
funct ion can be switched on and off .
T he Comi ng home and Leaving home f unc
t io ns only ope rate when it is dark and the
light switch is in the
AUTO position .
Auto headlights
When the lig ht sw itch i s in the AU TO
c> page 49 position, the swi tch-on point of the
li gh ts can be changed i n the automa tic driving
light function.
Daytime running lights
USA models: You can swit ch the daytime run-
ning lights
On a nd Off . .,..
Page 57 of 316
while driving. You can switch this function off by moving the lever to position ® within 10
seconds of the afterwipe operation. The after
wipe function is reactivated the next time the ignit ion is switched on.
The rear wiper automatically switches on
when the reverse gear is engaged and the
front w indshield wipers are on and in opera
tion .
C lea ning the headlights *. The headlight wash
er system * operates on ly when the headlights
are on. If you move the lever to pos ition ®,
the headlights are washed in interva ls .
® -Wipe the rear window. The rear wiper
moves about every 4 seconds .
0-Clean the rear window. The number of
wiping operations depends on how long the l ever is held in positio n 7.
A WARNING
-The ra in sensor is only intended to assist
the driver. The driver is still responsible
for man ually sw itching the w ipers on ac
cording to the v is ibility conditions.
- The windshie ld may not be treated w ith
water-repe lling windshie ld coat ing
agents. Unfavorable conditions, such as
wetness, darkness, low sun, can res ult in
increased glare. W iper b lade chatter is
also possible .
- Proper ly functioning w indshie ld w iper
blade s are required fo r a clear view and
sa fe dr iv ing .
(D Note
-In the case of frost, check whether the
windsh ield wiper b lades a re fro zen to
t h e windshie ld. Swit ching on the wind
s h ield wipers can d amage t he wipe r
blades!
- Prior to using a car w ash, the windshield
wipe r system m ust be swit ched off (lever
i n position 0) . This helps to prevent unin
tentiona l switching on and damage to
the windshie ld w iper system.
Clear v is ion 5 5
(D Tips
- The windshie ld w ipers are switched off
when the ign it ion is tu rned off . Act ivate
the windsh ield wipers after the ignition
is switc hed back on by moving t he wind
shield wipe r lever to any position .
- Worn or d irty windshield wiper blades
result in streaking. This ca n affect the
rai n sensor function. Check your wind
shield w iper blades regularly.
- The washer fluid nozz les of the wind
shield washe r system a re heated at low
tempe rat ures whe n the ignition is on .
- When stopping temporarily, e .g. at a
t raffic light, the set spe ed of the wind
shield wiper s is automatically reduced by
one speed.
Service position
The windshield wiper blades ore replaced in
the service position.
"' If the w iper blades are no t frozen to t he
w indshield, br ing the w indshie ld w iper lever
to the basic position @¢
page 54, fig . 53 .
"' Sele ct: !CAR !func tion butt on> Windshield
wipers
> Service position . Or
"' Sele ct: I CAR I func tion b utton > Car sy s
tem s*
contro l butto n > Servicing & checks >
Wiper service position . Or
"' Switch the ignit ion off and move the wind
shield w iper lever to position ©¢
page 54,
fig . 53.
- On -changing the windshield wiper b lades
can only be done if you b ring the wiper arms
to the service position . You will also avoid
pai nt damage to the hood when working on
the wipe rs in th is posit ion .
-Off -the w indshield w ipers are moved to
their in itia l position again .
(D Note
Neve r mane uver yo ur vehicle with t he
front windshie ld w iper arms raised s ince
they wi ll automatically be moved back to
Page 58 of 316
56 Clear vis ion
their basic position above a speed of 3
mph (6 km/h) and can scratch the hood .
(D Tips
-You can also use the service pos ition, for
example , if you want to protect the
windsh ield from icing by using a cover .
- The service position automatically
switches to
Off when you operate the
winds hield wiper lever , or speed exceeds
3 mph (6 km/h).
Replacing windshield wiper blades
Wiper blades in good condit ion help keep the
windshield cl ear .
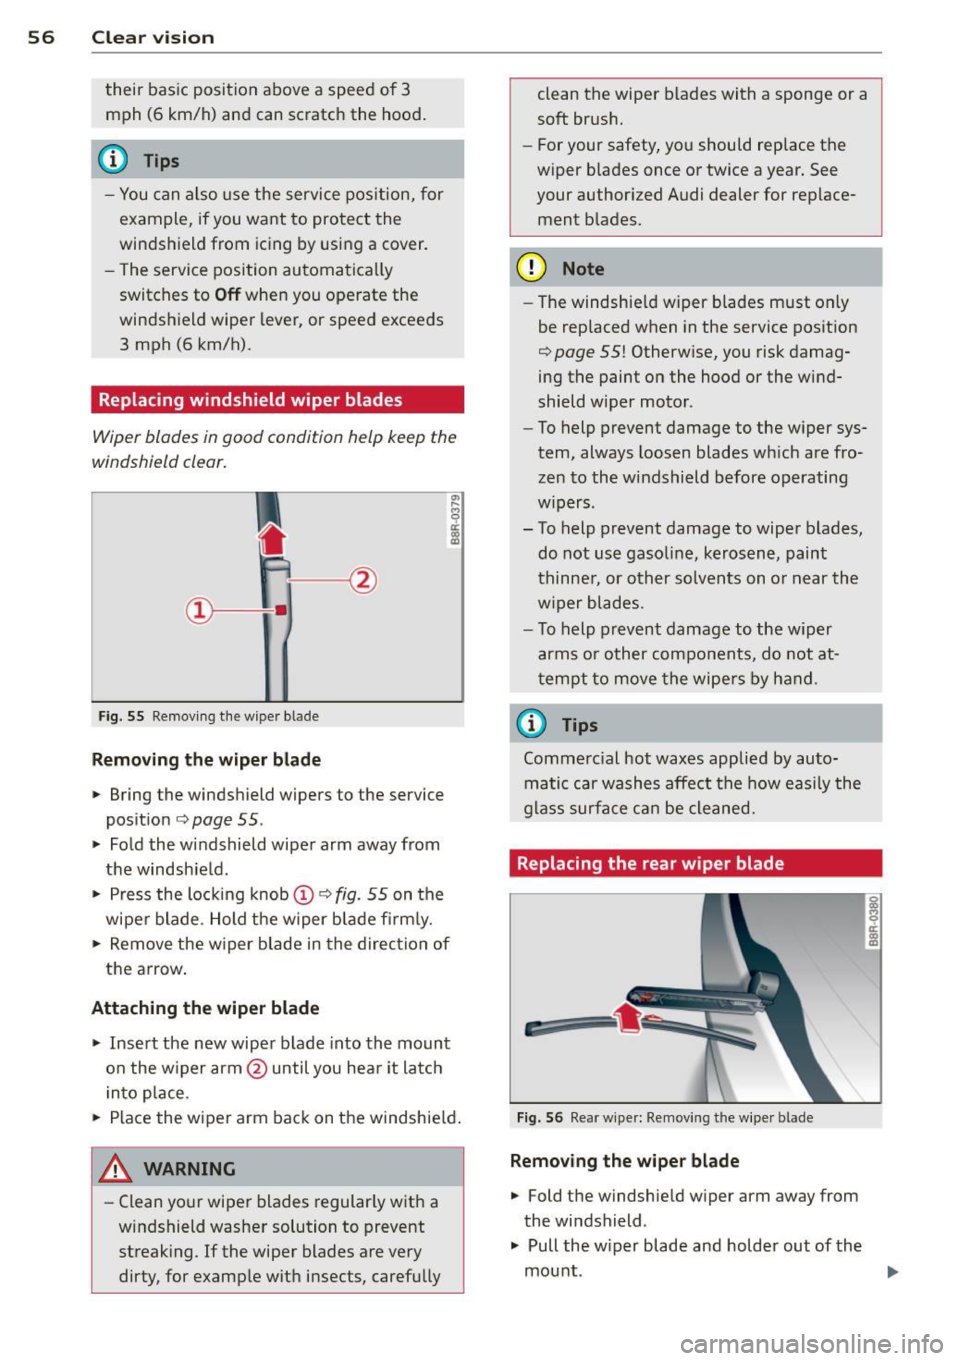
Fig. 55 Remov ing t he w iper blade
Removing the wiper blade
""' Bring the wind shield wipers to the service
pos it ion
¢ page 55.
""' Fo ld the windshield wiper arm away from
the windshie ld .
""' Press the lo cking knob @¢
fig. 55 on the
wiper blade . Hold t he w iper blade fi rm ly.
""' Remove the w iper blade in the direc tion of
the arrow .
Attaching th e wiper blade
""' Insert the new wipe r blade into the mount
on the w iper arm @until you hear it latch
i n to place .
""' Place the wiper arm back on the windshie ld .
A WARNING
- Clean yo ur wipe r blades regular ly wit h a
w indshield washer solution to prevent
streaking . If the wiper blades are very
dirty, for example with insects, carefu lly clean the wiper blades with a sponge or a
soft brush.
- For your safety, yo u should replace the
wiper blades once or twice a year. See
your authori zed Audi dealer for replace
ment b lades.
(D Note
- The windshie ld wi per blades must only
be replaced when in the service pos ition
¢
page 55! Otherwise, you risk damag
ing the paint on the hood or the wind
shield wipe r moto r.
- To help prevent damage to the w iper sys
tem, always loosen blades wh ich are fro
zen to the windshield before operating
w ipers .
- To help prevent damage to wiper blades,
do not use gasoline, kerosene, paint
thinner, or other solvents on o r near the
w iper blades.
- To help prevent damage to the w ip er
arms o r other compo nents, do not at
t empt to move the wipe rs by hand .
(D Tips
Comme rc ial hot waxes applied by auto
matic car washes affect t he how easily the
glass surfa ce ca n be cleaned.
Replacing the rear wiper blade
Fig . 56 Rea r w ipe r: Re mov ing t he w ipe r bl ade
Removing the wiper blade
""' Fold the windshie ld w iper arm away from
the wi ndshield .
""' Pull the w iper blade and holder out of the
g
q er a, II)
mou nt. .,.