belt AUDI Q5 2017 Owners Manual
[x] Cancel search | Manufacturer: AUDI, Model Year: 2017, Model line: Q5, Model: AUDI Q5 2017Pages: 296, PDF Size: 74.43 MB
Page 5 of 296
CD
CD
.... N ,-... N ..... 0 0 C<'. 00
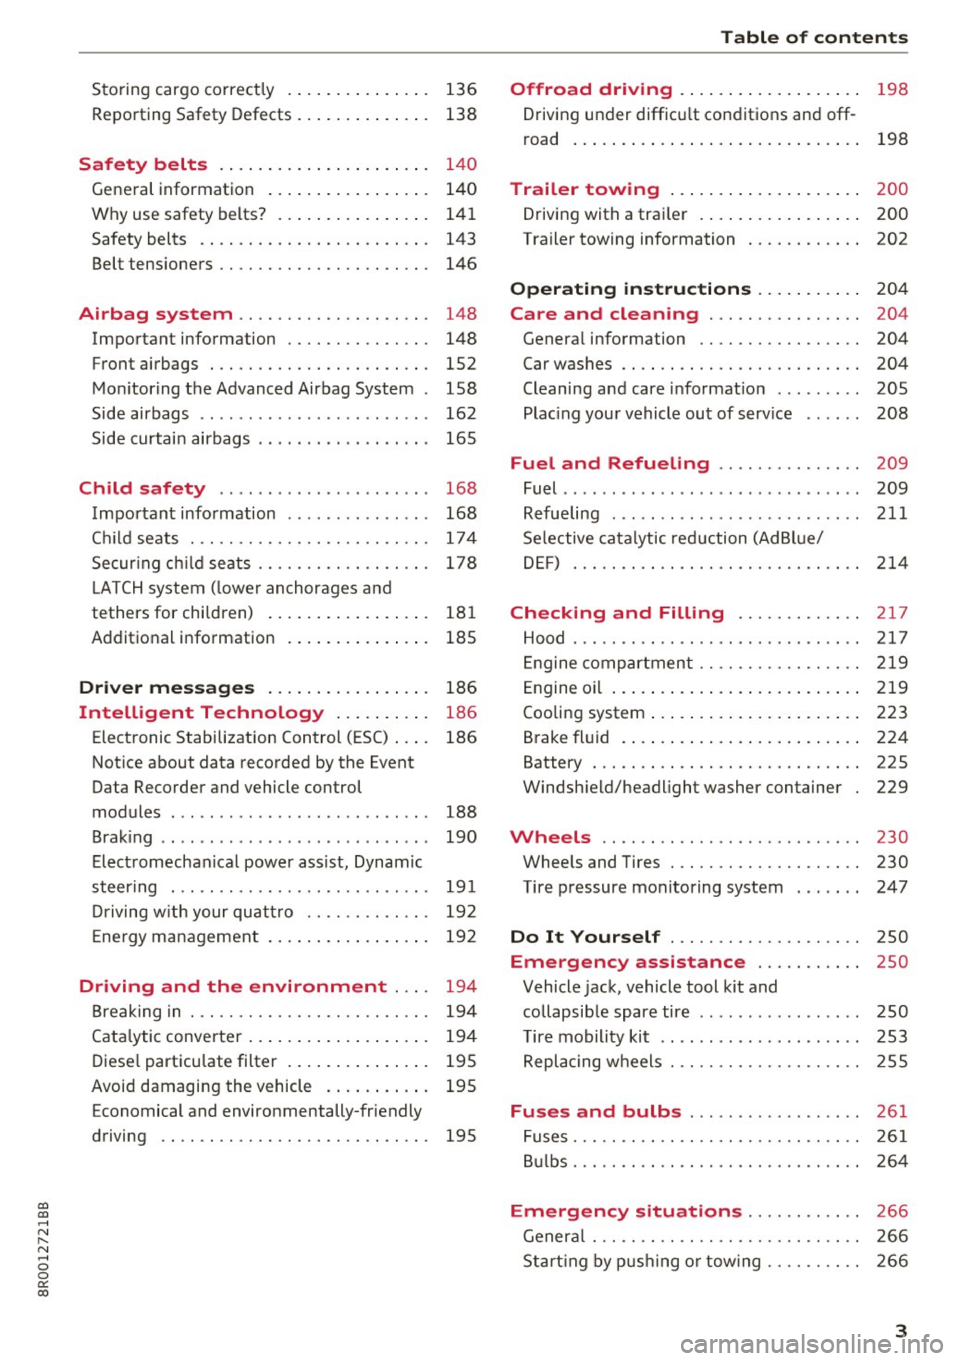
Storing cargo correctly . . . . . . . . . . . . . . . 136
R epo rting Safety Defects . . . . . . . . . . . . . . 138
Safety belts . . . . . . . . . . . . . . . . . . . . . . 14 0
General information . . . . . . . . . . . . . . . . . 140
Why use safety belts? . . . . . . . . . . . . . . . . 141
Safety belts . . . . . . . . . . . . . . . . . . . . . . . . 143
Belt tensioners . . . . . . . . . . . . . . . . . . . . . . 146
Airbag system . . . . . . . . . . . . . . . . . . . . 148
Important information . . . . . . . . . . . . . . . 148
Front airbags . . . . . . . . . . . . . . . . . . . . . . . 1S2
Monitoring the Advanced Airbag System . 158
Side airbags . . . . . . . . . . . . . . . . . . . . . . . . 162
Side curtain airbags . . . . . . . . . . . . . . . . . . 165
Child safety . . . . . . . . . . . . . . . . . . . . . . 168
Important information . . . . . . . . . . . . . . . 168
Ch ild seats . . . . . . . . . . . . . . . . . . . . . . . . . 174
S ecur ing ch ild seats . . . . . . . . . . . . . . . . . . 178
L ATCH system (lower anchorages and
tethers for chi ldren) . . . . . . . . . . . . . . . . . 181
Additional in fo rma tion
185
Driver messages . . . . . . . . . . . . . . . . . 186
Intelligent Technology . . . . . . . . . . 186
Elect ronic Stabilization Control (ESC) . . . . 186
Notice about data recorded by the Event
Data Recorder and vehicle control
modules . . . . . . . . . . . . . . . . . . . . . . . . . . . 188
B rak ing . . . . . . . . . . . . . . . . . . . . . . . . . . . . 190
E lect romechanical power assist, Dynamic
steering . . . . . . . . . . . . . . . . . . . . . . . . . . . 191
Dri ving with your quattro . . . . . . . . . . . . . 192
En erg y management . . . . . . . . . . . . . . . . . 192
Driving and the environment . . . . 194
Br eak ing in . . . . . . . . . . . . . . . . . . . . . . . . . 194
Catalytic converter . . . . . . . . . . . . . . . . . . . 194
Di ese l particulate filter . . . . . . . . . . . . . . . 195
Avoid damaging the vehicle . . . . . . . . . . . 195
Economical and environmentally-friendly
driving . . . . . . . . . . . . . . . . . . . . . . . . . . . . 195
Table of contents
Offroad driving . . . . . . . . . . . . . . . . . . .
198
Driving under difficult conditions and off-
ro ad . . . . . . . . . . . . . . . . . . . . . . . . . . . . . . 198
Trailer towing . . . . . . . . . . . . . . . . . . . . 200
Driving with a traile r . . . . . . . . . . . . . . . . . 200
Trailer towing information . . . . . . . . . . . . 202
Operating instructions . . . . . . . . . . . 204
Care and cleaning . . . . . . . . . . . . . . . . 204
Genera l information . . . . . . . . . . . . . . . . . 204
Car washes . . . . . . . . . . . . . . . . . . . . . . . . . 204
Cleaning and care information . . . . . . . . . 205
Plac ing your vehicle out of service . . . . . . 208
Fuel and Refueling . . . . . . . . . . . . . . . 209
Fuel .. .. .. .. .. .. .. ... .. ..... ... .. .. 209
Refueling ... .. .. .. .... .. ... .... .. .. 211
Selective catalytic reduct ion (Ad Blu e/
DEF) . . . . . . . . . . . . . . . . . . . . . . . . . . . . . . 214
Checking and Filling ........... .. 2 17
Hood ..... .. .. .. ................. .. 217
Eng ine compartm ent . . . . . . . . . . . . . . . . . 219
Eng ine oil . . . . . . . . . . . . . . . . . . . . . . . . . . 219
Cooling system . . . . . . . . . . . . . . . . . . . . . . 223
Brake fluid . . . . . . . . . . . . . . . . . . . . . . . . . 224
Battery . . . . . . . . . . . . . . . . . . . . . . . . . . . . 225
Windshield/headlight washer container
229
Wheels ........................... 230
Wheels and Tires . . . . . . . . . . . . . . . . . . . . 230
Tire pressure monitoring system 247
Do It Yourself . . . . . . . . . . . . . . . . . . . . 250
Emergency assistance . . . . . . . . . . . 250
Vehicle jack, vehicle tool kit and
collapsible spare tire . . . . . . . . . . . . . . . . . 250
T ire mobility kit . . . . . . . . . . . . . . . . . . . . . 253
Replacing wheels . . . . . . . . . . . . . . . . . . . . 255
Fuses and bulbs . . . . . . . . . . . . . . . . . . 261
Fuses . . . . . . . . . . . . . . . . . . . . . . . . . . . . . . 261
Bulbs . . . . . . . . . . . . . . . . . . . . . . . . . . . . . . 264
Emergency situations . . . . . . . . . . . . 266
General . . . . . . . . . . . . . . . . . . . . . . . . . . . . 266
Starting by pushing or tow ing . . . . . . . . . . 266
3
Page 16 of 296
Instruments and indicator lights
¢ Q Turn signals
The indicator light blinks when you use either
turn signal.
Whenever you use the left B or the right.
turn signal, the indicator l ight blinks. When you
use the emergency flashers, both indicator lights
flash.
If one of the turn s ignal light bulbs burn out, the
turn signal w ill blink twice as fast as normal.
This does not apply, however, in towing mode .
The indicator light does not flash if a turn s ignal
is out on the tra iler or the towing vehicle. Addi
tional informat ion on the turn s ignals
c::> page52.
¢1.~ Trailer turn signal assembly
Appl ies to: ve hicles w ith towing hitch
The indicator light also blinks if the turn signal is
operated when towing a trailer .
The indicator light . blinks when the turn sig
na l is used, if a trailer has been p roperly connect
ed to the vehicle .
If one of the turn signal bulbs on the trailer is burned out or defective, the indicator light will
not blink when you use the turn s ignals.
@ Tips
For vehicles with a factory installed towing
hitch or a tra ile r hitch that was installed later
according to factory specif ications, the trailer
turn signa l assembly is actuated.
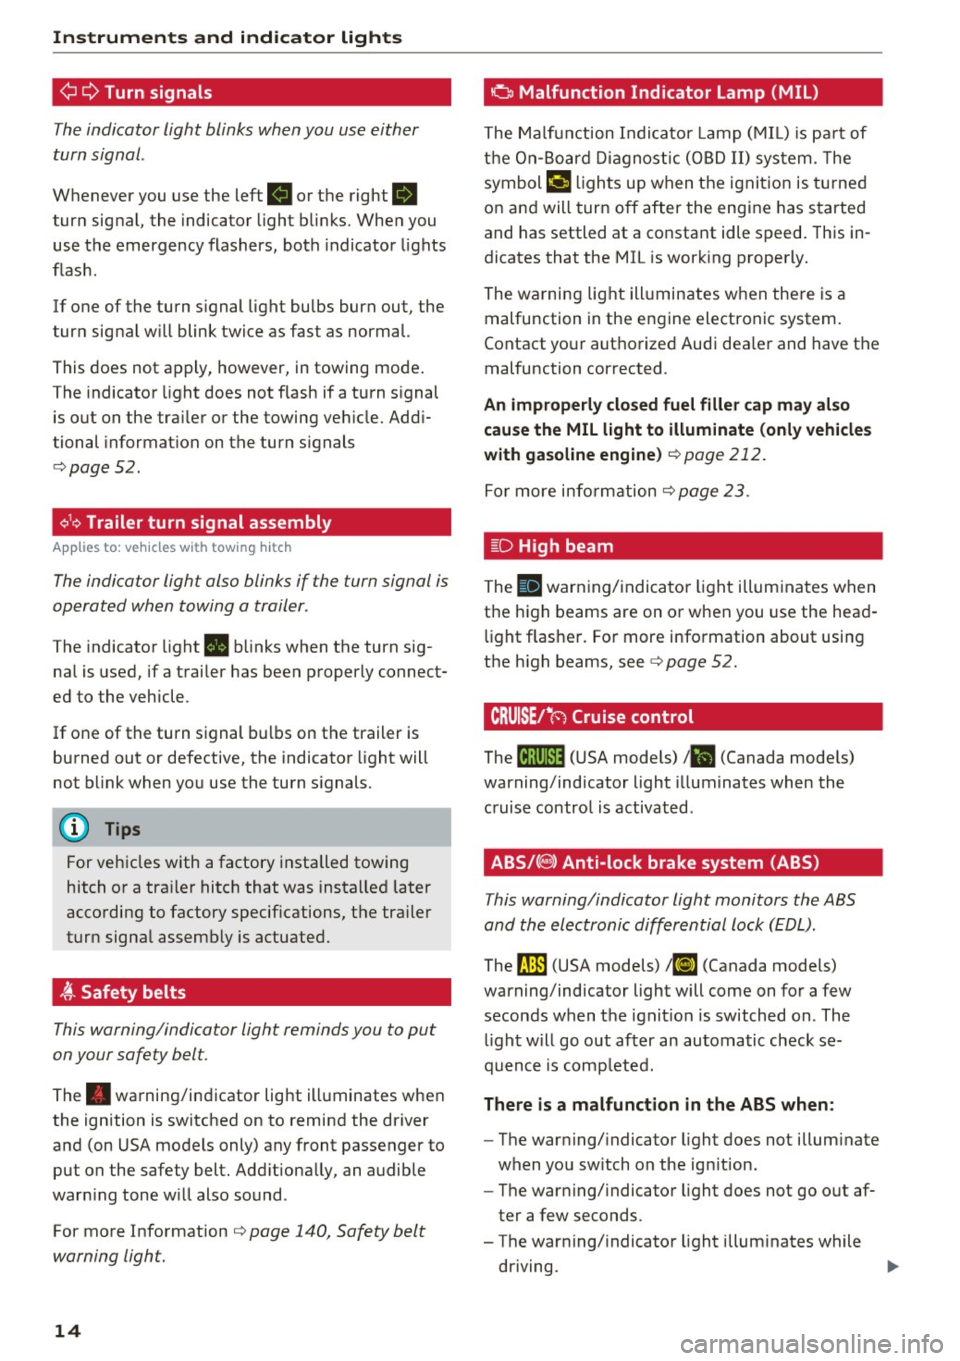
~ Safety belts
This warning/indicator light reminds you to put
on your safety belt.
The . warning/indicator light illuminates when
the ignition is switched on to remind the dr iver
and (on USA models only) any front passenger to put on the safety belt. Add itionally, an audible
warn ing tone w ill also sound .
For more Information
c::> page 140, Safety belt
warning light.
14
o Malfunction Indicator Lamp (MIL)
The Malf u nction Indicator Lamp ( MIL) is pa rt of
t h e On-Boar d Diagnos tic ( OBD II) sys tem . T he
symbol
('4 li ghts up when the ignit io n is t urned
on and will turn off after the engine has s tarted
and has settled at a constant idle speed. This in
dicates that the MIL is work ing properly.
The warning light ill uminates w hen the re is a
malfunction in the engine electronic system.
Contact your authorized Audi dea ler and have the
malfunction corrected .
An improperly closed fuel filler cap may al so
cau se the MIL light to illuminate (only vehicle s
with gasoline engine )
c::> page 212.
For more info rm ation c::> page 23 .
l[D High beam
The SI warning/ indica to r li ght illum ina tes when
the high beams are on or when you use the head
li ght f lasher. Fo r more information about using
the high beams, see
c::> page 52.
CRUISE/"(') Cruise control
The lij;\1)~14 (USA mode ls) 1B (Canada mode ls)
warning/indicator light illuminates when the
c ruise contro l is activated .
ABS/(8) Anti-lock brake system (ABS)
This warning/indicator light monitors the ABS
and the electronic differential lock (EDL) .
The rJln (USA models) lri] (Canada models)
warning/indicator light will come on for a few
seconds when the ignit ion is switched on . The
li ght w ill go out after an automatic check se
quence is comp leted.
There i s a malfunction in the ABS when:
-The warning/ indicator light does not illum inate
when you sw itch on the ign ition.
- The warning/ indicato r light does not go o ut af
ter a few seconds .
- The warning/ indicator light illum inates while
driving. ..,.
Page 62 of 296
Seat s and sto rage
Seats and storage
General information
Why is your seat adjustment so important?
The safety belts and the airbag system can only
provide maximum protection if the front seats are correctly adjusted .
There are various ways of adjusting the front
seats to provide safe and comfortable support
for the dr iver and the front passenger . Adjust
your seat properly so that:
- you can easily and quickly reach all the switches
and controls in the instrument panel
- your body is properly supported thus reducing
physical stress and fatigue
- the safety belts and a irbag system can offer
maximum protection ¢
page 148.
In the following sections, you will see exact ly
how you can best adjust your seats.
There are spec ial regulat ions and instr uctions for
installing a c hild safety seat on the front pas
senger 's seat . Always fo llow the information re
garding child safety provided in ¢
page 168,
Child safety.
A WARNING
Incorrect seating position of the driver and all
other passengers can result in serious person
al injury.
- Always keep your feet on the floor when the
vehicle is in motion - never put your feet on
top o f the instrument pane l, o ut of the win
dow o r on top of the sea t cushion. This ap
plies espe cially to the passenge rs.
If your
seat ing pos ition is inco rre ct, you increase
the risk of injury in the case of sudden b rak
ing or an accident . If the airbag inf lates and
the seating position is incor rect, this could
result in personal injury or even death.
- It is important for both the driver and front
passenge r to keep a d istance o f at least
10 inches (25 cm) between themselves and
the steering wheel and/or instrument pan el. If you're s itting any closer than this, the
airbag system cannot pro tect you properly.
60
In addition, the front seats and head re
straints must be adjusted to your body
he ight so that they can give you maximum
protection .
- Always try to keep as much distance as pos
sible between yourself and the steer ing
wheel or instrument panel.
- Do not adjust the driver's or front passeng
er's seat while the veh icle is moving. Yo ur
seat may move unexpectedly, causing sud
den loss of vehicle contro l and personal in
jury. If you ad just yo ur seat while the veh icle
is moving, you a re o ut of pos ition.
, Driver's seat
The correct seat position is important for safe
and relaxed driving .
We recommend that you adjust the dr iver's seat
i n the following manner:
.. Adjust the seat in fore and aft direction so that
you can easi ly push the pedals to the floor
while keep ing your knees slightly bent¢
A. in
Why is your seat adjustment so important? on
page 60 .
.. Adjust the seatback so that when yo u sit with
your back agains t the seatback, you can still
gras p the top of the steering wheel.
.. Adjust the head res traint so the uppe r edge is
as even as possib le w ith the top of you r head. If
that is not possible, try to adjust the head re
straint so that it is as close to this pos it ion as
possible ¢
page 64.
A WARNING
Neve r place any objects in the dr iver's foo t
well. An object could get into the pedal area and inte rfere with pedal function. In case of
sud den bra king or an ac cident, you w ould no t
be ab le to b rake o r accelerate.
-
Page 63 of 296
a,
a,
..... N ,....
N ..... 0 0
0:
co
Front passenger's seat
Always move the front pas senger seat into the
rearmost position .
To avoid contact with the airbag while it is de
ploying, do not sit any closer to the instrument
panel than necessary and always wear the three
point safety belt provided adjusted correctly . We
recommend that you adjust the passenger's seat
in the following manner:
.. Move the front passenger seat into the rear
most position of the fore and aft adjustment
range
c;> .&. in Why is your seat adjustment so
important? on page 60.
• Bring the backrest up to an (almost) upright
position.
Do not ride with the seat reclined .
.. Adjust the head restraint so the upper edge is
as even as possible with the top of your head. If
that is not possible, try to adjust the head re
straint so that it is as close to this position as
possible
c;> page 64 .
.. Place your feet on the floor in front of the pas
senger's seat .
Front seats
Power seat adjustment
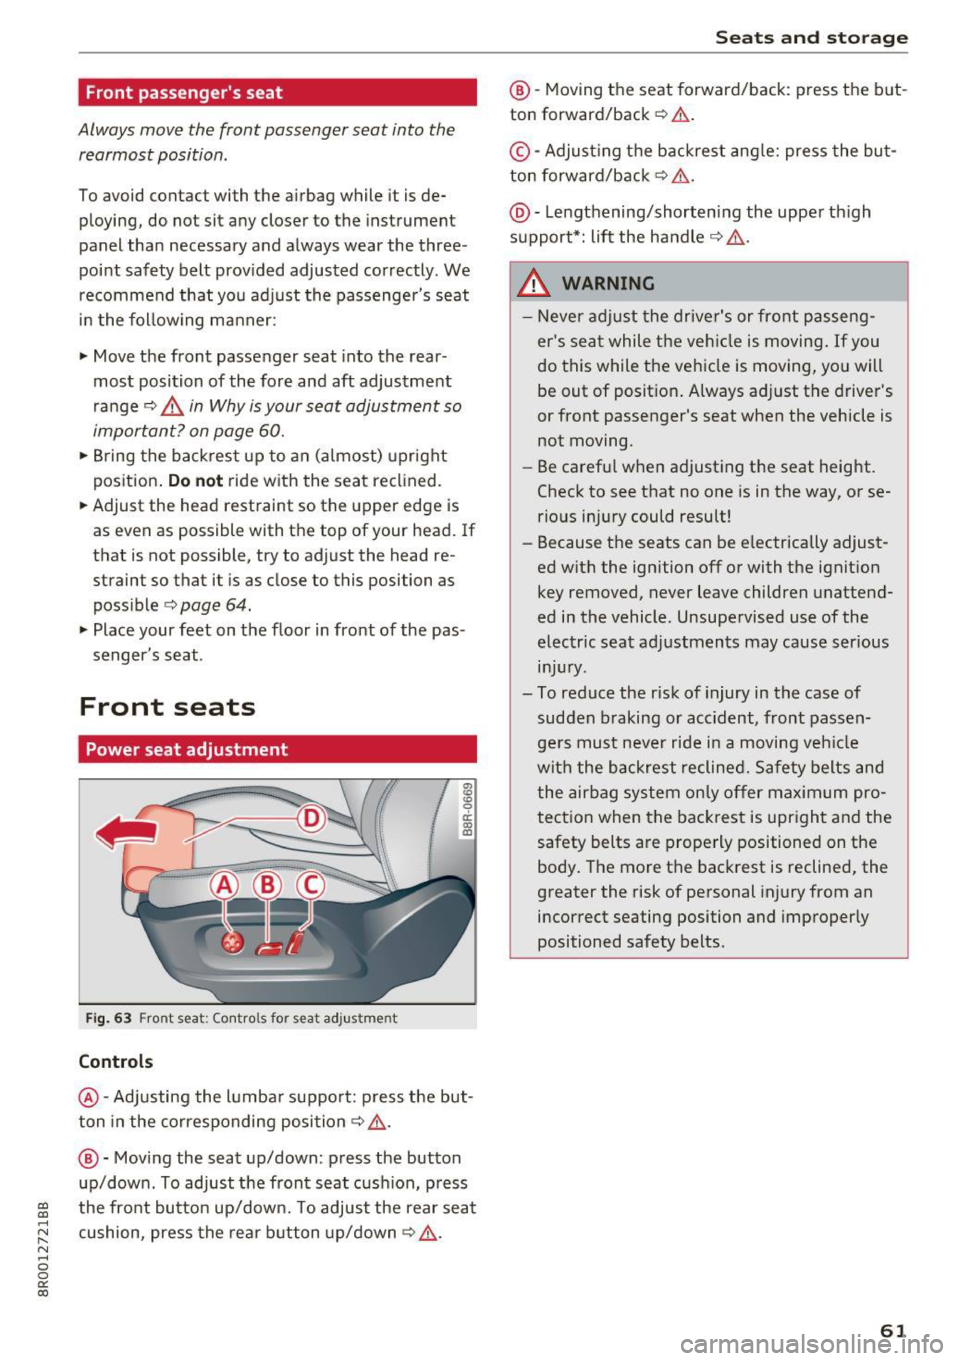
Fig. 63 Fro nt seat: Contro ls fo r seat adjus tme nt
Controls
"' 0 ci: a, a,
@ -Adjusting the lumbar support: press the but
ton in the corresponding position¢
Le,..
@ -Moving the seat up/down : press the button
up/down . To adjust the front seat cushion, press
the front button up/down. To adjust the rear seat
cushion, press the rear button up/down¢
Le,. .
Seats and storage
@-Moving the seat forward/back: press the but
ton forward/back
~ & .
©-Adjusting the backrest angle: press the but
ton forward/back
c;> & .
@ -Lengthening/shortening the upper thigh
support*: lift the handle
c;> Le,. .
_&. WARNING
- Never adjust the driver's or front passeng
er 's seat while the vehicle is moving.
If you
do this while the vehicle is moving, you will
be out of position . Always adjust the driver's
or front passenger's seat when the vehicle is
not moving.
- Be careful when adjusting the seat height.
Check to see that no one is in the way, or se
rious injury could result!
- Because the seats can be electrically adjust
ed with the ignition off or with the ignition
key removed, never leave children unattend
ed in the vehicle . Unsupervised use of the
electric seat adjustments may cause serious injury .
- To reduce the risk of injury in the case of
sudden braking or accident, front passen
gers must never ride in a moving veh icle
with the backrest reclined. Safety belts and
the airbag system only offer maximum pro
tection when the backrest is upright and the
safety belts are properly positioned on the
body. The more the backrest is reclined, the
greater the risk of personal injury from an
incorrect seating position and improperly
positioned safety belts.
-
61
Page 66 of 296
Seats and storage
-Exercise caution when adjusting the seat .
Adjusting the seat without checking or pay
ing attention can pinch fingers or limbs -
danger of injury!
Head restraints
Front head restraints
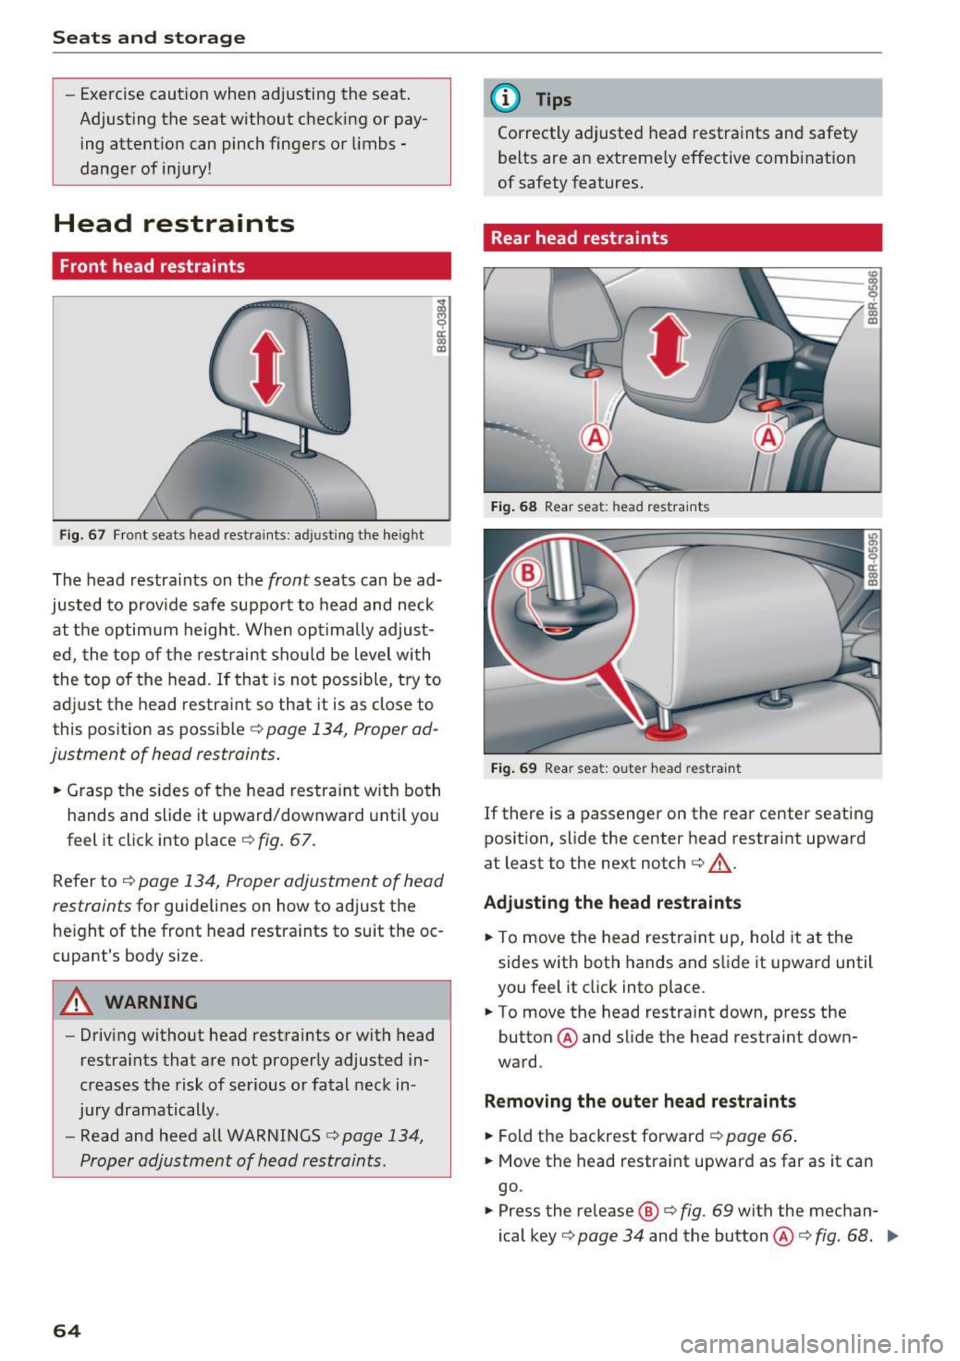
Fig. 67 Fro nt seats head restrai nts: adj ust ing the he ig h t
The head restra ints on the front seats can be ad
justed to provide safe suppo rt to head and neck
at the optimum height . When optimally adjust
ed, the top of the restraint should be level wi th
the top of the head. If that is not possible, try to
adjust the head restraint so that it is as close to
this position as possibler::!;>
page 134, Proper ad
justment of head restraints.
• Grasp the sid es of the head restraint with both
hands and slide it upward/downward until you
feel it click into place r::!;>
fig. 67.
Refer to
r::!;> page 134, Proper adjustment of head
restraints
for guidelines on how to adjust the
height of the front head restra ints to suit the oc
cupant 's body size.
_&. WARNING
- Driving without head restraints or with head
restraints that are not properly adjusted in
creases the risk of ser ious or fatal neck in
jury dramatically .
- Read and heed all WARNINGS
c:> page 134,
Proper adjustment of head restraints.
64
@ Tips
Correctly adjusted head restraints and safety
belts are an extreme ly effective combinat ion
of safety features.
Rear head restraints
Fig. 68 Rear seat : head rest raints
Fig. 69 Rear sea t: ou ter head restrain t
If there is a passenger on the rear center seating
position, slide the center head restraint upward
at least to the next notch
c:> .&_ .
Adjusting the head restraints
• To move the head restraint up, hold it at the
sides with both hands and slide it upward until
you feel it click into place.
• To move the head restraint down, press the
button @and slide the head restraint down
ward .
Removing the outer head restraints
• Fold the backrest forward r::!;> page 66.
• Move the head restra int upward as far as it can
go .
.,. Press the release@<=>
fig. 69 with the mechan
ical key
c:> page 34 and the button@<=> fig. 68. Iii>-
Page 68 of 296
Sea ts and stor age
Luggage compartment
Expanding the passenger compartment
The rear seat backrests can be folded forward
separately or together .
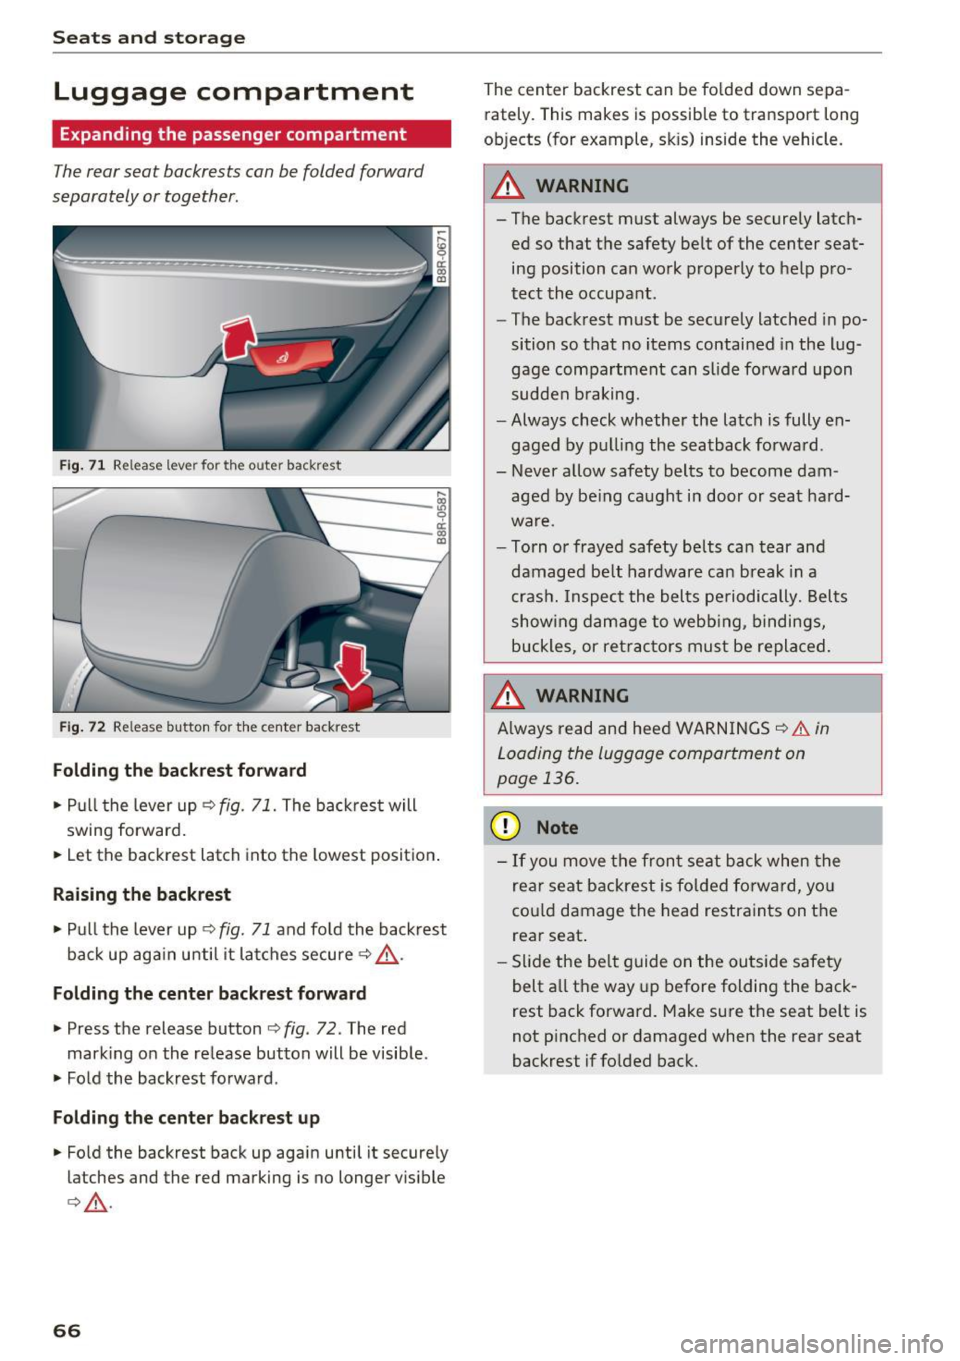
Fig. 71 Re lease lever for the outer back rest
~
~----i m
Fig . 72 Re lease button for the center backrest
Folding the ba ckrest forward
• Pull the lever up c:::> fig. 71. The backrest will
swing forward.
• Let the backrest latch into the lowest position .
Raising the backrest
• Pull the lever up c:::> fig. 71 and fo ld the backrest
back up aga in until it la tches secure
c:::> ,&. .
Folding the center ba ck rest f orward
• Press the release button c:::> fig . 72. The red
mark ing on the release button will be visib le .
• Fold the backrest forward .
Folding th e ce nter back re st up
• Fo ld the backrest back up again until it securely
latches and the red marking is no longer v isible
c:::> ,&. .
66
The center backrest can be fo lded down sepa
rately. This makes is possible to transport long
ob jects (for example, skis) inside the vehicle.
_& WARNING
-The backrest must always be securely latch
ed so that the safety belt of the center seat
ing position can work properly to help pro
tect the occupant .
- The backrest must be securely latched in po
sition so that no items contained in the lug
gage compartment can sl ide forwa rd upon
sudden b raking.
- Always check whether the latch is fully en
gaged by pu lling the seatback forward .
- Never allow safety belts to become dam
aged by be ing caught in door or seat hard
ware.
- Torn or frayed safety belts can tear and
damaged be lt hardware ca n break in a
cras h. Inspect the belts pe riodically. Bel ts
show ing damage to webb ing, bindings,
buckles, or ret rac tors must be replaced.
_& WARNING
A lways read and heed WARNINGS c:::> &. in
Loading the luggage compartment on
page 136.
(D Note
- If you move the fron t seat back when the
rea r seat b ackrest is fo lded forward, you
cou ld damage the head restraints on t he
rear seat.
-
- Slide the be lt guide on the outside safety
belt a ll the way up before folding the back
rest back forward. Make sure the seat belt is
not p inched or damaged when the rear seat
backrest if folded back.
Page 69 of 296
a,
a,
..... N r-N ..... 0 0
0:
co
Expanding the luggage compartment
The rear seat backrests can be folded forward
separately or together.
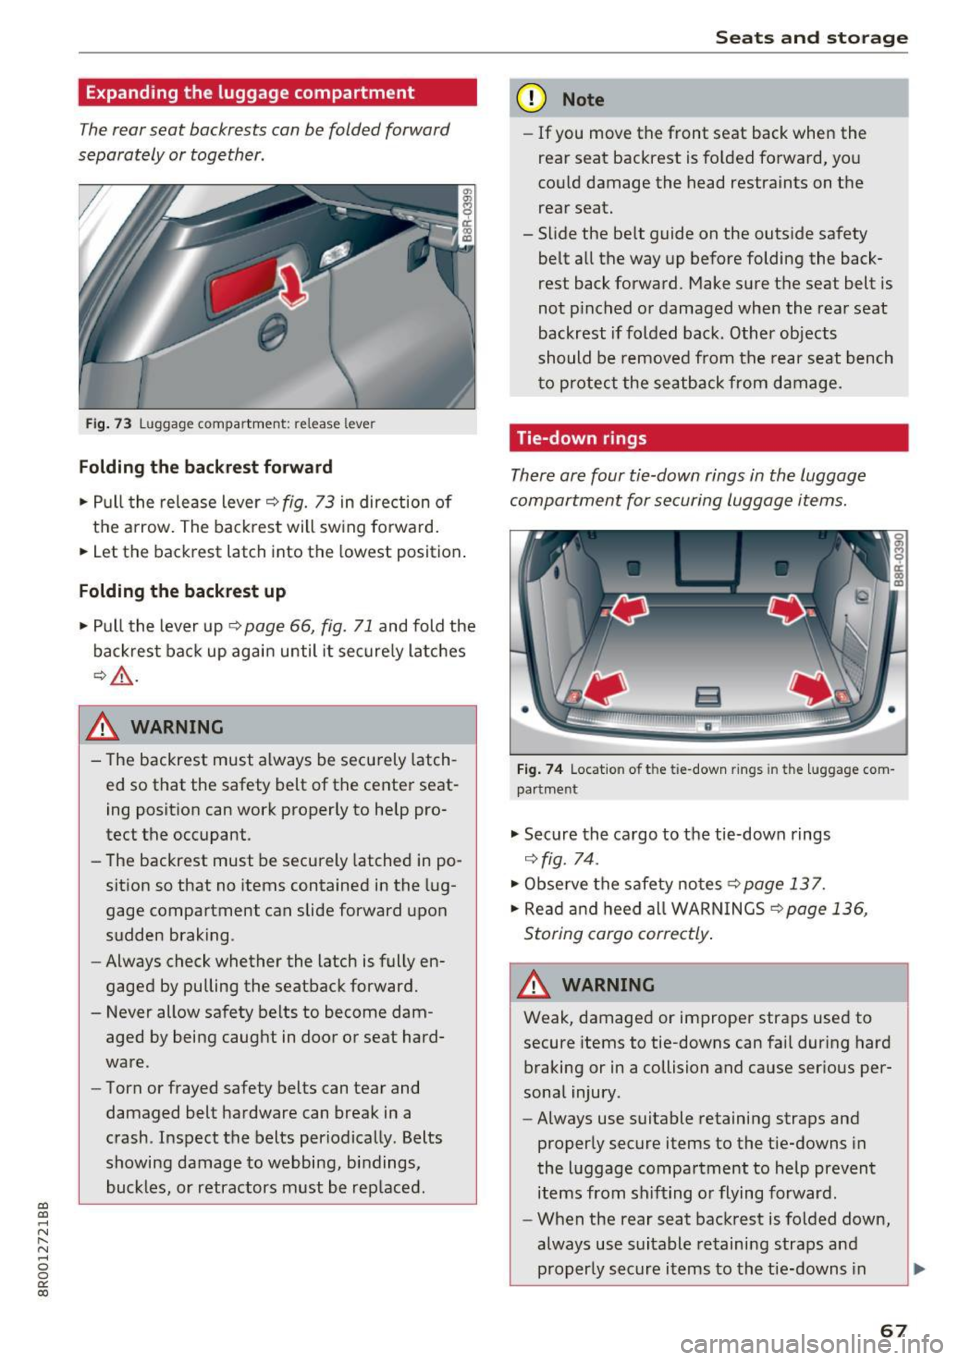
Fi g. 73 Luggage compartment : release leve r
Folding the backrest forward
... Pull the release lever c::> fig. 73 in direction of
the arrow . The back rest will sw ing forward .
... Let the back rest latch into the lowest position .
Folding the backrest up
... Pull the lever up c::> page 66, fig. 71 and fold the
backrest back up again until it sec ure ly latches
¢ _&. .
& WARNING ,-
- The backrest must always be secu rely latch-
ed so that the safety belt of the center seat
ing position can work proper ly to help pro
tect the occupant.
- The backrest must be securely latched in po
sit ion so that no items contained in the l ug
gage compartment can slide forward upon
sudden braking.
- Always check whether the latch is fully en
gaged by pulling the seatback forward.
- Never allow safety belts to become dam
aged by being caught in door or seat hard
wa re.
- Torn or frayed safety belts can tear and
damaged belt hardware can break in a
c rash. Inspect the belts periodically . Belts
showing damage to webbing, bi ndings,
buckles, or retractors must be rep lac ed .
Seats and storag e
(D Note
-If you move the front seat back when the
rear seat backrest is fo lded forward, you
cou ld damage the head restraints on t he
rear seat.
- Slide the be lt guide on the outside safety
belt a ll the way up before folding the back
rest back forward . Make sure the seat belt is
not p inched o r damaged when the rea r seat
backrest if folded back. Other objects
should be removed from the rear seat b ench
t o p rotect the seatback from d amage.
Tie-down rings
There are four tie-down rings in the luggage
compartment for se curing luggage items .
F ig . 74 Locat io n of the tie-dow n rings in the luggage com
pa rt me nt
.,. Secure the c argo to the tie-down rings
c::> fig. 74 .
.,. Observe the safety notes <=:> page 13 7.
... Rea d and heed a ll WARN INGS c::> page 136 ,
Storing cargo correctly .
A WARNING
Weak, damaged or improper straps used to
secure items to tie-downs can fai l dur ing hard
braking or in a collision and cause ser ious per
sona l injury .
- Always use suitable retaining straps and
properly secure items to the tie-downs in
the l uggage compartment to help prevent
ite ms from shi ft ing or flying forward.
- When the rear seat backrest is folded down,
always use suitable re taini ng straps and
proper ly secure i tems to the tie-downs in
-
67
Page 98 of 296
Driving
Driving the automatic transmission
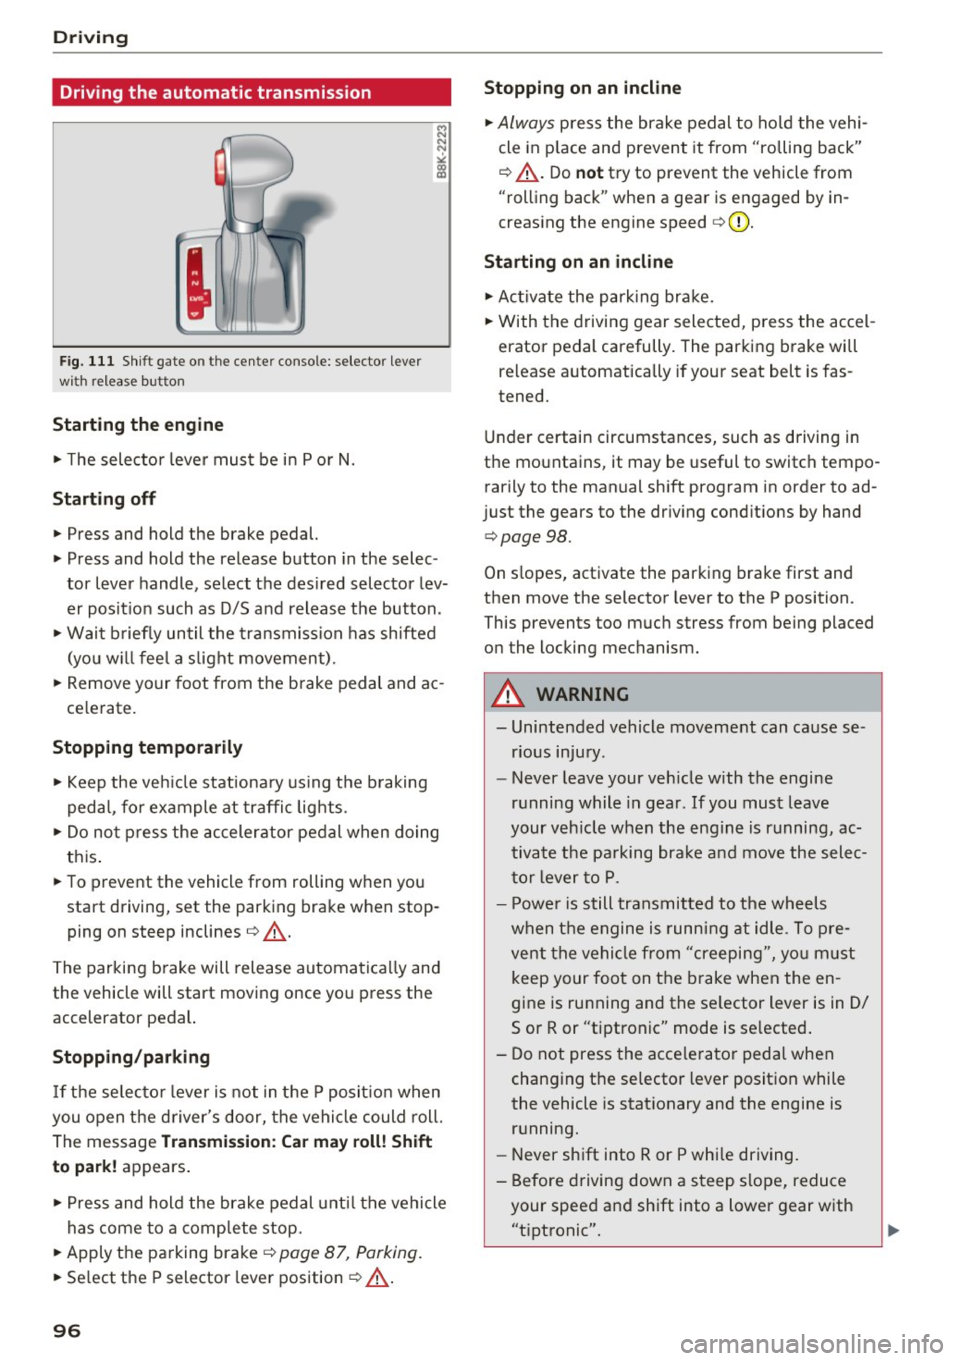
F ig. 111 Shift gate o n the cen te r co nso le: selecto r lever
wi th re lease button
Starting the engine
.. The selector leve r must be in P o r N.
Starting off
.. Press and hold the brake pedal.
.. Press and hold the release button in the selec
tor lever handle, select the des ired selector lev
er posit ion such as D/S and release t he button.
.. Wai t briefly until the transmission has shifted
(you w ill feel a s light movement) .
.. Remove your foot from t he b rake pedal and ac
ce lerate.
Stopping temporarily
.. Keep the veh icle stat iona ry using the b raking
pedal, fo r example at traffi c lights .
.. Do not p ress the accelerator pe dal when doing
th is .
.. To preve nt the vehicle from rolling when you
start driving, set the parking brake w hen stop
ping on steep inclines¢_&. .
The parking b rake will release automatica lly and
the vehicle will start moving once you press the
accelerator pedal.
Stopp ing /parking
If t he se lec to r l ever i s not in t he P posit io n w hen
you open t he d river's door, the vehicle could roll.
The message
Transmission: Ca r ma y roll! Shift
to pa rk!
appears .
.. Press and hold the brake pedal unti l the vehicle
has come to a comp lete stop.
.. Apply t he parking brake¢
page 87, Parking .
.. Se lect the P selector lever position ¢ _&. .
96
Stopping on an incline
.. Always press the brake pedal to ho ld the vehi
cle in p lace and prevent it from "rolling back"
¢ _&. . D o
not try to prevent the vehicle from
"rolling back" when a gear is engaged by in
creas ing the engine speed ¢(D .
Starting on an incline
.. Ac tivate the pa rk ing br ake .
.. With the driving gear selected, press the accel
erator pedal carefully. The parking brake will
re lease a utomatically if your seat belt is fas
tened.
Under certain circumstances, such as driving in
the mountains, it may be useful to switch tempo rarily to the manual sh ift program in order to ad
j ust the gears to the dr iv ing cond it ions by hand
¢ page 98 .
On slopes, activate the parking brake first and
then move the selector lever to the P position.
This prevents too m uch stress from being placed
on the locking mechanism.
A WARNING
- Unintended vehicle moveme nt can cause se
rious injury .
- Never leave your veh icle with the engine
r u nning while in gear . If you mus t leave
your veh icle when the engine is running, ac
tiva te t he pa rking bra ke and move the selec
t o r lever to P .
- P owe r is still transmitted to the wheels
w hen t he engine is running at idle . To pre
vent the vehi cle from "creeping", yo u m ust
keep your foot on the brake when the en
gine is running and the se lector lever is in 0/
Sor R or "tiptronic" mode is se lected .
- Do not press the acce le ra tor pedal when
changing t he se lector lever posit ion while
the vehicle is stat ionary and the engine is
running.
- Never shift into R or P whi le driving.
- Before driving down a s teep slope, reduce
your spee d and sh ift into a lower gear with
"t i pt ronic" .
Page 99 of 296
CD
CD
.... N ,-... N .... 0 0 C<'. 00
-Do not ride the brakes or press the brake
peda l too often or too long when driving
down a hill. Constant braking causes the
brakes to overheat and substantially re
duces braking performance, increases brak
ing distance or causes complete failure of
the b rake system.
- To prevent the vehicle from rolling back
when stopping on inclines, always ho ld it in
place wi th the brake pedal o r parking brake.
- Never hold the veh icle on an incl ine with a
slipping clutch. The clutch opens automati
cally when it becomes too hot from the
overload. An indicato r lamp
mJ illum inates
and a driver message appears ¢
page 98
when the clutch is overloaded.
- If the engine must remain running, neve r
have any driving pos ition engaged when
checking under the hood. Make sure these
lector lever has secure ly engaged and is
locked in P with the parking brake set
¢ page 217. Otherw ise, any increase in en
gine speed may set the vehicle in motion,
even with the parking brake applied.
(D Note
- When stopping on an incline, do not try to
ho ld the vehicle in place by press ing the ac
ce lerator pedal while a driv ing gear is se
l ected. T his can cause the t ransmission to
ove rheat and can damage it. Activate the
parking b rake or press the b rake peda l to
prevent the vehicle from ro lling.
- Al low ing the ve hicl e to ro ll when the eng ine
i s s topped and the se lector lever is in
N w ill
damage the transmission beca use it is not
l ubricated under those ci rcumstances.
(D Tips
F or safety reasons, the parking b rake is re
leased au tomatically only when the dr iver's
safety belt is engaged in the buckle.
D riv ing
Hill descent control
The hill descent control system assists the driver
when driving down declines .
Hill descent control is activated when the selec
tor lever is in D/S and you press the brake pedal.
T he transmission automat ically selects a gear
that is su itable for the incline . Hill descent con
t ro l tries to maintain t he speed ach ieved at the
t ime of b raking, w ith in phys ica l and te chnical
l imita tions.
It may still be necessary to adjust the
speed with the brakes.
Hill descent cont rol switches off once the decline
levels out or you press the acce lerator pedal.
When the speed is set in the cru ise control sys
tem ¢
page 92, hill descent control is also acti
vated.
,&. WARNING
H ill descent cont rol cannot over come physical
limitat ions, so it may not be able to ma intain
a constant speed under all conditions. A lways
be ready to app ly the brakes.
97
Page 133 of 296
CD
CD
.... N ,-... N ,....,
0 0 C<'. 00
Driving safety
Basics
Safe driving habits
Please remember -safety first!
This chapter contains important information,
tips, instructions and warnings that you need to
read and observe for your own safety, the safety
of your passengers and others . We have summar
ized here what you need to know about safety
belts, airbags, child restraints as well as child
safety. Your safety is for us
priority number 1. Al
ways observe the information and warnings in
this section - for your own safety as well as that
of your passengers.
The information in this section applies to all
model versions of your vehicle. Some of the fea
tures descr ibed in this sections may be standard
equipment on some models, or may be optional
equipment on others. If you are not sure, ask
your authorized Audi dealer.
A WARNING
- Always make sure that you follow the in
structions and heed the WARNINGS in this
Manual. It is in your interest and in the in
terest of your passengers .
-
-Always keep the complete Owner's Litera
ture in your Audi when you lend or sell your
vehicle so that this important information
will always be available to the driver and
passengers.
- Always keep the Owner's literature handy so
that you can find it easily if you have ques
tions.
Safety equipment
The safety features are part of the occupant re
straint system and work together to help reduce
the risk of injury in a wide variety of accident sit
uations.
Your safety and the safety of your passengers
should not be left to chance. Advances in tech
nology have made a var iety of features available
to help reduce the risk of injury in an accident.
Driving safety
The following is a list of just a few of the safety
features in your Audi:
- sophisticated safety belts for driver and all pas-
senger seat ing pos itions,
- be lt force limiters for the front seats,
- belt pretensioners for the seats,
- belt height adjustment for the front seats,
- head restraints for each seating position,
- front airbags,
- side airbags in the front seats and outer rear
seats *,
- side curtain airbags,
- special LATCH anchorages for child restraints,
- adjustab le steering column.
These individual safety features, can work to gether as a system to help protect you and your
passengers in a wide range of accidents . These
features cannot work as a system if they are not
always correctly adjusted and correctly used.
Safety is everybody's responsibility!
Important things to do before driving
Safety is everybody 's job! Vehicle and occupant
safety always depends on the informed and care
ful driver .
For your safety and the safety of your passen
gers,
before driving always:
.,. Make sure that all lights and signals are operat
ing correctly.
.,. Make sure that the tire pressure is correct .
.,. Make sure that all windows are clean and afford
good visibility to the outside .
.,. Secure all luggage and other items carefully
~page 74 .
.,. Make sure that nothing can interfere with the
pedals.
.,. Adjust front seat, head restraint and mirrors
correctly for your height.
.,. Instruct passengers to adjust the head re
straints according to their height.
.,. Make sure to use the right child restraint cor
rectly to protect children
¢ page 168, Child
safety. ..,.
131