ESP AUDI Q7 2009 Owner´s Manual
[x] Cancel search | Manufacturer: AUDI, Model Year: 2009, Model line: Q7, Model: AUDI Q7 2009Pages: 426, PDF Size: 97.13 MB
Page 201 of 426

__________________________________________ A_ d_v _a_ n_ c_e _d _ P_a_ r_ k_ i_n ..:g =-- S...:y:- s_ t_ e_ m ___ JIII
When the turn signal is switched on, only the necessary surfaces
and curves are shown . To change the s ide that is shown, simp ly
change the turn signa l.
The displayed light b lue
0 or dark blue © curved line identifies the
turn-around point when maneuvering to park. If the curved line
touches the curb, the steering wheel turn -around point has been
reached => page 198, fig. 215.
T he distance from the rear bumper © to the red line © is approxi
mate ly 1.3 ft (40 cm). Here, at the latest, you shou ld s top bac king up
=> page
200 .
& WARNING
Please note that objects not tou ching the g round ca n appear to be
further away than they really are (for example , the bumper of a
parked vehi cle , a trailer hitch , or the re ar of a truck ). In th is case ,
you should not u se the guide h elp lines to mea sure distance -
danger of a ccident !
0 Note
In the MMI Display, the direction of travel of the vehicle rear is repre
sented depending on the steering w heel angle. The veh ic le front
swings out more than the veh icle rear.
[ i ] Tips
• I n order for the rear -v iew camera to function properly, the
camera lens=> page 191, fig. 205 must be kept clean, and free of
snow and ice . P lease follow the additional notes on => page
204 .
• T he positions of the orientation lines/ surfaces are disp laced up
or down if the pa rk ing process is carried out with the rear-view
camera in Adaptive Air Suspension*=> page 21 dynamic, off road, or
l if t m ode. Therefore, the accuracy is reduced. •
Controls and equip
ment
Special parking situations
A pplies to veh ic les : wit h Advance d Pa rk in g S yste m w it h rear view c amera
Parking next to obstacles
When parking next to an obstacle, enough distance mus t
left on the side.
Fig . 216 Top view:
P arki ng ne xt t o a brick
wall
With "parking mode 2", you can park very c losely to a sidewalk curb
with your vehicle=> page 194, fig. 209.
However, when parking next to an obstacle, such as a brick wall , a
larger side distance must be selected in order to prevent col lisio n
damage to the vehicle. Position the long side of the marked blue
s u rface so that there is enoug h distance from the curb; the surface
must not touch the curb=> fig. 216.
A lso, the turning process has to occur considerab ly sooner . This
means that the corresponding blue curved line=> page 198, fig. 215
must not touch the curb, but shou ld rather be at a distance far
enough from the curb=>& .
& WARNING
• Keep plenty of di sta nce from an obstacle , so that your out side
mirror or a corner of your vehi cle does not collide with any obsta-
cle s -danger of accident!
~
I • •
Page 202 of 426
IIIII..__A_ d_v _ a_ n_c _e _ d_ P_ a_r _k _in ---== g'-- S...:y _ s_ t_ e_ m ___________________________________________ _
& WARNING (continued )
• The Audi parking system is not a substitute for being careful
and alert when backing up. Be especially careful during parking
and similar maneuvers . Always watch where you are driving and
make sure that nothing is in the way.
• When maneuvering or parking, do not only use the MMI Display
for orientation . Certain objects • depending on the screen resolu
tion -may not , or not entirely , be displayed ; for example trailer
hitches , chains , narrow posts , or fence s.
• Improper reliance on the Audi parking system can cause colli
sions and serious personal injury.
- Never rely only on parking assist when changing backing up .
- Always check rear view mirrors to make sure it is safe to ba ck
up. •
Applies to veh icles : wit h Ad vanced Pa rk ing System w ith rea r view c ame ra
Notes on distance information
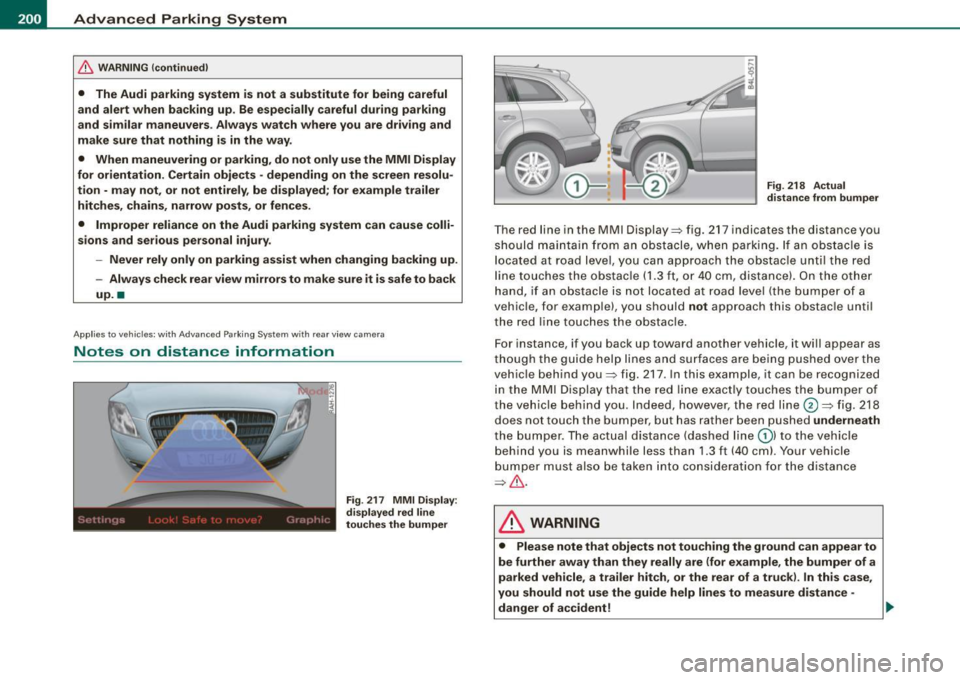
Fig . 21 7 MMI Displ ay:
di splayed red l ine
touche s the bumpe r F
ig . 218 Actu al
distan ce from bumpe r
The red line in the MMI Display~ fig. 217 indicates the distance you
should maintain from an obstacle, when parking. If an obs tac le is
l ocated at road l eve l, you can approach the obstacle unti l the red
l ine to uche s the obstac le ( 1.3
ft, or 4 0 cm , distance). On the o the r
h a n d, if an obstacle is no t locat ed a t road level (the bu mpe r of a
vehic le, for examp le), you should not approach this obstac le unti l
t h e red line touc hes the obstacle.
F or instance, if you back u p toward another vehicle, it will a ppear as
thou gh the gui de help line s and s urface s are be ing pushed over the
vehic le behind you~ fig. 217. In this example, it can be reco gnized
in the M MI Display that t he re d l in e exac tly touc hes the bum per o f
th e ve hicle behind you . Ind eed, however, the red line@~ fig. 218
does not touch the bumper, b ut has rather been pushed underneath
t h e b umpe r. T h e actual d istance (dashed line G) l to the vehicle
behind you is meanwhile less than 1.3 ft ( 40 cm). Your vehicle
bu mper must als o be taken into co nsiderat ion for the d istance
~&. .
& WARNING
• Please note that objects not touch ing the ground can appear to
be further away than they really are (for example , the bumper of a
parked vehicle , a trailer hitch, or the rear of a truck) . In this case ,
you should not use the guide help lines to measure distance -
danger of accident ! .,_
Page 203 of 426
____________________________________________ A_d_ v_ a_n_ c_ e_d _ P_a_ r_ k_ i_ n ..::g==-- S_ y=- s_t _e _m __ lJII
& WARNING (continued)
• Maintain plenty of distance from an obstacle, so that your
outside mirror or a corner of your vehicle does not collide with any
obstacles -danger of accident!
• The Audi parking system is not a substitute for being careful
and alert when backing up. Be especially careful during parking
and similar maneuvers. Always watch where you are driving and
make sure that nothing is in the way.
• When maneuvering or parking , do not only use the MMI Display
for orientation. Certain objects -depending on the screen resolu
tion -may not, or not entirely, be displayed; for example trailer
hitches , chains, narrow posts, or fences . •
Appl ies to vehic les : with Audi Pa rk ing System and factory insta lled tow ing h itch
Towing hitch
For vehicles with a factory installed towing hitch, or a trailer hitch
installed according to factory specifications , the rear acoustic
parking sensors are not activated when the vehicle is put in reverse
gear while an electrical connection to the trailer socket* is estab
lished. No distance alert occurs in the rear =:>
page 191. The rear
view camera picture=:>
page 194 is displayed without orientation
lines and without blue surfaces. •
Controls and equip
ment
Settings in the MMI
A pplies to v ehicles: with A dvanc ed Park ing System with rear view camera
Adjusting the chimes -option 1
The volume and the pitch (frequency) of the chimes can
be adjusted in the MM!.
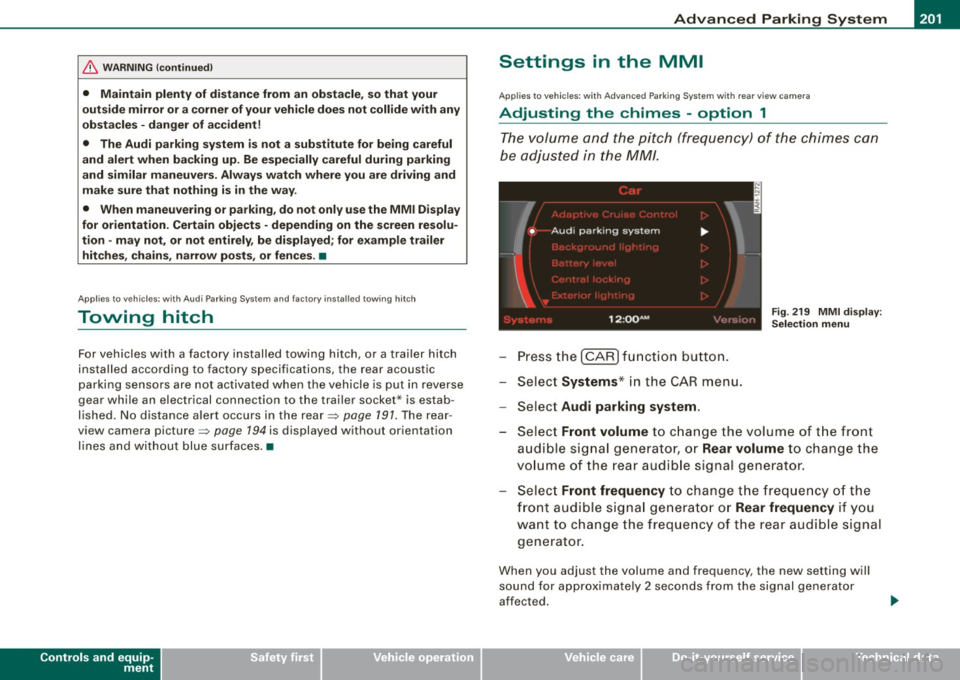
Press the [CAR] function button.
Select
Systems* in the CAR menu.
- Select
Audi parking system .
Fig. 219 MMI display :
Selection menu
- Select Front volume to change the volume of the front
audible signal generator, or
Rear volume to change the
volume of the rear audible signal generator.
Select
Front frequency to change the frequency of the
front audible signal generator or
Rear frequency if you
want to change the frequency of the rear audible signal
generator.
When you adjust the volume and frequency, the new setting will
sound for approximately 2 seconds from the signal generator
affected.
I • •
Page 207 of 426

____________________________________________ A_d_ v_ a_n_ c_ e_d _ P_a_ r_ k_ i_ n ..::g==-- S_ y=- s_t _e _m __ flll
& WARNING (continued )
Be especially careful to check for small children and animals
before backing up . Small children and animals will not always be
shown in the rear-view display .
• The Audi parking system is not a substitute for being careful
and alert when backing up . Be especially careful during parking
and similar maneuvers . Always watch where you are driving and
make sure that nothing is in the way .
• Do not allow yourself to be distracted from traffic by the rear
v iew camera pictures.
• When maneuvering or parking , do not only use the MMI Display
for or ientation . Certa in objects -depending on the screen resolu
tion -may not , or not entirely , be di splayed; for example trailer
hitches , chains , narrow posts , or fences .
• Only use the rear -view camera for aid if it shows a good, clear
picture . The image may be obscured , for example , by the sun
shining into the lens, dirt on the lens , or as the result of a defect ·
danger of accident!
• If the image is hazy when the MMI Display is switched on or the
area behind the vehicle is not visible (for example , as the result of
a dirty or defective lens ), the rear -view camera must not be used
for aid in maneuvering -danger of ac cident!
• The rear -view camera generates two -dimensional images . For
this reason, please note that recesses in the ground and
protruding parts on another vehicle , or protruding objects fixed to
the ground , will be more difficult or impossible to recognize on the
MMI Display, due to the missing spacial depth.
• If the position and the installation angle of the camera has
changed , for example, after a rear end collision, do not continue to
use the system for safety reasons . Have it checked by an autho
rized Audi dealer or qualified workshop .
• Only use the rear-v iew camera when the rear lid is fully closed.
Make sure that objects mounted on the rear are not obscuring the
camera v iew .
Controls and equip
ment
& WARNING (continued )
• Remove ice, preferably with de-icing spray .
0 Note
• Never use warm or hot water to remove snow or ice from the
rear -view camera lens -danger of crack format ion on t he lens!
• Whe n cleani ng t he le ns, neve r use care p ro d uc ts wi th a n abr a
s ive effect.
[ i ] Tips
The positio ns of t he orientation lines/ surfaces are disp laced up or
down if the par king p rocess is car ried out with the rear -view camera
i n Adap tive A ir Suspen sio n*:::::>
page 21 dy namic, o ffro ad , or lift
mode. Therefo re, the accuracy is reduced. •
I • •
Page 211 of 426
______________________________________________ A_ d_a ""' p'-- t_iv _ e_ A_ i_r _S_ u_s _,p_ e _ n_s_ i_ o _ n _ ___.9I
- Press the I CARI f unction button . The main menu
Adaptive Air Su spe nsion appears~
page 208, fig. 224 or
~ page 208, fig . 225 .
Select the desired mode by rotating and pressing the
control knob .
Rai sing and l owerin g
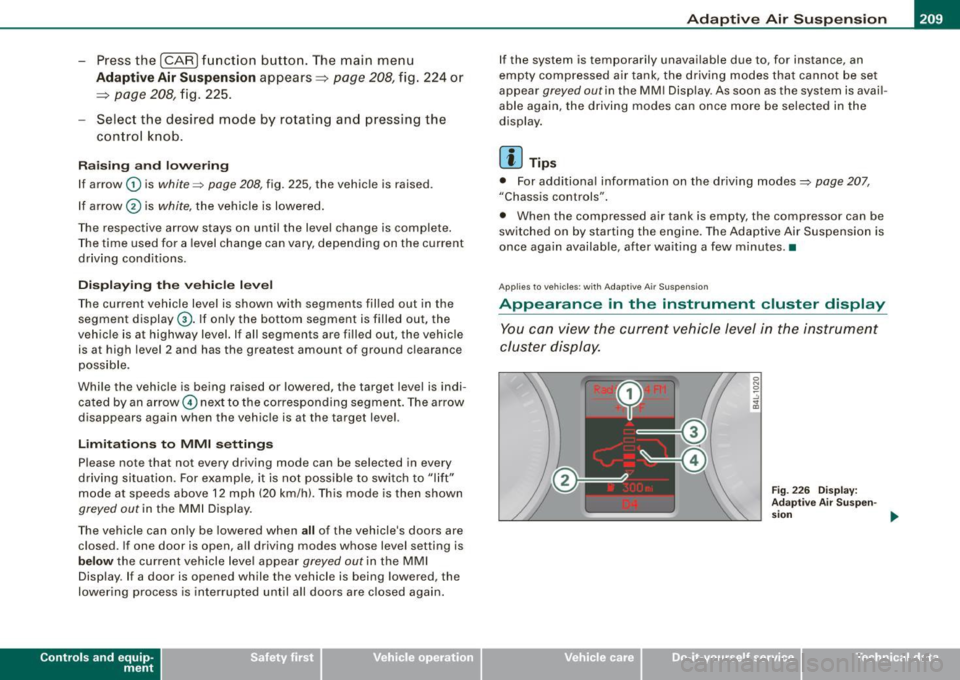
If arrow
G) is white :::::, page 208, fig. 225, the vehicle is raised.
If arrow @ is
white, the vehicle is lowered .
The respective arrow stays on until the !eve.I change is complete.
The time used for a level change can vary, depending on the current
driving conditions.
Di sp la yin g th e ve hicle l eve l
The current vehicle level is shown with segments filled out in the
segment display@. If only the bottom segment is filled out, the
vehicle is at highway level. If all segments are filled out, the vehicle
is at high level 2 and has the greatest amount of ground clearance
poss ible.
While the vehic le is being raised or lowered, the target level is indi
cated by an arrow © next to the corresponding segmen t. The arrow
disappears again when the vehic le is at the target level.
Limita tion s to MMI setting s
Please note that not every driving mode can be selected in every
driving si tuation. For example, it is not possib le to switch to "lift"
mode at speeds above 12 mph (20 km/h). This mode is then shown
greyed out in the MMI Display.
The vehicle can on ly be lowered when all of the vehicle's doors are
closed. If one door is open, a ll driving modes whose level setting is
below the current vehicle leve l appear greyed out in the MMI
Display. If a door is opened while the vehicle is being lowered, the
lowering process is interrupted until all doors are closed again .
Contro ls and eq uip
ment
I f the system is temporarily unavailable due to, for instance, an
empty compressed air tank, the driving modes that cannot be se t
appear
greyed out in the MM I Display. As soon as the system is avai l
able again, the driving modes can once more be selected in the
display.
[ i ] Tips
• For additiona l information on the driving modes:::::, page 207,
"Chassis controls".
• When the compressed air tank is empty, the compressor can be
sw itched on by starting the engine. The Adaptive Air Suspension is
once again availab le, after waiting a few minutes. •
Applies to veh icles: with Adapt ive A ir Suspens ion
Appearance in the instrument cluster display
You can view the current vehicle level in the instrument
cluster display.
Fig . 2 26 D ispla y:
A dap tive Air Sus pen-
s ion
~
Vehicle care I I irechnical data
Page 212 of 426
llffl..__A_ d_ a--=- p_t _iv _ e_ A_ i_ r _ S_ u_ s....; p=--- e_n_ s_ io_ n _____________________________________________ _
Fig . 227 D isp lay:
Ad apti ve Air Suspen
s io n
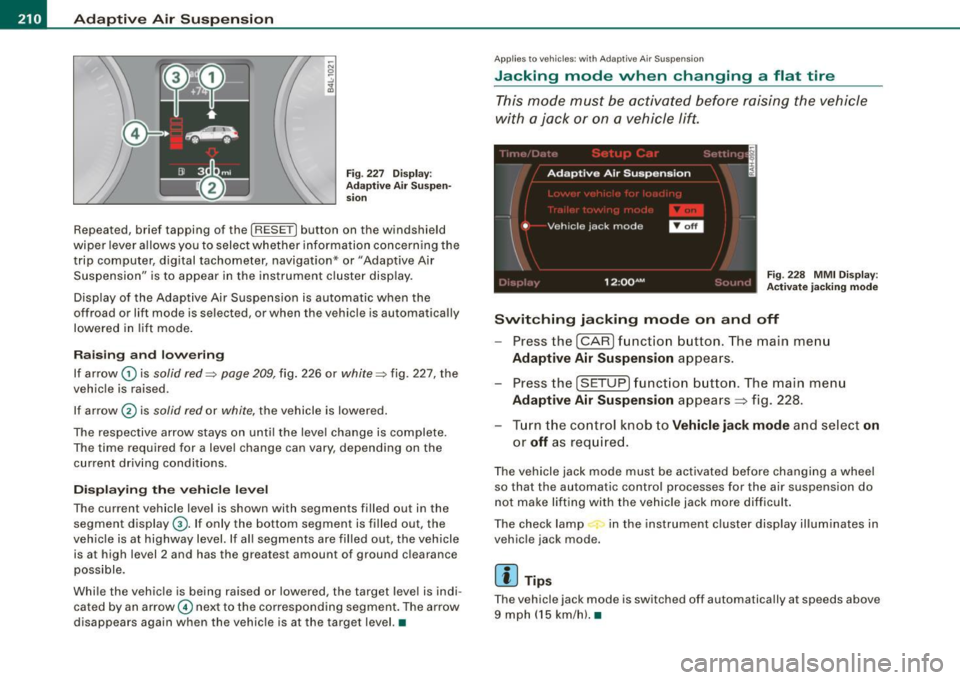
Repeated, brief tapping of the [R ESET] button on the windshield
wiper lever allows you to select whether information concerning the
trip computer, digital tachometer , navigation* or "Adaptive Air
Suspension" is to appear in the instrument c lu ste r disp lay.
Disp lay of the Adapt ive Air Suspension is automatic when the
off road or lift mode is sel ected, or when the v ehicle is automatically
lowered in lif t mode .
Raising and low ering
If arrow G) is solid red=> page 209, fig. 226 or white => fig. 227, the
vehic le is raised .
If ar row
0 is solid red or white, the vehicle is lowered .
The respective arrow stays on unti l the leve l change is complete.
The time required for a leve l change can vary, depend ing on the
current driv ing cond it ions .
Displ aying the vehicle level
The current vehicle level is shown with segments filled out in the
segment display@. If only the bottom segment is filled out, the
veh ic le is at highway level. If al l segments are filled out, the vehicle
is at high level 2 and has the grea test amount of ground c learance
possible .
Whi le the veh icle is being raised or lowered, the target level is indi
cated by an arrow© nex t to the co rresponding segment . The arrow
d isappears again when the vehic le is at the targe t level. •
Applies to vehi cle s: wi th A daptive Air S uspens ion
Jacking mode when changing a flat tire
T his mode must be activated before raising the vehicle
with a jack or on a vehicle lift.
Fig . 228 MMI Di splay:
A ctivat e jacking mod e
Switching jacking mode on and off
Press the (CAR ) funct ion b utton. The main me nu
Adaptive Air Suspension appears.
Press the (SETUP ) funct ion b utton. The main menu
Adaptive Air Suspension appea rs ~ fig . 228.
- Tur n the control k nob to
Vehicle jack mode and select on
or off as req uired.
The vehicle jack mode must be activated before changing a wheel
so that the au tomatic control processes for the air suspens ion do
not make lifting with the vehic le jack m ore diff icult .
The check lamp in the instrument c luster display illum inates in
vehic le jack mode.
[ i ] Tip s
The vehicl e jack mode is sw itched off automa tically at sp eeds above
9 mph ( 15 km/h). •
Page 223 of 426

Driving Safely -
----------------
Safety is everybody's responsibility! •
Important things to do before driv ing
Safety is everybody's job! Vehicle and occupant safety
always depends on the informed and careful driver.
For your safety and the safety of your passengers, before
driving always:
- Make sure that al l lights and signals are operat ing
correctly.
- Make sure that the tire pressure is correct.
- Make sure that all windows are clean and afford good
visibility to the outside.
- Secure all luggage and other items carefully :::>
page 119.
-Make sure that noth ing can interf ere w ith the pedals.
Adjust fro nt seat, head restraint and mirrors correctly for
your height .
Instruct passengers to adjust the head restraints
according to their height.
- Make sure to use the right ch ild restraint correctly to
protect children :::>
page 263, "Child Safety".
- Sit properly in your seat and make sure that your passen
gers do the same :::>
page 92, "General recommenda
tions".
- Fasten your safety belt and wear it p roperly. Also instruct
your passengers to fasten their safety belts properly
~ page 231. •
Controls and equip
ment Safety first Vehicle operation
What impa
irs driving safety?
Safe driving is directly related to the condition of the
vehicle, the driver as well as the driver's ability to concen
trate on the road without being distracted.
The driver is responsible for the safety of the vehicle and all
of its occupants. If your ability to drive is impaired, safety
risks for everybody in the vehicle increase and you also
become a hazard to everyone else on the road :::>& .There
fore:
- Do not let yourself be distracted by passengers or by
using a cellula r telephone .
NEVER drive when your driving ability is impaired (by
medications, alcohol, drugs, etc.).
Observe all traffic laws, rules of the road and speed limits
and plain common sense .
- ALWAYS adjust your speed to road, traffic and weather
conditions.
- Take frequent breaks on long trips. Do not drive for more
than two hours at a stretch.
- Do NOT drive when you are tired, under pressure or when
you are stressed .
& WARNING
Impaired driving safety increases the risk of serious personal
injury and death whenever a vehicle is being used. •
Vehicle care Do-it-yourself service Technical data
Page 227 of 426

Driving Safely ---------------=------------'-
Proper adjustment of head restraints
Correctly adjusted head restraints are an important part
of your vehicle's occupant restraint system and can help
to reduce the risk of injuries in accident situations.
Fig. 237 Correctly
adjusted head restraint
viewed from the side
The head restraints must be correctly adjusted to achieve
the best protection.
-Adjust the head restraint so that the upper edge of the
restraint is level with the top of your head, but no lower
than eye level and so it is as close to the back of your
head as possible ~
page 225, fig. 237.
Adjusting head restraints=> page 101.
& WARNING
Driving without head restraints or with improperly adjusted head
restraints increases the risk of serious injuries in a collision . To
help reduce the risk of injury :
• Always drive with the head restraints in place and properly
adjusted.
• Every person in the vehicle must have a properly adjusted head
restraint.
Controls and equip ment Safety first Vehicle operation
& WARNING (continued)
•
Always make sure each person in the vehicle properly adjusts
their head restraint. Each head restraint must be adjusted
according to occupants' size so that the upper edge is as even
with the top of the person's head, but no lower than eye level and
so it is as close to the back of to the head as possible .
• Never attempt to adjust head restraint while driving. If you
have driven off and must adjust the driver headrest for any reason,
first stop the vehicle safely before attempting to adjust the head
restraint.
• Children must always be properly restrained in a child restraint
that is appropriate for their age and size
=> page 263. •
Examples of improper seating positions
The occupant restraint system can only reduce the risk of
injury if vehicle occupants ore properly seated.
Improper seating positions can cause serious injury or
death . Safety belts can only work when they are properly
positioned on the body. Improper seating positions reduce
the effectiveness of safety belts and will even increase the
risk of injury and death by moving the safety belt to critical
areas of the body. Improper seating positions also increase
the risk of serious injury and death when an airbag deploys
and strikes an occupant who is not in the proper seating
position. A driver is responsible for the safety of all vehicle
occupants and especially for children. Therefore:
- Never allow anyone to assume an incorrect seating posi
tion when the vehicle is being used~& .
The following bulletins list only some sample positions that will
increase the risk of serious injury and death. Our hope is that these .,_
Vehicle care Do-it-yourself service Technical data
Page 230 of 426
lllffl..,___D_ r_iv _i_ n""' g::;._ S_ a_f _e _ly =---------------------------------------------------
& WARNING
Improperly stored luggage or other items can fly through the
vehicle causing serious personal injury in the event of hard braking or an accident. To help reduce the risk of serious personal injury:
• Always put objects, for example, luggage or other heavy items
in the luggage compartment.
• Always secure objects in the luggage compartment using the
tie-down eyelets and suitable straps.
& WARNING
Heavy loads will influence the way your vehicle handles. To help
reduce the risk of a loss of control leading to serious personal
injury :
• Always keep in mind when transporting heavy objects, that a
change in the center of gravity can also cause changes in vehicle
handling:
-Always distribute the load as evenly as possible.
- Place heavy objects as far forward in the luggage compart-
ment as possible.
• Never exceed the Gross Axle Weight Rating or the Gross
Vehicle Weight Rating specified on the safety compliance sticker on the left door jamb. Exceeding permissible weight standards
can cause the vehicle to slide and handle differently.
• Please observe information on safe driving
~ page 220.
& WARNING
To help prevent poisonous exhaust gas from being drawn into the
vehicle, always keep the rear lid closed while driving.
• Never transport objects larger than those fitting completely
into the luggage area because the rear lid cannot be fully closed.
& WARNING (continued)
• If you absolutely must drive with the rear lid open, observe the
following notes to reduce the risk of poisoning :
- Close all windows,
- Close the Panoramic sliding sunroof*,
- Open all air outlets in the instrument panel,
- Switch off the air recirculation,
- Set the fresh air fan to the highest speed.
& WARNING
Always make sure that the doors, all windows, the Panoramic
sliding sunroof* and the rear lid are securely closed and locked to
reduce the risk of injury when the vehicle is not being used.
• After closing the rear lid, always make sure that it is properly
closed and locked .
• Never leave your vehicle unattended especially with the rear lid
left open. A child could crawl into the vehicle through the luggage
compartment and close the rear lid becoming trapped and unable
to get out . Being trapped in a vehicle can lead to serious personal
injury.
• Never let children play in or around the vehicle.
• Never let passengers ride in the luggage compartment . Vehicle
occupants must always be properly restrained in one of the
vehicle's seating positions.
[ i] Tips
• Air circulation helps to reduce window fogging. Stale air escapes
to the outside through vents in the trim panel. Be sure to keep these
slots free and open.
• The tire pressure must correspond to the load. The tire pressure
is shown on the tire pressure label. On USA vehicles, the tire pres- .,_
Page 233 of 426

Safety belts -----------------=------
Safety belts
General notes
Always wear safety belts!
Wearing safety belts correctly saves lives!
This chapter explains why safety belts are necessary, how
they work and how to adjust and wear them correctly.
- Read all the information that follows and heed all of the
instruct ions and WARNINGS.
& WARNING
Not wearing safety belts or wearing them improperly increases
the risk of serious personal injury and death.
• Safety belts are the single most effective means available to
reduce the risk of serious injury and death in automobile acci
dents . For your protection and that of your passengers, always
correctly wear safety belts when the vehicle is moving.
• Pregnant women, injured, or physically impaired persons must
also use safety belts . Like all vehicle occupants, they are more
likely to be seriously injured if they do not wear safety belts . The
best way to protect a fetus is to protect the mother -throughout
the entire pregnancy. •
Number of seats
Vehicles with five seats: Your vehicle has two front seats and three
rear seats. Each seating position has a safety belt.
Vehicles with six seats:* Your vehicle has two front seats, two seats
in the second row and two seats in the third row. Each seating posi
tion has a safety belt.
Controls and equip ment Safety first
Vehicle operation Vehicles
with seven seats:* Your vehicles has two front seats, three
seats in the second row and two seats in the third row. Each seating
position has a safety belt.
& WARNING
Not wearing safety belts or wearing them improperly increases
the risk of serious personal injury and death.
• Never strap more than one person, including small children,
into any belt. It is especially dangerous to place a safety belt over
a child sitting on your lap.
• Never let more people ride in the vehicle than there are safety
belts available.
• Be sure everyone riding in the vehicle is properly restrained
with a separate safety belt or child restraint. •
Safety belt warning light 4,.
Your vehicle has a warning system for the driver and front
seat passenger (on USA models only) to remind you about
the importance of buckling-up.
Vehicle care
Fig . 239 Safety belt
warning light in the
instrument cluster -
enlarged ...
Do-it-yourself service Technical data