ESP AUDI Q7 2009 Owner´s Manual
[x] Cancel search | Manufacturer: AUDI, Model Year: 2009, Model line: Q7, Model: AUDI Q7 2009Pages: 426, PDF Size: 97.13 MB
Page 67 of 426

& WARN IN G (c ontinu ed)
start ing of the eng ine and u se of vehicle system s su ch as power
windows , etc . which could resul t in seriou s injury.
• Rememb er - you can still ope n or close the power windo ws for
a bout t en minute s after the ignit ion i s s witched off . Only when
e ither of the front doors are opened are th e power windo ws
s witched off .
• Be ca reful when closing t he w indow s. Ch eck to se e th at no o ne
i s in the w ay, or seriou s injury could resu lt !
• Always r emove the ignition key when ever you le ave your
v ehi cle .
• If you lock your v ehi cle from the out side , no one , e spe cially chil
d ren , s hould rem ain in the vehi cle .
• Do not stick anything on the windows or the windshield that
ma y interfere with the dri ver 's field of vision.
[ i ] Tip s
In addition to the switches in the driver's door there is a separate
switch i n each door for the power w indow in that door~
page 66,
fig. 50 . •
Switches in the driver's door
The driver can operate all windows.
If t he respective switch is pus hed o r pulled the window wi ll
open or c lose. The power window sw itches have a
two-posi
tion fun ction :
Opening the windows
- Pus h the switch to the first stop and hold it the re until the
window has lowered to t he desired pos ition.
Controls and equip
ment
Opening and clo sing
- P ush the swit ch brie fly to the s econd stop : the window
will aut om atical ly open a ll the way .
Closing th e windows
- Pu ll the switc h up to the fir st stop and ho ld it there until
the window has risen to the des ired position.
- Pull the sw itch q uickly to the
second position : the
window will automatically close all the way=>
& in
"Controls" on
page 64.
Activating /deacti vating th e rear windows
- Press the left 00 sw itch => page 64, fig. 49 to deactivate
only the wind ow reg ulator in the left doo r. The indicat or
light in the switch illuminates.
- Press the ri ght
00 switch => page 64, fig. 49 to deactivate
only the w indow regulator in the right d oor. T he indicator
ligh t in the switch illuminates.
- Press the[!_] sw itch aga in to reactivate the window regu-
lator . The indicator light in the switch goes out.
If you press both 00 switches © in succession, the following func
tions are switched off in the rear of the vehicle:
• The window regulator switches in the rear doors .
• The buttons for the Panoramic s liding sunroof *.
• On vehicles with rear c limate control*, operation from the rear is
b locked. Dashes" ---" are shown in the displays for the rear climate
controls, and the rear air-cond itioning can only be operated from
the c limate controls in the cabin~
page 131.
• If only the left 00 switch was pressed, the window regulator in
the
left rear d oo r and the buttons in the rear for the Panoramic
s liding sunroof* are deactivated. In addition, the door is locked. .,
I • •
Page 68 of 426
Opening and closing
• If onl y the right (!) switch was pressed, the window regulator in
t he
right rear door and the buttons in the rear for the Panoramic
sliding sunroof * are deactivated . In addition, the door is locked .
This feature has been provided for the safety of small children riding in the rear of the vehicle.
[ i ] Tips
• The windows can still be opened and closed for about ten
minutes after the ignition has been turned off. The power windows
are not shut off until one of the front doors is opened.
• In order to activate the child safety lock on the left and the right
side, you have to press the two safety swi tches in succession . Make
certain that the check light comes on the corresponding safety
switch when the c hild safety lock is act ivated. •
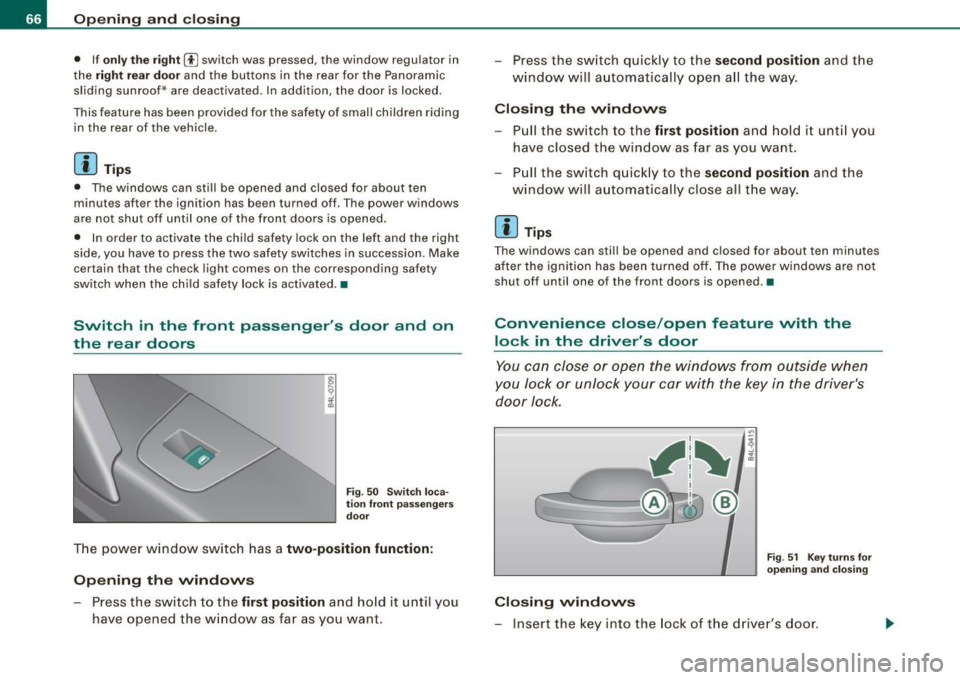
Switch in the front passenger 's door and on
the rear doors
F ig . 5 0 Sw itch loca
ti on fr ont pa sse nge rs
d o or
The power w indow switch has a two-posit ion function :
Opening the windows
Press the switch to the fir st position and ho ld it until you
have opened the w indow as fa r as you want. -
Press the sw it c h quickly to th e
second po sition and t he
wind ow will a uto matically open all th e way .
Closing the windows
-Pull the switch to the first position and hold it unti l you
have closed the window as far as you want.
- Pull the sw itch q uick ly to the
second position and the
window will automatically close all t he way.
[ i ] Tip s
The windows can still be opened and closed for about ten minutes
af ter the ignition has been turned off . The power windows are not
shut off until one of the front doors is opened .•
Convenience close/open feature vvith the
lock in the driver's door
You can close o r open the wi ndo ws from outside when
you lock or unlock your c ar with the key in the driver's
door lock.
Closing windows
Fi g. 51 Key t urns fo r
opening and clo sing
- Insert the key into the lock of the d river's door .
Page 71 of 426
Closing front roof segment when slid open
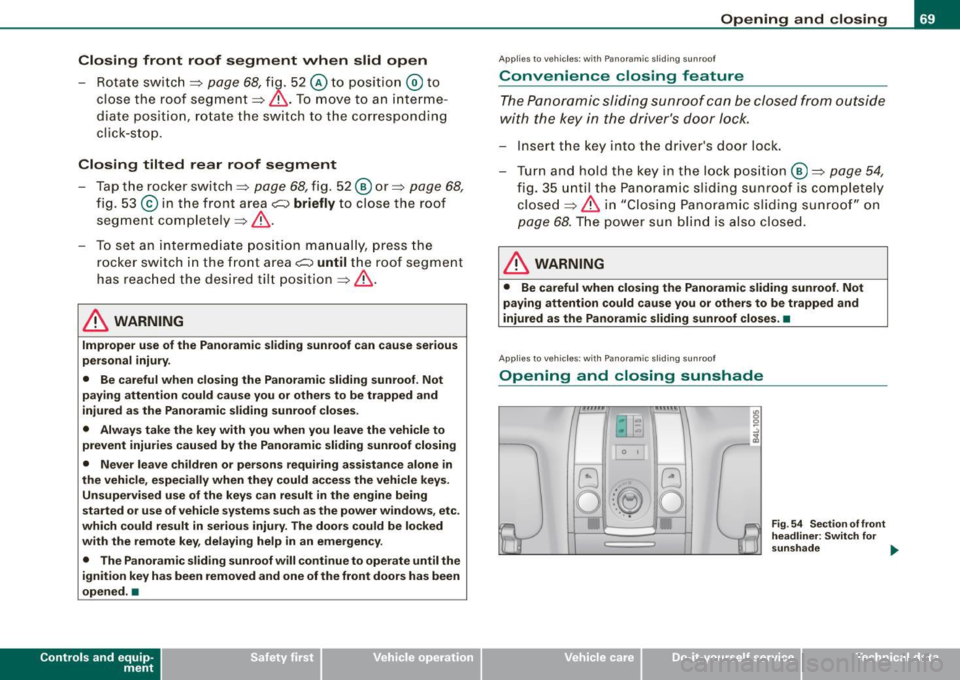
-Rotate switch => page 68, fi~ . 52 © to position @ to
close the roof segment=>
&-To move to an interme
diate position, rotate the switch to the corresponding
c lick-stop.
Closing tilted rear roof segment
- Tap the rocker switch => page 68, fig. 52 @ or=> page 68,
fig . 53
© in the front area~ briefly to close the roof
segment completely =>,& .
- To set an intermediate position manually , press the
rocker switch in the front area~
until the roof segment
has reached the desired tilt position:::;,,& .
& WARNING
Improper use of the Panoramic sliding sunroof can cause serious
personal injury.
• Be careful when closing the Panoramic sliding sunroof. Not
paying attention could cause you or others to be trapped and
injured as the Panoramic sliding sunroof closes.
• Always take the key with you when you leave the vehicle to
prevent injuries caused by the Panoramic sliding sunroof closing
• Never leave children or persons requiring assistance alone in
the vehicle, especially when they could access the vehicle keys.
Unsupervised use of the keys can result in the engine being
started or use of vehicle systems such as the power windows, etc.
which could result in serious injury. The doors could be locked
with the remote key, delaying help in an emergency.
• The Panoramic sliding sunroof will continue to operate until the
ignition key has been removed and one of the front doors has been
opened. •
Contro ls and eq uip
ment
Opening and closing
A pp lies to ve hicles: w it h P an oram ic slid in g su nroof
Convenience closing feature
The Panoramic sliding sunroof can be closed from outside
with the key in the driver's door lock.
Insert the key into the driver's door lock.
Turn and hold the key in the lock position ®=> page
54,
fig. 35 until the Panoramic sliding sunroof is completely
closed =>
& in "Closing Panoramic sliding sunroof" on
page 68. The power sun blind is also closed.
& WARNING
• Be careful when closing the Panoramic sliding sunroof. Not
paying attention could cause you or others to be trapped and
injured as the Panoramic sliding sunroof closes. •
Applies to ve hicles : w it h Pa noram ic slidin g su nroof
Opening and closing sunshade
0 t
Vehicle care I I
Fig . 54 Section of front
headliner: Switch for
sunshade .,.
irechnical data
Page 73 of 426
& WARNING !continued)
• Never leave children or persons requiring assistance alone in
the vehicle, especially when they could access the vehicle keys.
Unsupervised use of the keys can result in the engine being
started or use of vehicle systems such as the power windows, etc.
which could result in serious injury. The doors could be locked
with the remote key, delaying help in an emergency.
• The Panoramic sliding sunroof will continue to operate until the
ignition key has been removed and one of the front doors has been
opened .•
Appl ies to vehicles: with Panoramic sli ding sunroof
Mechanical emergency closing for front roof
segment (Step 1 )
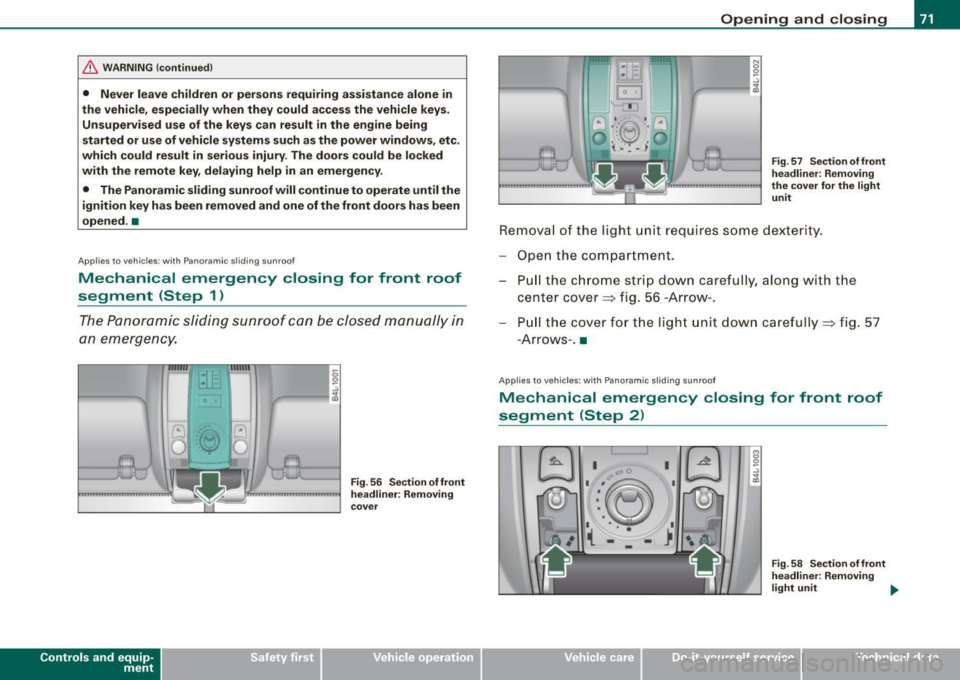
The Panoramic sliding sunroof can be closed manually in
an emergency.
Con tro ls and eq uip
ment
Fig . 56 Sect ion of front
headliner: Removing
cover
Opening and closing
Fig . 57 Section of front
headliner : Removing
the cover for the light unit
Removal of the light unit requires some dexterity.
Open the compartment. Pull the chrome strip down carefully, along with th e
center cover=> fig. 56 -Arrow -.
Pu ll the cover for the lig ht un it down carefully=> fig. 57
-A rro ws- .•
App lies to veh icles: with Panoramic sliding sunroof
Mechanical emergency closing for front roof
segment (Step 2)
a;. I
Vehicle care I I
Fig . 58 Section of front
headliner: Removing
light unit .,,_
irechnical data
Page 75 of 426

Clear vision
Lights
Switching the headlights on and off ·'t!-·
In the "AUTO" position, a light sensor* automatically
switches the head- and taillights on and off in response to
light conditions.
Fig. 60 Instrument
panel : light switch
The light switch must not be overturned past the stops in
either direction.
Switching on automatic headlight control
-Turn the light switch to AUTO=> fig. 60.
Switching on the side marker lights
-Turn the light switch to ~oo:.
Switching on the headlights and high beam
-Turn the light switch to ~D.
- Push the high beam lever forward towards the instru-
ment panel=>
page 77.
Contro ls and eq uip
ment
Switching off the lights
- Turn the light switch to 0. Clear vision
The headlights only work when the
ignition is switched on . While
starting the engine or when switching off the ignition, the head
lights will go off and only the side marker lights will be on.
After starting the engine, the headlights are automatically adjusted* to the load and angle of the vehicle (for example, during
acceleration, braking). This prevents oncoming traffic from experi
encing unnecessary headlight glare from your headlights.
If the system is not operating properly, a warning symbol in the
Auto -Check Control is displayed
=> page 37.
With the side marker lights or headlights switched on, the symbol
next to the light switch illuminates
coo:.
Daytime running lights
• USA models:
On vehicles with xenon lights the daytime running
lights will come on automatically when the ignition is turned on and
the light switch=> fig. 60 is in the
O position or the AUTO position
(only in daylight conditions). The
Daytime running lights function
can be turned on and off in the MMI menu
Exterior lighting
=> page 74. On vehicles with halogen fights, daytime running lights
can be activated by your authorized Audi dealer=>
f.1.
• Canada models: The daytime running lights will come on auto
matically when the ignition is turned on and the light switch
=> fig. 60 is in the O position or the AUTO position (only in daylight
conditions)
=> /.1 .
Automatic headlight control*
In the switch position AUTO the automatic headlight control is
turned on . The low beams and tail lights are turned on automatically
through a light sensor as soon as ambient brightness (e.g . when
driving into a tunnel) falls below a value preset at the factory. When ..,_
Vehicle care I I irechnical data
Page 76 of 426

Clear vision
ambient brightness increases again, the low beams are turned off
again automatica lly => & .
In the
AUTO pos ition the low beams are switched off automatically
when the ignition is turned off .
L ight S ensor M alfu nction *
In the event of a ligh t sensor mal func tion, the drive r is notified in the
ins trument cluster display :
e. Automatic headlights /autom ati c w ipers defe ctive
For safety reasons the low beams are turned on permanently with
the switch in
AUTO . However , you can continue to turn the lights on
and off using the light switch . Have the light sensor checked as soon
as possible at an authorized Audi dealer or qualified workshop.
& WARNING
• Never use d ayt ime running lights to see where you are going.
The y are no t bright enough and will not let you see far enough
ahead for safety , espe cially at du sk or when it is d ark . Al way s
switch on the low beams at du sk or when it is dark .
• Automati c he adlights* are onl y intended to assist the driver .
They do not relieve the driver of his re sponsibility to check the
headlight s and to turn them on manually a ccording t o th e cur rent
light and visibility condit ion s. For example , fog and ra in cannot be
dete cted by the l ight sen sor s. S o alwa ys sw itch on the headlight s
under th ese weather condition s and wh en driv ing in the dark
t D .
• Cras hes c an happen when y ou cannot see th e road ahead and
when you cannot be seen by other motori sts.
- Alway s turn on the headlights s o that you can see ahead a nd
s o that others can see your c ar from the ba ck.
[ i ] Tips
• With the switch in AUTO front fog lights and rear f og lights
cannot be turned on in addition . • T
he light sensor * for headlight control is located in the rear view
mirror mount . Do no t apply any stickers to the windshie ld in this
area to prevent malfunctions or failures .
• I f you remove the ign itio n from the ign ition lock while the head
lights are still on, a bu zzer will sound as long as the driver's door is
open to remind you to turn off the lig hts.
• Always observe the specific local regulations for your ar ea as to
when to use you r lights .•
Adjusting exterior lighting
The functions are set in the MM/ .
Fig . 61 MM I display :
E x te rior lighting
- Press the [ CAR ] fu nct io n butto n.
- Selec t
Exterior lighting . The menu Exterior lighting
appears=> fig. 61.
C oming h om e*
T he
Com ing home function ensures that after turn ing off the igni
tion and op ening the driver's doo r
the vehicle periphery is il lumi
nated in the dark. In addition , the front fog lights, the tail lights and
the license plate light are turned on . On- time can be set fo r a period
from
O (off) to 60 seconds. .,,_
Page 89 of 426

Applies to vehicles : wit h automat ically di mmi ng in side mirr or
Automatically dimming inside mirror
The automatic dimming function can be turned on and off
if required.
Disabling auto dimming
Fi g. 8 1 In side r ear
v iew mirror
- Press butto n @ ~ fig. 8 1 briefly, -th e gree n indicator
light @ goes out .
A ctivating /re activ ating auto dimming
- Press button@
briefly, -the green indicato r light @
goes on.
Automa tic dimming func tio n
The automatic dimming function is activated every time the ignition
is turned on . The green indicator light is lit to indicate auto dimming
is active.
When dim ming is activated, the inside m irror will darken
automati
cally
in response to the amount of light striking the mirror (such as
headlights from rearwa rd approaching vehicles). Even in dimm ing
mode, the mirror surface turns bright when :
• the interior light is switched on
• reverse gear is engaged .
Controls and equip
ment
Cl ea r vision
& WARNING
The glas s of the in side re ar vie w mirror i s layered and cont ain s an
electrolyte to a chieve it s properties. Be aware of liquid electrolyte
leaking from a bro ken mirror gl ass. Thi s liquid can cause irrit ation
to skin , eyes , and re spir atory sy ste m . If you get el ectrolyte in your
e ye s or on your skin , immed iatel y rinse w ith plenty of w ater.
If irri
t a tion per sists, s eek medical attention .
0 Note
Liquid electrolyte leaked from a broken mirror glass wil l damage any
p lastic surfaces it comes in contact with . C lean up sp illed e lectrolyte
immediately with clear water and a sponge .
[ i ] Tip s
• If you sw it c h off the automati c di m mi ng function on the in side
mirror , autom atic dimming of the out side mirrors* will likewise be
dis abled .
• Check to make sure there are no objects preven ting light from
reaching the inside mirror.
• Do not attach any stickers to the windshie ld in front of the light
sensor*, as this would interfere with the automatic operation of the
headlig hts and the automatic d imming of the inside mirror.
• Be aware that automatic dimming of the inside mirror can only
operate properly if the rear window sun b lind* is retracted. •
I • •
Page 94 of 426
Seats and storage
Seats and storage
General recommendations
Why is your seat adjustment so important?
The safety belts and the airbag system can only provide
maximum protection if the front seats are correctly
adjusted.
There are various ways of adjusting the front seats to provide safe
and comfortable support for the driver and the front passenger.
Adjust your seat properly so that :
• you can easily and quickly reach all the switches and controls in
the instrument panel
• your body is properly supported thus reducing physical stress
and fatigue
• the safety belts and airbag system can offer maximum protec
tion=>
page 241.
In the following sections , you will see exactly how you can best
adjust your seats.
There are special regulations and instructions for installing a child safety seat on the front passenger's seat. Always follow the informa
tion regarding child safety provided in=>
page 263, "Child Safety".
L1}. WARNING
Incorrect seating position of the driver and all other passengers
can result in serious personal injury.
• Always keep your feet on the floor when the vehicle is in motion
- never put your feet on top of the instrument panel, out of the
window or on top of the seat cushion. This applies especially to
the passengers. If your seating position is incorrect, you increase
the risk of injury in the case of sudden braking or an accident. If
& WARNING (continued)
the airbag inflates and the seating position is incorrect, this could
result in personal injury or even death.
• It is important for both the driver and front passenger to keep
a distance of at least 10 inches (25 cm) between themselves and
the steering wheel and/or instrument panel. If you're sitting any closer than this, the airbag system cannot protect you properly. In
addition, the front seats and head restraints must be adjusted to
your body height so that they can give you maximum protection.
• Always try to keep as much distance as possible between your
self and the steering wheel or instrument panel.
• Do not adjust the driver's or front passenger's seat while the
vehicle is moving. Your seat may move unexpectedly, causing
sudden loss of vehicle control and personal injury.
If you adjust
your seat while the vehicle is moving, you are out of position. •
Driver's seat
The correct seat position is important for safe and relaxed
driving.
We recommend that you adjust the driver's seat in the
following manner:
- Adjust the seat in fore and aft direction so that you can
easily push the pedals to the floor while keeping your
knees slightly bent=>&, in "Why is your seat adjustment
so important?".
Adjust the seatback so that when you sit with your back
against the seatback, you can still grasp the top of the
steering wheel. _..
Page 95 of 426
-Position the head restraint according to the occupant's
height==>
page 701. For maximum protection, the top of
the head restraint should be at least at eye level, prefer
ably higher and ideally level with the top of the head
==> page 225, fig. 237.
& WARNING
Never place any objects in the driver's footwell. An object could
get into the pedal area and interfere with pedal function . In case
of sudden braking or an accident, you would not be able to brake
or accelerate. •
Front passenger's seat
Always move the front passenger seat into the rearmost
position.
To avoid contact with the airbag while it is deploying, do not
sit any closer to the instrument panel than necessary and
always wear the three-point safety belt provided adjusted
correctly. We recommend that you adjust the passenger's
seat in the following manner:
- Move the front passenger seat into the rearmost position
of the fore and aft adjustment range==>
& in "Why is
your seat adjustment so important?" on
page 92.
-Bring the backrest up to an (almost) upright position. Do
not ride with the seat reclined.
- The ideal posit io n for the head restraint is with the upper
edge of the restraint level with the top of your head
==> page 101. You should not lower the top of the restraint
below the level of your eyes.
Controls and equip
ment
Seats and storage
- Place your feet on the floor in front of the passenger's
seat. •
Power seat
Controls
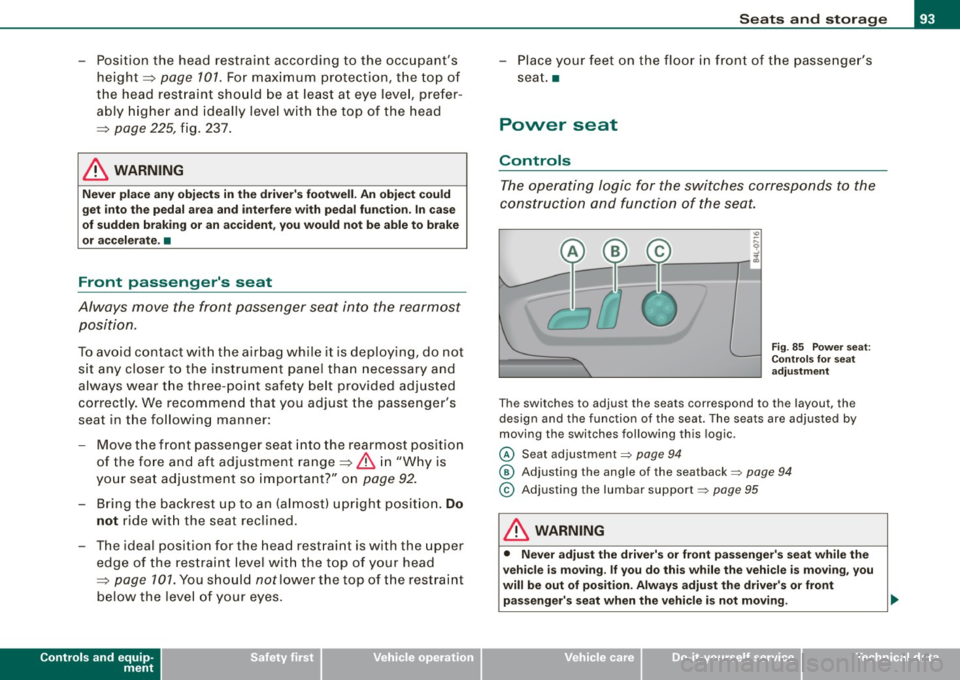
The operating logic for the switches corresponds to the
construction and function of the seat.
Fig. 85 Power seat:
Controls for seat
adjustment
Th e switches to adjust the seats correspond to the layout, the
design and the function of the seat. The seats are adjusted by
moving the switches following this logic.
@ Seat adjustment=> page 94
@ Adjusting the angle of the seatback => page 94
© Adjusting the lumbar support=> page 95
& WARNING
• Never adjust the driver's or front passenger's seat while the
vehicle is moving. If you do this while the vehicle is moving, you
will be out of position . Always adjust the driver's or front
passenger's seat when the vehicle is not moving. .,,
I • •
Page 99 of 426
Seat memory
Applies to vehicles: w ith seat memory
Driver's seat memory
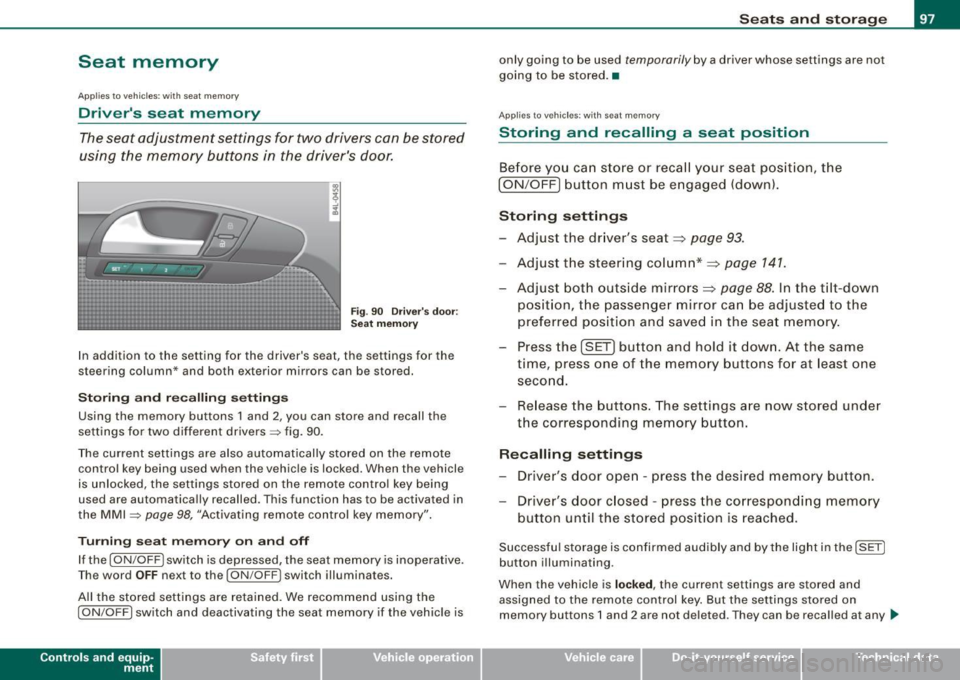
The seat adjustment settings for two drivers con be stored
using the memory buttons in the driver's door.
Fig . 90 Driver's door :
Seat memory
In addition to the setting for the driver's seat, the settings for the
steering column* and both exterior mirrors can be stored.
Storing and recalling settings
Using the memory buttons 1 and 2, you can store and recall the
settings for two different drivers=> fig. 90.
The current settings are also automatically stored on the remote control key being used when the vehicle is locked. When the vehicle
is unlocked, the settings stored on the remote control key being
used are automatically recalled. This function has to be activated in
the MMI =>
page 98, "Activating remote control key memory".
Turning seat memory on and off
If the [ ON/OFF ! switch is depressed, the seat memory is inoperative.
Th e word OFF next to the [ON/OFF) switch illuminates.
All the stored settings are retained. We recommend using the
I ON/OFF] switch and deactivating the seat memory if the vehicle is
Con tro ls and eq uip
ment
Seats and storage
only going to be used temporarily by a driver whose settings are not
going to be stored. •
Applies to veh icles: w ith seat memory
Storing and recalling a seat position
Before you can store or recall your seat position, the
I ON/OFF] button must be engaged (down).
Storing settings
- Adjust the driver's seat~
page 93.
-Adjust the steering column*~ page 141.
Adjust both outside mirrors~ page 88. In the tilt-down
position, the passenger mirror can be adjusted to the
preferred position and saved in the seat memory.
- Press the
!SET) button and hold it down. At the same
time, press one of the memory buttons for at least one
second.
- Release the buttons. The settings are now stored under
the corresponding memory button.
Recalling settings
- Driver's door open -press the desired memory button.
- Driver's door closed -press the corresponding memory
button until the stored position is reached.
Successful storage is confirmed audibly and by the light in the [ SET]
button illuminating.
When the vehicle is
locked , the current settings are stored and
assigned to the remote control key. But the settings stored on
memory buttons 1 and 2 are not deleted. They can be recalled at any
~
Vehicle care I I irechnical data